Configuring SAML SSO for ServiceNow
These steps will guide you through setting up the single sign-on functionality between ADSelfService Plus and ServiceNow.
Prerequisite
- Log in to ADSelfService Plus as an administrator.
- Navigate to Configuration → Self-Service → Password Sync/Single Sign On → Add Application, and select app_name from the applications displayed.Note: You can also find app_name application that you need from the search bar located in the left pane or the alphabet wise navigation option in the right pane.
- Locate and click on ServiceNow in the list of applications provided.
- Click Download SSO Certificate link in the top-right corner of the screen.
- In the pop-up that appears, click Download metadata file and save the XML file. Open the file in a text editor and copy its content.
ServiceNow (Service Provider) configuration steps
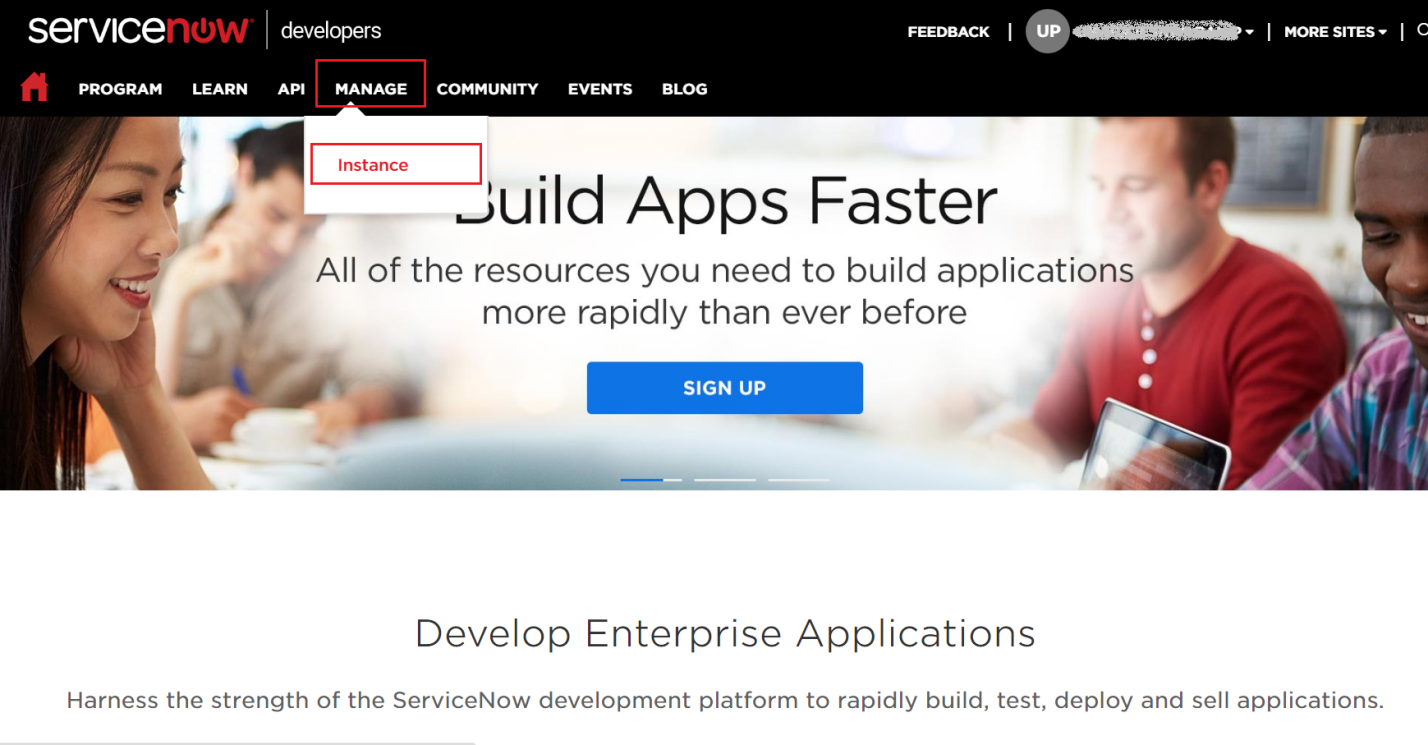
- Now, Login to ServiceNow portal with an administrator’s credentials.
-
Navigate to Manage → Instance.
-
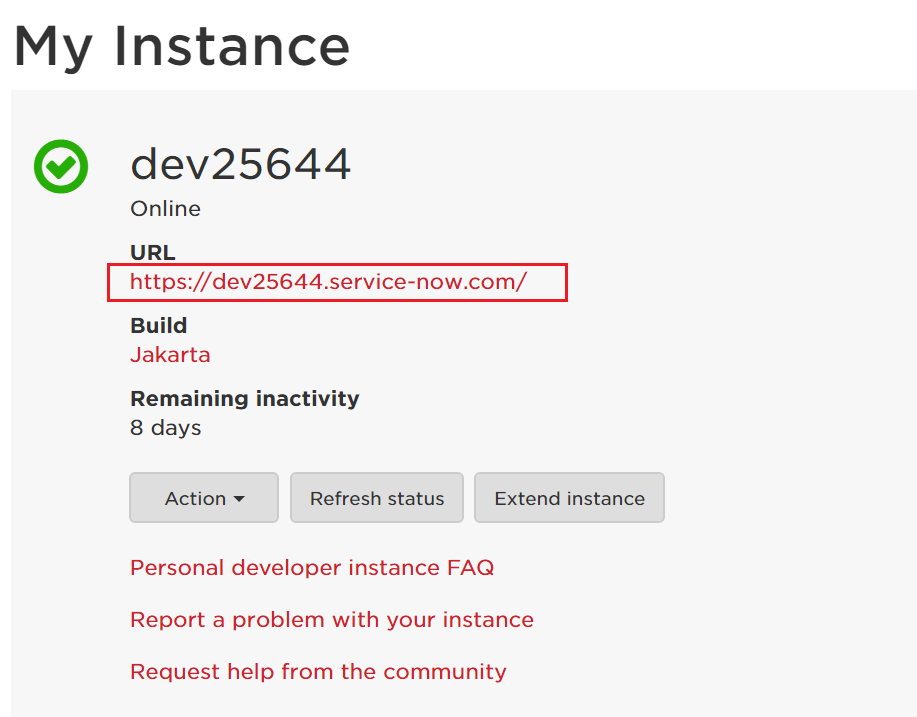
In the My Instance page, click on the instance URL. Also, note down this value. We will need it while configuring ServiceNow with ADSelfService Plus.
-
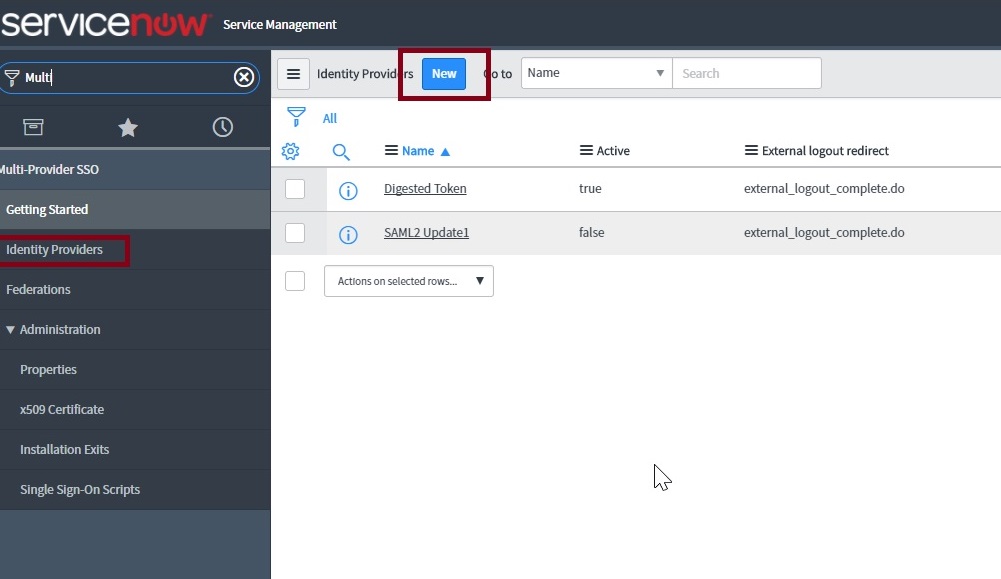
In the left pane, navigate to Multi-Provider SSO → Identity Providers and then click New.
Note: If Multi-Provider SSO plugin is activated in your instance, Please follow thissteps
-
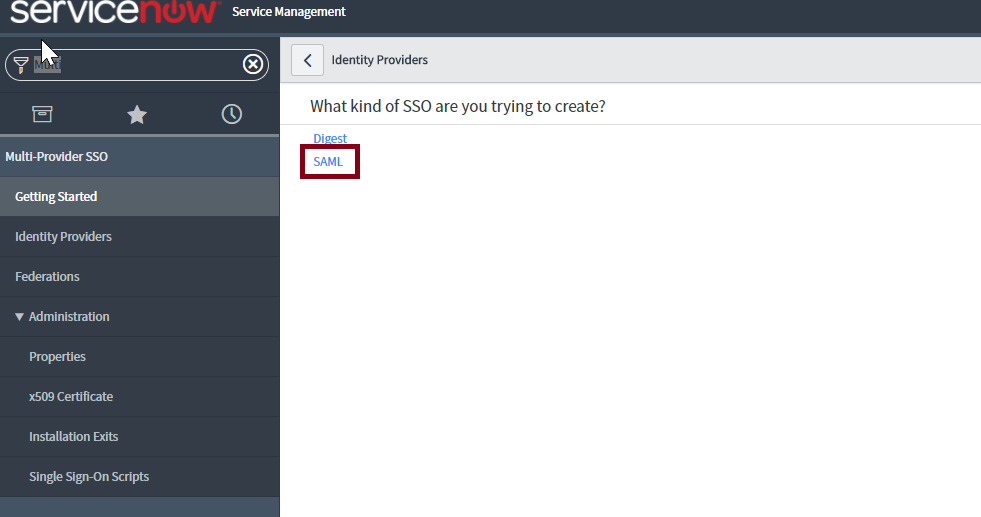
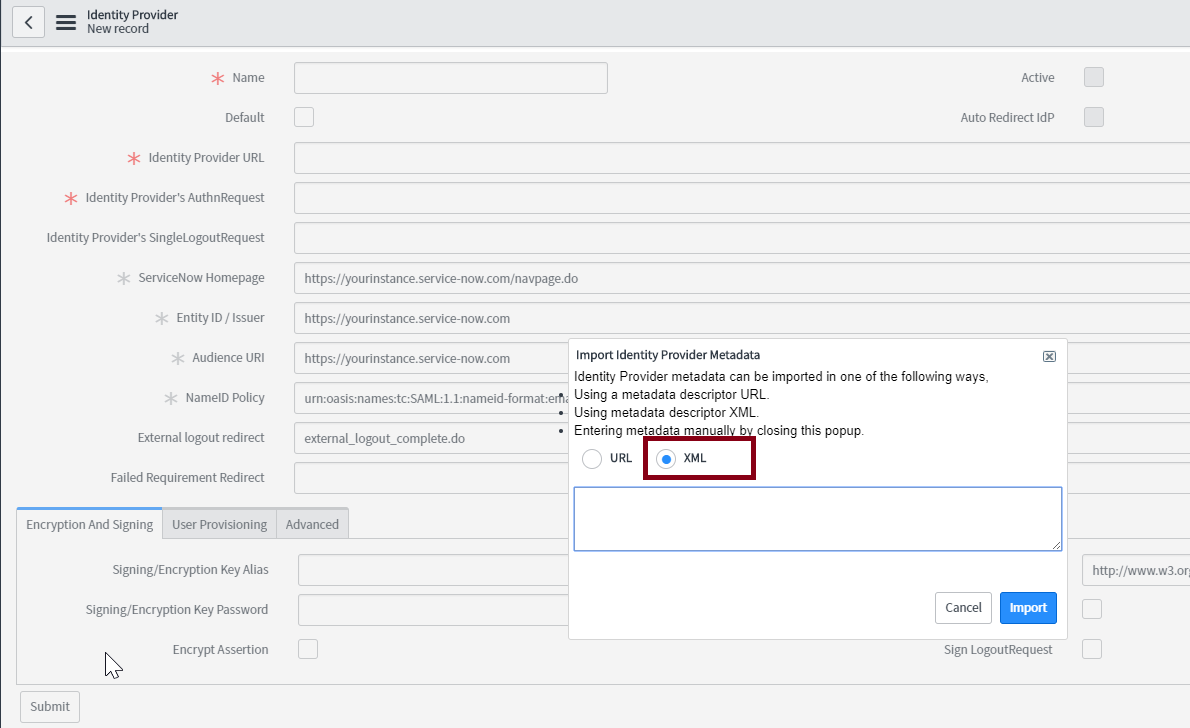
In the What kind of SSO are you trying to create? section, select SAML
-
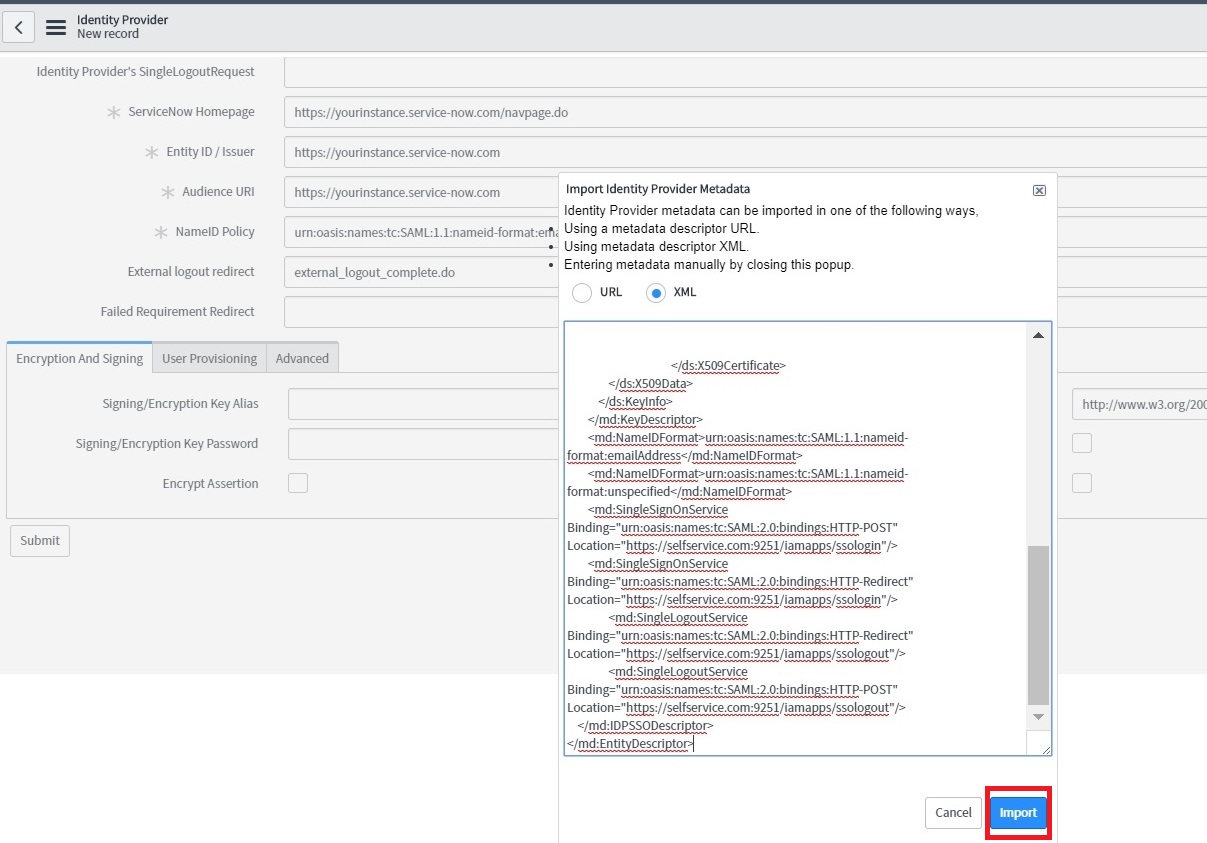
In the Import Identity Provider Metadata pop up that appears, select XML and paste the XML file content you had copied in Step 5 of Prerequisite.
-
Click Import.
-
All the required fields will be auto-filled. Scroll down and click Advanced tab. Make sure in the User Field, the value “email” is entered.
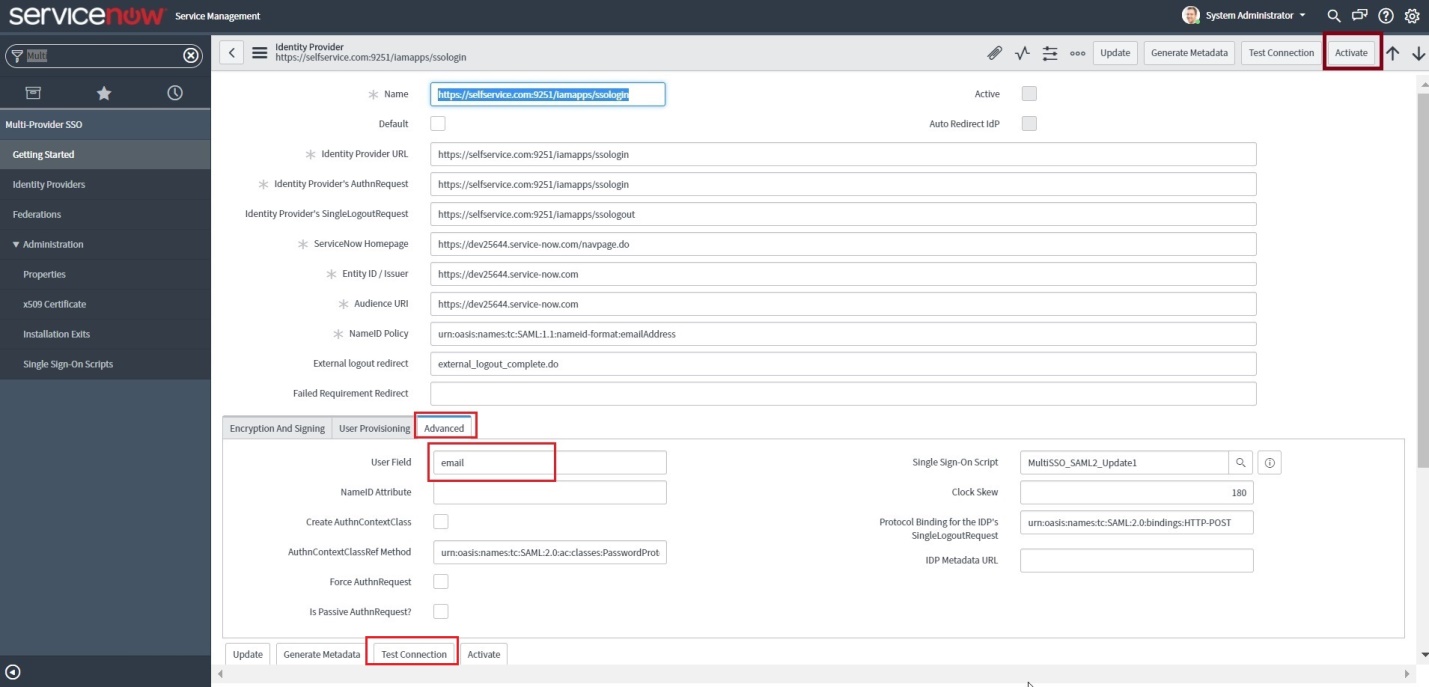
- Click Test Connection. You will be asked to log in to ADSelfService Plus.
- One the connection is successful, click Activate.
-
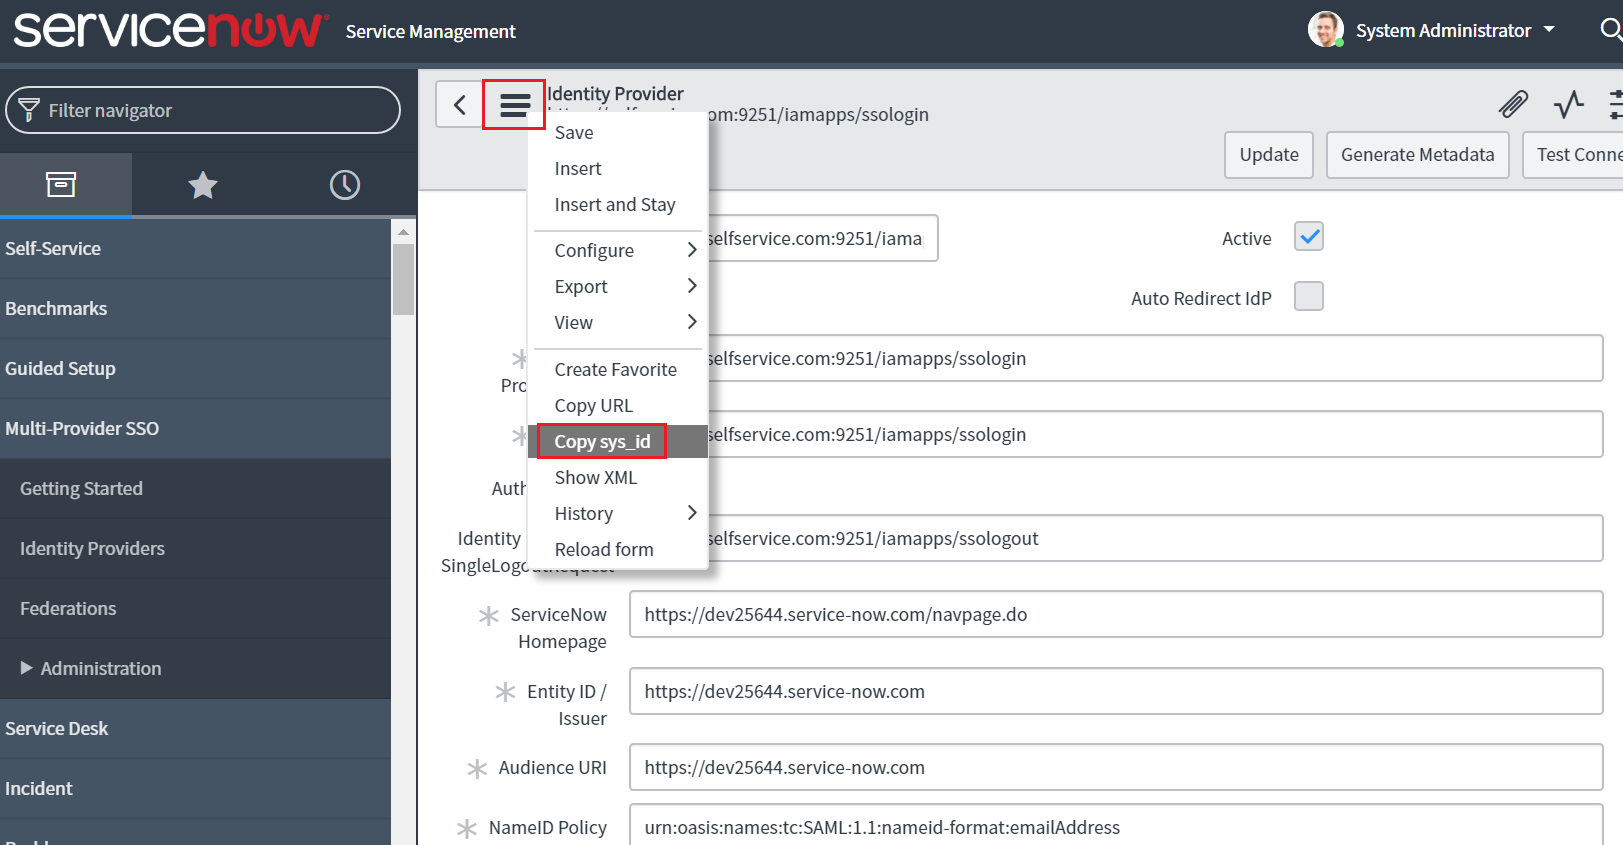
Now click on the Additional Actions icon at the topnear the identity provider and select Copy sys_id. Paste the value in a note and keep it safe.
- In the left pane, navigate to Multi-Provider SSO → Administration → Properties.
- Make sure that Enable multiple provider SSO in enabled.
-
In the field for user identification, change ‘user_name’ to email as the value.
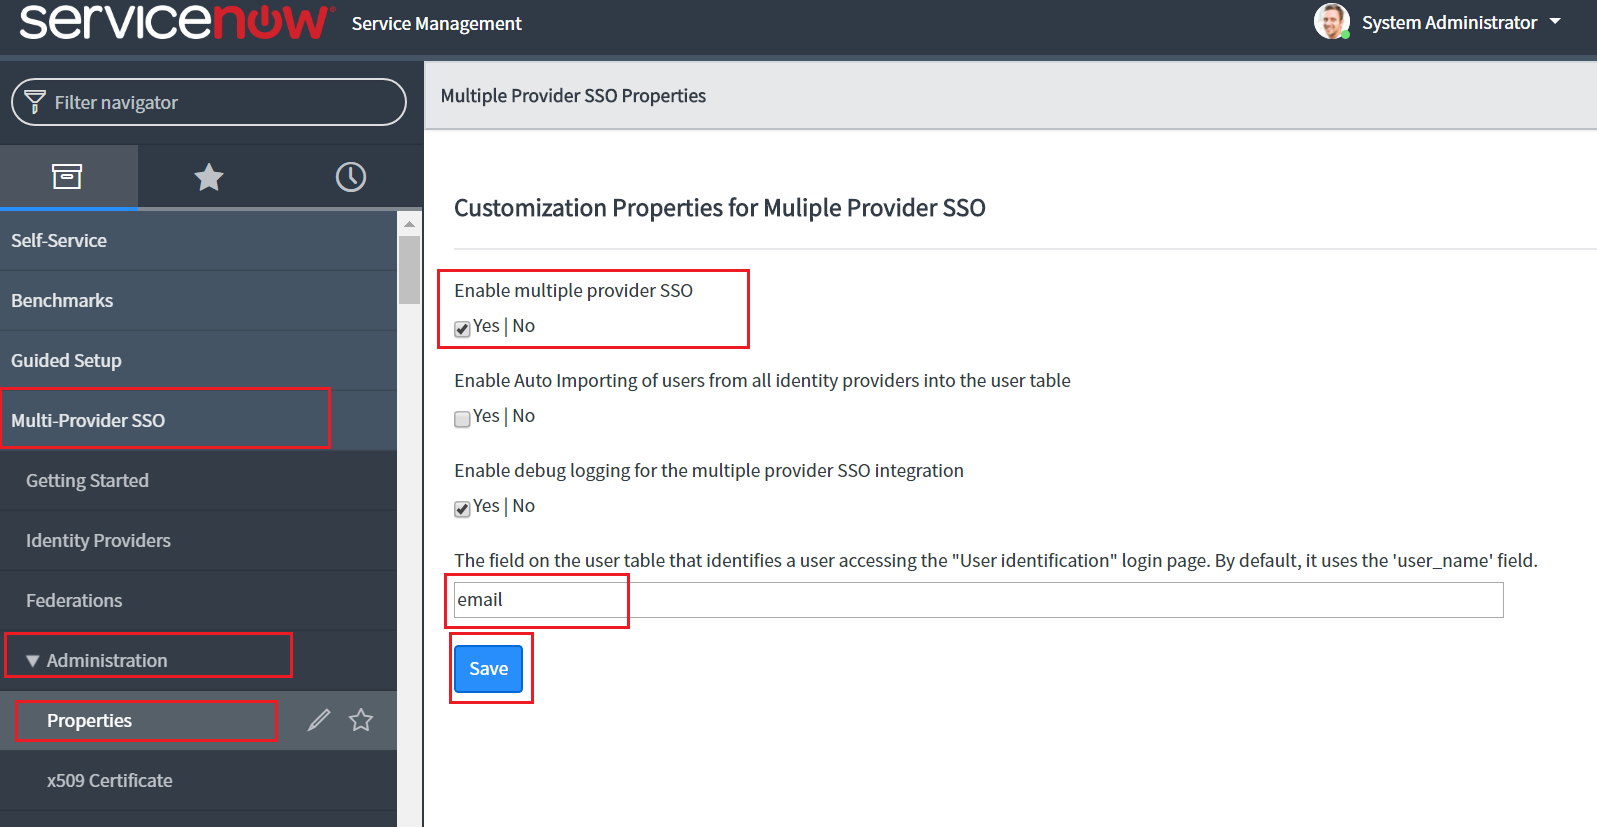
- Click Save.
-
In the left pane, navigate to User Administration → Users.
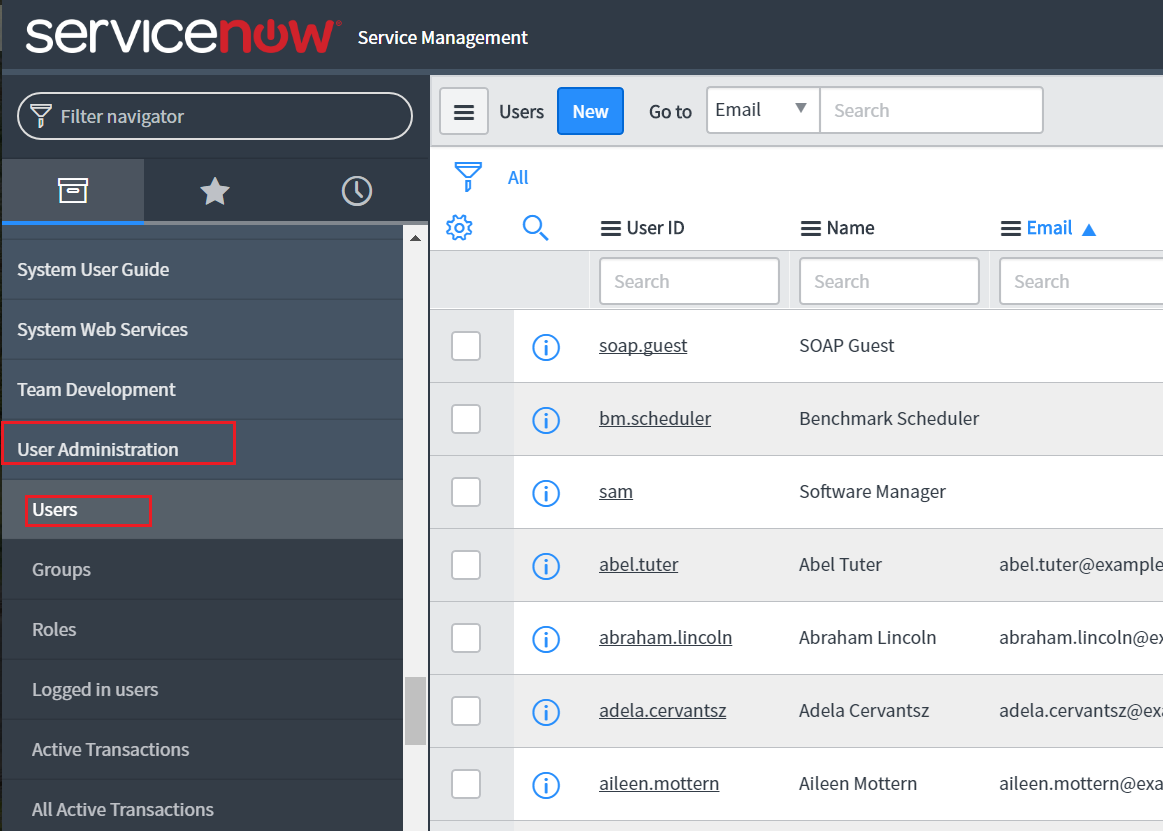
- Select a user for whom you want to enable SSO and click his/her username.
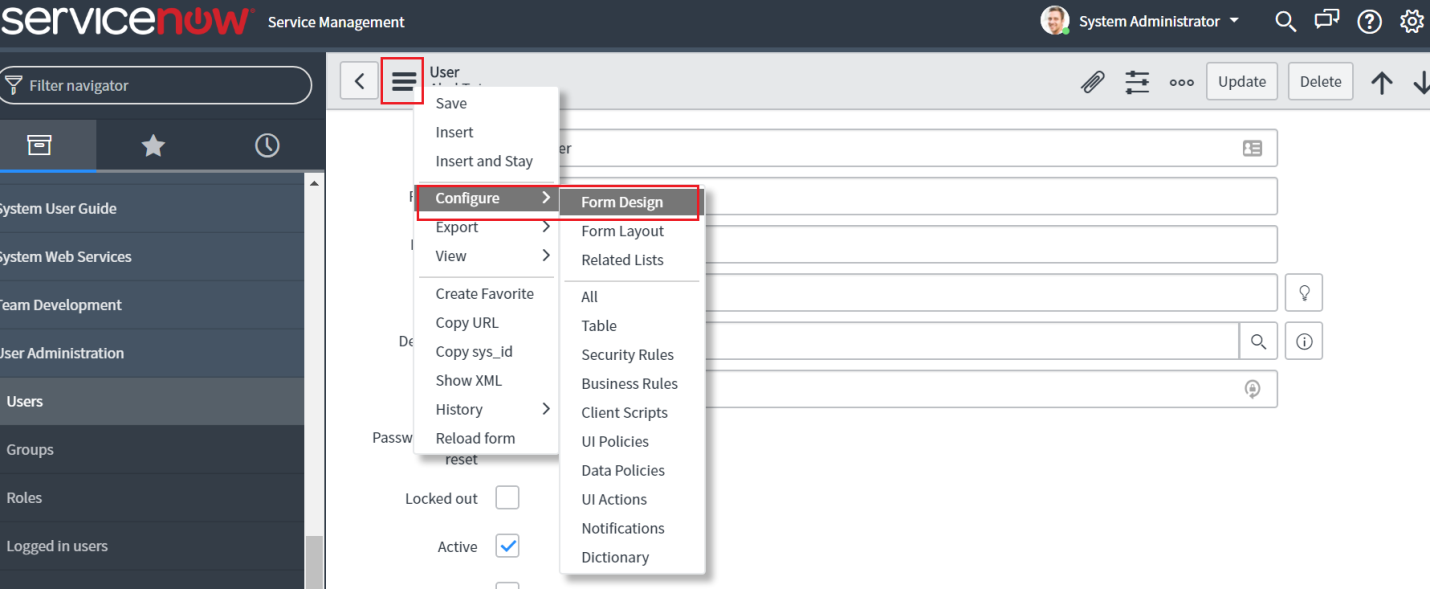
-
Now click the Additional Actions icon and select Configure → Form Design.
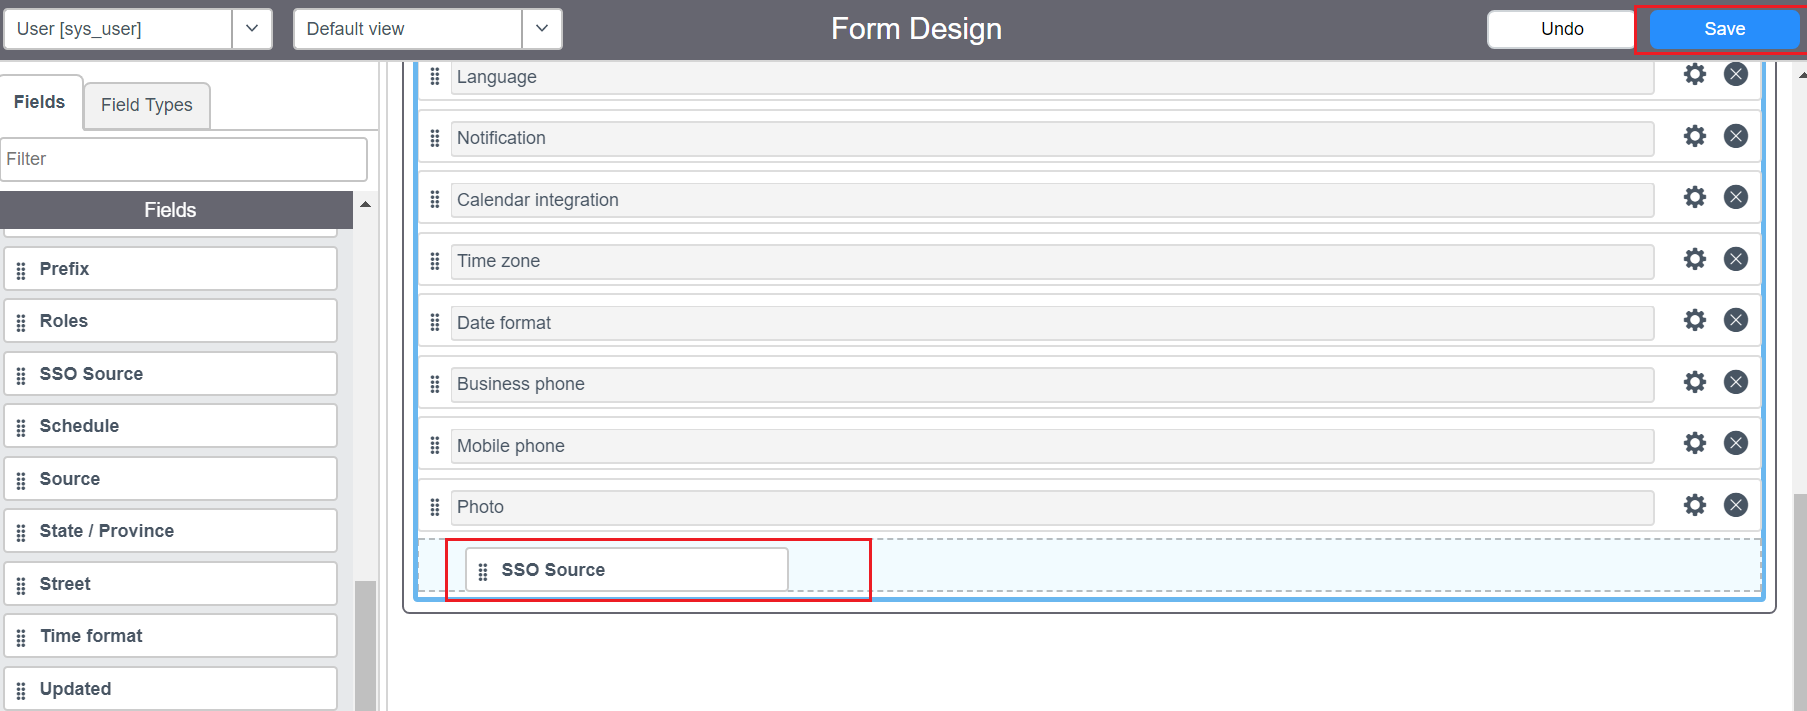
-
Drag and drop the SSO source field from the left pane into the user’s form and click Save.
- Close the form design tab and go back to the user configuration page. You can notice the SSO source field added to the user’s form
-
In the SSO source field, paste the sys_id you had copied in Step 11. Append “sso:” before the sys_id value.
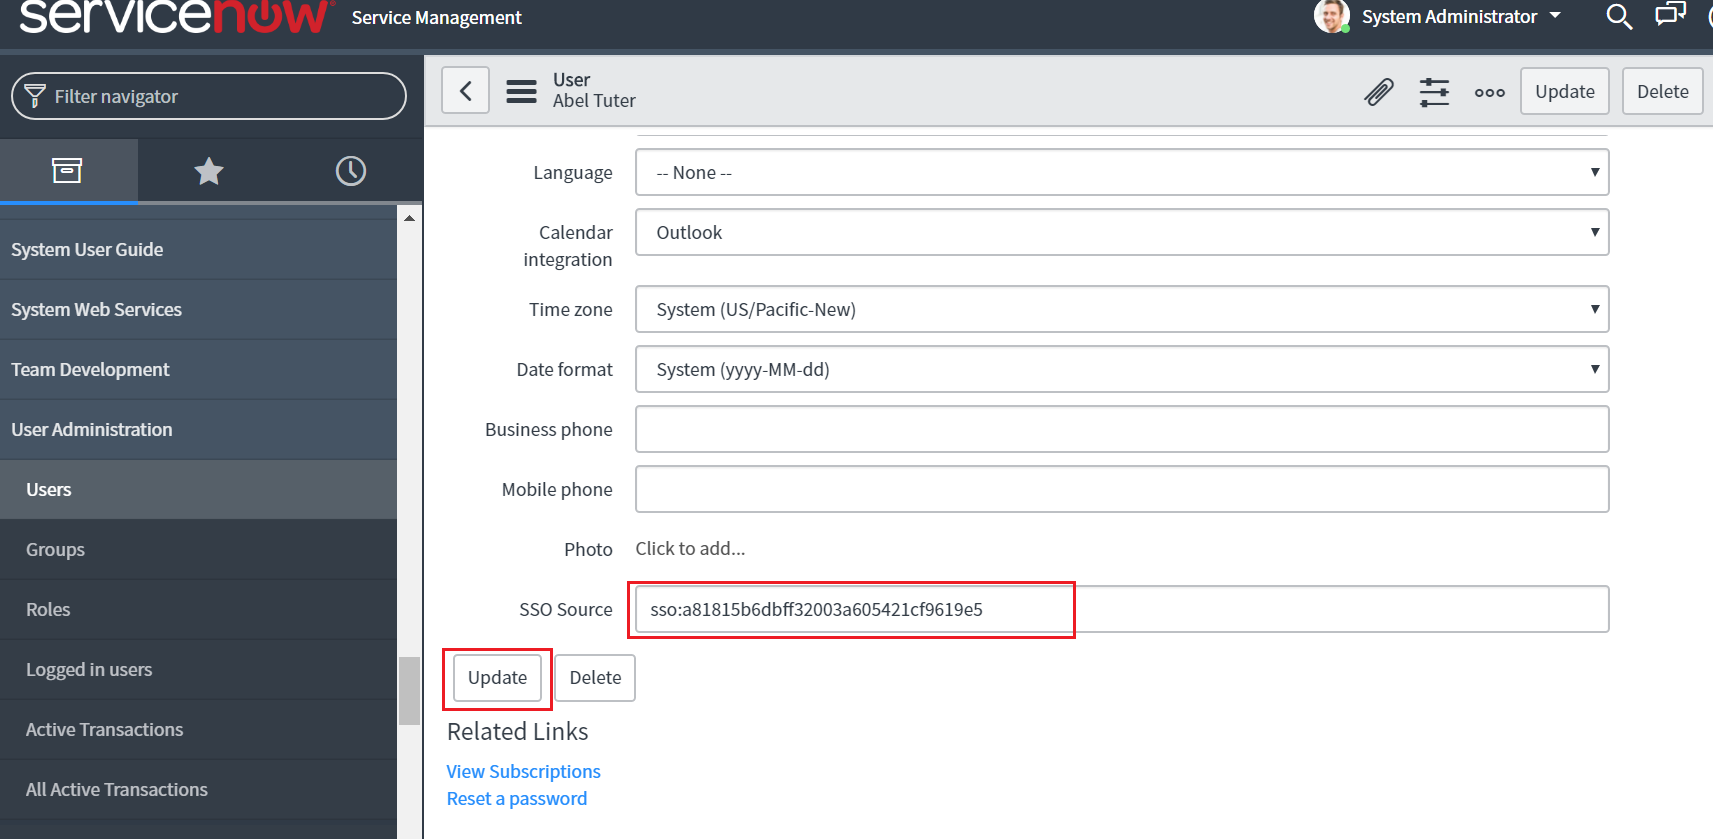
- Click Update.
- Repeat steps 17-22 for other users to whom you want to enable SSO.
ADSelfService Plus (Identity Provider) configuration steps
- Now, switch to ADSelfService Plus’ ServiceNow configuration page.
- In the Domain Name field, enter the domain name of your email address. For example, if you use johndoe@thinktodaytech.com to log in to ServiceNow, then thinktodaytech.com is the domain name.
- In the SAML Redirect URL field, enter the value you copied in Step 3 of ServiceNow configuration.
- In the Name ID Format field, choose the format for the user login attribute value specific to the application.
-
Click Add Application
.Your users should now be able to sign in to ServiceNow through ADSelfService Plus.
Note: Use Unspecified as the default option if you are unsure about the format of the login attribute value used by the application