Note: SSO for applications is available only with the Endpoint MFA.
ADSelfService Plus uses the secure and widely adopted industry standard Security Assertion Markup Language 2.0 (SAML 2.0) to provide SSO. It also supports multi-factor authentication during login to ensure security.
In this page, we have covered:
There are two ways through which users can log in to an application or a service using SSO.
Here, the Identity provider (IdP) refers to ADSelfService Plus and the Service provider (SP) refers to the cloud application or service. To initiate SSO, users can begin at either the IdP or the SP.
In an IdP-initiated SSO, users log in to the ADSelfService Plus page, and click an application. The application will open in a new tab and the users will be logged in automatically.
In a SP-initiated SSO, when users click on an application link, they will be taken to the login page of the SP. After entering their username or selecting the SAML SSO option, the SP will redirect the users to the IdP. Users then need to log in to the IdP to be able to access the SP.
ADSelfService Plus supports only one of these flows for some applications.
ADSelfService Plus lets you provide Active Directory-based SSO for any SAML-enabled application.
|
A B C D E F G H I J K L M N O P Q R S |
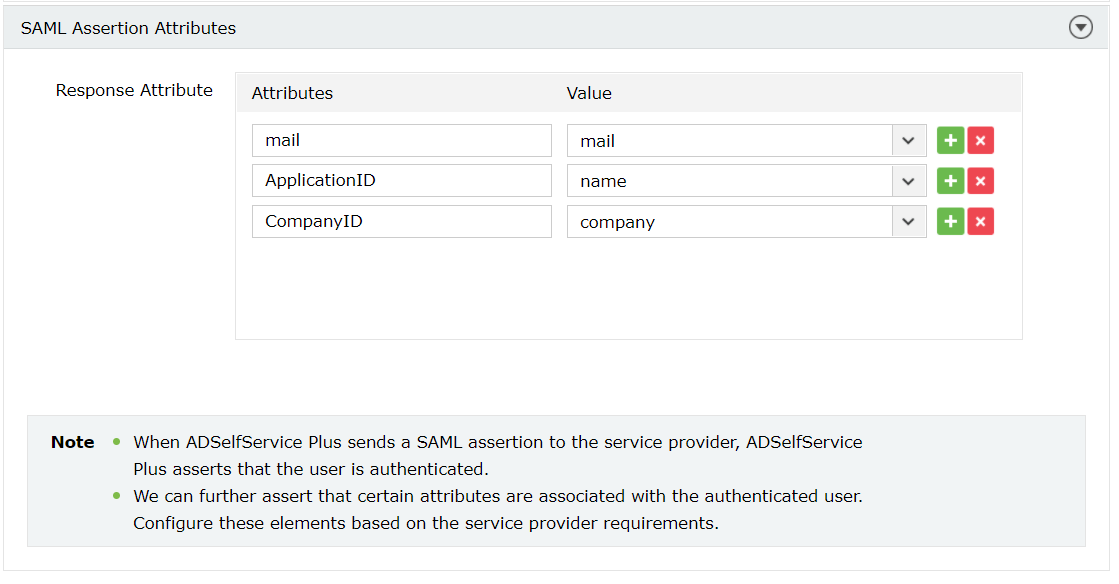
With this setting, you can choose the attributes to be included in the SAML response token sent to the service provider by ADSelfService Plus to prove a user's identity. This is also useful in just-in-time provisioning for service providers that require specific attributes to complete configuration, and thus, enable login.
A SAML certificate is essential to establish a trust relationship between the identity provider (IdP) and the service provider (SP). It ensures that messages are travelling between the expected SP and IdP. This certificate has an expiration date, and it is essential to renew the certificate before expiration to ensure that users don't face any problem in accessing the applications through single sign-on.


Your request has been submitted to the ADSelfService Plus technical support team. Our technical support people will assist you at the earliest.
Copyright © 2026, ZOHO Corp. All Rights Reserved.
 ADManager Plus
 ADAudit Plus
 Exchange Reporter Plus
 M365 Manager Plus