Domain Configuration

Note:
  • Once an Active Directory domain has been configured in ADSelfService Plus, the product will regularly fetch information on the users, computers, OUs, groups and domain policies from the domain. This information will be used to update ADSelfService Plus with the latest user information, generate reports, send notifications, perform automatic password reset and account unlock and much more.
  • Information fetched from the domain is stored in the product's database (the in-built PostgreSQL or any other database configured externally). During domain configuration, the credentials provided must have Domain Admin privileges or the individual privileges listed out in this guide.

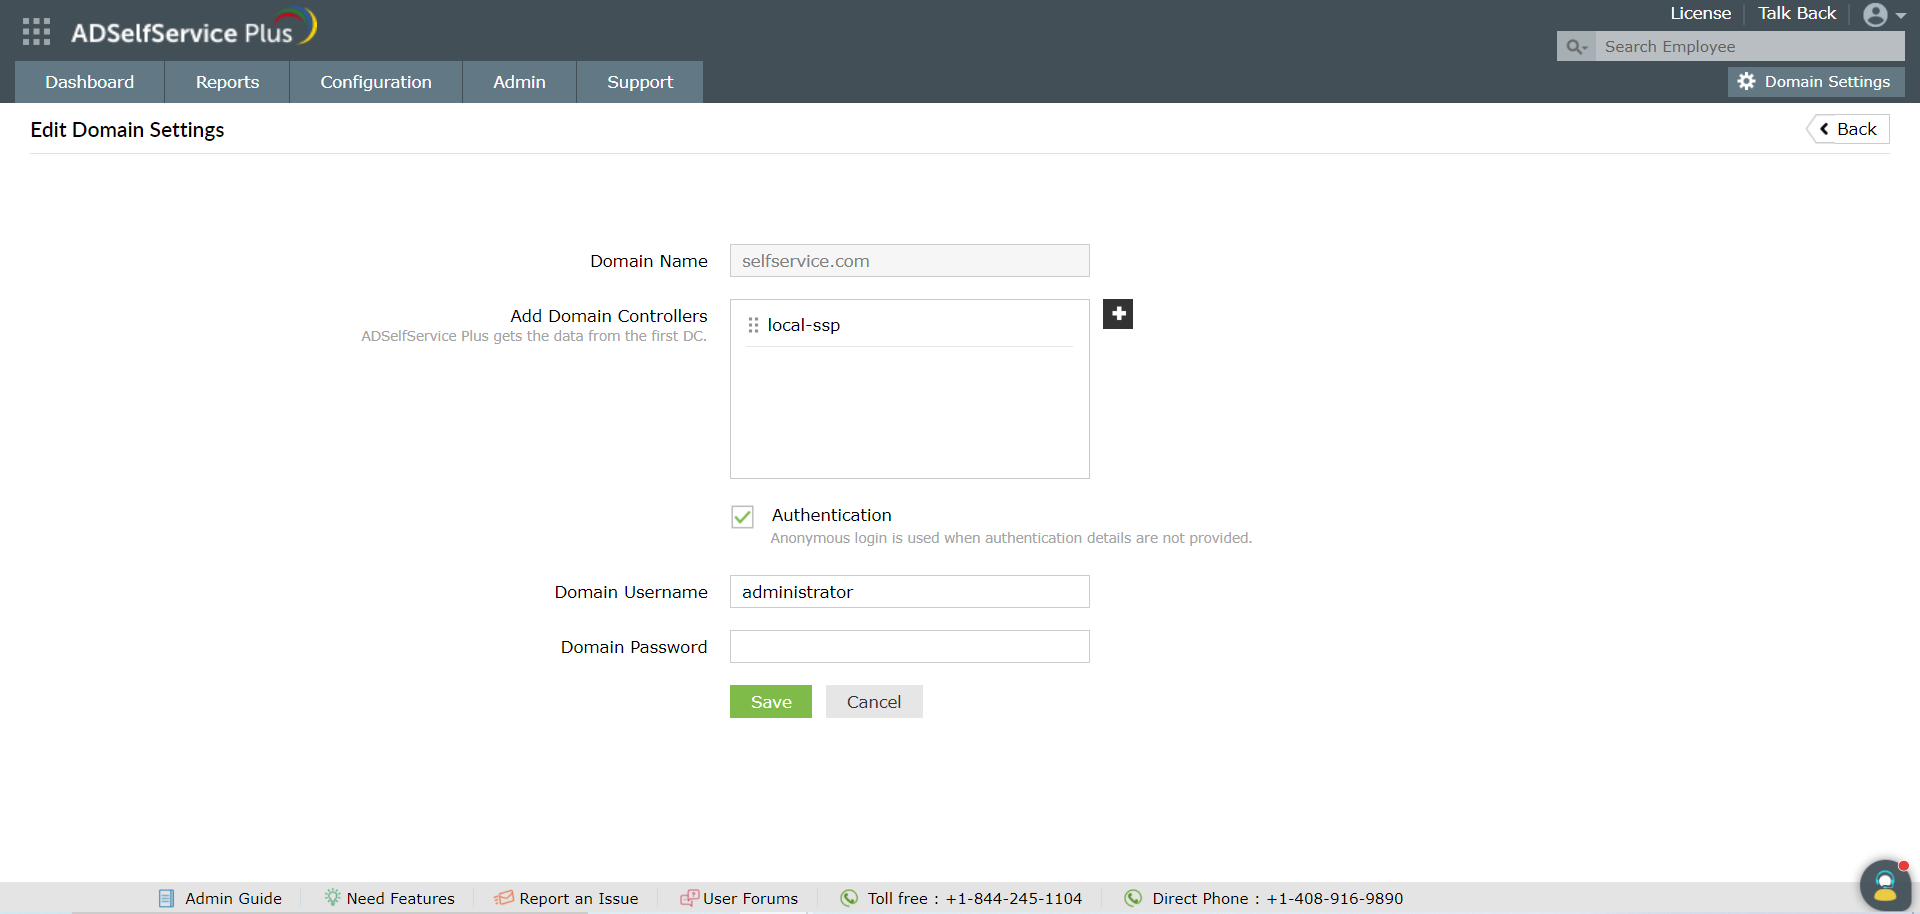
Using the Domain Settings option, you can configure new domains as well as modify the various settings of the configured domains. Only after a domain has been configured can the administrator enable the ADSelfService Plus features for users under that domain. During the startup, ADSelfService Plus automatically adds all the domains that could be discovered in a network. If you wish to add other required domains manually, follow these steps:

Steps to configure a new domain

  1. Click the Domain Settings button (available on the top right corner of the application).
  2. In the Configured Domains section that appears. click on Add New Domain.
  3. In the Add New Domain section, specify the domain name and follow these steps to add the domain controllers:
    1. To add domain controllers, click on the Discover button next to the Add Domain Controllers field.
    2. In the Add Domain Controllers pop-up, select the domain controller from the list of available domain controllers that were discovered from the DNS. In the case of domain controllers not being found a message will be displayed. You would have to manually add the domain controllers by specifying their DNS hostnames (specifying IP addresses will not work) in the field provided.
    3. ADSelfService Plus will get the required data from the first domain controller in this list. The order of the domain controllers can be adjusted based on the preferred domain controller for direct interaction with ADSelfService Plus.
    4. Click on Add to add the specified domain controllers.
    5. Select the Authentication check-box and mention the Domain Username and Domain Password. In case the check-box is not selected, the privileges of the user account currently logged in will be used to configure the domain.
    6. Note: If the credentials provided during the domain configuration belongs to a service account that is a part of the Active Directory Domain Admins group, the domain gets configured. It can then exchange object information with ADSelfService Plus and can use all of its features. In case the organization does not prefer to bestow the service account with all the privileges that come with the Domain Admins group for security reasons, the service account can be delegated only the permissions required by following the steps in this guide.
    7. Click on Save to configure the domain.
    8. domain-config

Configured Domain Information

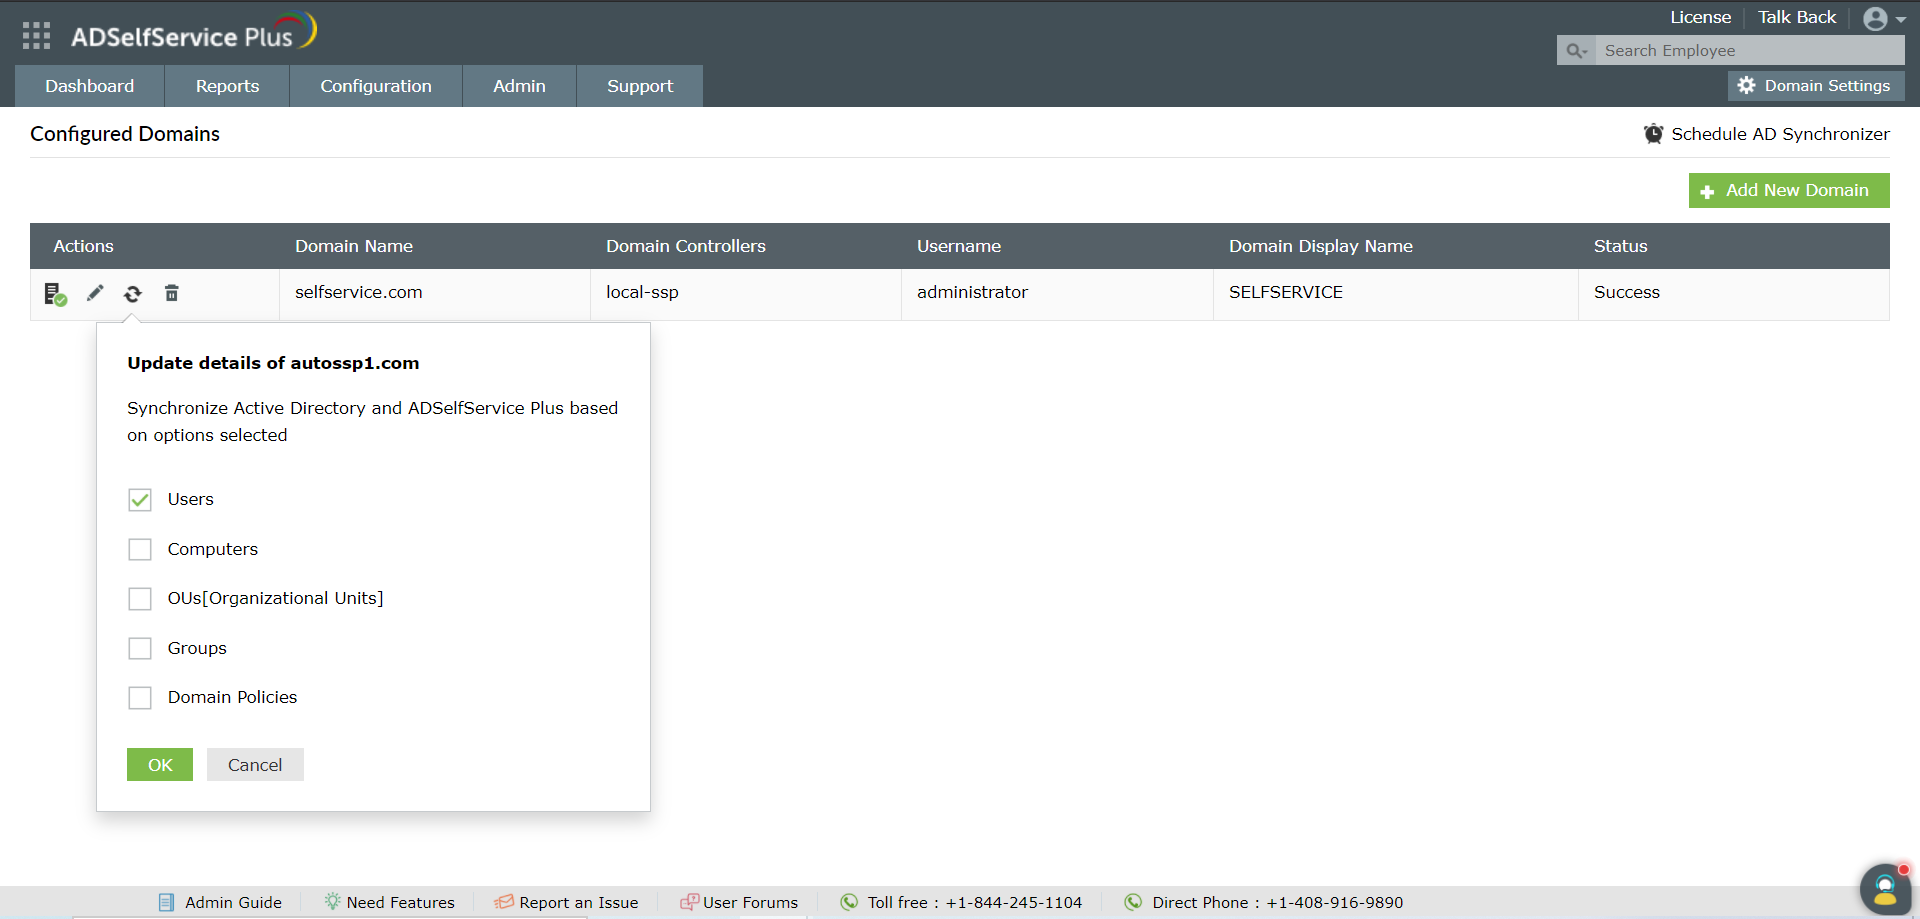
The Configured Domains section contains the complete list of configured domains along with information like:

  1. Domain Name
  2. Domain controllers under the domain.
  3. Username specified for domain configuration.
  4. Domain display name - The domain display name can be defined by administrators, and is used to represent the domain in fields where the required domain has to be chosen. It helps users and administrators easily identify the domain. The domain display name can be edited by clicking on the edit icon under the Domain Display Name column
  5. Status of the configured domain - It is used to denote that the service account used for domain configuration has been delegated the necessary permission in Active Directory. If the status is Success it means that it has been delegated the necessary rights. If the status is Failure, it means that the account does not have the necessary permission. It also informs if any of the domain controllers in the domain are not operational anymore.
  6. domain-config-list-view

Actions that can be performed on configured domains

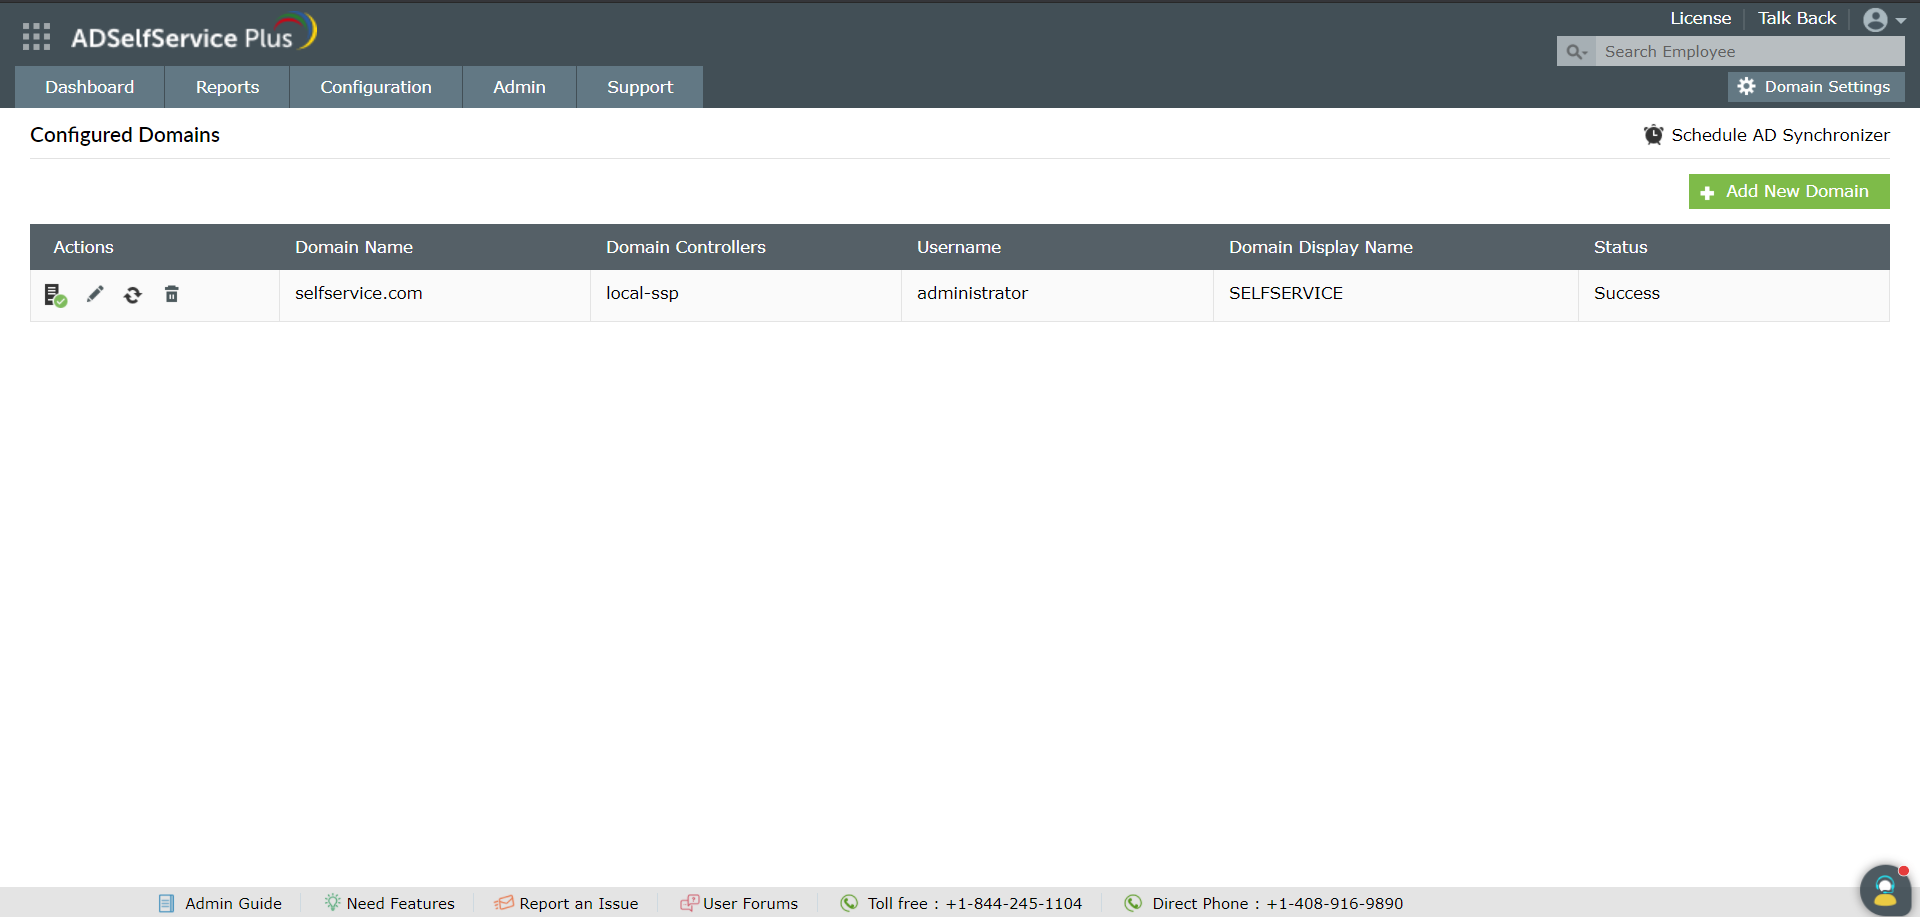
Other than providing the above information, the Configured Domains section can also be used to perform certain actions on the configured domains, all of which are detailed below. The icons under the Actions column are used for this.

  1. Select a default domain:

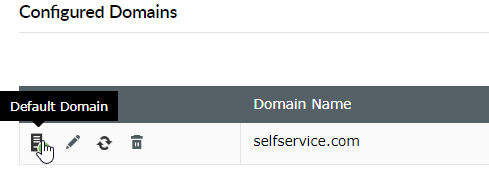
    Clicking on the Default Domain icon would make that particular domain the default domain in ADSelfService Plus. Every time a policy is configured or a feature is enabled, the default domain is selected automatically. It can be changed to any other domain if required.

    domain-config-default
  2. Edit domain details / Add or Remove Domain Controllers:

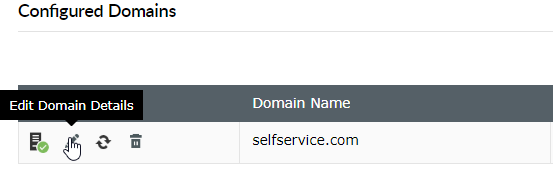
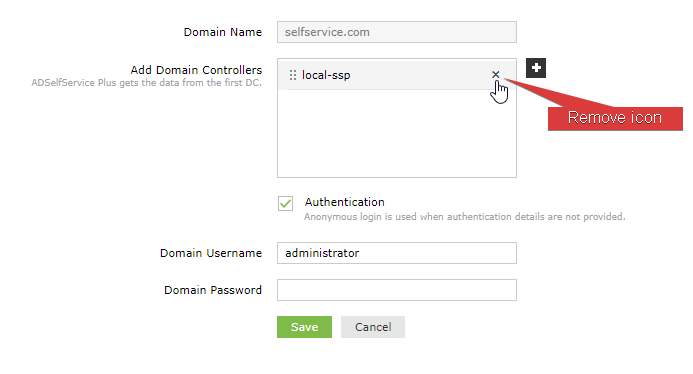
    To alter the details of the existing domain or add/remove domain controlers, click the Edit Domain Details icon.

    • You can make the required changes through the Edit Domain Settings section that appears.
    • You can add domain controllers by clicking plus icon [ plus-icon ] in the Add Domain Controllers section.
    • You can remove domain controllers by clicking remove (cross) icon while hovering each domain controllers in the Add Domain Controllers section.

      dc-remove

      Note: Editing domain details will not lead to AD synchronization and updation of domain information. AD synchronization will only occur according to the frequency set in the AD Synchronizer or by manually updating the domain object information.
    • Update domain objects:

      The Update Domain Objects icon is used to update ADSelfService Plus with the latest domain objects' information for the domain. This update action brings about synchronization between ADSelfService Plus and the Active Directory, in case a lag exists between the two. Clicking on the Update Domain Objects icon will open the Update details of <domainname> dialog box. Here, you can select the type of domain objects whose information needs to be updated in ADSelfService Plus. These include:

      1. Users
      2. Computers
      3. Organizational Units (OUs)
      4. Groups
      5. Domain Policies

      Once you have selected the desired domain objects, click on OK to update the information.

      domain-config-update

      Important:

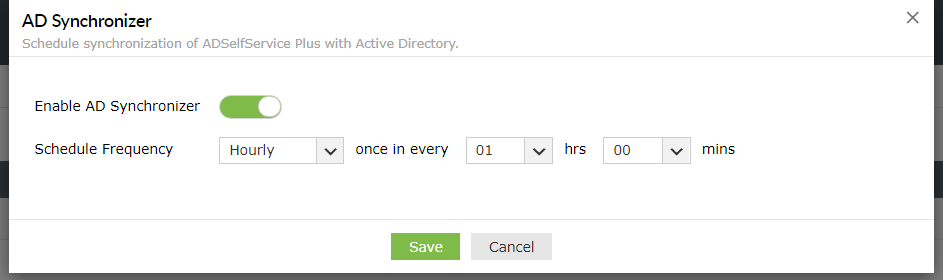
      Scheduling Domain Update: Synchronization between ADSelfService Plus and Active Directory can also be scheduled at regular intervals with the AD Synchronizer.

      • Clicking on the AD Synchronizeroption.
      • In the AD Synchronizer pop-up that appear, toggle the Enable AD Synchronizer switch to On.
      • Use the Schedule Frequency option to set the frequency (Daily, Weekly, Monthly and Hourly) and the time for synchronization.
      • Click Save.

      domain-config-schedule

    • Delete domain details:

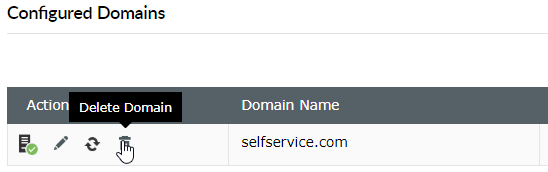
      To remove a configured domain, click on the Delete Domain icon. If the domain gets deleted, all the information including the domain's object, policy configuration, and enrollment information is erased from ADSelfService Plus. If the domain is configured again, policies have to be configured and features need to be enabled once more.

      domain-config-delete

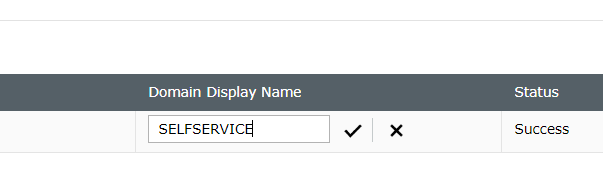
    • Customizing Display Name:

      This is the domain name given by you for display purposes only. It has no connection to the actual name of the domain. Its sole purpose is to display the domain on the user logon page with a name that is comprehensible to the user.

      domain-config-displayname

    • Status:

      • The Status feature sheds light on the rights associated with the users of a domain.
      • A Success status indicates that there are users with admin privilege in the domain.
      • The User/System has no Admin Privilege status would be displayed incase none of the domain users are granted admin rights.

Thanks!

Your request has been submitted to the ADSelfService Plus technical support team. Our technical support people will assist you at the earliest.


Need technical assistance?

  • Enter your email ID
  • Talk to experts
  •  
     
  •  
  • By clicking 'Talk to experts' you agree to processing of personal data according to the Privacy Policy.

Don't see what you're looking for?

  •  

    Visit our community

    Post your questions in the forum.

     
  •  

    Request additional resources

    Send us your requirements.

     
  •  

    Need implementation assistance?

    Try onboarding


Copyright © 2024, ZOHO Corp. All Rights Reserved.