Adding New Product
Products are the commodities purchased by the account in SupportCenter Plus. You can add products manually in SupportCenter Plus.
Adding New Product
The new product form can be accessed by two ways in SupportCenter Plus application.
-
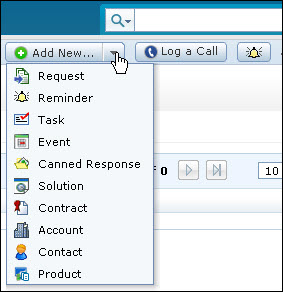
Add New drop down
-
Products tab
Add New drop down
The Add New drop down is a quick navigator to instantly access the New Product form from the home page.
To configure the New Product, go to Step 3 in Products tab.
Products Tab
-
Click the Products tab in the header pane to open the product list view page.
-
Click New Product button.
-
From the New Products form, specify the name of the Product in the Product Name field. This is a mandatory field.
-
Choose the Product Type under which you would like to classify the product from the drop down.
If the product type is unavailable in the list, then you can add a new product type using the Add Product Type link. The drop down box disappears and a text field appears with tick and cross mark, where you can enter the Product Type and click the tick mark to add the product type.
-
Enter the Part No. of the product.
-
You also have an option to enter the Warranty Period of the product by choosing the number of years and months from the drop down.
-
Enter the purchased price of the product in Unit Price ($) field.
-
If you have added any Additional Product Details fields then the additional fields is displayed under Additional Product Details block.
-
Provide the brief description about the Product in the Description field.
-
Click Save. The product is added to the product list.