Adding a new app
SaaS Manager Plus offers three ways to add a new app. They are as follows,
New App
To add a new app
New App: In the top-right corner, you'll find the New App button offering four options to manage vendors: Integrate App, Upload Invoice, Add Manually, and Import Apps.

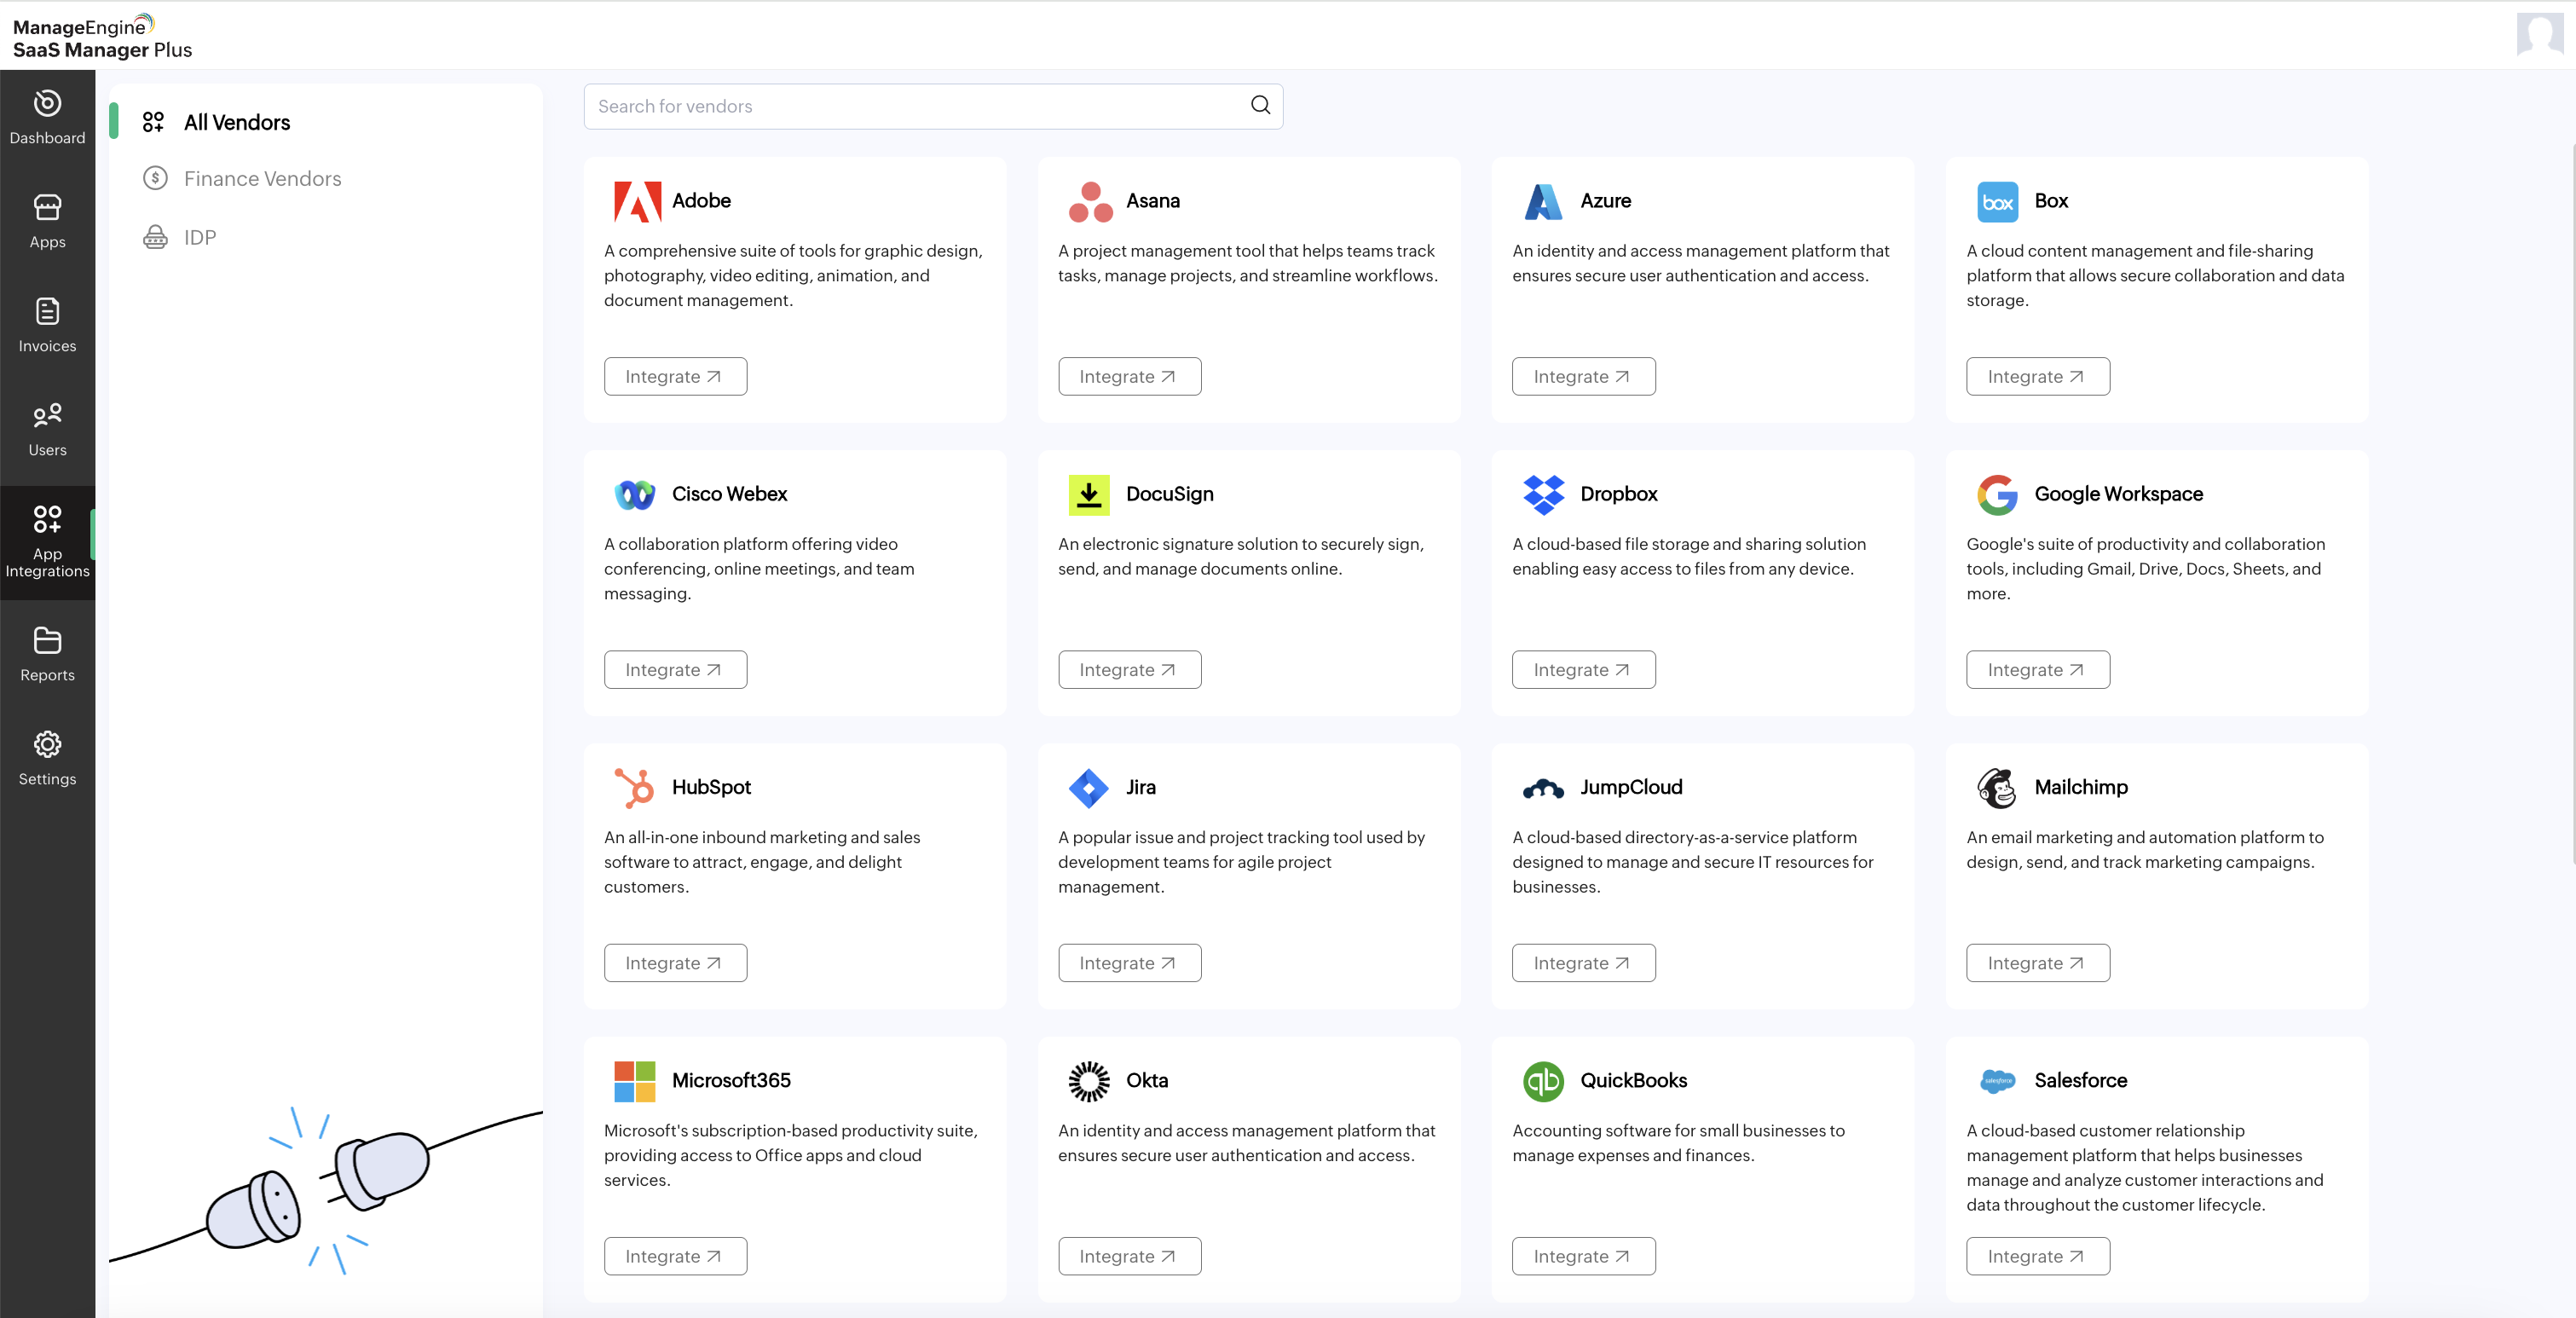
Integrate App: Click this option to add a vendor from the existing integrations or subscribed apps list. You can also search for apps using the search box. Follow these steps to integrate with existing applications.
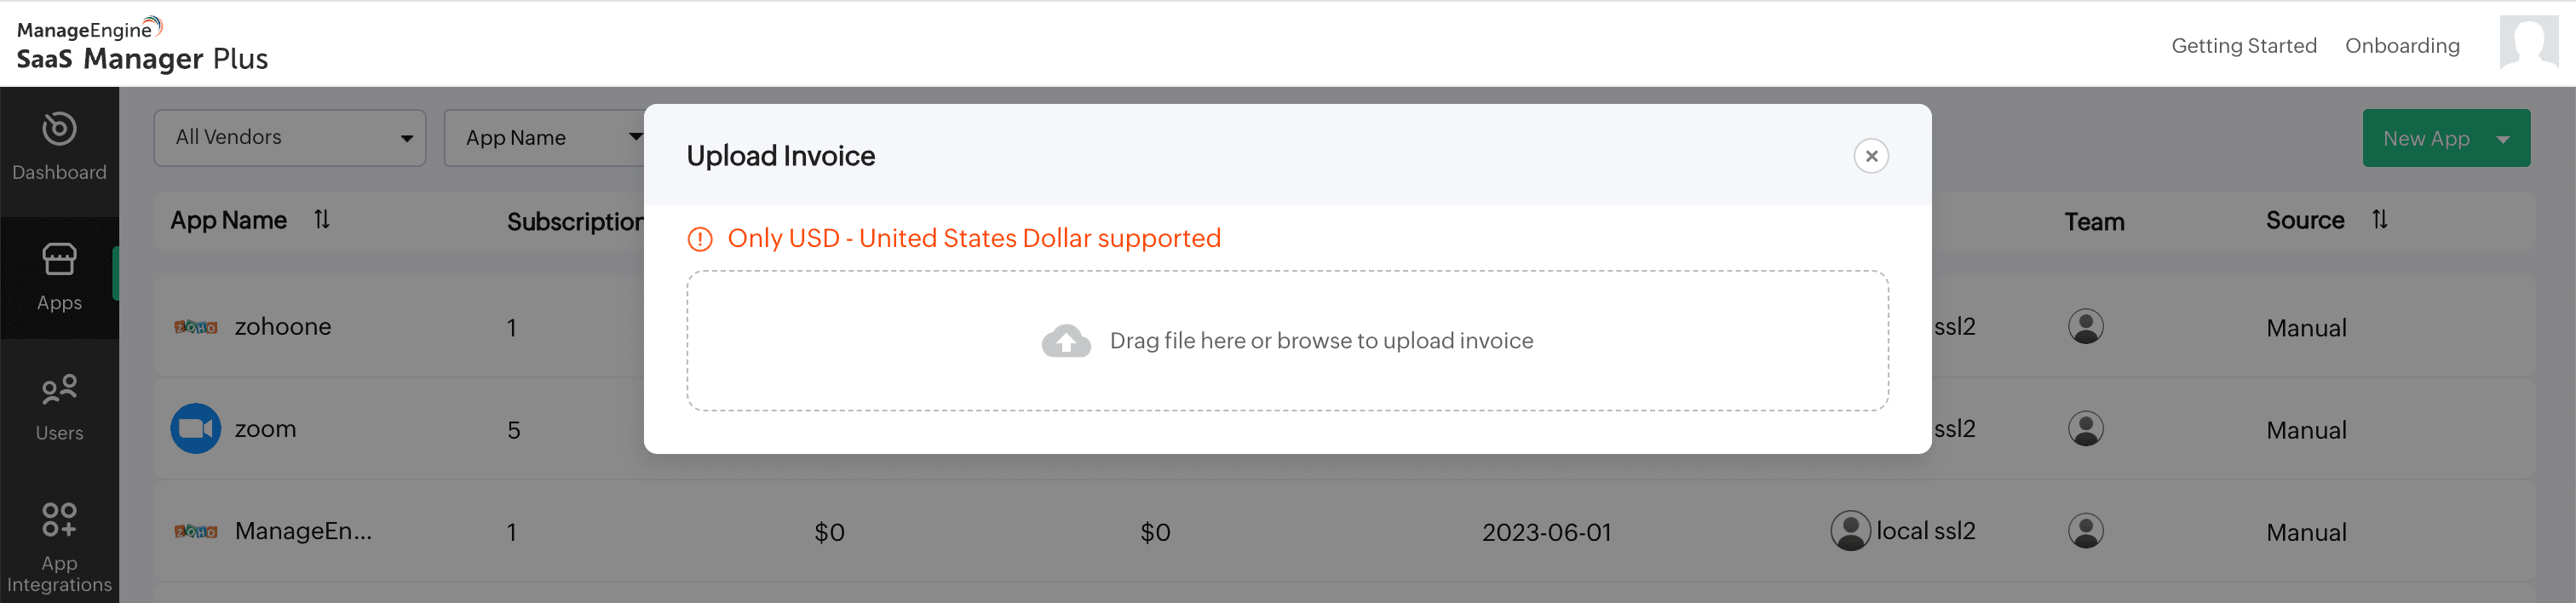
Upload Invoice: Click this option to upload invoices by dragging and dropping them into the Upload Invoice box or browsing from your system.
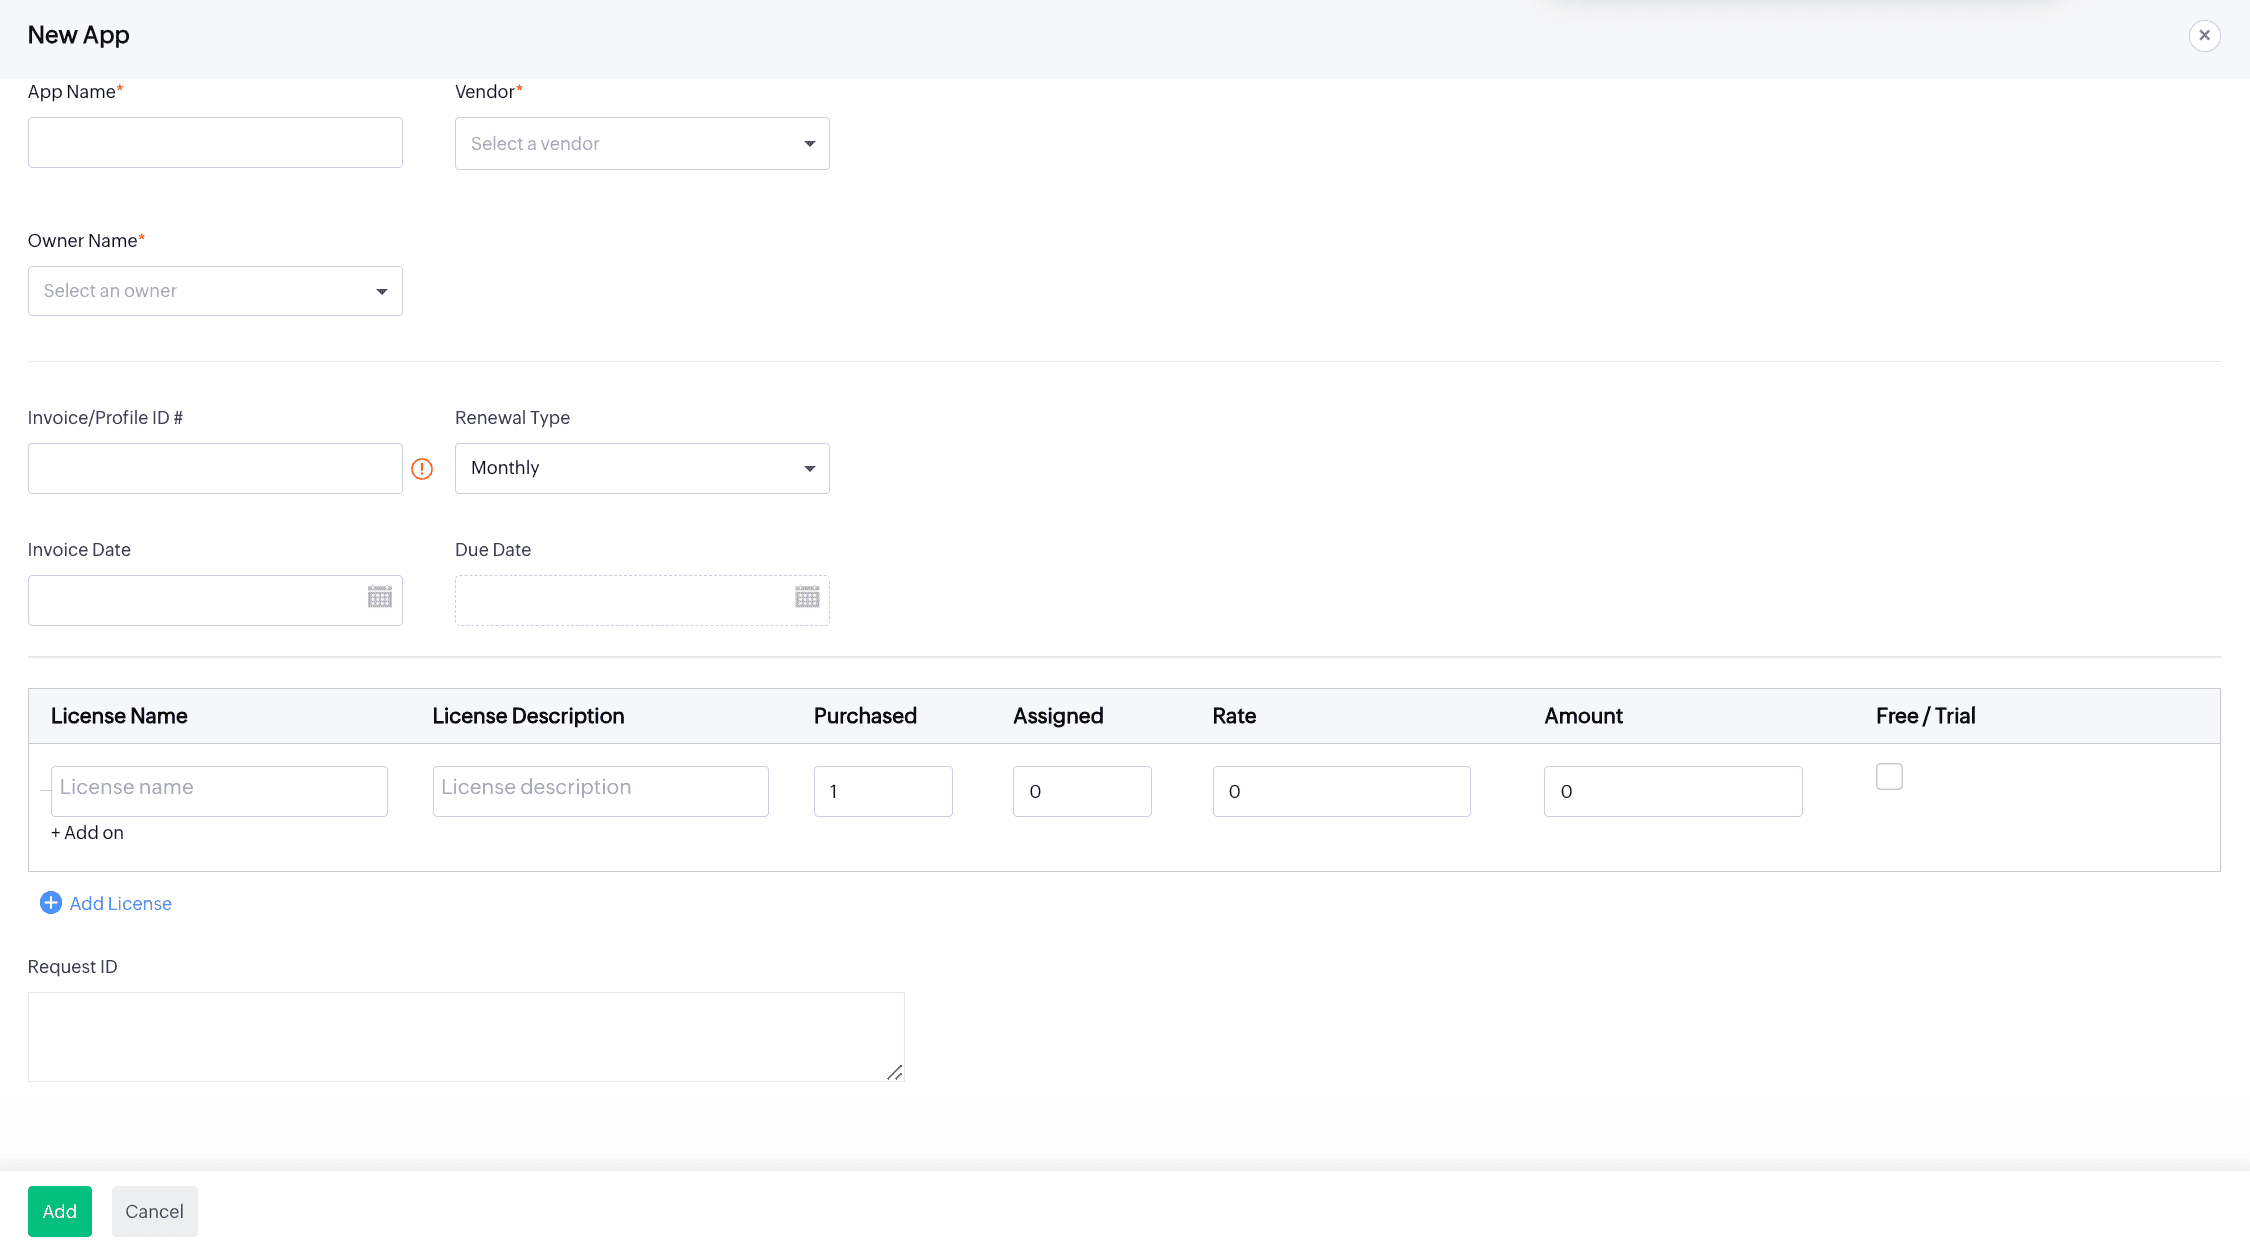
Add Manually
- Click this option to add a new vendor manually. Fill in the required details in the New App section, including Vendor Name, Service Name, Owner Name, Invoice/Profile ID, Renewal Type, Invoice Date, and Due Date.
- Provide details for the License Name, Description, Purchased, Assigned, Rate, Amount, and Free/Trial, if needed.
- Add the Request ID, if required, and click Add to create a new app.
To import apps
Import Apps: Click this option to upload CSV files by dragging and dropping them into the Import Apps box or browsing from your system.
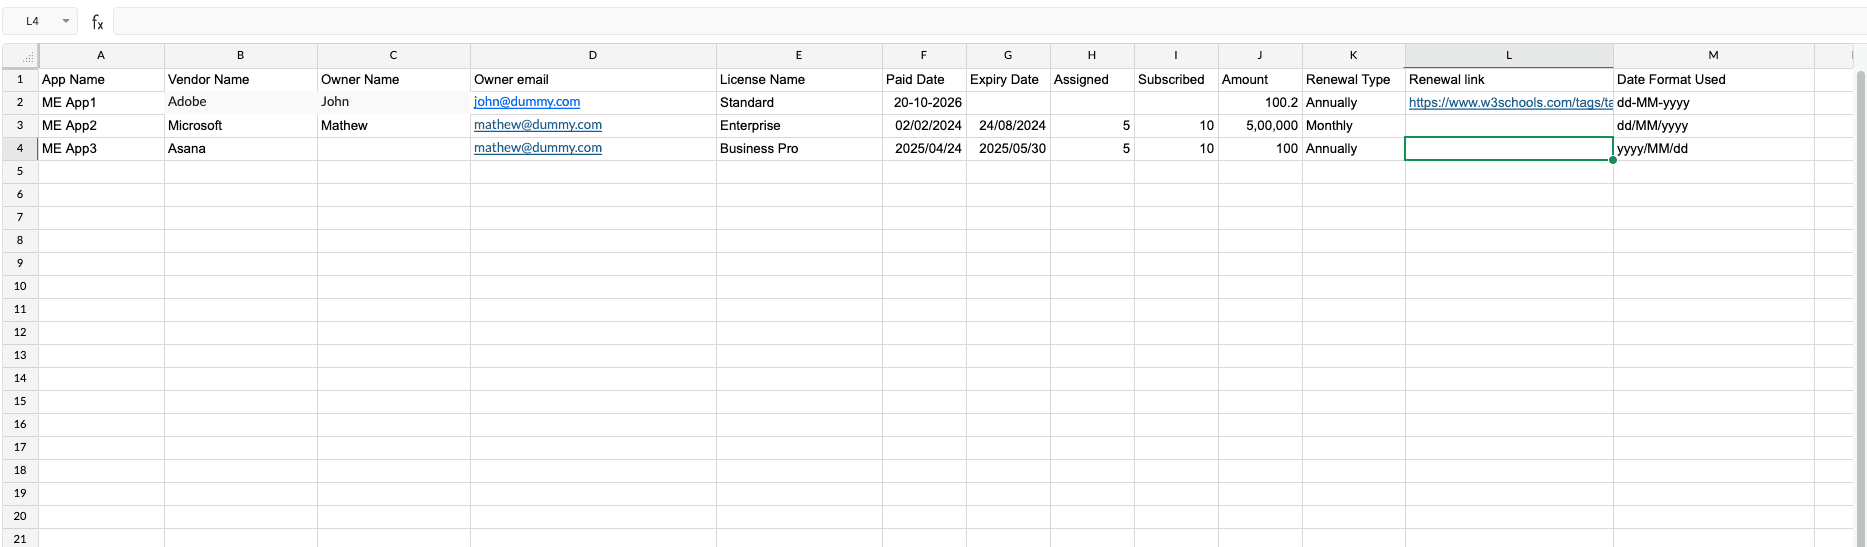
To import apps into the system successfully, your CSV file must follow the specified format. Here's a breakdown of the required columns:
- App Name(Mandatory): Provide the name of the application.
- Vendor Name(Mandatory): Enter the vendor's name.
- Owner Name(Optional): It will be considered only when a new owner email address is added.
- Owner Email(Mandatory):
- Specify the owner's email address.
- If the email is new, it will automatically add the owner as a new user.
- License Name (Optional):
- If you wish to include licenses, this becomes a mandatory field.
- License Paid Date: Enter a valid date.
- License Expiry Date: Enter a valid date.
- Assigned Users Count: Provide a numerical value.
- Subscribed Users Count: Provide a numerical value.
- Amount: Enter a numerical value representing the cost.
- Renewal Type: Choose one of the license types: Monthly/Quarterly/Halfyearly/Annually.
- Renewal Link: Provide a valid URL that can be used to add a renewal link.
- Date Format: Supported formats are MM/dd/yyyy, dd/MM/yyyy, yyyy/dd/MM, and yyyy/MM/dd.
Important note
- Header row: The first row of your file will not be processed as it is considered the header row.
- App Name and Vendor Name have a character limit of 50 and do not support special characters.
- License Name has a character limit of 250 and does not support special characters.
- If the License Name is not provided, the related license fields will not be considered during import.
Once you import the CSV file, a scheduler will be created automatically. You can track its status under:
Settings → Scheduler Settings → Import Apps
Please refresh the page after a few moments to view the updated status.
