Application Settings
Application Settings is where you connect SecureAI to the platforms your AI agents already run on. Each connection is saved as an instance, and each instance declares which capabilities it contributes, so a single page decides what the rest of the product can see. Until an instance exists here and has fetched at least once, Governance, Access Protection, Reports and the risk assessments have nothing to work with. The page supports Microsoft, Google and Zoho Zia as directory and agent platforms, and Anthropic Claude and GitHub Copilot as enterprise AI applications.
How an instance feeds the rest of SecureAI
When you create an instance you select its services under Choose Capabilities. The group each service sits in is what determines where its data lands.
- Identity Provider & Protection services supply the directory identity that Access Protection authenticates against. A service in this group becomes selectable as the Identity Source when you create an MCP gateway.
- Governance services discover agents. What they bring in populates Governance > AI Inventory and the matching report set under Reports.
- Risk Assessment and AI Risk Assessment services score the vendor account itself. Their findings appear under Governance > AI Risk Assessment, one report per account.
Every agent discovered through a governance service consumes one license, which you can review under Settings > License Management. Changes made on this page are recorded in the Admin Audit Report under Delegation.
The application catalogue
Click Manage Applications to open the catalogue. Applications are grouped as Directories/Agent Platforms and Enterprise AI Applications, and each card names the capabilities that application contributes. A card shows two capability tags and a +n tag standing for the rest, so the Microsoft card reads Governance, Access Protection and +1.
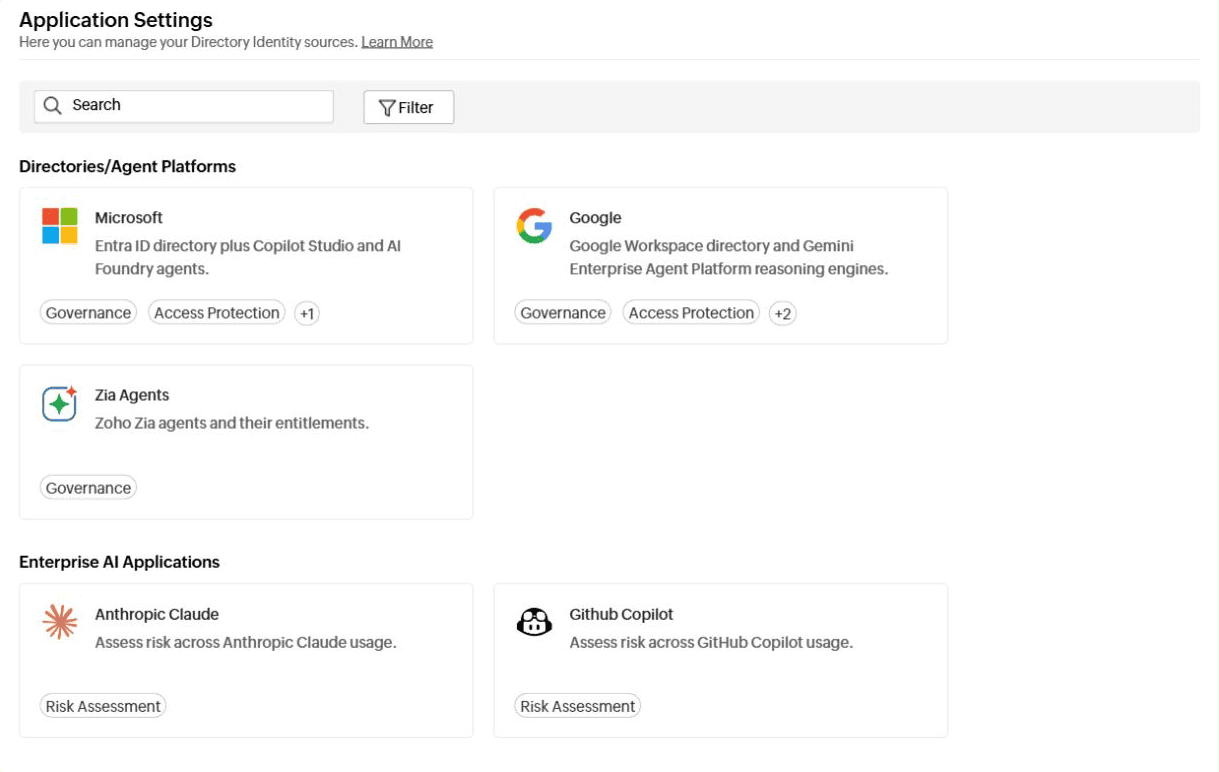
The catalogue offers five applications.
- Microsoft, for an Entra ID directory along with Copilot Studio and AI Foundry agents.
- Google, for a Google Workspace directory and Gemini Enterprise Agent Platform reasoning engines.
- Zia Agents, for Zoho Zia agents and their entitlements.
- Anthropic Claude, to assess risk across Anthropic Claude usage.
- Github Copilot, to assess risk across GitHub Copilot usage.
Note: Gemini does not appear as an application of its own. Gemini reaches SecureAI through the Google application, as the Gemini Enterprise Agent Platform service for agent governance and the Gemini AI service for risk assessment.
Use Search to narrow the catalogue by name. If nothing matches, SecureAI reports No Applications Found.
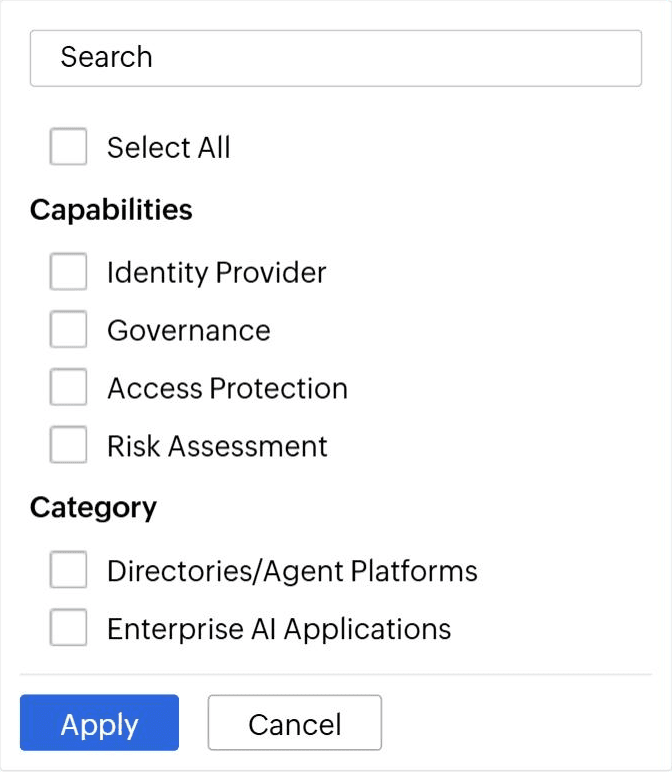
Click Filter to narrow the catalogue by what an application does. Select any combination under Capabilities, which offers Identity Provider, Governance, Access Protection and Risk Assessment, and under Category, which offers Directories/Agent Platforms and Enterprise AI Applications. Select All ticks everything. Click Apply to filter, or Cancel to close without changing the view.
The instance list
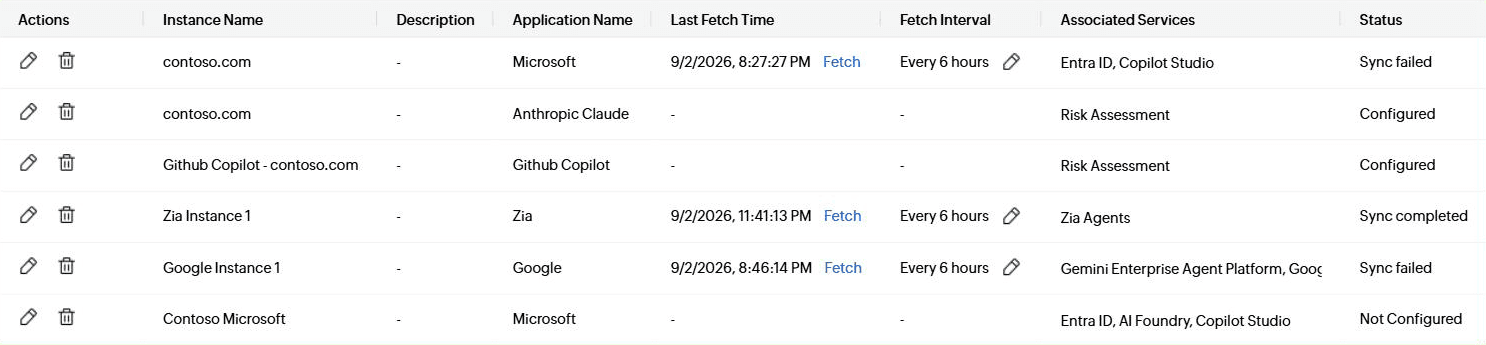
The page opens on the list of instances you have already saved. Each row reports one connection and what SecureAI knows about it.
- Actions holds the edit and delete icons.
- Instance Name and Description are what you entered when you created the instance.
- Application Name is the application the instance belongs to.
- Last Fetch Time shows when data last came in, with a Fetch link beside it.
- Fetch Interval shows the sync schedule, with an edit icon beside it.
- Associated Services lists the services selected for that instance.
- Status reports where the instance has got to.
Status takes one of the following values.
- Not Configured means the instance was saved but its connection was never completed.
- Configured means the connection is in place.
- Not synced means the connection is in place but no data has been fetched yet.
- Sync in progress means a fetch is running.
- Sync completed means the last fetch finished.
- Sync failed means the last fetch did not finish.
Adding an instance
- Go to Application Settings and click Manage Applications.
- Click the card for the platform you want to connect. The Instance Creation panel opens on the General step.
- In Instance Name, enter a name that identifies what this instance points at. SecureAI fills the field in for you, and the name has to be unique.
- To record what the instance is for, click Description and type into the box that appears. The description is optional and shows in the instance list.
- Under Choose Capabilities, select the services this instance should provide.
Note: Some services depend on another being selected first. On Microsoft, AI Foundry and Copilot Studio stay unavailable until you select Entra ID. On Google, Gemini AI stays unavailable until you select Google Workspace, while Gemini Enterprise Agent Platform can be selected on its own.
- Click Next.
Note: Next saves the instance straight away. It appears in the instance list with the status Not Configured and stays that way until you finish the connection.
- On the Connection step, supply the credentials the platform needs. Where an application has governance services, the left pane lists Configuration followed by one entry per selected service. Work down the pane and click Configure on each in turn.
- Click Finish.
The credentials differ by application, so see the guide for the application you are connecting.
Keeping instance data current
SecureAI re-fetches each instance on its own schedule. To pull data immediately instead of waiting, click Fetch beside the instance in Last Fetch Time.
To change the schedule, click the edit icon beside the value in Fetch Interval. Select Hourly, Daily or Weekly, set the Every value between 1 and 6, then click Apply, or click Cancel to leave the schedule as it is.

Note: Instances that only provide risk assessment services, such as Anthropic Claude and Github Copilot, show no Last Fetch Time and no Fetch Interval. They are refreshed from Set Data Sync Time on the AI Risk Assessment page instead.
Editing and removing an instance
To change an instance, click the edit icon in Actions. The Edit Instance panel presents the same content as creation, split across a General tab and a Connection tab, with Save to commit.
Note: Stored secrets stay masked in Edit Instance. Leave a secret field as it is to keep the existing value, or type a new value to replace it.
To remove an instance, click the delete icon in Actions. SecureAI spells out what deletion takes with it before you commit.
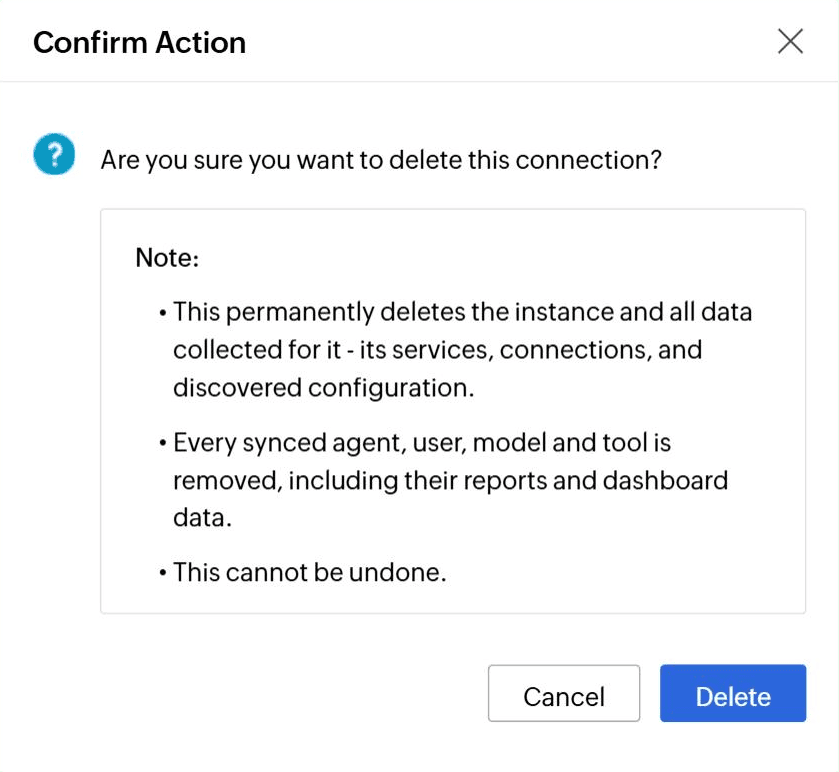
Click Delete to remove the instance, or Cancel to keep it. Deleting an instance permanently removes it along with every service, connection and discovered configuration under it, and every agent, user, model and tool synced through it, including their reports and dashboard data. The action cannot be undone.