Github Copilot
Github Copilot connects SecureAI to a GitHub organization so that the organization's Copilot posture can be assessed. Rather than discovering agents, this instance reads how the organization is configured: its billing and seats, its security settings, its open alerts and its audit trail. SecureAI scores what it finds against weighted checks and returns a risk score with per-finding remediation. Because it is a posture assessment, a Github Copilot instance contributes nothing to the agent inventory and consumes no agent licenses.
What a Github Copilot instance covers
The Github Copilot card sits under Enterprise AI Applications in the application catalogue and offers a single service.
- Risk Assessment, under Risk Assessment, performs risk assessment of the GitHub organization's Copilot posture (billing, seats, org security settings, alerts).
Because that is the only service, the card carries one capability tag, Risk Assessment, and the service is selected for you. A Github Copilot instance does not act as an identity provider and does not feed AI Inventory or the agent report sets.
Note: SecureAI spells this application two ways. The catalogue card and the instance list read Github Copilot, while the creation panel is titled Instance Creation - GitHub Copilot and the risk findings say GitHub Copilot. They are the same application.
Prerequisites
Before you add a Github Copilot instance, arrange the following on the GitHub side.
- A GitHub organization with Copilot enabled for its members. Organization owners grant and revoke that access. See Managing access to GitHub Copilot in your organization.
- The organization's name as GitHub spells it in the URL, which is what SecureAI asks for under Organization.
- A personal access token belonging to an account that can read that organization, including its billing, seats, security settings, alerts and audit log. Create it under Settings > Developer settings > Personal access tokens. See Managing your personal access tokens.
Note: The breadth of the token decides how much of the assessment can run. Checks whose endpoint the token cannot reach report Failed to Run rather than passing or failing, so a token that is too narrow produces an assessment full of gaps rather than an error.
Creating a Github Copilot instance
- Go to Application Settings and click Manage Applications.
- Click the Github Copilot card. The Instance Creation - GitHub Copilot panel opens on the General step.
- In Instance Name, enter a name that identifies the GitHub organization this instance points at. SecureAI fills the field in for you, and the name has to be unique.
- To record what the instance is for, click Description and type into the box that appears. The description is optional and shows in the instance list.
- Leave Risk Assessment selected under Choose Capabilities.
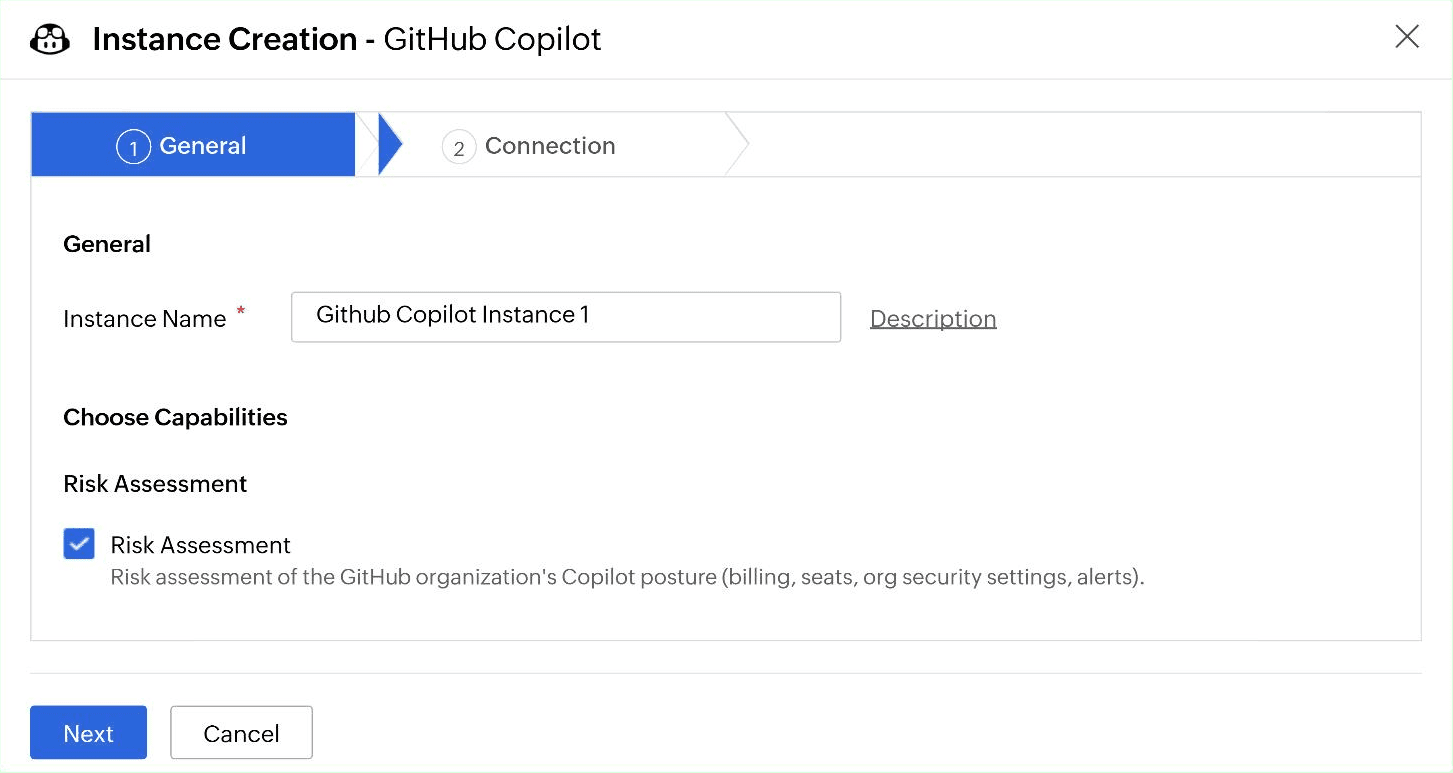
Fig 1: The General step of Instance Creation - GitHub Copilot. - Click Next.
Note: Next saves the instance straight away. It appears in the instance list with the status Not Configured and stays that way until you finish the connection.
Setting up the connection
- Check Connection Name, which SecureAI fills in for you and which you can rename.
- In Personal Access Token, paste the token you created on GitHub.
- In Organization, enter the name of the GitHub organization to assess.
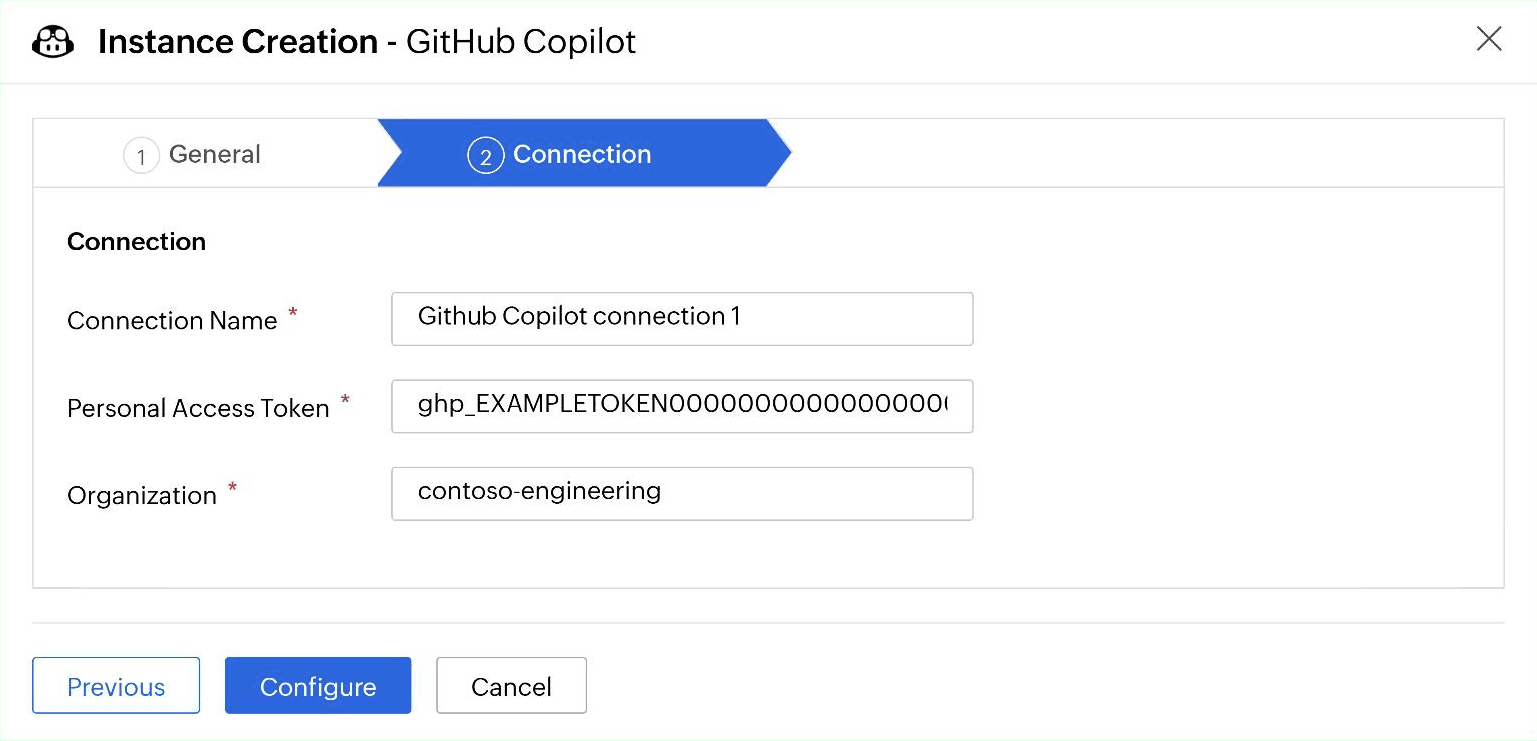
Fig 2: The Connection step of Instance Creation - GitHub Copilot. - Click Configure.
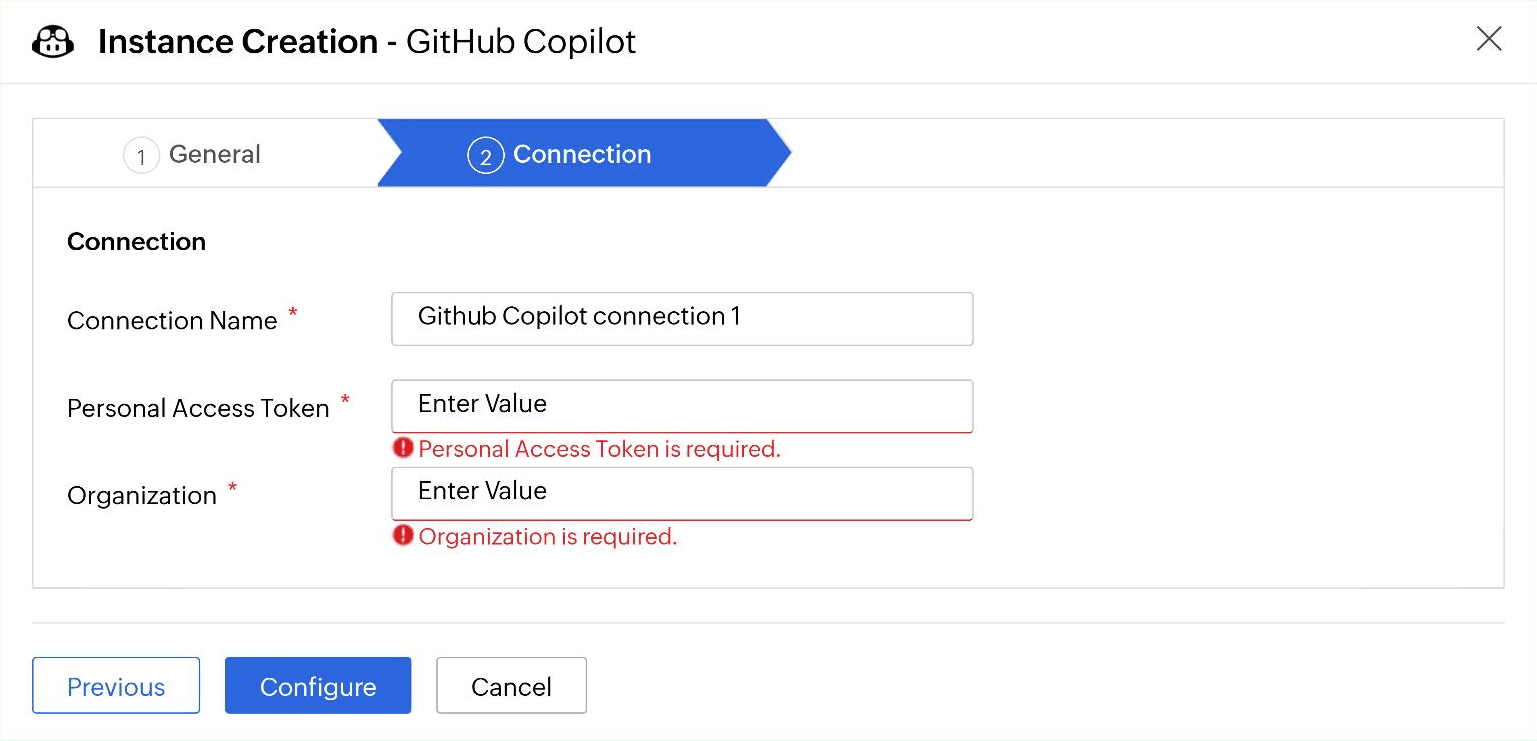
SecureAI checks both fields before it tries the connection, reporting Personal Access Token is required. and Organization is required. against whichever is empty.
Reading the risk assessment
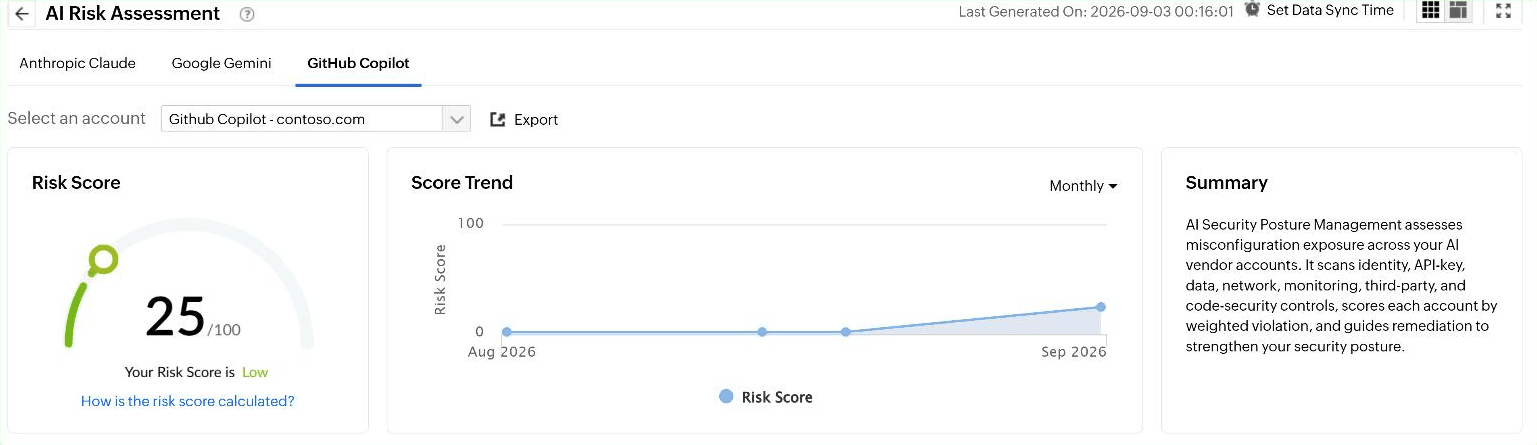
Once the connection is in place and an assessment has run, the results appear under Governance > AI Risk Assessment, on the GitHub Copilot tab. Use Select an account to switch between instances when you have more than one, and Export to take the whole assessment away.
The page opens with a Risk Score out of 100 and a band beneath it, a Score Trend chart with a Monthly selector, and a Summary card explaining what AI Security Posture Management assesses.
Findings are grouped into eight categories, each on its own tab. Six of them appear for every vendor: API Key Security, Data Governance, Identity & Access Management, Monitoring & Logging, Network Access Control, and Third-Party Integrations. Two are specific to Github Copilot.
- CI/CD Security covers how GitHub Actions is allowed to run, default workflow token permissions, self-hosted runner exposure, deploy keys, and whether Actions may approve pull requests.
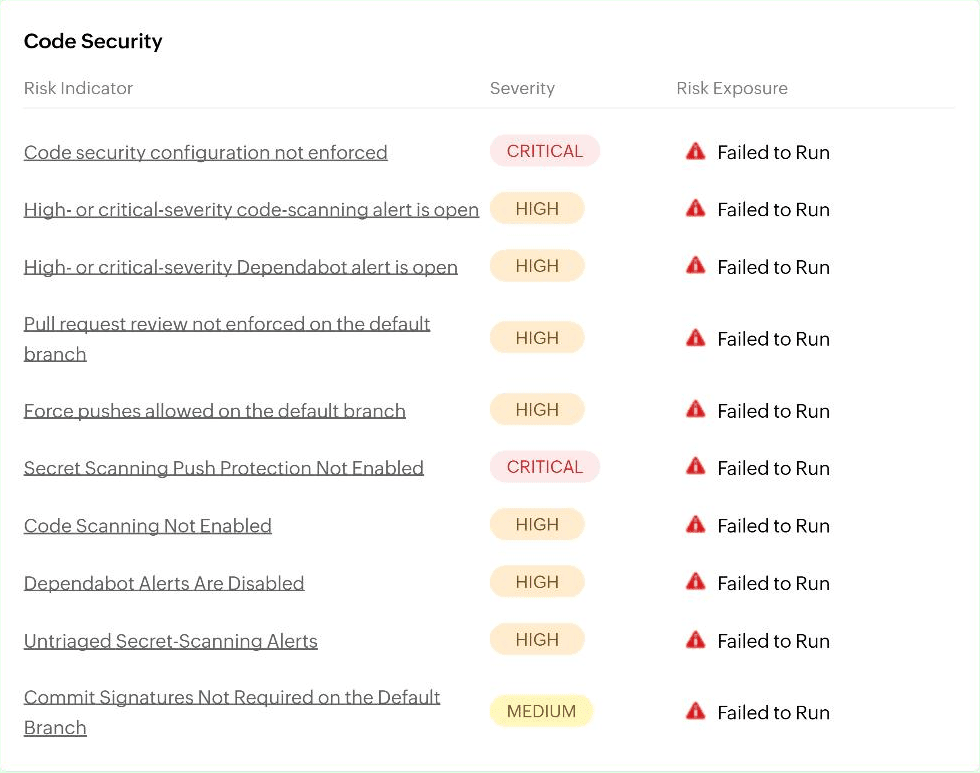
- Code Security covers code scanning, Dependabot, secret scanning push protection, branch protection on the default branch, commit signing, and open high or critical severity alerts.
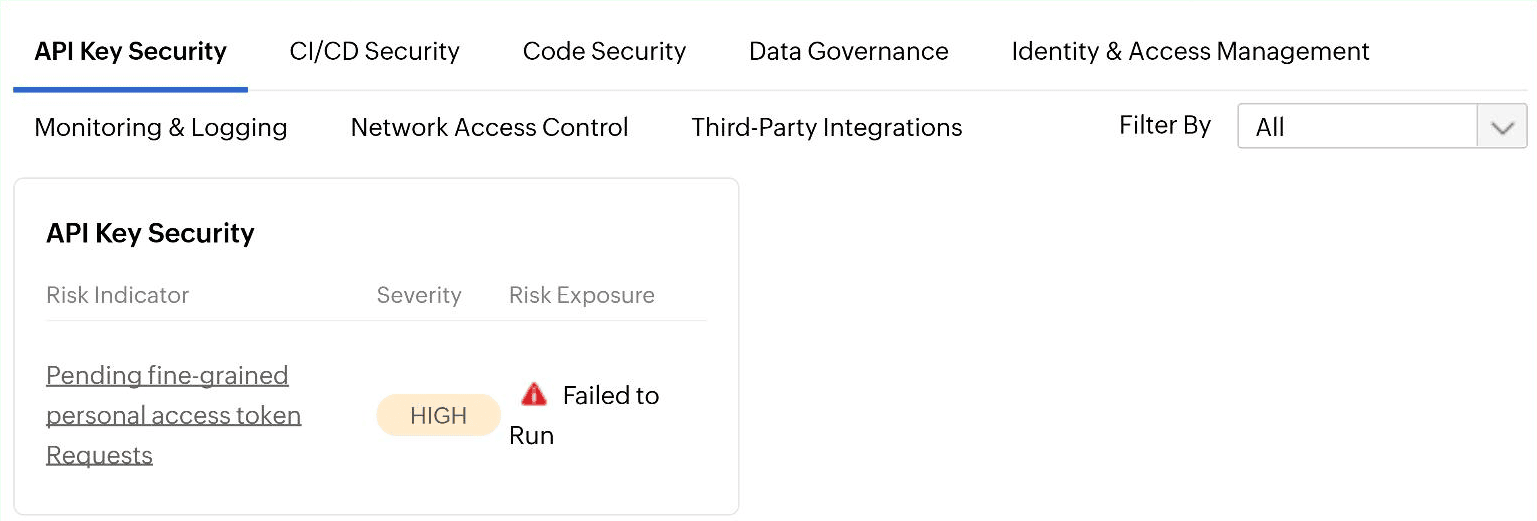
Each tab lists its checks as Risk Indicator, Severity and Risk Exposure. Severity is Critical, High, Medium or Low. Risk Exposure reads as a percentage with the affected count behind it, and Failed to Run replaces it when SecureAI could not evaluate the check. Use Filter By to show only Critical, High, Medium or Low findings, or All.
Click any risk indicator to open it. The detail page reports the exposure, Severity, Weight and Status, lists the objects that matched, and offers Export As for CSV, PDF or XLSX along with Add or Remove Column. Clicking here in the category description opens the guidance panel, which carries a Description, numbered Remediation measures including the GitHub path to follow, and Compliance Frameworks (Domain Level) mapping the finding to standards such as the EU AI Act, the NIST AI Risk Management Framework, OWASP LLM, ISO 42001, MITRE ATLAS, Gartner AI TRiSM, NCSC guidance, NIST SP 800-53 and CIS.
Keeping the assessment current
The header of the AI Risk Assessment page shows Last Generated On and carries Set Data Sync Time, which is where the assessment schedule lives. Turn on Enable Data Sync Schedule, choose a Schedule Frequency of Daily, Weekly, Monthly or Custom, set the hour and minute under At:, then click Save, or click Cancel to leave the schedule alone.
Note: A Github Copilot instance shows no Last Fetch Time and no Fetch Interval in the instance list, and offers no Fetch link. Risk assessment instances are refreshed from Set Data Sync Time instead, not from the instance list.
Managing a Github Copilot instance
In the instance list on the Application Settings page, a Github Copilot instance reports Risk Assessment under Associated Services and a status of Not Configured until the connection is complete, then Configured.
To change an instance, click the edit icon in Actions. The Edit Instance panel presents the same content as creation, split across a General tab and a Connection tab, with Save to commit.
Note: Personal Access Token keeps the stored token masked in Edit Instance. Leave it as it is to keep the existing token, or paste a new token to replace it.
To remove an instance, click the delete icon in Actions, then click Delete to confirm or Cancel to keep it. Deleting an instance permanently removes it along with its connection and every assessment result collected for it, and the action cannot be undone.