Microsoft
Microsoft connects SecureAI to your Microsoft Entra ID tenant and to the agent platforms that sit on top of it. A single Microsoft instance can act as the identity provider that access protection relies on, and it can serve as the data source for the agents your teams build in Copilot Studio and deploy in AI Foundry. You decide which of those services an instance carries, then supply one set of Microsoft credentials that covers them. SecureAI fetches directory and agent data from that connection on a schedule you control, so governance and access protection work from current information.
What a Microsoft instance covers
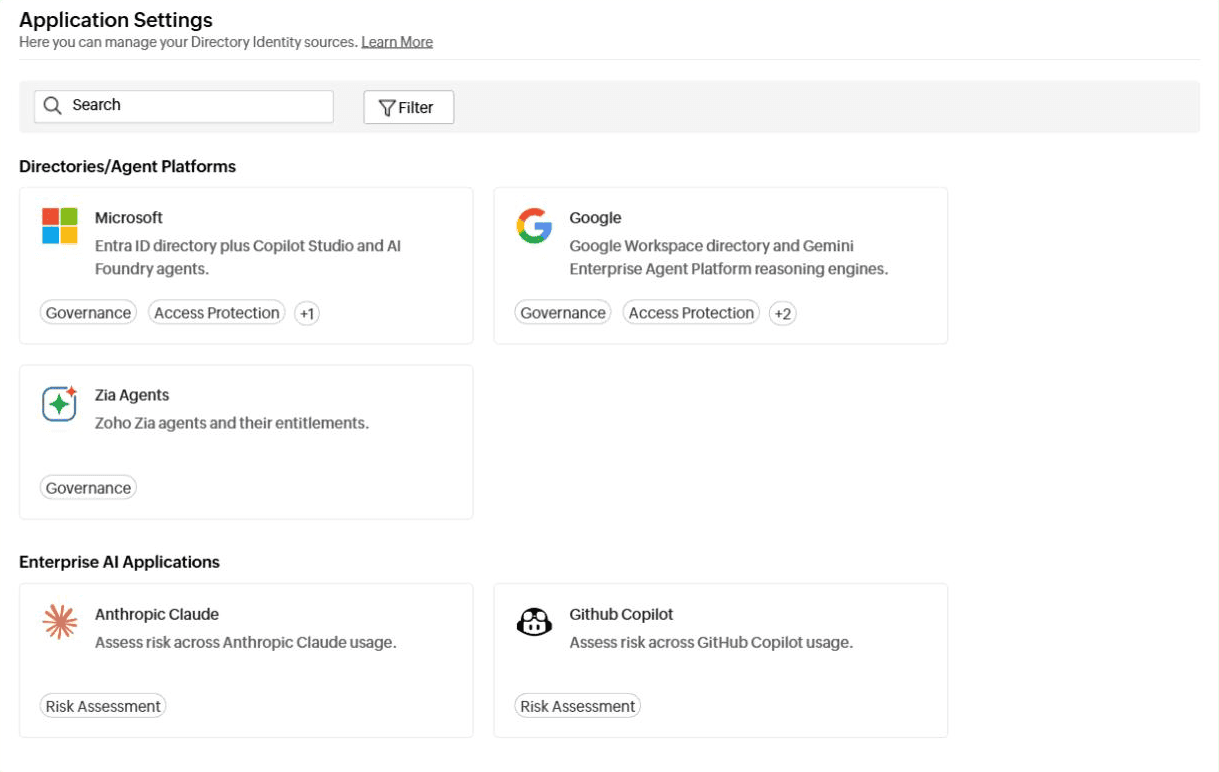
The Microsoft card sits under Directories/Agent Platforms in the application catalogue and offers three services, grouped by what they are used for.
- Entra ID, under Identity Provider & Protection, acts as the identity provider for secure access protection.
- AI Foundry, under Governance, is used as a data source to discover and manage agents deployed within your AI Foundry environment.
- Copilot Studio, under Governance, is used as a data source to discover and manage agents built and deployed through Copilot Studio.
Note: AI Foundry and Copilot Studio stay unavailable until you select Entra ID. Entra ID supplies the tenant connection that both governance services read through, so select it first and the other two become selectable.
The tags on the Microsoft card name the capabilities the application contributes to. Two are shown, and clicking +1 reveals the third, so the full set reads Governance, Access Protection, and Identity Provider.
Prerequisites
Before you add a Microsoft instance, arrange the following on the Microsoft side.
- A Microsoft Entra ID tenant that holds the users and agents you want SecureAI to work with.
- For the Use Microsoft 365 Login connection type, an account with the Global Administrator role. SecureAI creates an application in your tenant during this flow, and the Microsoft 365 sign-in it sends you to has to be completed with that account.
- For the Use registered Entra ID Application connection type, an application already registered in Entra ID, along with its tenant name, application (client) ID, and a client secret. Microsoft documents both tasks, in Register an app in Microsoft Entra ID and Add and manage application credentials in Microsoft Entra ID.
- For AI Foundry, a Foundry resource and at least one project in the same tenant, since SecureAI asks you to pick the resource group, resource, and project it should read from. See Microsoft's Create a project documentation.
- For Copilot Studio, at least one Power Platform environment that holds the agents you want discovered, since SecureAI asks you to select the environment by its URL. See Microsoft's Work with Power Platform environments in Copilot Studio documentation.
Creating a Microsoft instance
- Go to Application Settings > Manage Applications.
- Click the Microsoft card. The Instance Creation - Microsoft panel opens on the General step.
- In Instance Name, enter a name that identifies the tenant this instance points at. The field is filled in for you, and the name has to be unique.
Note: If you keep a name that is already in use, SecureAI reports An instance named 'Microsoft Instance 1' already exists. Please use a different name. Nothing was saved. and stays on the same step.
- To record what the instance is for, click Description and type into the box that appears. The description is optional and shows in the instance table.
- Under Choose Capabilities, select Entra ID, then select AI Foundry or Copilot Studio, or both, depending on which agent platforms you want SecureAI to govern.
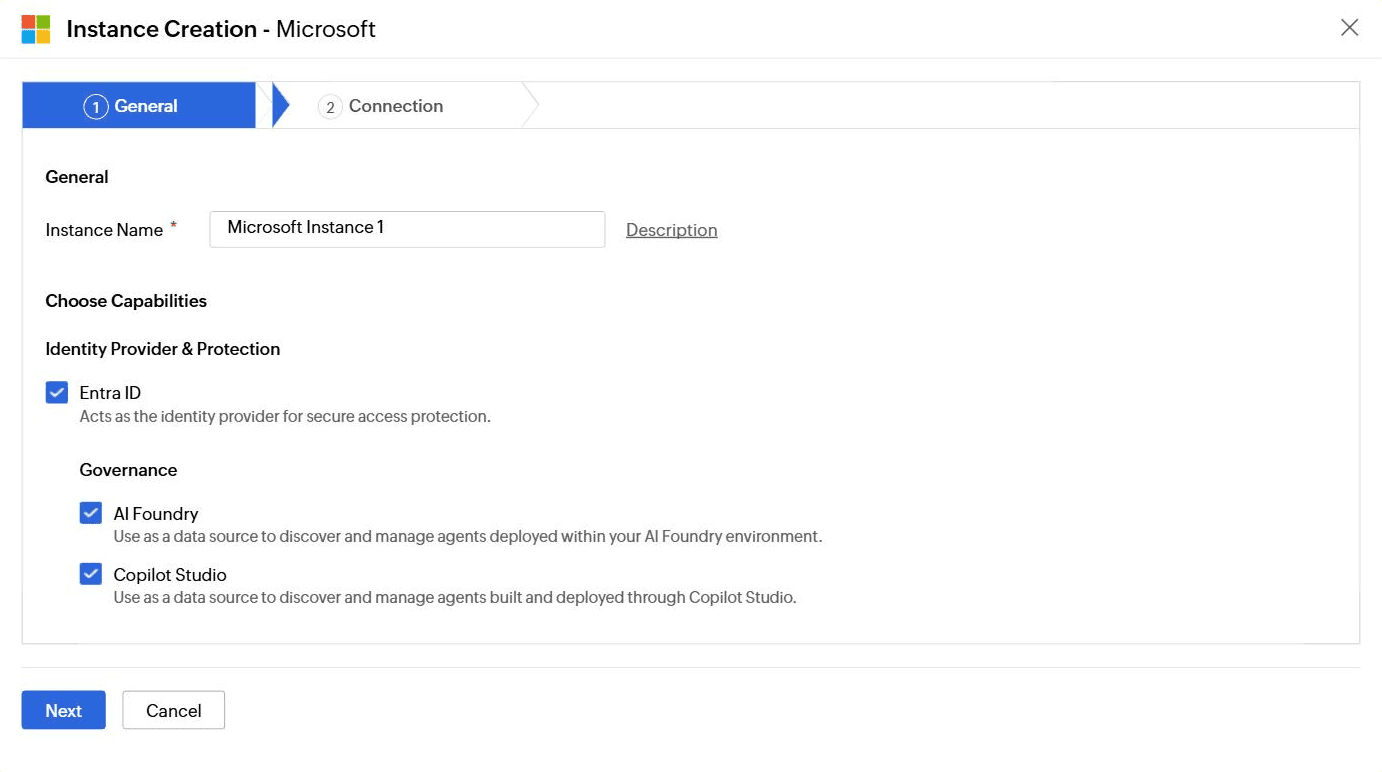
Fig 2: Choosing capabilities on the General step of Instance Creation - Microsoft. - Click Next.
Note: If no service is selected, clicking Next reports Select at least one service.
Note: Next saves the instance. It appears in the instance table straight away with the status Not Configured, and it stays that way until you finish the connection.
- On the Connection step, the left pane lists Configuration followed by one entry for each governance service you selected. Configure them from the top down, starting with Configuration.
Setting up the base connection
Configuration holds the credentials SecureAI uses to reach the tenant. Check Connection Name, which is filled in for you and can be renamed, then choose a Connection Type.
Connecting with a Microsoft 365 sign-in
- Select Use Microsoft 365 Login.
- From the Azure Environment drop-down, select the cloud your tenant runs in. The options are Azure Global, Azure US Government, and Azure China.
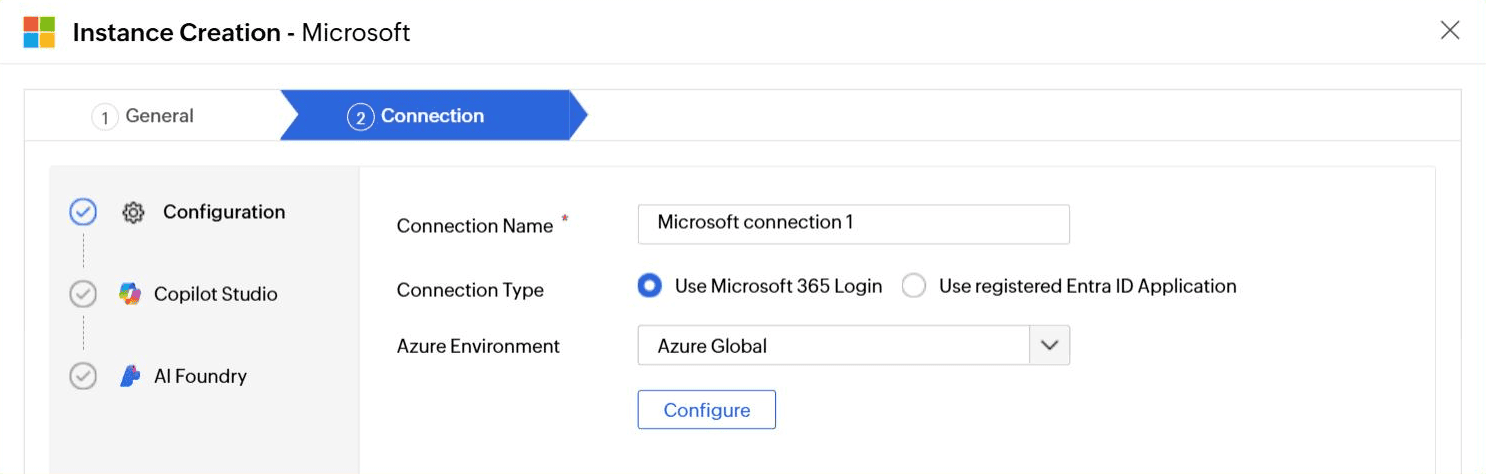
Fig 3: The Configuration pane with Use Microsoft 365 Login selected. - Click Configure. SecureAI sets out what the action will do before anything happens.
- Click Proceed, then complete the Microsoft 365 sign-in with your Global Administrator account.
Connecting with a registered Entra ID application
- Select Use registered Entra ID Application. Because switching connection type clears what you have entered, SecureAI asks you to confirm with The data you modified will be reset. Are you sure you want to proceed?
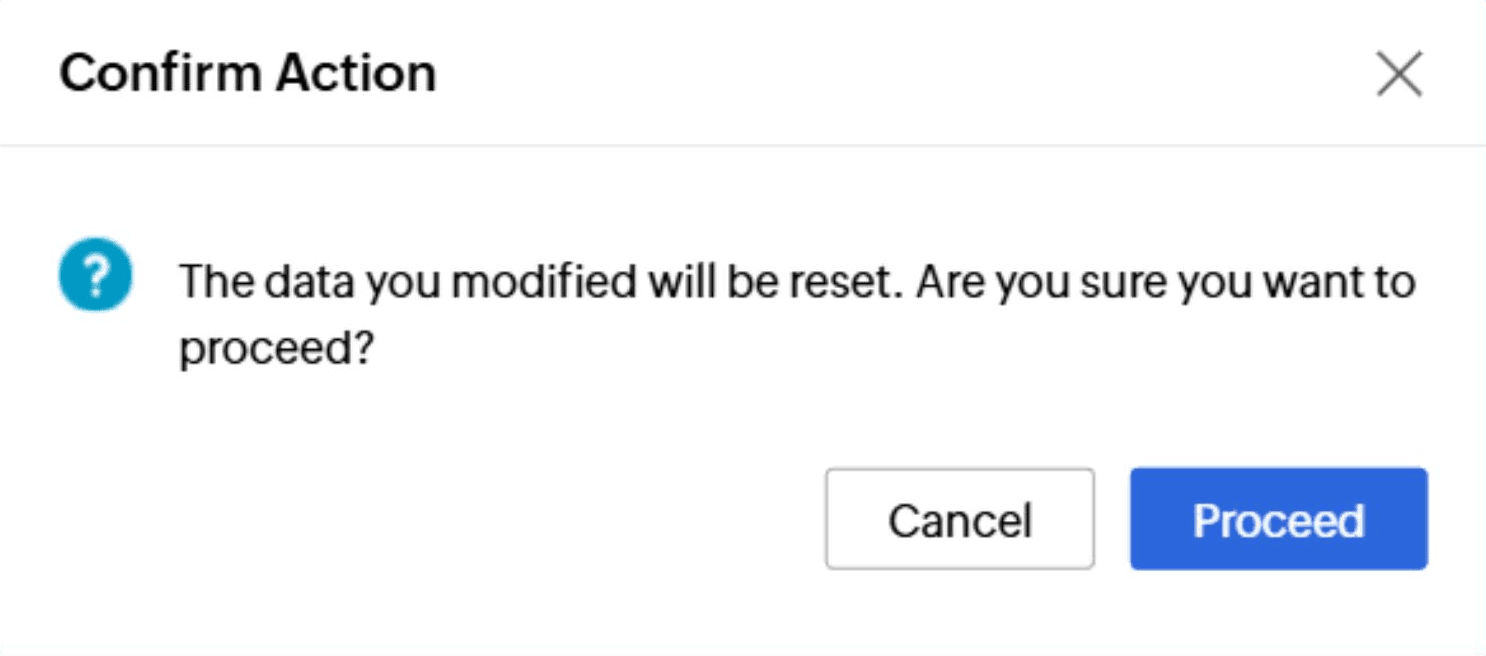
Fig 4: The prompt shown when you switch Connection Type. - Click Proceed.
- Enter the Tenant Name, Application Id, and Application Secret of your registered application. All three are required.
- From the Azure Environment drop-down, select the cloud your tenant runs in.
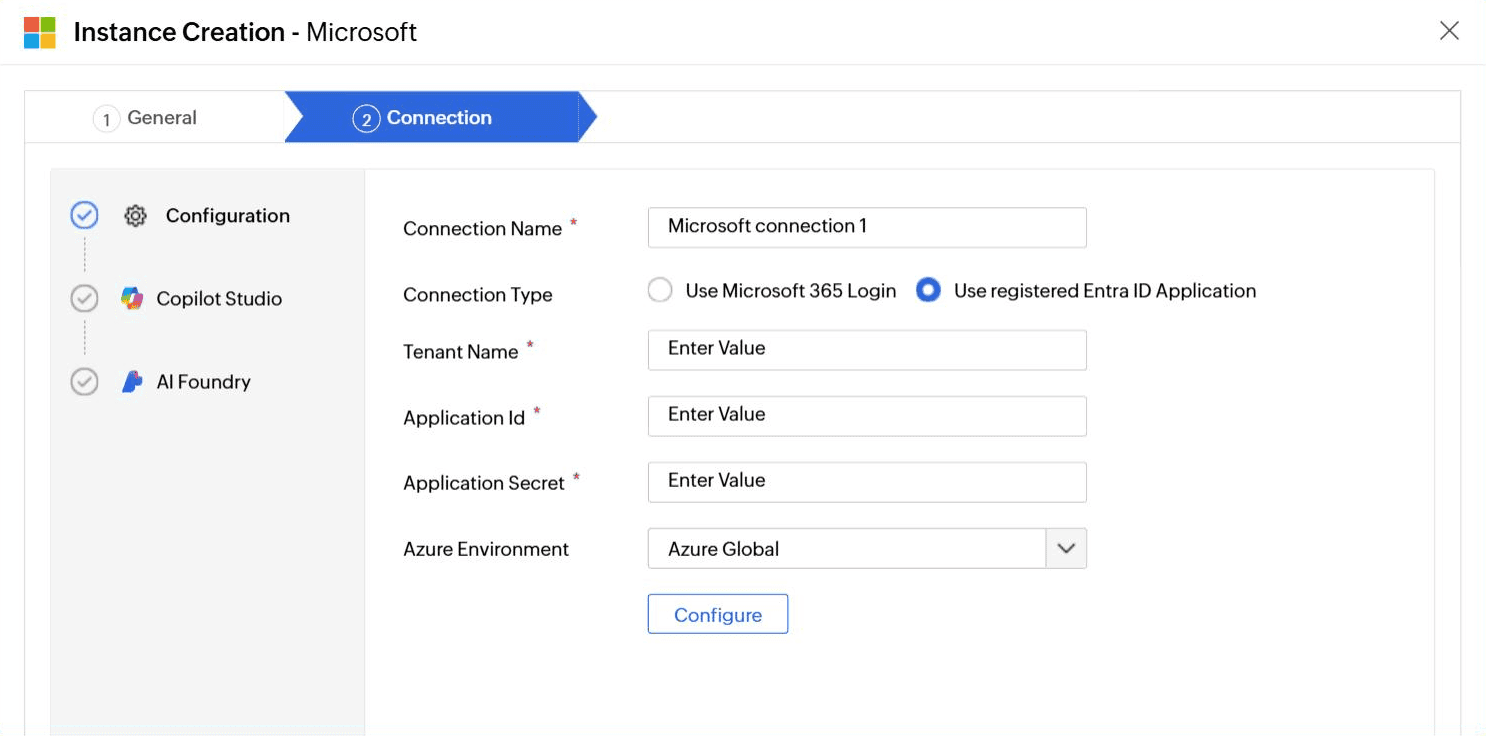
Fig 5: The Configuration pane with Use registered Entra ID Application selected. - Click Configure.
Note: If any credential is missing, SecureAI reports it against the field, as Tenant Name is required., Application (client) ID is required., and Application secret is required.
Pointing the governance services at your agents
With the base connection in place, work down the left pane and configure each governance service you selected. SecureAI fills the pickers in these panes from what it finds in your tenant, so they are populated only after Configuration succeeds.
Copilot Studio
- Select Copilot Studio in the left pane.
- Click the add icon next to Environment URL and select the Copilot Studio environments SecureAI should read agents from. The picker lists each environment by Name and Environment URL. Choose the ones you want and click Select. The field then reports how many you picked.
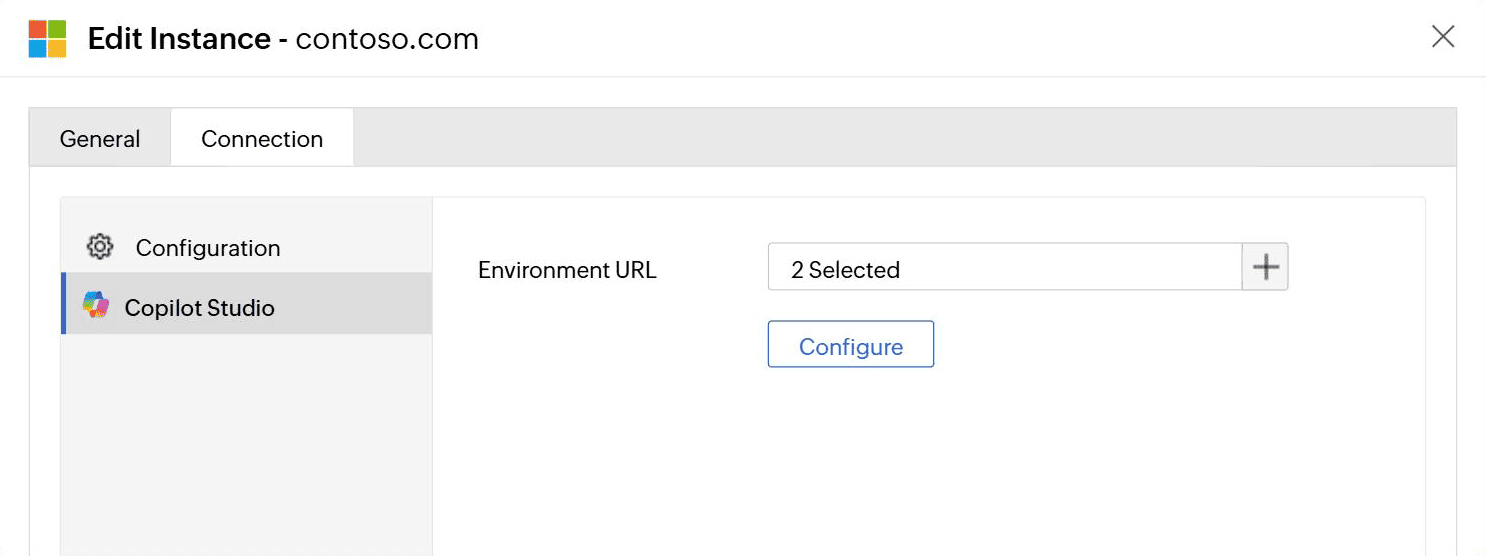
Fig 6: The Copilot Studio pane, showing how many environments are selected. - Click Configure.
AI Foundry
- Select AI Foundry in the left pane.
- Select a Resource Group, then a Resource, then a Project. Resource and Project are required, and each field offers a picker listing what SecureAI found in your tenant.
- Click Configure.
- Click Finish. The instance status changes from Not Configured once the connection is complete, and SecureAI begins fetching on the next scheduled run.
Managing a Microsoft instance
The instance table on the Application Settings page is where a saved instance is maintained. Alongside the name, description, and application, it reports Last Fetch Time, Fetch Interval, the Associated Services the instance carries, and a Status.
- Not Configured means the instance was saved but its connection is not complete.
- Configured means the connection is in place.
- Not synced means no data has been fetched yet.
- Sync in progress means a fetch is running.
- Sync completed means the last fetch finished.
- Sync failed means the last fetch did not finish.
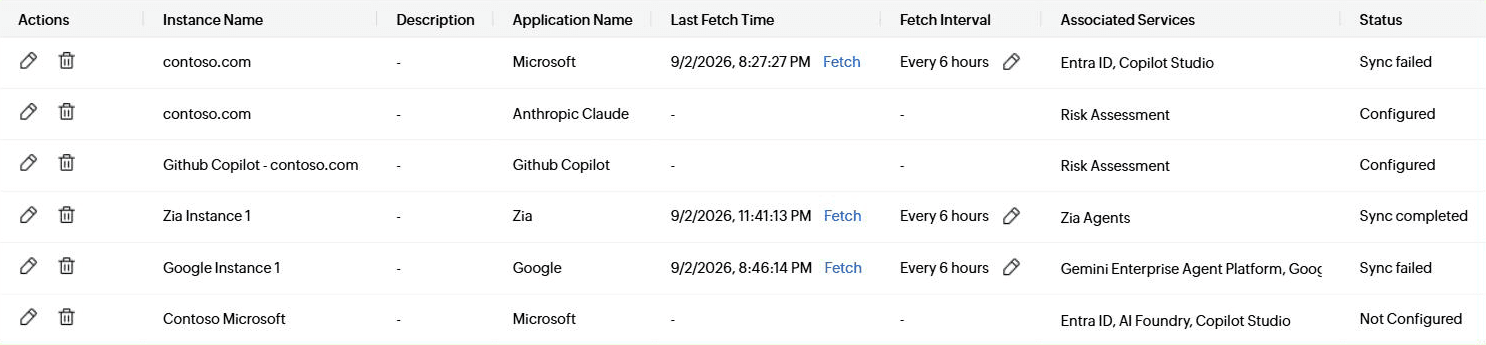
To pull data straight away rather than waiting for the schedule, click Fetch next to the instance.
To change how often SecureAI re-fetches, click the edit icon beside the value in Fetch Interval, select Hourly, Daily, or Weekly, set the Every value, then click Apply.

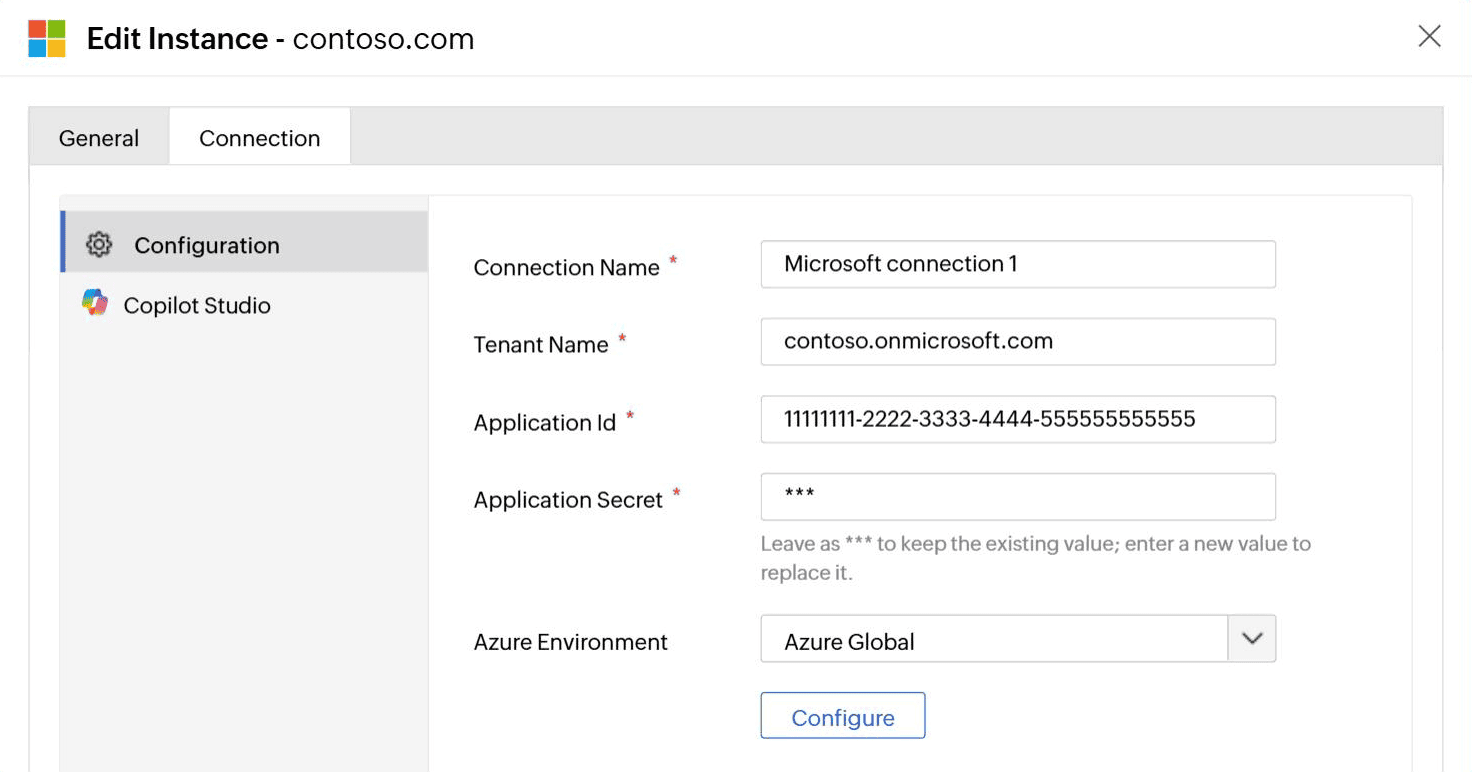
To change an instance, click the edit icon in the Actions column. The Edit Instance panel presents the same content as creation, split across a General tab and a Connection tab, so you can add or remove a service and re-point a connection. Click Save to apply the change.
Note: The Application Secret field in Edit Instance keeps the stored secret masked. Leave it as it is to keep the existing value, or type a new secret to replace it.
To remove an instance, click the delete icon in the Actions column. SecureAI spells out what deletion takes with it before you commit.
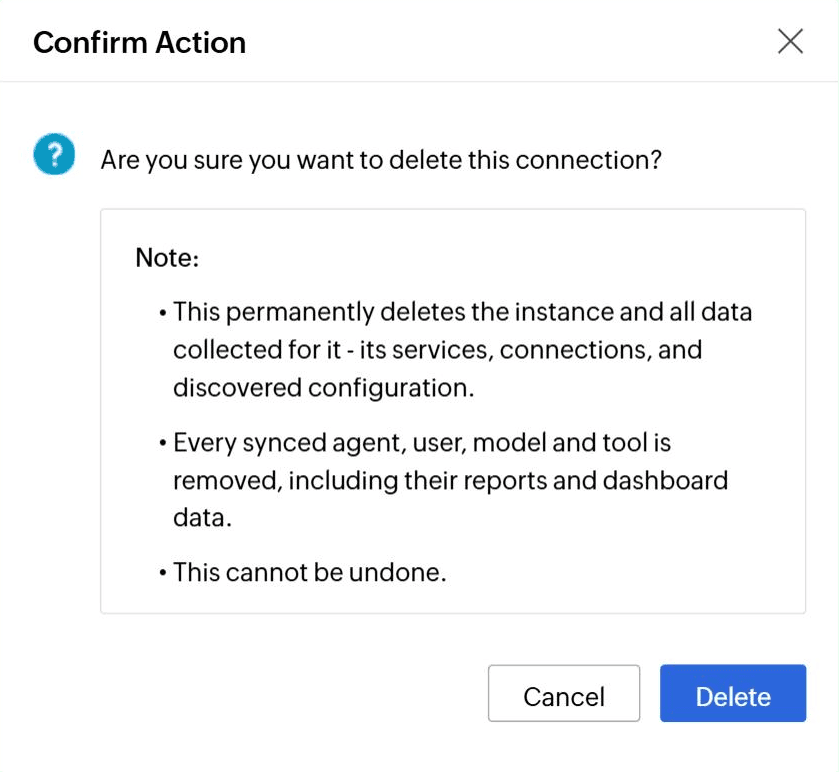
Click Delete to remove the instance, or Cancel to keep it.