High Availability
Overview
High availability is the capability of an IT system to operate at a specified performance level, even when hardware, software, or network components fail. It is typically achieved through redundancy, automated failover, and resilient design so that users experience little to no disruption during outages or maintenance activities.
How high availability works in SharePoint Manager Plus
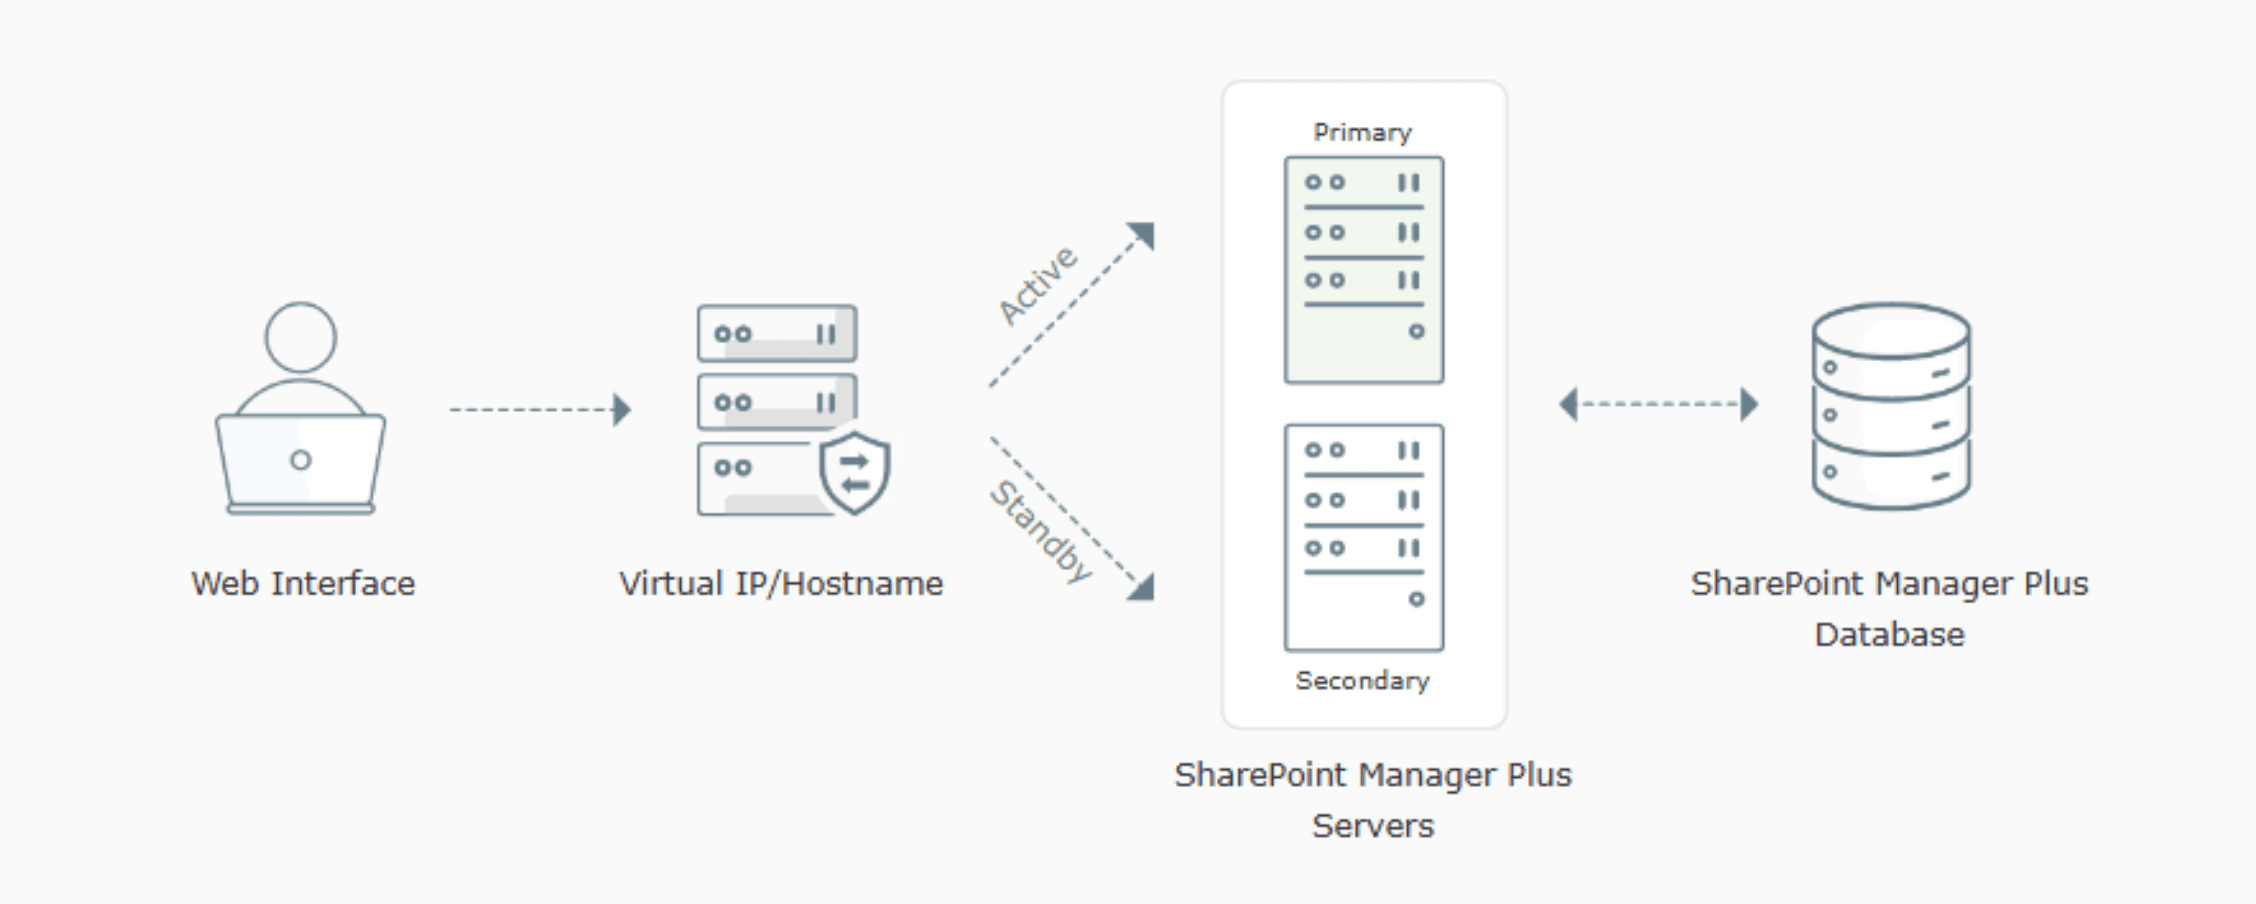
In SharePoint Manager Plus, high availability is achieved through a failover setup where a secondary SharePoint Manager Plus instance will be installed on another machine. When users connect through a virtual IP or hostname, requests are automatically routed to the primary SharePoint Manager Plus server. If the primary server becomes unavailable, the secondary server seamlessly takes over, maintaining uninterrupted access with minimal downtime.
Prerequisites
- Configure an external Microsoft SQL Server database before enabling high availability.
- The external database hostname must not be set to “localhost” when enabling high availability.
- A minimum of two servers is required to configure high availability: one acting as the primary server and the other as the secondary server which uses the database configured on the primary server.
- Ensure all servers run the same build. We recommend that you upgrade to the latest version.
- Ensure all servers can communicate without firewall or antivirus restrictions.
- Use the same product port number across all secondary servers as configured on the primary server.
- Ensure that port 7800 (high availability communication) and the default product ports 8085 (HTTP) and 8086 (HTTPS) are open and reachable on all configured servers.
- Confirm HTTP and HTTPS before enabling high availability, as this setting cannot be changed later. All servers must use the same protocol as the primary server.
- The user running the product must have admin privileges to bind or unbind the virtual IP for same-subnet mode.
Configuring high availability
- Log in to SharePoint Manager Plus and navigate to Admin > Configuration > High Availability.
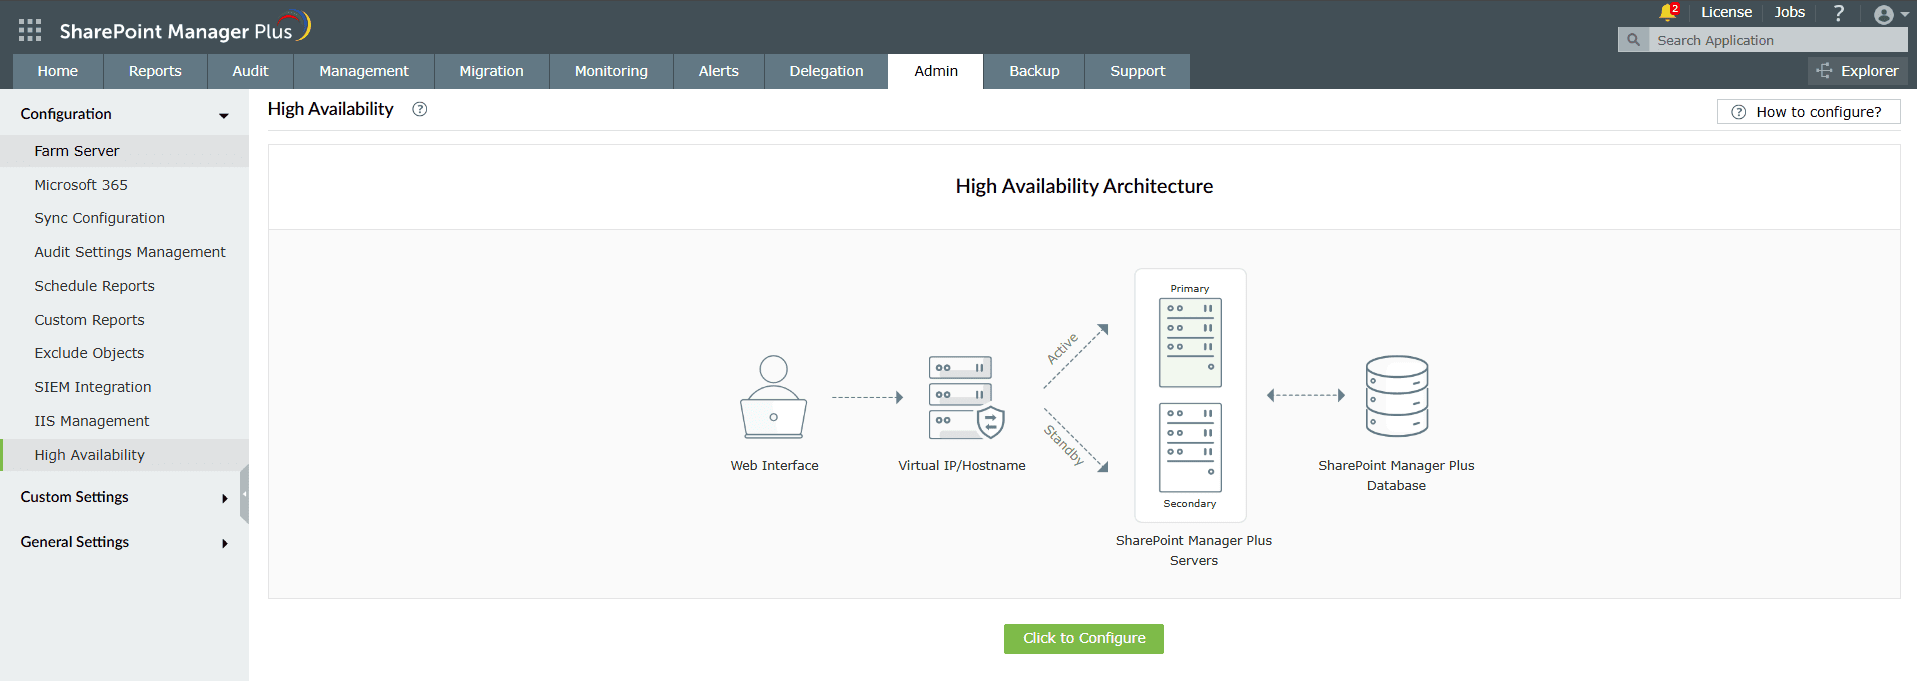
- Select Click to Configure to open the High Availability page.
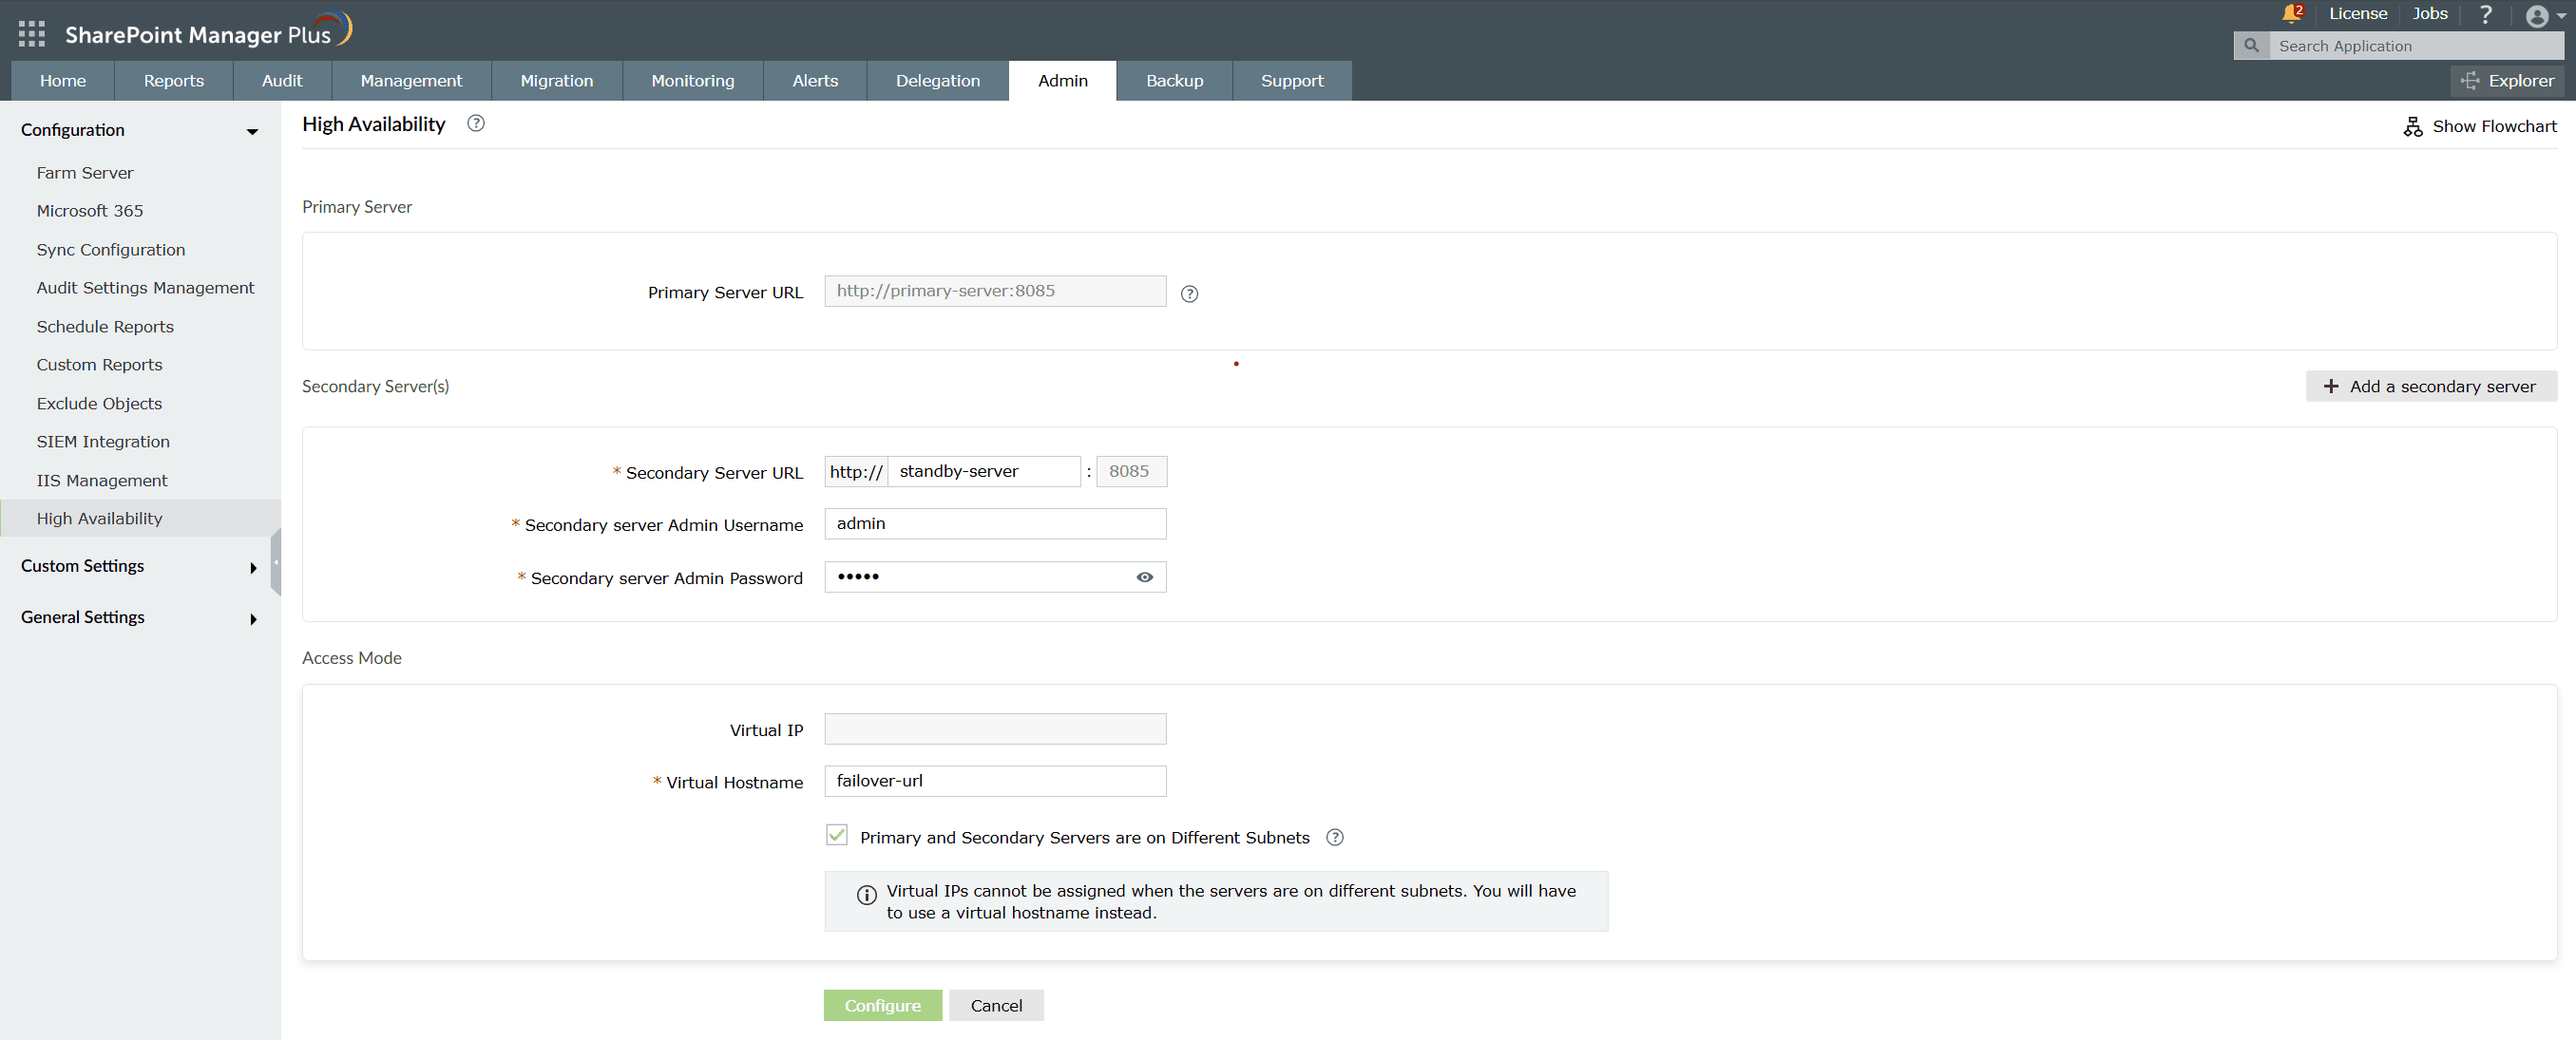
- In the Secondary Server(s) section,
- Enter the hostname or IP address of the SharePoint Manager Plus instance that you would like to configure as a secondary node in the Secondary Server URL field.
- Enter the Secondary server Admin Username and Secondary server Admin Password.
- If additional secondary servers are needed, click + Add a secondary server.
- In the Access Mode section,
- If the primary and secondary servers are in the same subnet:
- Enter the Virtual IP and Virtual Hostname.
- Leave the Primary and Secondary Servers are on Different Subnets box unchecked.
- If the primary and secondary server(s) are in different subnets:
- Check the Primary and Secondary Servers are on Different Subnets box.
- Create a virtual host and provide the hostname in the Virtual Hostname field.
Note The virtual IP automatically binds to the active server in the high availability setup. You can map this IP to a virtual hostname in DNS. - Click Configure.
Modifying the high availability configuration
- Steps to modify the high availability configuration:
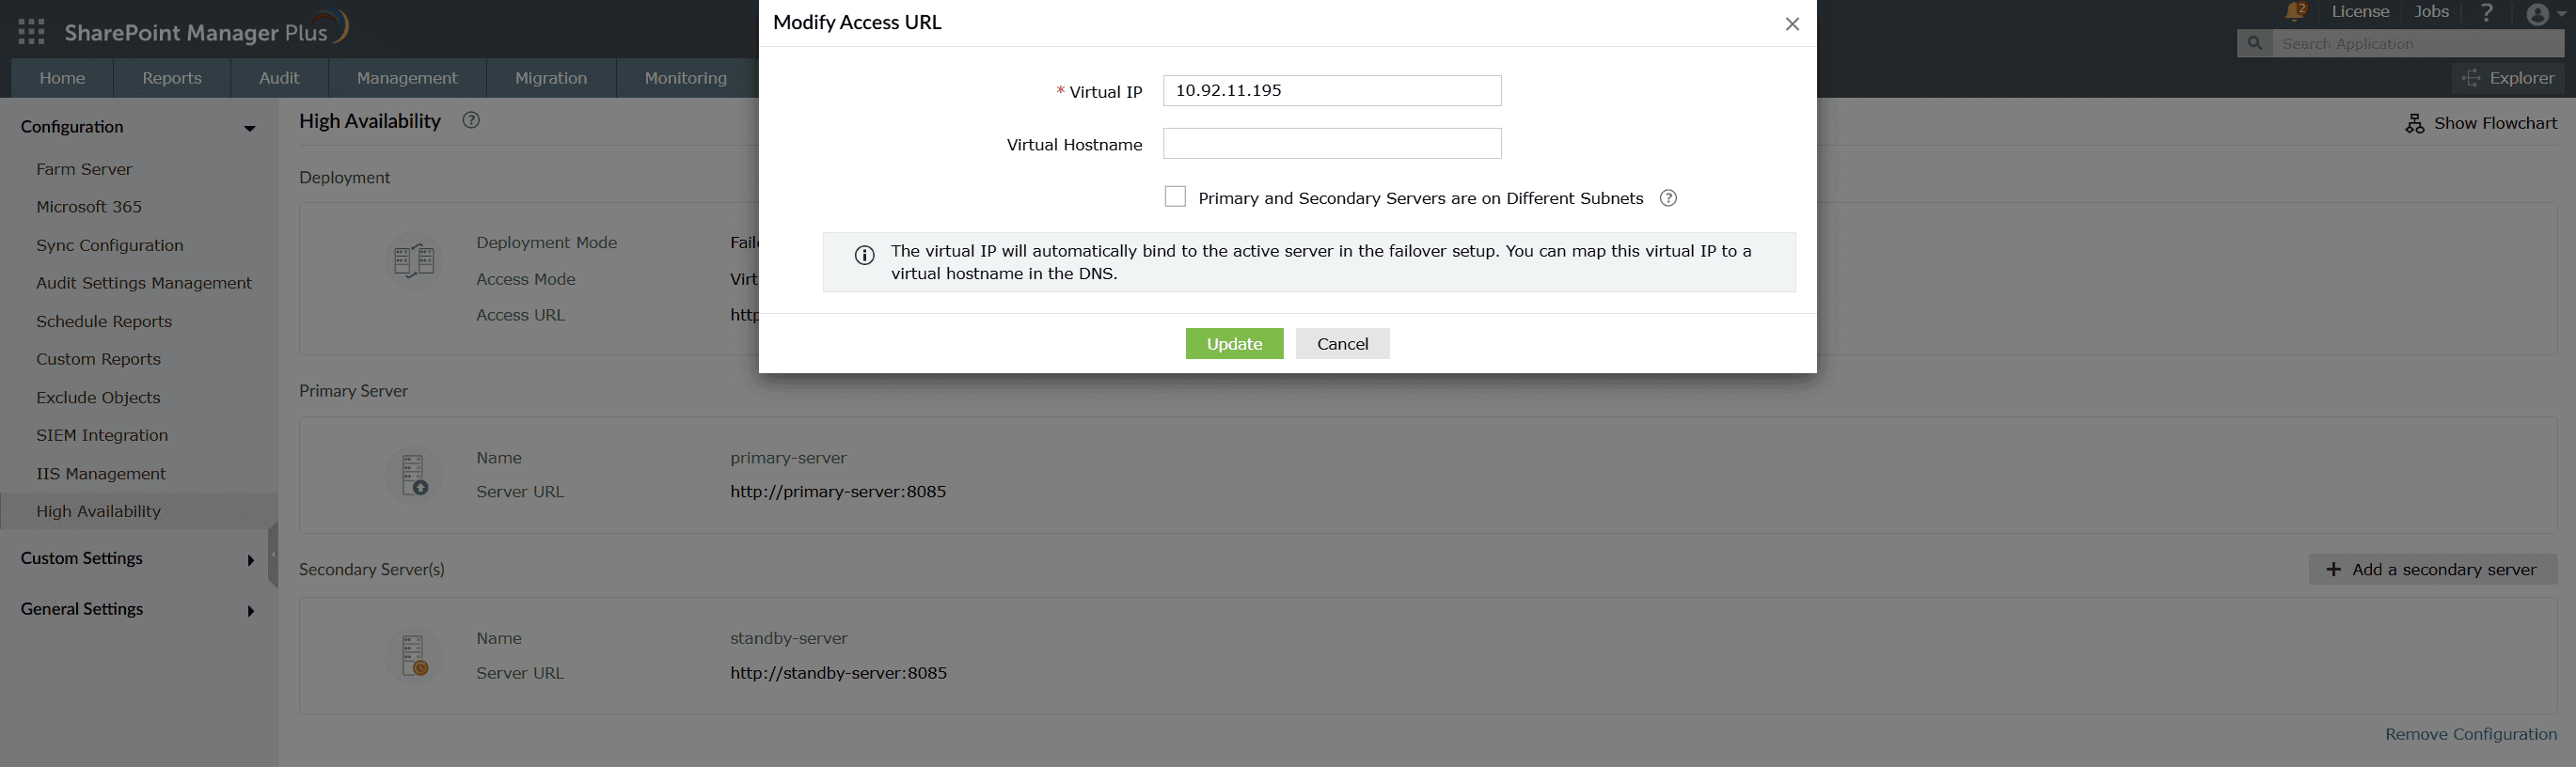
- In the Deployment section, hover over an entry and click the edit
 icon.
icon. - Modify the Virtual IP and Virtual Hostname, and check or uncheck the Primary and Secondary Servers are on Different Subnets box based on whether your servers operate in the same or different subnets.
- Click Update.
- If the primary server and secondary servers are in different subnets, a virtual IP cannot be used.
- When changing the configuration from different subnets to the same subnet, ensure that the primary and secondary servers are within the same subnet.
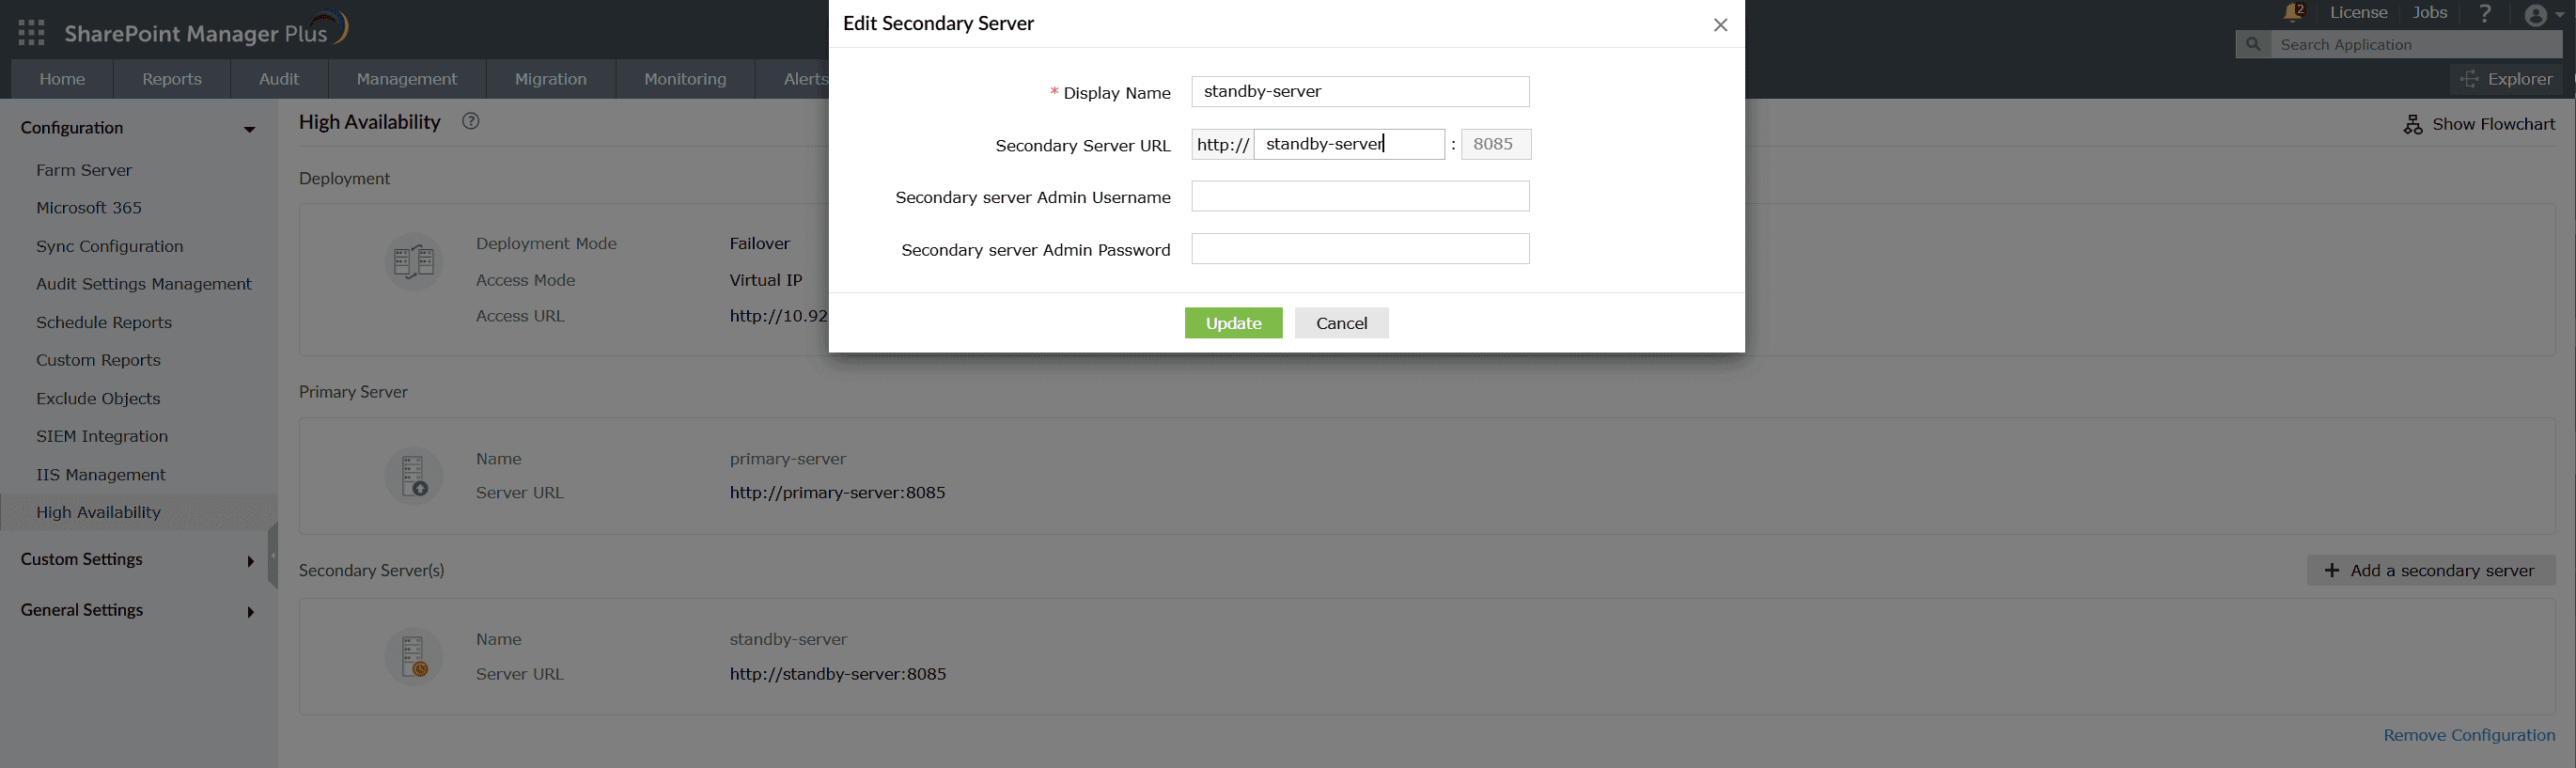
- Steps to edit secondary server(s):
- In the Secondary Server(s) section, hover over an entry and click the edit icon.
- Modify the Display Name, Secondary Server URL, Secondary server Admin Username, and Secondary server Admin Password.
- Click Update.
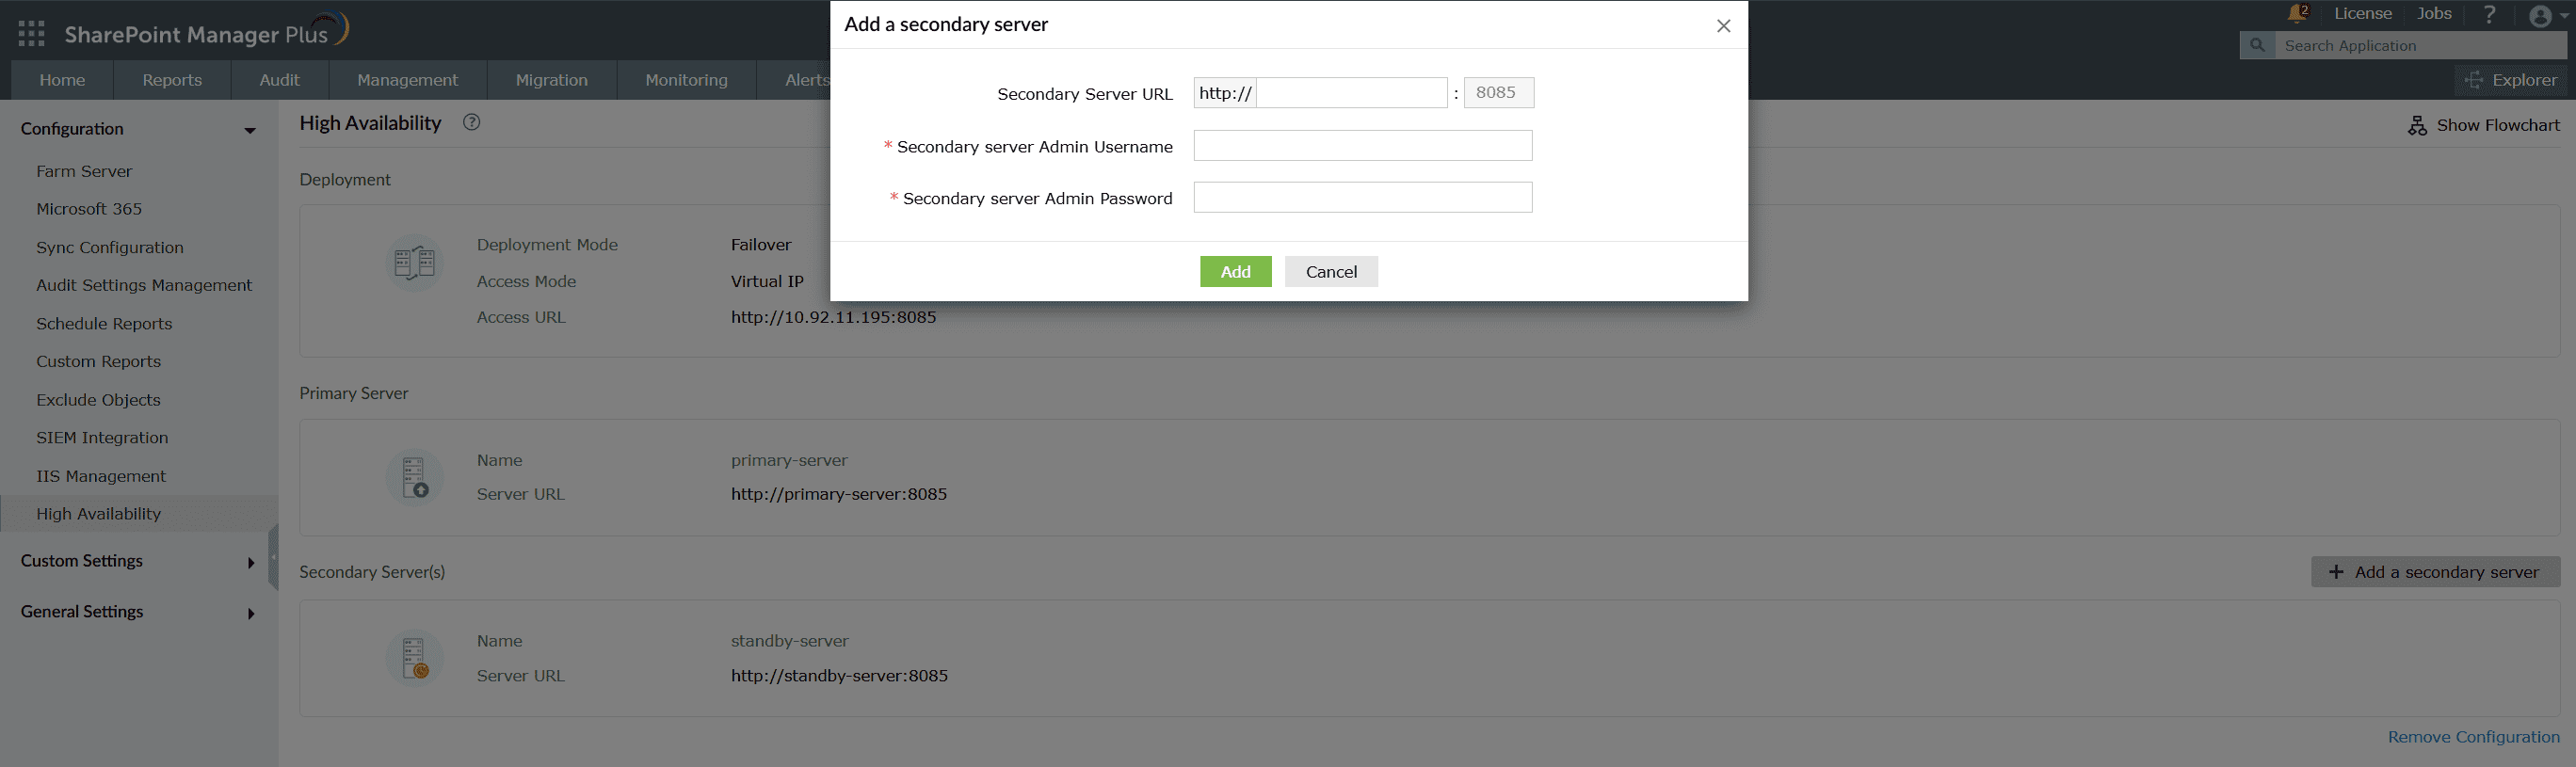
- Steps to add a secondary server:
- In the Secondary Server(s) section, click + Add a secondary server.
- Enter the secondary server's hostname or IP address in the Secondary Server URL field.
- Enter the Secondary server Admin Username and Secondary server Admin password.
- Click Add. Once the configuration is successful, the added secondary server will restart and join the high availability setup.
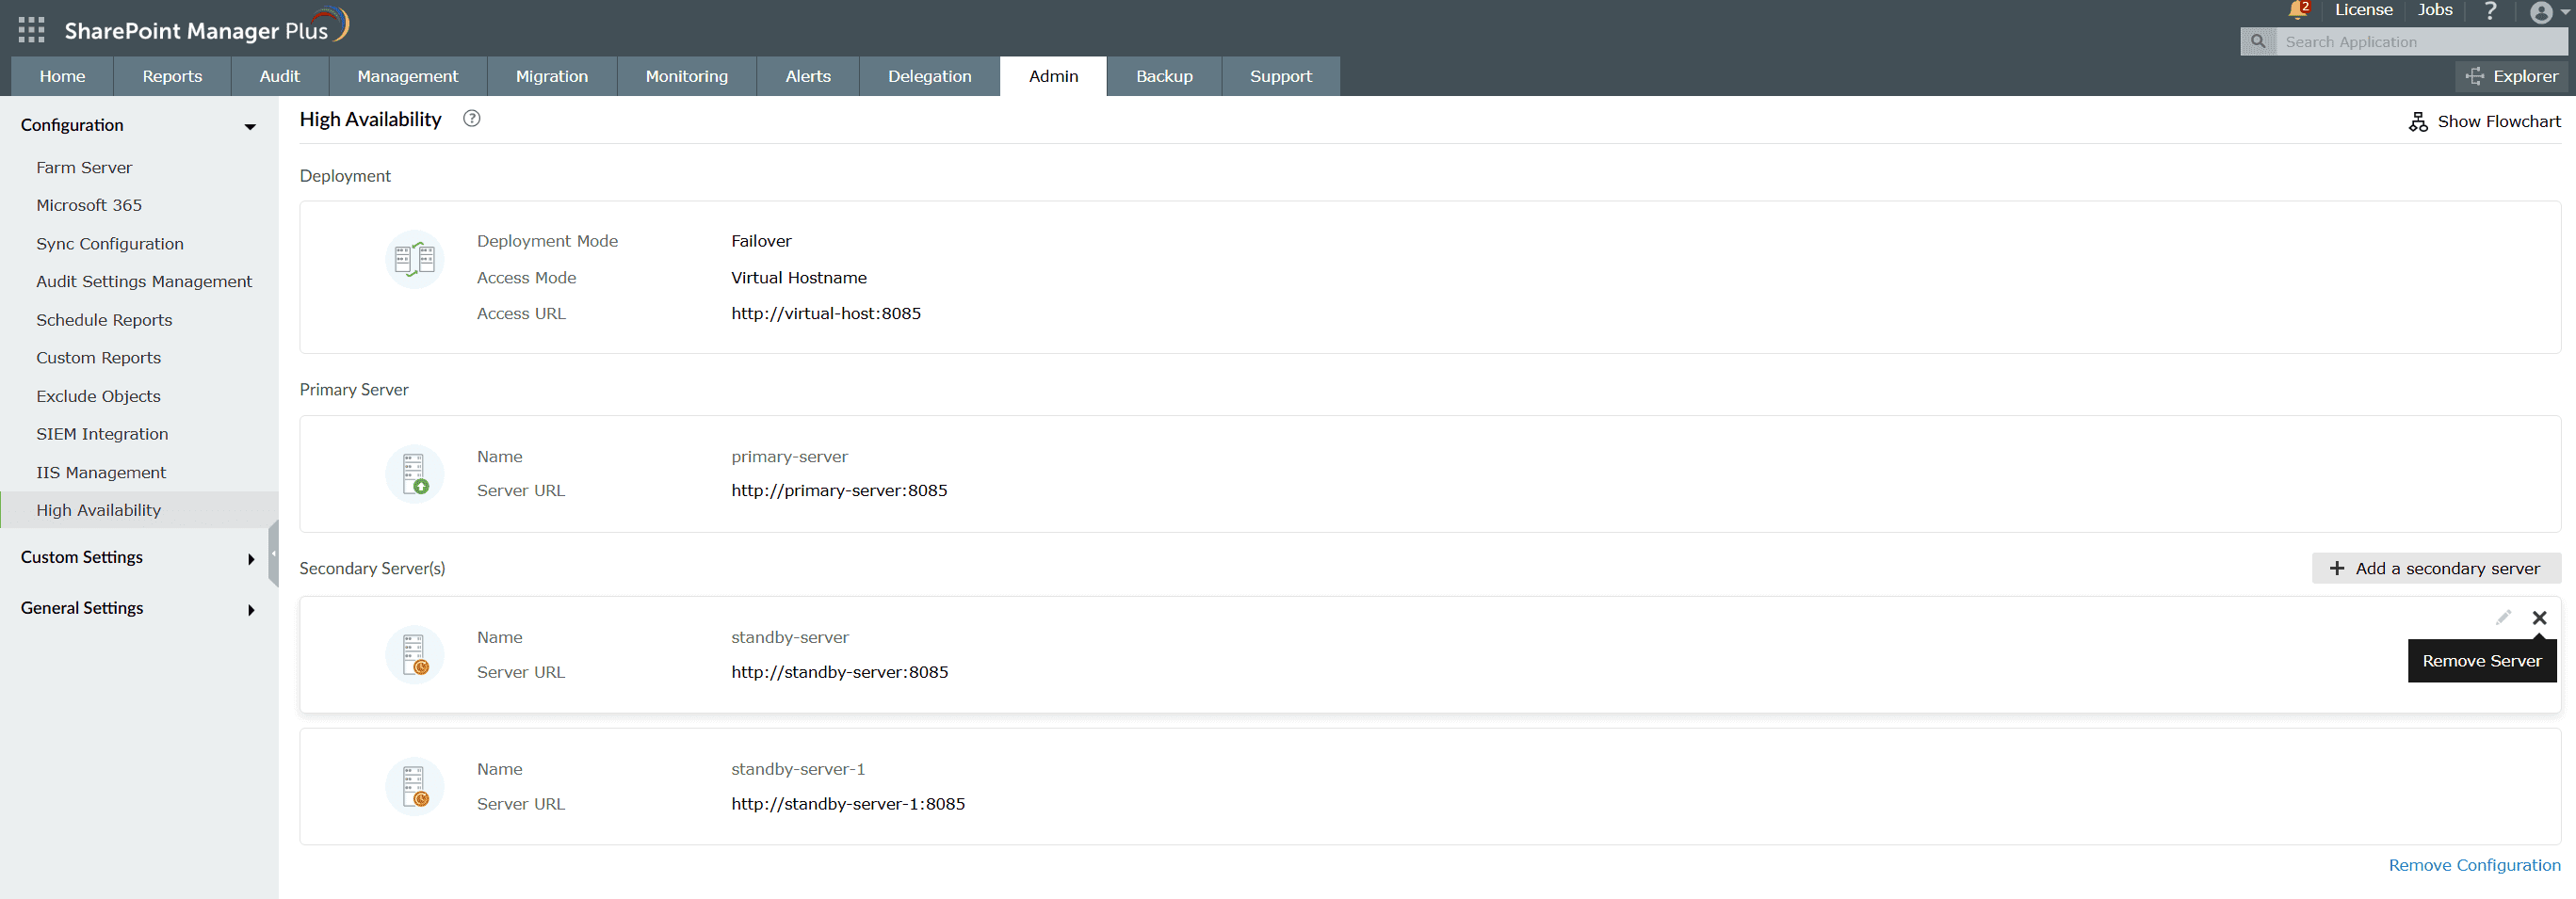
- Steps to remove a secondary server:
- To remove a secondary server, hover over the secondary server entry and click the remove
 icon.
icon. - On the pop-up that appears, confirm your action to remove the secondary server.
- Step to remove the high availability configuration:
- Click Remove Configuration under the Secondary Server(s) section to delete the entire high availability setup. After the removal is complete, the primary server will restart, and the secondary servers will become inaccessible.
Promoting the secondary server to the primary server
When a primary server is down and cannot be recovered, you can promote any available secondary server to the primary role, allowing you to modify the high availability configuration from that server.
- Log in to SharePoint Manager Plus from the secondary server.
- A pop-up will appear as shown in the image below. Click Promote Now.
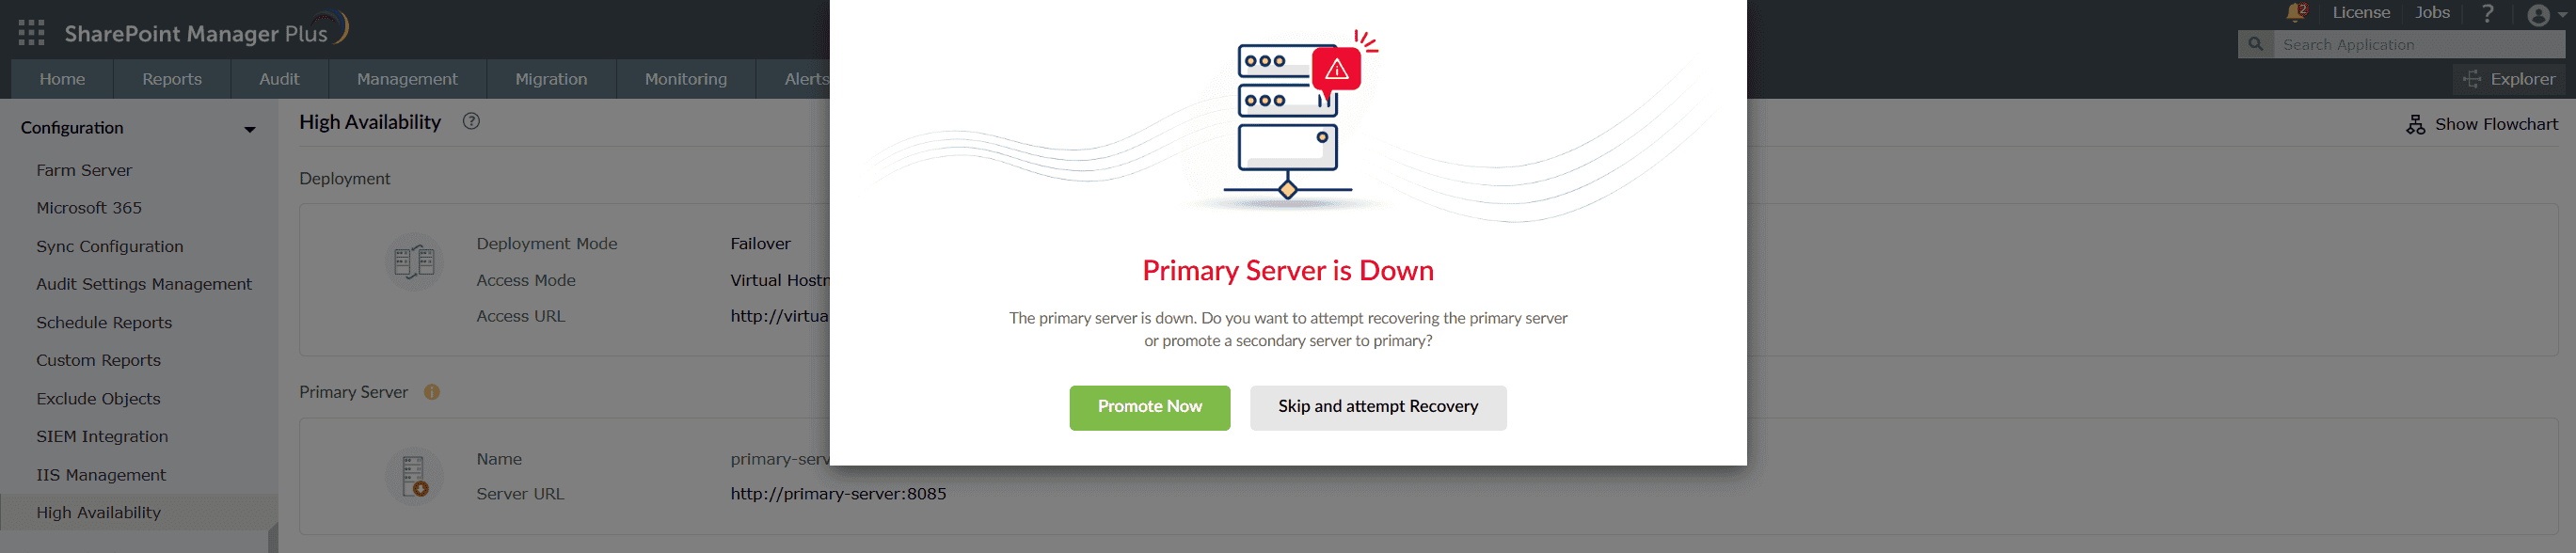
- You will be redirected to the High Availability page. Here, all available secondary servers will be listed with the Promote as primary option.
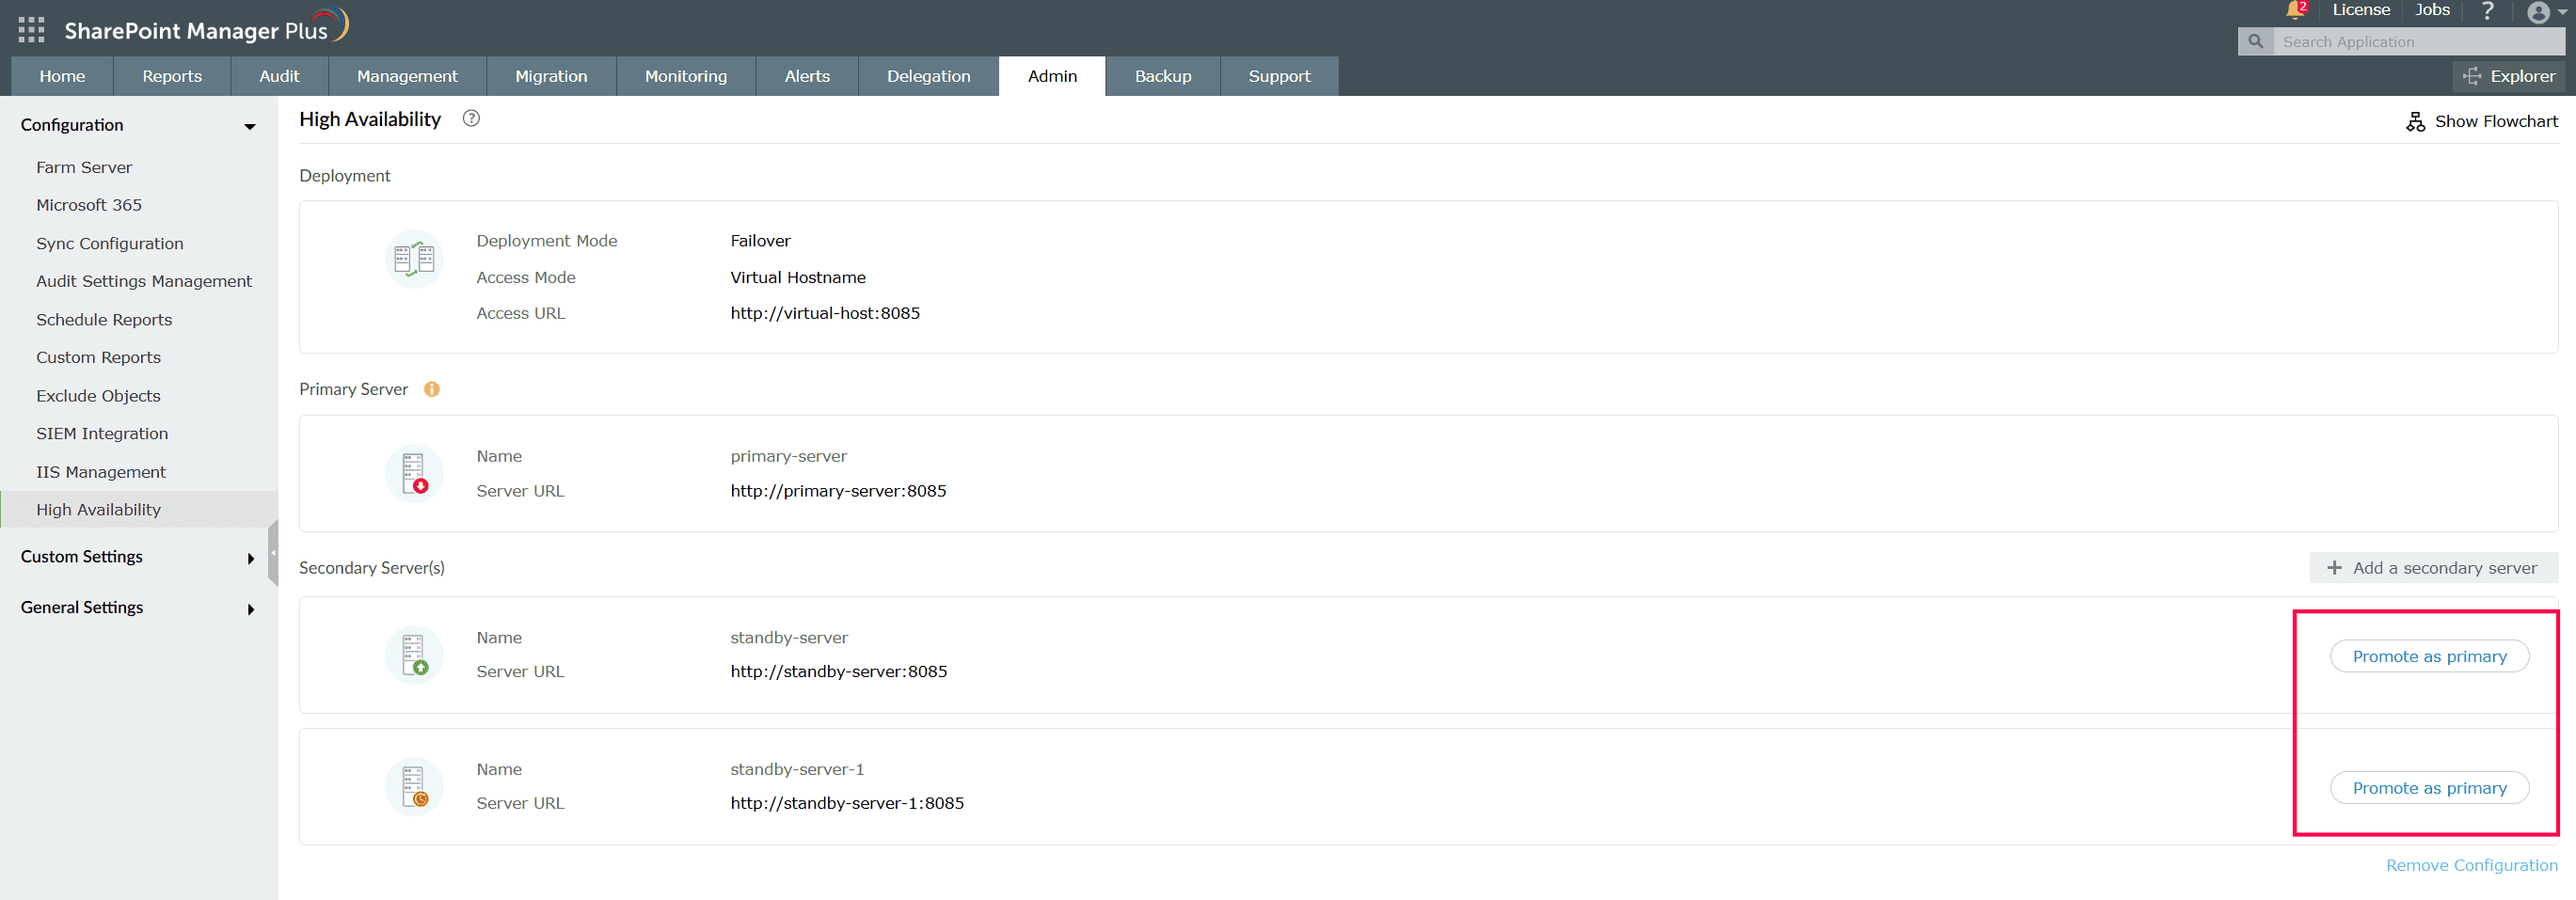
- Click Promote as primary on the desired secondary server entry to promote it to the primary role.