Importing data from JDBC Driver supported databases
If you have your data stored in JDBC Driver supported databases, you can easily import the data into Analytics Plus for advanced reporting and analysis. Periodic schedules can be set up to fetch the latest data automatically from the local database.
- How do I import data from the JDBC Driver supported databases into Analytics Plus?
- How do I edit the data import configuration?
- How long does it take for the JDBC Driver supported databases data to be imported?
- Will foreign keys defined between the tables in the JDBC Driver supported databases be linked in Analytics Plus as well?
- Is it possible to change the data type of the columns imported into Analytics Plus?
- How do I schedule data import?
- How do I get notified of import failures?
- Can I import data from the JDBC Driver supported databases into an existing workspace in Analytics Plus?
- Can I synchronize data from the JDBC Driver supported databases instantly?
- How do I resolve synchronization failure?
- How do I remove the JDBC Driver supported databases data source?
Data import
1. How do I import data from the JDBC Driver supported databases into Analytics Plus?
2. How do I edit the data import configuration?
3. How long does it take for the JDBC Driver supported databases data to be imported into Analytics Plus?
After setting up data import from your local database, you might have to wait some time for the initial fetch to happen. Depending on the amount of data in your application, the reports and dashboards might take up to 5 minutes to display all the metrics. If you access the workspace before the initial fetch is complete, it will not display any data.
4. Will the foreign keys defined between the tables in the JDBC Driver supported databases be linked in Analytics Plus as well?
When importing multiple tables, the foreign keys defined between the tables in the local database will be linked in Analytics Plus using lookup columns. However, if you import one table at a time, the foreign keys will not be defined. In such cases, you can link the tables in Analytics Plus using the lookup column functionality. To learn more about lookup columns, click here.
5. Is it possible to change the data type of the columns imported into Analytics Plus?
Yes. To learn more about changing the column type in Analytics Plus, click here.
Note: While changing the column's data type in Analytics Plus, ensure that it is compatible with the column's data type in the local database, for successful data synchronization.
6. How do I schedule data import?
Analytics Plus allows you to schedule data import for any existing tables imported from JDBC Driver supported databases. Follow the steps below to do this.
- Select the Data Sources option from the side panel, and navigate to the required JDBC Driver supported databases data source.
- Click the Sync Settings button.
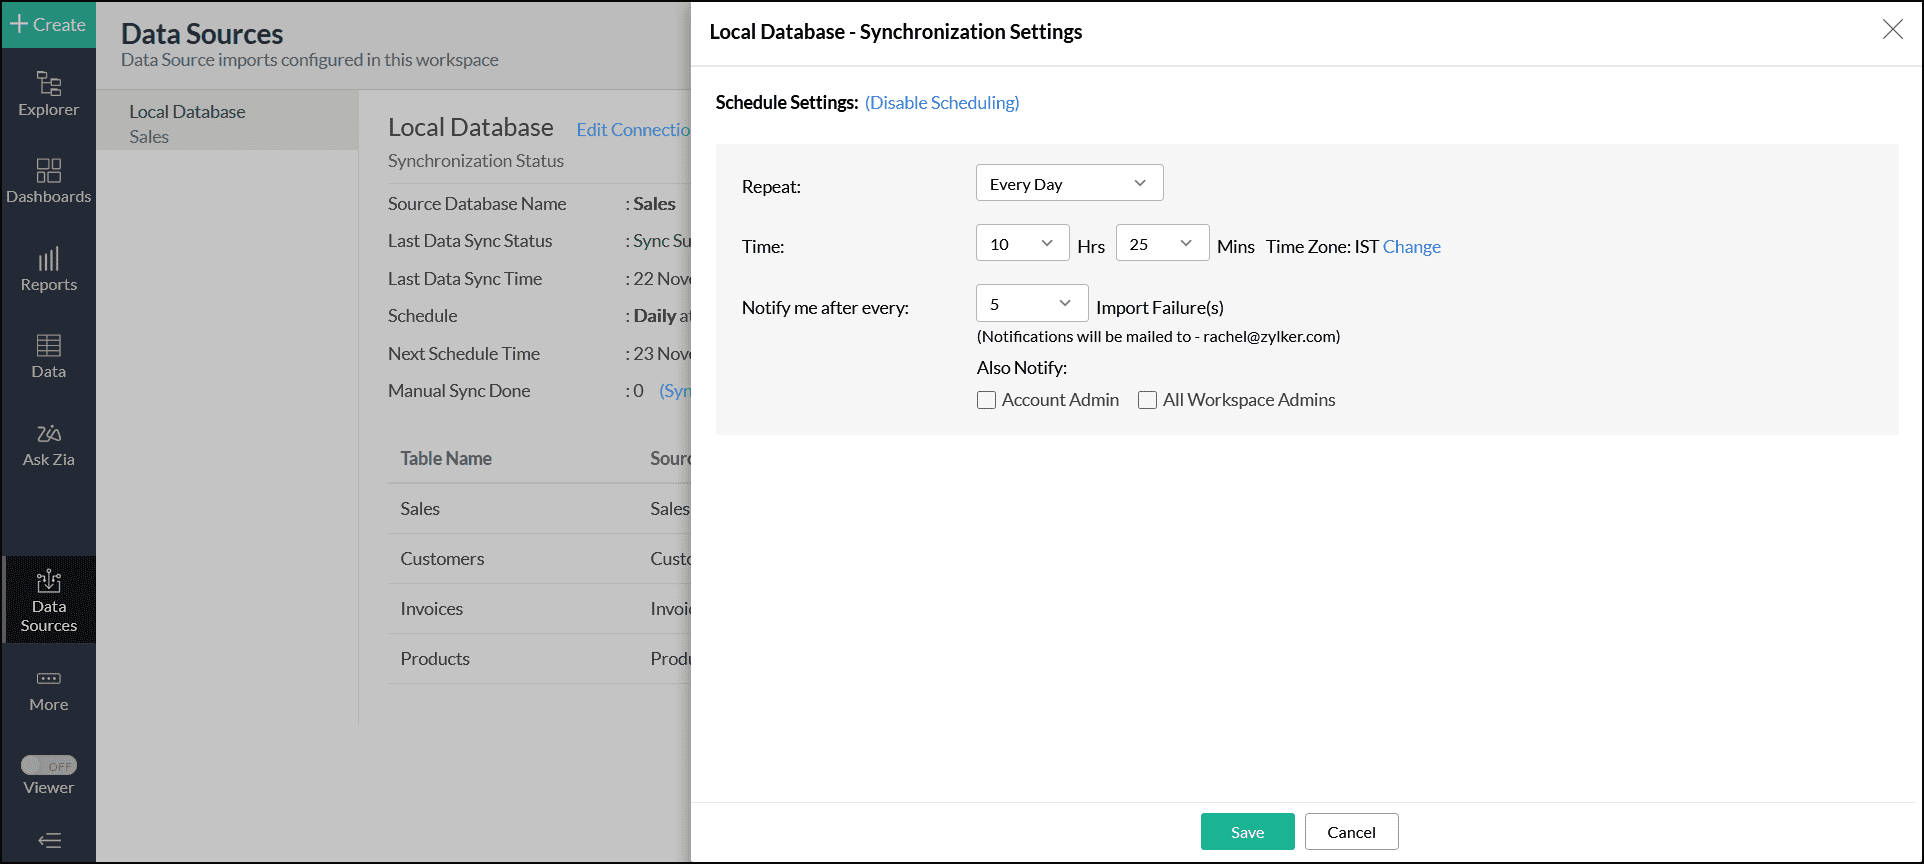
- In the pop-up that appears, select the required schedule interval from the Repeat every drop down.
- Choose the required option from the Notify me after every 'N' Sync Failure (s) drop-down to get notifications on consecutive import failures. You can also choose to notify the account admin and all the workspace admins by selecting the corresponding checkboxes.
- Click Save. The data from the JDBC Driver supported databases will be imported into Analytics Plus in the specified intervals.
You can also schedule the import during the initial import. Refer this presentation to know more.
7. How do I get notified of import failures?
Analytics Plus allows you to get notified of consecutive import failures, while setting up data schedules. To do this,
- Select the Data Sources option from the side panel, and navigate to the required JDBC Driver supported databases data source.
- Click the Sync Settings button.
- In the pop-up that appears, choose the required option from the Notify me after every 'N' Sync Failure (s) drop-down to get notifications on consecutive import failures. You can also choose to notify the account admin and all the workspace admins by selecting the corresponding checkboxes.
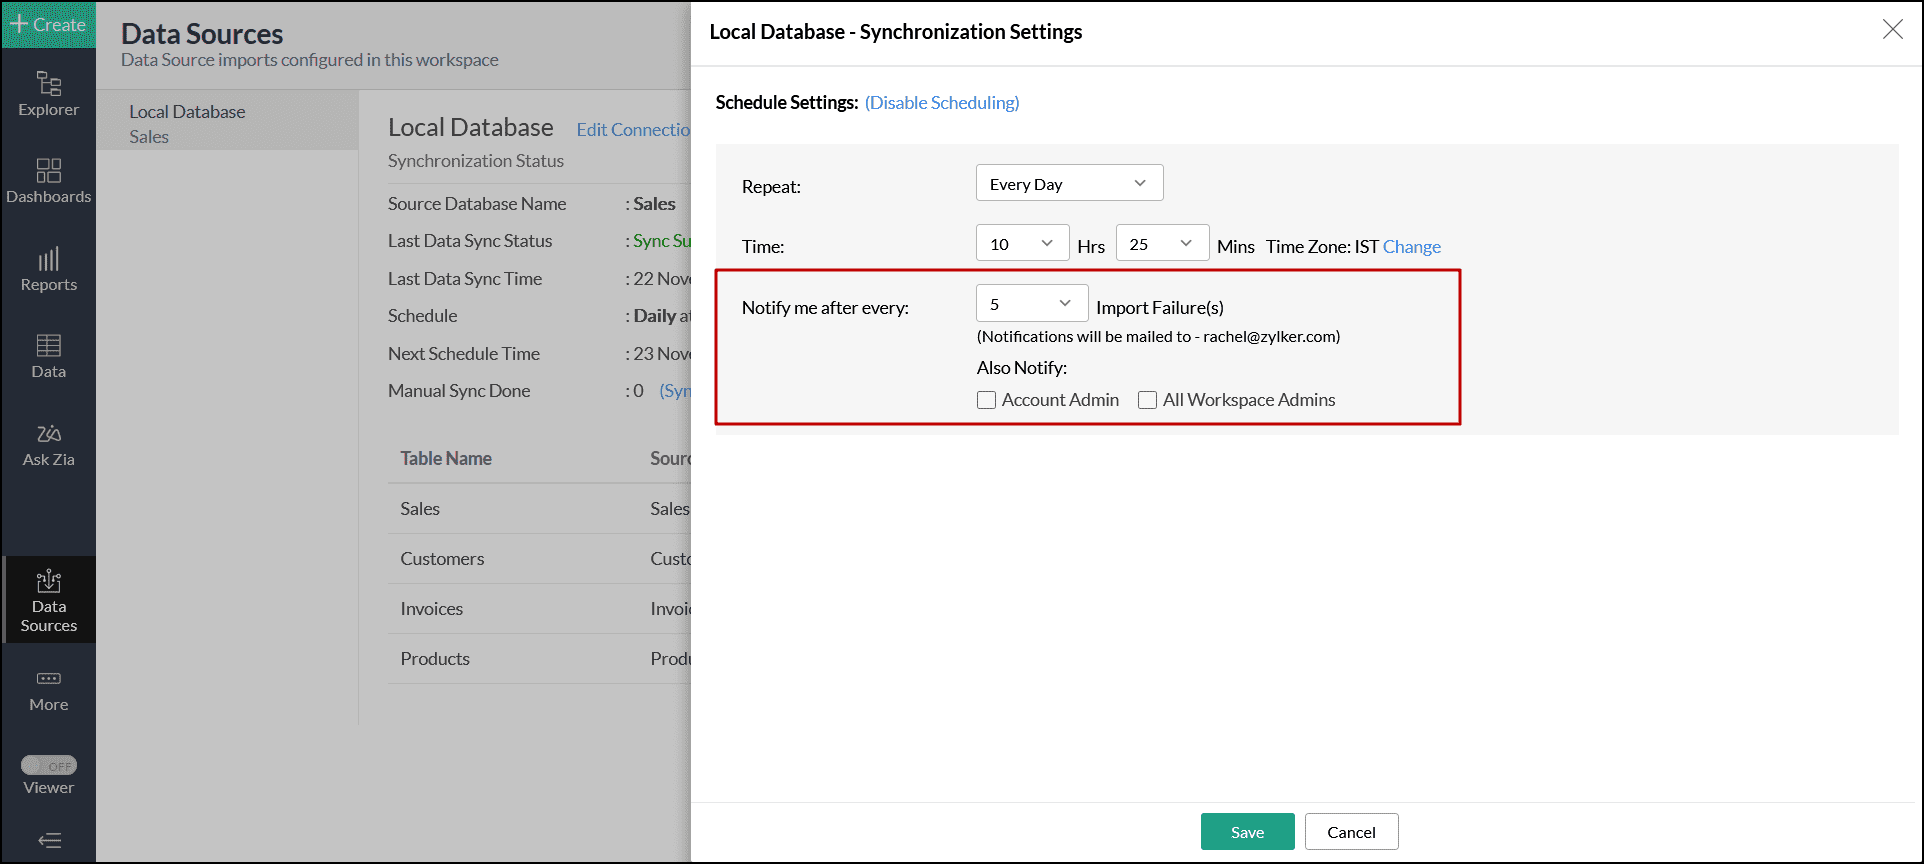
You can also set up notifications of import failures during the initial data import. Refer this presentation to know more.
8. Can I import data from the JDBC Driver supported databases into an existing workspace in Analytics Plus?
Yes. Follow the below steps to import data into an existing workspace:
- Open the required workspace. Click Create from the side panel, and select the New Table / Import Data option.
- Click the Local Databases tile, and follow the steps detailed in this presentation.
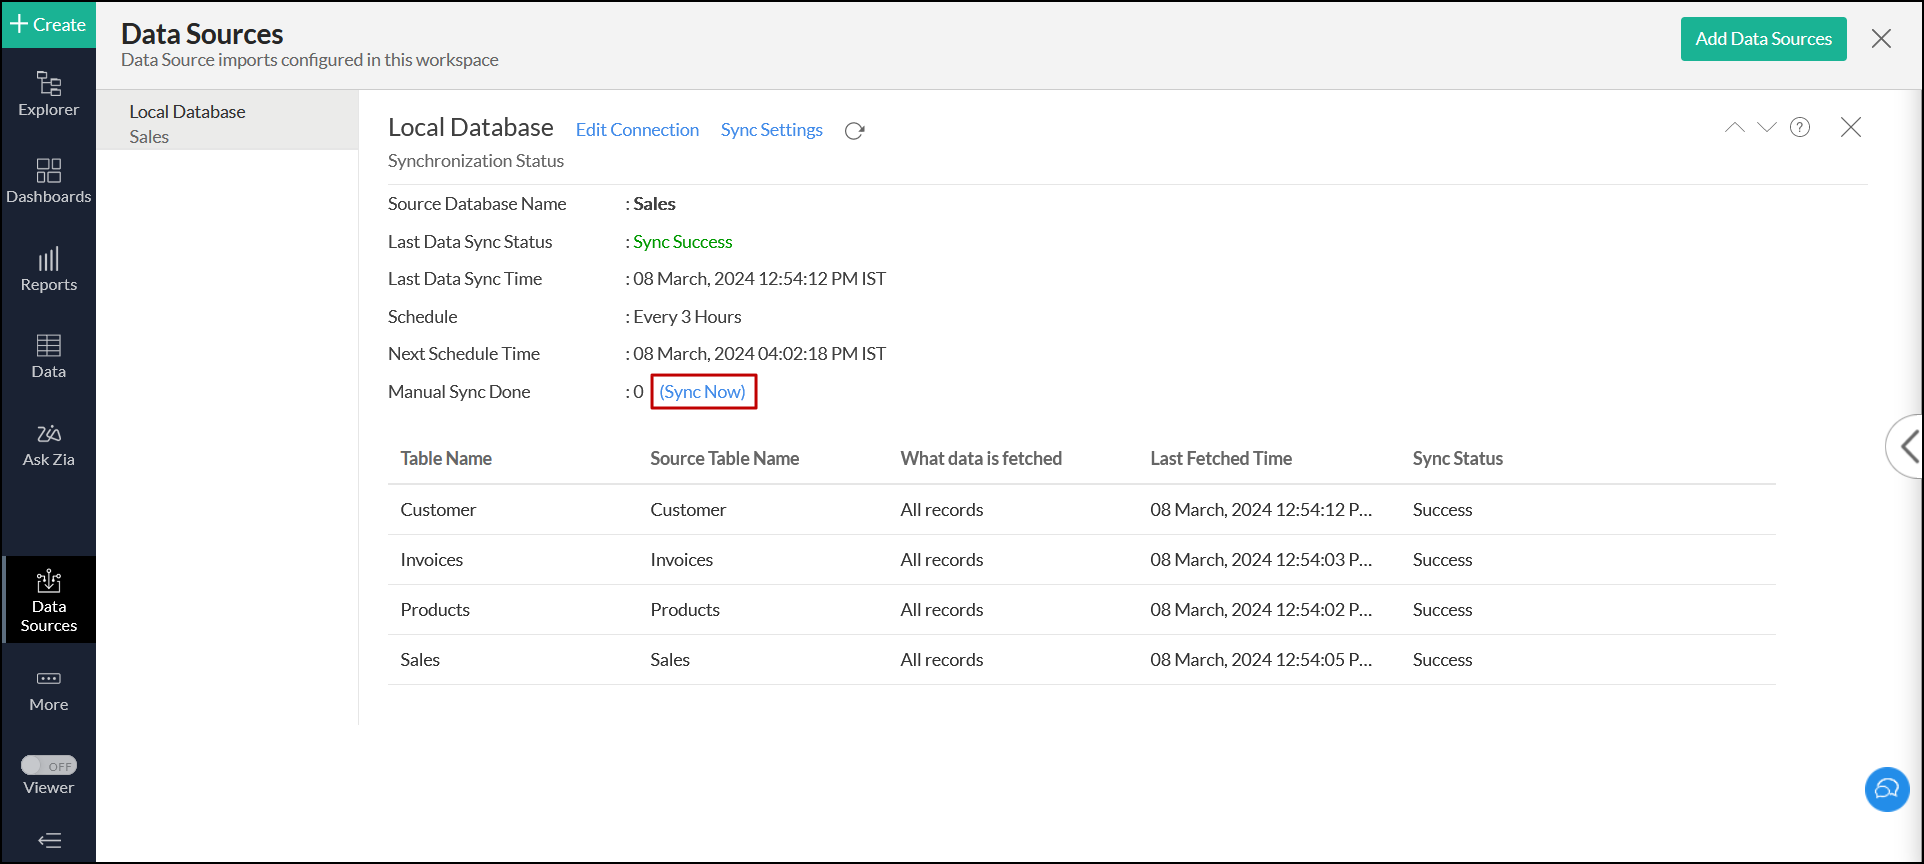
9. Can I synchronize data from the JDBC Driver supported databases instantly?
Yes. Follow the steps below to do this.
- Open the required workspace, and click the Data Sources tab from the side panel.
- Click the Sync Now link.
10. How do I resolve synchronization failure?
To resolve synchronization failure, you need to understand the reason behind the failure. To do this,
- Click the Data Sources button from the side panel, and navigate to the required data source.
- Click the View Last Import Details icon that appears on mouse over the listed tables. This opens the Import Details page, which provides detailed insight on the reason for the synchronization failure.
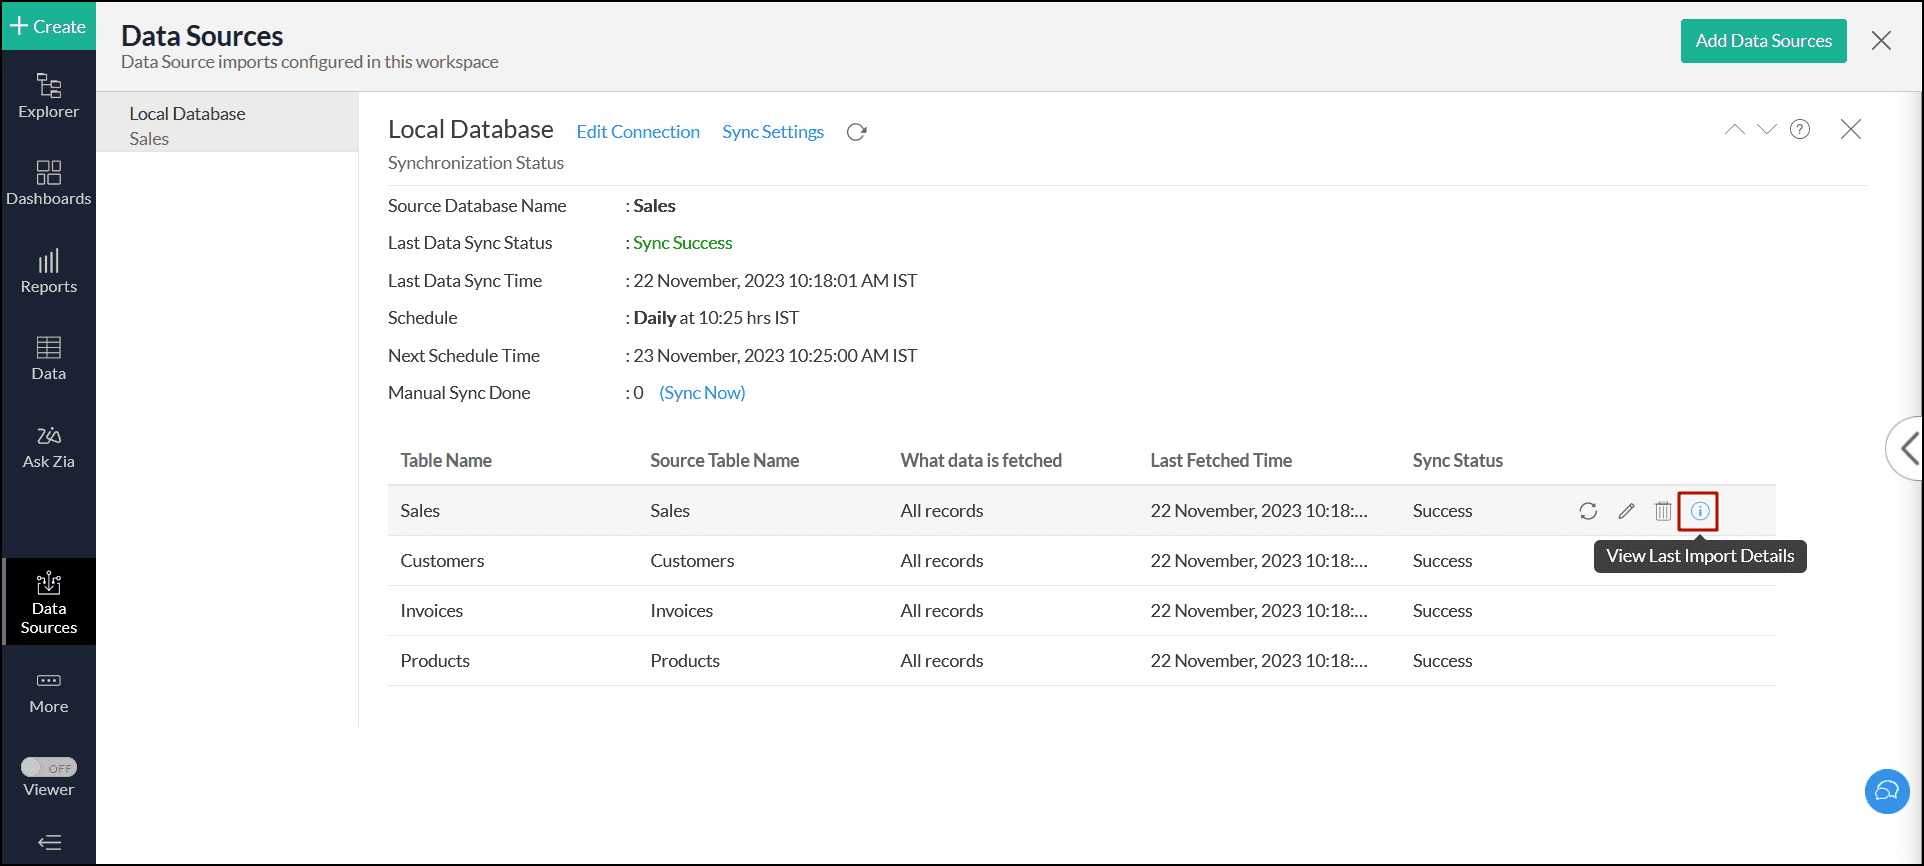
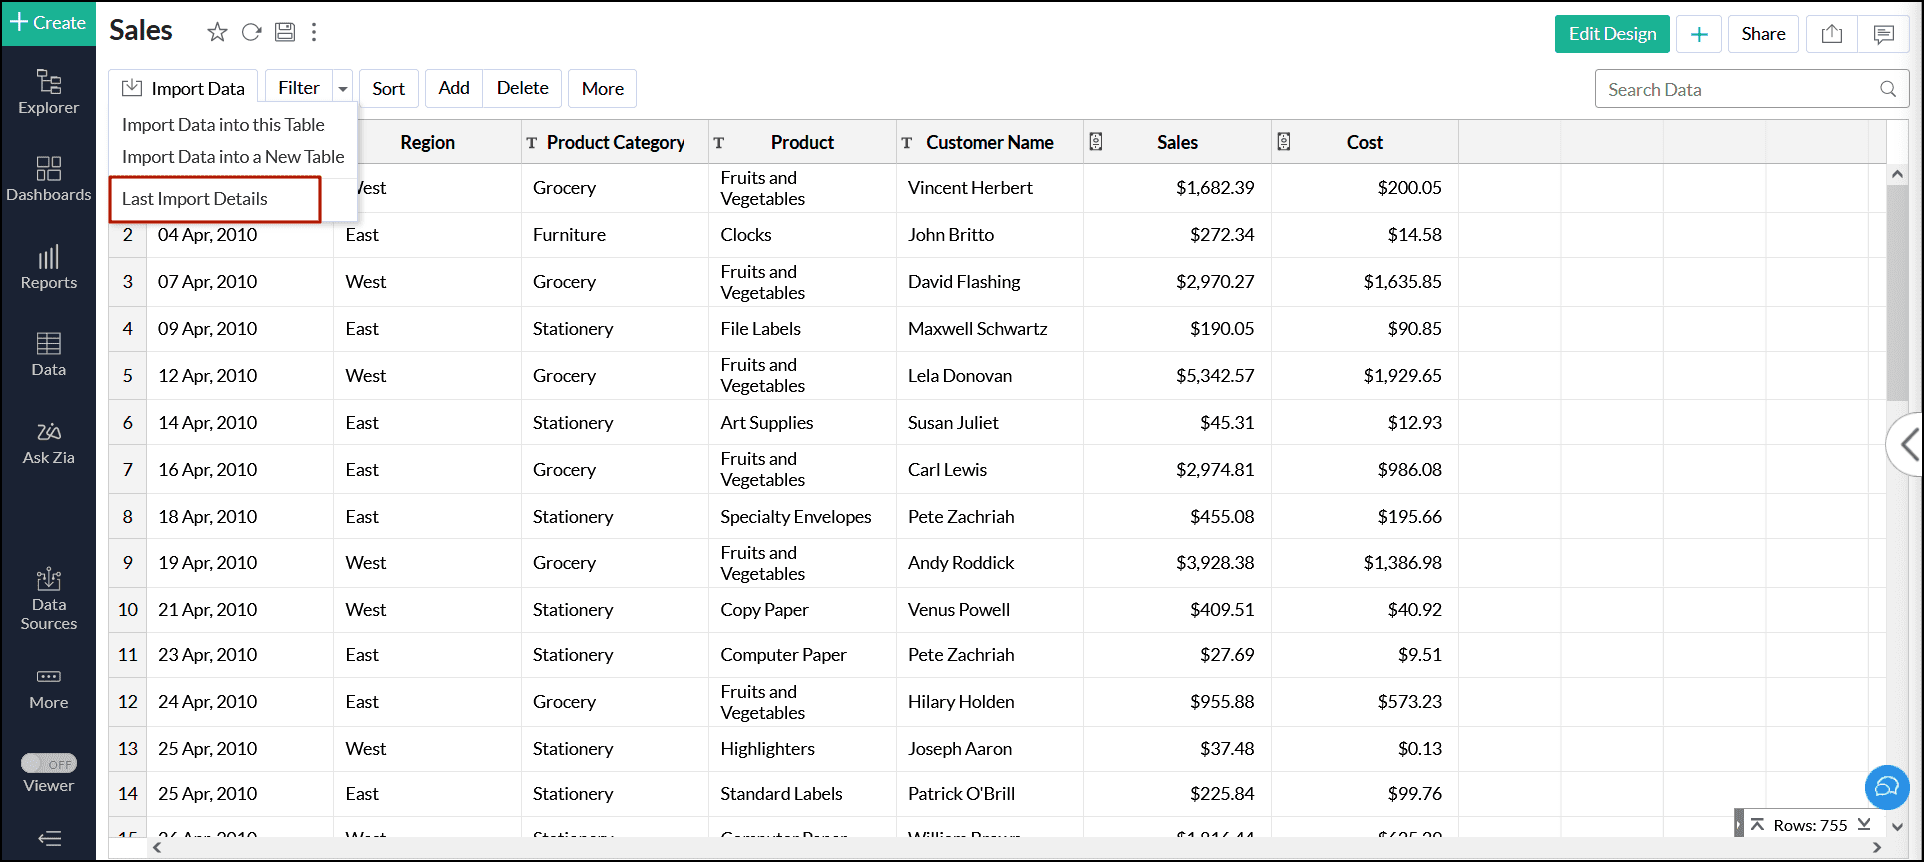
You can also view the Import Details page by opening the required table, and selecting the Import Data -> Last Import Details option.
11. How do I remove the JDBC Driver supported databases data source?
To remove the setup,
- Click the Data Sources button from the side panel, and navigate to the required data source.
- Click the Settings icon that appears on mouse over the data source's name, and select Remove Data Source.
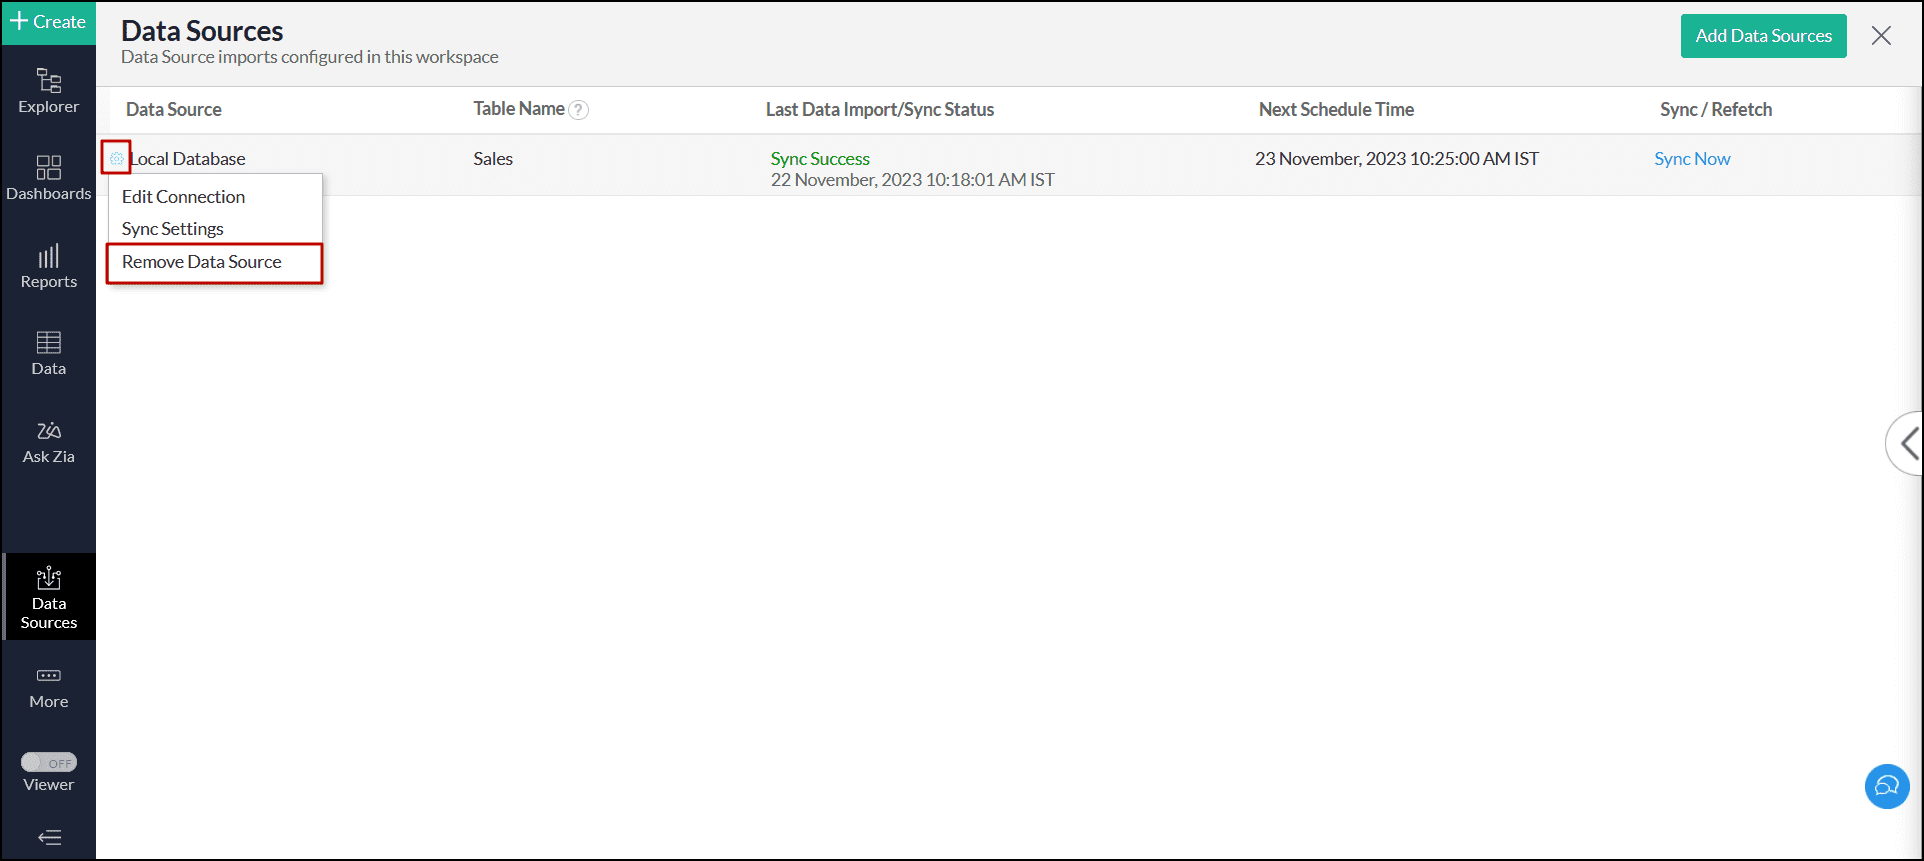
Note: Removing the data source does not delete the corresponding tables and reports from Analytics Plus. However, further synchronization cannot be carried out.