Upgrade to the latest version
It is recommended to upgrade to newer versions of the software at least once every 2 months. Check announcements on our user community regularly for news about latest versions.
For users running Analytics Plus on high availability mode:
- The upgrade steps outlined in this document needs to be performed only on the Primary Server. The Secondary Server upgrades automatically once the Primary Server upgrade is complete.
- Ensure you stop the services on your Secondary Server before proceeding with the Primary Server upgrade.
- Start the Secondary Server once you complete the upgrade on the Primary Server and after it comes back online for the automatic upgrade on the Secondary Server.
Locate the existing and latest build number
To know about the existing and latest Analytics Plus' build number, follow the steps below.
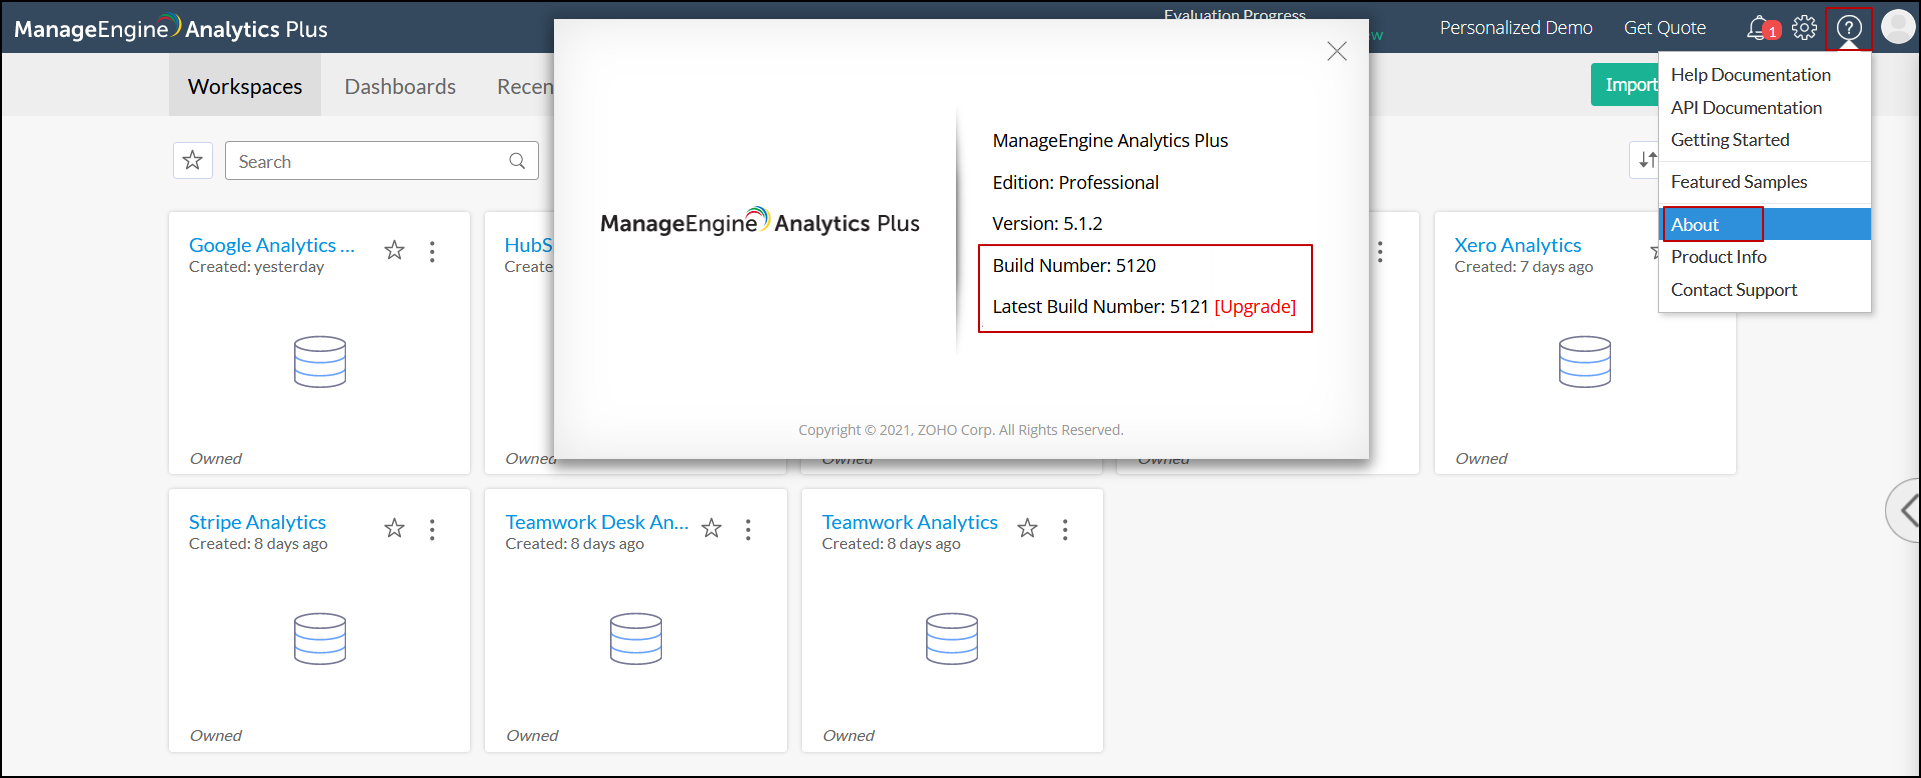
- Open your Analytics Plus application.
- Click the Help icon, and choose About from the drop-down. You can find your present and latest build number in the pop-up that appears.
Know the installation path
- Click the Help icon in your Analytics Plus application, and choose Product Info from the drop-down.
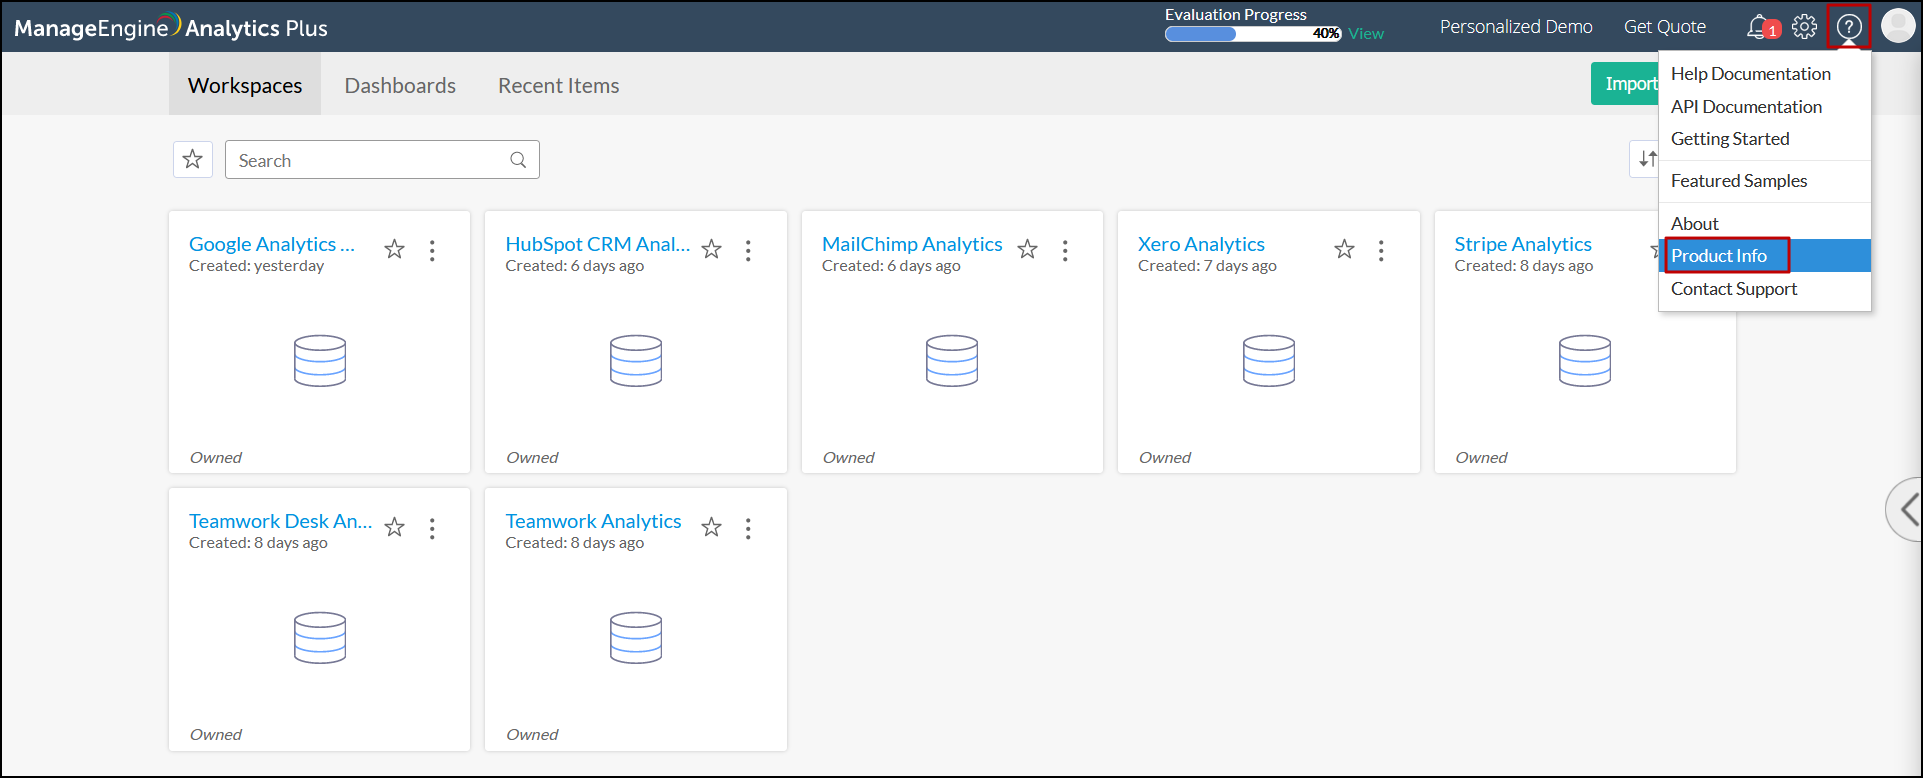
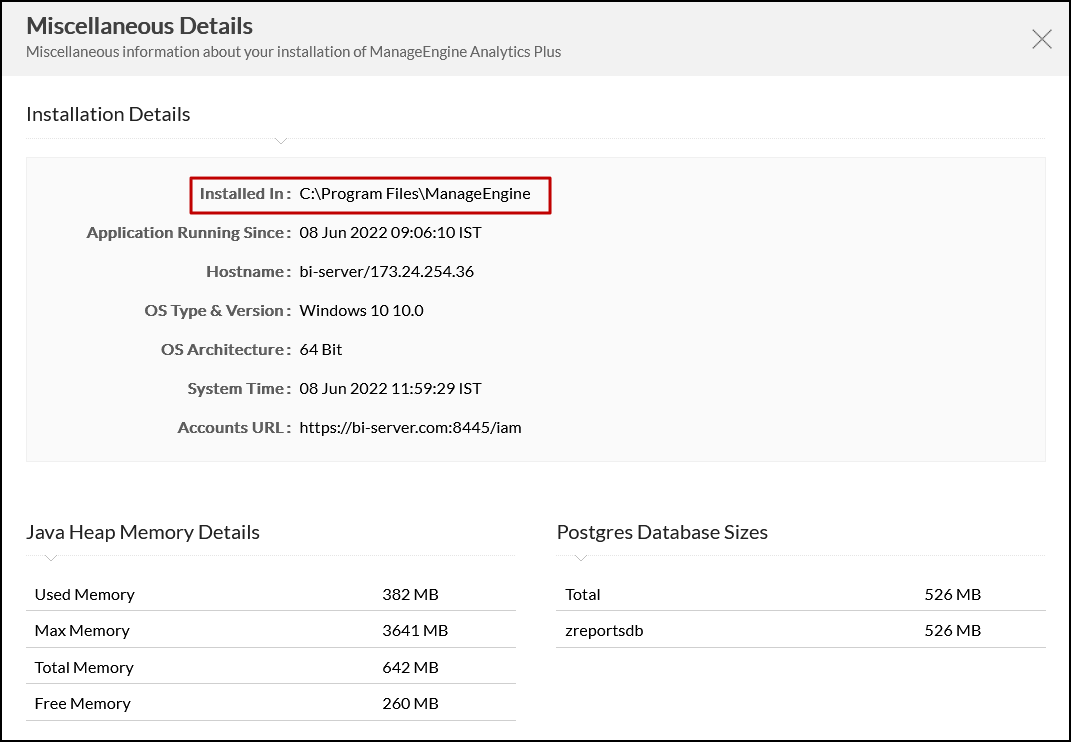
- In the dialog that appears, choose Miscellaneous Details to get the installation path of your Analytics Plus.
Steps to upgrade Analytics Plus
To upgrade your Analytics Plus from one build to another, follow the steps given below.
Prerequisites:
Please make sure that the free disk space is at least twice the size of your present Analytics Plus application. To know about your existing disk space usage, open your Analytics Plus application. Click the Help icon, and choose Product Info > Miscellaneous Details. A dialog appears displaying the disk usage details.
Note:
- The text <Analytics Plus Home> referred in this document indicates the directory in which you have installed the Analytics Plus application. This directory location is specified by you during the application installation.
- If you are using #2900 and #2901 build, the home directory would be <Reports Home>. <Reports Home> refers to the directory in which you have installed the application. This directory location is specified by you during the application installation.
Windows Installation
Log in to the server and stop the Analytics Plus application by following the steps below.
If you have configured high availability in Analytics Plus, initially stop the Analytics Plus application in secondary server and then stop the application in primary server.
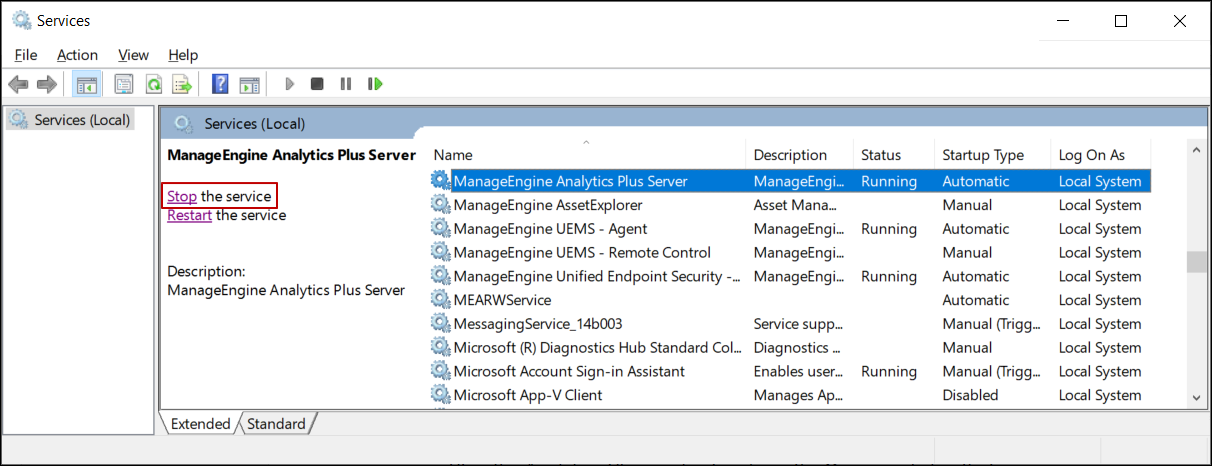
- Open the Run dialog, type services.msc and click OK.

- Stop the Analytics Plus application from the Services dialog that appears.
- Open the Run dialog, type services.msc and click OK.
- Navigate to the <Analytics Plus home> folder (Home folder refers to the installation directory of Analytics Plus) in your server (primary server for Analytics Plus configured with high availability).
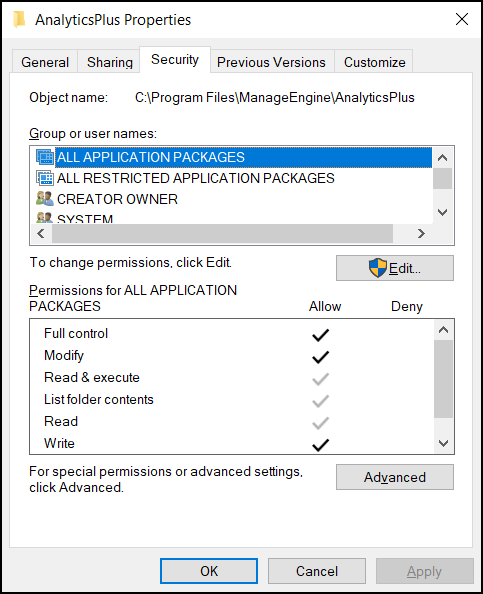
- Right-click the folder and select Properties.
- In the dialog that appears, navigate to the Security tab.
- Provide Full Control permission for the following four groups: All Application Packages, All Restricted Application Packages, Creator Owner, and System.
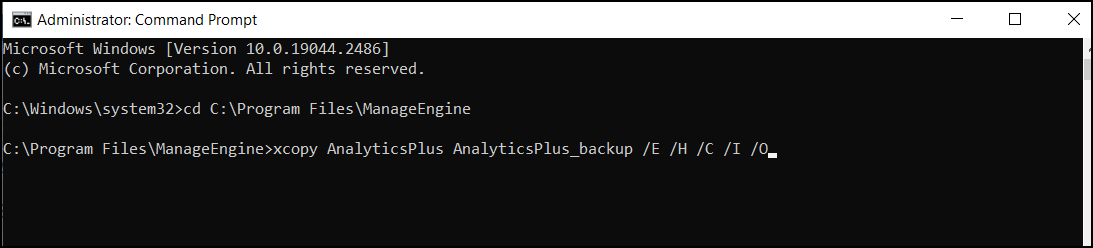
- Open command prompt in "Run as Administrator" mode.
- Navigate to the required folder where Analytics Plus is installed.
- Run the following command to take a backup copy of the entire folder: xcopy <AnalyticsPlus home> <AnalyticsPlus home_backup> /E /H /C /I /O
Replace the text within the <> with the actual Analytics Plus installation directory name and name of the backup file.
Please note that copy pasting the folder does not carry the necessary file permissions.
- Navigate to the <Analytics Plus home>\bin folder, and run the UpdateManager.bat file.
- In the dialog that appears, browse and select the latest Analytics Plus .ppm file and click Install to initiate the upgrade process.
Note: If the upgrade process fails with the "Keystore file not found" error, please follow the steps detailed in this documentation and continue with the .ppm installation.
At the time of installation, the following warning messages are displayed. Click the corresponding option to proceed with the installation.
- Click the I've added exclusions. Let me continue. button, if your Analytics Plus installation directory is already excluded from antivirus scanners. If exclusions are not added, please add antivirus exclusions before you proceed.

- If you have already taken a full folder backup of the Analytics Plus installation directory, click Yes to proceed with the upgrade. If not, click No to run a backup of your data in the following pop-up message.

- For users on the perpetual pricing model, an additional warning message appears in case the Annual Maintenance and Support (AMS) is expired. Click OK to proceed with the upgrade. Note: Users are not allowed to upgrade after the next major release. Please renew your AMS license to continue to upgrade.

- Click the I've added exclusions. Let me continue. button, if your Analytics Plus installation directory is already excluded from antivirus scanners. If exclusions are not added, please add antivirus exclusions before you proceed.
- Once the installation is successful, click Close > Exit to complete the installation process.
While upgrading to 5200, perform the following. For other version upgrades, please skip this step.
Navigate to the <Analytics Plus home>\bin folder, and run the jreCorrector.bat file as administrator. Please note that this step is applicable only to the 5200 upgrade.
- Open the Services dialog and start the Analytics Plus application. For Analytics Plus with high availability configuration, start the application in the primary server, ensure the application is accessible from your web browser and then start the application in the secondary server.
Linux Installation
Graphical Mode
Log in to the server and stop the Analytics Plus application by following the below step.
If you have configured high availability in Analytics Plus, initially stop the Analytics Plus application in secondary server and then stop the application in primary server.
Open the command prompt and run the shutdown.sh command from the <Analytics Plus home>/bin directory.
- Navigate to the <Analytics Plus home> folder (Home folder refers to the installation directory of Analytics Plus) in your server (primary server for Analytics Plus configured with high availability).
- Take a backup copy of the entire folder with all the permissions retained in backup file. You can use any method of your preference to copy the folder.
- Provide Read (r), Write (w), and Execute (x) permission for the <Analytics Plus home> and <Analytics Plus home>/pgsql/data folder.


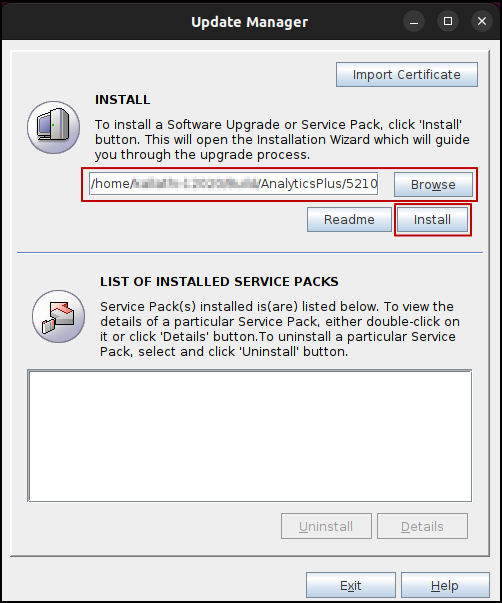
- From the <Analytics Plus home>/bin directory, run the sh UpdateManager.sh file.

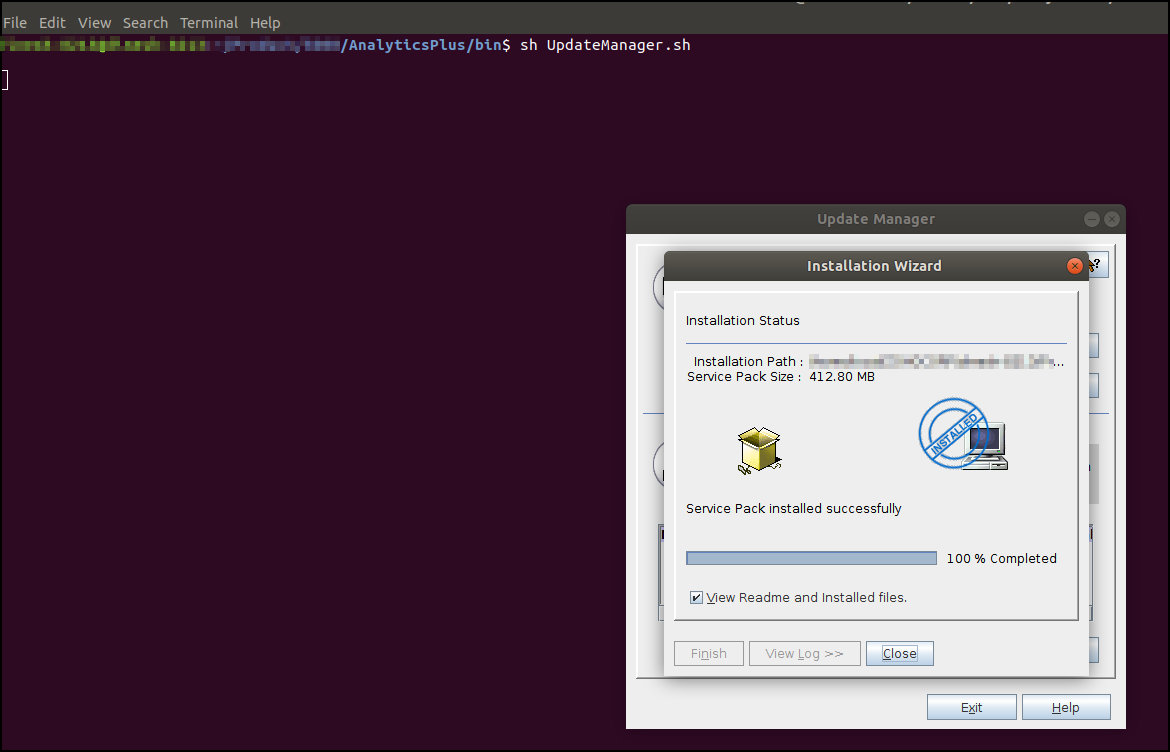
- In the dialog that appears, browse and select the latest Analytics Plus .ppm file and click Install to initiate the upgrade process.

Note: If the upgrade process fails with the "Keystore file not found" error, please follow the steps detailed in this documentation and continue with the .ppm installation.
At the time of installation, the following warning messages are displayed. Click the corresponding option to proceed with the installation.
- Click the I've added exclusions. Let me continue. button, if your Analytics Plus installation directory is already excluded from antivirus scanners. If exclusions are not added, please add antivirus exclusions before you proceed.
- If you have already taken a full folder backup of the Analytics Plus installation directory, click Yes to proceed with the upgrade. If not, click No to run a backup of your data in the following pop-up message.
- For users on the perpetual pricing model, an additional warning message appears in case the Annual Maintenance and Support (AMS) is expired. Click OK to proceed with the upgrade. Note: Users are not allowed to upgrade after the next major release. Please renew your AMS license to continue to upgrade.
- Click the I've added exclusions. Let me continue. button, if your Analytics Plus installation directory is already excluded from antivirus scanners. If exclusions are not added, please add antivirus exclusions before you proceed.
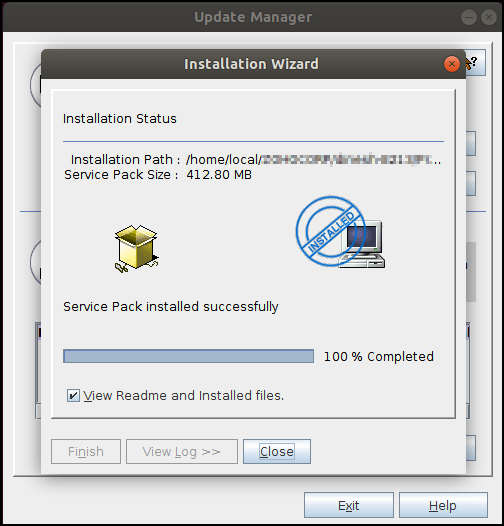
- Once the installation is successful, click Close > Exit to complete the installation process.
- Run the sh app_ctl.sh run command to start the Analytics Plus application. For Analytics Plus with high availability configuration, start the application in the primary server, ensure the application is accessible from your web browser and then start the application in the secondary server.
Console Mode
Log in to the server and stop the Analytics Plus application by following the below step.
If you have configured high availability in Analytics Plus, initially stop the Analytics Plus application in secondary server and then stop the application in primary server.
Open the command prompt and run the shutdown.sh command from the <Analytics Plus home>/bin directory.
- Navigate to the <Analytics Plus home> folder (Home folder refers to the installation directory of Analytics Plus) in your server (primary server for Analytics Plus configured with high availability).
- Take a backup copy of the entire folder with all the permissions retained in backup file. You can use any method of your preference to copy the folder.
- Provide Read (r), Write (w), and Execute (x) permission for the <Analytics Plus home> and <Analytics Plus home>/pgsql/data folder.
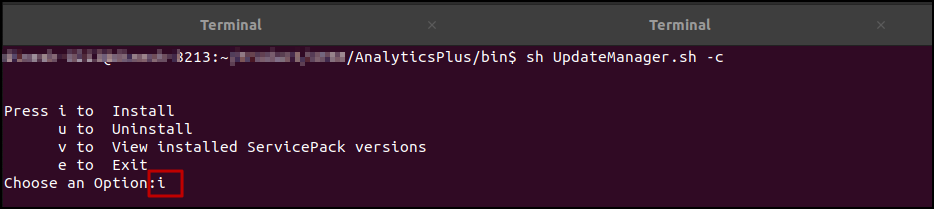
- From the <Analytics Plus home>/bin directory, run the sh UpdateManager.sh -c command.
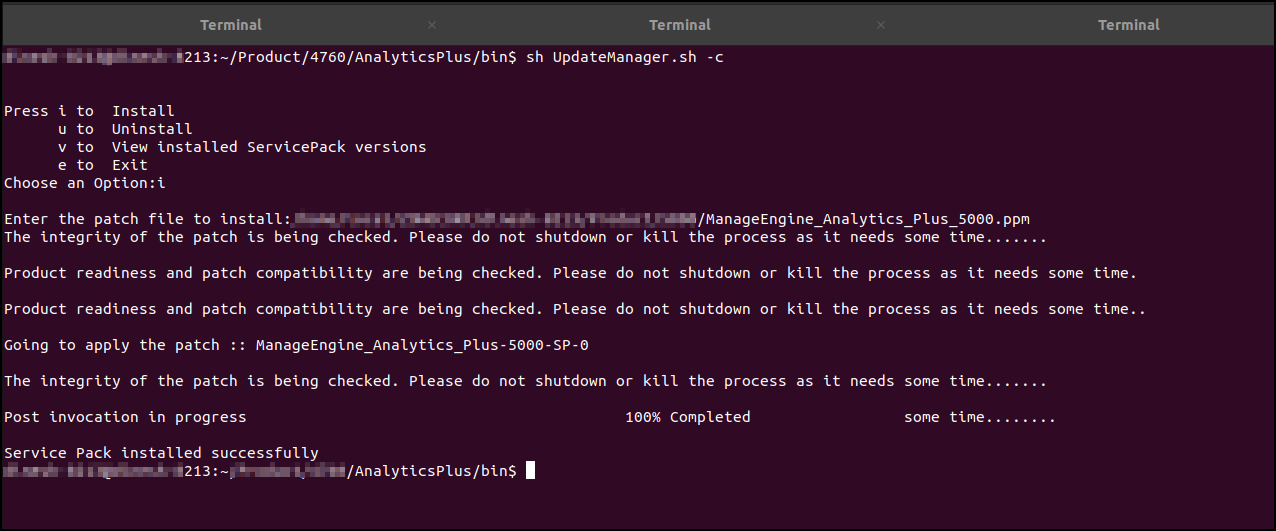
- Press i when prompted, to start the upgrade process.
- Enter the path where the .ppm file is located, and press Enter to complete the installation.
Note: If the upgrade process fails with the "Keystore file not found" error, please follow the steps detailed in this documentation and continue with the .ppm installation.
- Run the sh app_ctl.sh run command to start the Analytics Plus application. For Analytics Plus with high availability configuration, start the application in the primary server, ensure the application is accessible from your web browser and then start the application in the secondary server.