Installing DDI Central using custom ISO image
Download the Debian ISO image of the custom Linux distribution that will help you run ManageEngine DDI Central in any environment like Windows using your VM software.
Prerequisites
Virtual machine software like: VirtualBox, VMware, Hyper V, and KVM
Installing the DDI Console
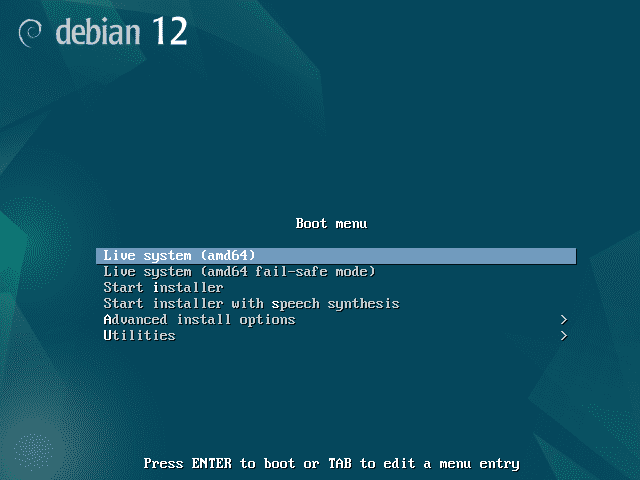
1. Start the Virtual Machine with the Debian ISO image
Boot up your virtual machine software (like VirtualBox or VMware).
Start the VM configured with the Debian ISO image.
You will be greeted with a boot menu similar to the image below. Choose Live System (amd64) to begin the Debian installation process. This live ISO image allows you to boot into a fully functional Debian environment without installing it on your hard drive.
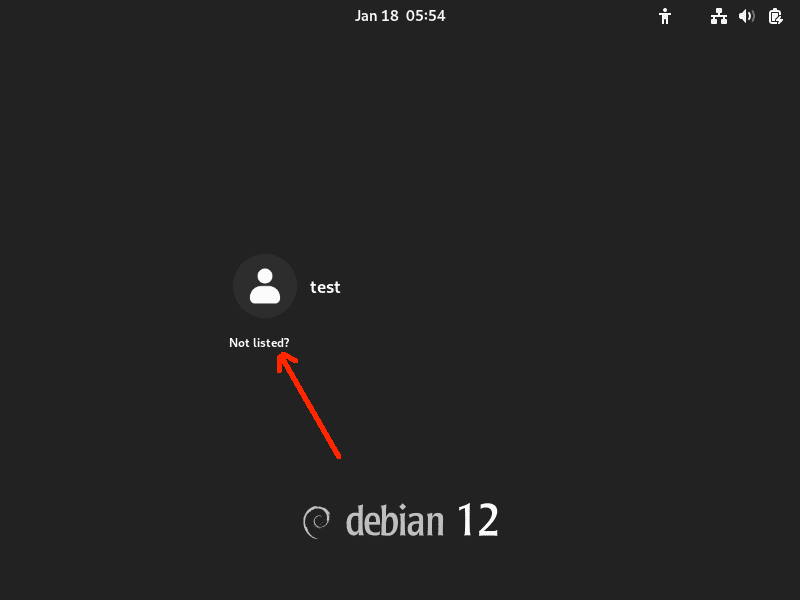
2. Explore the live Debian environment
You will reach a desktop environment, where you will see an unlisted desktop account. Click on it.
This will take you to a different screen that will ask you for the Username. Enter the username as root.
On entering the username, you'll be prompted to enter the password. Now, enter the password provided by the DDI support team via a dedicated email sent for downloading ISO image.
Note: The password sent via email is only temporary. You should reset it in the steps to follow as you proceed.
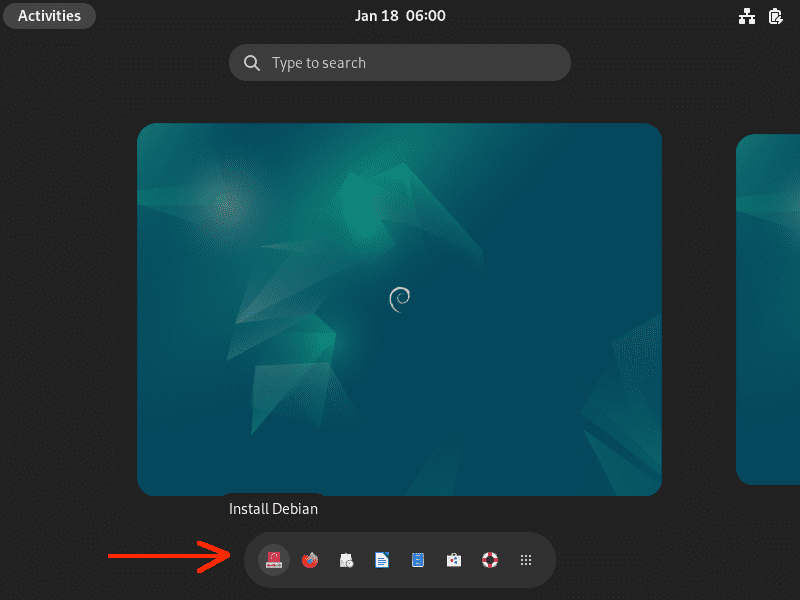
3. Start the installer from the live environment
On successful login, you can install Debian onto the virtual machine's hard drive by locating and double-clicking the Install Debian icon on the desktop, as shown in the image below.
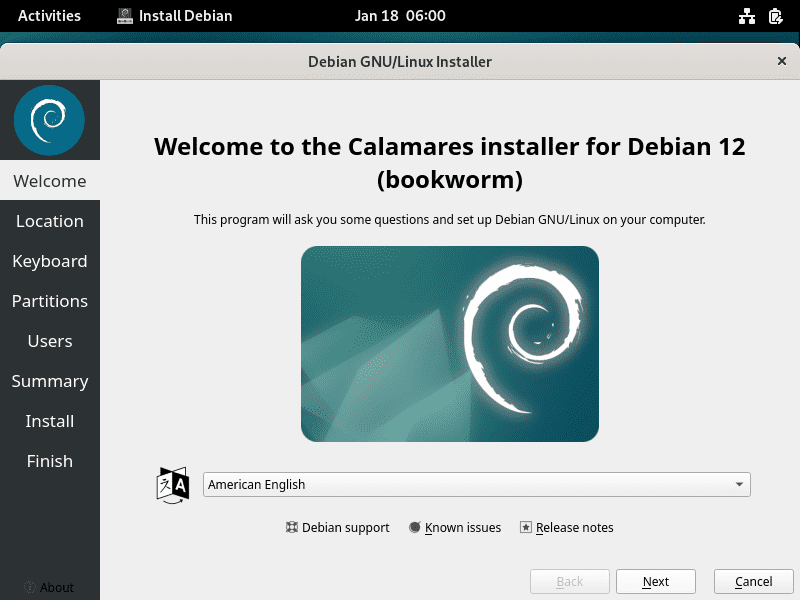
4. Welcome screen of the installer
Now, the welcome screen of the Calamares installer appears. Here, choose the installation language as American English and proceed by clicking Next.
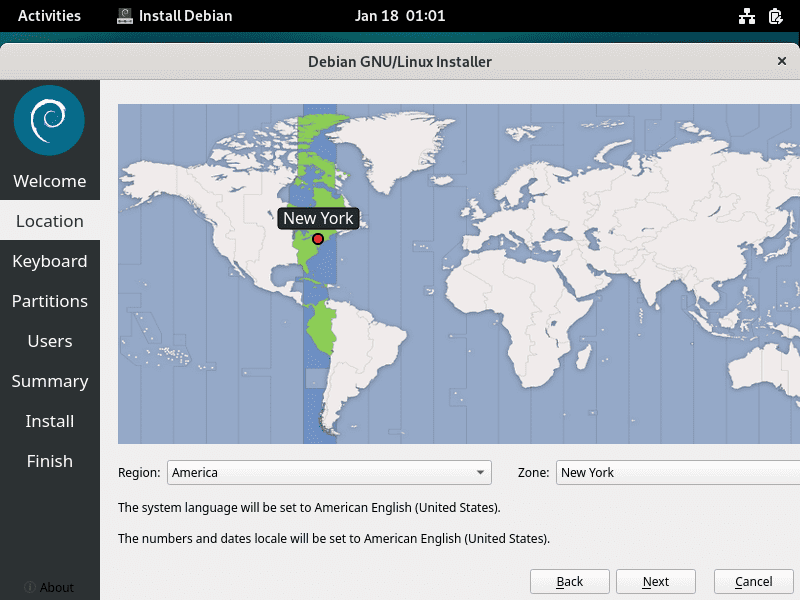
5. Set up location and timezone
Select your location and timezone from the respective dropdown menus and click Next.
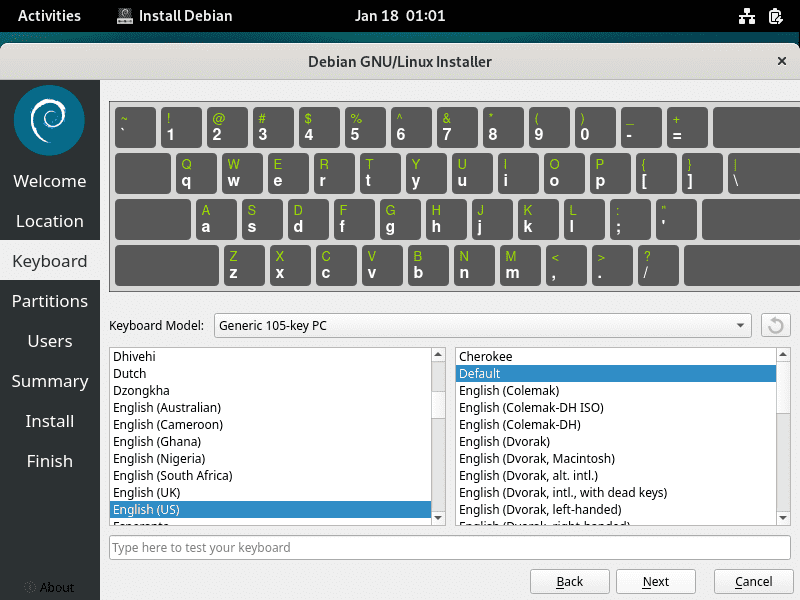
6. Configure the keyboard
Choose your keyboard layout from the Keyboard Model dropdown menu. For an English (US) keyboard, you should select English (US).
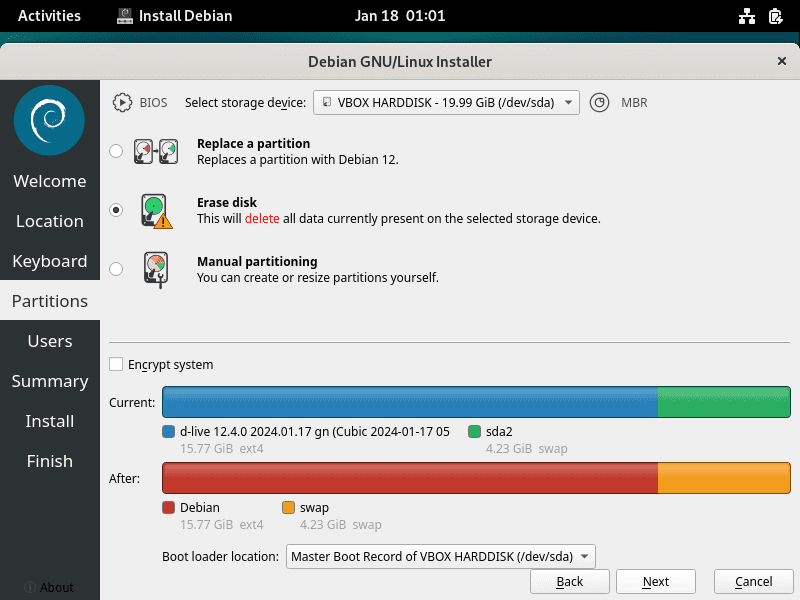
7. Disk partitioning
On the partitioning screen, configure the partitioning of your disk. If you're okay with wiping the entire virtual disk, select Erase disk. This will delete all data and install Debian 12.
Confirm that the bootloader is installed to the correct location, typically the Master Boot Record (MBR) of the VM's virtual disk.
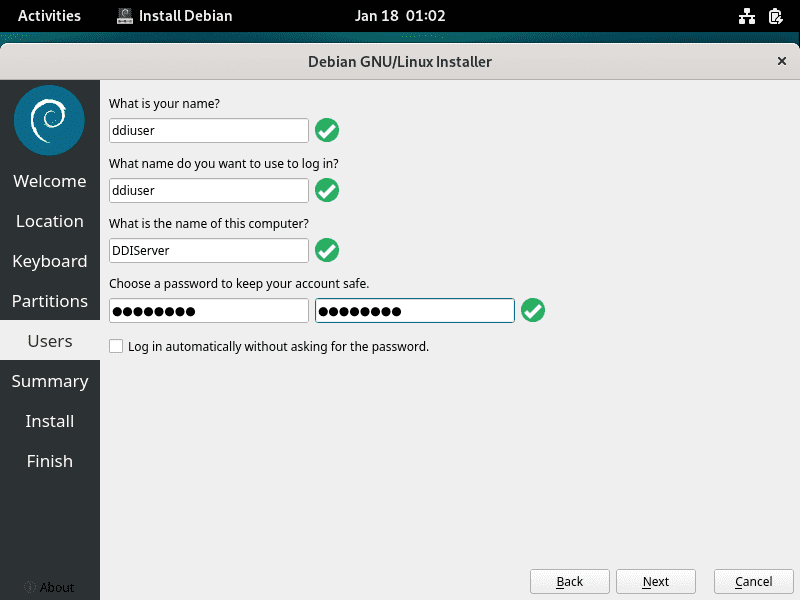
8. Create a User Account
Create a user account. Fill in the desired username and password, which will be used to log into Debian after the installation. Click Next.
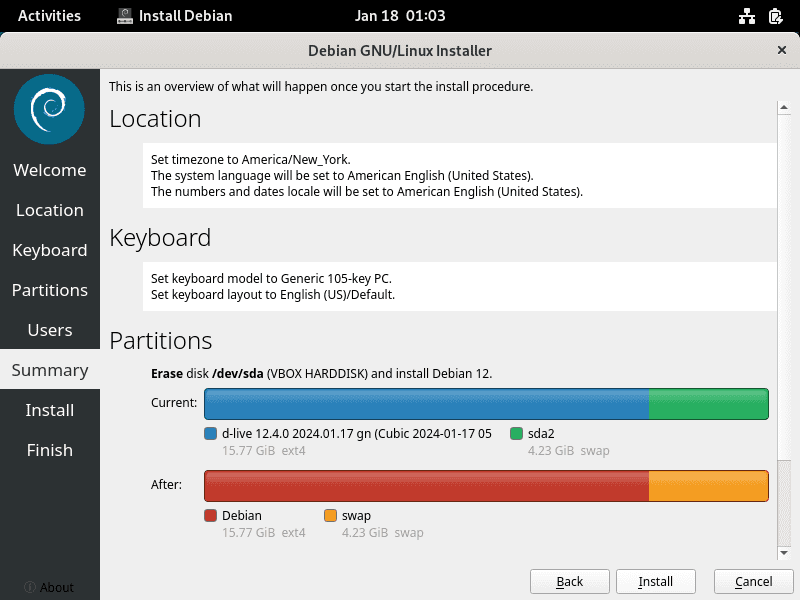
9. Review installation summary
The image below summarizes your choices. If all the details are correct, proceed by clicking Install.
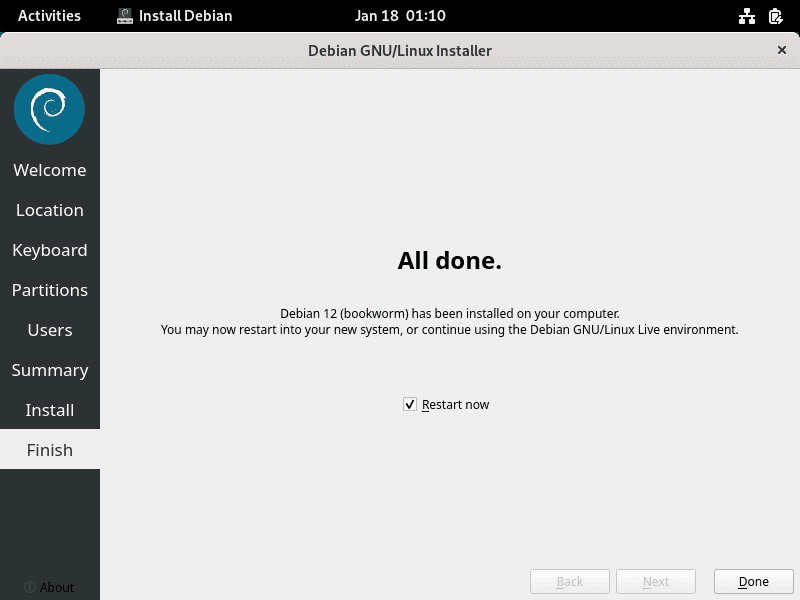
10. Completing the installation
As shown in the image below, the installation process will begin. The progress bar will indicate how far along the installation is. Wait for it to complete. After the installation process completes, you will usually be prompted to restart the VM.
Note: Upon reboot, ensure to remove the installation ISO from the VM's settings to avoid booting into the live environment again.
11. Post-installation steps
Once Debian is installed, you can login to your new user account with the username and password from Step 8.

12. Installing and configuring your application
After successfully installing Debian, you can now set up ManageEngine DDI Central on your system. Open the terminal window.
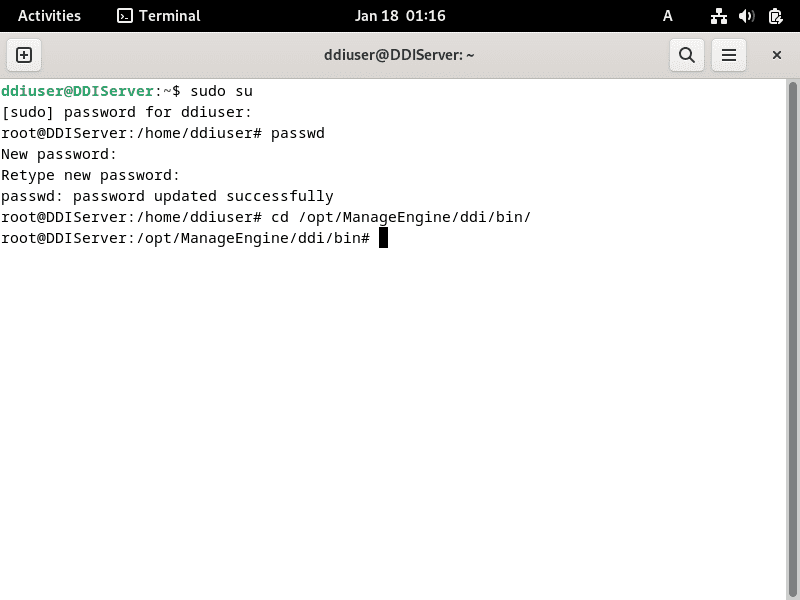
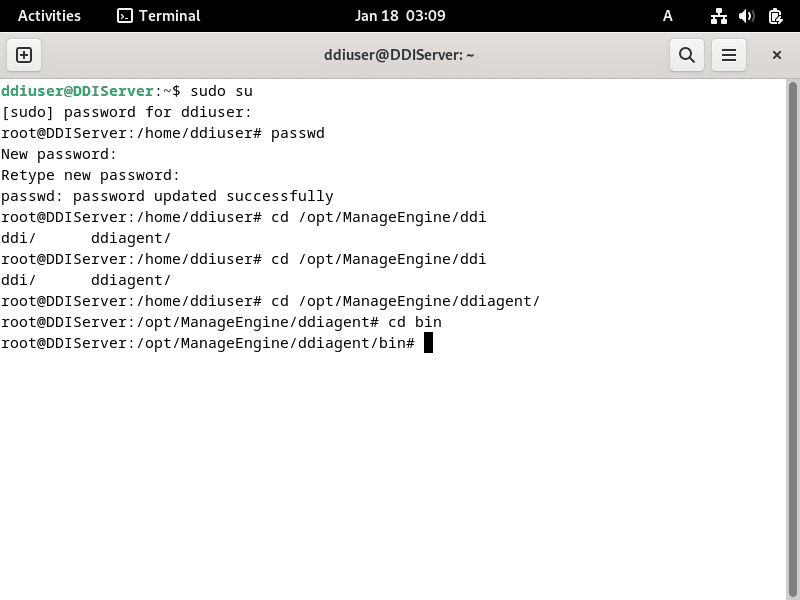
13. Reset the root password
On the terminal window, reset the temporary root password from Step 2 following the steps below.
Gain SuperUser access by entering the command sudo su to switch to the root user. You will be prompted to enter the password for your current user (the one with sudo privileges).
Once you are logged in as root, reset the root password by typing the command passwd. You will then be prompted to enter a new root password.
After entering passwd, you’ll be asked to enter the new password twice to confirm.
14. Access the Application Installation Directory
Navigate to the directory where your application's .bin files are located using the cd command in the terminal.
cd /opt/ManageEngine/ddi/bin/
15. Change file permissions
You might need to change the permissions of the scripts to make them executable. This can be done using the chmod command.
Note: Use the chmod command as specified below, introducing a / (slash) anywhere within the chmod command would yield errors.
chmod 777 *
This command grants read, write, and execute permissions of all files in the current directory.
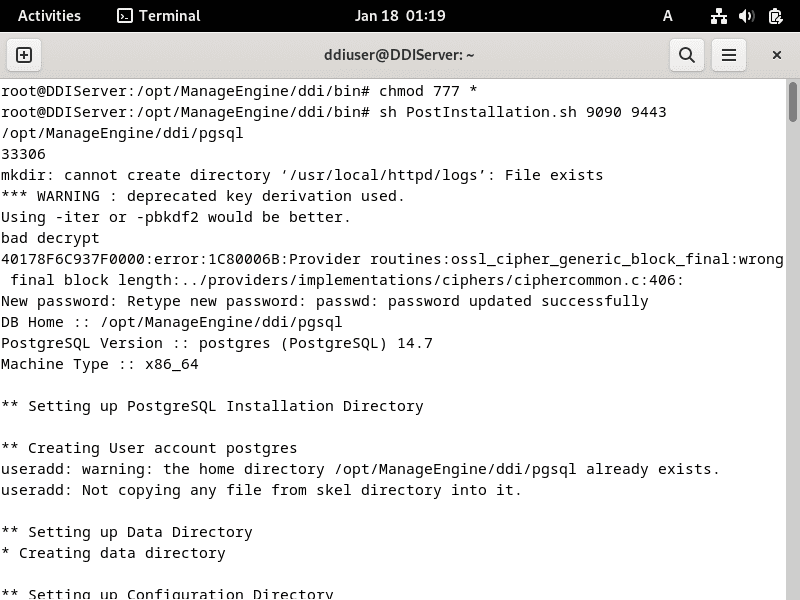
16. Run the Installation Script
Execute the command - sh PostInstallation.sh 9090 9443
This executes a shell script named PostInstallation.sh with two arguments, 9090 and 9443, which are http and https port numbers that the script needs to configure the application to.
Wait till the script is run completely.
If you encounter errors, you can seek support from the ddi-support team.
17. Start the application services
Once the installation is complete and all configurations are set, start the application services. Use the command systemctl for this purpose: systemctl start DDI
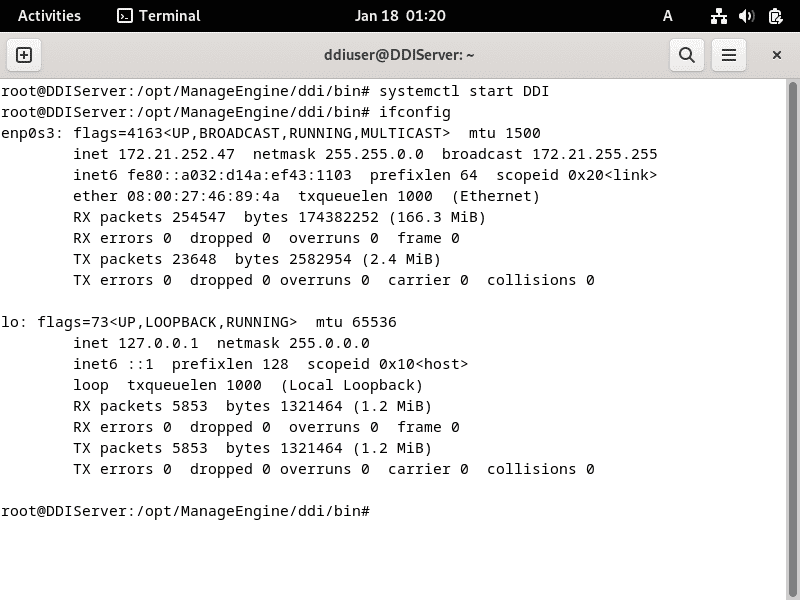
18. Verify network configuration
Use the ifconfig network command to view the configuration of network interfaces and IP addresses. From the response generated, the IP address near inet shows the IPv4 address assigned to the interface. This is the ip address that is used to run the DDI application using the web browser.
The netmask indicates the network mask for the IP address, defining which portion of the address is the network and which part is the host.
Note: Make sure that the correct ports are open and listening for the application to communicate over the network.
19. Final verification
Ensure that the application is running by accessing its web GUI through the browser.
Example: Using the IPv4 address and the port number from the image. DDI application can be accessed using anyone of the following urls:
http://172.21.252.47:9090/ or http://172.21.252.47:9443/
Test the functionalities of the application to confirm that it is operating as expected.
Installing the DDI Node Agent
Follow the same steps from Step 1 through Step 13 to install DDI agent onto each of DNS and DHCP servers.
Note: DDI Console and DDI Node Agent cannot run in the same machine.Please ensure to install DDI Node Agent in a different machine you want to manage.
Now for the further steps
14. Access the Application Installation Directory
Navigate to the directory where your application's .bin files are located using the cd command in the terminal.
cd /opt/ManageEngine/ddiagent/bin/
15. Change file permissions
You might need to change the permissions of the scripts to make them executable. This can be done using the chmod command.
Note: Use the chmod command as specified below, introducing a / (slash) anywhere within the chmod command would yield errors.
chmod 777 *
This command grants read, write, and execute permissions of all files in the current directory.
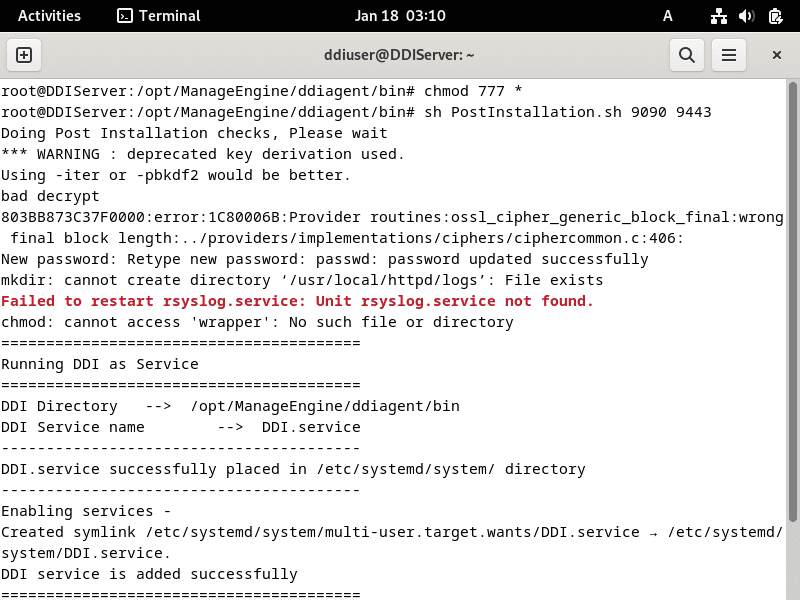
16. Run the installation script
Execute the command - sh PostInstallation.sh 9090 9443
This executes a shell script named PostInstallation.sh with two arguments, 9090 and 9443, which are http and https port numbers that the script needs to configure the application to.
Wait till the script is run completely.
If you encounter errors, you can seek support from the ddi-support team.
17. Start the application services
Once the installation is complete and all configurations are set, start the application services. Use the command systemctl for this purpose: systemctl start DDI
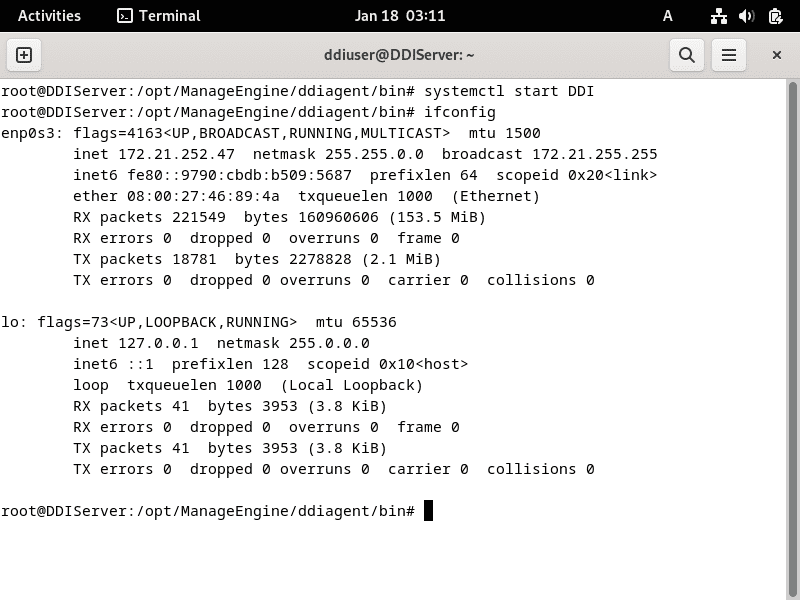
18. Verify network configuration
Use the ifconfig network command to view the configuration of network interfaces and IP addresses. From the response generated, the IP address near inet shows the IPv4 address assigned to the interface. This is the ip address that is used to run the DDI application using the web browser.
The netmask indicates the network mask for the IP address, defining which portion of the address is the network and which part is the host.
Note: Make sure that the correct ports are open and listening for the application to communicate over the network.