Steps to configure SAML SSO for Blink
About Blink
The Blink app is a mobile-first employee communication platform designed to streamline internal communications, enhance engagement, and simplify access to workplace tools. It offers features such as real-time messaging, document sharing, and integration with various enterprise applications.
The following steps will help you enable SSO for Blink from Identity360:
Prerequisites
- The MFA and SSO license for Identity360 is required to enable SSO for enterprise applications.
- Log in to Identity360 as an Admin, Super Admin, or Technician with a role that has Application Integration and Single Sign-on permissions.
- Navigate to Applications > Application Integration > Create New Application, and select Blink from the applications displayed.
Note: You can also find Blink from the search bar located at the top.
- Under the General Settings tab, enter the Application Name and Description.
- Under the Choose Capabilities tab, select Single Sign-on and click Continue.
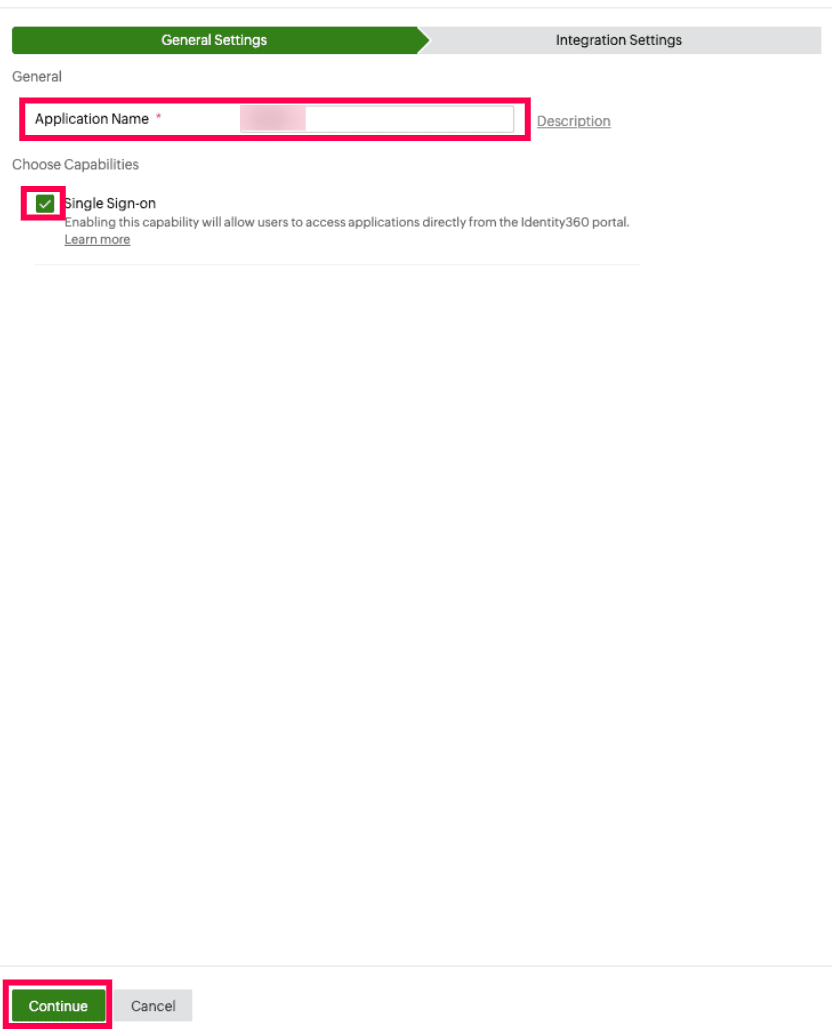 General Settings of SSO configuration for Blink
- Under Integration Settings, navigate to the Single Sign On tab, click IdP Details. Download the Metadata, which will be used later during the configuration in Blink.
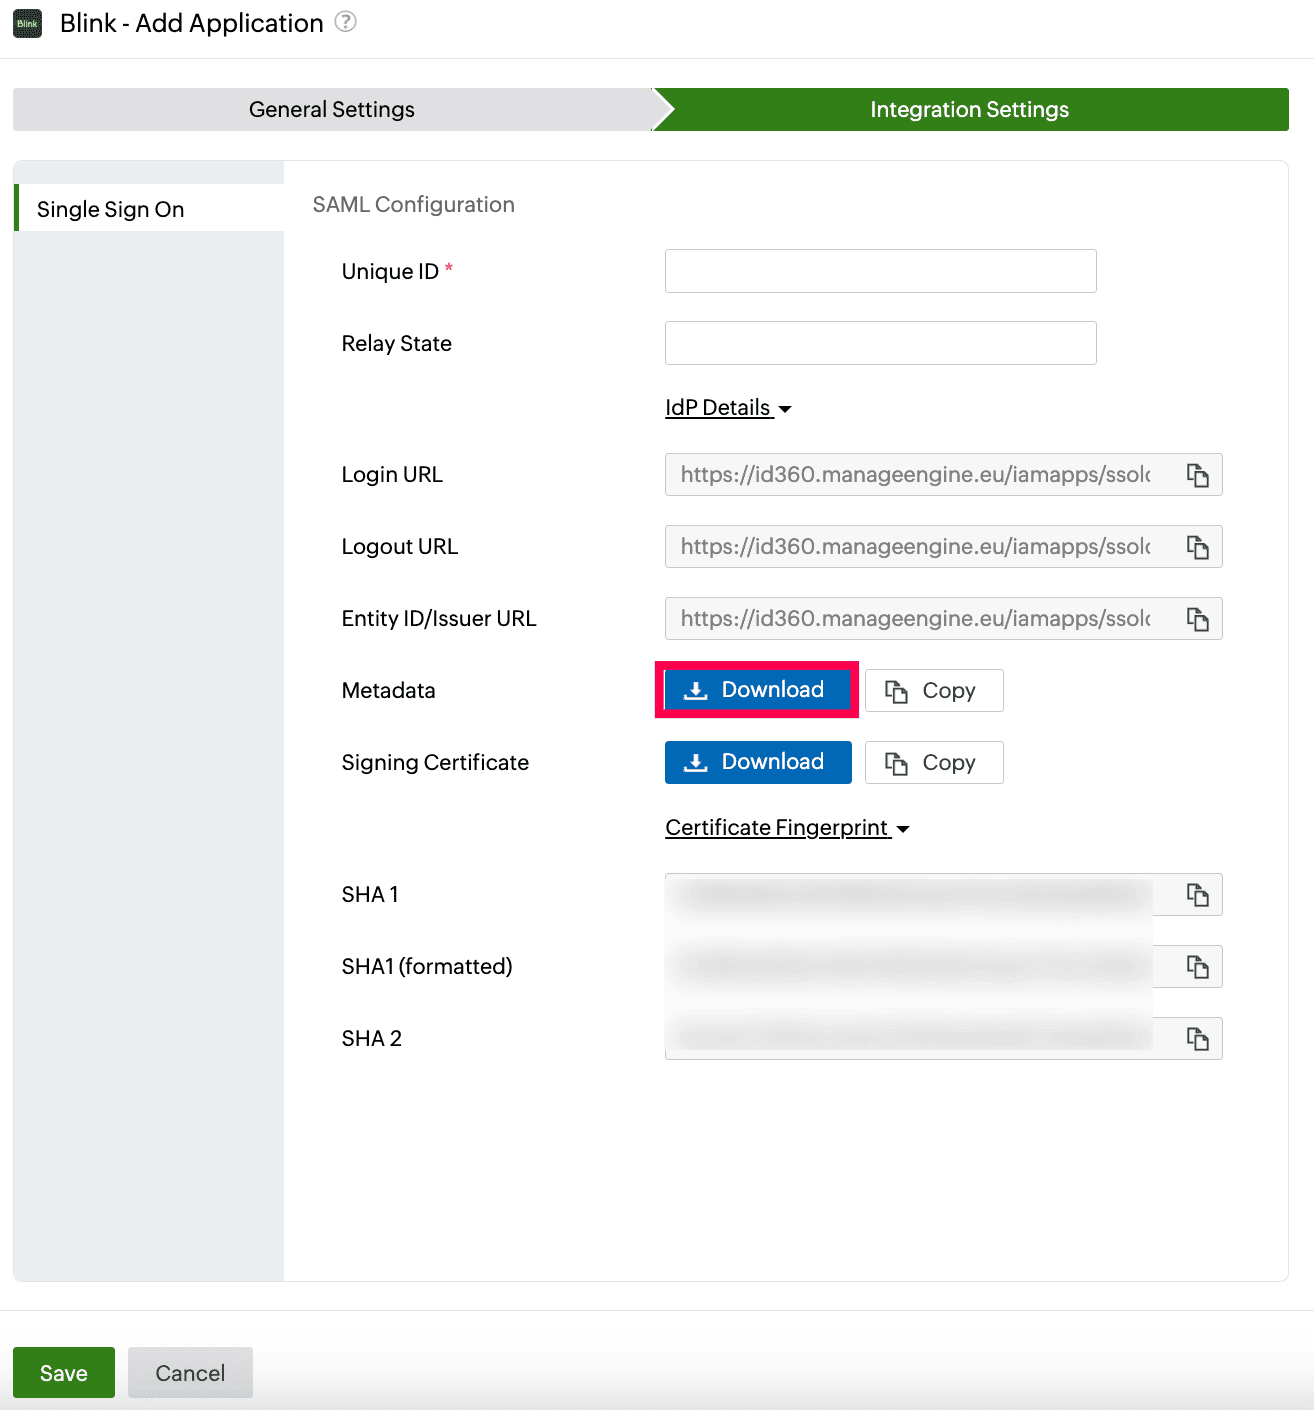 Integration Settings of SSO configuration for Blink.
Blink (service provider) configuration steps
- Log in to Blink as an administrator.
- Navigate to Authentication > Third party methods > SAML.
- Under Service Provider (Blink) section, copy the Entity id value, which will be used later during Identity360 configuration.
- Under Identity Provider section, click Read metadata file, and upload the metadata downloaded in step 6 of prerequisites.
- Select Save changes.
Identity360 (identity provider) configuration steps
- Switch to Identity360's application configuration page.
- In the Unique ID field, use the value copied from step 3 of Blink configuration. For example, if the Entity id is https://api.joinblink.com/saml/123-456-789, then Unique ID will be 123-456-789.
- Enter the Relay State parameter, if necessary.
Note: Relay State is an optional parameter used with a SAML message to remember where you were or to direct you to a specific page after logging in.
- Click Save.
 Integration Settings of SSO configuration for Blink.
- To learn how to assign users or groups to one or more applications, refer to this page.
Your users will now be able to sign in to Blink through the Identity360 portal.
Note: For Blink, only SP-initiated flow is supported.
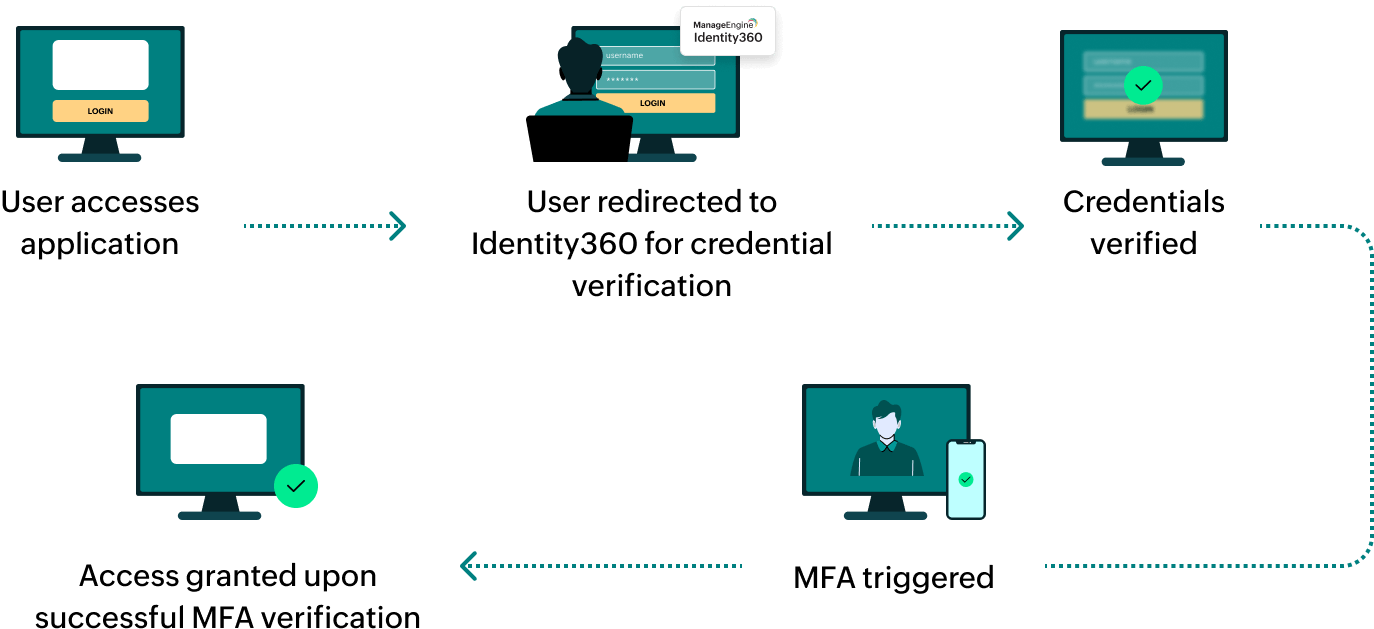
Steps to enable MFA for Blink
Setting up MFA for Blink using Identity360 involves the following steps:
- Set up one or more authenticators for identity verification when users attempt to log in to Blink. Identity360 supports various authenticators, including Google Authenticator, Zoho OneAuth, and email-based verification codes. Click here for steps to set up the different authenticators.
- Integrate Blink with Identity360 by configuring SSO using the steps listed here.
- Now, activate MFA for Blink by following the steps mentioned here.
How does MFA for applications work in Identity360?