Certificate Renewal
The Certificates tab in Key Manager Plus is a centralized console where all types of SSL certificates such as Self Signed, Root Signed, Microsoft CA Signed, certificates issued by third-party CAs etc., are consolidated and displayed. Through the Renew option, these certificate types can be renewed in the Certificates tab directly. These renewed certificates will automatically inherit the deployed servers and their credentials. For certificates issued by third-party CAs, the renewal will be initiated and redirected to the respective CA's tab. After successful renewal, the previous version of the certificate will be listed under Certificate History.
To proceed further, follow the below step:
- Navigate to SSL >> Certificates.
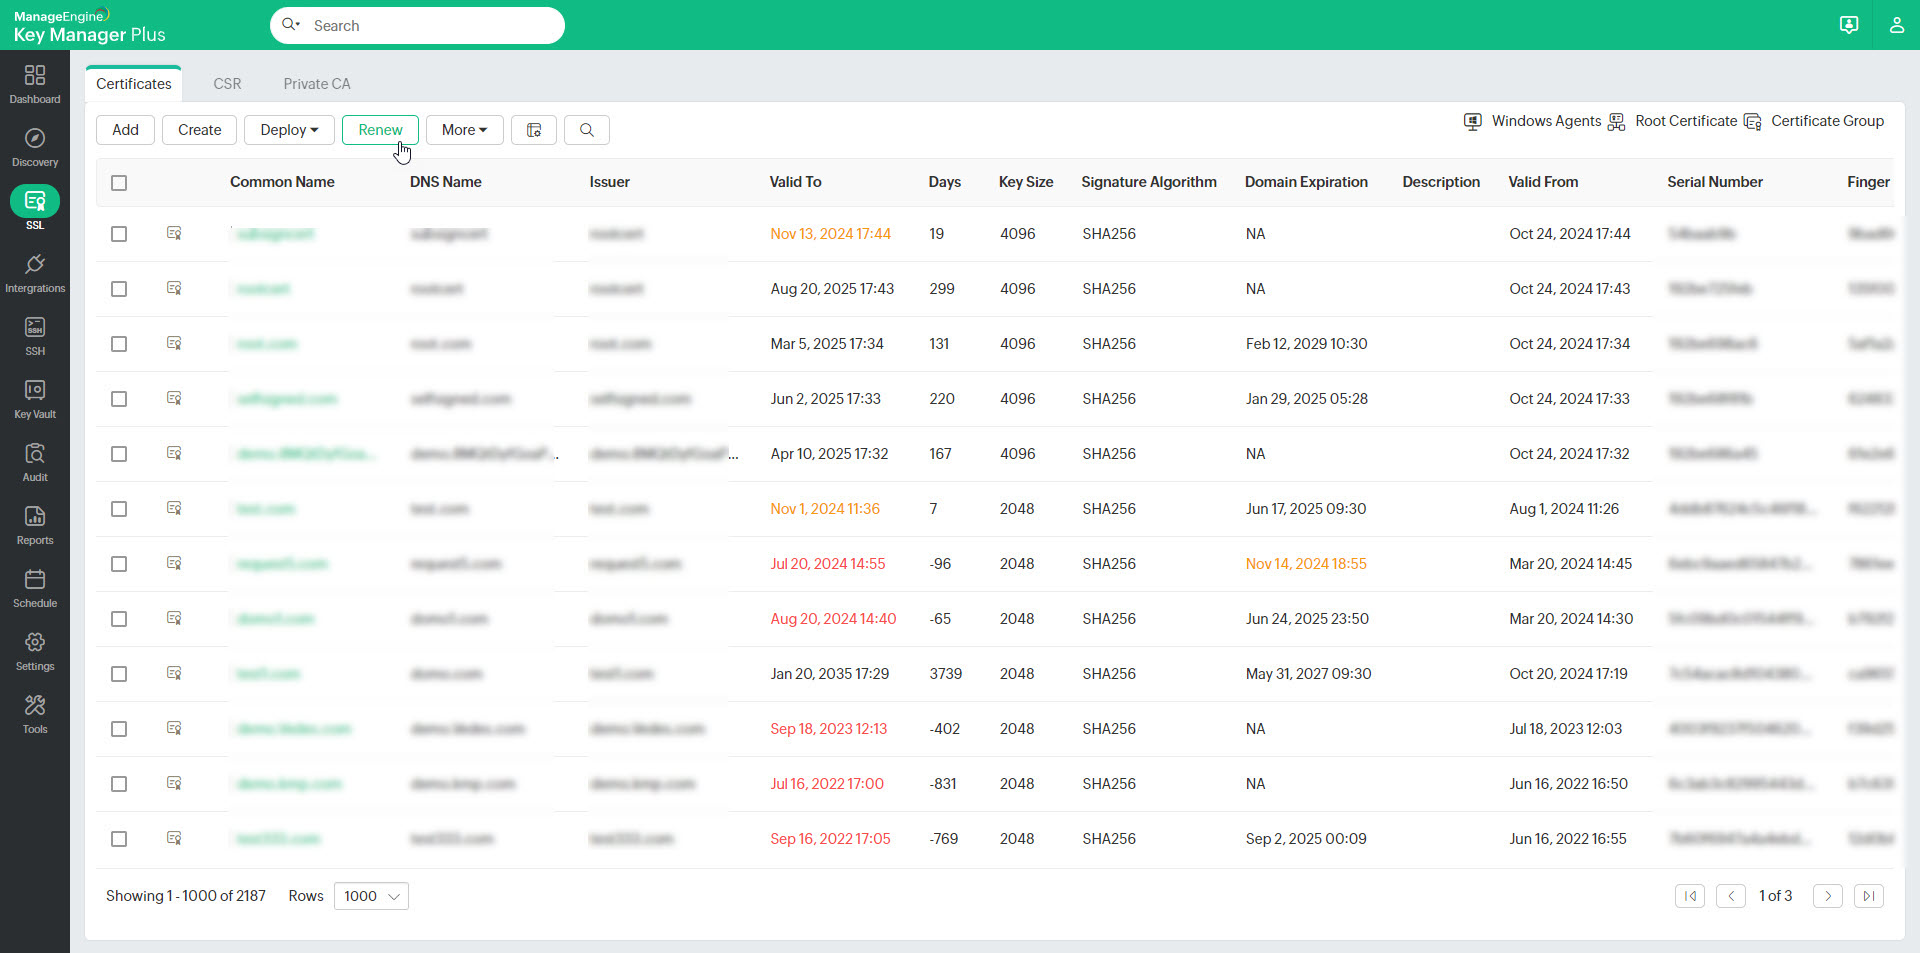
There are three types of certificate renewal:
- Self Signed Certificate Renewal
- Root Signed Certificate Renewal
- Microsoft CA Signed/Signed with Agent Certificate Renewal
- Auto Renewal
1. Self-Signed Certificate Renewal
To renew a self-signed certificate, follow the below steps:
- Select a self-signed certificate and click Renew at the top.
- The renewal type will be Self Signed by default.
- Specify the number of days for which the certificate shall be valid in the Validity field. Click Renew.
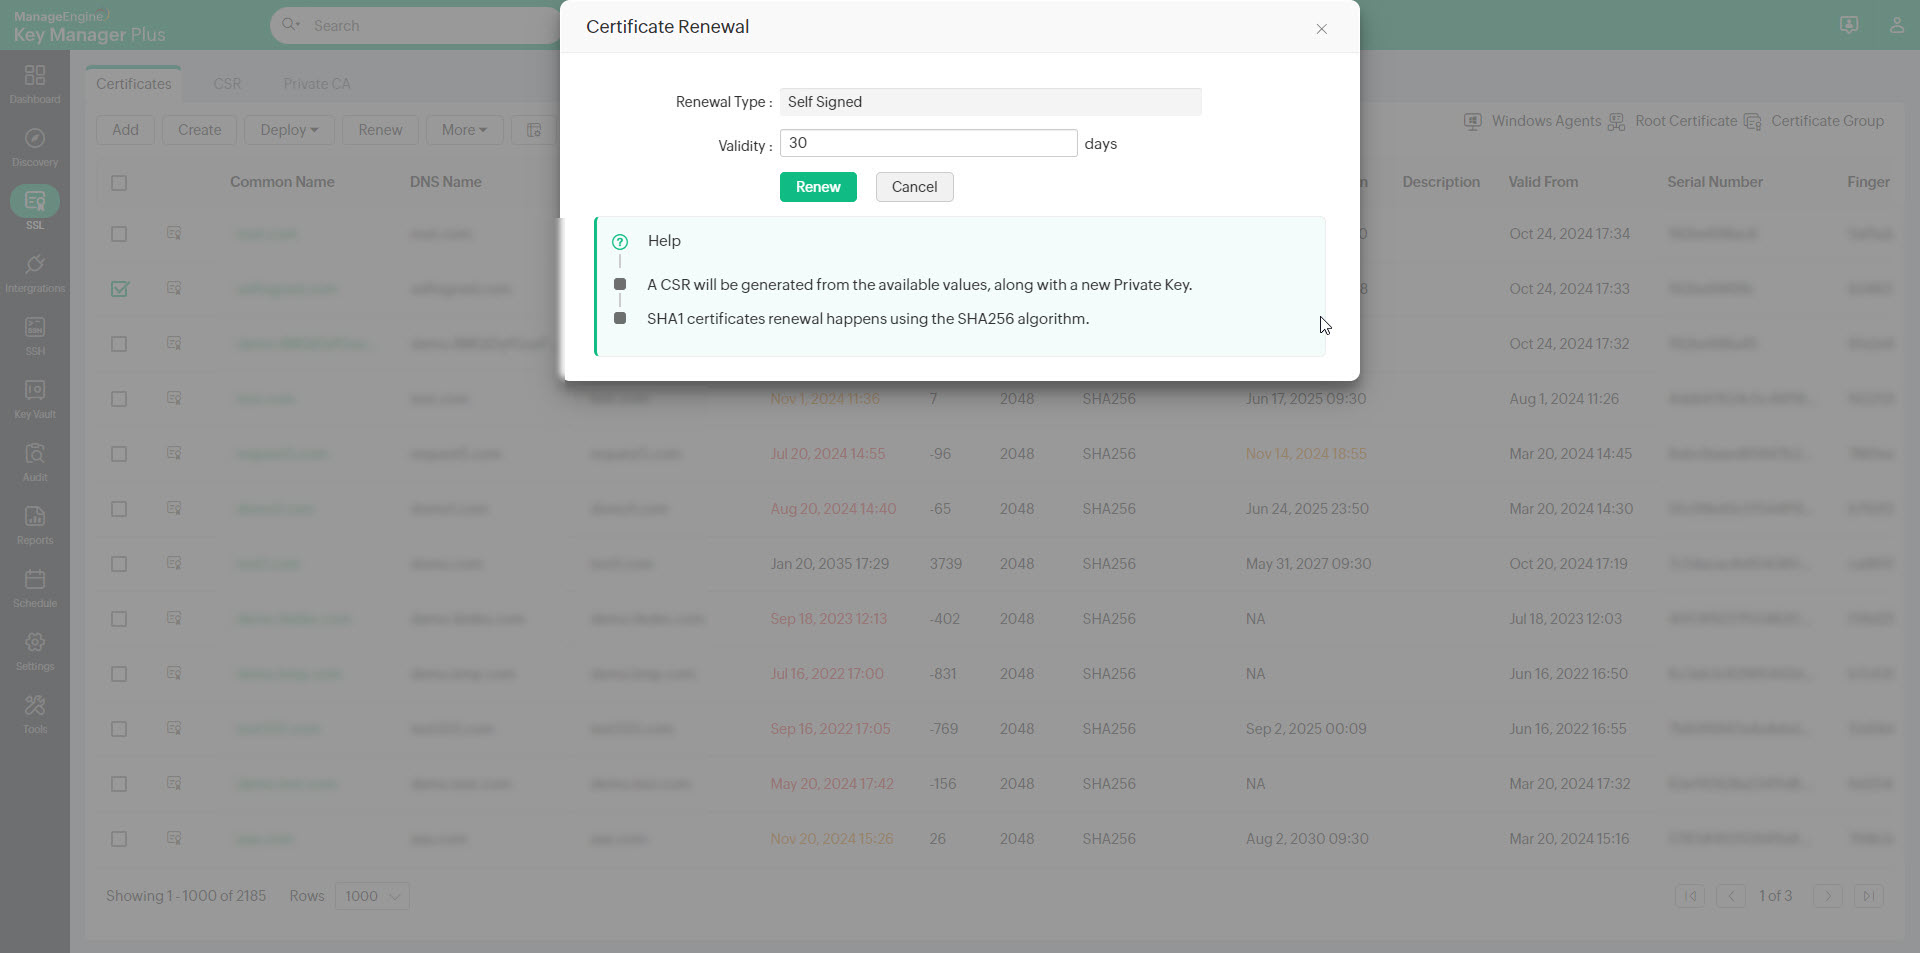
The certificate will be renewed successfully and the Valid To date will change according to the new validity period specified.
2. Root Signed Certificate Renewal
To renew a Root Signed certificate, follow the below steps:
- Select a Root Signed certificate and click Renew at the top.
- The renewal type will be Renew with Root by default and the Issuer name will be autopopulated in the Root Name field.
- Specify the number of days for which the certificate shall be valid in the Validity field. Click Renew.
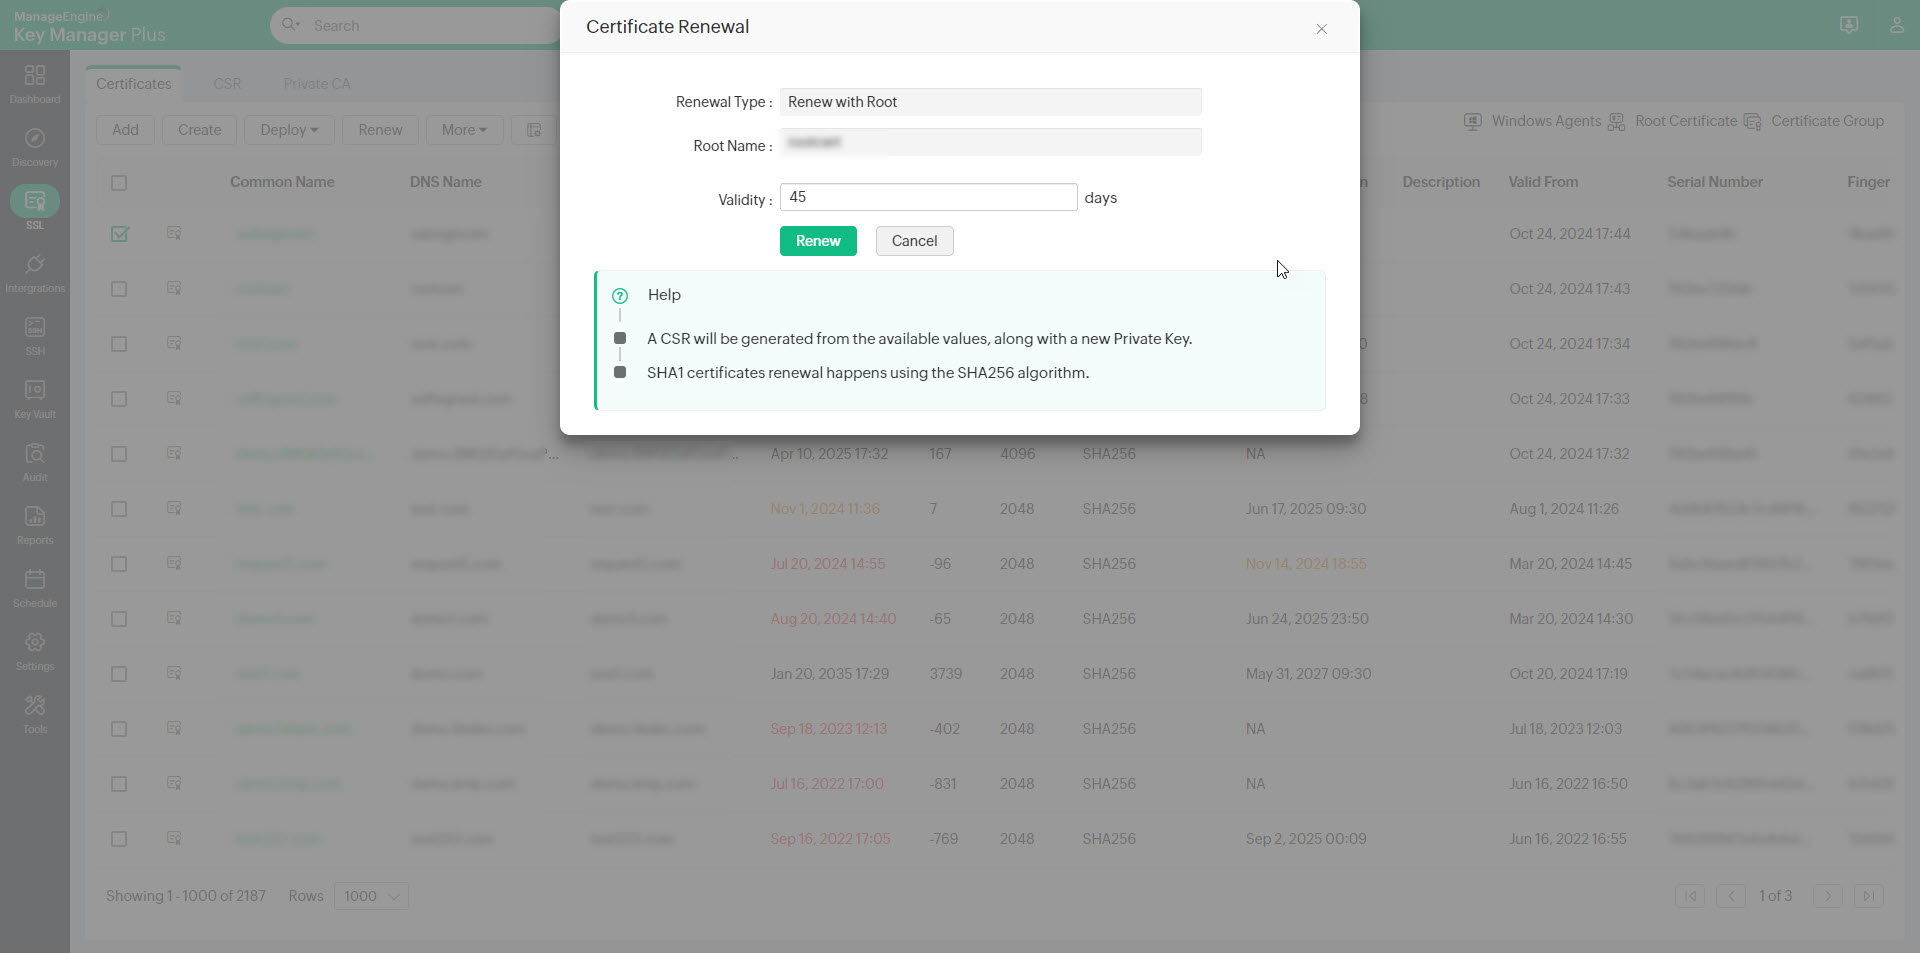
The certificate will be renewed successfully and the Valid To date will change according to the new validity period specified.
3. Microsoft CA Signed/Signed with Agent Certificate Renewal
To renew a Microsoft CA signed certificate, follow the below steps:
- Select a Microsoft CA Signed certificate and click Renew at the top.
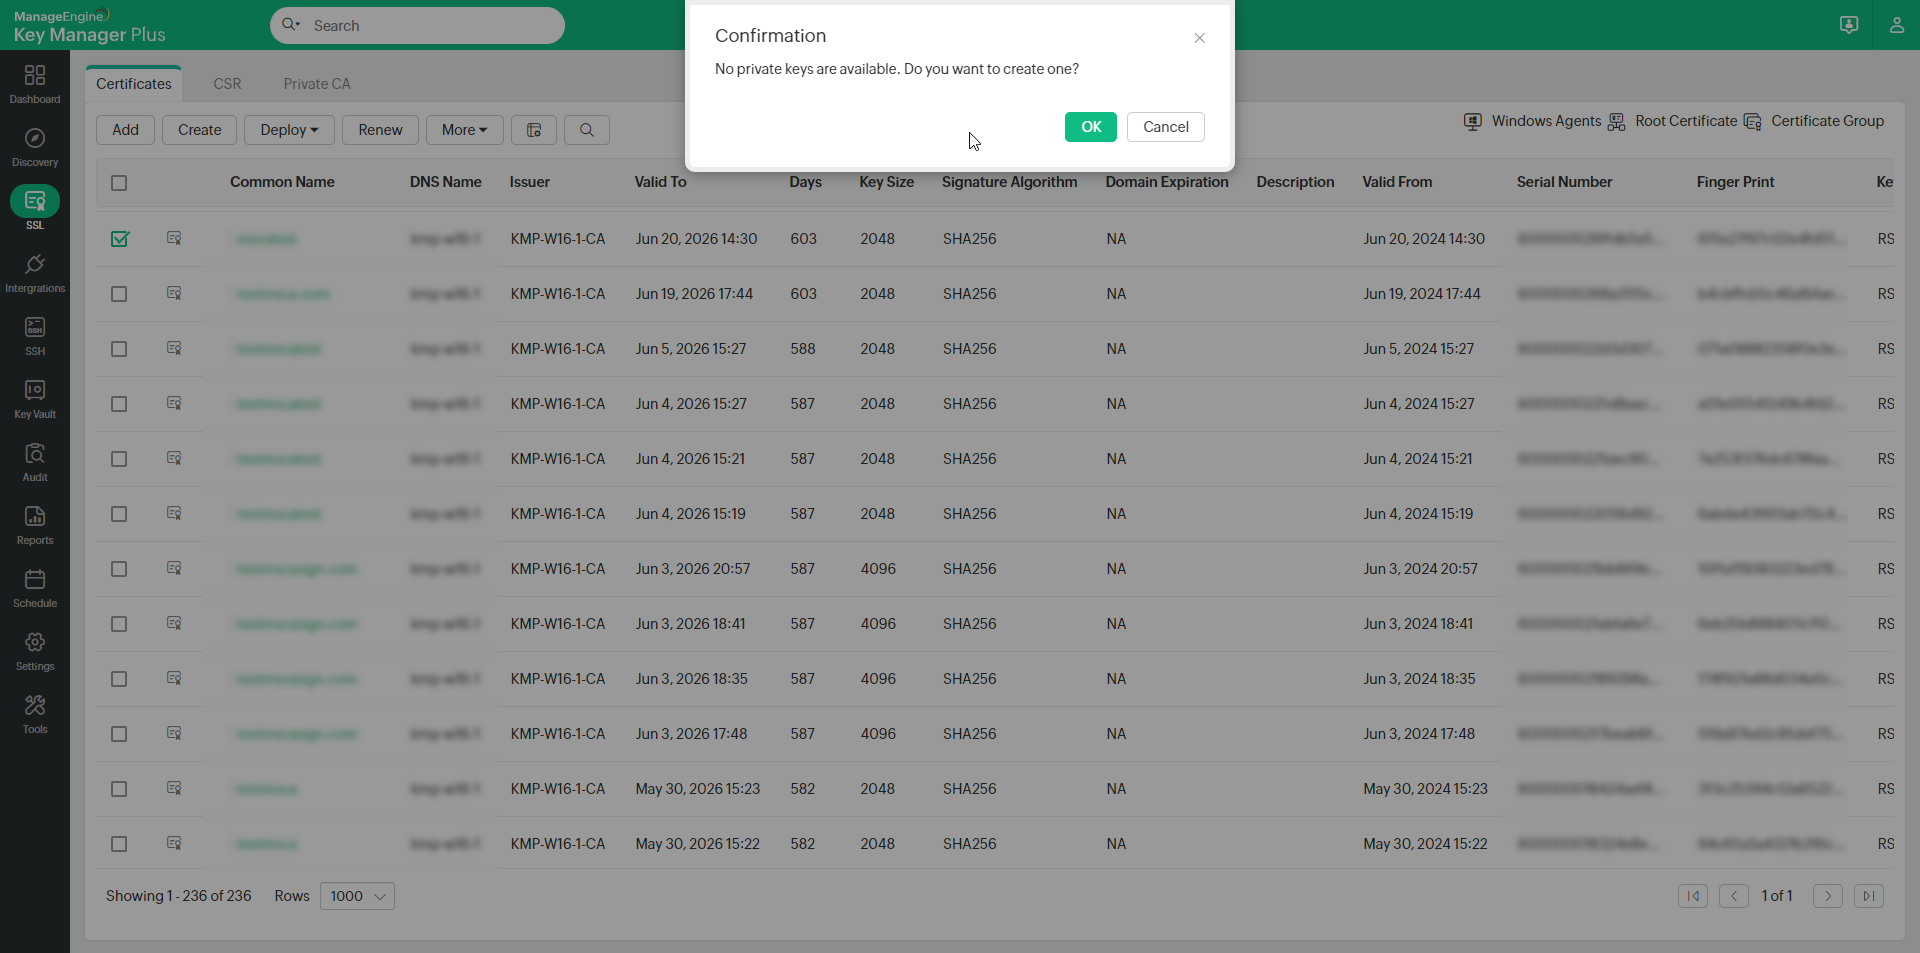
- If the certificate does not have a private key, Key Manager Plus allows you to create a new private key. Click OK in the pop-up that appears.
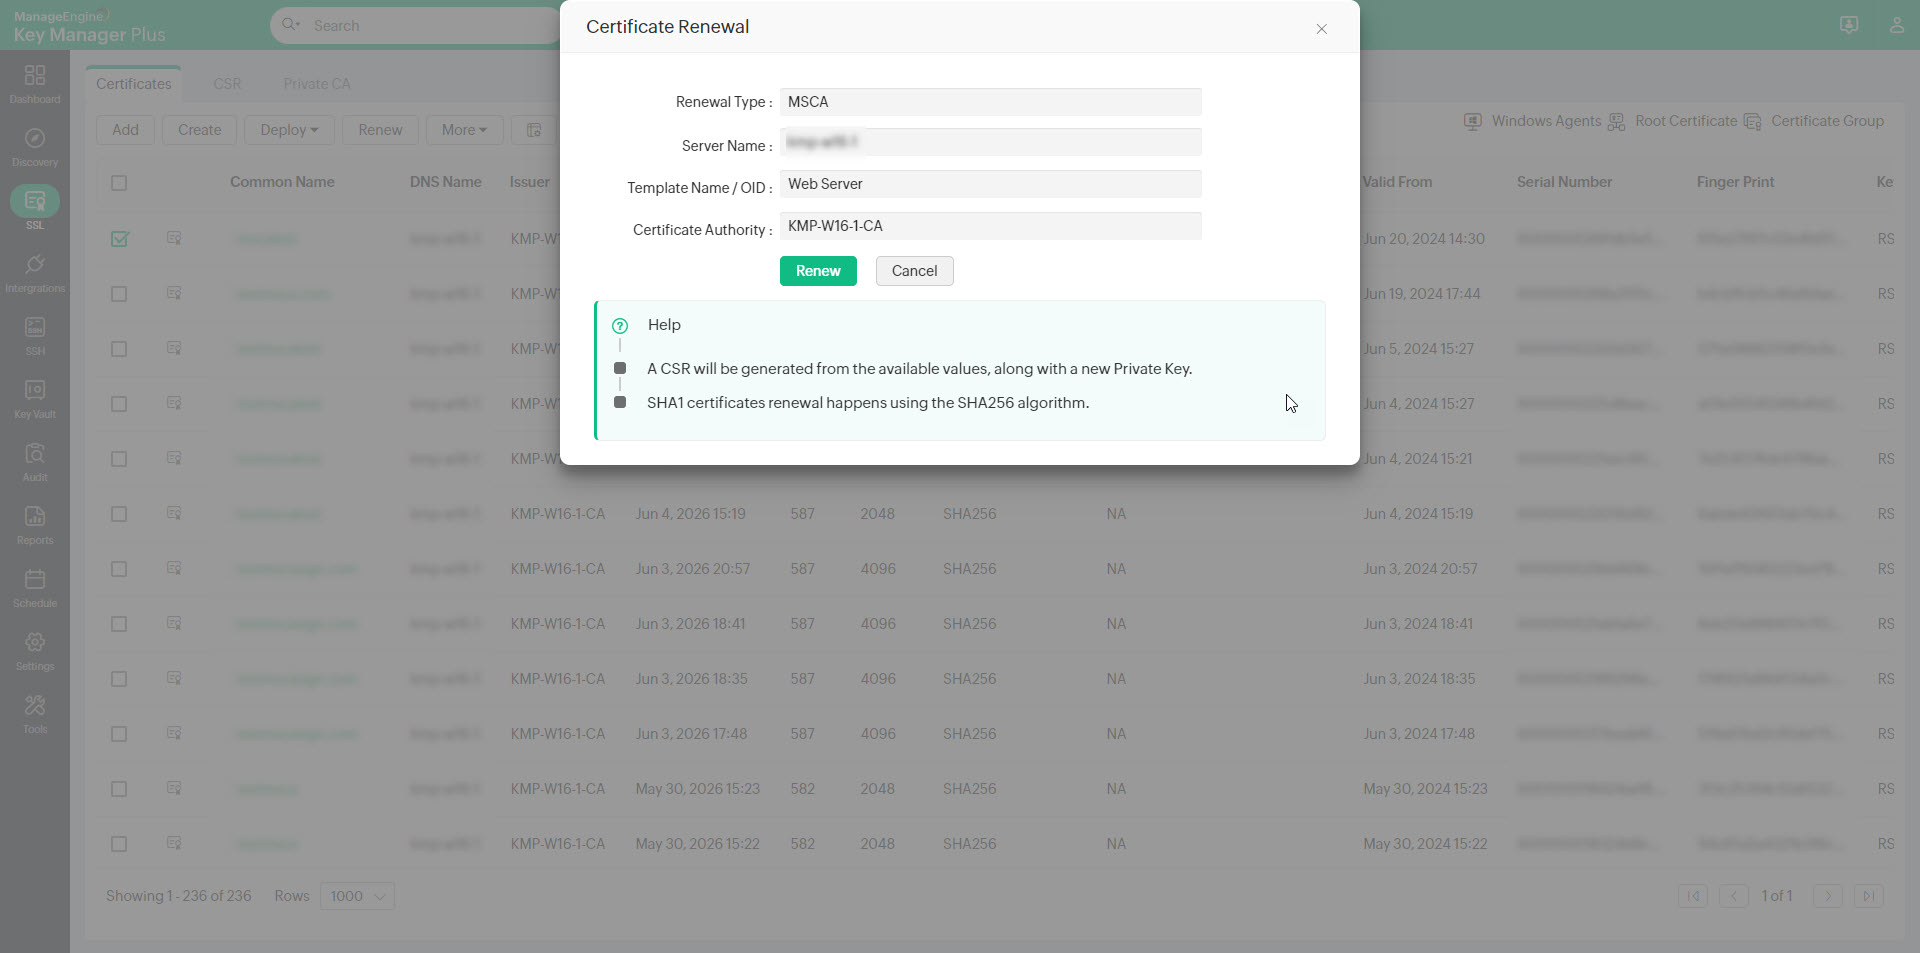
- Attributes such as Renewal Type, Server Name, Template Name / OID, Certificate Authority will be autopopulated from the certificate details. The Server Name is the name of the Microsoft CA server which signed the certificate. Certificate Authority is the CA service that runs in the specified Microsoft CA server.
- For certificates signed by Microsoft CA directly or using the KMP agent, validity days will be taken from the Microsoft CA server and therefore it cannot be entered manually during renewal. These type of certificates will be renewed only till the date specified in the the Microsoft CA server.
In addition to the above types, third-party CA signed certificates can also be renewed using this renewal option. Follow the same procedure to initiate renewal and Key Manager Plus will redirect the renewal request to the respective third-party CA. Below, you will learn how to set up auto-renewal for certificates in Key Manager Plus.
Notes:
- During the renewal process, a CSR will be generated from the available values, along with a new Private Key.
- SHA1 certificates will be renewed using the SHA256 algorithm.
4. Auto Renewal
Certificates issued by Local CA can be renewed automatically from Key Manager Plus.
To enable auto-renewal of Local CA certificates,
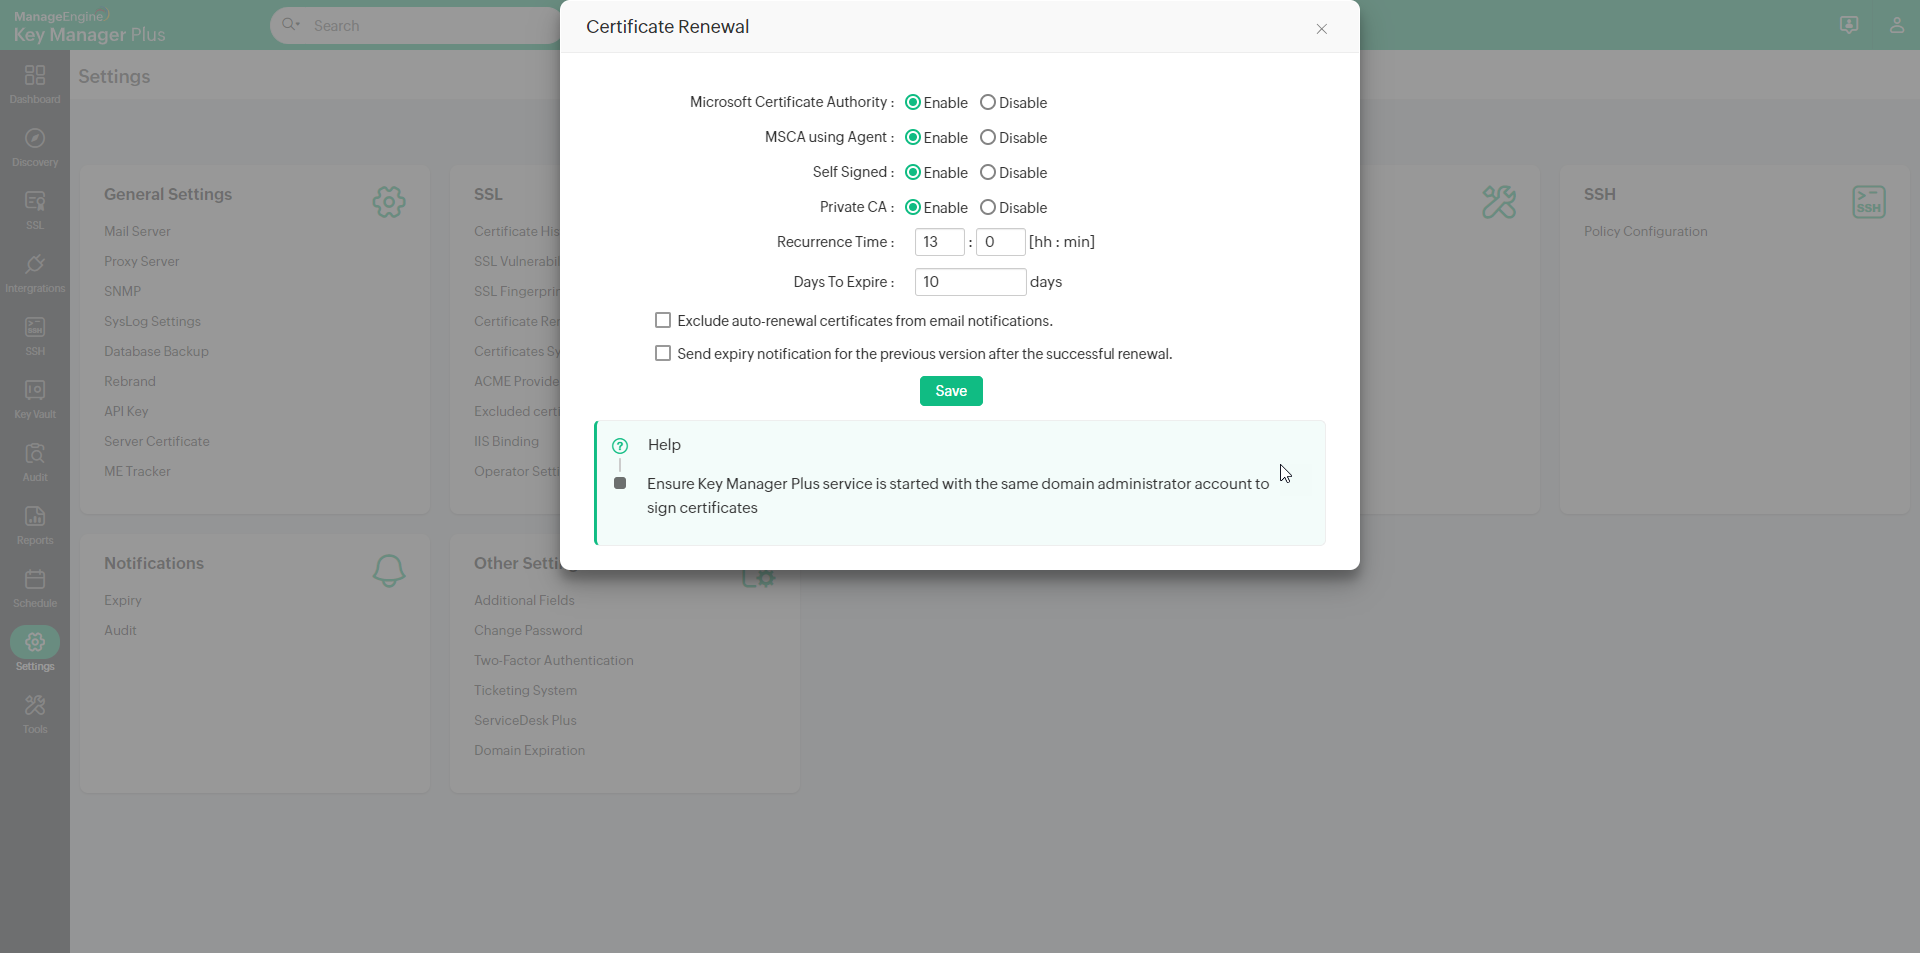
- Navigate to Settings >> SSL >> Certificate Renewal.
- Enable MS Certificate Authority, MSCA using Agent, Self Signed, or Private CA and specify the Recurrence Time.
- Certificates that have already expired are auto-renewed and updated in the certificate repository.
- The certificates that are due to expire in the number of days mentioned in the Days to Expire field will also be auto-renewed.
- Select the checkbox to Exclude auto-renewal certificates from email notifications. This allows the certificates marked for auto-renewal to be excluded from the email notifications even if they fall under the expiry notification configuration.
- Select the checkbox to Send Expiry Notification for the Previous version after successful Renewal.
- Click Save.
- After successful auto-renewal, the previous version of the certificate will be listed under Certificate History.
