Certificate Signing
Key Manager Plus provides the option to sign and issue certificates to all clients in your network either from your Microsoft Certificate Authority or using a custom root CA certificate that is trusted within your environment.
To request and acquire certificates from Local CA from Key Manager Plus, you have to initially generate a CSR, then get it signed from the local certificate authority using the steps mentioned below.
There are three ways to sign your certificates:
Navigate to SSL >> CSR.
1. Microsoft Certificate Authority
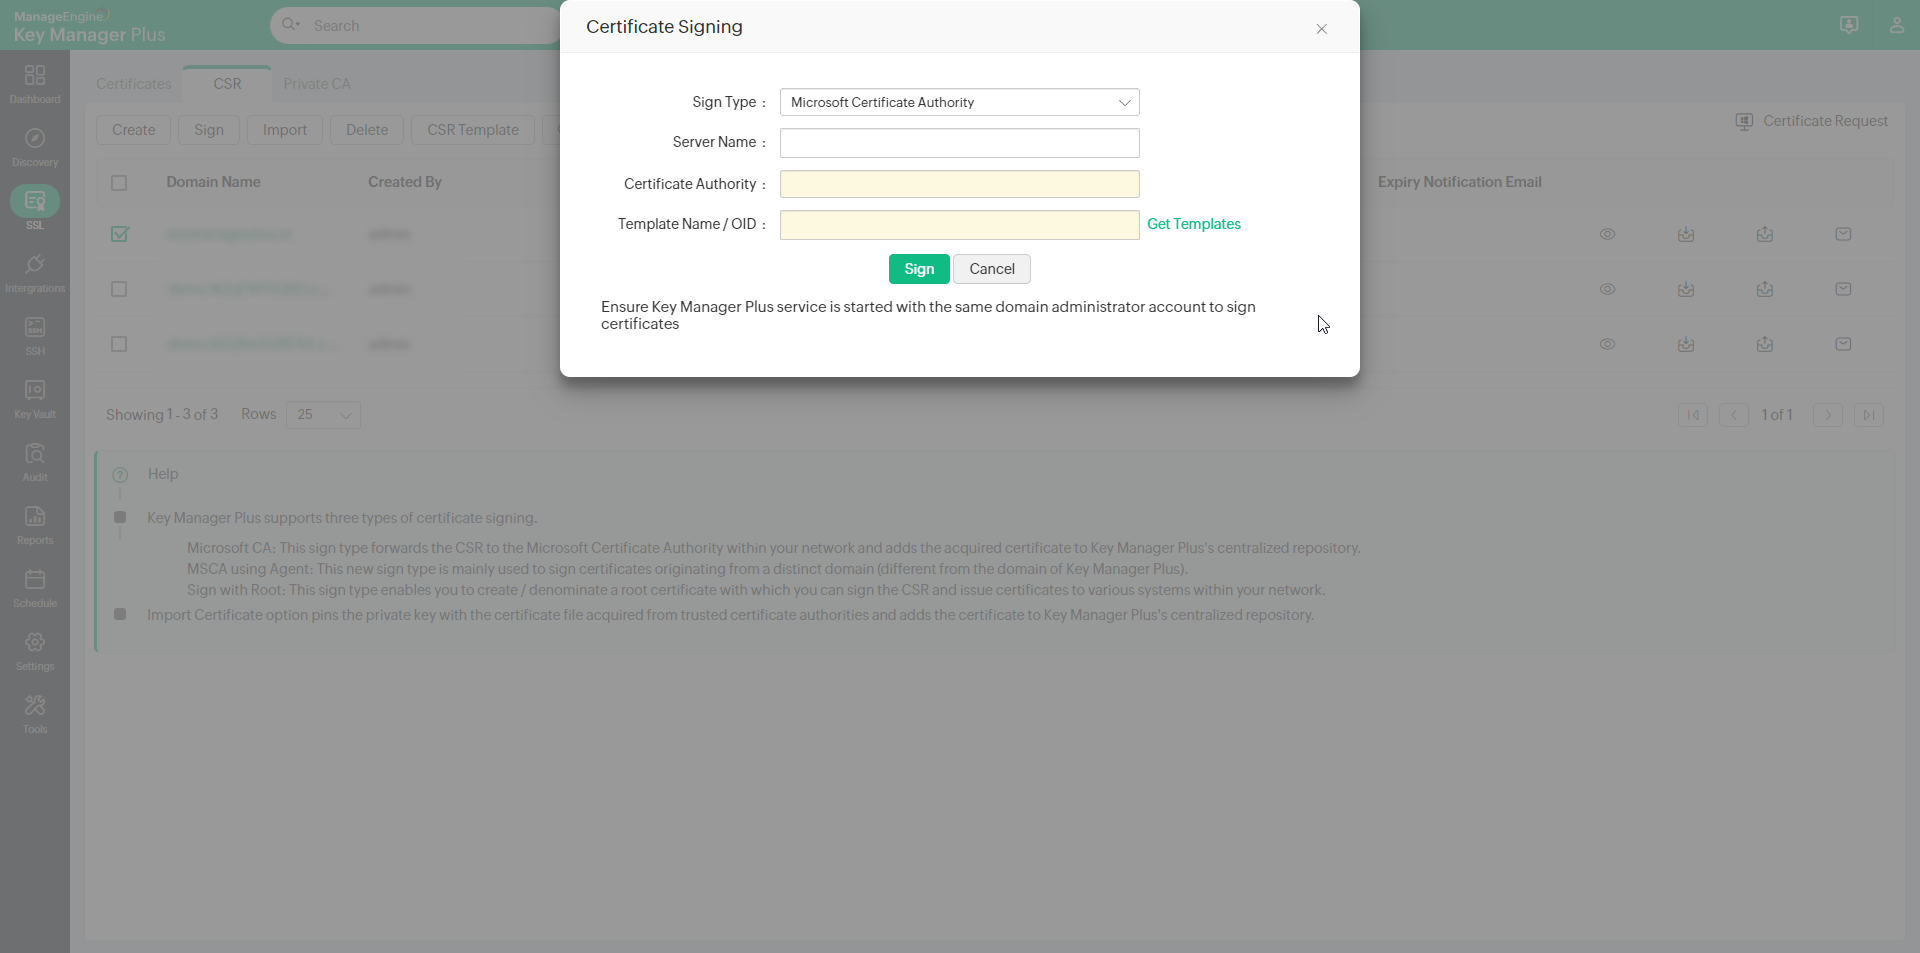
- Select the required CSR and click Sign from the top menu.
- Select the Sign Type as Microsoft Certificate Authority.
- Mention the Server Name that runs the internal CA and also the Certificate Authority name.
- Select the Certificate Template based on your requirement or select any of the pre-defined templates by clicking the Get Template link and click Sign.
Notes:
- Start Key Manager Plus using your domain administrator account to begin management of certificates from Microsoft Certificate Store and those issued by your Local CA. If you use a domain service account to run Key Manager Plus, make sure that you have configured it in your local admin group beforehand.
- During MS Certificate Store discovery, Get Stores option will list all stores available in the local host if the Server Name field is left empty.
- For MS CA auto-renewal to take effect, the certificate(s) need to be of type Microsoft CA. For manually added certificates, the certificate type needs to be changed to Microsoft CA using Edit option from More top menu.
The CSR is signed and the issued certificate can be viewed from SSL >> Certificates.
2. Microsoft CA with Agent
- Select the required CSR from the list view and click Sign from the top menu.
- In the pop-up that appears,
- Select the Sign Type as Microsoft CA with Agent.
- Select the Agent from the list available in the drop-down. You can also Manage the agent by clicking the link. To know more about managing the agent, click here.
- Enter the Server Name and the Certificate Authority.
Note:
Server Name and Certificate Authority fields are applicable for Microsoft Certificate Authority only from build 6680 onwards.
From build 6680 onwards, Key Manager Plus agent can be installed on any server, provided the server has access to connect to the Microsoft CA server. Enter the Microsoft CA server name in the Server Name field. - Specify the Certificate Template or click Get Template to get new templates.
- Mention the Agent Time out in seconds within which the agent should respond. If the agent doesn't respond within the timeout period, the operation will be audited as failed.
- Click Sign.
The CSR is signed and the issued certificate can be viewed from SSL >> Certificates.
3. Sign with Root
Key Manager Plus provides the option to sign and issue certificates to all clients in your network either from your Microsoft Certificate Authority or using a custom root CA certificate that is trusted within your environment. To Sign certificates with custom root CA follow the below steps:
- Create a custom root CA
- Sign certificates with the custom root CA
- Deploy the signed certificates to target systems
3.1 Create a Custom Root CA
To sign locally generated certificate requests with the root CA certificate, you have to initially create a custom root CA.
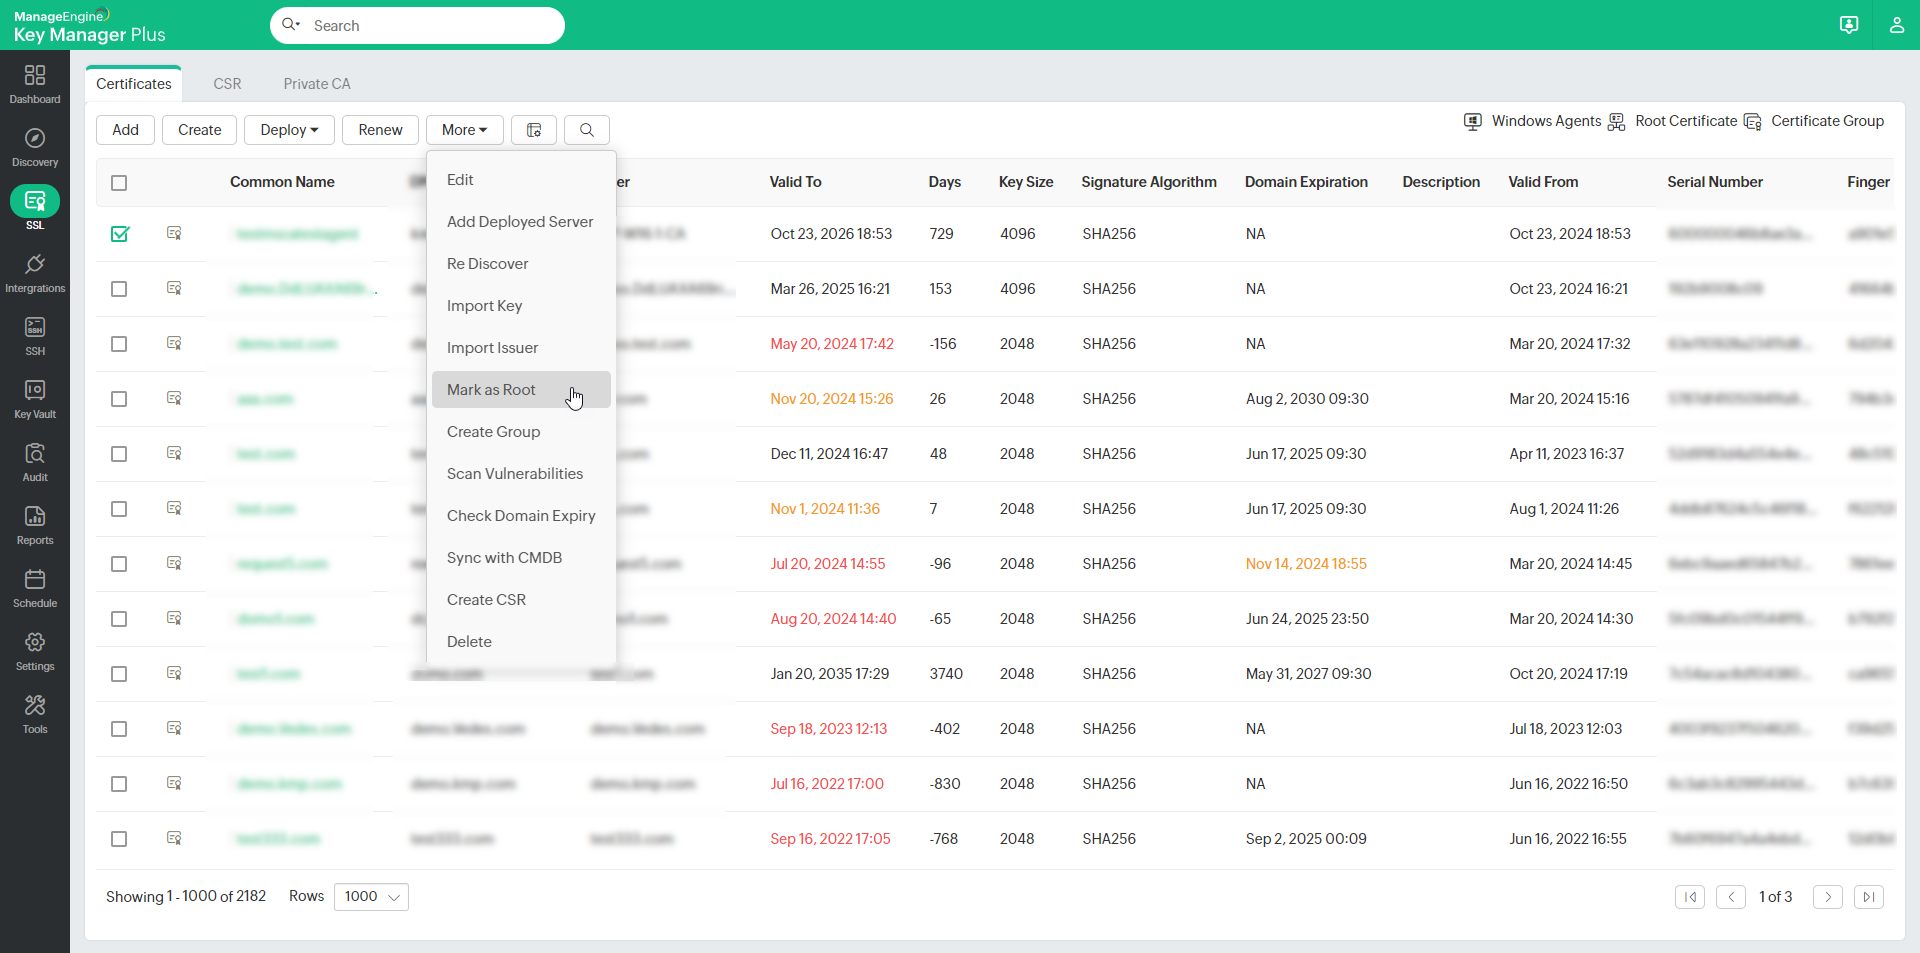
- Navigate to SSL >> Certificates tab.
- Select a certificate from the list view and click More >> Mark as Root.
The chosen certificate is successfully denominated as a root CA certificate and is listed under the Root Certificate tab. You can then use this certificate to sign locally generated certificate requests.
Note: You can also generate new root CA certificates from Key Manager Plus by enabling Generate root certificate check-box while creating a certificate from SSL >> Certificates >> Create option.
3.2 Sign Certificates with the Custom Root CA
To sign certificates with the custom root CA, generate a certificate signing request (CSR) and then sign it using the root certificate.
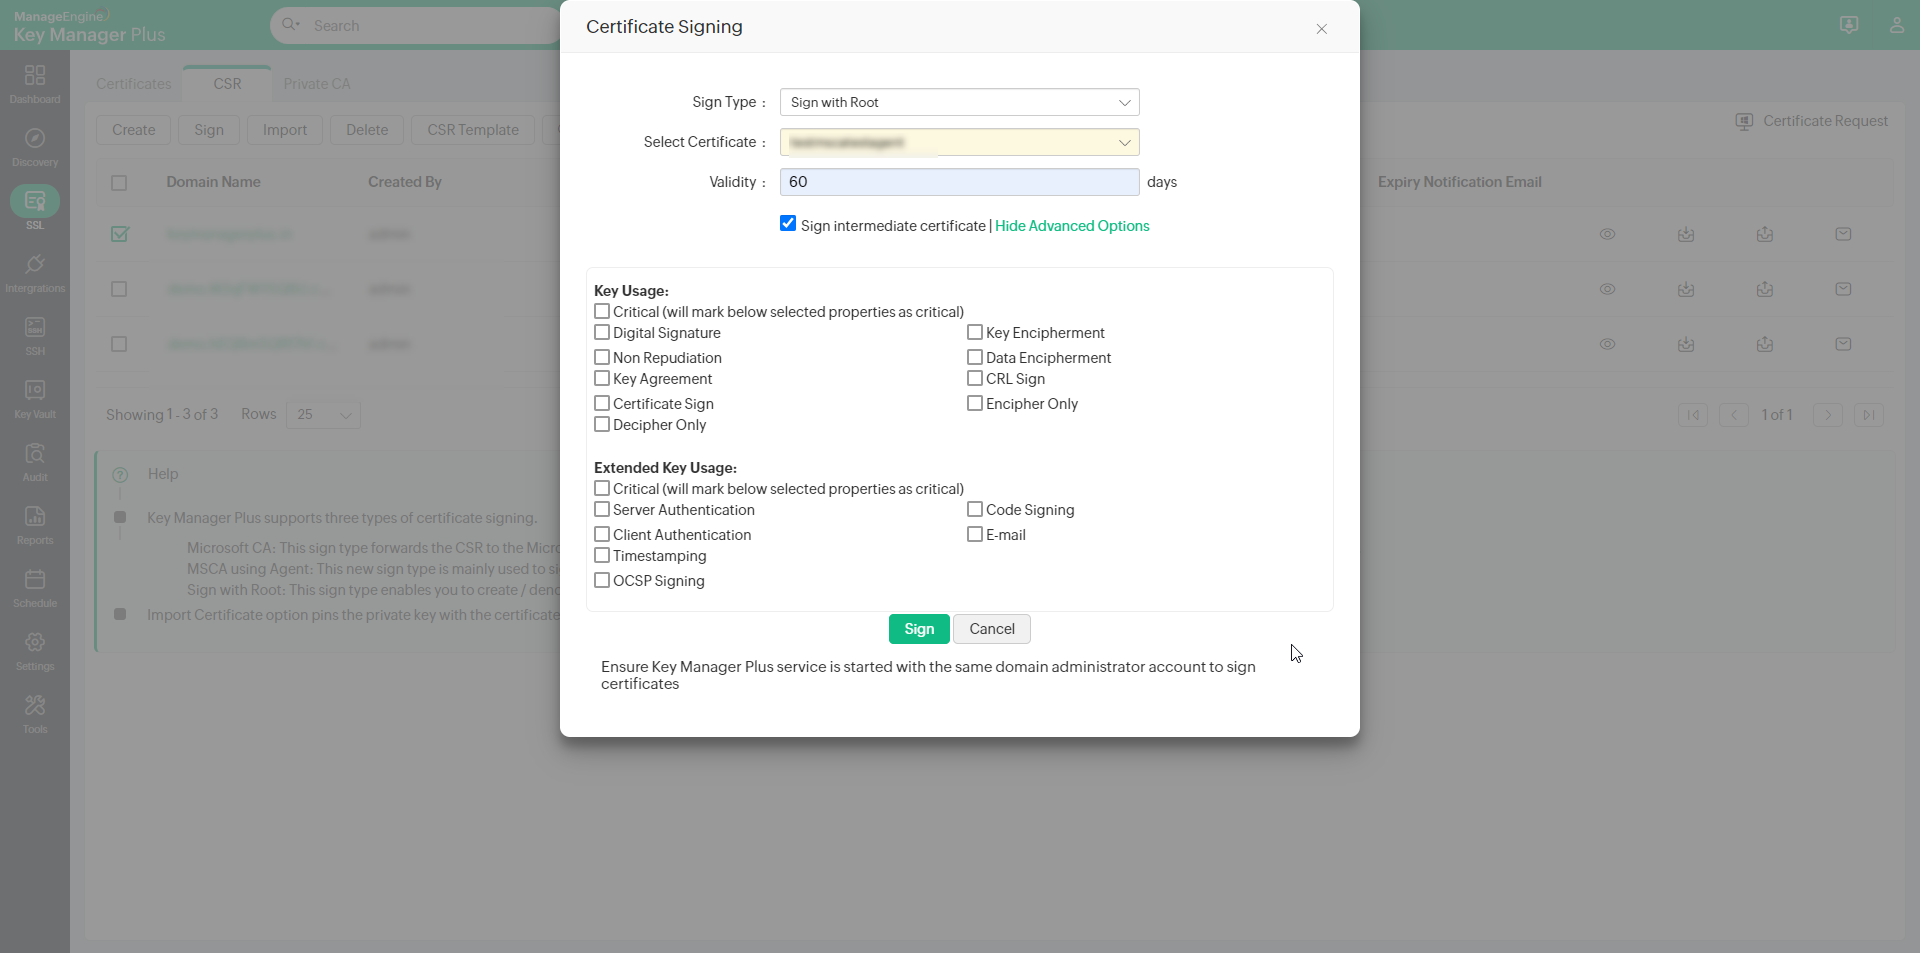
- Select the required CSR and click Sign from the top menu.
- Select the Sign Type as Sign with Root.
- Select the Root Certificate and mention the Validity in days
- Select checkbox to Sign intermediate certificate. This allows users to sign the certificate on behalf of Root CA.
- To add optional properties to the new certificate, click Advanced Options to expand the menu. Here, there are two categories of options, Key Usage and Extended Key Usage. Select the required options to set the preferred flags for the certificate to denote the purpose for which the new certificate may be used. The Key Usage options include Non Repudiation, Digital Signature, Data or Key Encipherment, Server/Client Authentication etc. You can choose the properties and mark them as critical by selecting the Critical checkbox.
- Click Sign.
The CSR is signed and the issued certificate can be viewed from SSL >> Certificates.
Also, you can use the root CA certificate to simultaneously generate and sign certificates to user groups in bulk directly from Key Manager Plus.
- Navigate to SSL and click Root Certificate on top-right corner of the window.
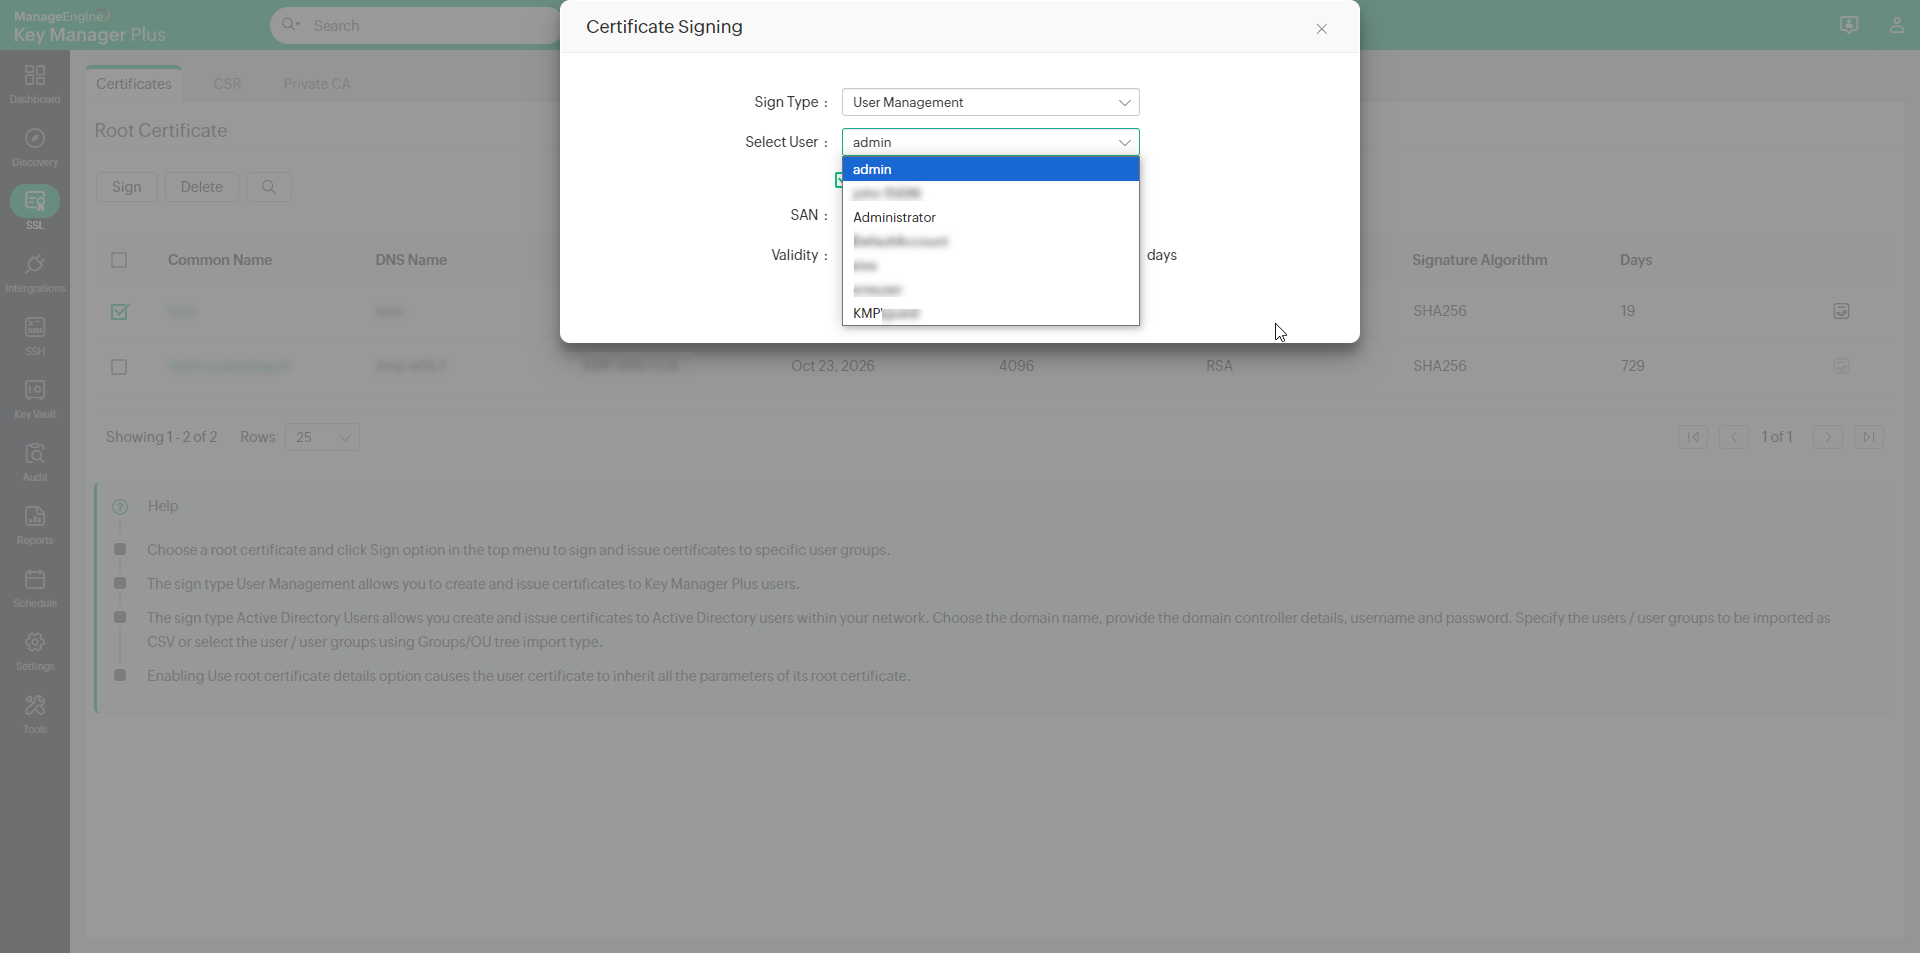
- Select the required root CA certificate and click Sign. In the pop-up that opens, choose the Sign Type, User / User Groups to which certificates have to be created and deployed, mention the SAN and Validity (in days).
- The sign type User Management allows you to generate and sign certificates for user accounts in Key Manager Plus.
- Select the User account for which you need to generate a certificate.
- By default, the user certificates inherit the same parameters as that of the root certificate. You can change it by unselecting the Use root certificate details option.
- After filling in the details, click Sign.
The certificate is signed and you can find listed in Key Manager Plus' certificate repository.
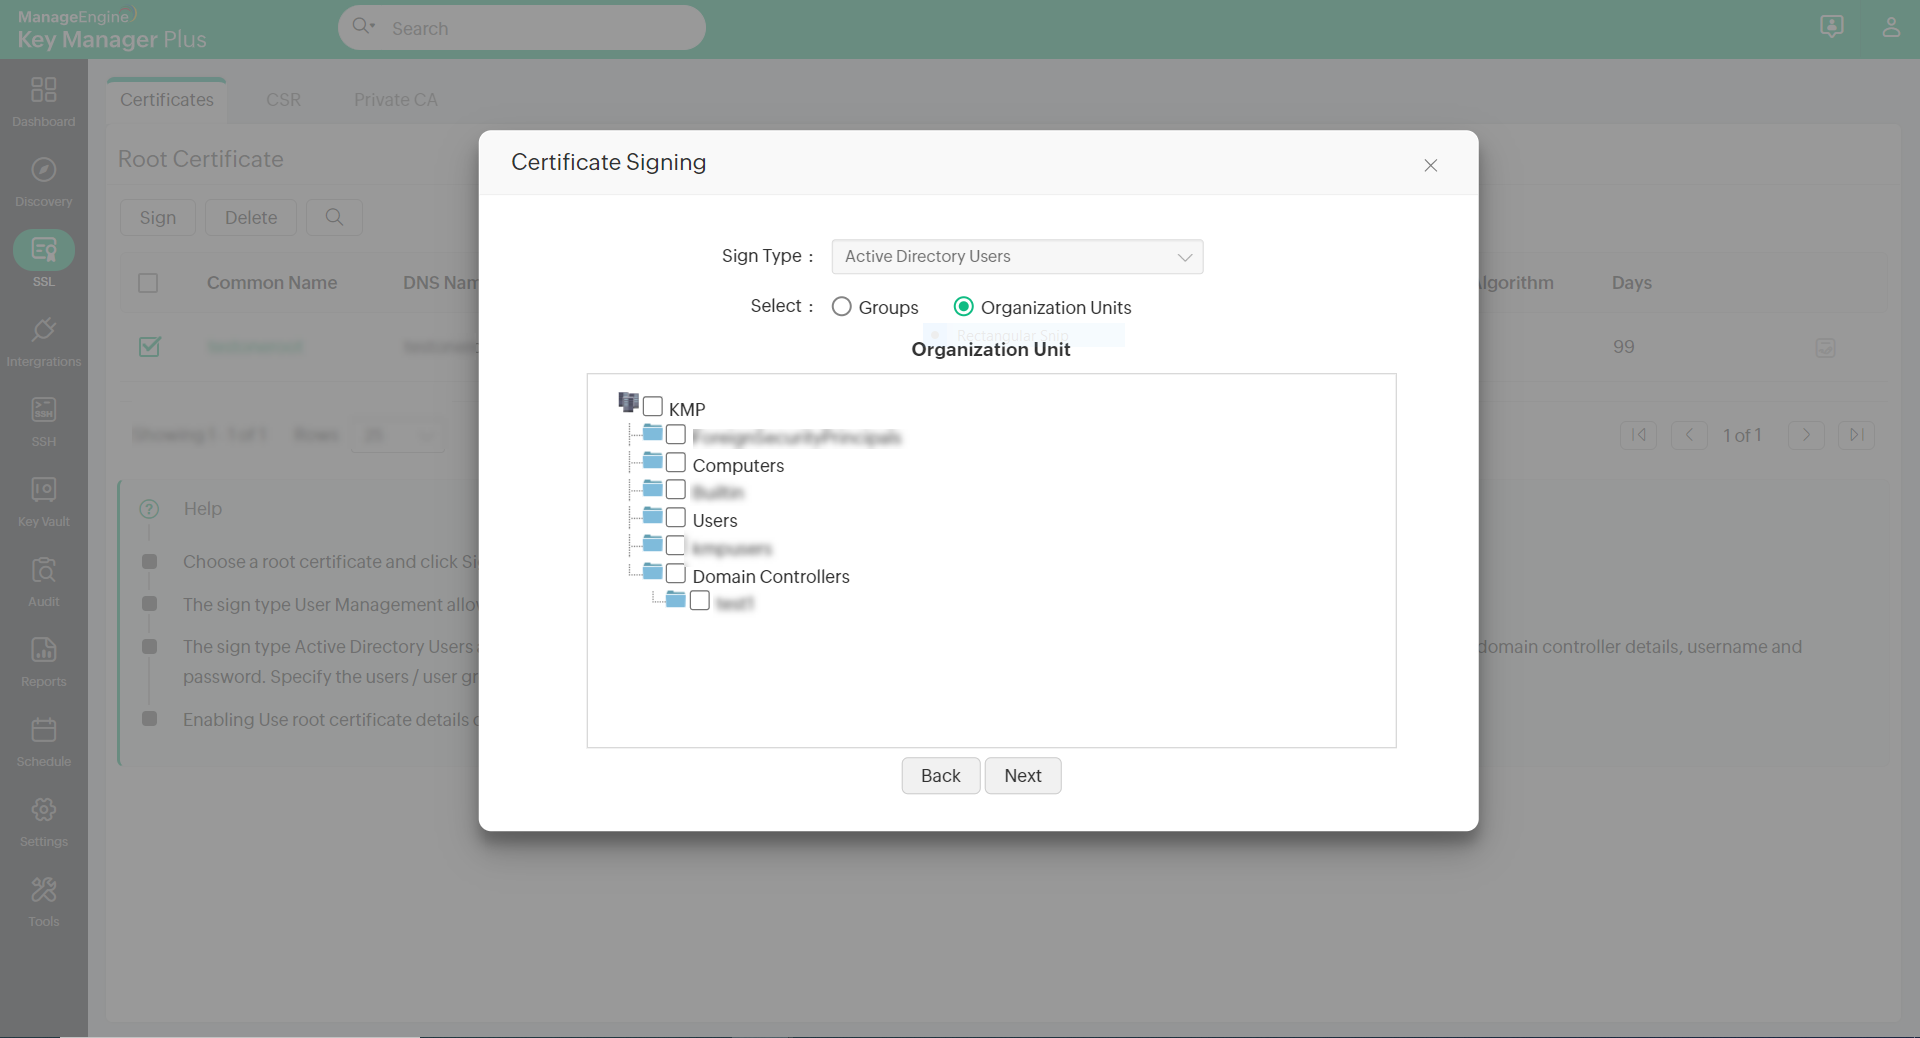
The sign type Active Directory Users allows you to generate and sign certificates to user accounts mapped to the Active Directory within your network environment.
- Select the Domain Name and provide the Primary Domain ControllerAddress, User Name, and Password.
- Choose import type Single and specify the user groups or use Groups/OU tree import type to choose the users or user groups for which certificates need to be created.
- After selecting the users, enter the certificate Validity in days. By default, the user certificates inherit the same parameters as that of the root certificate. You can change it by unselecting the Use root certificate details option.
- After filling in the details click Sign.
This will generate certificates for the selected users which will be listed in Key Manager Plus' certificate repository.
3.3 Deploy the Signed Certificate to Target Systems
After signing the certificate requests and obtaining the certificate, you have to deploy them to the necessary end-servers. Refer to this section of help for step-by-step explanation on certificate deployment.
Note: When signing certificates with custom root CA for web-applications, make sure all the browsers in your network are configured to trust the root CA certificate in order to avoid security error messages.