Creating Self-Signed Certificates in Key Manager Plus
Key Manager Plus allows administrators to create their own self-signed certificates using Java keytool. These certificates are automatically imported into the Key Manager Plus repository on successful creation.
To create a self-signed certificate using Key manager plus:
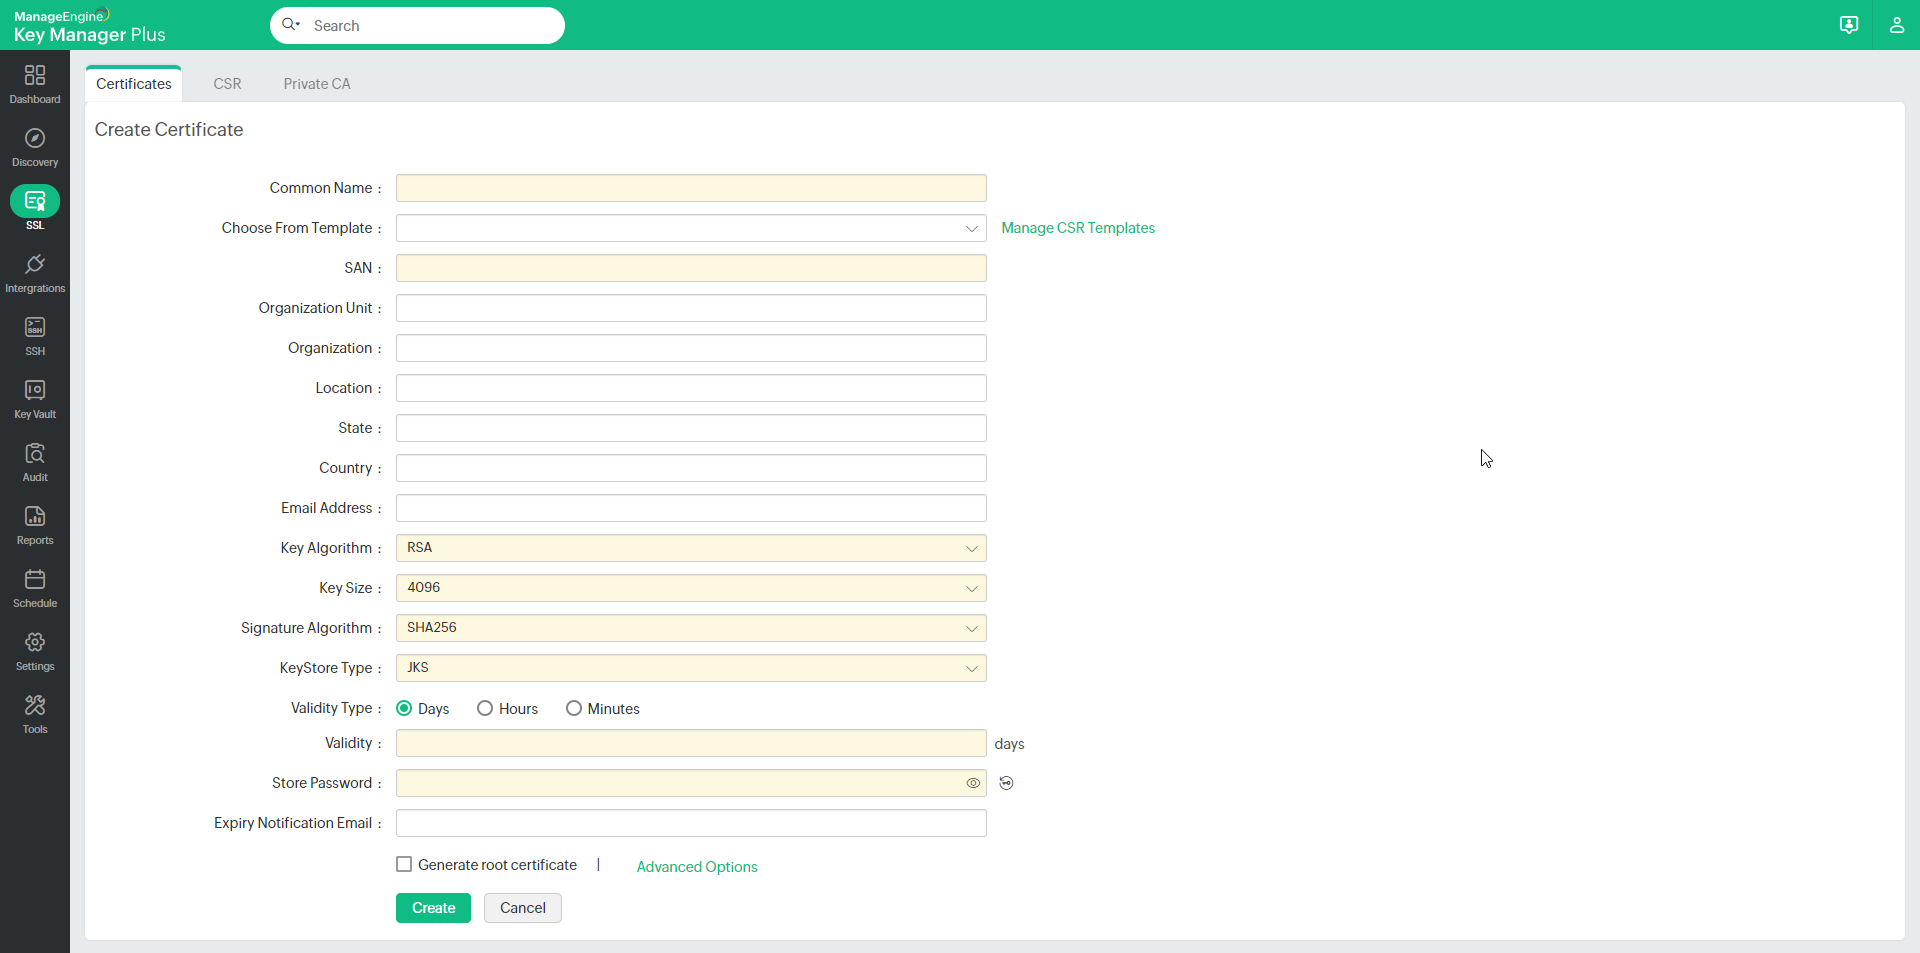
- Navigate to the SSL >> Certificate tab in the GUI.
- Click the Create button.
- Enter the details of the organization and certificate validity, and select the Key Algorithm and Key Size, Signature Algorithm, and enter a key Store Password in the create certificate tab.
- Choose the Validity Type as Days and specify the number of days for which the certificate will be valid.
- To create an ephemeral certificate with limited validity period, choose the Validity Type as Hours or Minutes and provide the validity period. The certificate will expire after the specified time (this option is applicable from build 5850 onwards).
- Mention the email address to which the
- You can denominate the certificate to be generated as a root certificate by enabling the Generate root certificate check-box.
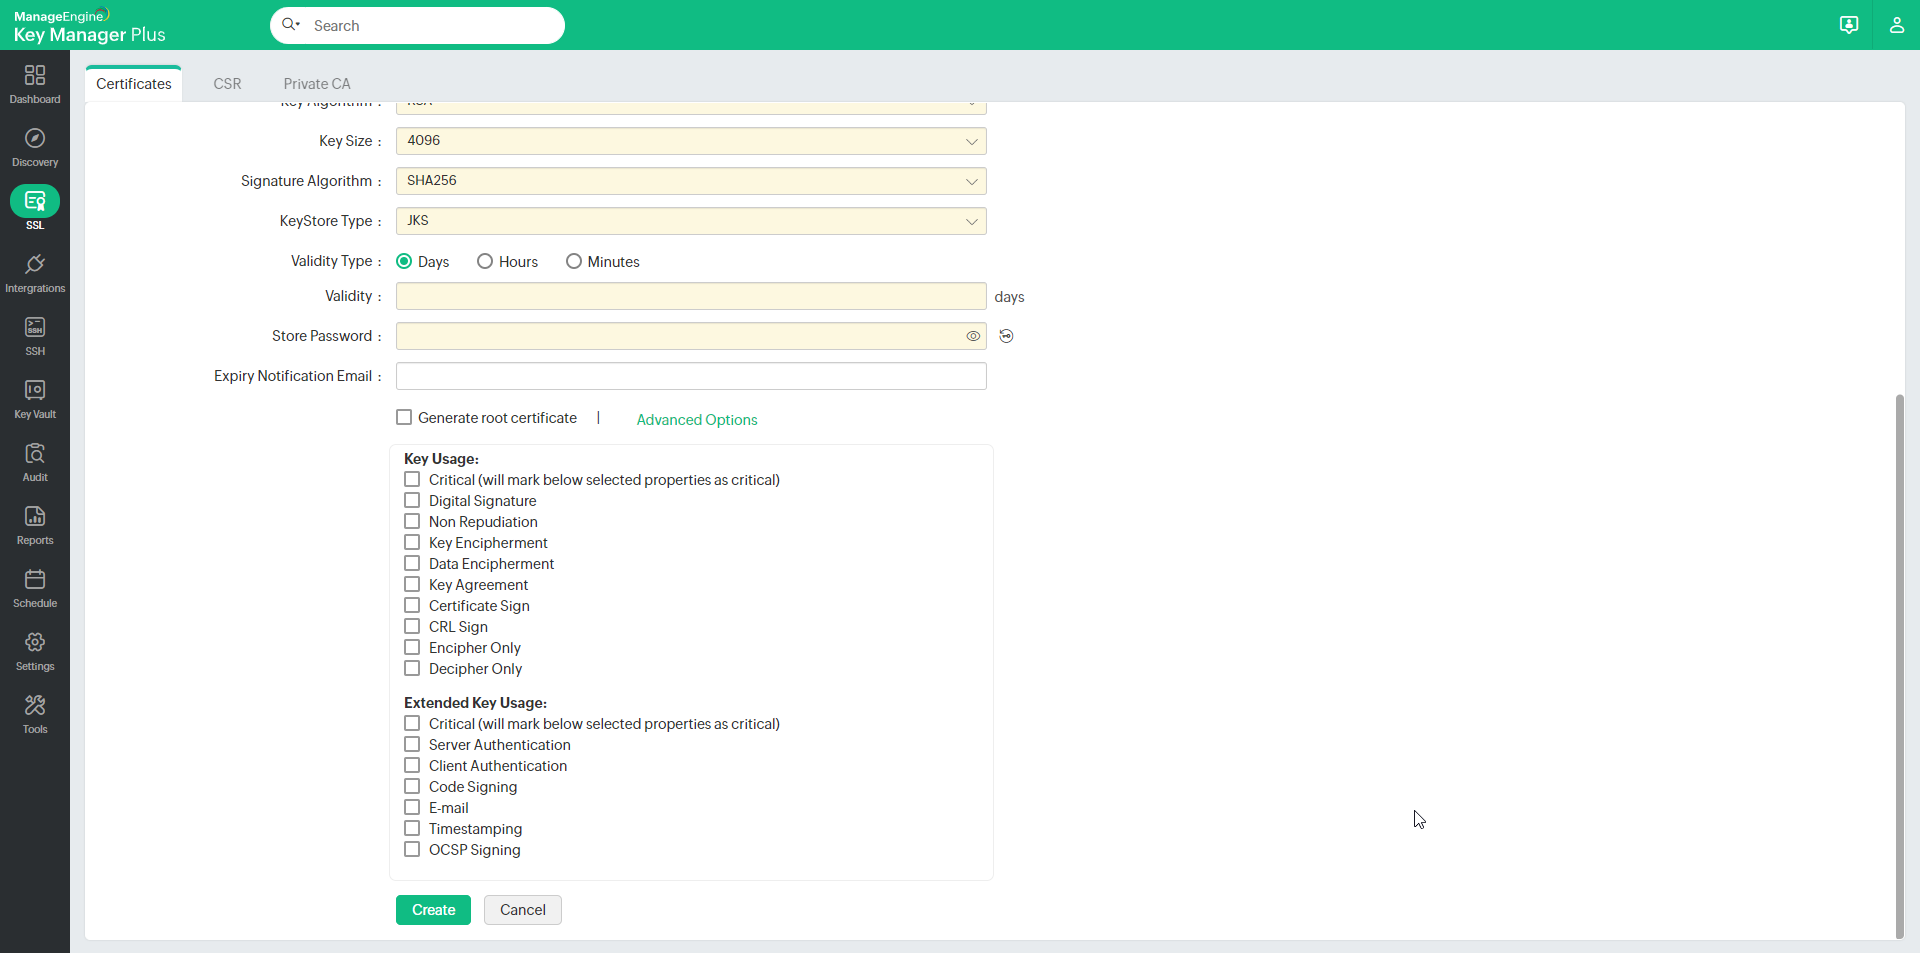
- To add optional properties to the new certificate, click Advanced Options to expand the menu. Here, there are two categories of options, Key Usage and Extended Key Usage. Select the required options to set the preferred flags for the certificate to denote the purpose for which the new certificate may be used. The Key Usage options include Non Repudiation, Digital Signature, Data or Key Encipherment, Server/Client Authentication etc. You can choose the properties and mark them as critical by selecting the Critical checkbox.
- Click the Create button. You will be redirected to the certificate window where the certificate content is displayed.
- You can copy the certificate content, or export the certificate to required email or system.
- Email — Select this check box to send the certificate file via email to the specified mail id.
- Export — Select this check box to export the file to your system.
- Both the options take effect once you click the Save button.
- Click the Save button to save the certificate in the Key Manager Plus repository, and export the certificate file, if opted in earlier step.
Notes:
- From Key Manager Plus build 5920 onwards, users can include a wildcard domain in the SAN field, in addition to having it in the Common Name field, when creating a self-signed certificate. Wildcard certificates allow securing an unlimited number of subdomains under a registered base domain. For example, for the base domain zoho.com, a wildcard certificate *.zoho.com can secure any subdomain such as mail.zoho.com, accounts.zoho.com, or support.zoho.com, where the asterisk (*) represents any valid subdomain.
- From build 7070 onwards, users can specify multiple DNS names in the SAN field in a comma-separated format when creating certificates.


Top