How to attain Okta Device Attestation for macOS devices?
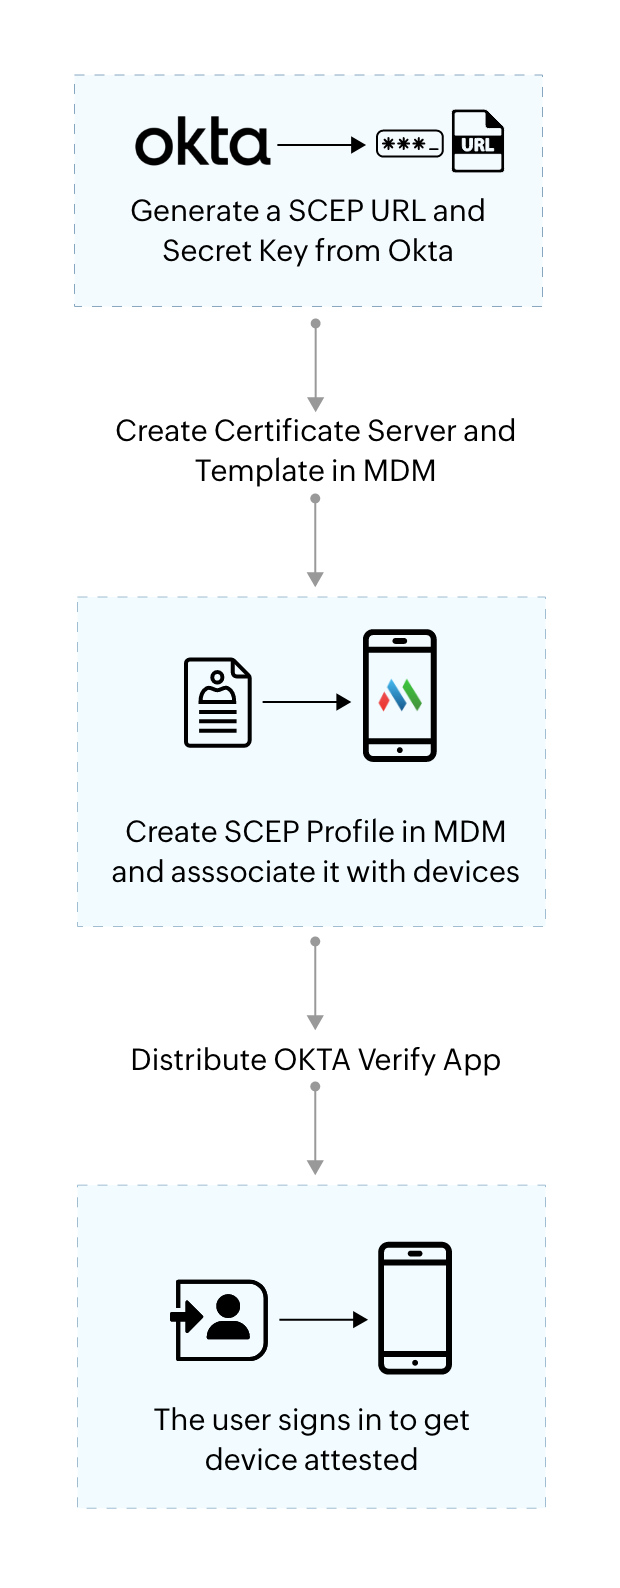
Managed devices should be attested by Okta for provisioning SSO extension with Okta and Okta Device Trust. In the case of macOS) devices ,attestation is achieved by Mobile Device Manager Plus by distributing management attestation certificates to the device through SCEP .
Overview
In order to obtain device attestation for macOS devices, management attestation certificates are deployed to the device. First an SCEP URL and Secret key must be generated in Okta by the administrator or technician,which will then be used to create a Certificate Server and Template in the MDM console. The next step is to generate and associate an SCEP profile to the device using the Certificate Template. After that, in order to get the device attested, the Okta Verify app has to be distributed to the devices and the user should setup their account and login once with their organization credentials.
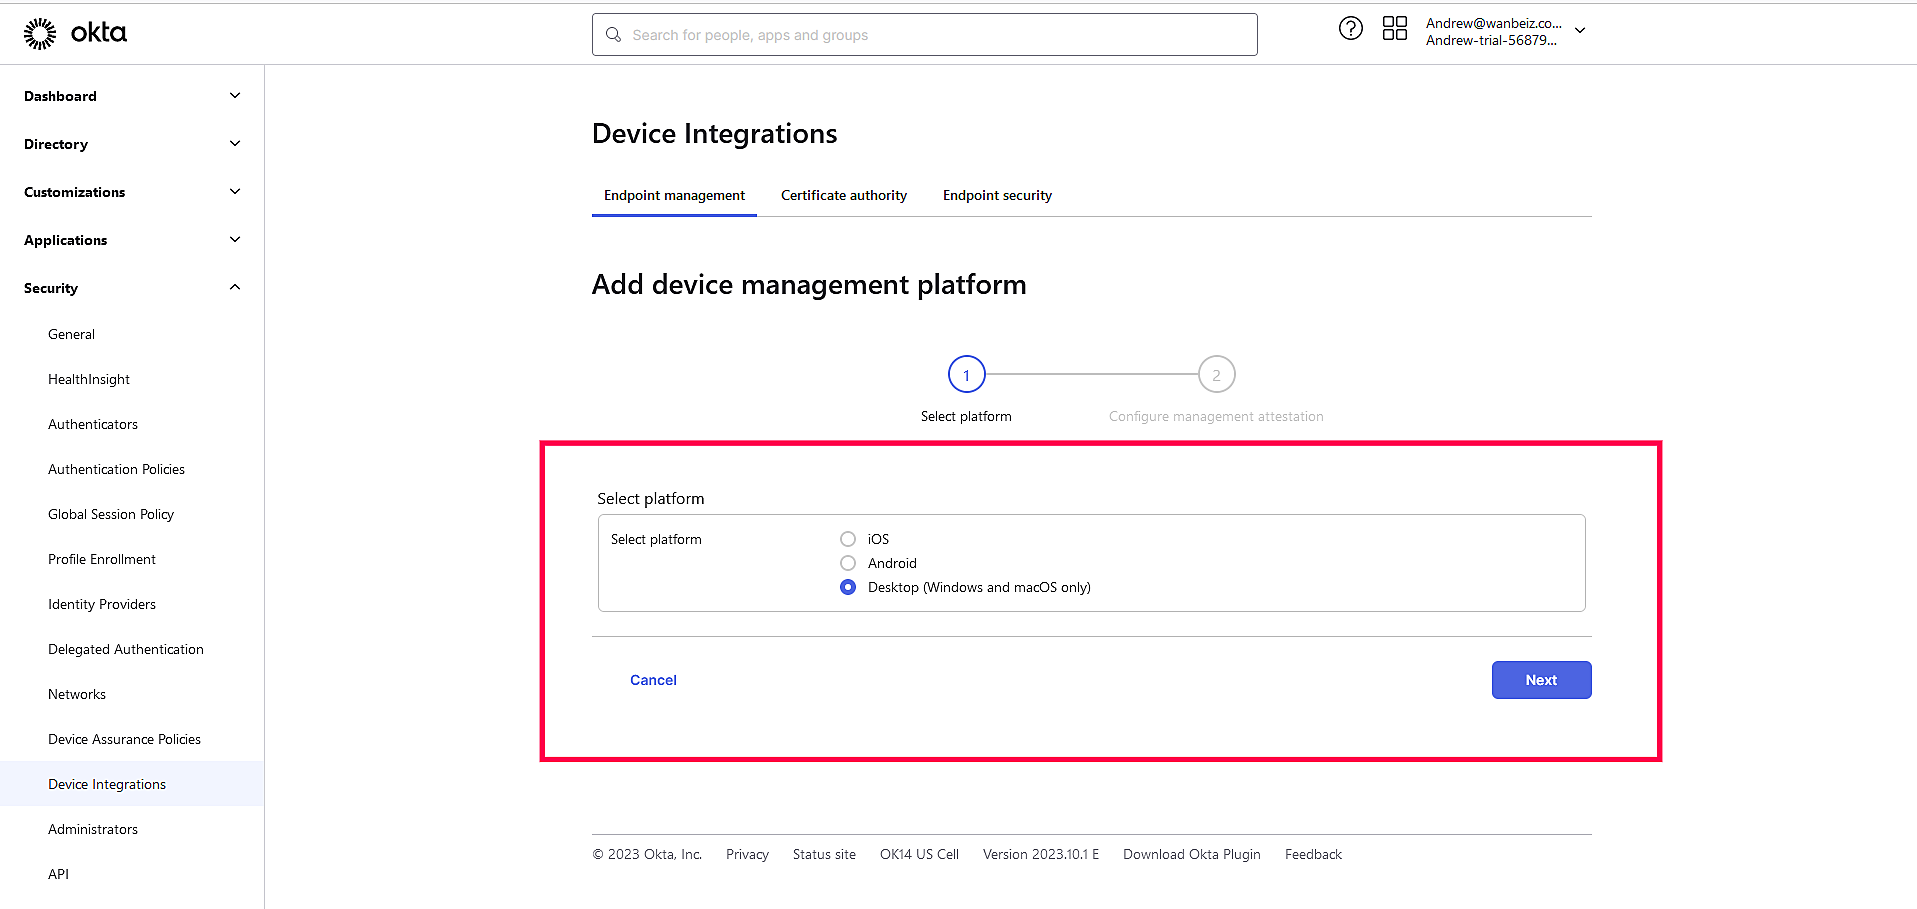
- Sign in to the Okta portal and go to Security > Device Integrations. Then Select platform as Desktop, and click Next.
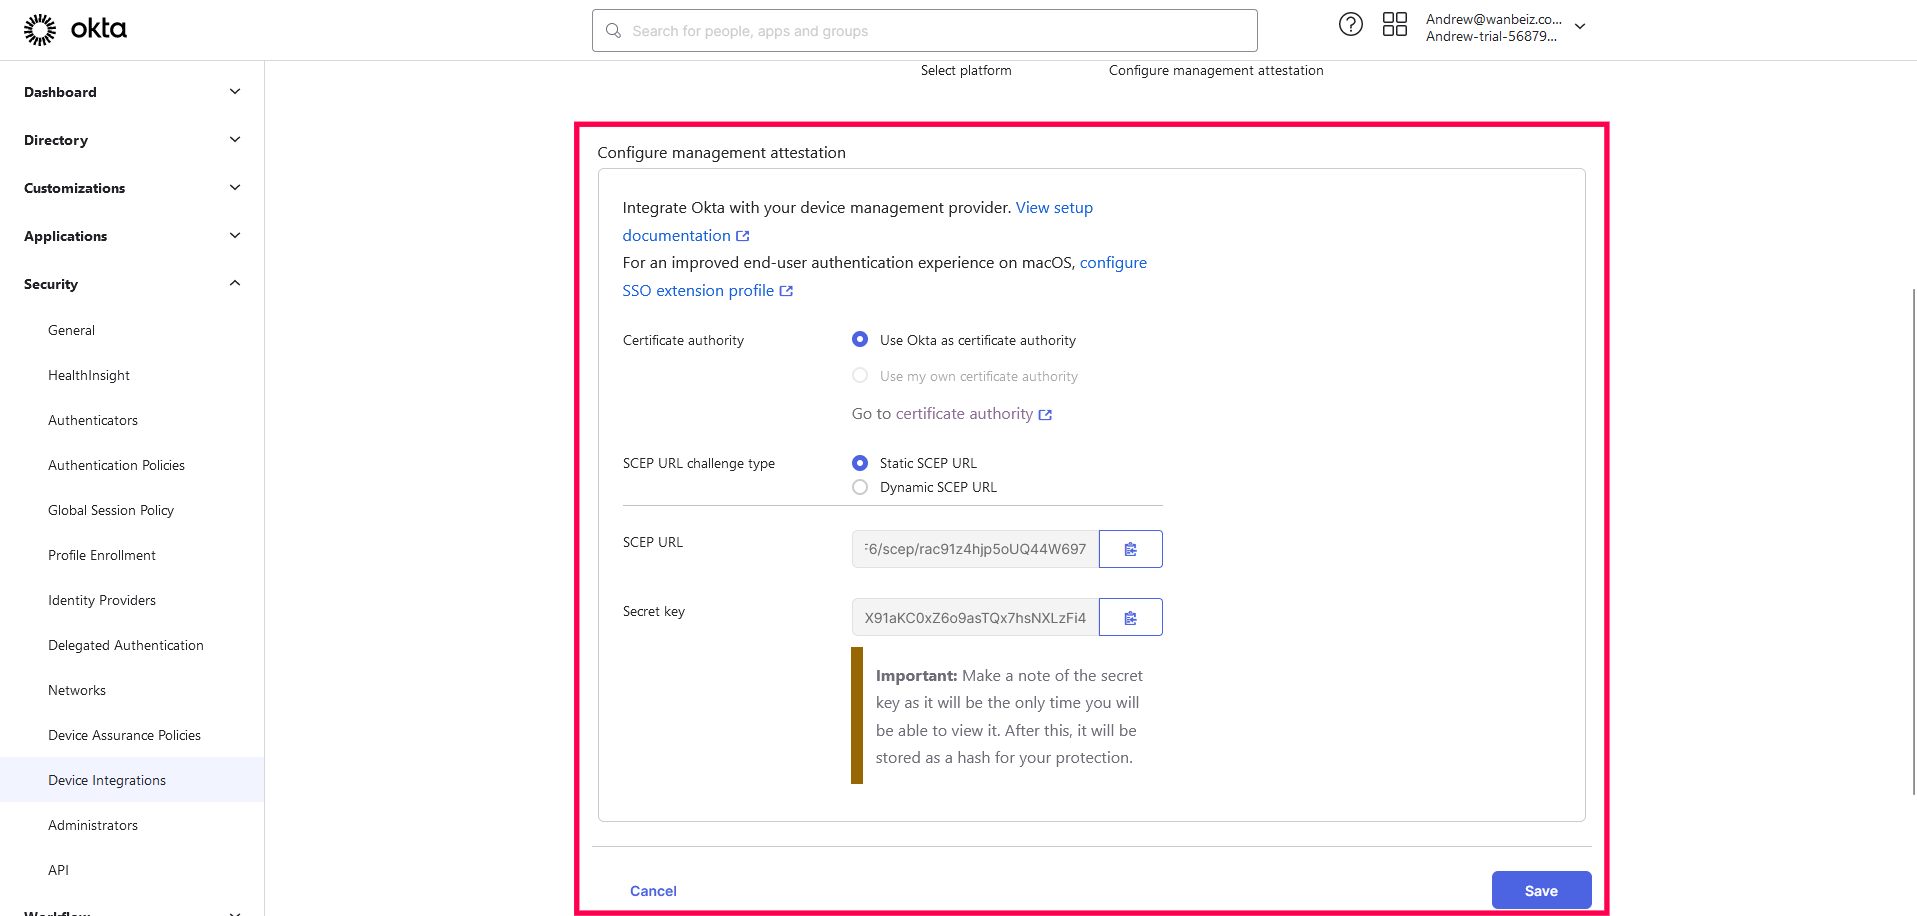
- Select SCEP URL challenge type as Static SCEP, and click Generate.Then copy the SCEP URL and Secret Key onto your clipboard, and then click Save.
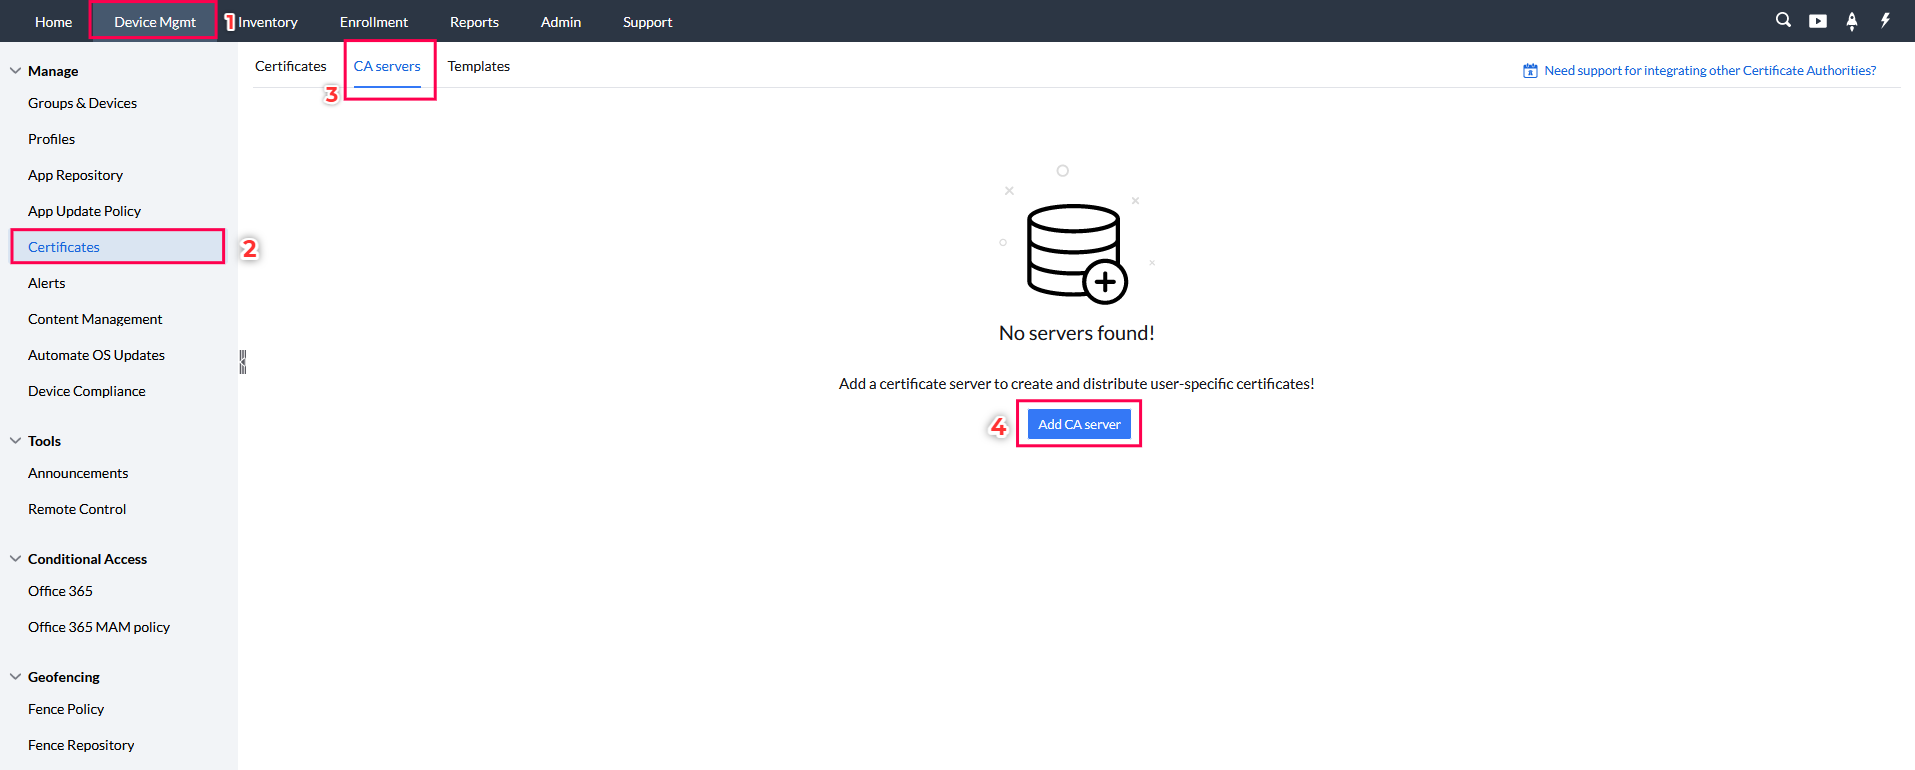
- On the MDM console, go to Device Management > Certificates > CA Server, and click on Add CA Server.
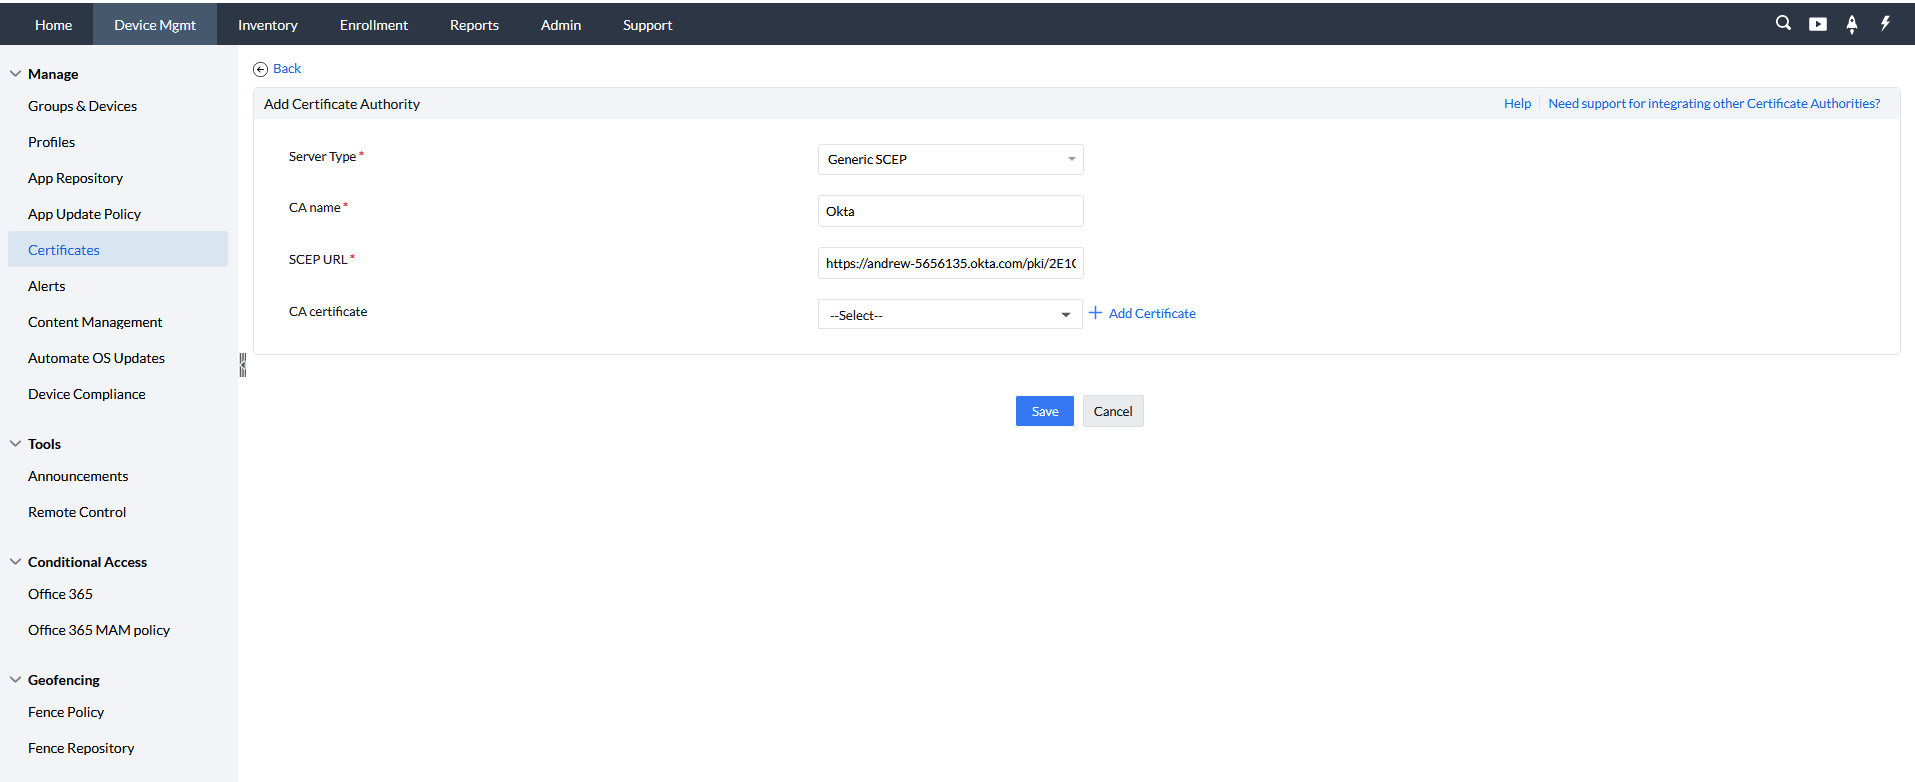
- Keep the server type as Generic SCEP, and provide a name for the Certificate Authority.
- Then paste the SCEP URL copied from the Okta in the SCEP URL, click save save to proceed.
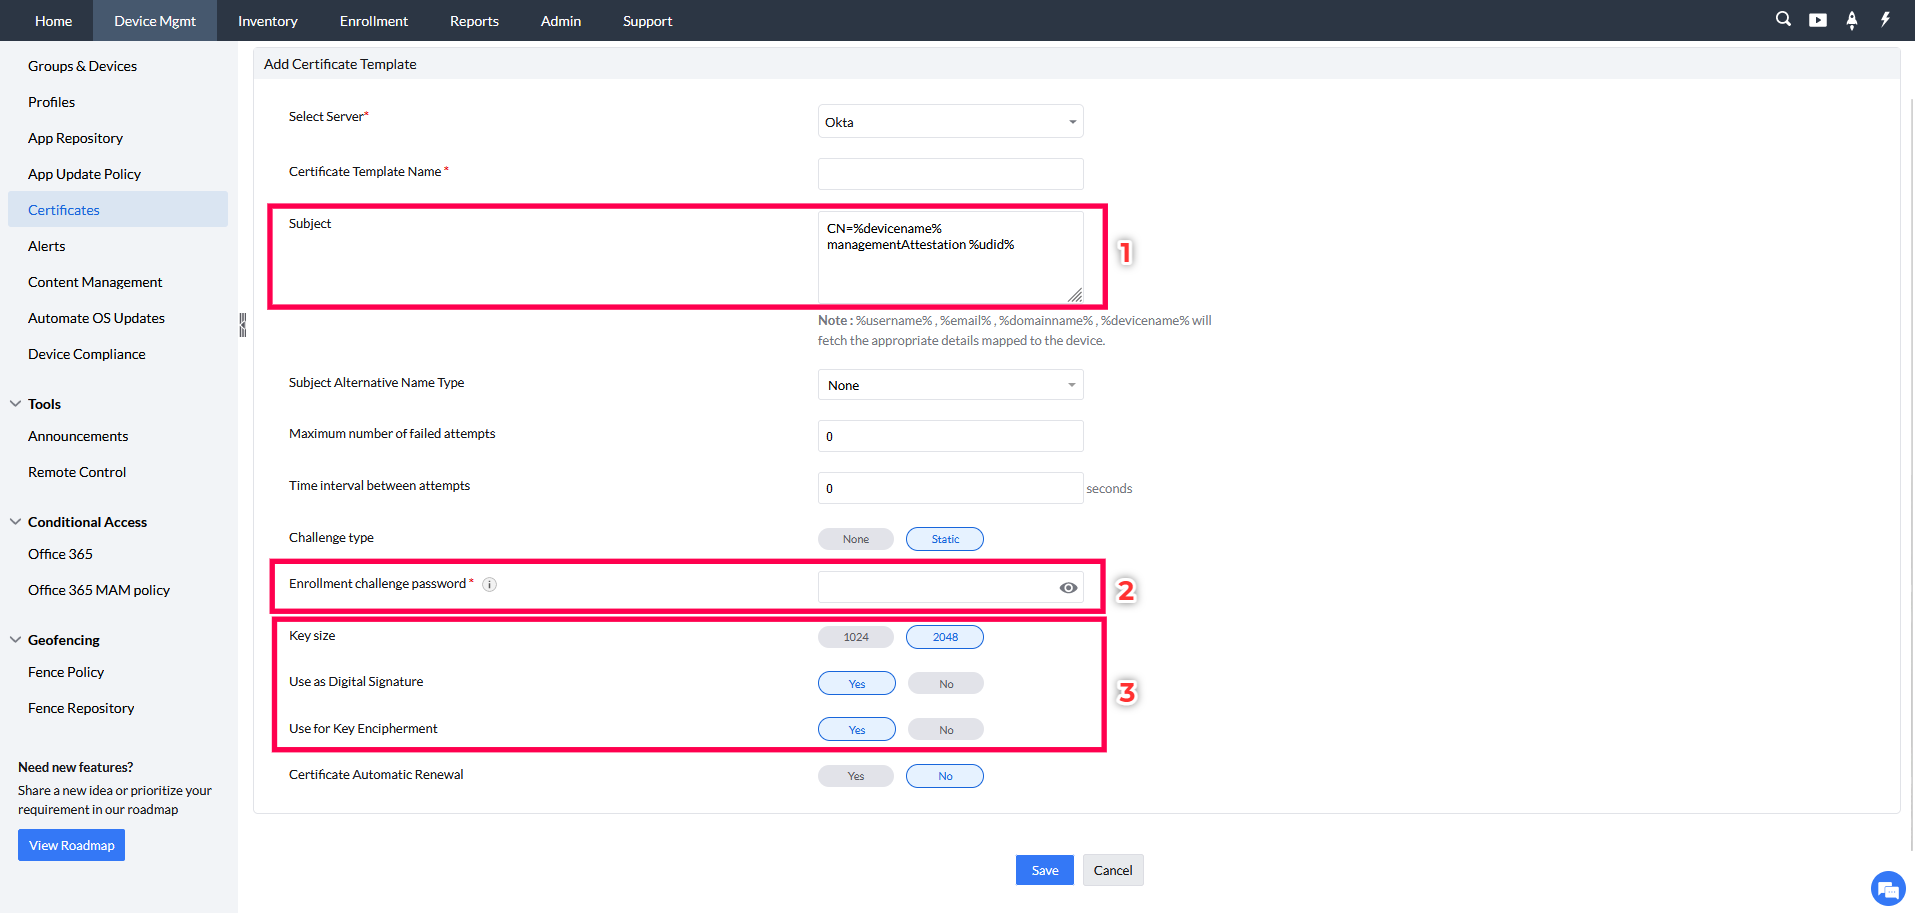
- Here also provide a name for the SCEP Template, and under Subject, paste CN=%devicename% managementAttestation %udid%
- Set the Challenge type as Static and for the Enrollment challenge password paste the secret key copied from Okta
- TFhen set the Key Size as 2048 and choose YES for the options Use as Digital Signature and Use For Key Encipherment. Finally click Save to create the CA Server.
- Go to Device Mgmt > Profile and click on Create Profile and choose macOS.
- Next provide a suitable name for the profile, and click Continue.
- Choose the SCEP template.
- Choose to Allow "Private Key Export from Keychain" and "Third Party Apps accessing the Private Key" keys according to your needs.
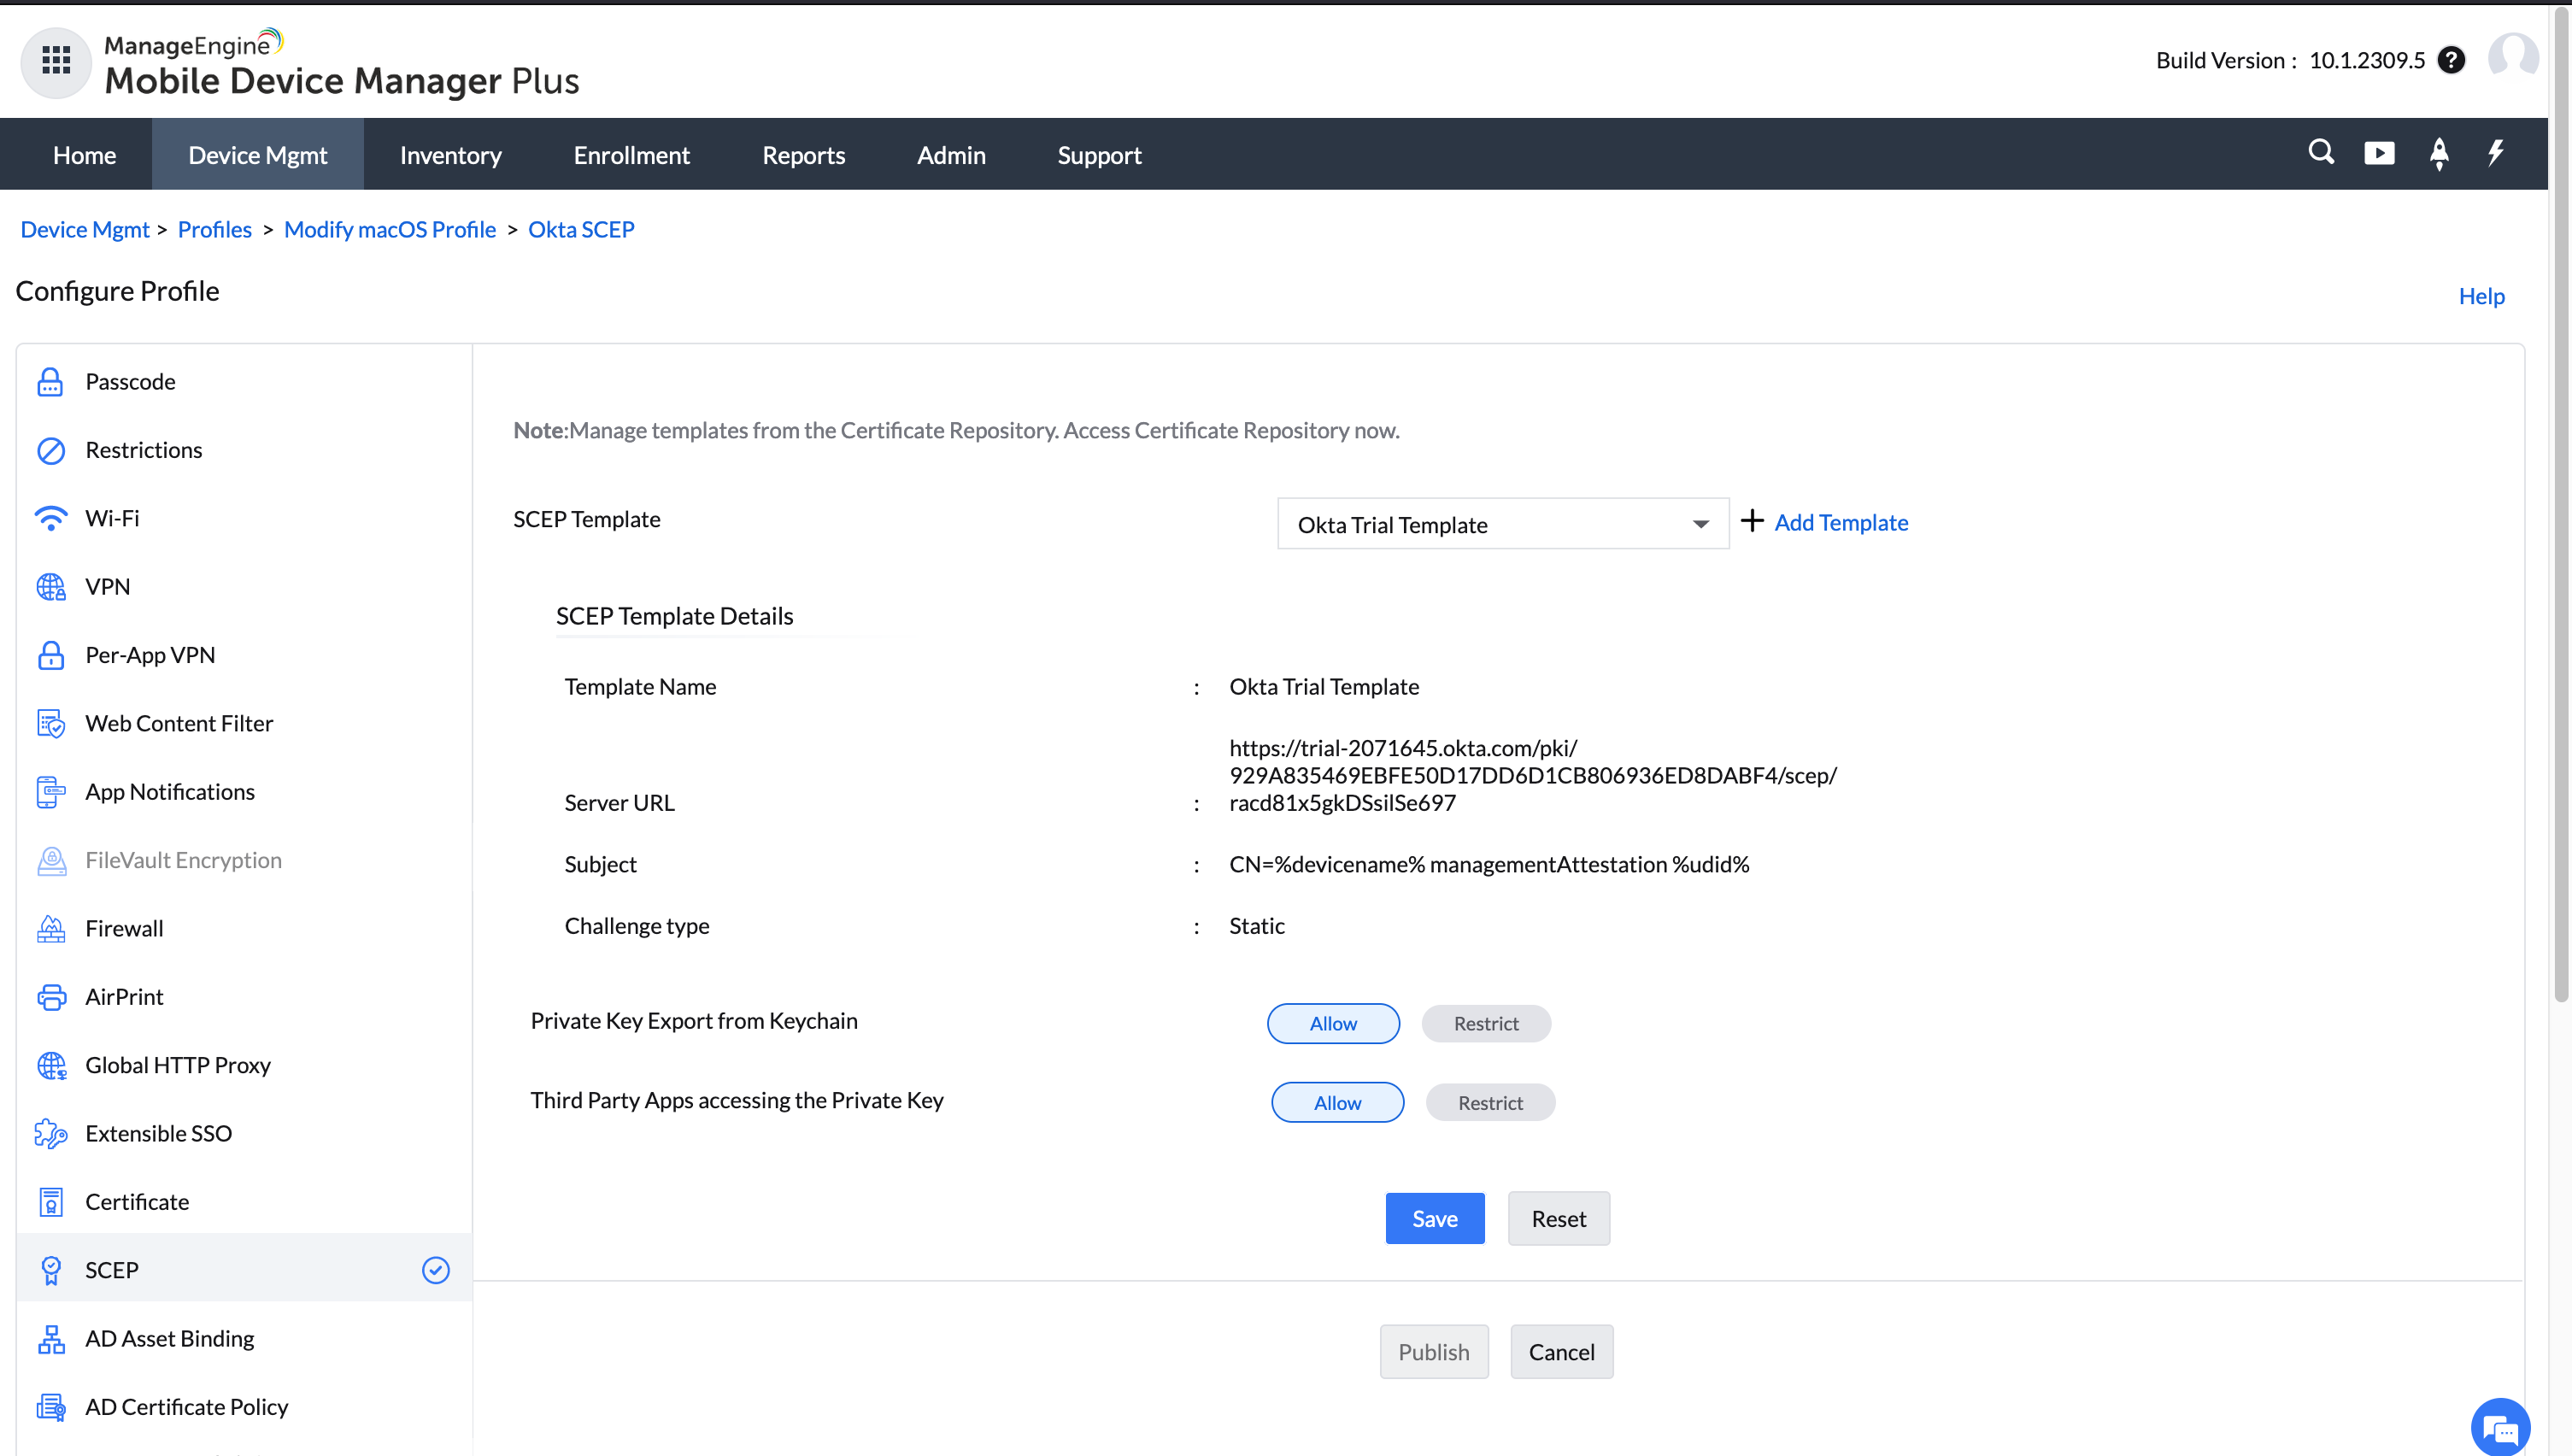
- Click Save and then Publish.
- Go to Groups & Devices under Device Mgmt in the MDM console and select the respective Group(s) or devices you want to associate the SCEP profile.
- Click on Actions > Associate Profile. Select the SCEP profile and click Associate.
Step 1: Generate an SCEP URL and Secret key
First, you have to generate an SCEP URL and Secret key in the Okta by following the steps provided below :
Step 2: Create a Certificate Server and Template in MDM
After generating an SCEP URL and Secret key in Okta, a Certificate Server and Template should be created in the MDM console .For this follow the steps provided below :
Step 3: Create an SCEP Profile in the MDM console
Next we need to create an SCEP profile to distribute to your managed devices. For that:
Step 4:Associate the SCEP Profile to the Devices
Now the SCEP profile should be associated with the devices by following the steps specified below :

Step 5:Distribute Okta Verify App to the Devices
Once the SCEP profile has been associated to the devices, the Okta Verify app should be distributed to the devices.
For macOS, the app can be added using ABM Server tokens or using the Apple Playstore in the MDM App repository.
Finally for the device(s) to attain the attested status, the user should setup Okta Verify with their user credentials and login into any org allotted apps at least once.