Windows 11 24H2 Feature Pack Deployment
This page explains how to download the Windows 11 24H2 dependency ISO file, upload it to the patch store, and deploy the October 2024 feature update using Patch Manager Plus or Patch Manager Plus — covering all edition and upgrade-path combinations for both Windows 10 and Windows 11 source systems.
Video Guide
Watch the video below to learn how to upgrade from Windows 10 to Windows 11 using Patch Manager Plus.
Overview
Released in October 2024, the Windows 11 24H2 update introduces new features and enhancements to Windows 11. For a full list of what's new, refer to the official Microsoft Windows 11 release information page. To install the Windows 11 24H2 feature update, the device must be running Windows 10 version 2004 or a later version. For a complete list of system requirements, refer to the Windows 11 specifications page.
Prerequisites
Complete the following checks before beginning the deployment.
- Run the Compatibility Check to confirm all target systems meet the minimum requirements that affect upgradeability.
- Enable the Feature Pack option in Patch Database Settings:
- In Patch Manager Plus: navigate to Patch Mgmt → Settings → Patch Database Settings, click the Windows tab, and enable the Feature Pack option.
- In Patch Manager Plus: navigate to Admin → Settings → Patch Database Settings, click the Windows tab, and enable the Feature Pack option.
- Confirm that feature pack updates have not been declined under Decline Patches.
Patch IDs by Edition and Upgrade Path
Use the correct main patch ID and dependency patch ID based on the source OS version and the target edition. The dependency ISO must be uploaded manually before the main patch can be deployed.
Also, the deployment of Windows 11 24H2 feature pack is supported only in Patch Manager Plus build versions 10.0.147 and above. The SSP (Self-Service Portal) method is not applicable for performing feature pack upgrade from Windows 10 to Windows 11 via Patch Management.
Upload the ISO File
The dependency ISO file must be uploaded to the patch store before the main feature pack patch can be deployed. The steps below apply to all edition and upgrade-path combinations.
- Dependency patches will not appear in the Uploaded Patches view by default.
- The system will automatically handle ISO download and deployment during the Feature Pack deployment process.
- If the ISO download fails, the corresponding dependency patch will appear in the Uploaded Patches view, allowing manual intervention.
- If a previously uploaded ISO is available, deployment will continue using the manually uploaded file.
- If patches were previously uploaded and later deleted, the dependency patch will not appear in the Uploaded Patches view but will be automatically re-downloaded during the next deployment attempt.
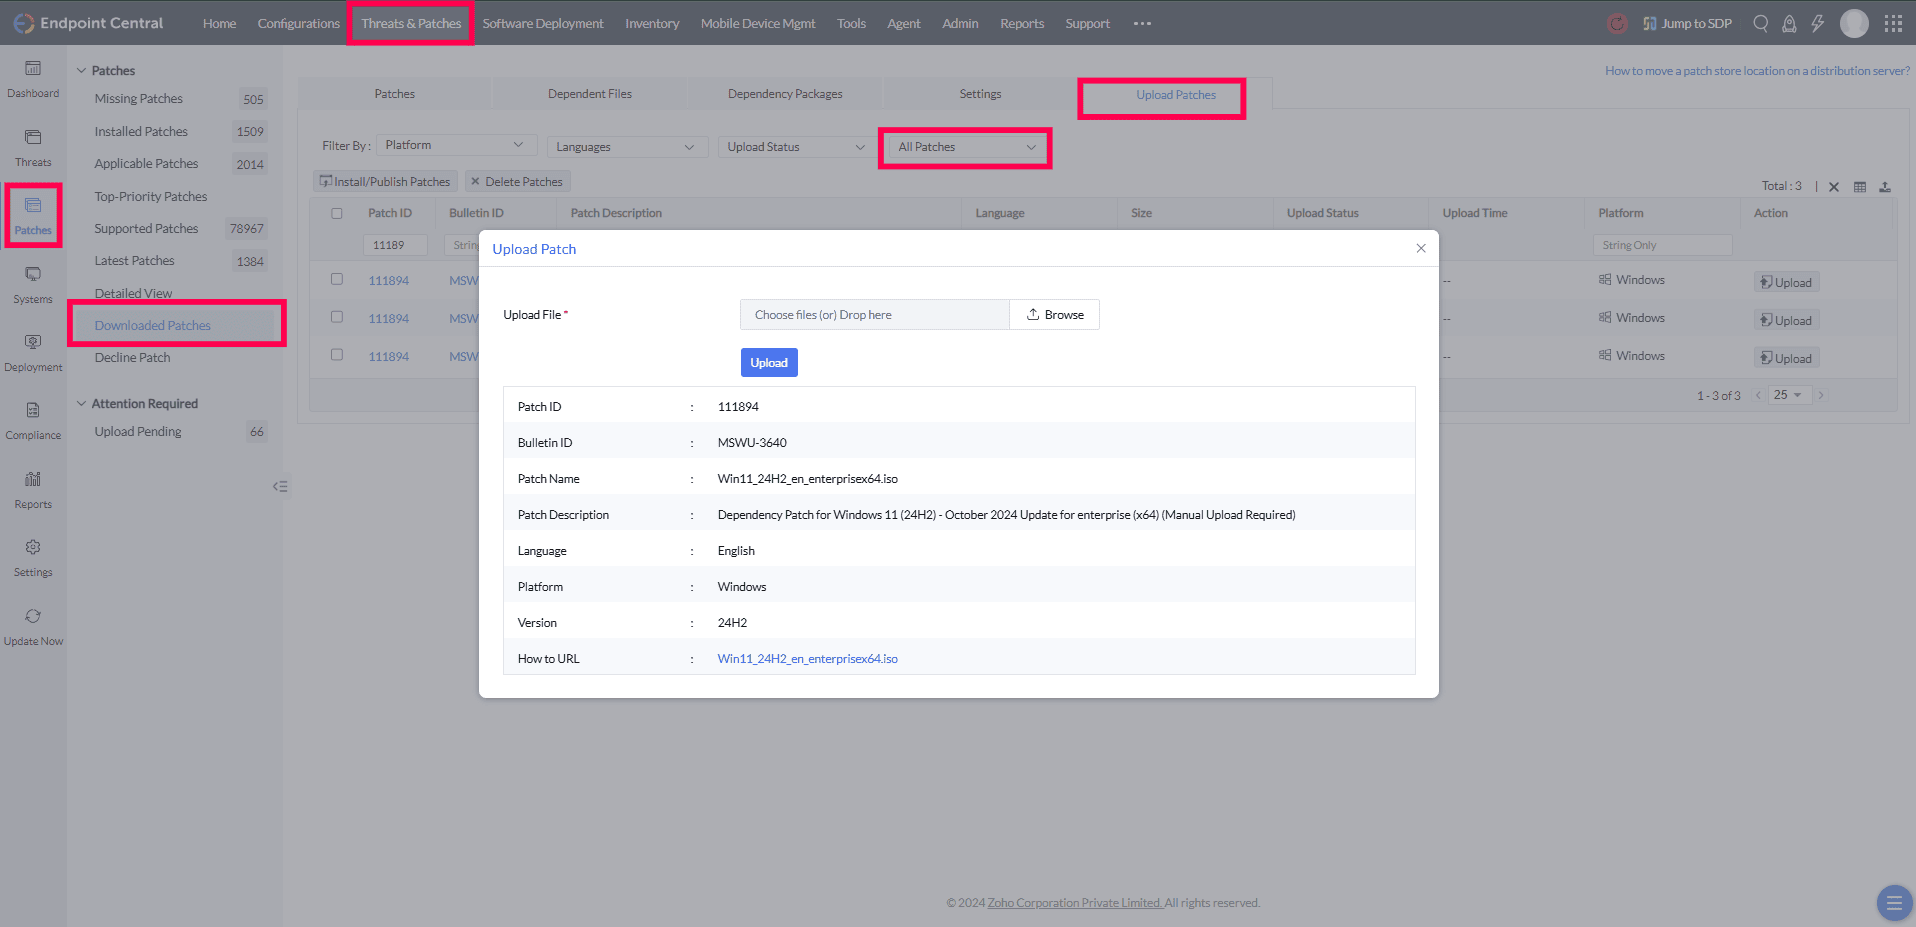
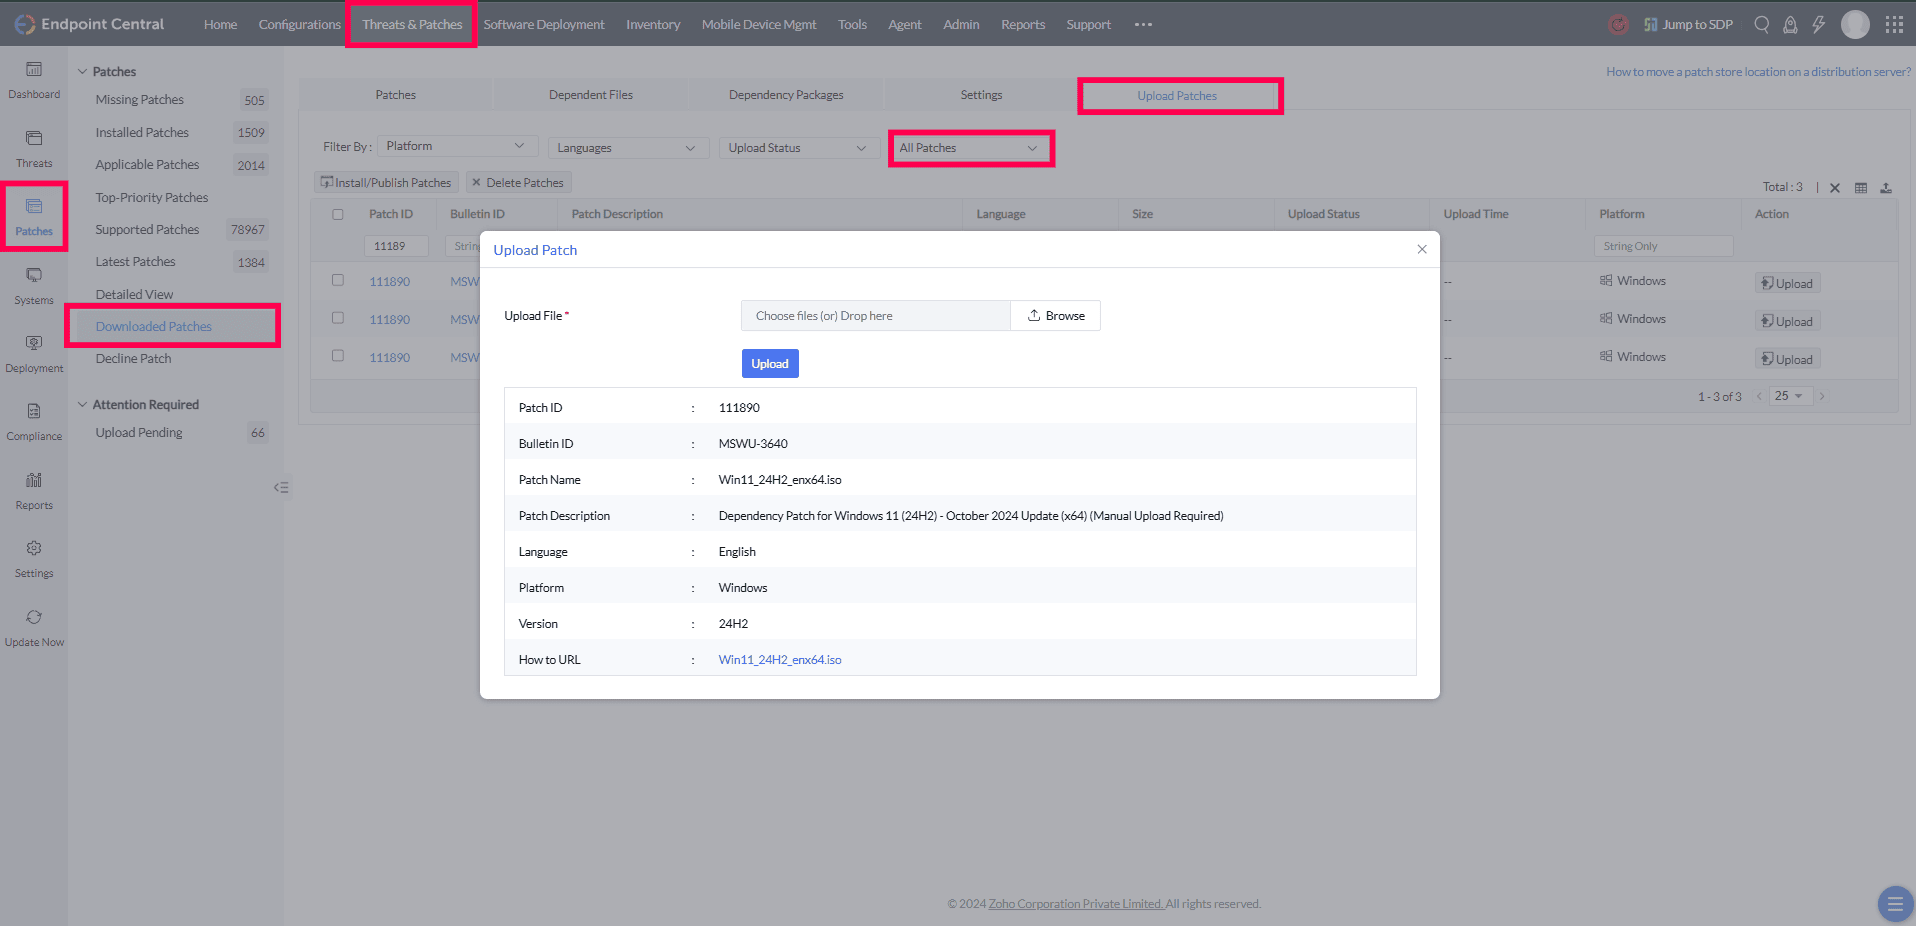
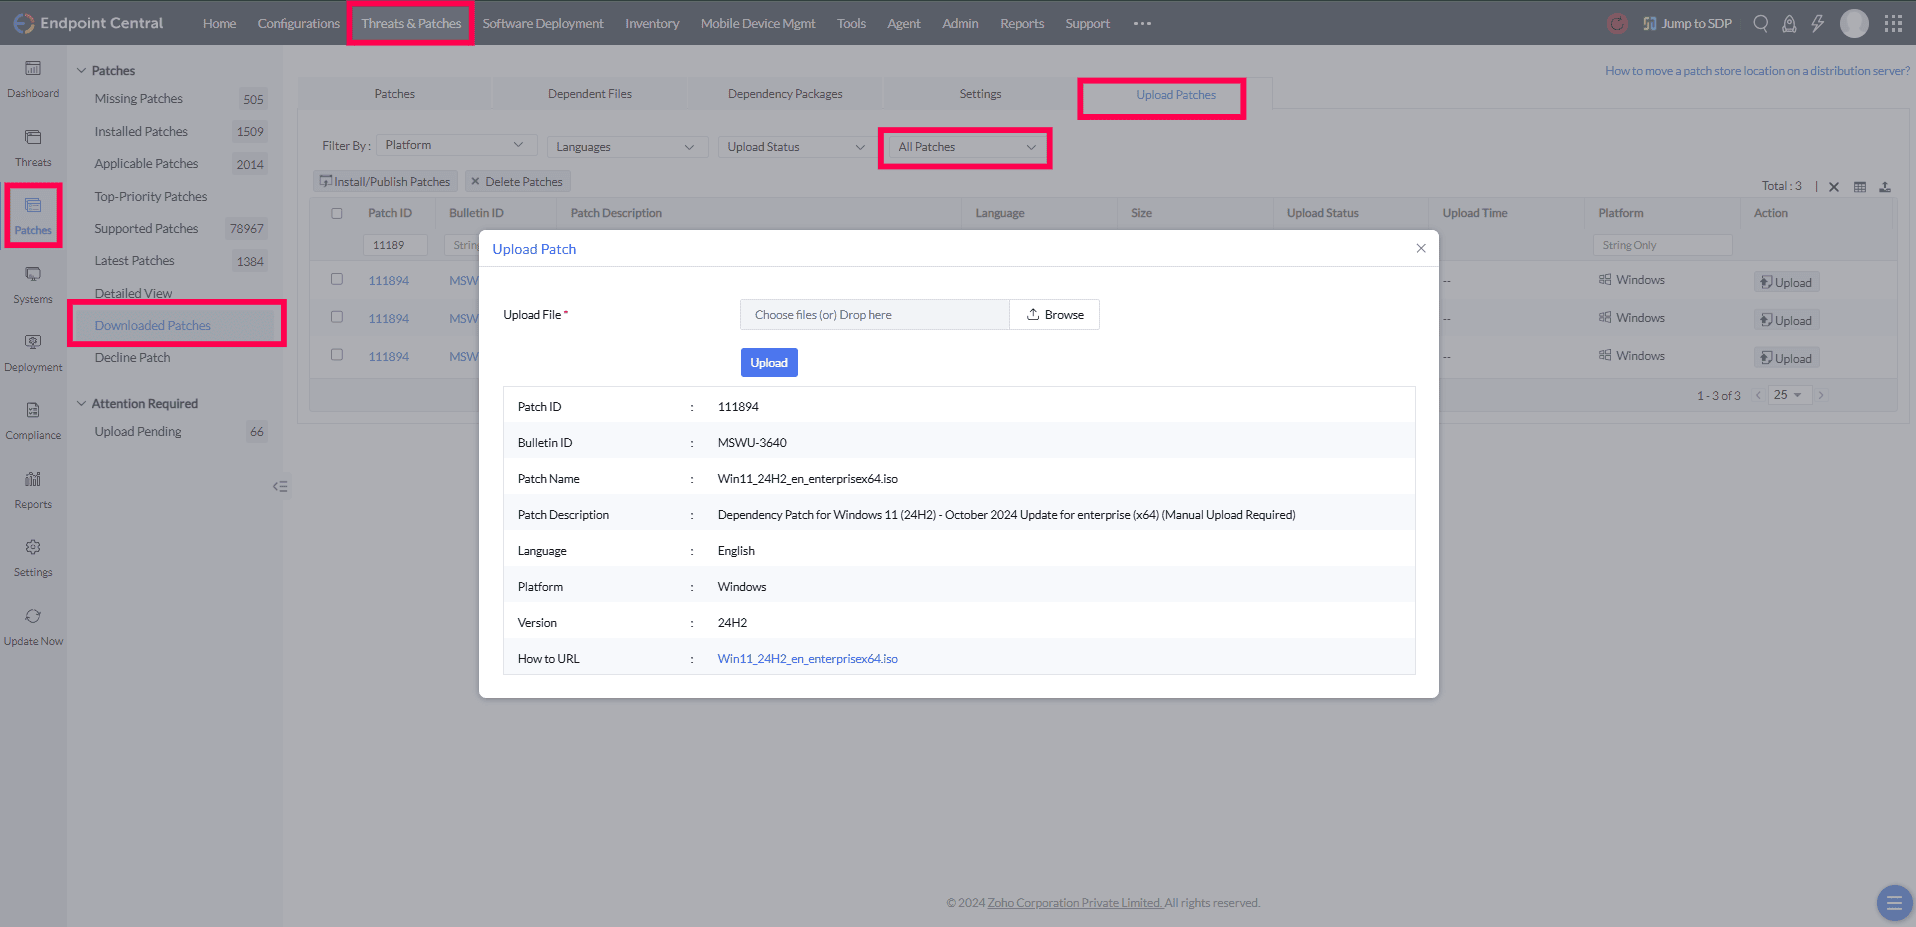
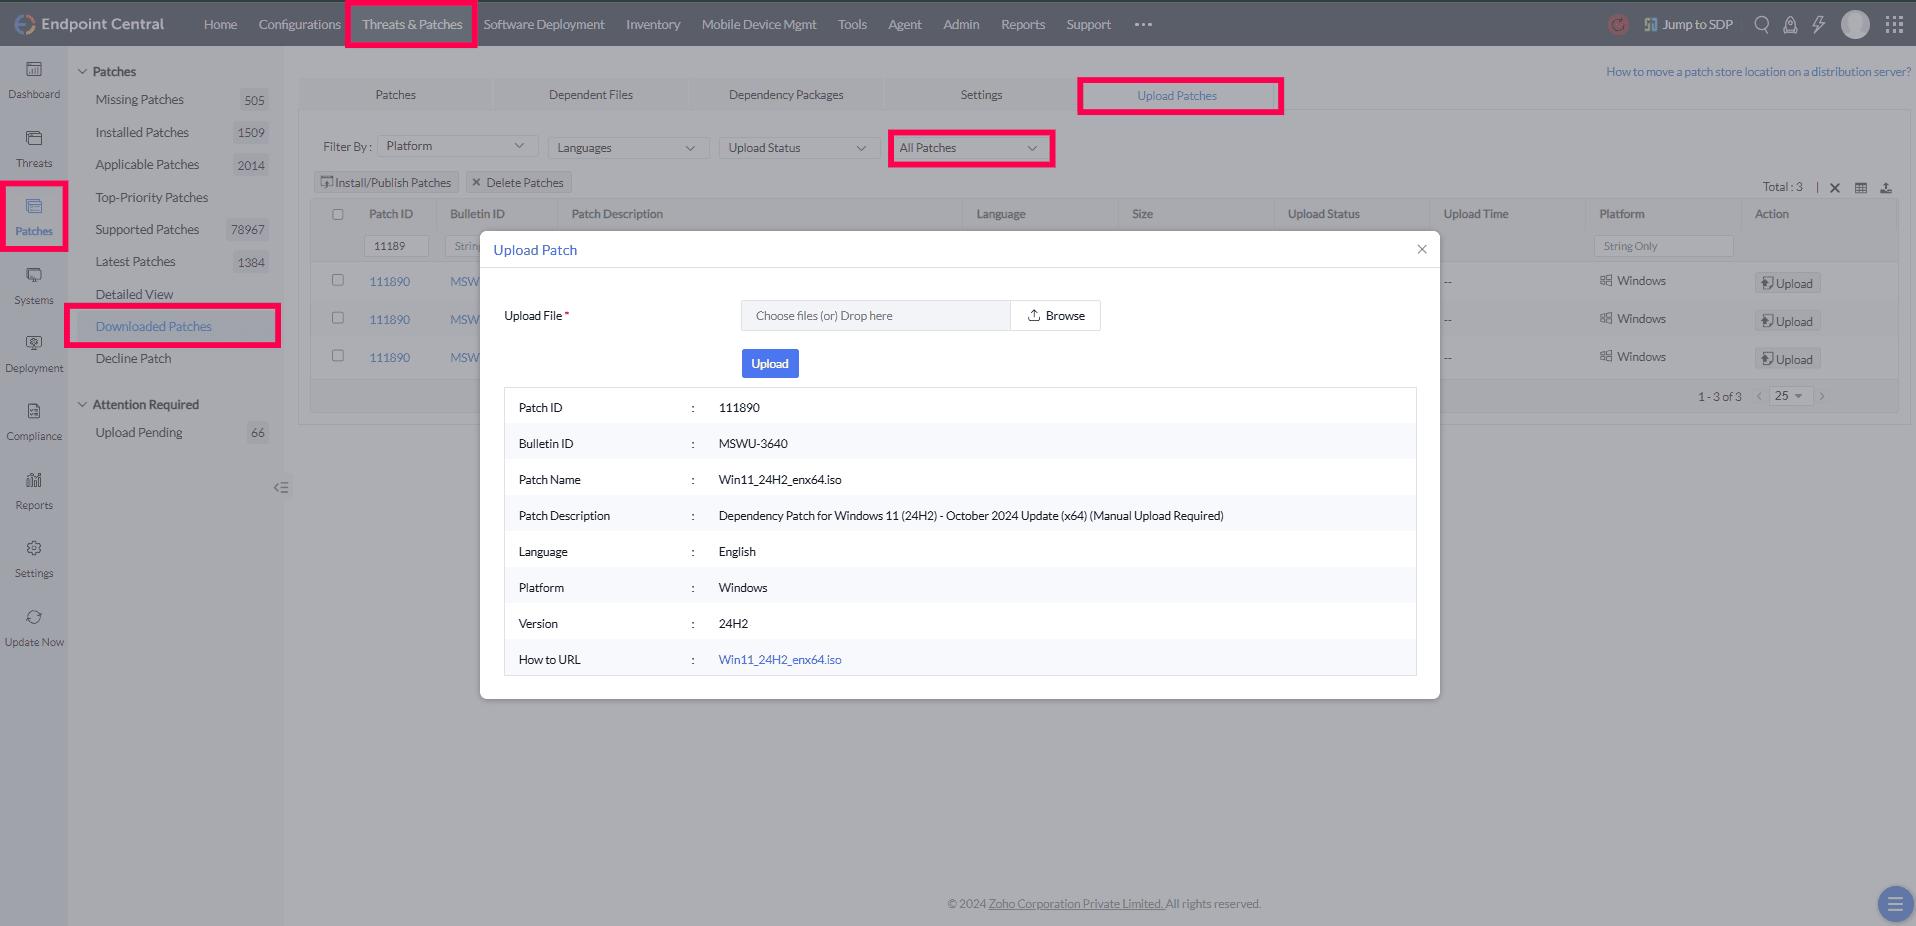
- Navigate to Threats & Patches → Patches → Download Patches → Upload Patches and apply the All Patches filter.
- In the Upload pop-up window, browse and select the downloaded ISO file to upload.
The screenshots below show the upload screen for each edition and upgrade path combination.
Windows 10 → Windows 11 Enterprise (Patch ID 111894)
Windows 10 → Windows 11 Professional / Other Editions (Patch ID 111890)
Windows 11 → Windows 11 24H2 Enterprise (Patch ID 111894)
Windows 11 → Windows 11 24H2 Professional / Other Editions (Patch ID 111890)
Deploy the Feature Pack
Once the dependency ISO file has been successfully uploaded, deploy the main patch from the Missing Patches view.
- Navigate to Threats & Patches → Patches → Missing Patches.
- Filter by Patch Type = Feature Packs.
- Select the applicable main patch ID for your edition and upgrade path (refer to the Patch IDs table above).
- Click Install Patches to begin deployment.