Configuring SAML SSO for Active Directory Users
In general, user accounts imported from Active Directory (AD) into Password Manager Pro have their login names stored in the following format: Loginname. When SAML Single Sign-on (SSO) is configured for AD users, you can set the Windows account name as the incoming claim type to match the default login format.
This method will work for all types of SAML SSO identity providers. For the sake of an example, we have provided the steps to configure this in the Microsoft Azure portal.
Trying to configure SAML SSO for users imported from Active Directory presents the following problem:
The default login name of the AD users will be in the format Loginname. However, during an Azure SAML response, Password Manager Pro retrieves a user's email address as their login name. During the Entra ID SAML SSO process, this login name format mismatch causes a problem, preventing the authentication process from being completed.
As a workaround for this challenge, create a custom attribute in your AD and add the Loginname value in the custom attribute section to sync it with the Microsoft Azure portal.
Follow the below steps:
- Setting up a custom attribute
- Setting up a claim in the Azure portal
- Editing the system properties file and complete the configuration
1. Setting up a Custom Attribute
- In your Active Directory portal, go to the OU which the required users are a part of and go to Properties.
- Here, under Attribute Editor, find the custom attribute that will be in the format: Loginname. If it is not already available, then create a new entry. This attribute must be added as a parameter in the Azure portal.
- Save and apply changes.
2. Setting up a Claim in the Azure Portal
Once you have added the custom attribute, proceed with the below steps to set up a claim for the NameID in the Microsoft Azure Portal.
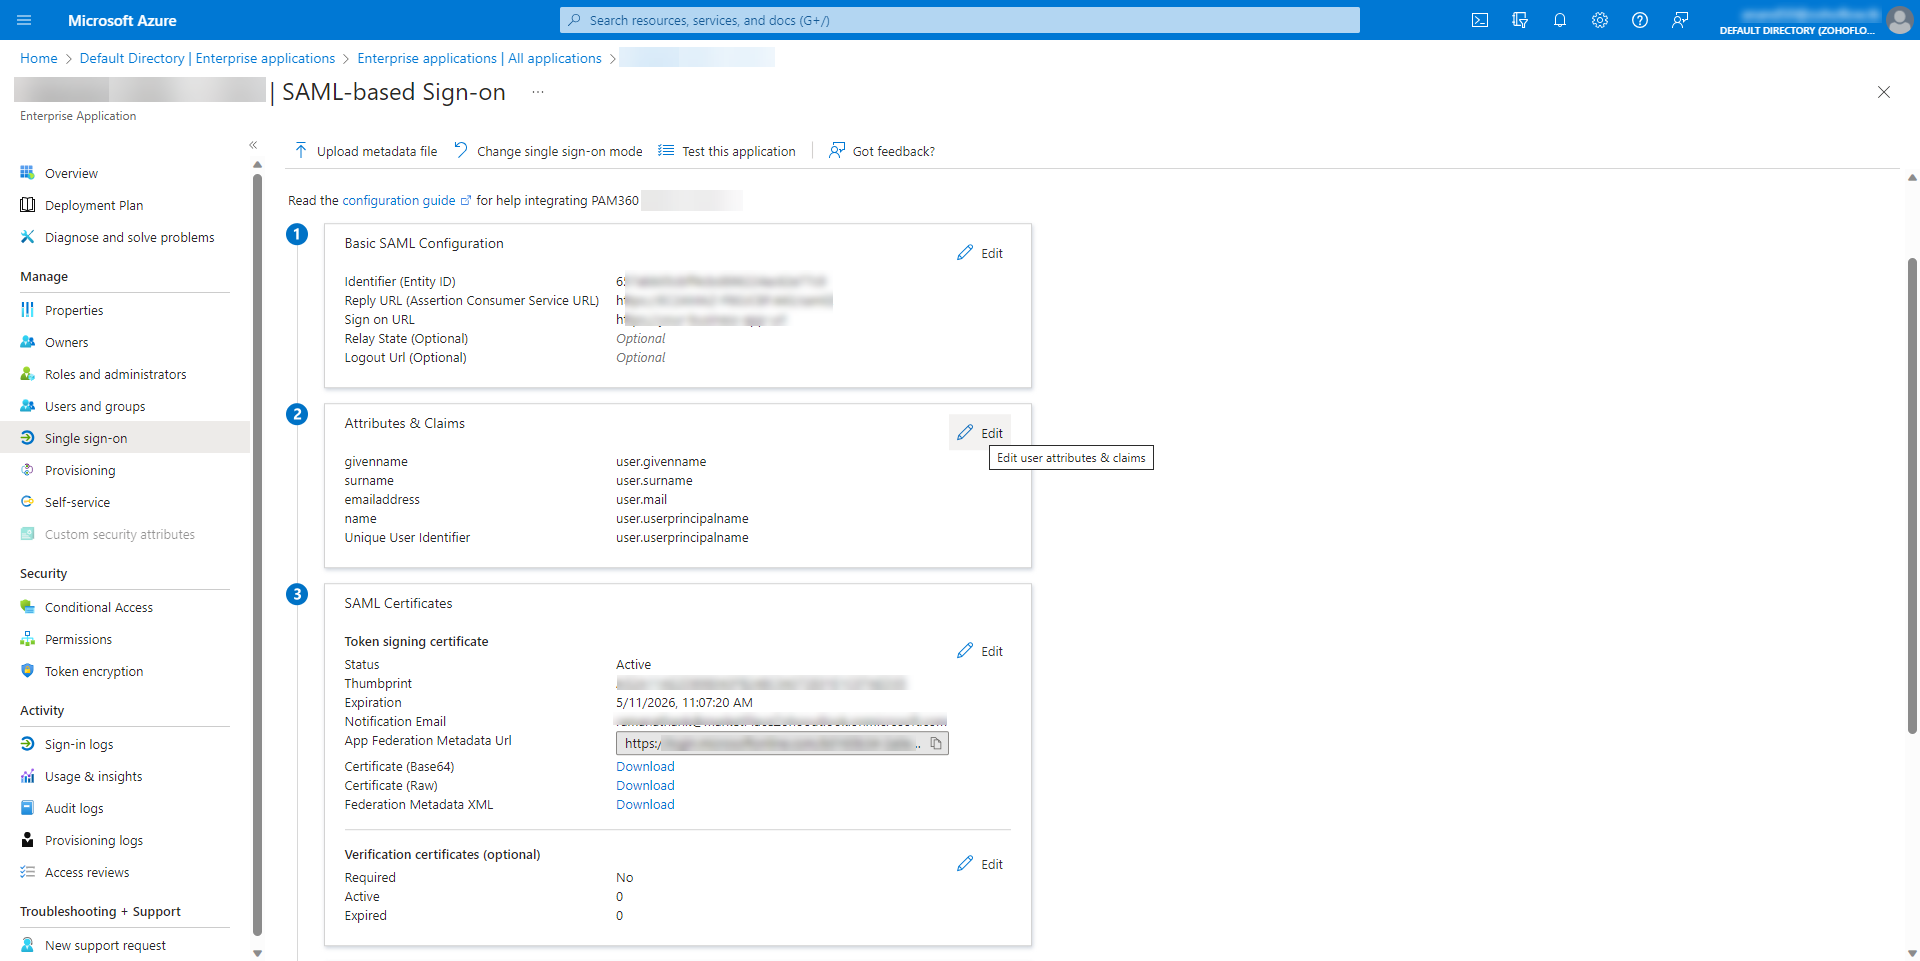
- In the Microsoft Azure portal, go to the Password Manager Pro enterprise application. Here, create a new user attribute to match the username in Password Manager Pro.
- Login to the Microsoft Azure portal and navigate to the Enterprise Application.
- Click the PMP SSO APP.
Click the edit icon in the User Attribute & Claims and create a new user attribute to match the username in Password Manager Pro.

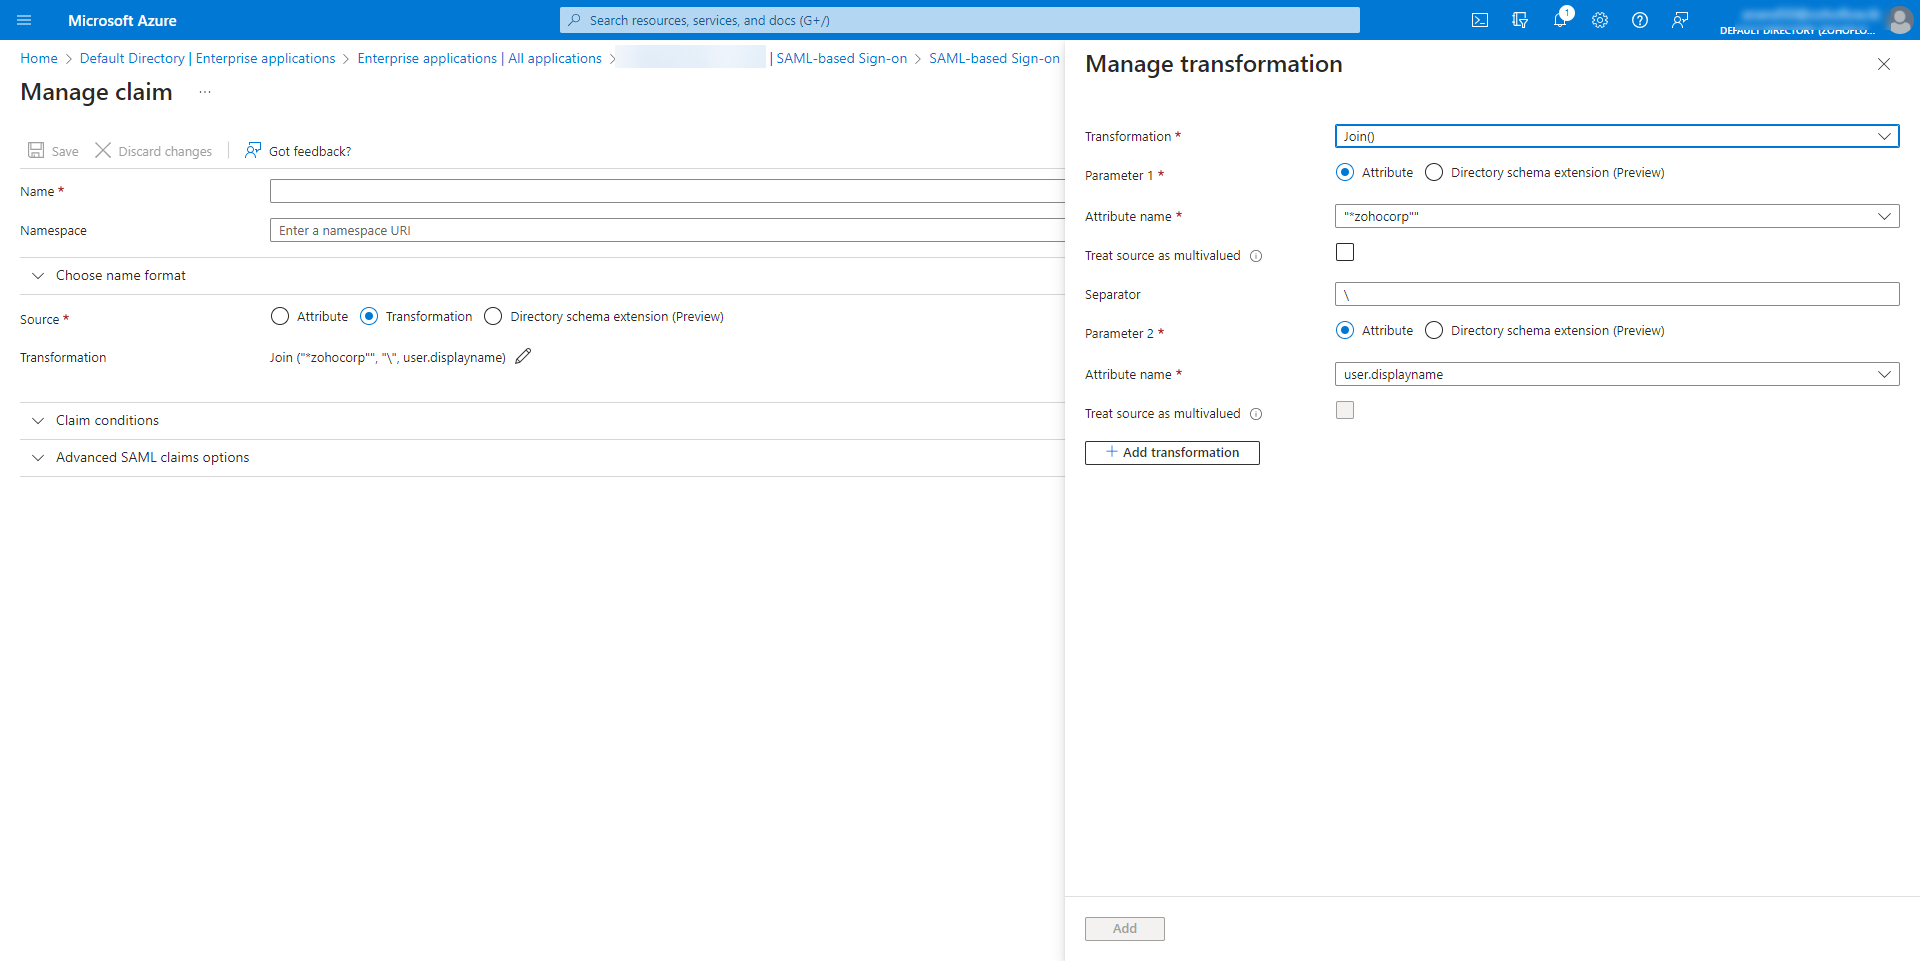
- In the Manage claim window, enter the following attributes:
- In the Name field, enter the name that needs to be customized - AzureNameId. This same name must be added as the SAML attribute in the system properties in this step.
- Under Manage transformation, enter Transformation value, and enter the domain name as Parameter 1 and the custom attribute you set up in this step as Parameter 2. Save your changes.

3. Editing the System Properties File and Complete the Configuration
Once you create the new user attribute in the Microsoft Azure portal for the Password Manager Pro Enterprise application, follow the below steps for the custom attribute configuration to be complete:
- Stop the Password Manager Pro service.
- Rename the logs file as 'logs.old'.
- Open system_properties.conf file found in the <PMP_installation_directory\conf> folder. Scroll down to the bottom and add a new entry saml.attribute.nameId=AzureNameId. The nameId mentioned here must be the same as the one added in the Manage claim window. Save the file.
Now, the custom attribute configuration is complete. Start the Password Manager Pro service and configure Microsoft Azure SAML SSO as usual.