Email and Message Templates
Password Manager Pro allows you to tailor email notifications sent to the users on the occurrence of various password and user management operations and modify the content displayed on the access control dialog boxes to suit your organization's needs. By default, the system sends predefined email content when various password actions occur and displays predefined messages for access control dialog boxes. However, you can customize these messages to align with your organization's requirements. Whether it is user management, password management, general administration, or access control, Password Manager Pro provides a range of templates that you can easily modify.
Email templates allow you to adjust the subject line and body content and even include placeholders that are dynamically replaced with actual data, such as usernames or resource names at runtime. This flexibility ensures that email communications align with your organization's style and preferences. Similarly, message templates allow administrators to modify the content displayed in access control dialog boxes, such as password request, password check-in, and password check-out windows. Customizing these messages ensures that users receive clear, organization-specific instructions during password access workflows. This document provides detailed steps to customize email and message templates, helping administrators personalize notification content and access control messages to enhance clarity, consistency, and relevance.
1. Email Templates
Follow the steps detailed below to customize the email content for the desired category:
- Navigate to Admin >> Customization >> Email Templates.
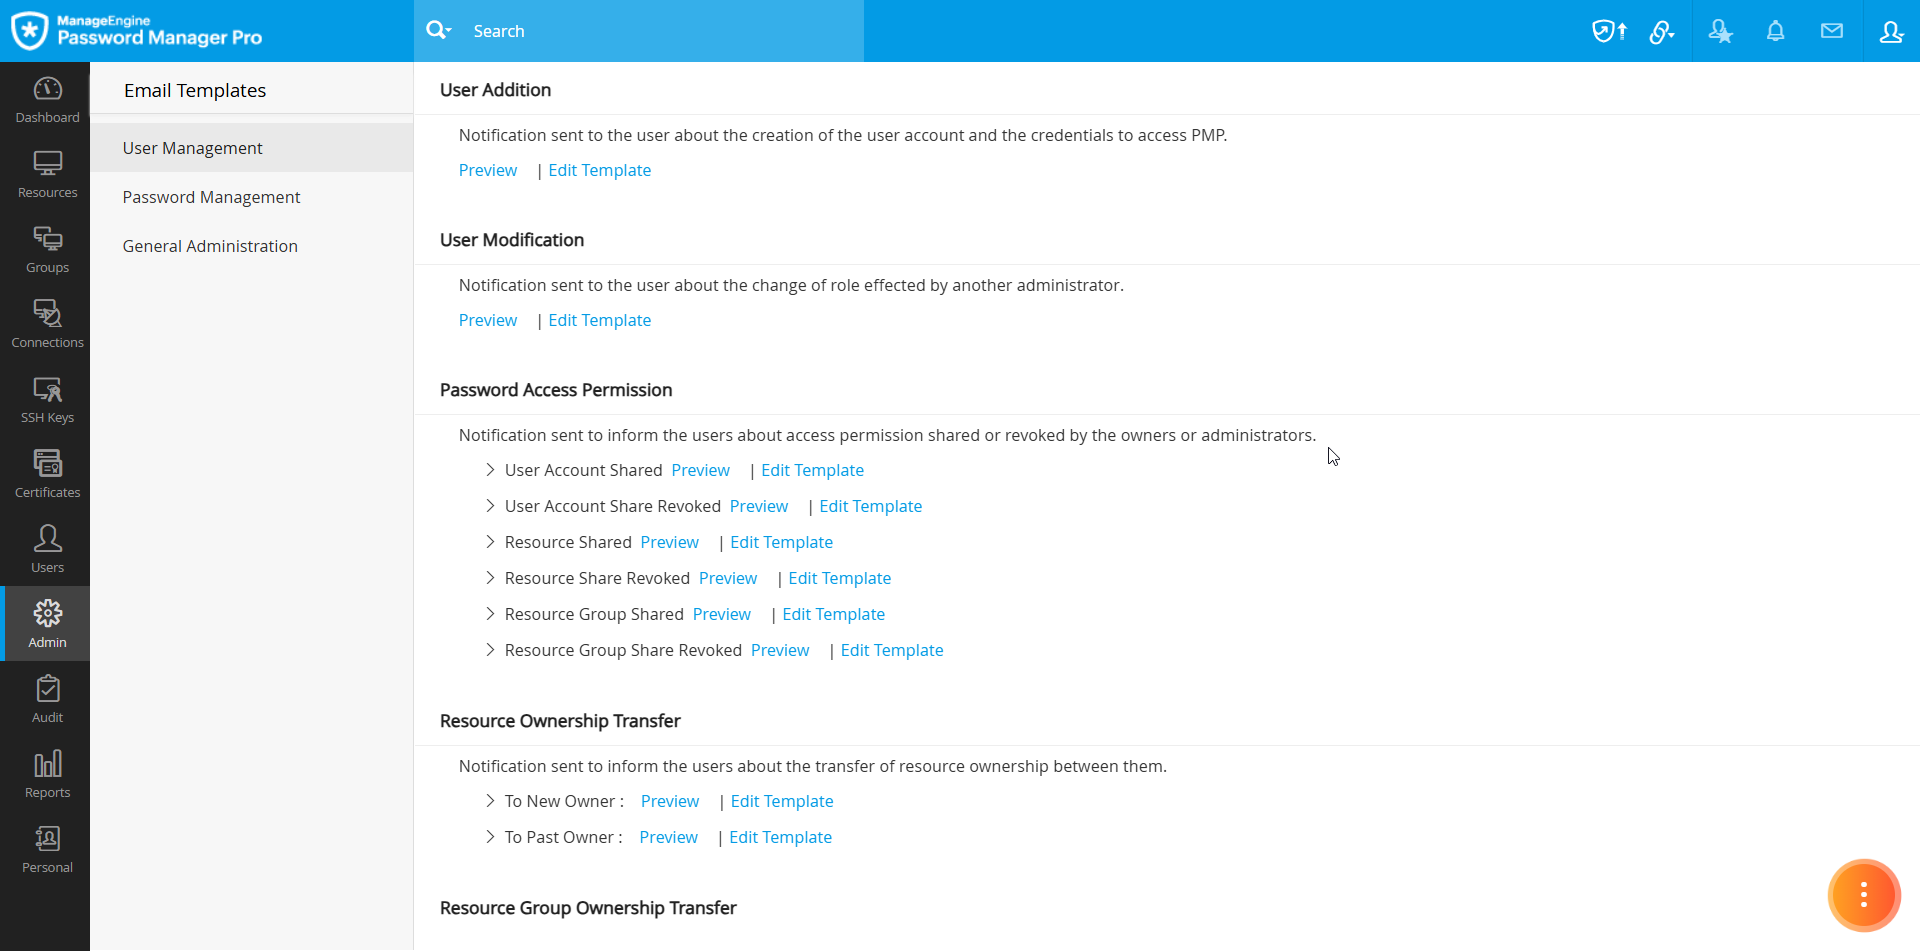
- In the Email Templates window, the templates are organized into various categories such as User Management, Password Management, and General Administration. For each category, you will find several sub-categories, each with a dedicated email template for specific actions, such as user addition, user modification, user account sharing, etc.

- To view the current email content for an email notification, click the Preview button beside the respective email template.
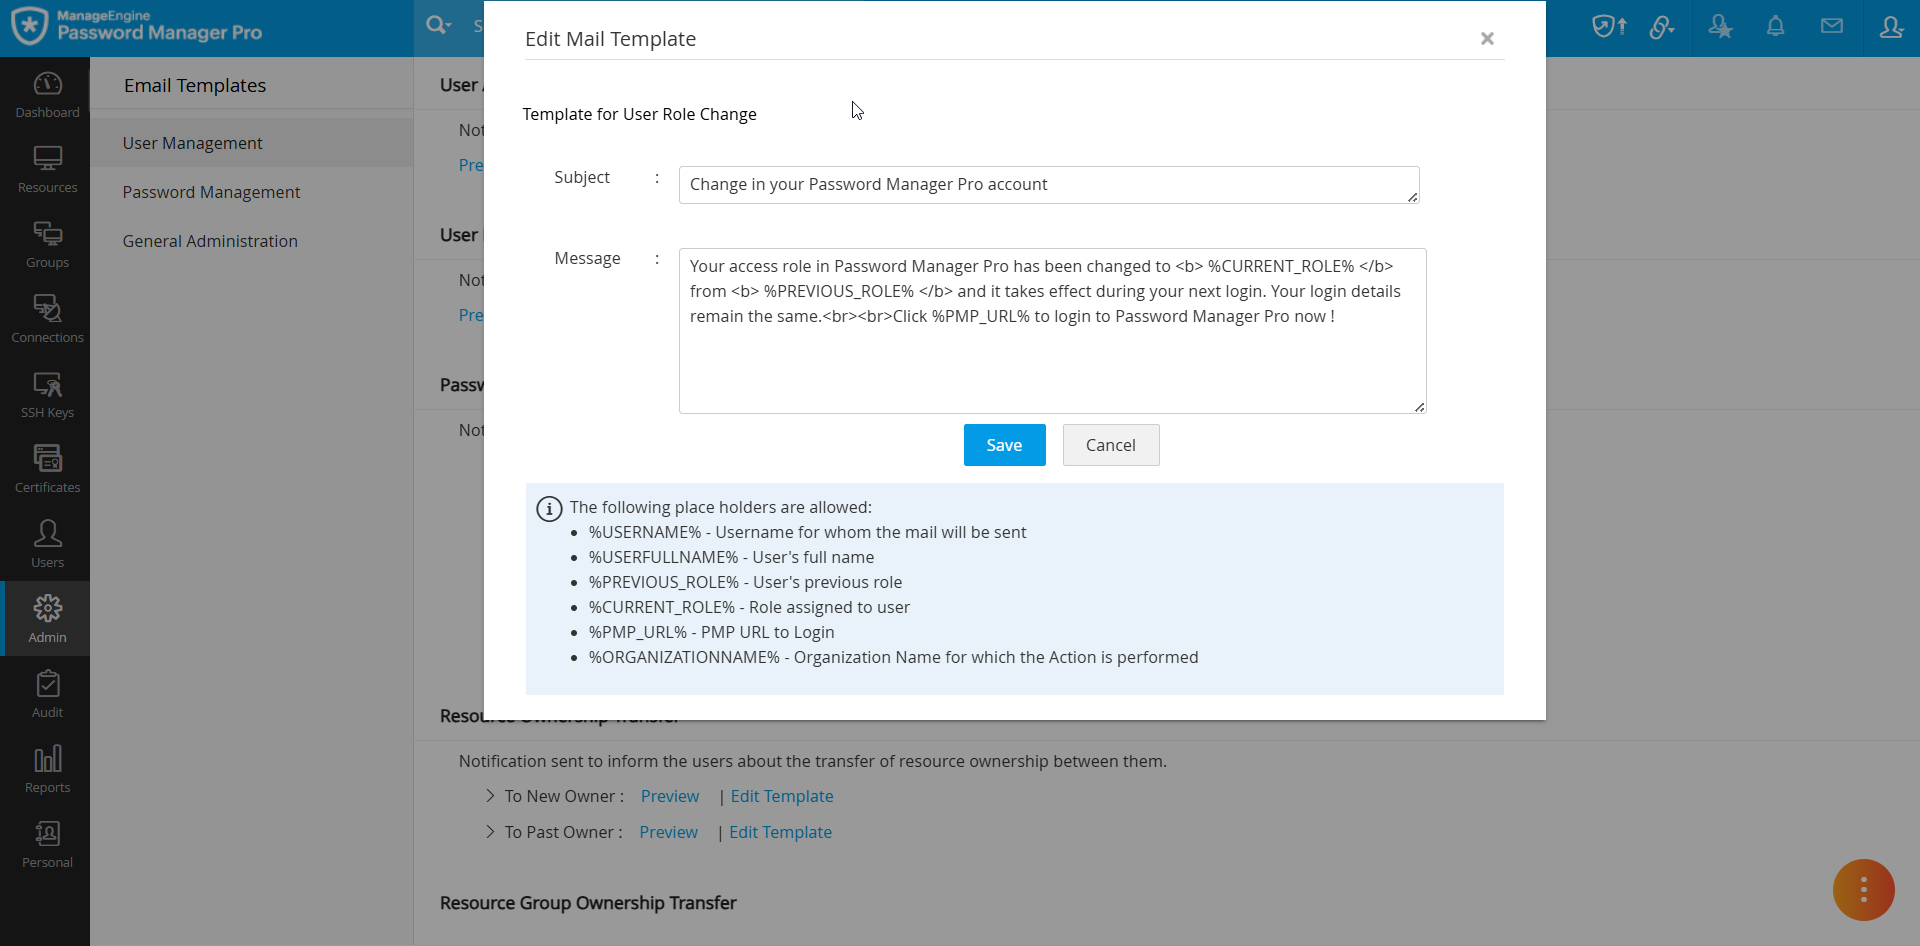
- To edit the existing content, click the Edit Template button beside the desired template. In the Edit Template window, you can customize the subject line and modify the body content in the Message field.
- While editing the body content, you can include placeholders for certain values like the user name, which will be dynamically replaced with the actual data at runtime. The allowed placeholders for each template are listed at the bottom of its respective Edit Template window.

- After making the required changes, click Save. The email notifications in the respective categories will now reflect your customized content.
Notes:
- Password Manager Pro allows customization of most email content within the platform. However, email notifications related to reports and alerts cannot be customized.
- You can include HTML tags in your customized message, but ensure that only single quotes are used inside the HTML tags instead of double quotes. For example, instead of '<span style="padding-left:10px">', you need to use '<span style='padding-left:10px'>'.
2. Message Templates
Follow these steps to customize the messages displayed on the various access control dialog boxes:
- Navigate to Admin >> Customization >> Message Templates.
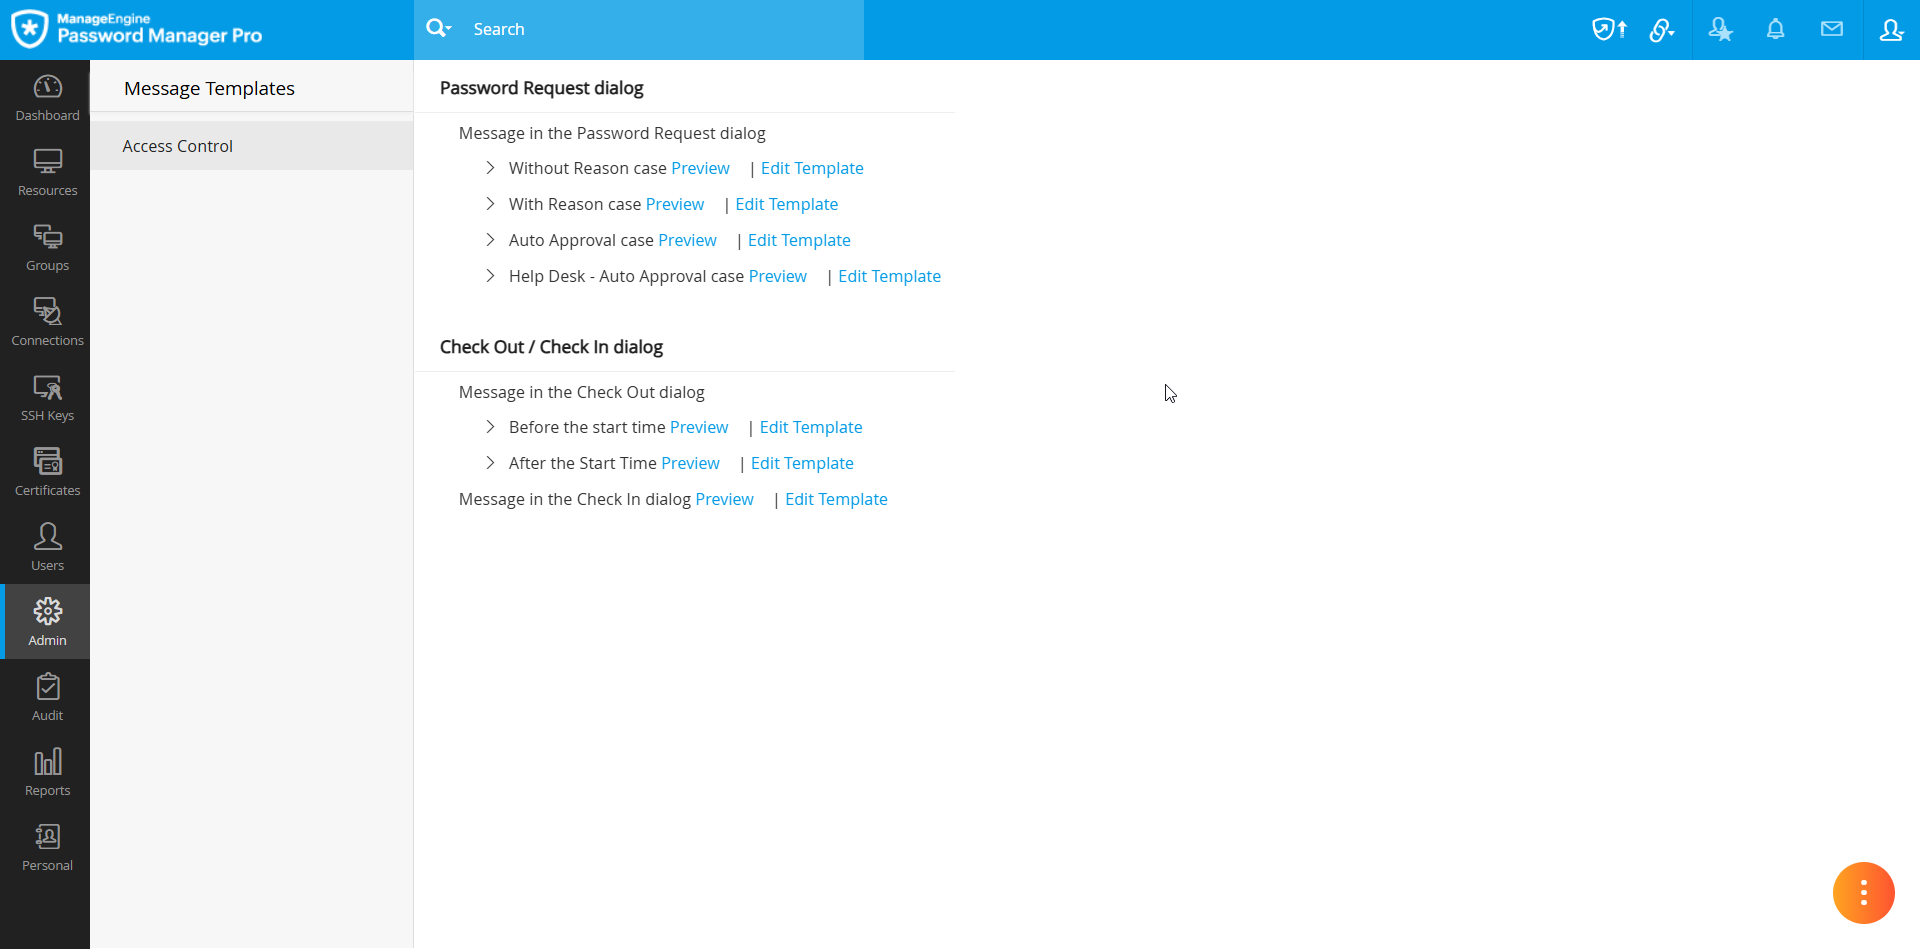
- In the Message Templates window, you will find a list of message templates organized into different categories
 .
. - Click the Preview button beside the desired template to view the existing message content.
- Click the Edit Template button beside the desired template you wish to modify.
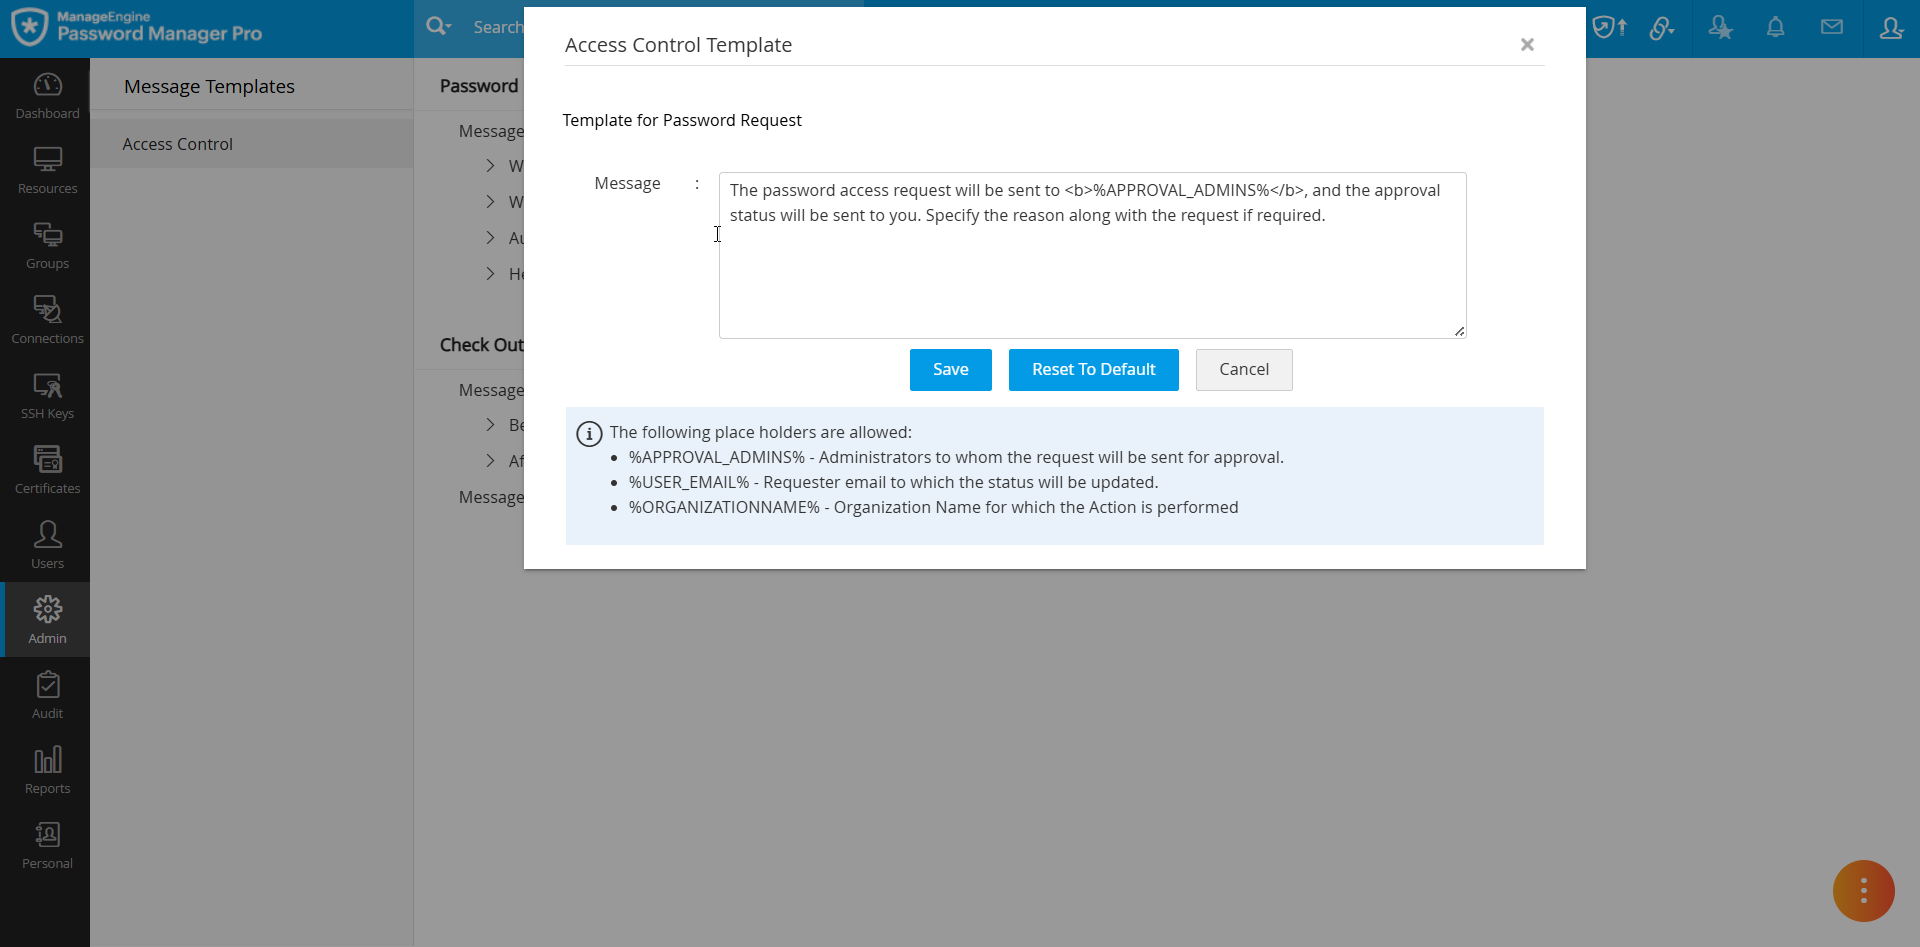
- On the Access Control Template window, enter the customized message you wish to display on the selected dialog box.
- Use the placeholders to insert details such as organization name (ORG name), user email, etc. The actual values will be replaced at runtime. Under each template, the allowed placeholders will be listed at the bottom of the template window.

- Click the Save button to apply the changes.
- Click the Reset to Default button to revert the template to its original message.
- Click the Cancel button to discard the changes made and exit the template window.
Once the template is updated, the respective Access Control dialog boxes will feature the customized message.