Managing Mac Computers
This document gives an overview for managing mac devices in your network. it explains how to inboard mac devices, supported features and macOS supported by the product.
Table of contents
To get started, you'll need to configure a few pre-requisites. Once you deploy the lightweight agent, you'll be able to add your MacOS devices to your server for management.
Supported macOS
- 10.14 Mojave
- 10.15 Catalina
- 11 Big Sur
- 12 Monterey
- 13 Ventura
- 14 Sonoma
- 15 Sequoia
Note: Apple Silicon processors can run apps that are compiled for the Intel chipset through a software technology known as Rosetta 2. This translation layer is automatically enabled in macOS Big Sur, providing users access to all features in UEMS Agent. In short, we efficiently support these new laptops.
Pre-requisites for remote install/uninstall
- Ensure that SSH & SCP communication is enabled on the target computer. To establish SSH & SCP communication in Mac computers, go to System Preferences -> General -> Sharing -> Enable File Sharing and Remote Login.
- By using the machine name in a Putty or SSH tool, ensure that you can remotely connect to the target computer from the server machine. If you are able to connect only using IP address but not machine name, you will need to re-configure the DNS resolution in your network.
- If you can connect to the machine via its computer name but not able to log in using any credentials, ensure that the credentials are valid.
- Ensure that the specified user has either root or sudo permission to access the target computer.
- If the specified user is root, go to the "Terminal" on the target computer and search for the conf file '/etc/ssh/sshd_config', ensure that the 'PermitRootLogin' is set as "yes".
Onboarding Mac devices
To effectively manage Mac devices in your organization, it is necessary to deploy agents to them, as well as configure the MDM profile to take full advantage of the management capabilities.
Mac agents can be installed manually on the computers that need to be managed by the server. To install an agent manually, log in to the endpoint as an administrator from the server web console and follow the steps mentioned below:
- Navigate to Agent > Computers > Download Agent.
- Choose the appropriate remote office and select the operating system as Mac.
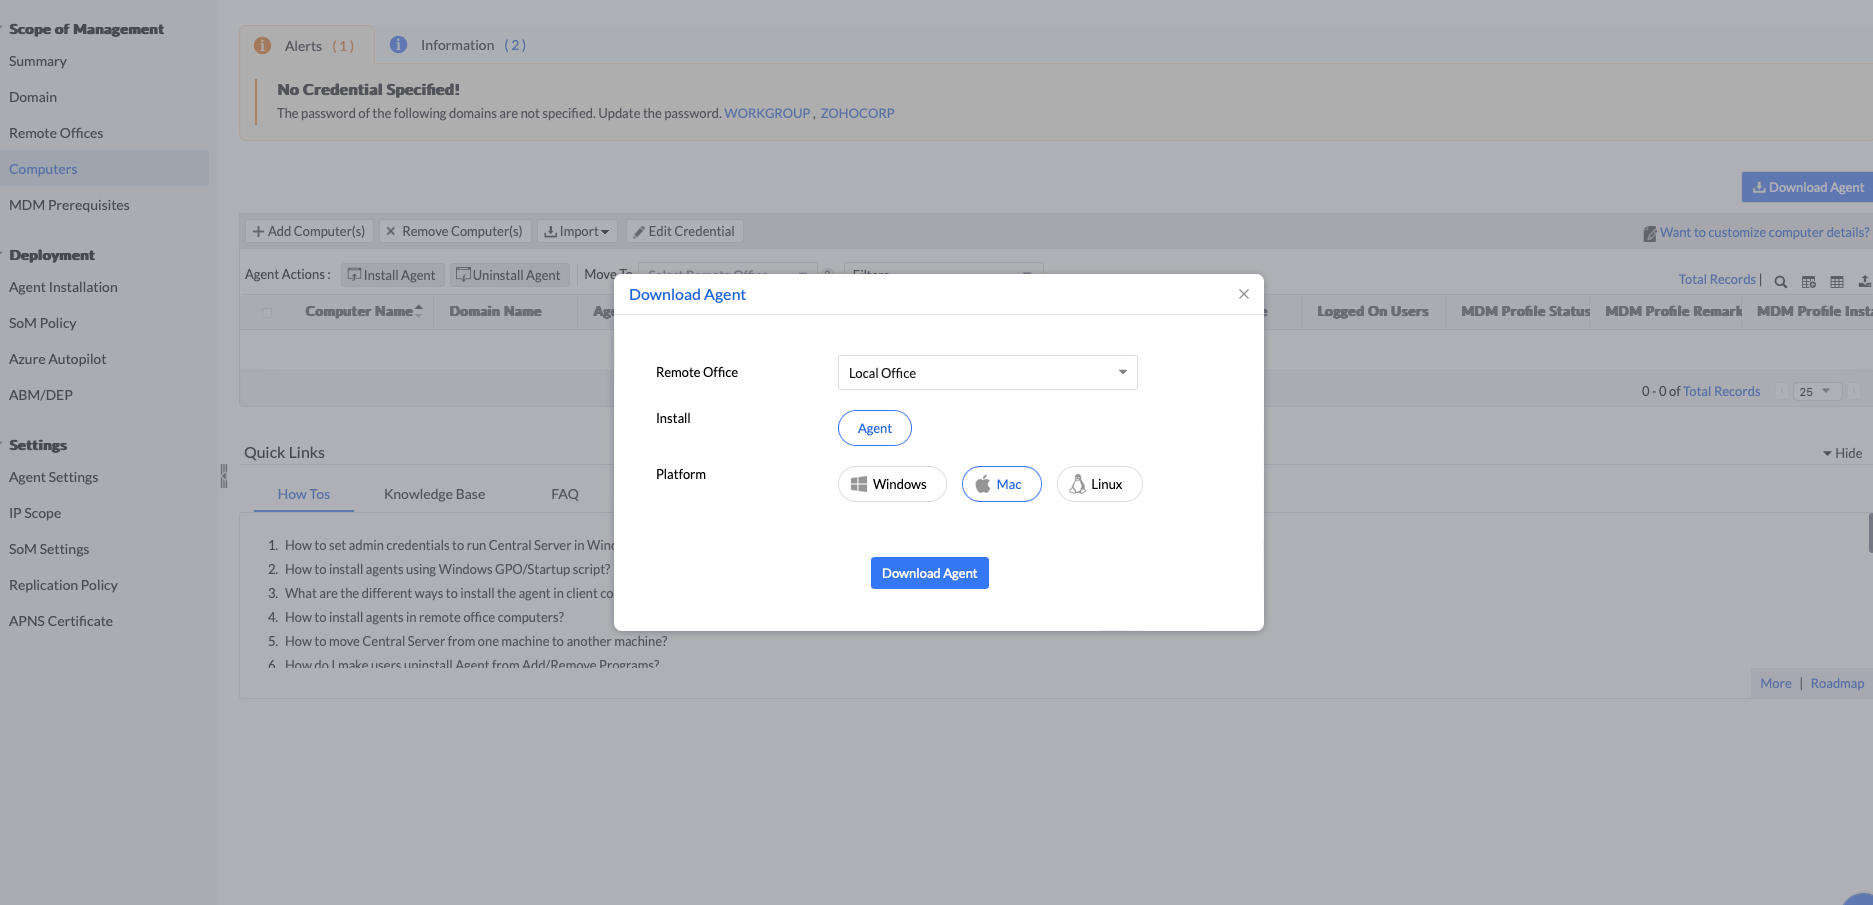
- Navigate to the folder where the agent is downloaded. Extract the zip file and locate
UEMS_MacAgent.pkgandserverinfo.plistfiles. - Install the agent and provide admin credentials when prompted to complete installation.
1. Remote Install from Local Office
To install an agent automatically from the console in a LAN setup, follow the steps given below:
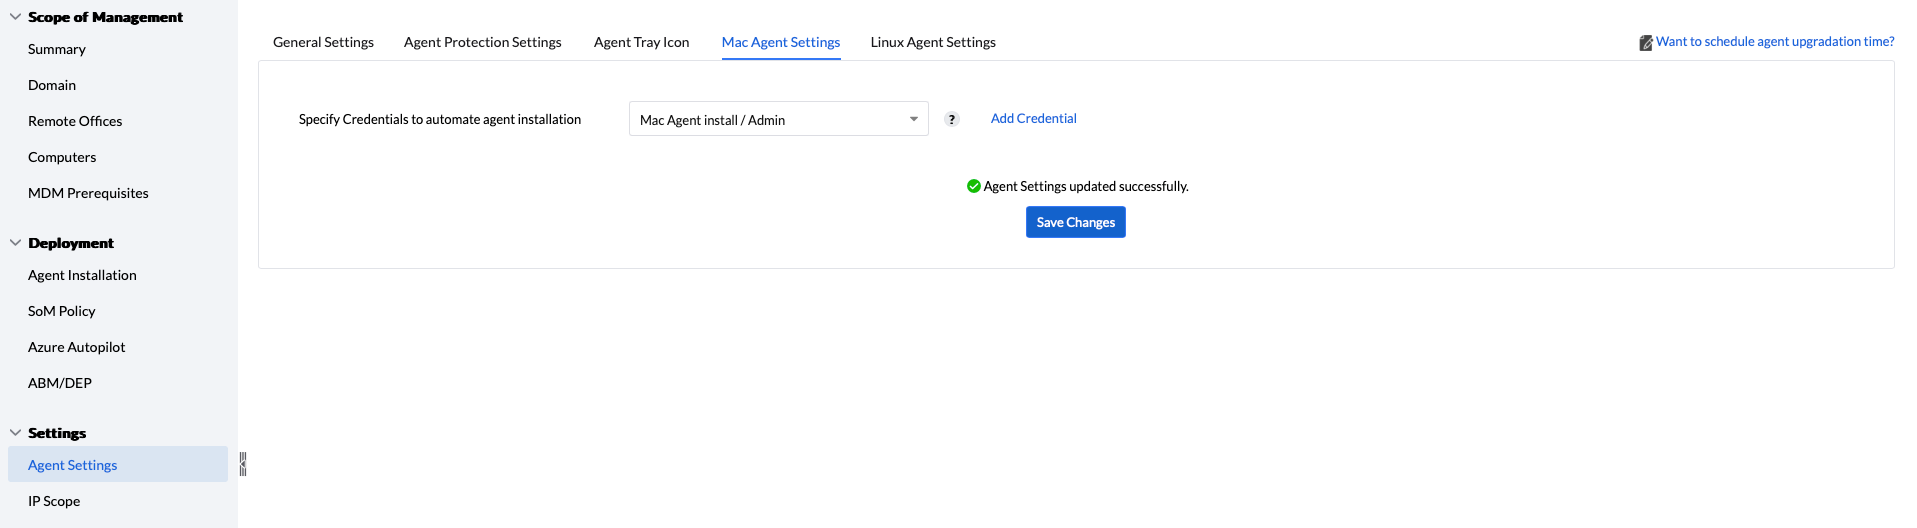
- Navigate to Agent tab -> Settings -> Agent Settings -> Mac Agent Settings.
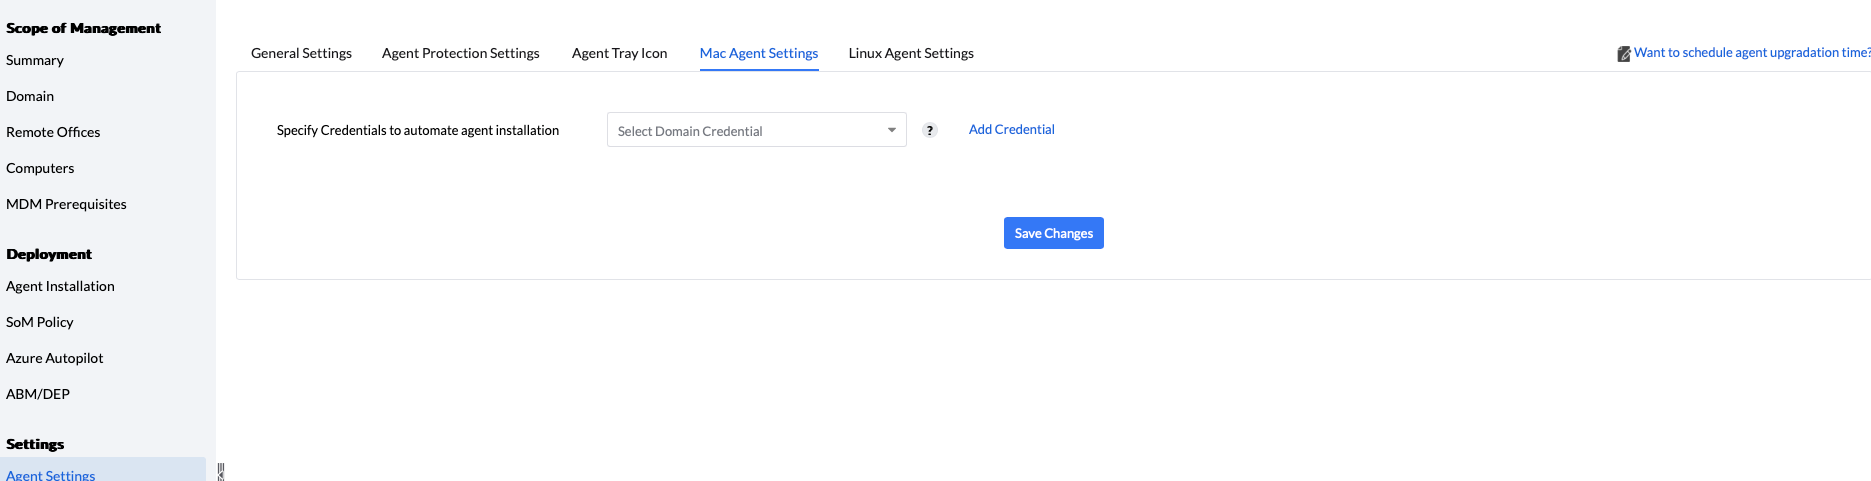
- Specify the credentials to automate agent installation.
- Click Save Changes.
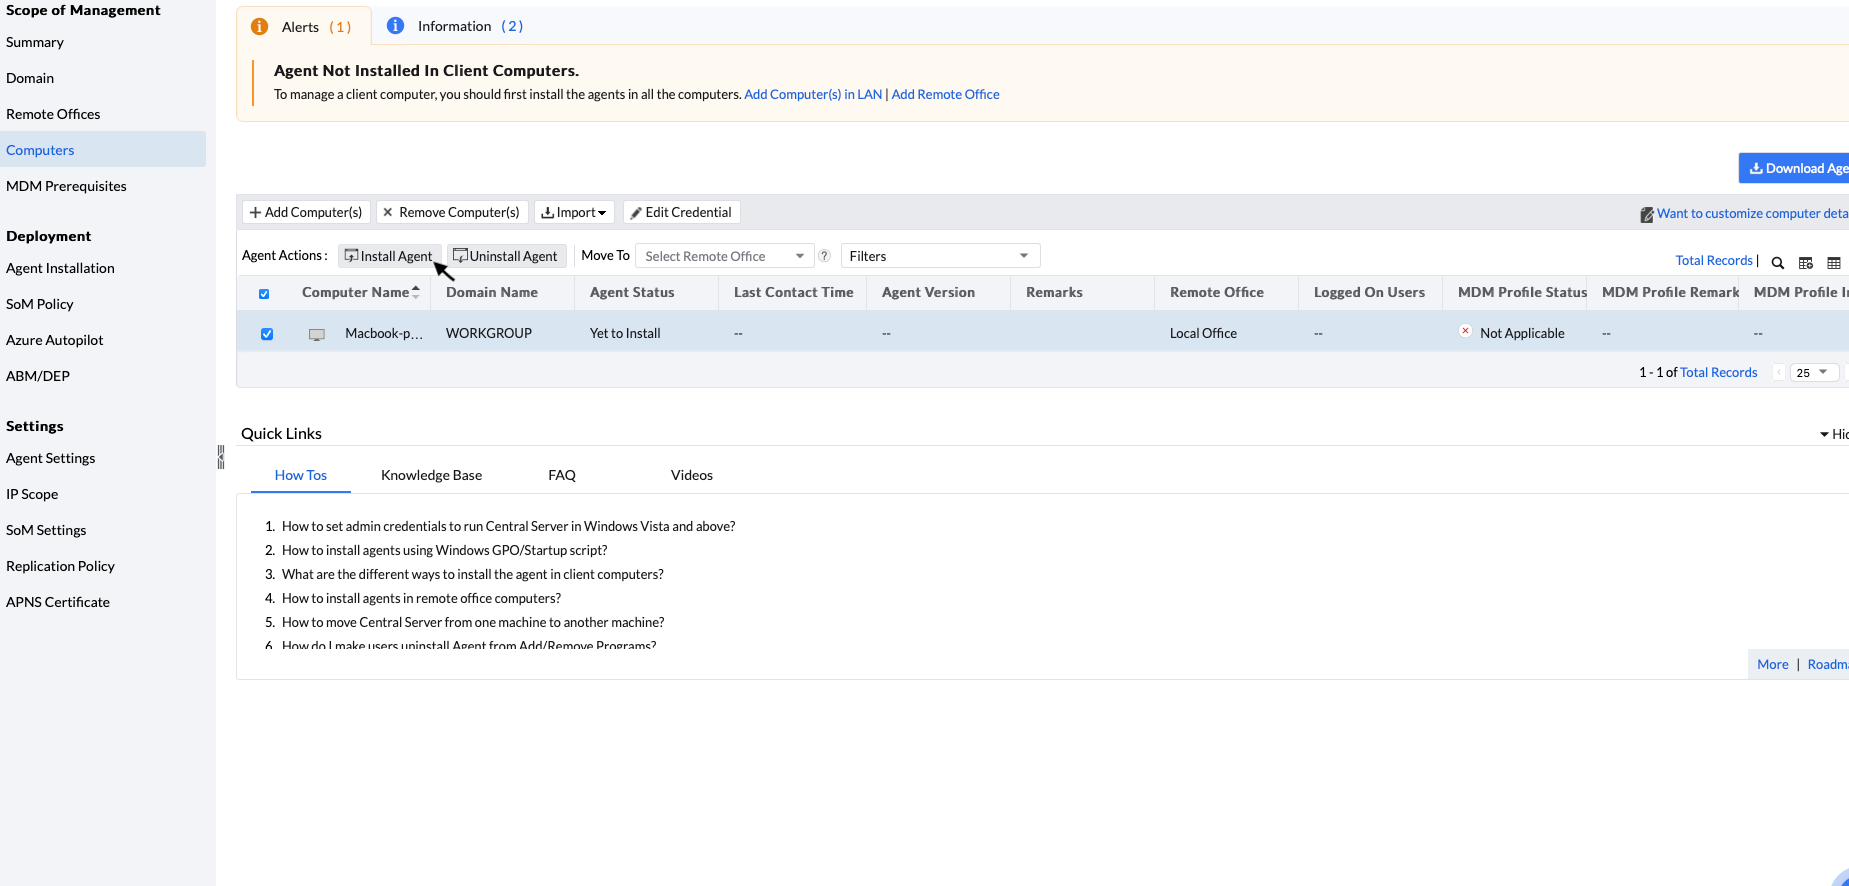
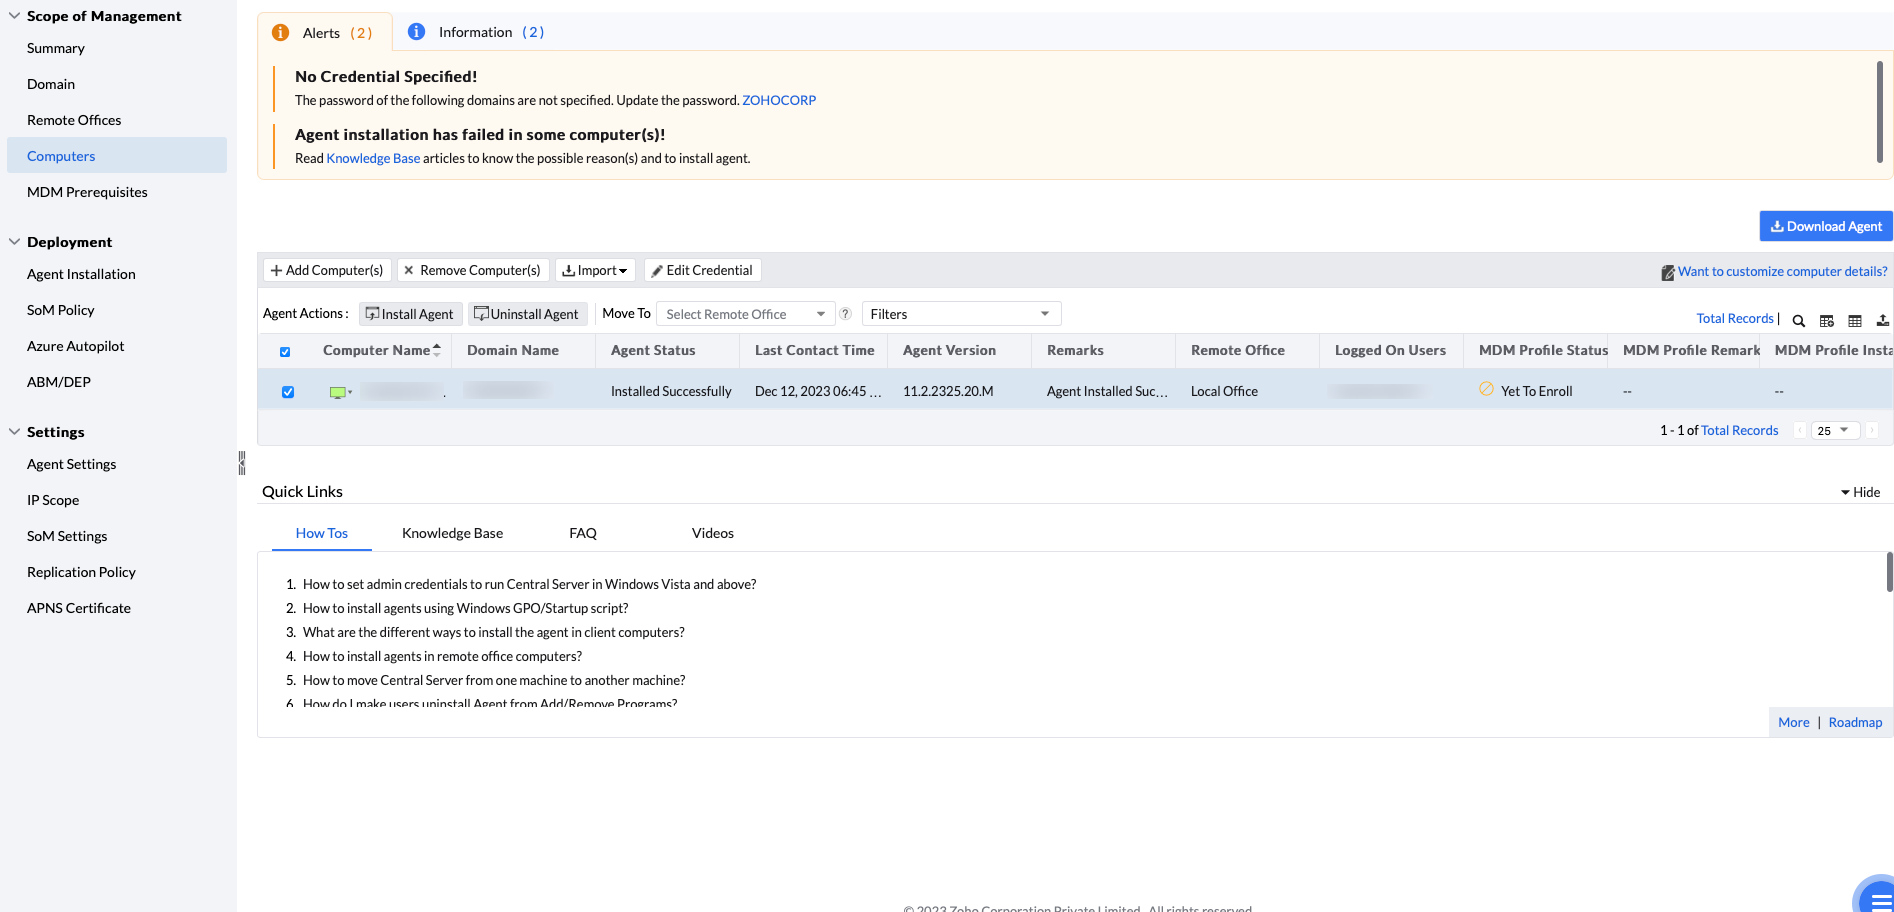
- Navigate to Agent > Computers > Add Computers.
This view will list down all the available computers from the selected domain. You can either add a computer from that view to your scope of management (SoM) or install an agent. The computers added to your scope of management (SoM) will be listed under computers view. You can select and click the Install Agent button to install an agent on the computer.
2. Remote Install From Remote Office
Currently, it is not possible to install a remote office agent from the console. Instead, you can use scripts to install an agent in a remote office. To know more, click here.
You can install Mac agents on devices by imaging them.To know more, kindly visit this page.
You can install agents by using third-party vendors. To know more, kindly visit these links:
Note: Once the agents are deployed on the machines, the MDM profile will be installed automatically if the prerequisites are configured. To know more about configuring the MDM Profile, visit this page.
Supported features
We currently support the following features for Mac computers:
De-provisioning Mac agents
Through Remove Computers option:
- Go to Agent > Computers tab.
- Select the computers to uninstall.
- Select the Remove Computers option.
- The agent, if reachable to the server, will uninstall itself automatically in the next 90 minutes refresh cycle.
Through Uninstall Agent option (Only for LAN setup) :
- Navigate to Agent tab > Settings >Agent Settings > Mac Agent Settings.
- Specify credentials to automate agent uninstallation. Click Save Changes.
- Go to Agent > Computers tab
- Select all the computers to uninstall
- Select the Uninstall Agent option
Uninstall agent manually
Using terminal:
- Log in to the computer as administrator and open the terminal.
If Uninstall is not restricted in Agent Settings > Agent Protection Settings, then use this command:
/Library/ManageEngine/UEMS_Agent/Uninstaller.app/Contents/MacOS/Uninstaller -silent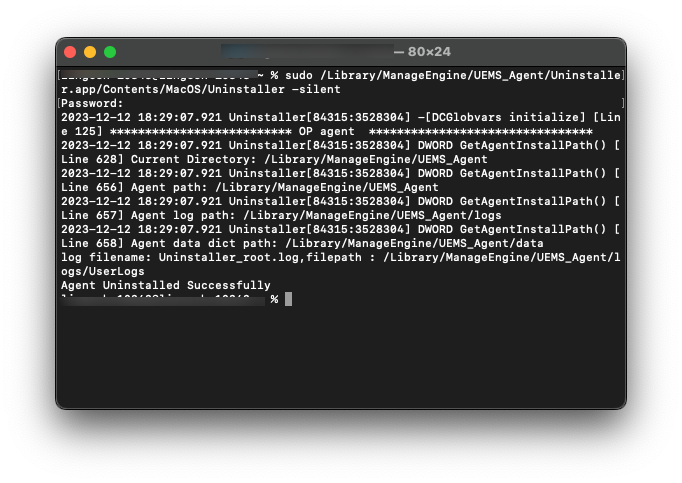
If Uninstall is restricted in Agent Settings > Agent Protection Settings, use this command and replace <TOTP> with the actual TOTP from Agent > Scope of Management > Computers > View TOTP:
/Library/ManageEngine/UEMS_Agent/Uninstaller.app/Contents/MacOS/Uninstaller -silent -cli-totp=<TOTP>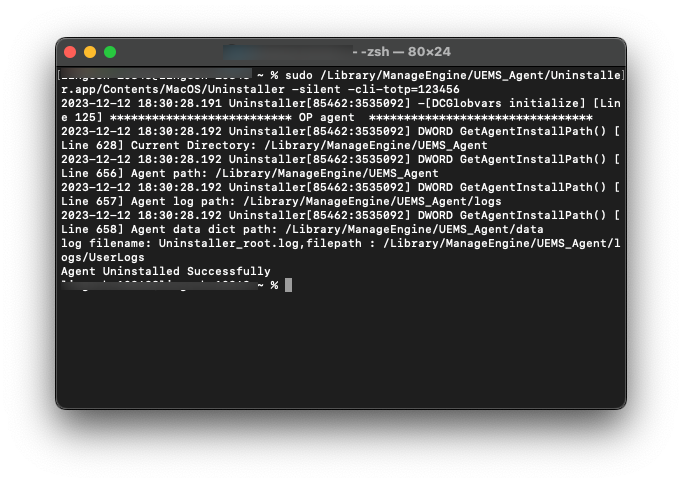
- In a few seconds, the agent will be uninstalled. (removes all the files except logs.)
Using Finder:
- Open Finder.app.
- Navigate to the directory
/Library/ManageEngine/UEMS_Agent/ Right-click on
Uninstaller.app-> click Open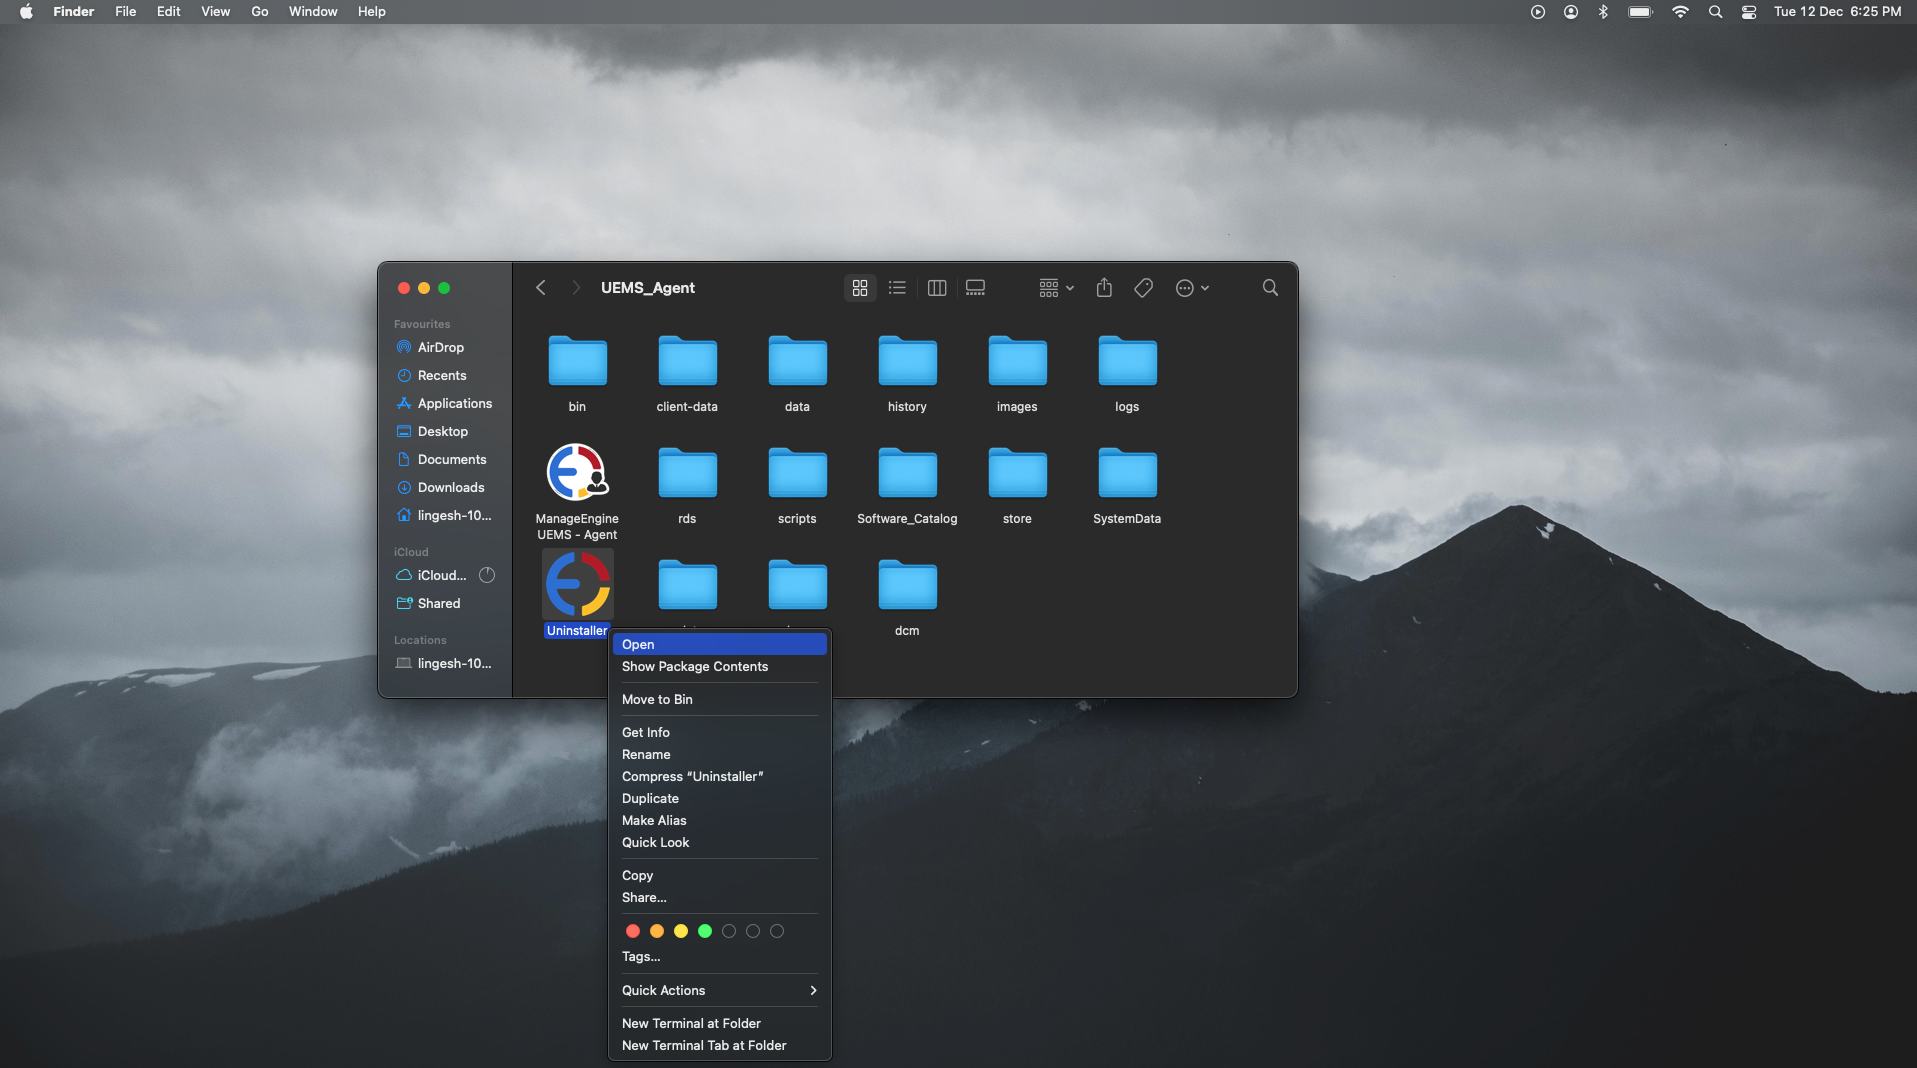
- Enter Admin password when prompted.
- In a few seconds, the agent will be uninstalled.
- Note: All the agent files will be removed except the agent logs.