Browser Restriction
Allowlist or blocklist browsers so employees stay on a single, secured browser.
About
About Browser Restriction
Control exactly which browsers are allowed to run on managed devices.
What it does
Browser Restriction lets admins control which browsers can be used on devices. By allowlisting or blocklisting specific browsers, admins can prevent unauthorized usage, ensure the best user experience and highest security, and prevent certain features from being available on specific browsers.
Benefits
Why mandate a single browser
Fewer browsers in play means fewer compatibility surprises and a smaller security surface.
Consistency at scale
Remote work has increased reliance on web browsers, and with many browsers available, each with unique features, IT admins face real challenges managing them all. Most web applications work across different browsers, but compatibility issues can still arise, leading to disruptions and increased help desk calls.
Browser Restriction lets IT admins mandate a single browser for employees, and test mission-critical web applications against just that browser. This keeps the user experience consistent and lets IT focus on securing one browser instead of several.
Configuration
Implementing Browser Restriction
Build an allowlist or blocklist policy and roll it out network-wide.
Create and deploy a Browser Restriction policy
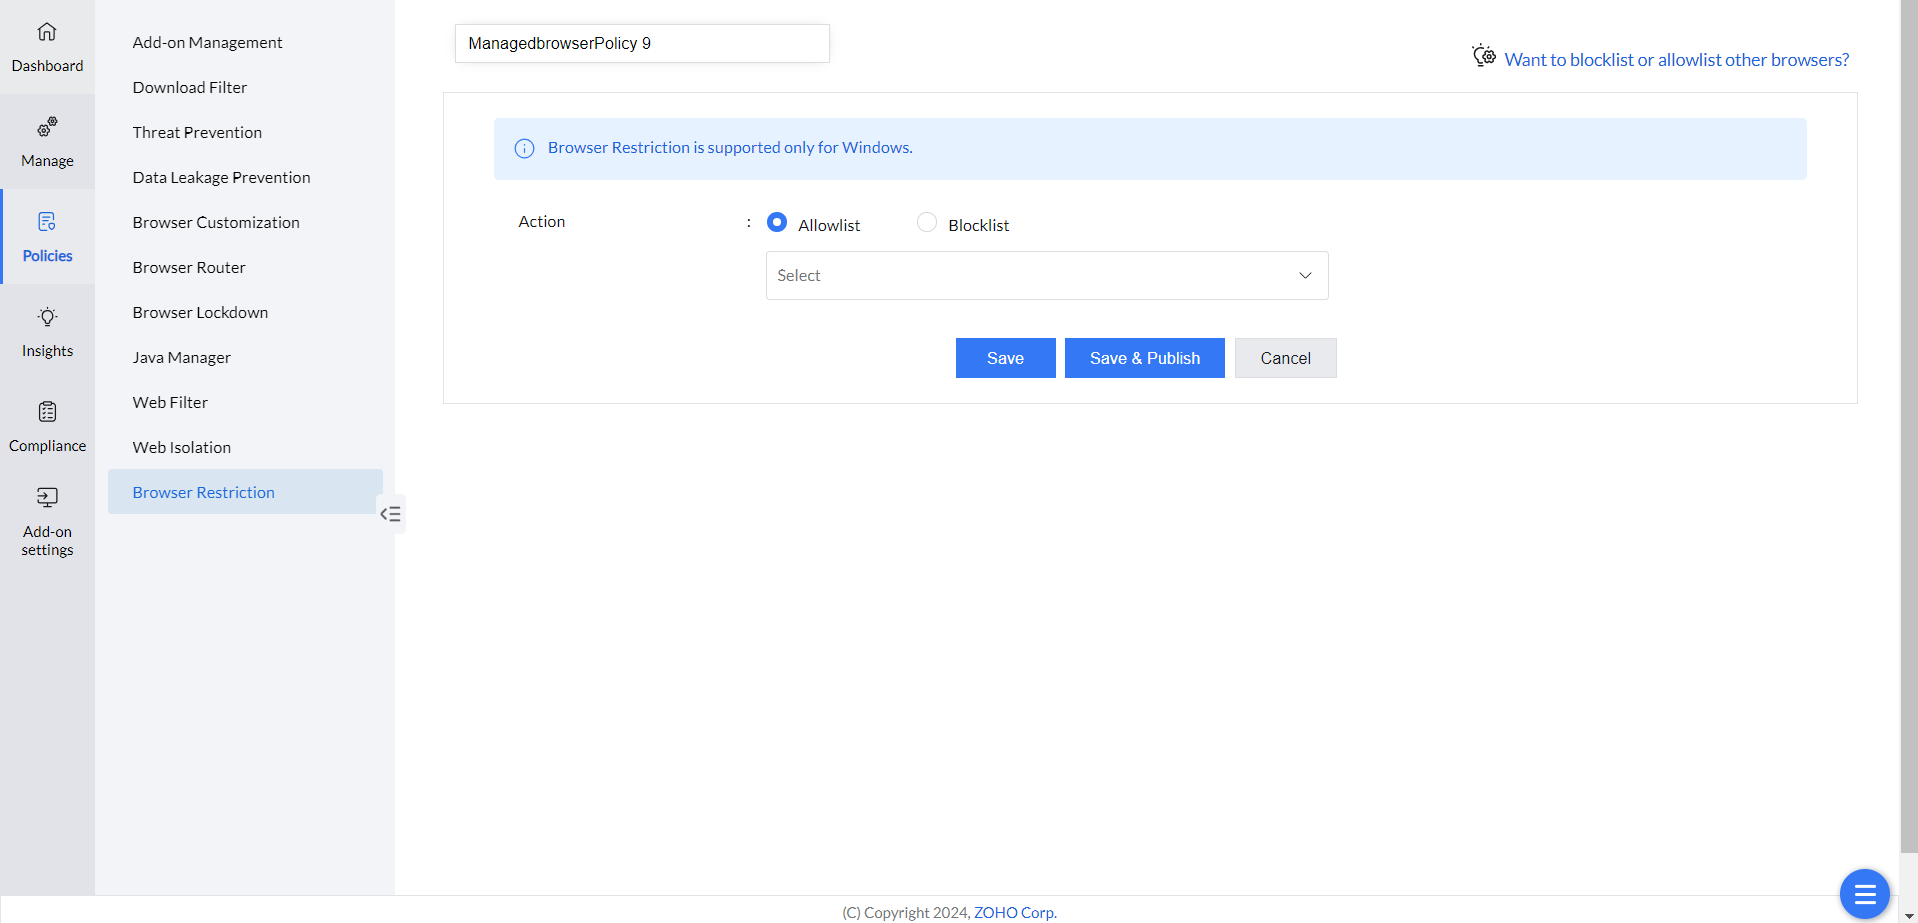
- Open the Endpoint Central MSP console and go to Browsers → Policies → Browser Restriction.
- Click Create Policy.
- Select Allowlist or Blocklist to allow or block the respective browsers.
- Choose the browsers to allowlist or blocklist from the list.
- Click Save to save the policy as a draft.
- Click Save & Publish to publish the policy.
- Deploy the policy with the computers or groups where web-application access should be restricted.