Integrate with Zendesk
Benefits of Integration
Endpoint Central MSP, Endpoint Central MSP’s comprehensive unified endpoint management and security solution, offers several benefits when integrated with Zendesk:
- Automate patch management for operating systems and third-party apps on Windows, macOS, and Linux.
- Easily deploy business-critical applications with pre-configured templates.
- Manage IT assets in real-time with in-depth control over hardware and software inventories.
- Utilize powerful remote access features, including file transfer and built-in communication tools.
- Troubleshoot remotely with multiple monitor support, session recording, and technician collaboration.
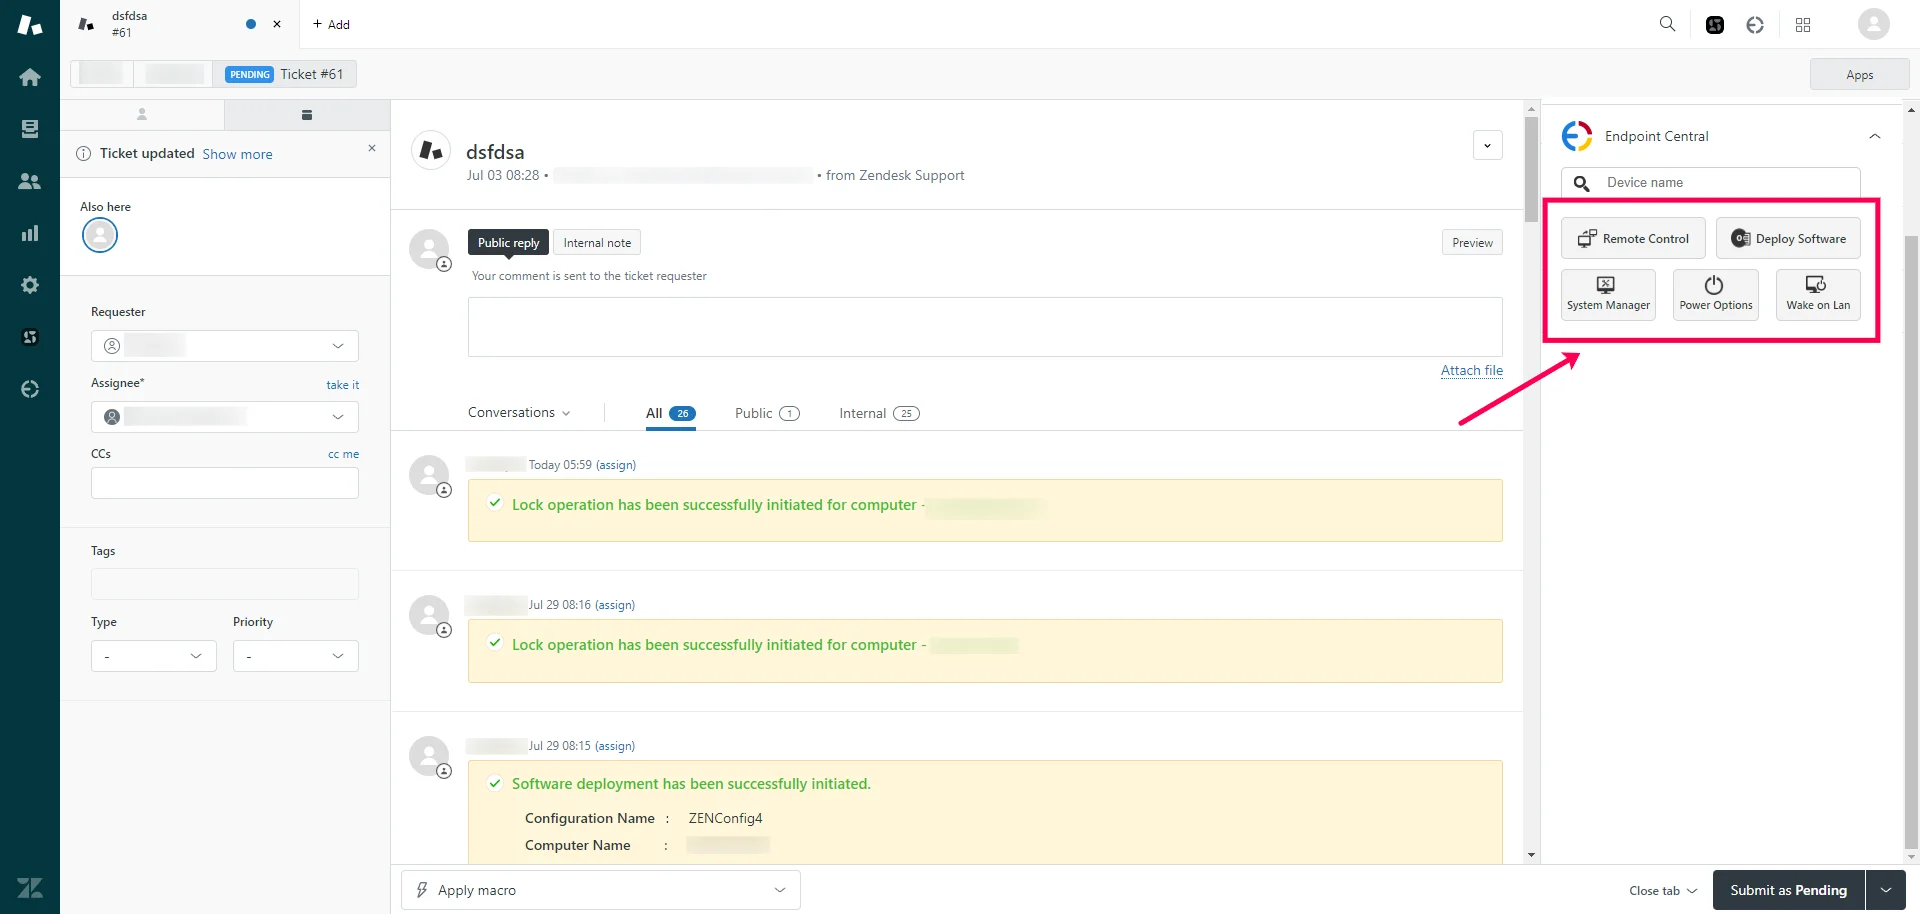
- Take advantage of remote power options like Wake-on-LAN, shutdown, and standby.
- Resolve issues using system manager tools without initiating a remote session.
- Generate comprehensive audit reports for in-depth analysis and compliance.
- Leverage OS imaging and deploy systems remotely, even to branch offices.
- Automate administrative tasks such as configuring printers or browser settings using pre-built configurations.
- Manage mobile devices efficiently, including app distribution and profile association.
- Track and secure lost or stolen devices by performing a remote data wipe if necessary.
This integration is compatible with both the On-Premise and Cloud versions of Endpoint Central MSP.
Endpoint Central On-Premise
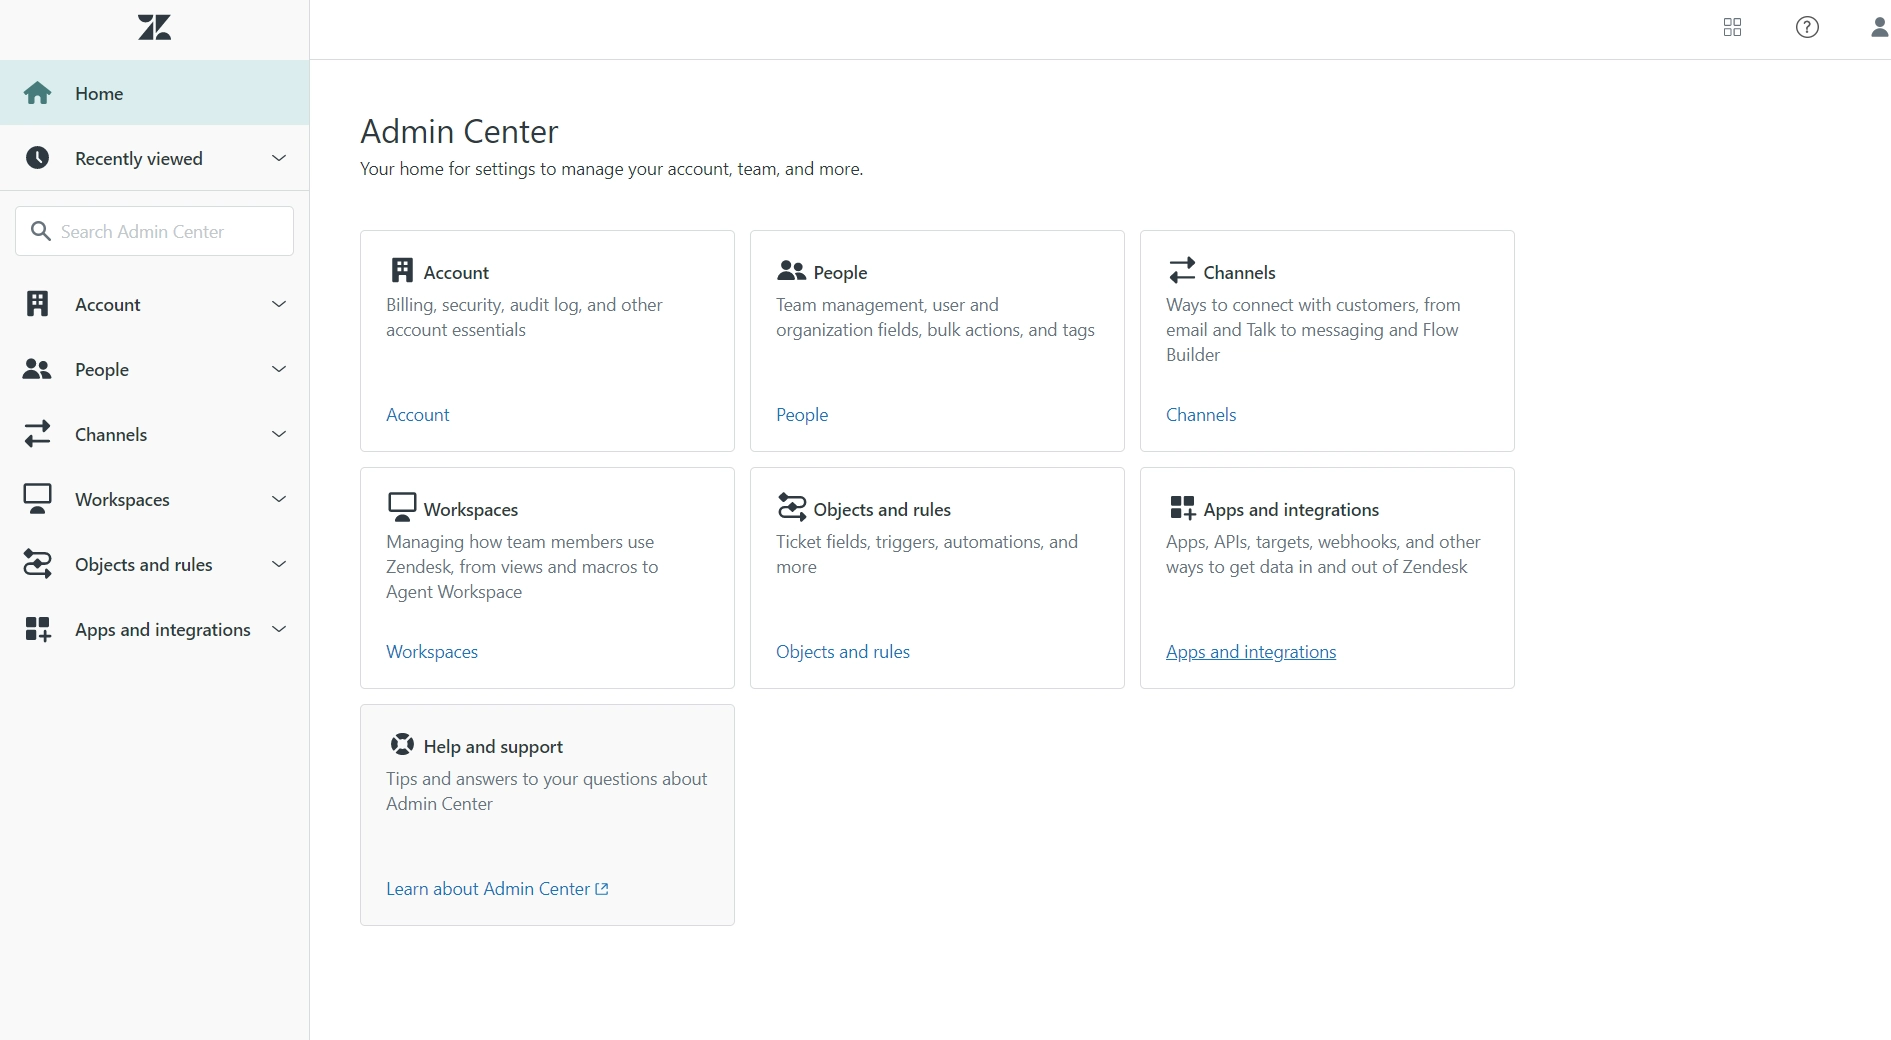
- Begin by navigating to the Admin Center within Zendesk.
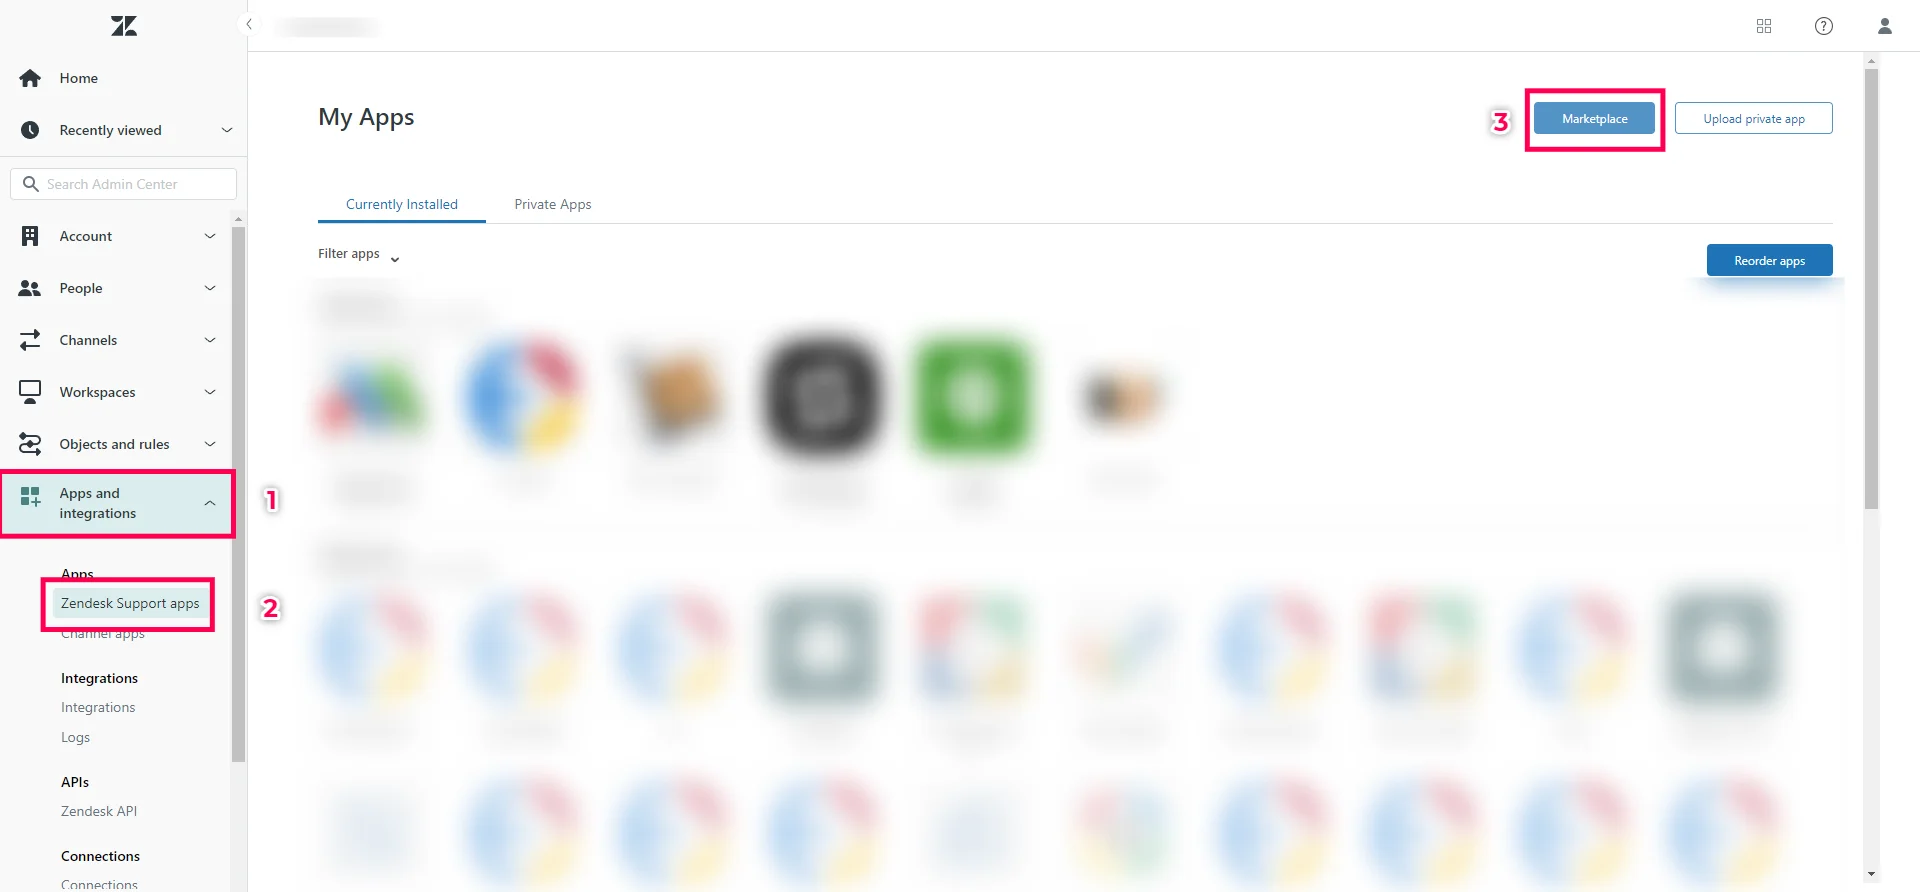
- Next, go to the Apps and Integrations section. Under this, select Zendesk Support Apps, and click on Marketplace.
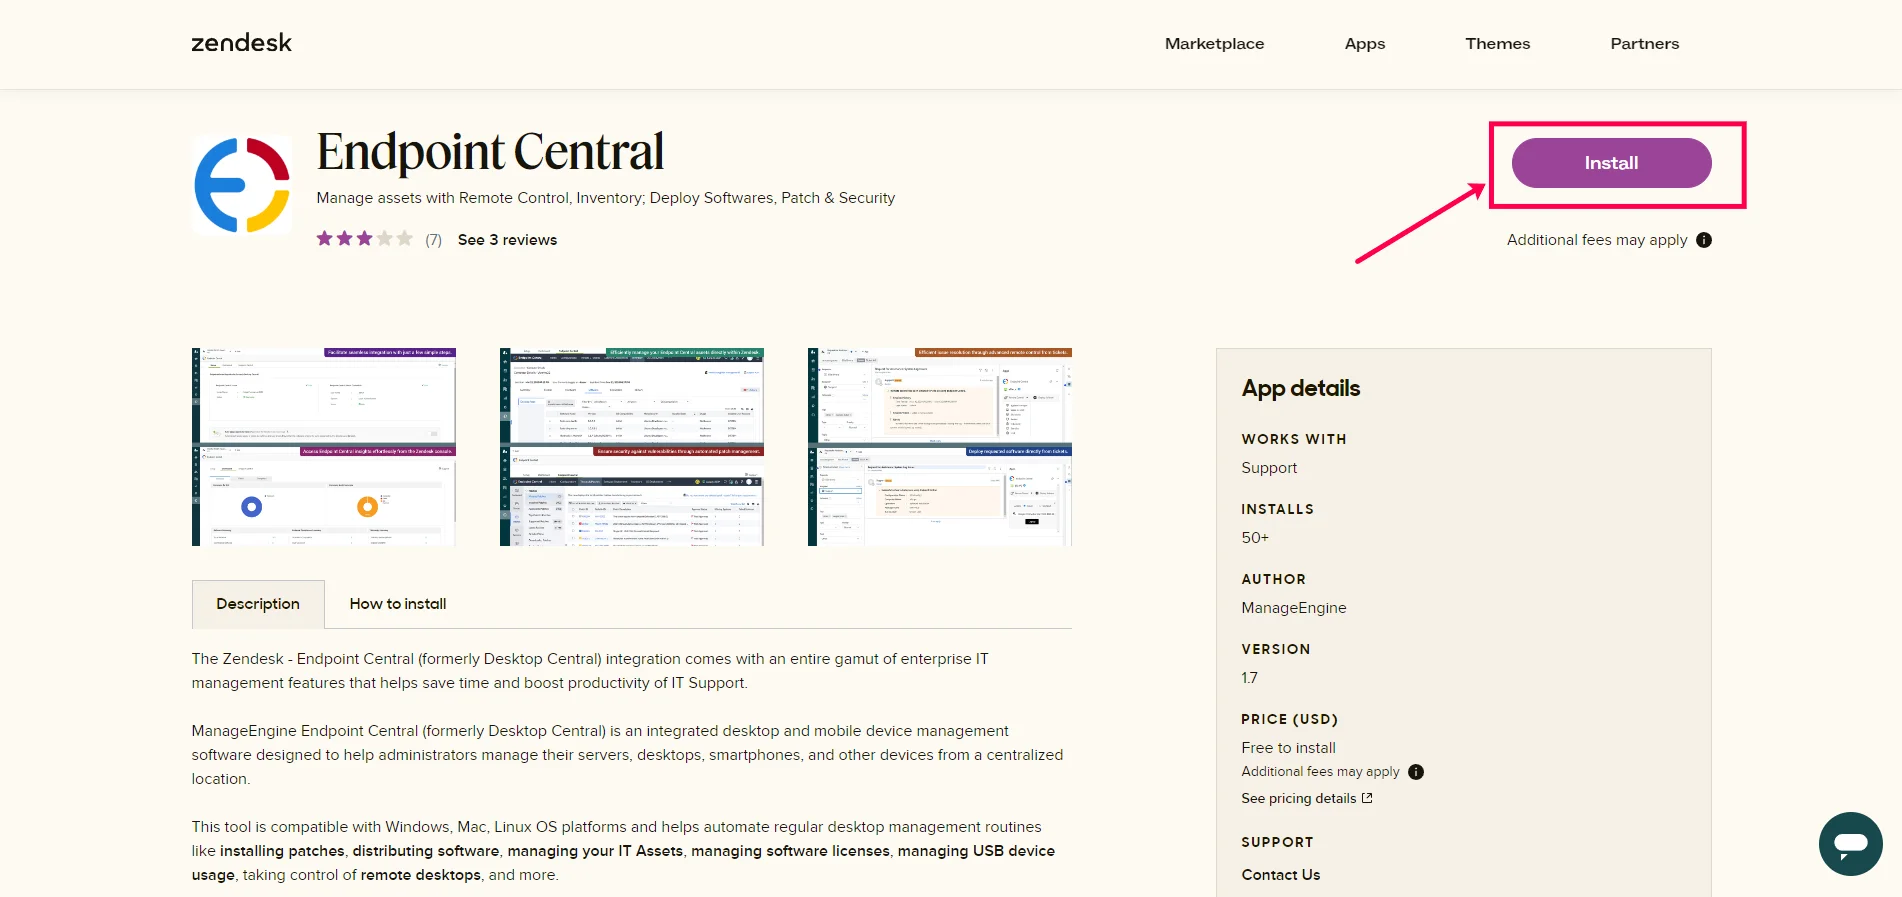
- Once in the Marketplace, search for Endpoint Central MSP and proceed to install the app.
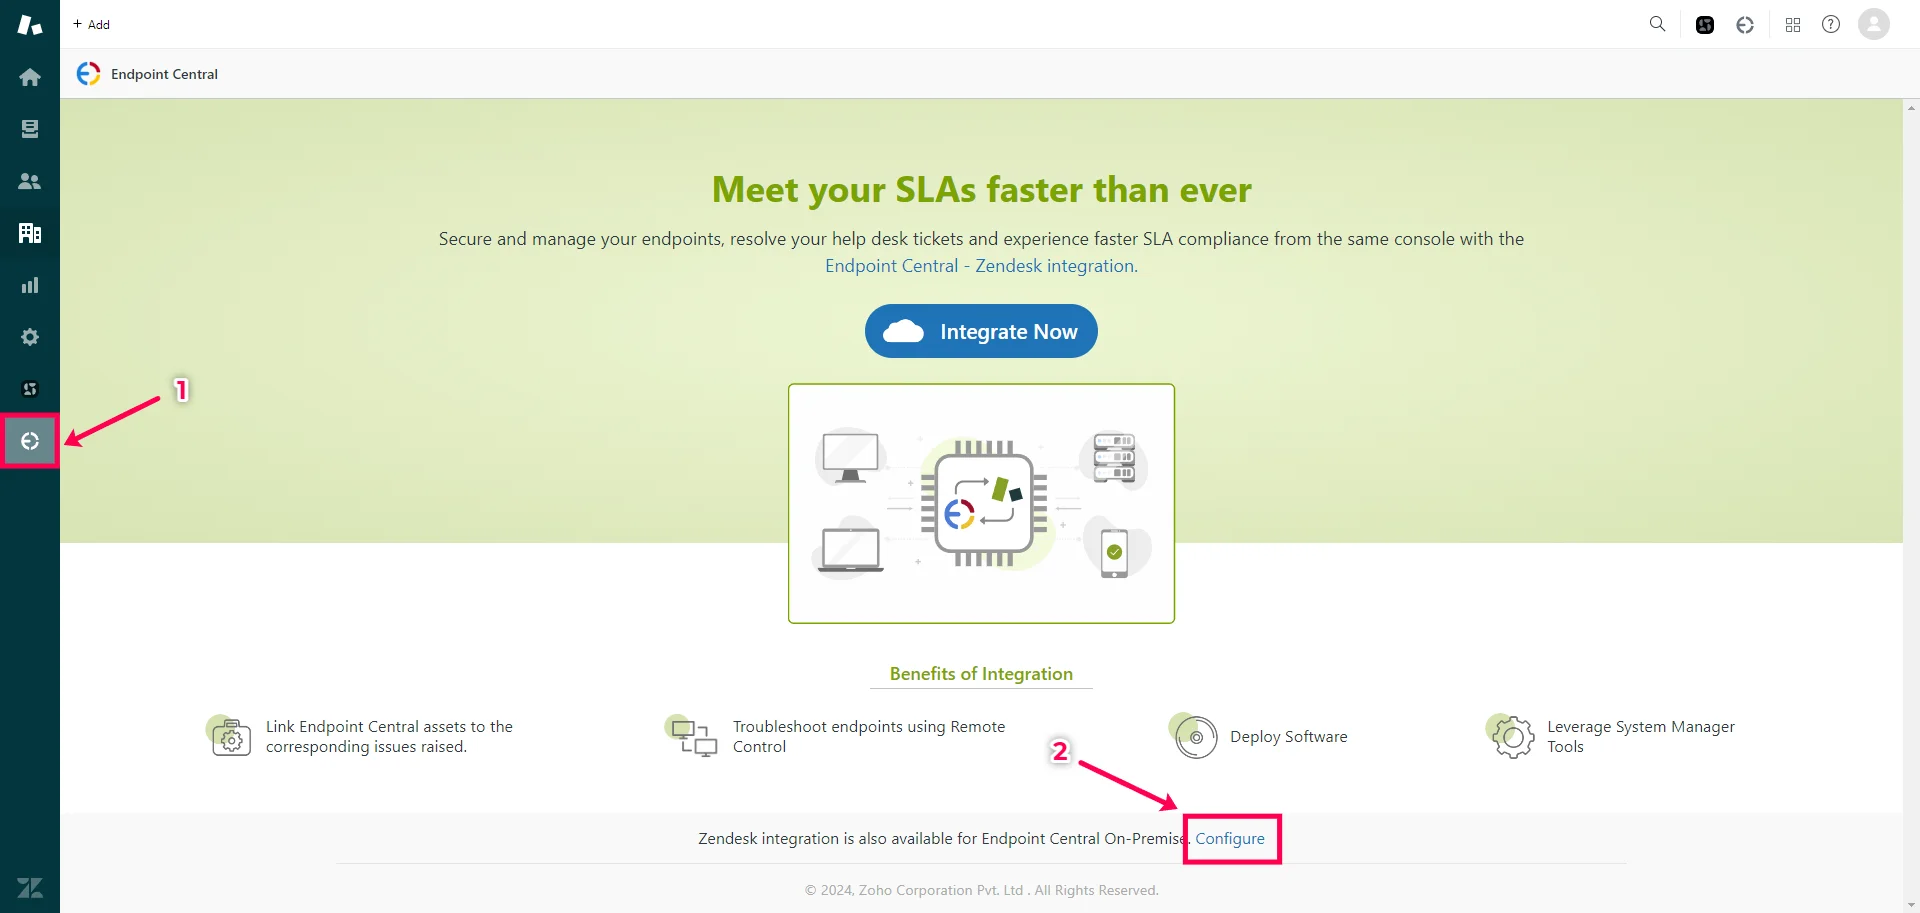
- After installation, open the Zendesk Agent Workspace and locate the Endpoint Central MSP icon on the left panel. Click on it, then select Configure at the bottom.
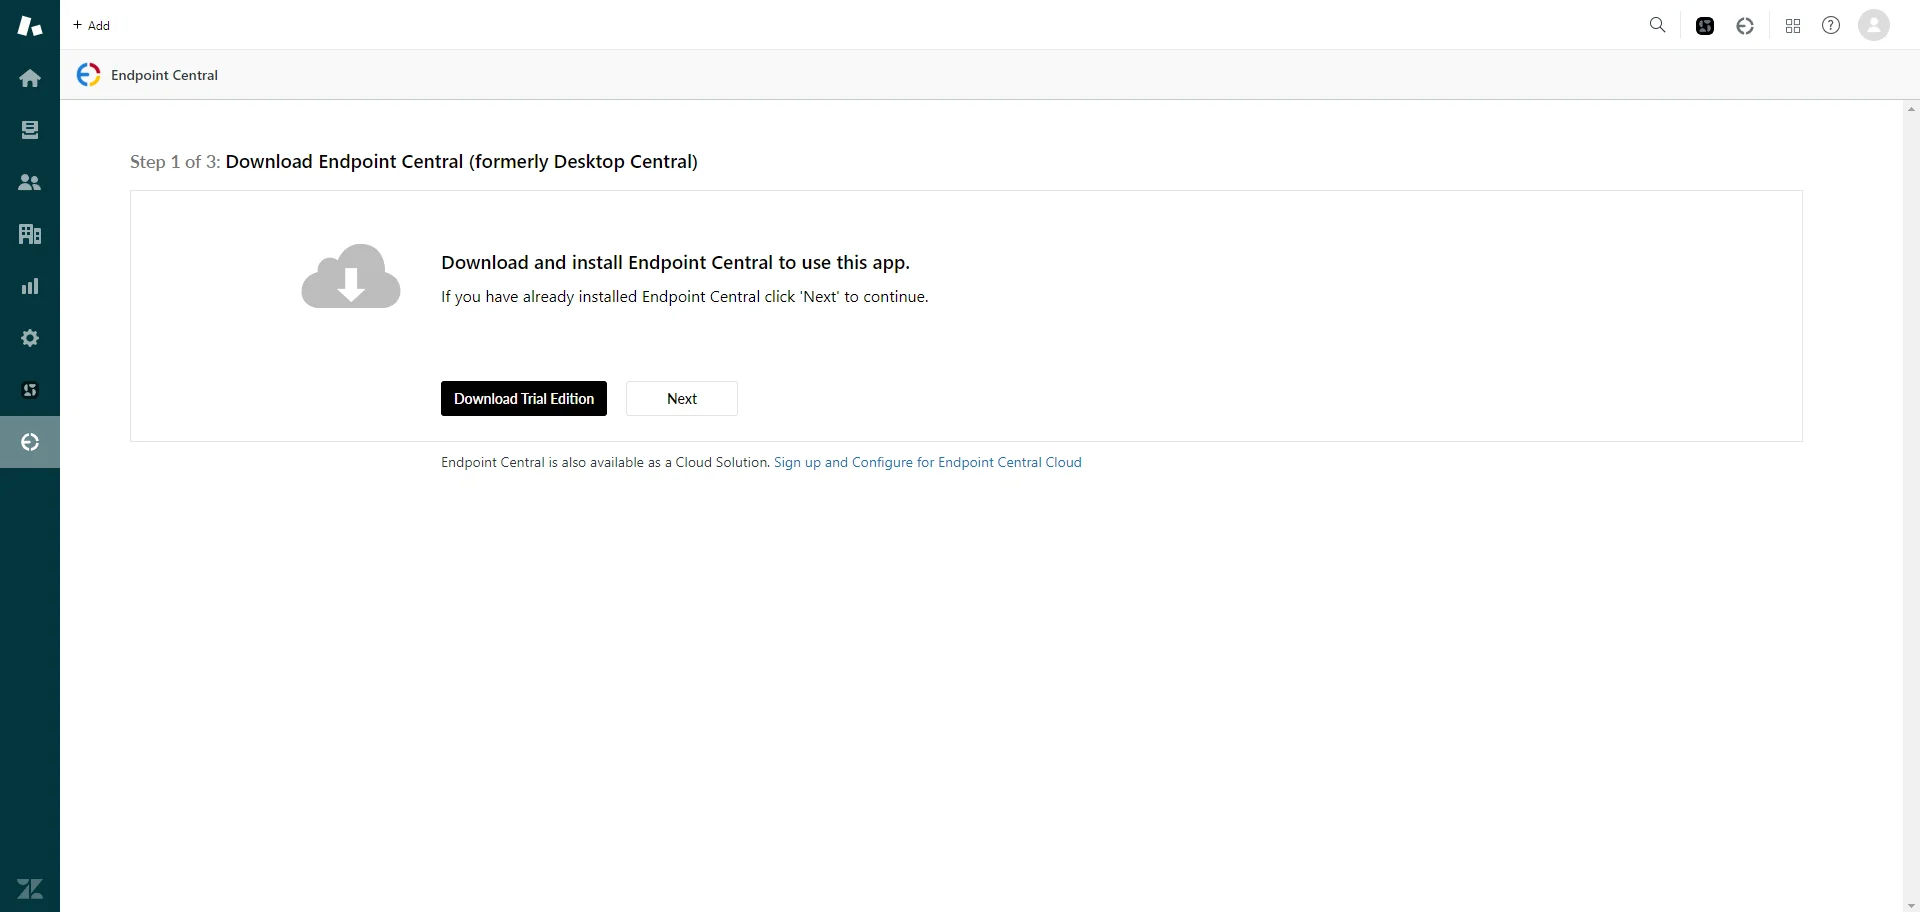
- If you're a new user, click on Download Trial Edition to set up the Endpoint Central MSP server. If you already have the server, simply click Next.
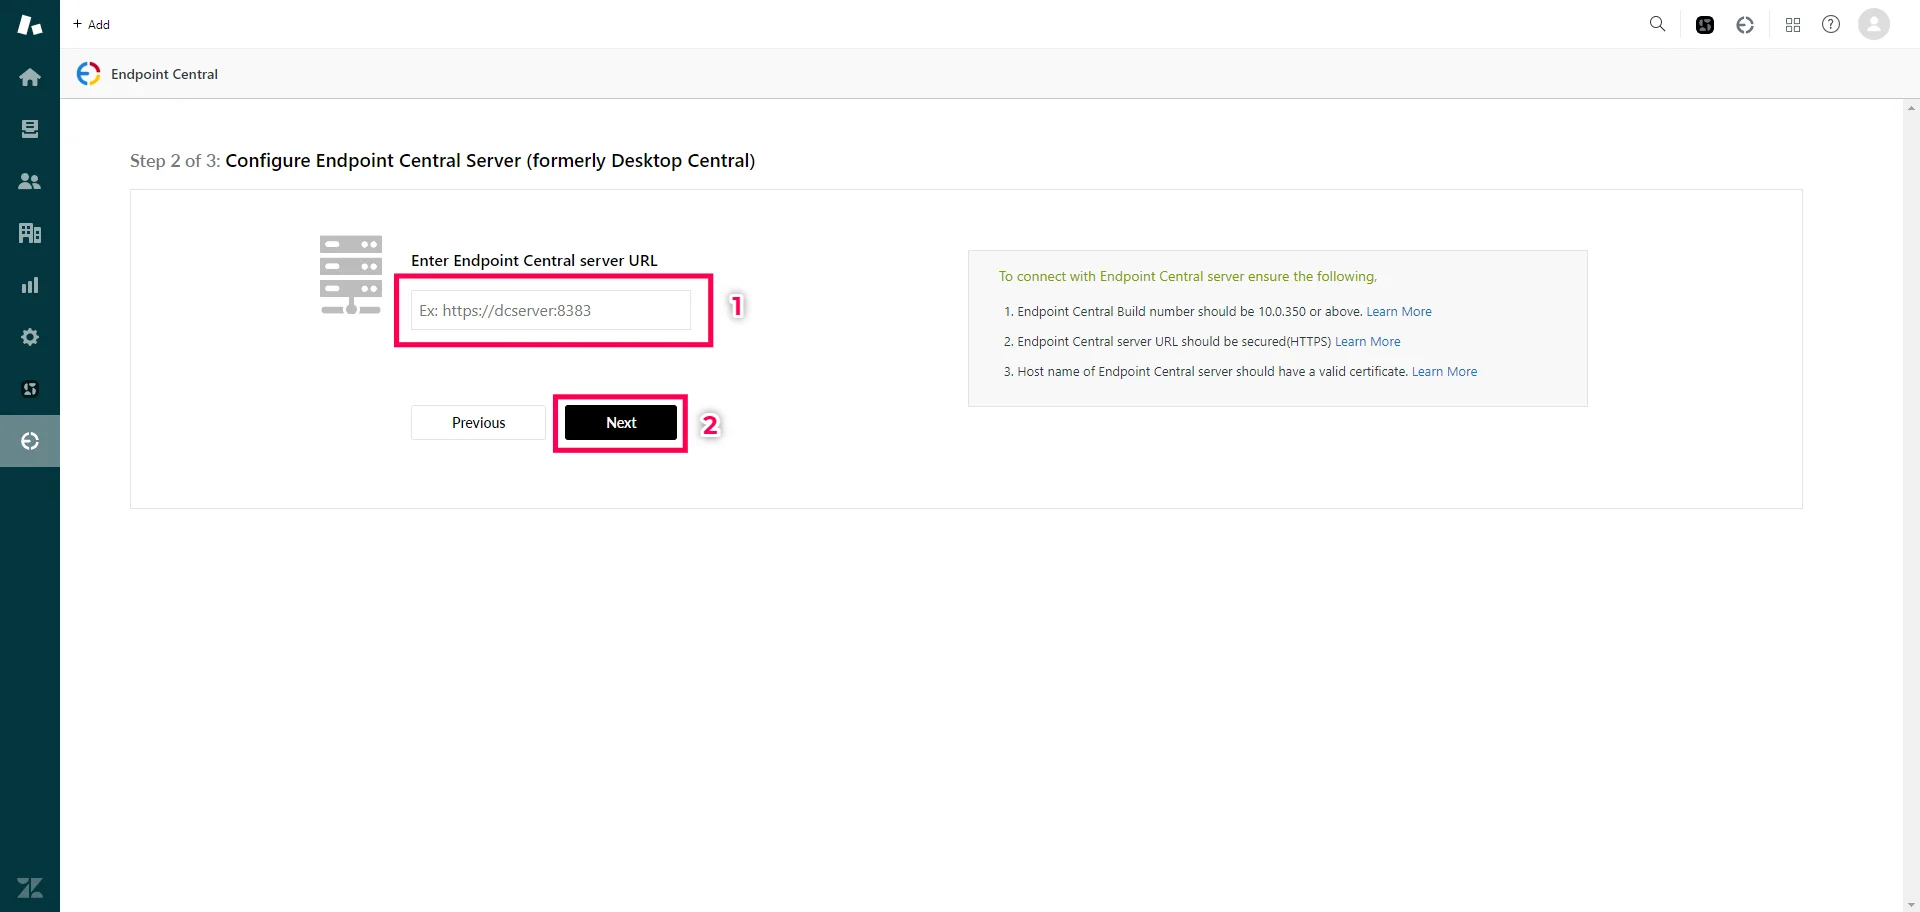
- Input the Endpoint Central MSP server URL and click Next to proceed.
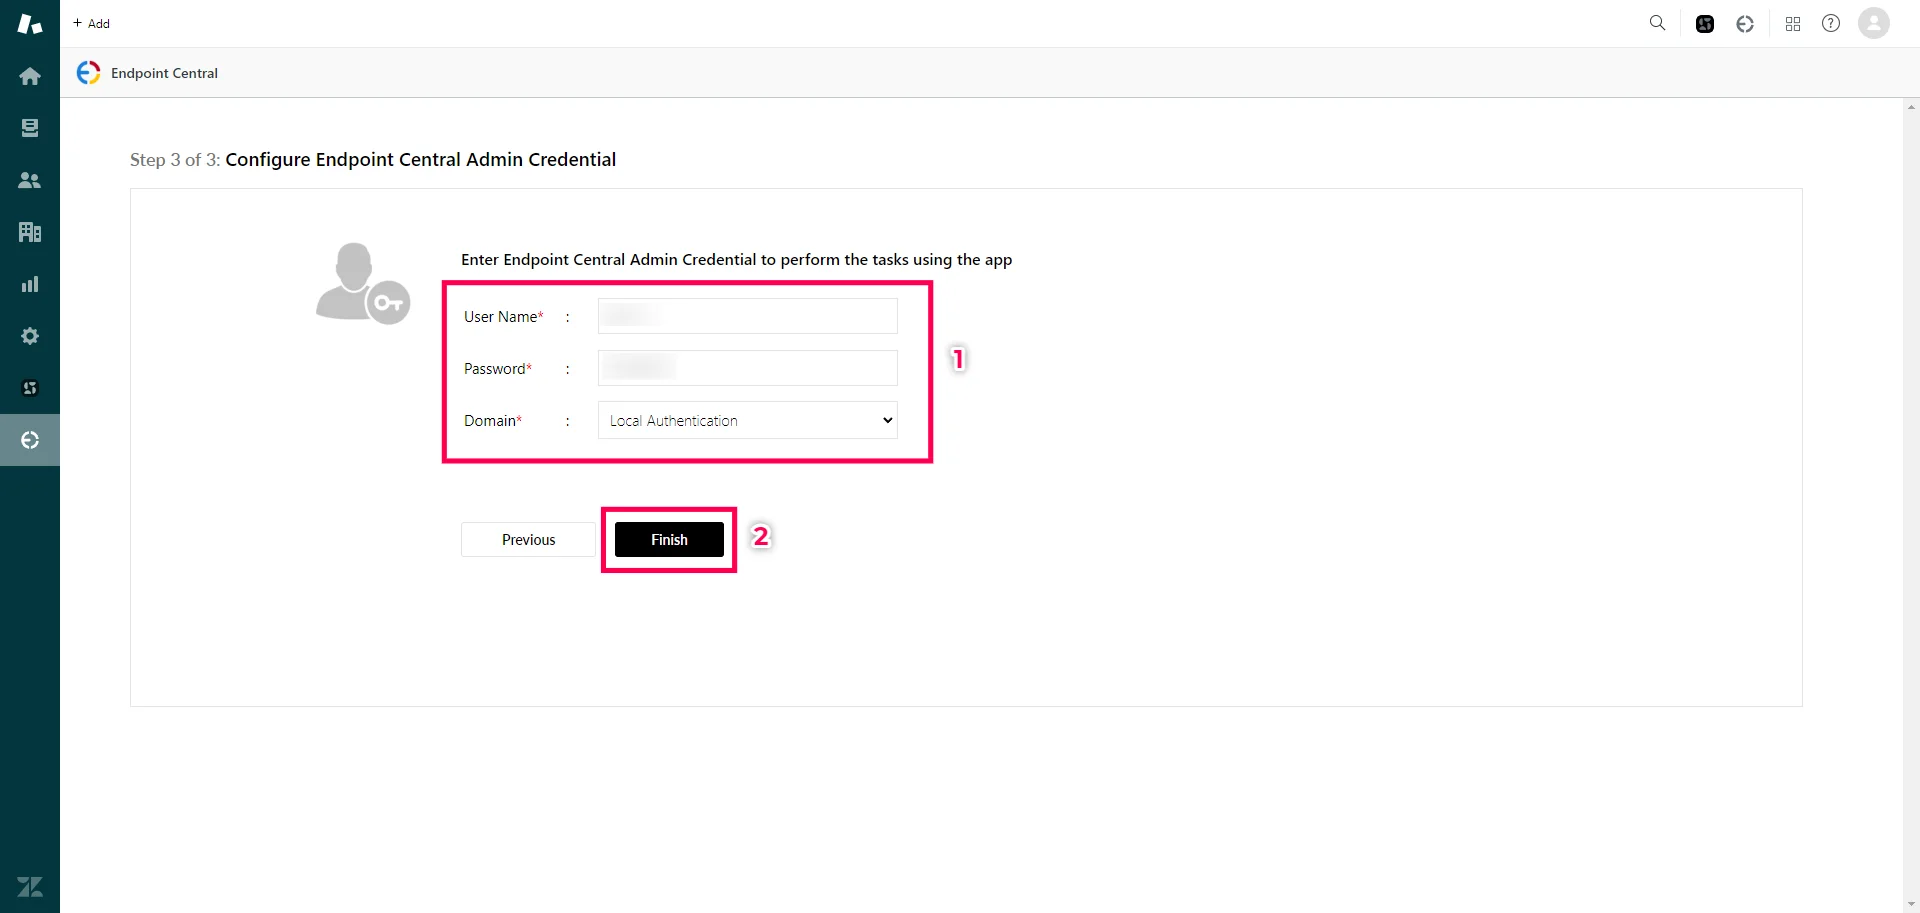
- Enter your administrator credentials for Endpoint Central MSP, then click Finish to finalize the integration process.
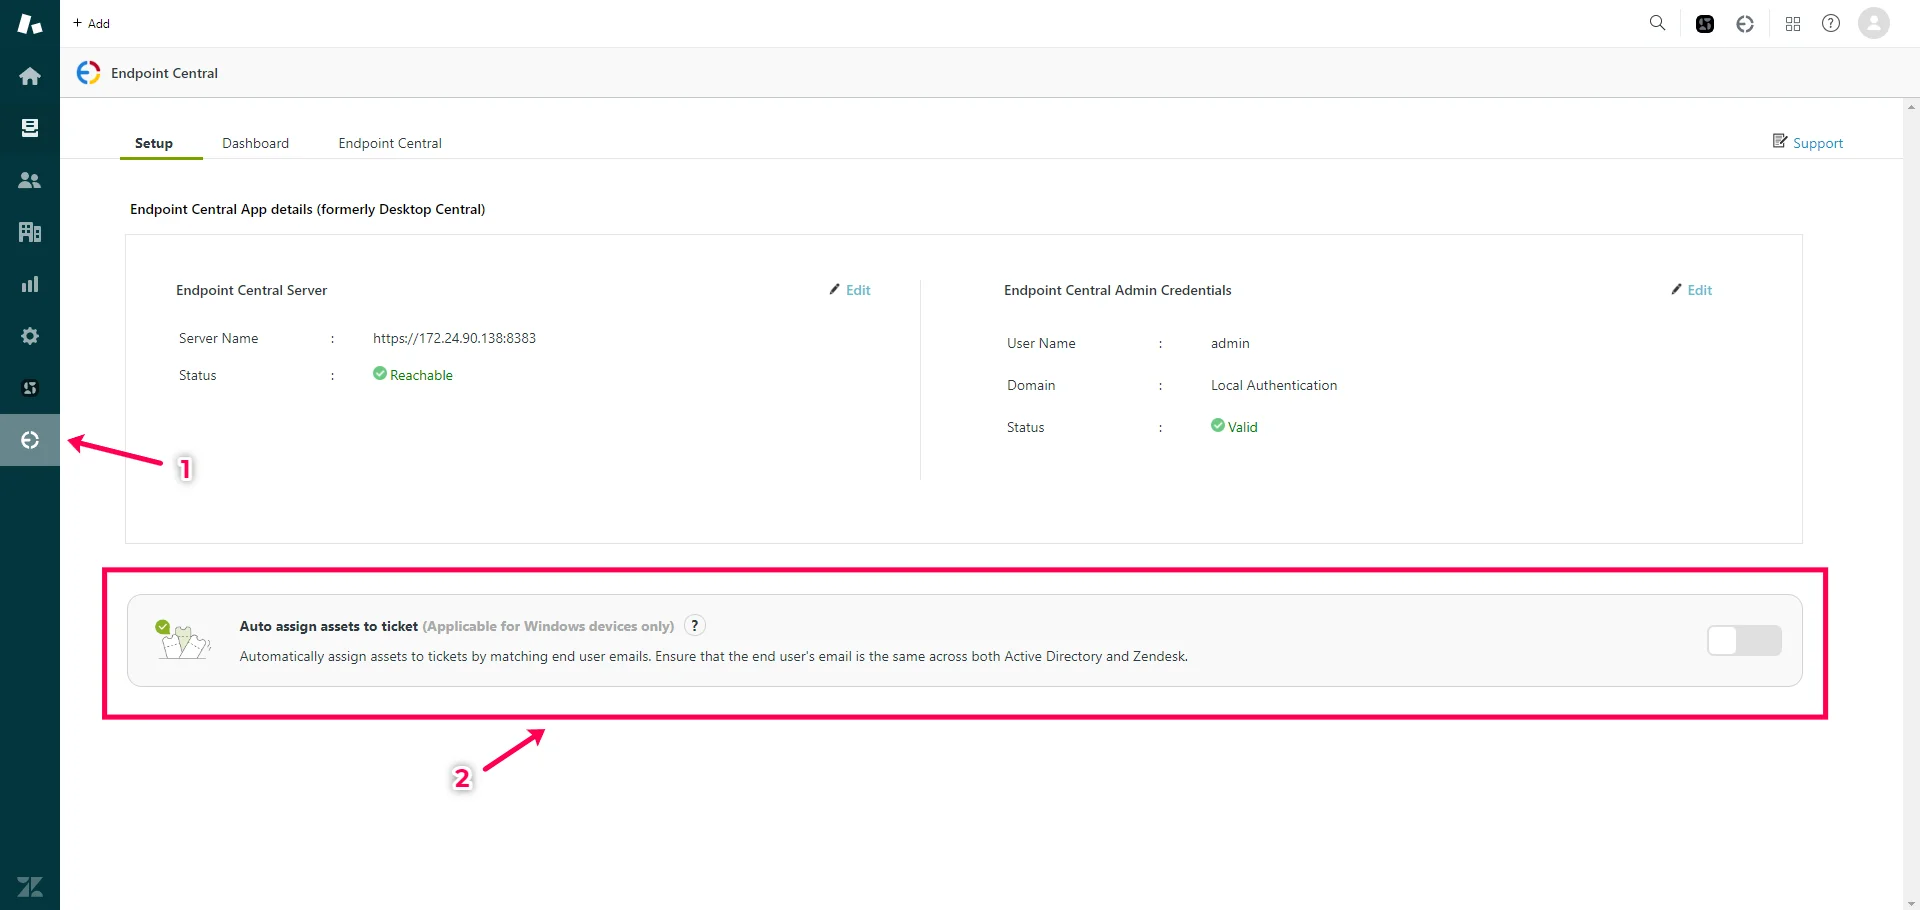
The Endpoint Central MSP app is now successfully integrated with Zendesk.
Auto Assign Assets
Enabling the Auto Assign Assets feature automatically maps the Windows machine to an issue whenever a request is created in Zendesk. This eliminates the need for manual machine mapping, streamlining the issue resolution process. To enable this feature, go to the Setup Server page and enable Auto-Assign Assets.
Note: This feature is currently available for Windows machines only.
Accessing Endpoint Central MSP Features
Once integrated, Zendesk users can use Endpoint Central MSP’s features to manage endpoints directly from within ticket window.
- Open any ticket, then click on the Endpoint Central MSP tab in the right panel.
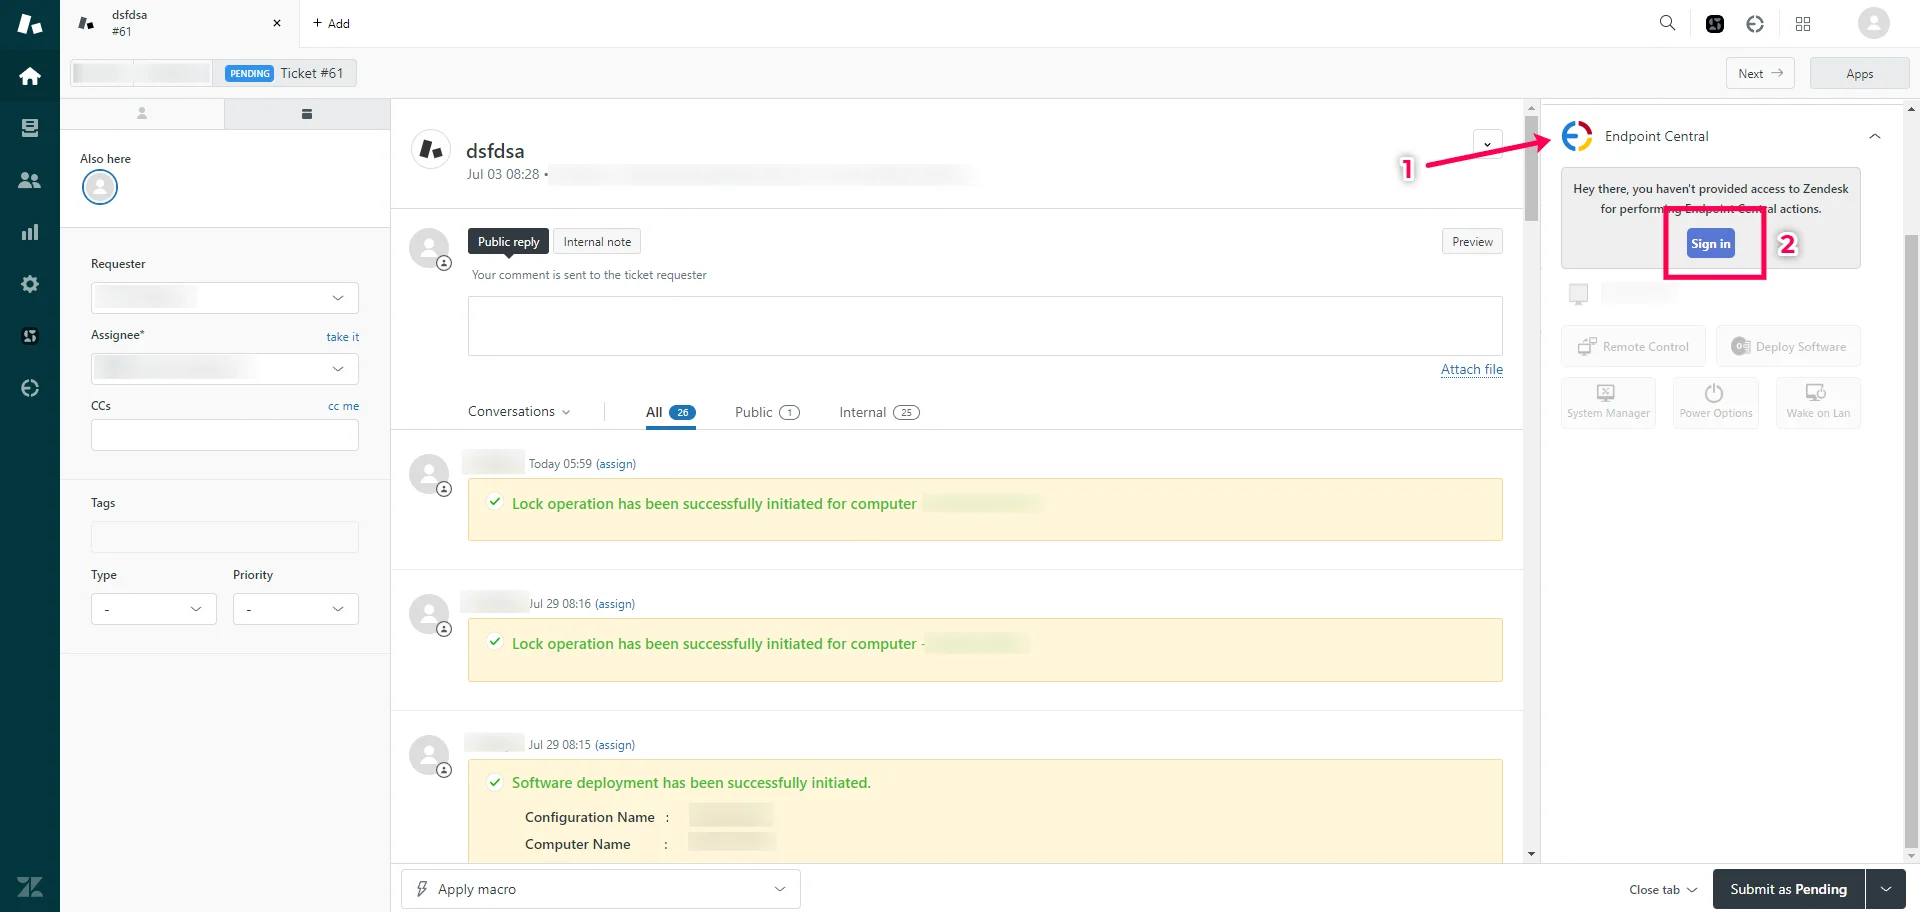
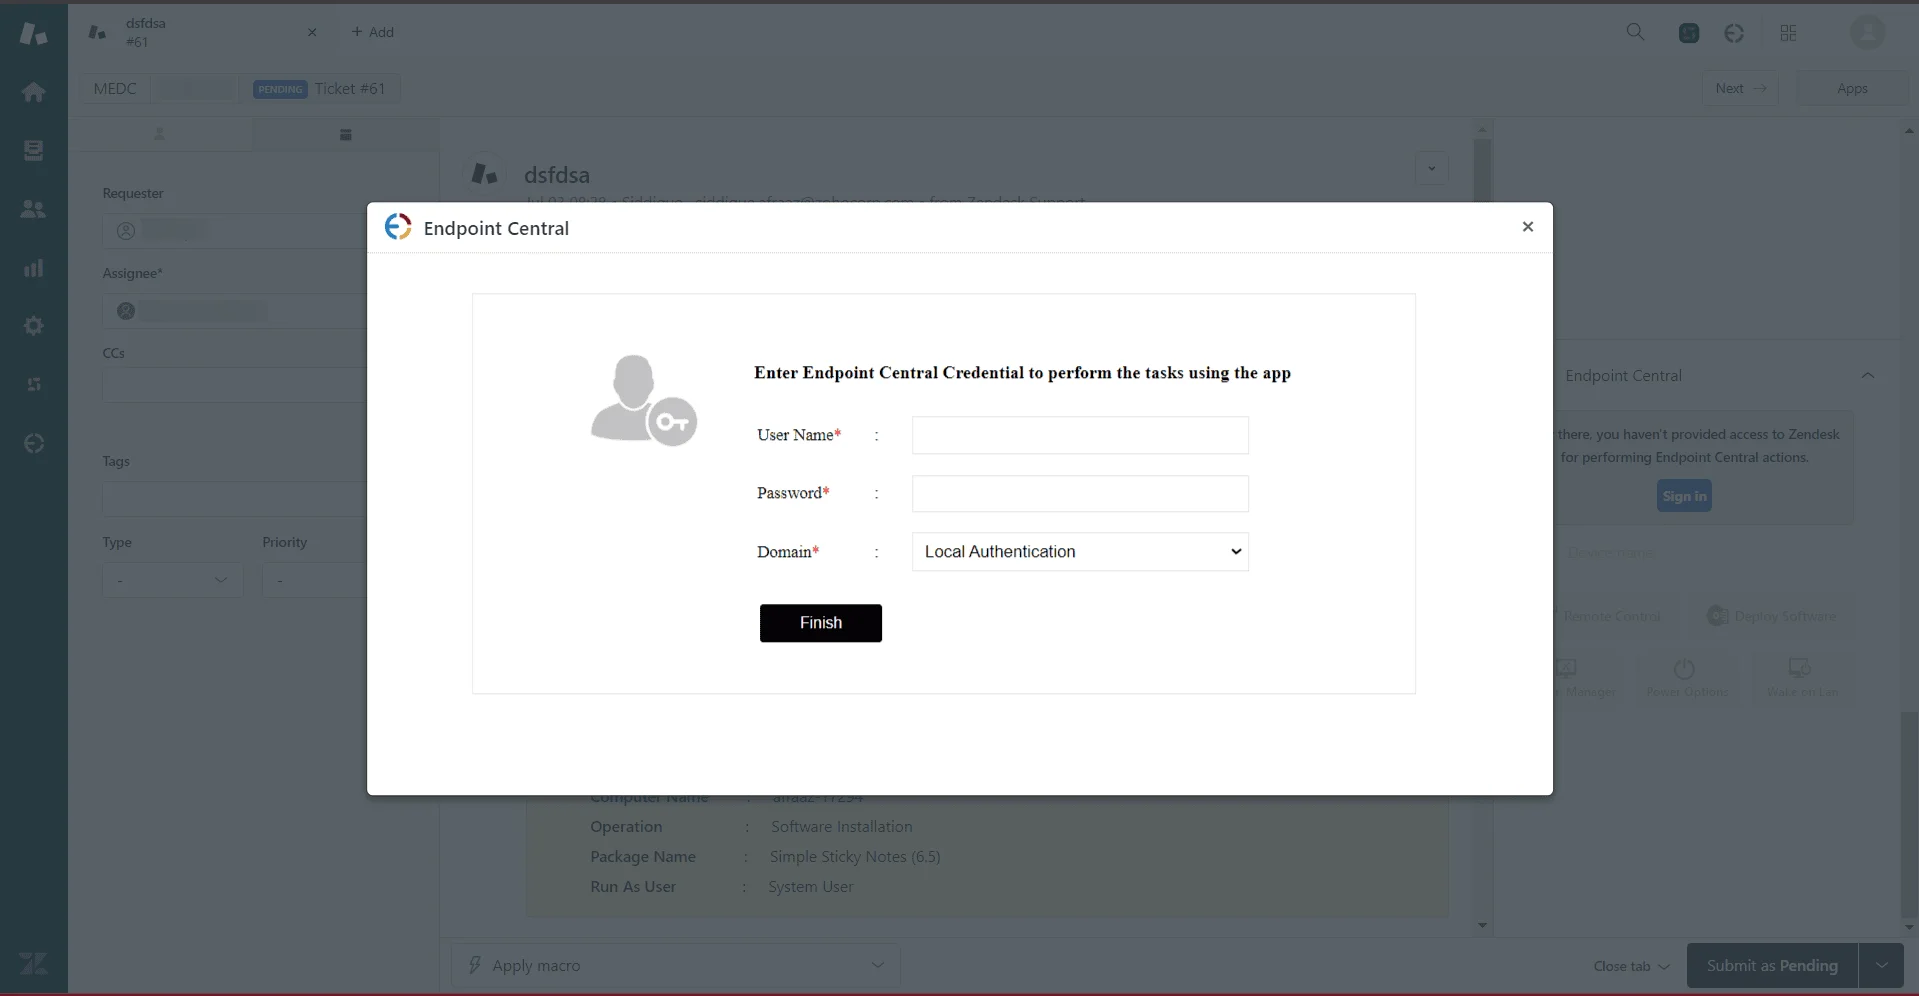
- If prompted, sign in using your Endpoint Central MSP credentials.
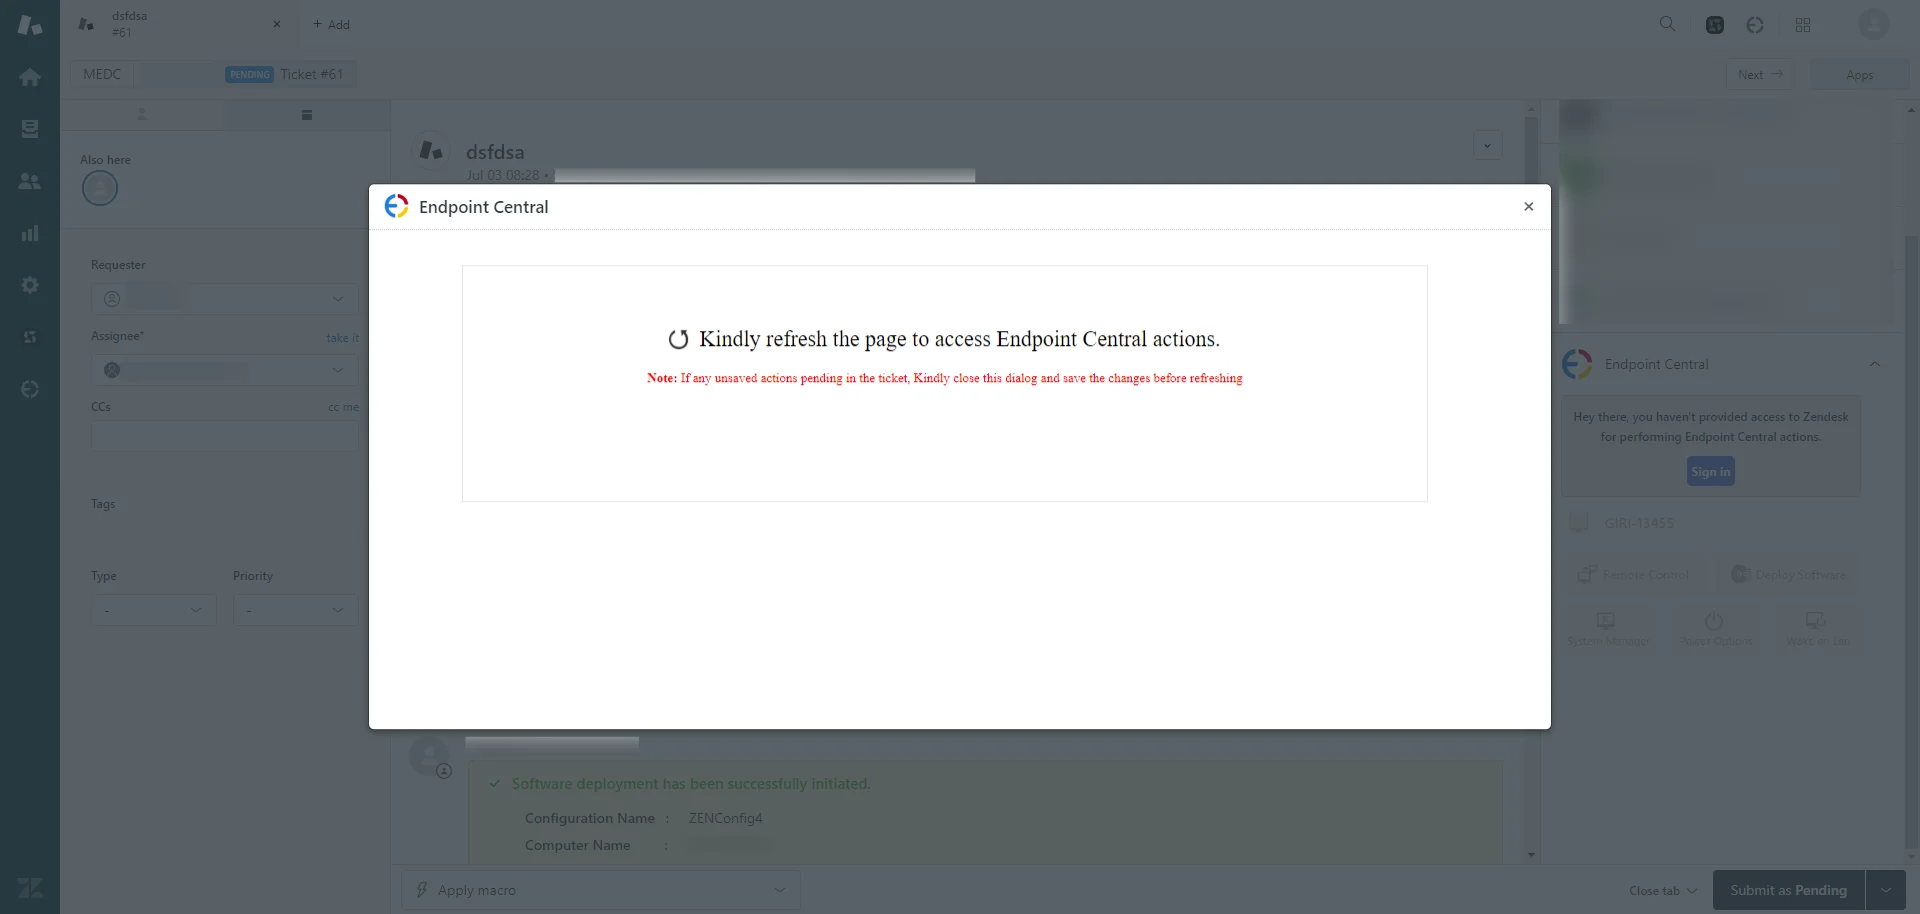
- After logging in, refresh your Zendesk console to gain access to Endpoint Central MSP features.
- You can now manage endpoints using Endpoint Central MSP within Zendesk.
Endpoint Central Cloud
- Start by visiting the Admin Center within Zendesk.
- In the Apps and Integrations section, open Zendesk Support Apps, then click on Marketplace.
- Search for Endpoint Central MSP in the Marketplace and install the app.
- Open the Endpoint Central MSP tab from the left panel. Click Integrate Now at the bottom of the page.
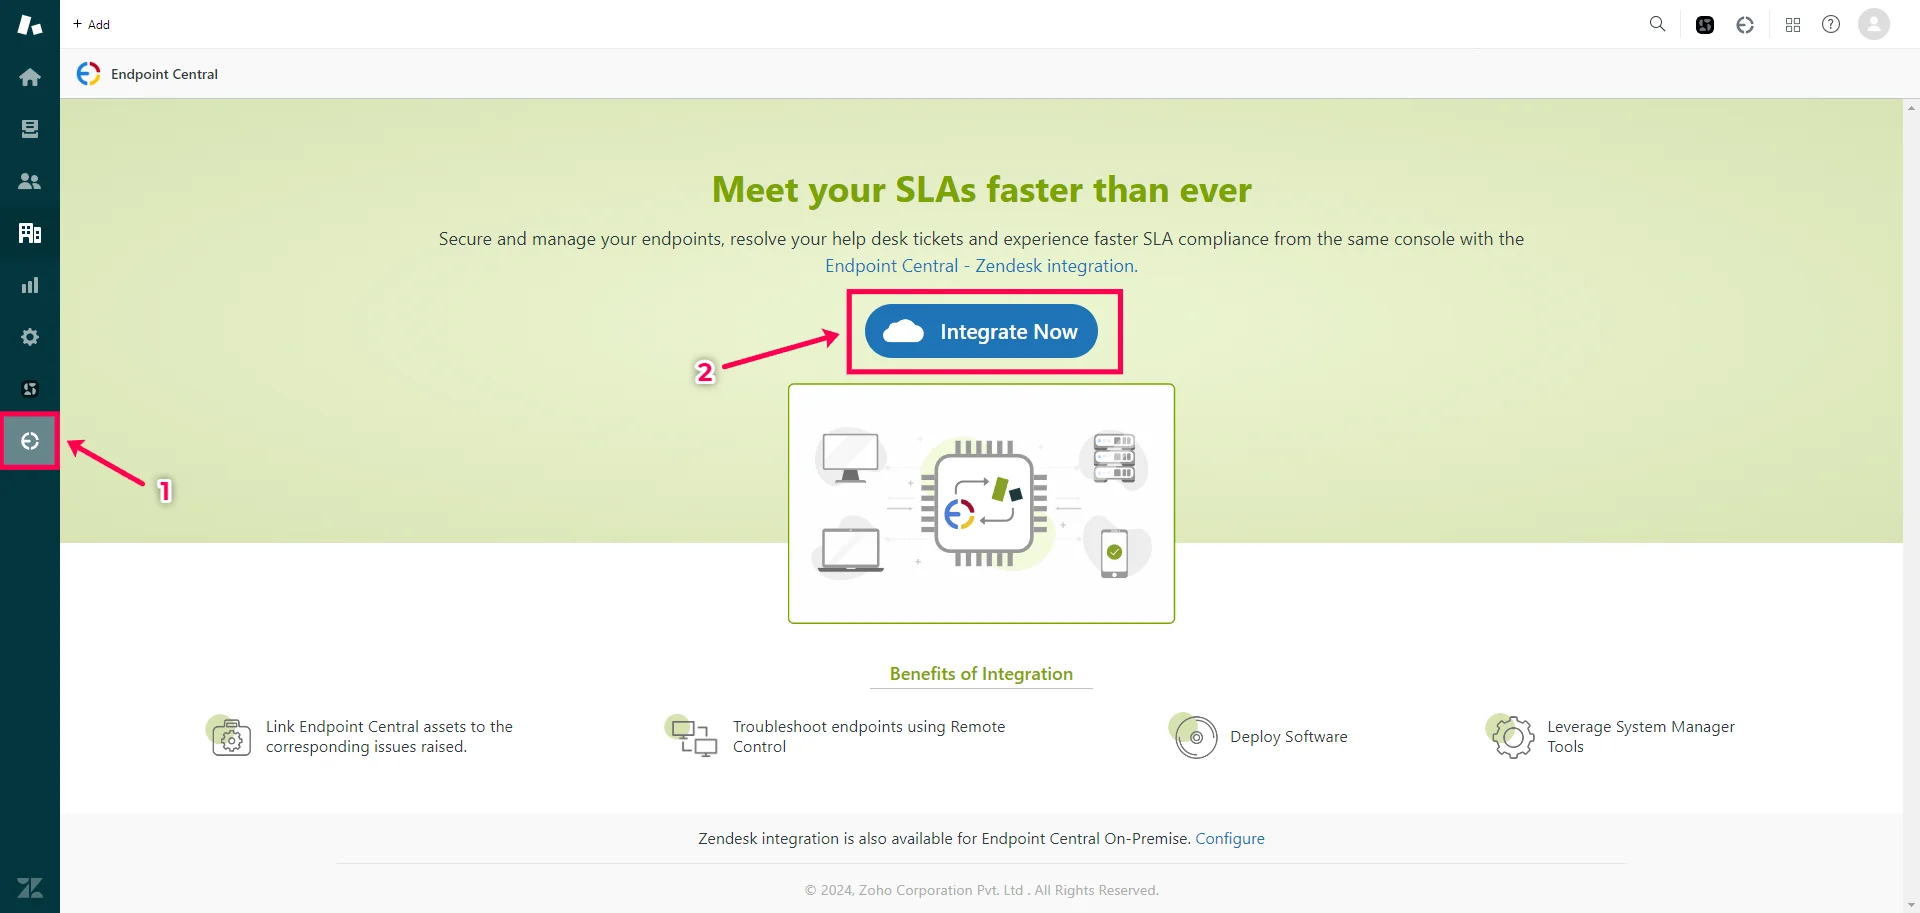
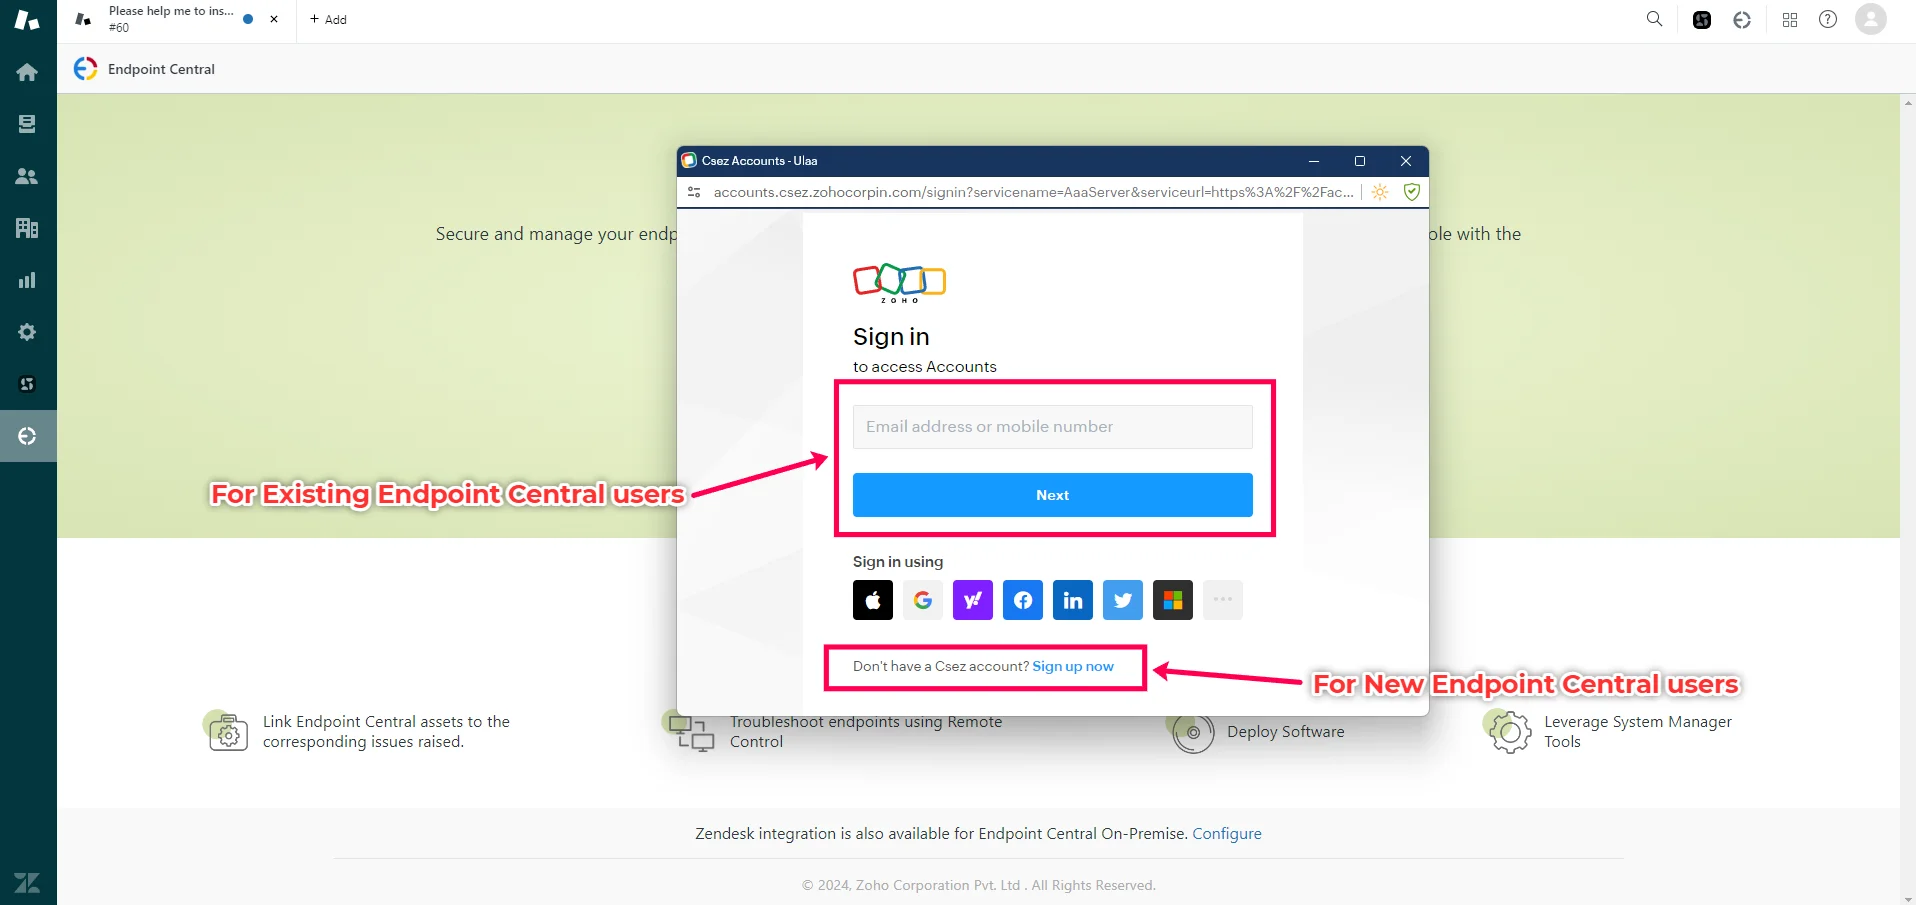
- A pop-up will appear for account details:
- Existing users can log in with their credentials.
- New users should click Sign Up to create a new account.
- Once logged in, you'll be prompted to grant permissions for the integration. Click Accept to complete the setup.
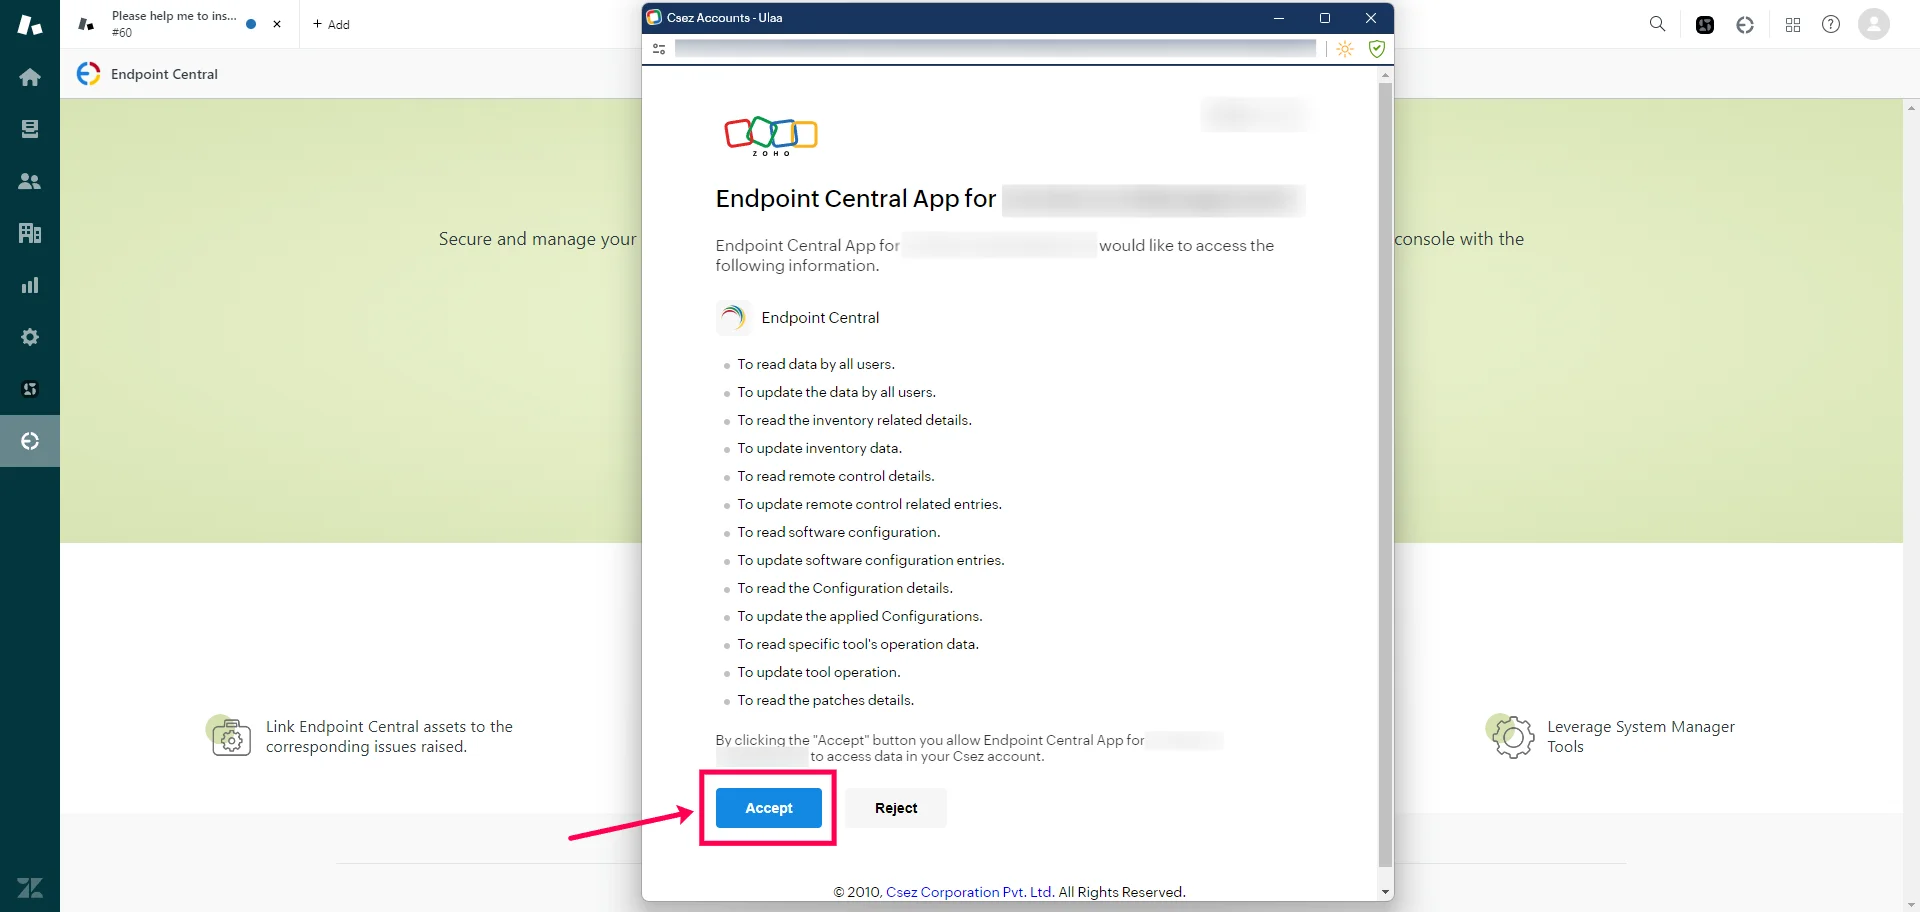
The Endpoint Central MSP app is now integrated with Zendesk successfully. Other Endpoint Central MSP users from your organization can directly authenticate themselves and start using the app.