Configuring Failover for Windows App Console in DDI Central
DDI Central supports failover for the Management UI console, helping ensure service continuity during the console server downtime. The application console can be installed on both primary and secondary servers to enable a complete failover mechanism. If the primary server goes down, the secondary server takes over and assumes full control of all managed DNS and DHCP servers in the network.
To configure failover in DDI Central application,
- Two installations are required. The DDI Central app console must be installed in both primary and secondary servers.
- The primary and secondary servers can be in different time zones. However, ensure that both servers are configured to run on the correct local time.
- Both primary or secondary servers should run on the same HTTPS port.
- Both servers should be in sync, and they should have consistent connectivity.
- Both servers should run on the same version of the app console.
Intially before setting up the Console Failover, you can see the NOT CONFIGURED status in the top right corner clearly indicating theres no console failover configuration in place.
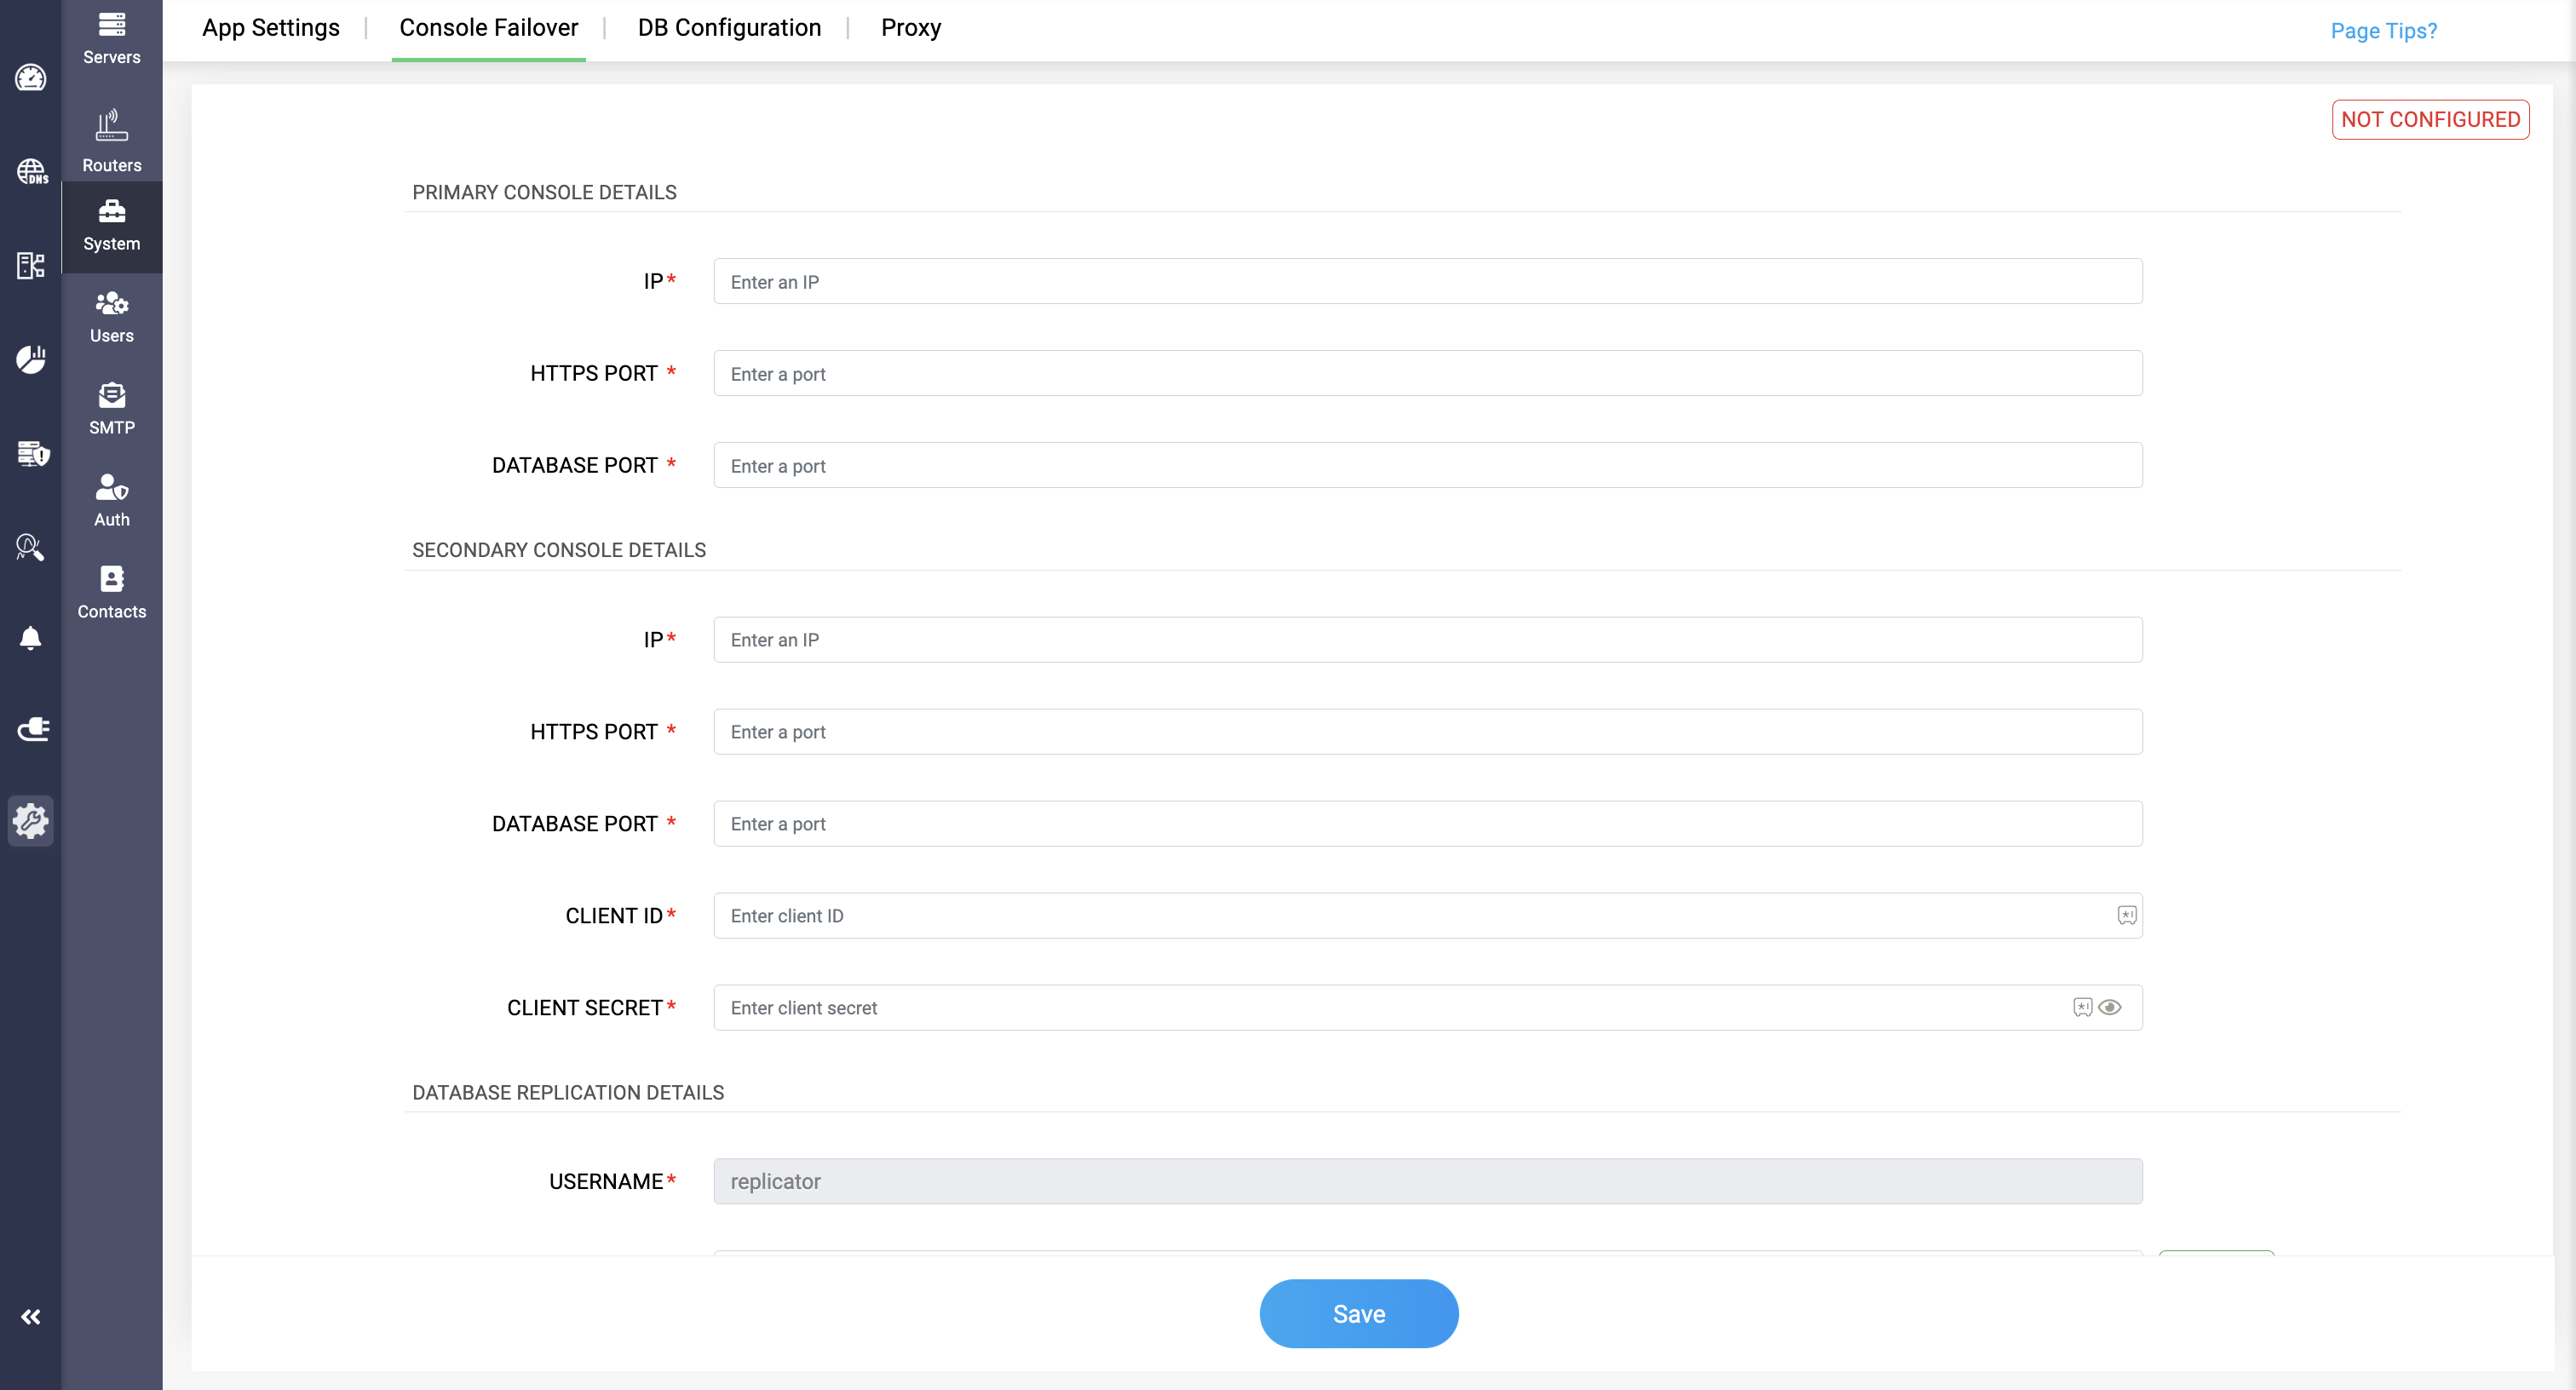
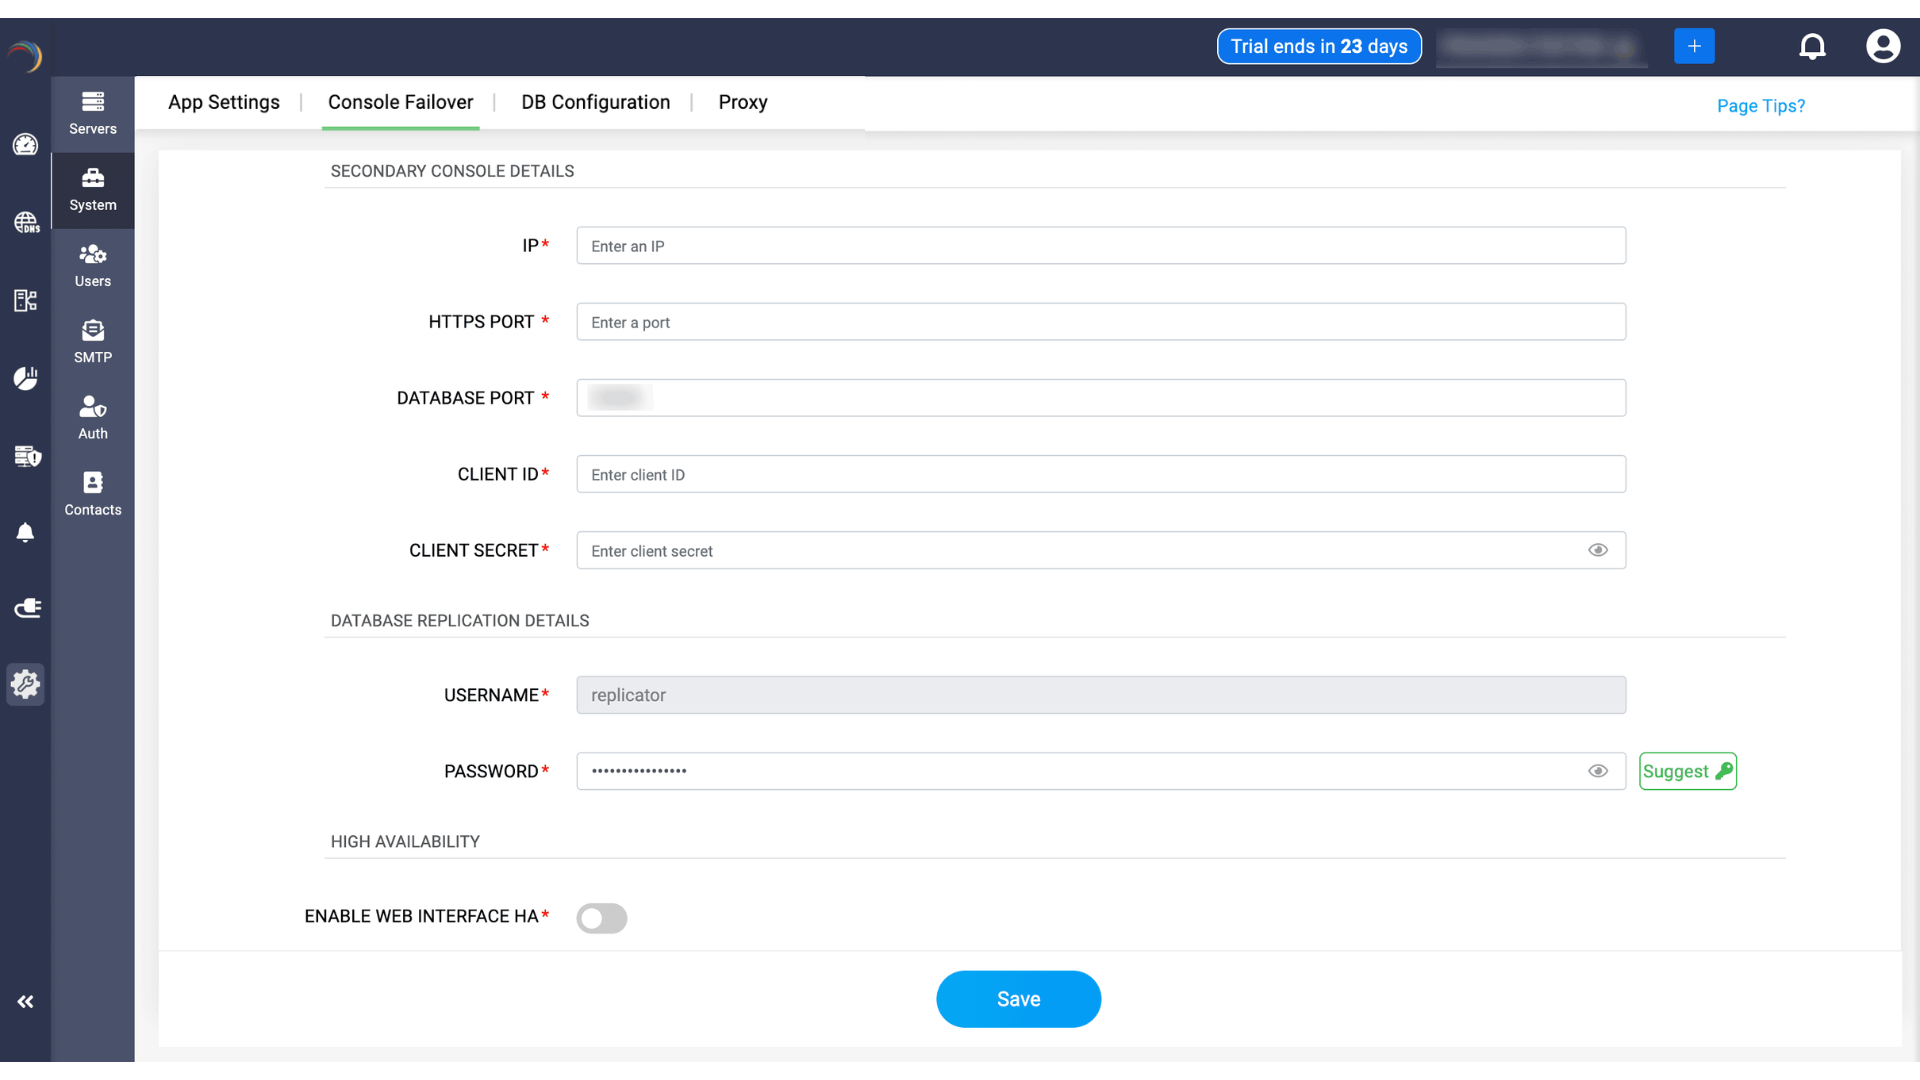
To start with Go to Settings->System->Console Failover. Now Enter the Primary Server details like: Server IP, HTTPS Port, and DB Port.
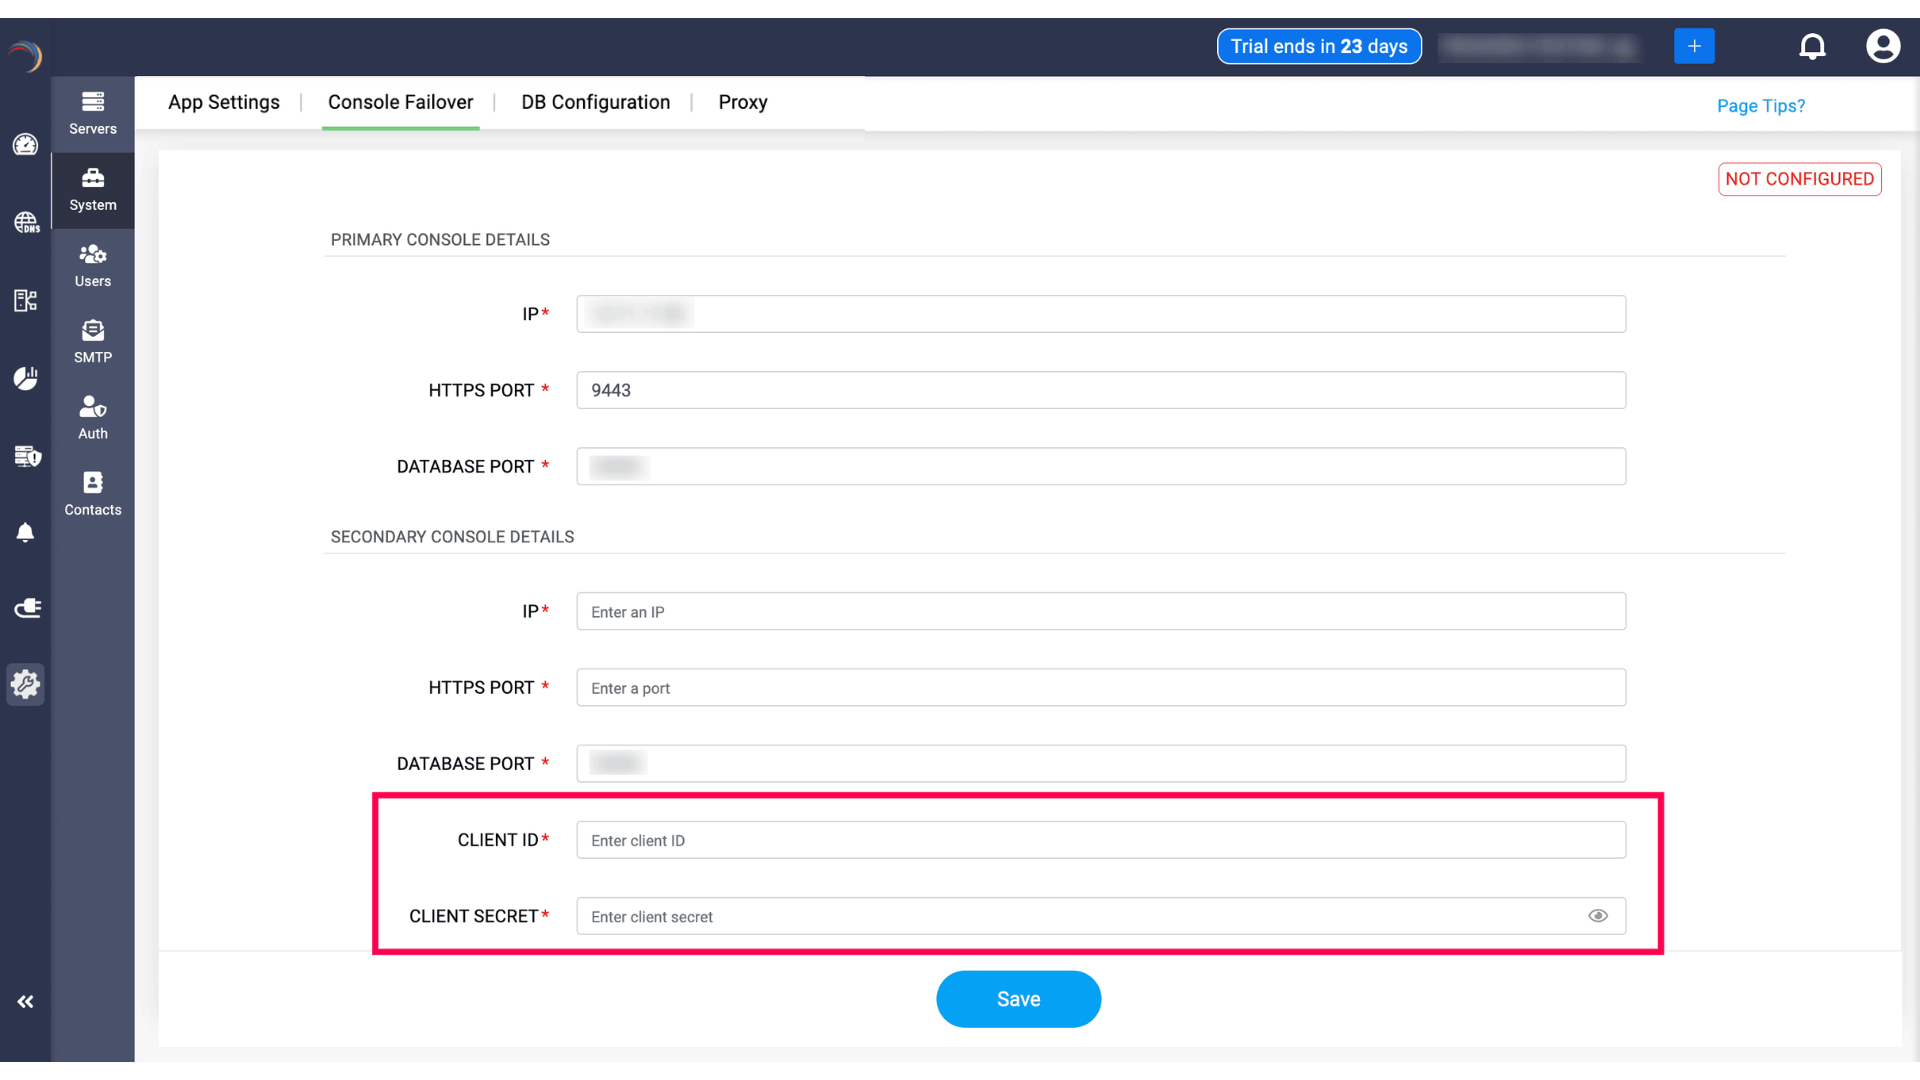
Similarly enter the same details for the secondary server as well. When entering the secondary server details, users need to provide secondary server's client ID and client secret in the fields.
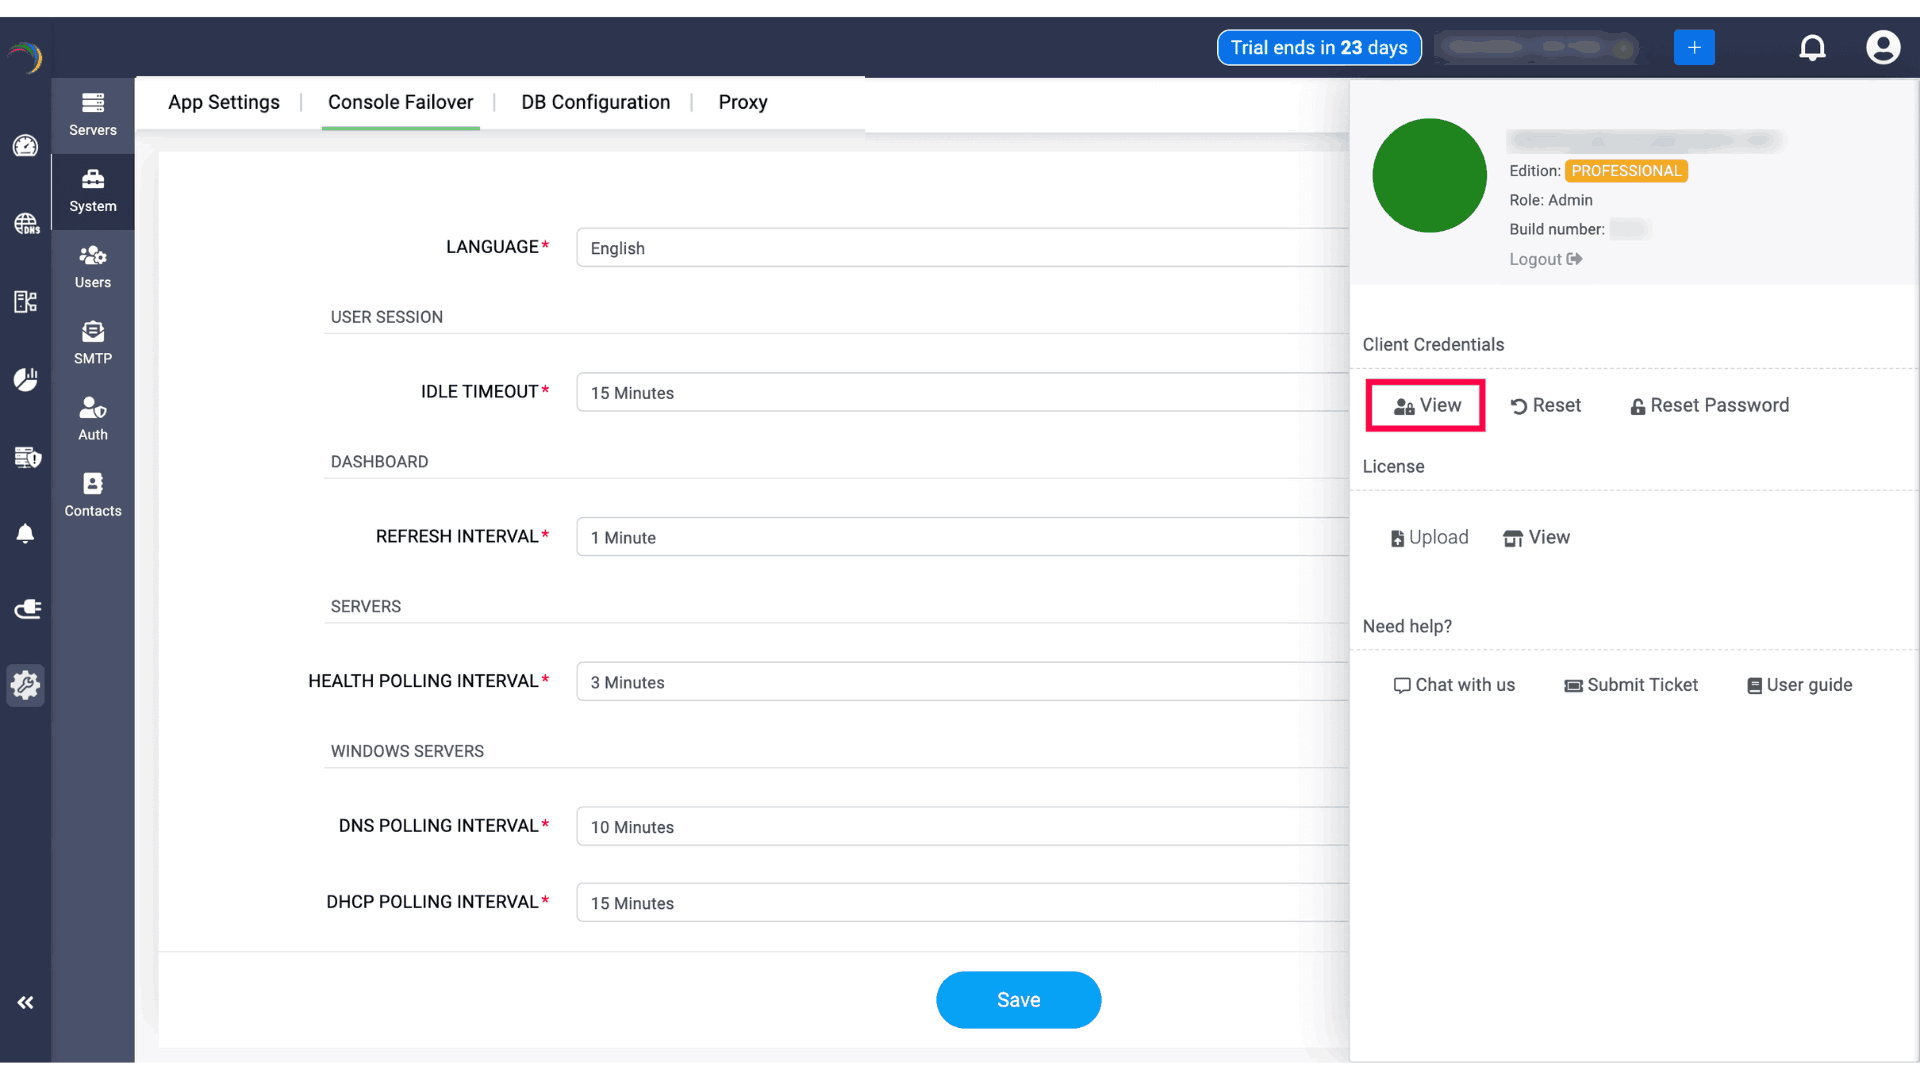
To get the client ID and client secret, Log in to the secondary server.
Click on the Profile, where you can find the Client credentials section. Select View option would display the client ID and client secret.

Database Replication
In this section, users need to provide the password for the replication process, as the username field will be auto-filled with a constant username called "replicator" and cannot be changed.
You can provide any secure password or you can generate a random one on DDI Central's suggestion by clicking on the Suggest button.
Once the password is added, admins cannot edit or change the password, as it would cut-down the connectivity between the servers.
The main purpose for the data replication section is to keep both database servers in sync and enable data redundancy, i.e., changes made in primary server is also updated in the secondary server.
Now, under the High Availability Section enable the Enable Web Interface HA toggle and Click Save

Before Failover occurs, Web login for the secondary server will be restricted when the primary is up. The secondary server will be available only in a "read only" mode, and no configurations or data changes can be implemented through the secondary server.
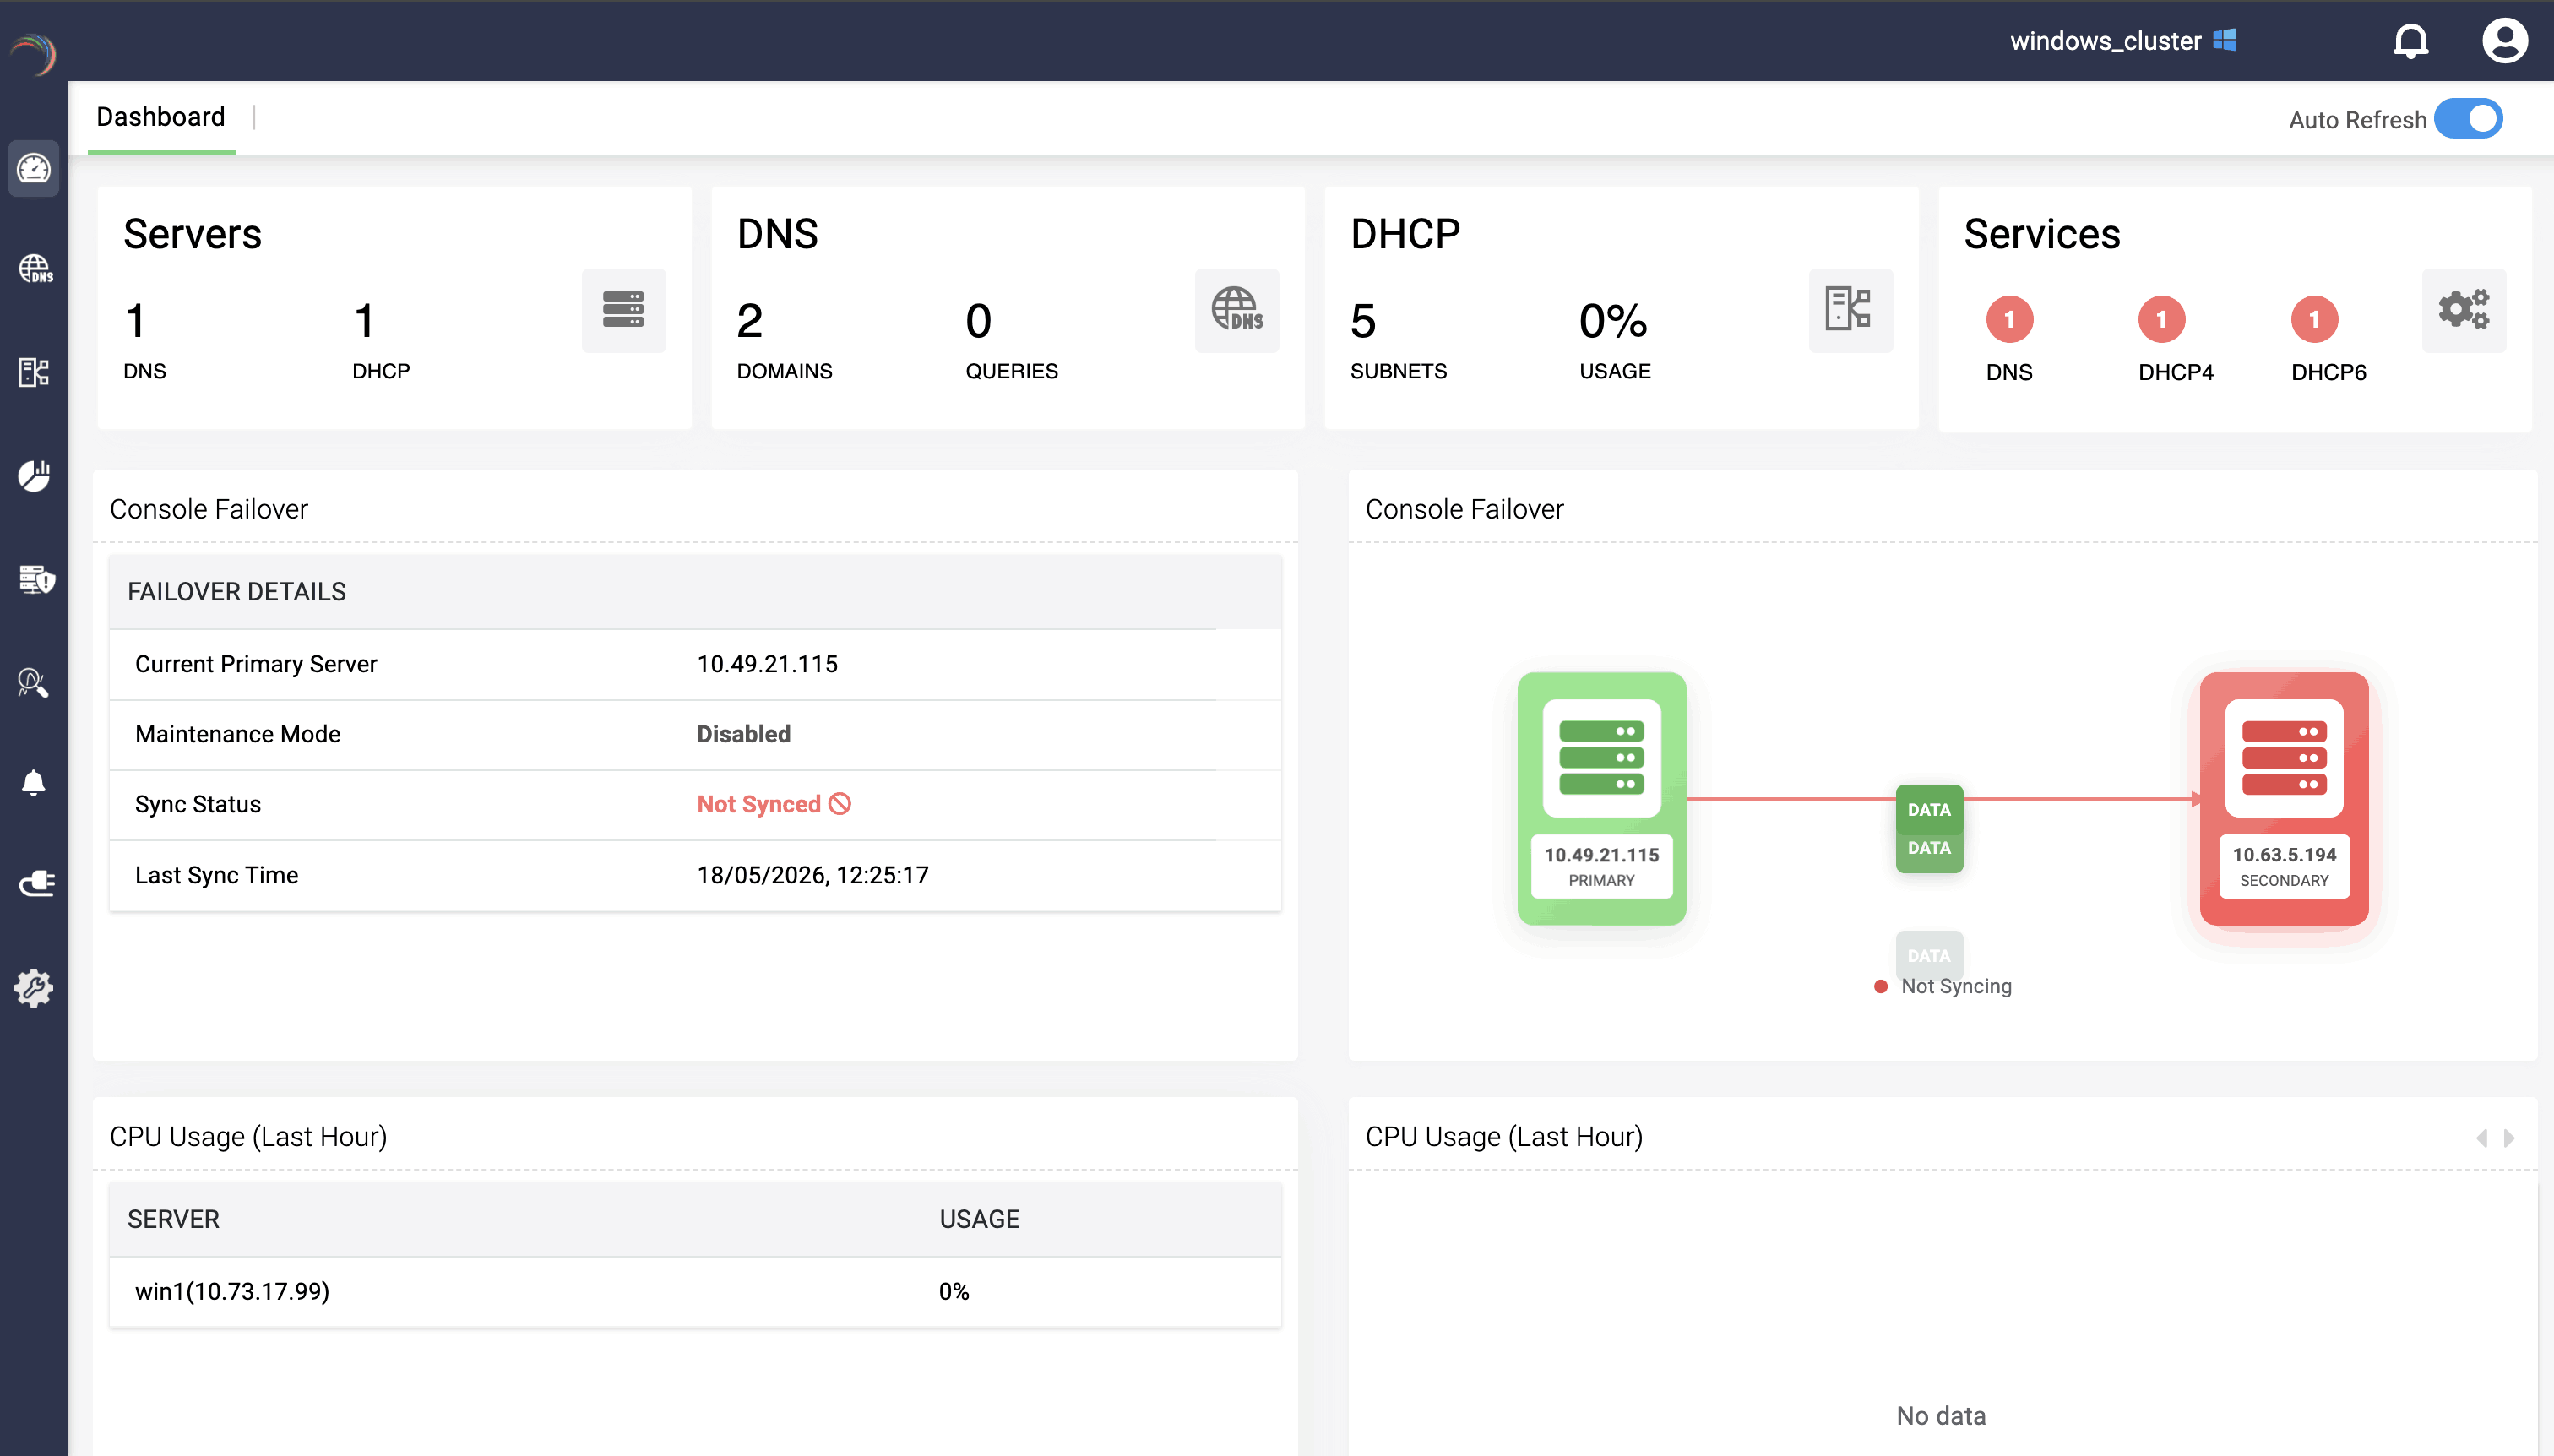
Once the failover configuration is saved successfully,you can see the CONFIGURED status in the top right corner. The failover setup is initiated in the background and may take some time to complete. The duration depends on factors such as database volume and network latency. During this period, the console failover status appears with aNot Synced status on both the main dashboard and under Settings > System > App Failover as shown below.
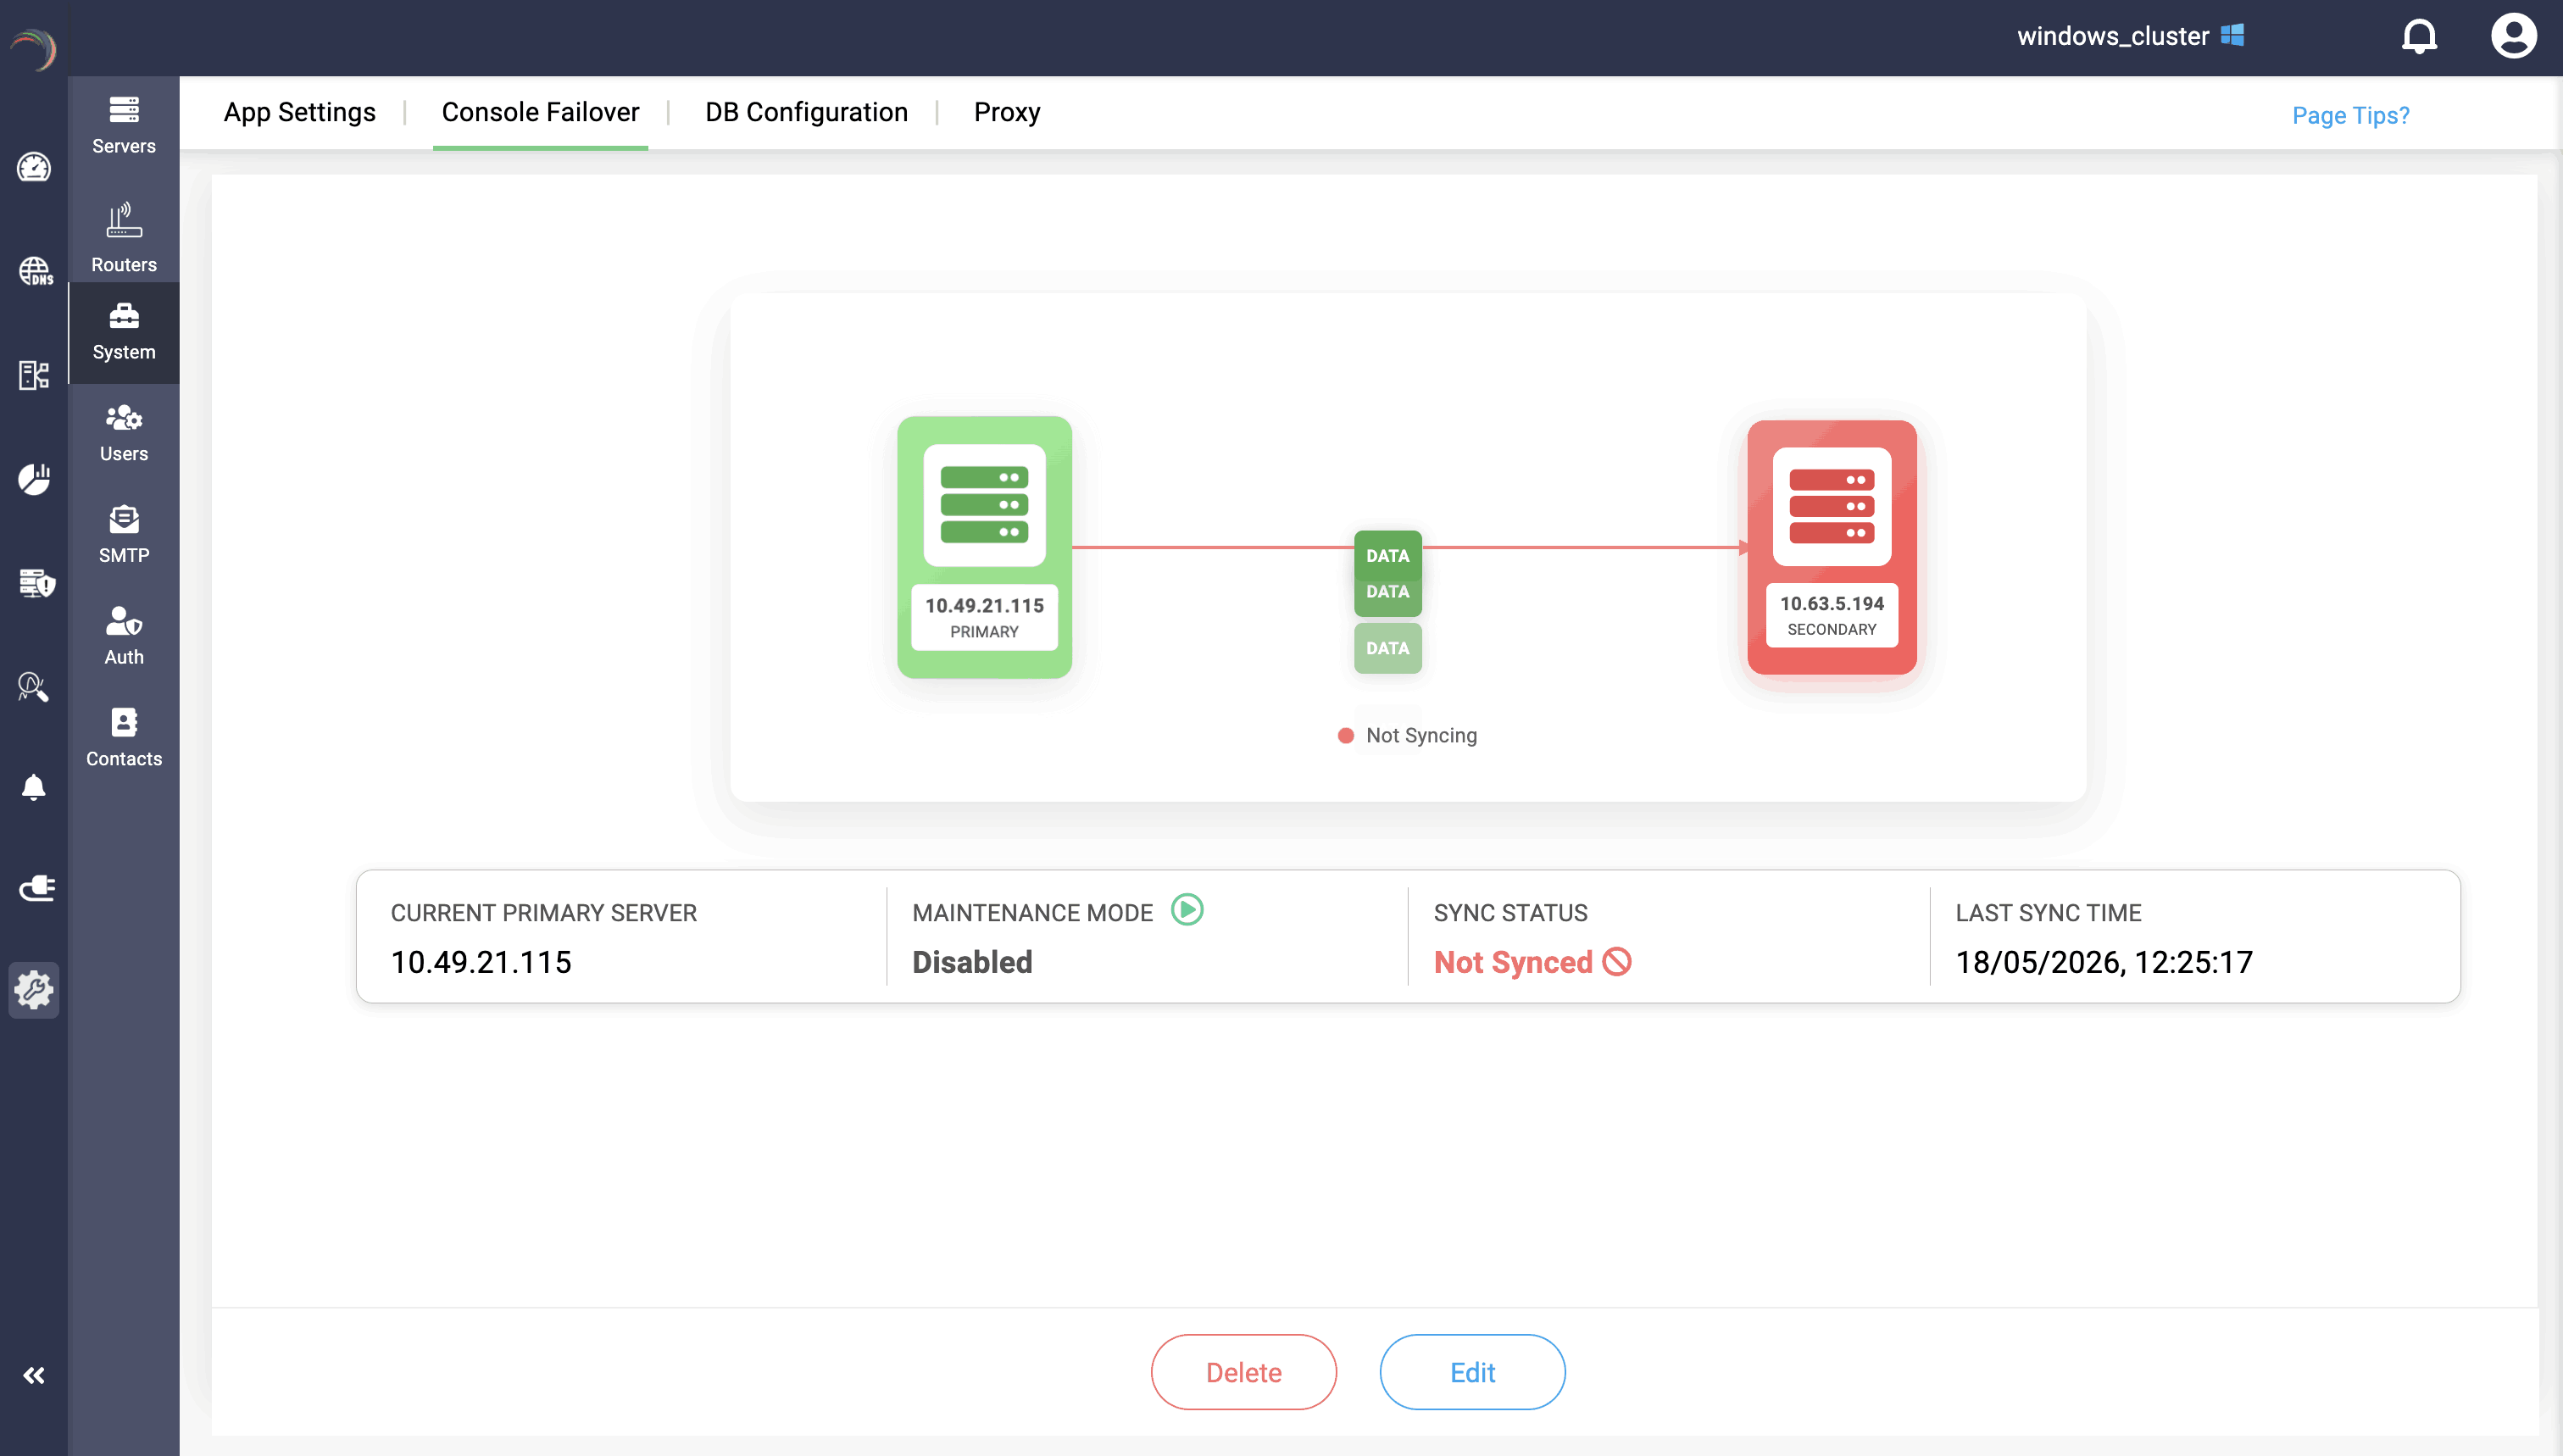
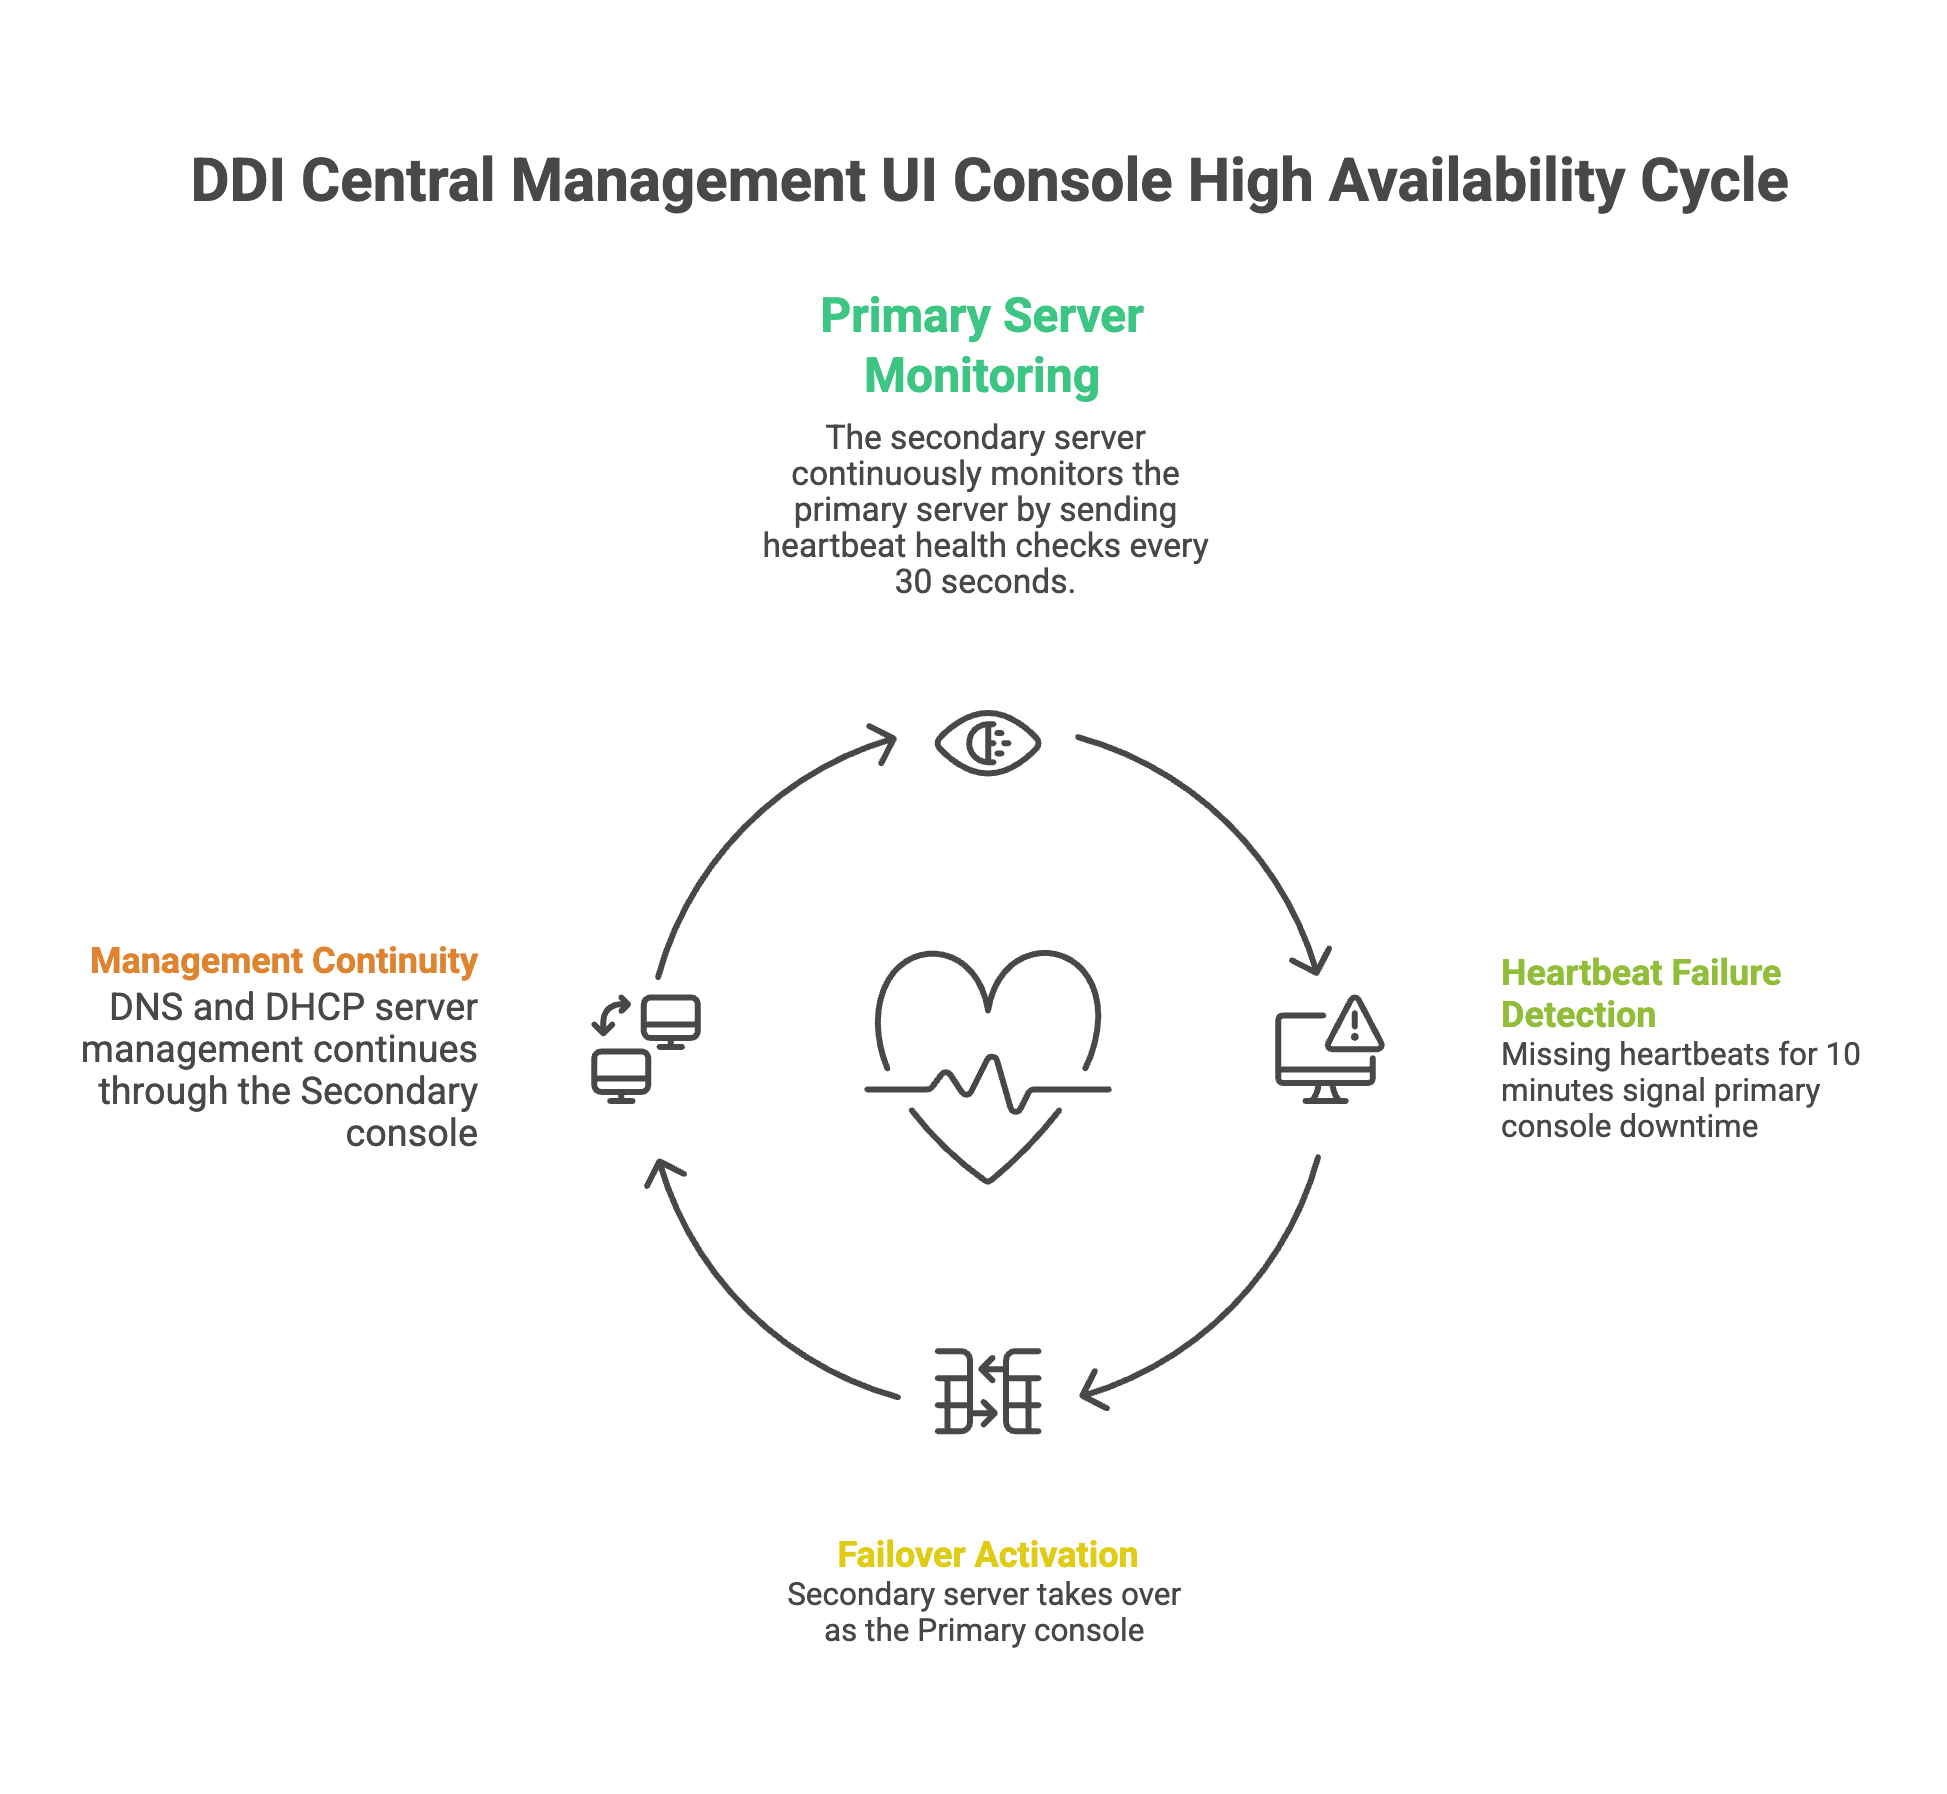
Once the sync is complete, Now the secondary server begins sending health-monitoring heartbeats every 30 seconds to check the status of the primary server.
When the failover setup is live, the secondary server continuously monitors the primary server through heartbeat health checks (sent every 30 seconds). If the secondary server does not receive heartbeats from the primary server continuously for 10 minutes, it treats this 10-minute period as the deciding window and determines that the primary server has failed. After this "10 minute time window", the secondary server is automatically promoted as the primary server.
DDI Central does not promote the secondary server immediately after one missed heartbeat. The secondary server waits and checks whether the primary server continues to miss heartbeats for a full 10 minutes.
Maintenance mode:

While upgrading a service pack or PPM, or starting a service, network admins must enable the maintenance mode in the primary server. Maintenance mode pauses the data replication process between primary and secondary servers, which allows admins to do configurations and changes in the servers, such as upgrading PPM.
Enabling maintenance mode in the primary server will reflect in secondary server.
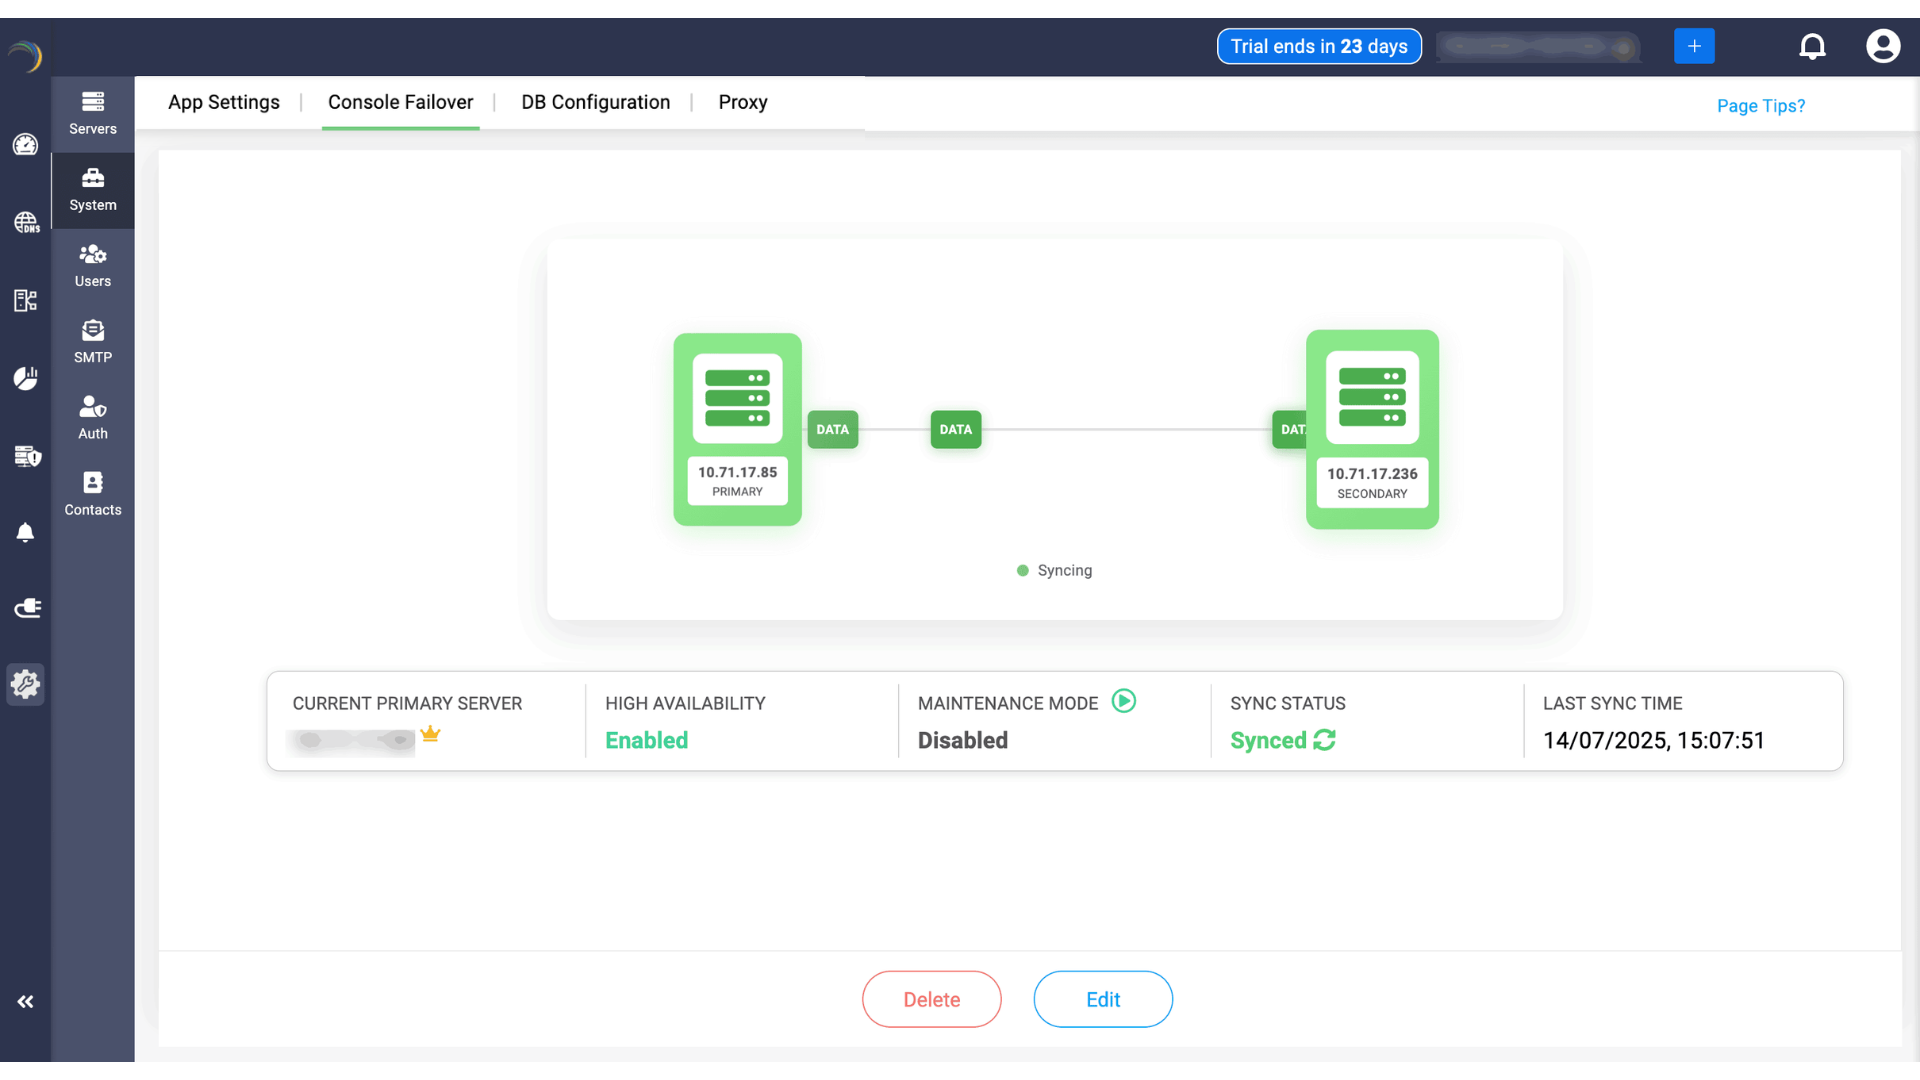
During maintenance mode, service takeover will not occur, but the data syncing continues. As a result, the sync status will display "synced" and also shows the "last synced time."
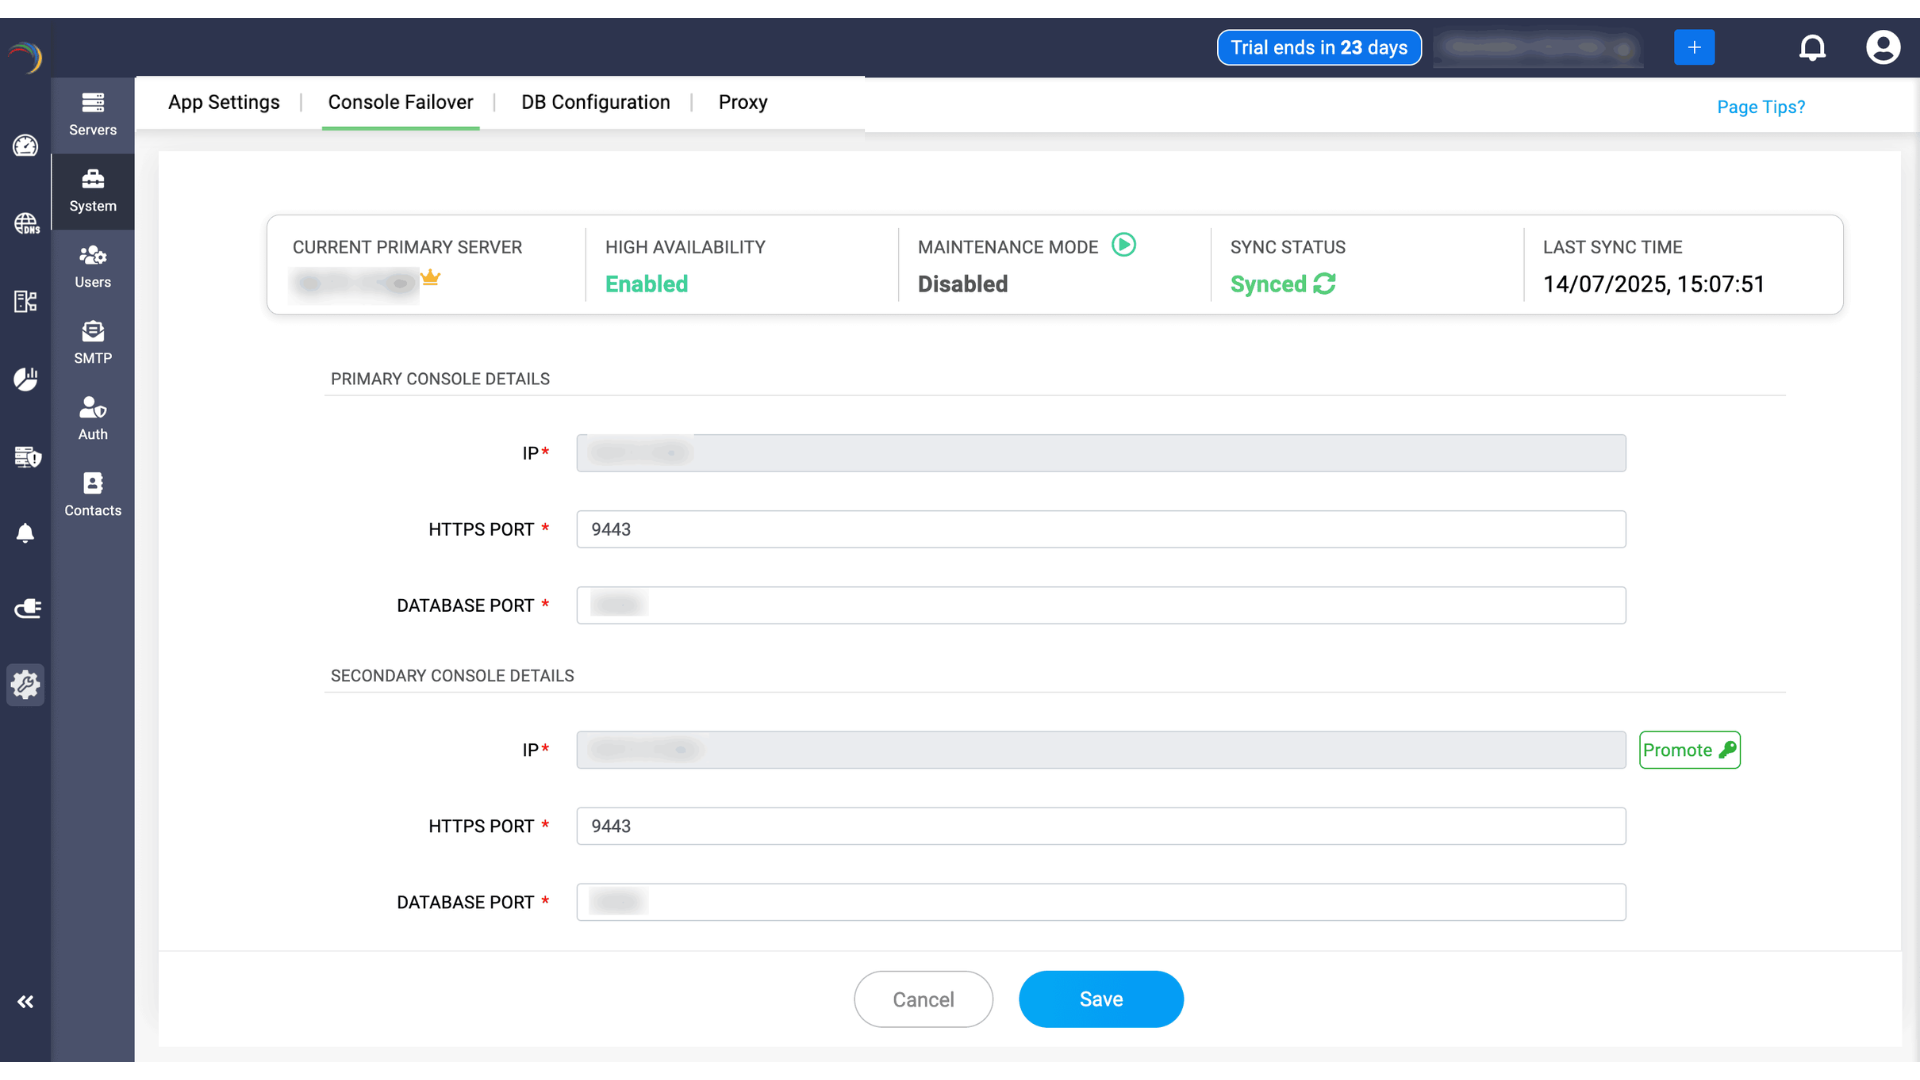
Promoting servers
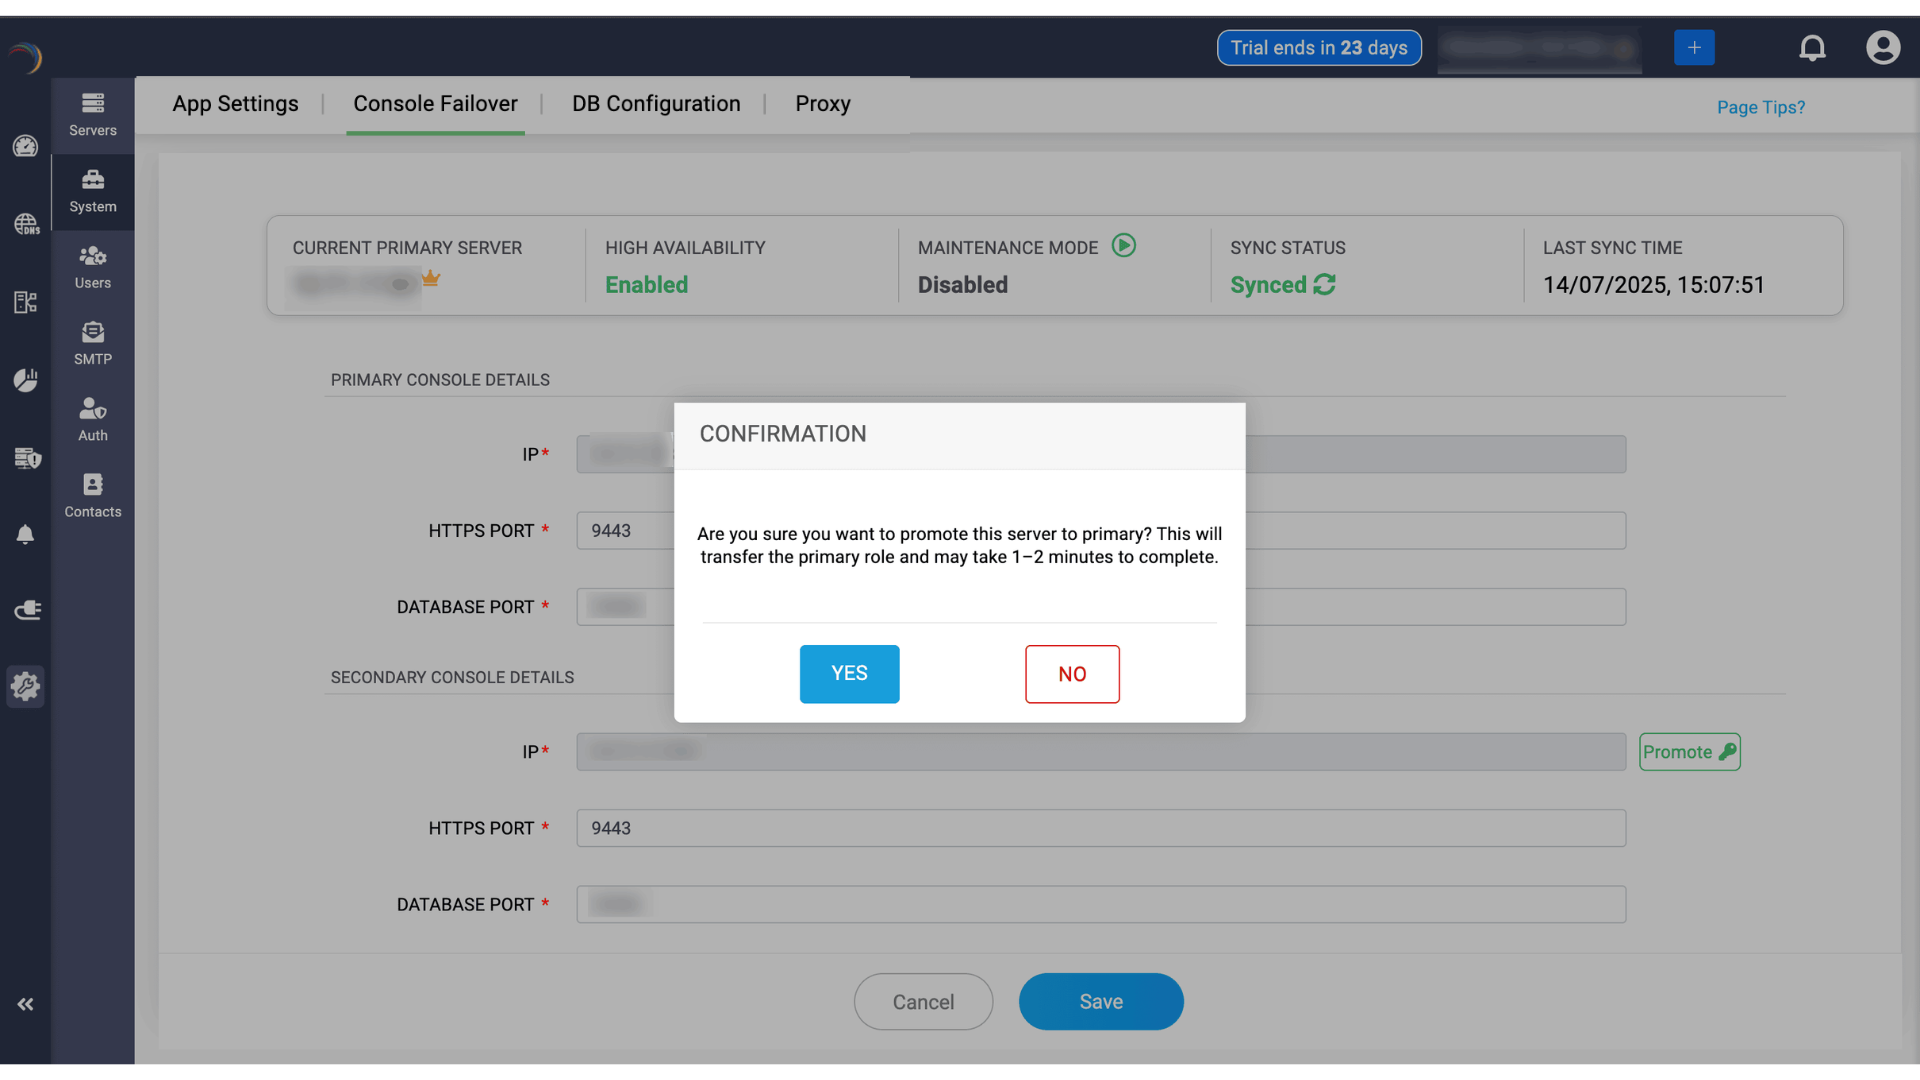
When the current secondary server is up and ready, if the admin wants to promote it as the primary for handling the service, they can be promoted by clicking on the Promote button.
Once you click on Yes in the promotion confirmation dialog box, It will trigger a log-out, you'll have to wait for sometime. The waiting time depends on the size of your database.