Managing custom services
Last updated on:
In this page
Overview
This section explains how to manage existing custom services in Log360 Cloud. You can edit service details, update or delete authentication types, and remove a custom service when it is no longer required.
Updating authentication type(s)
- In the product console, navigate to Settings tab and select Admin.
- Under Integrations, click Connections.
- In the Connections page, locate the custom service you want to update and click the
 icon on the custom service card.
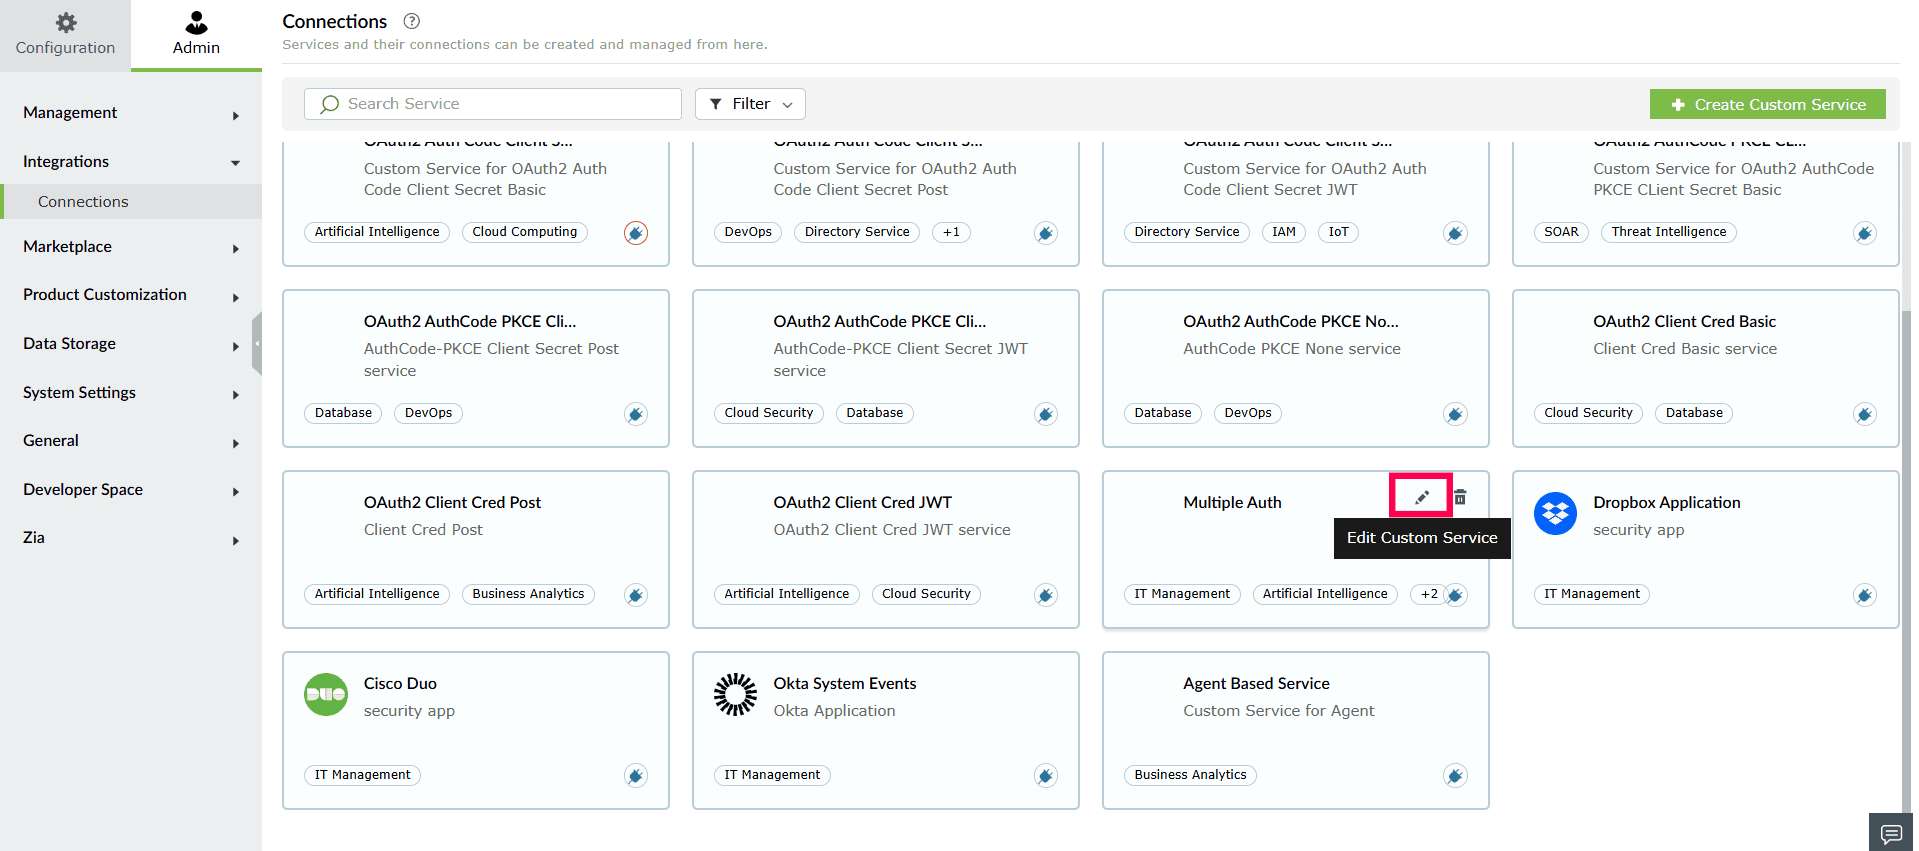
Figure 1: Updating authentication type(s) - In the Edit Custom Service window, click the Authentication Type(s) you want to add.
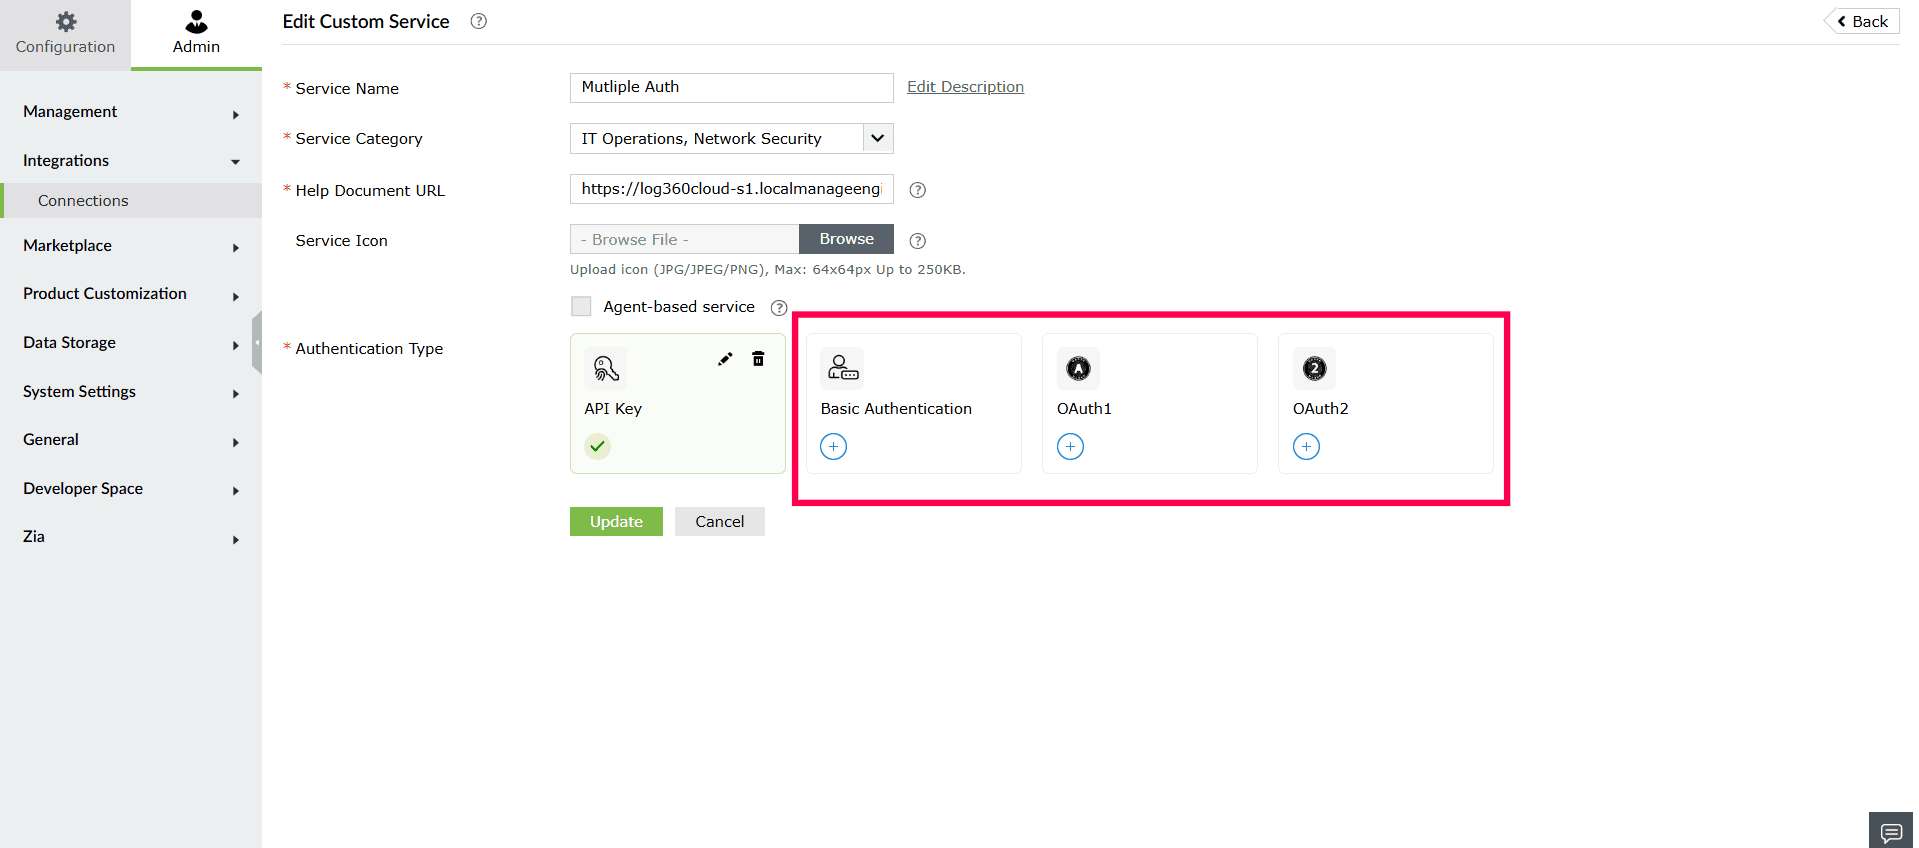
Figure 2: Selecting an authentication type - In the Add Authentication Setup window, provide the required setup details based on the selected authentication type(s).
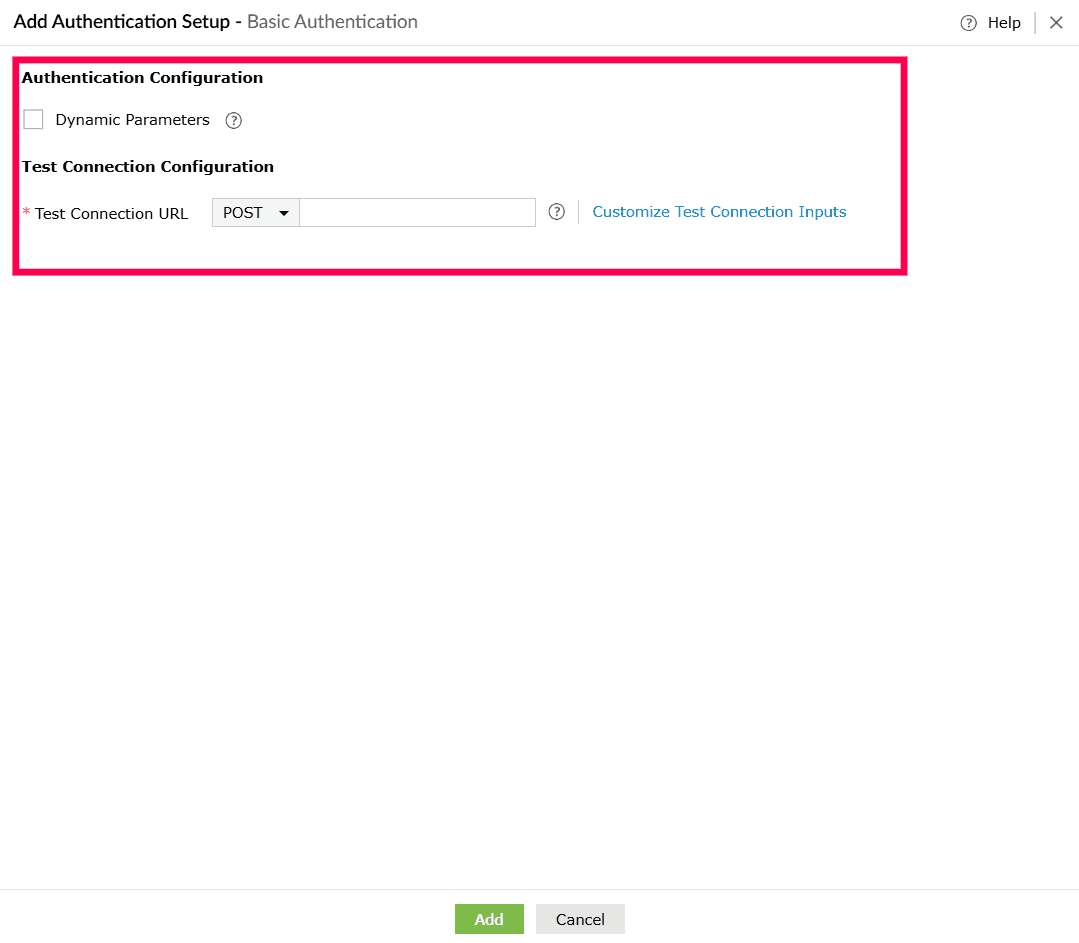
Figure 3: Entering a test connection URL - Click Add to save the new authentication configuration.
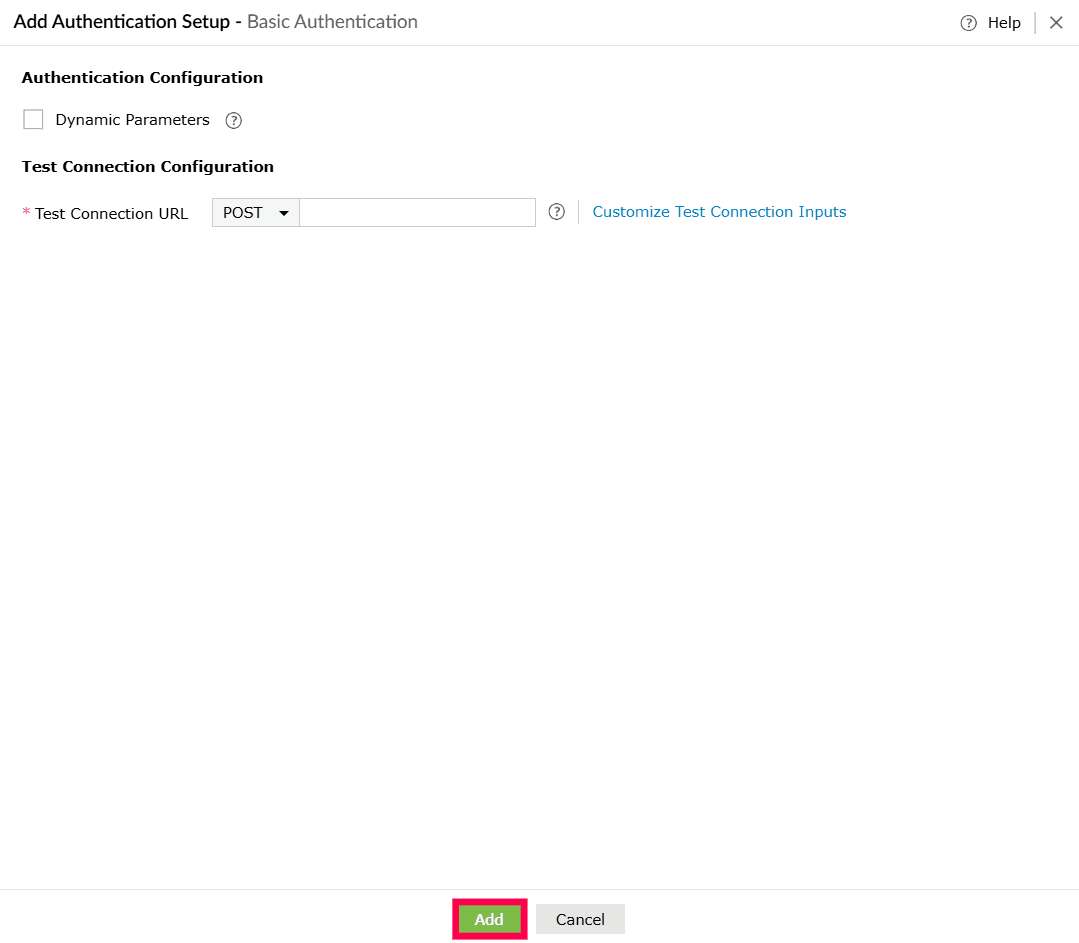
Figure 4: Adding the authentication - Click Update to apply the changes to the custom service.
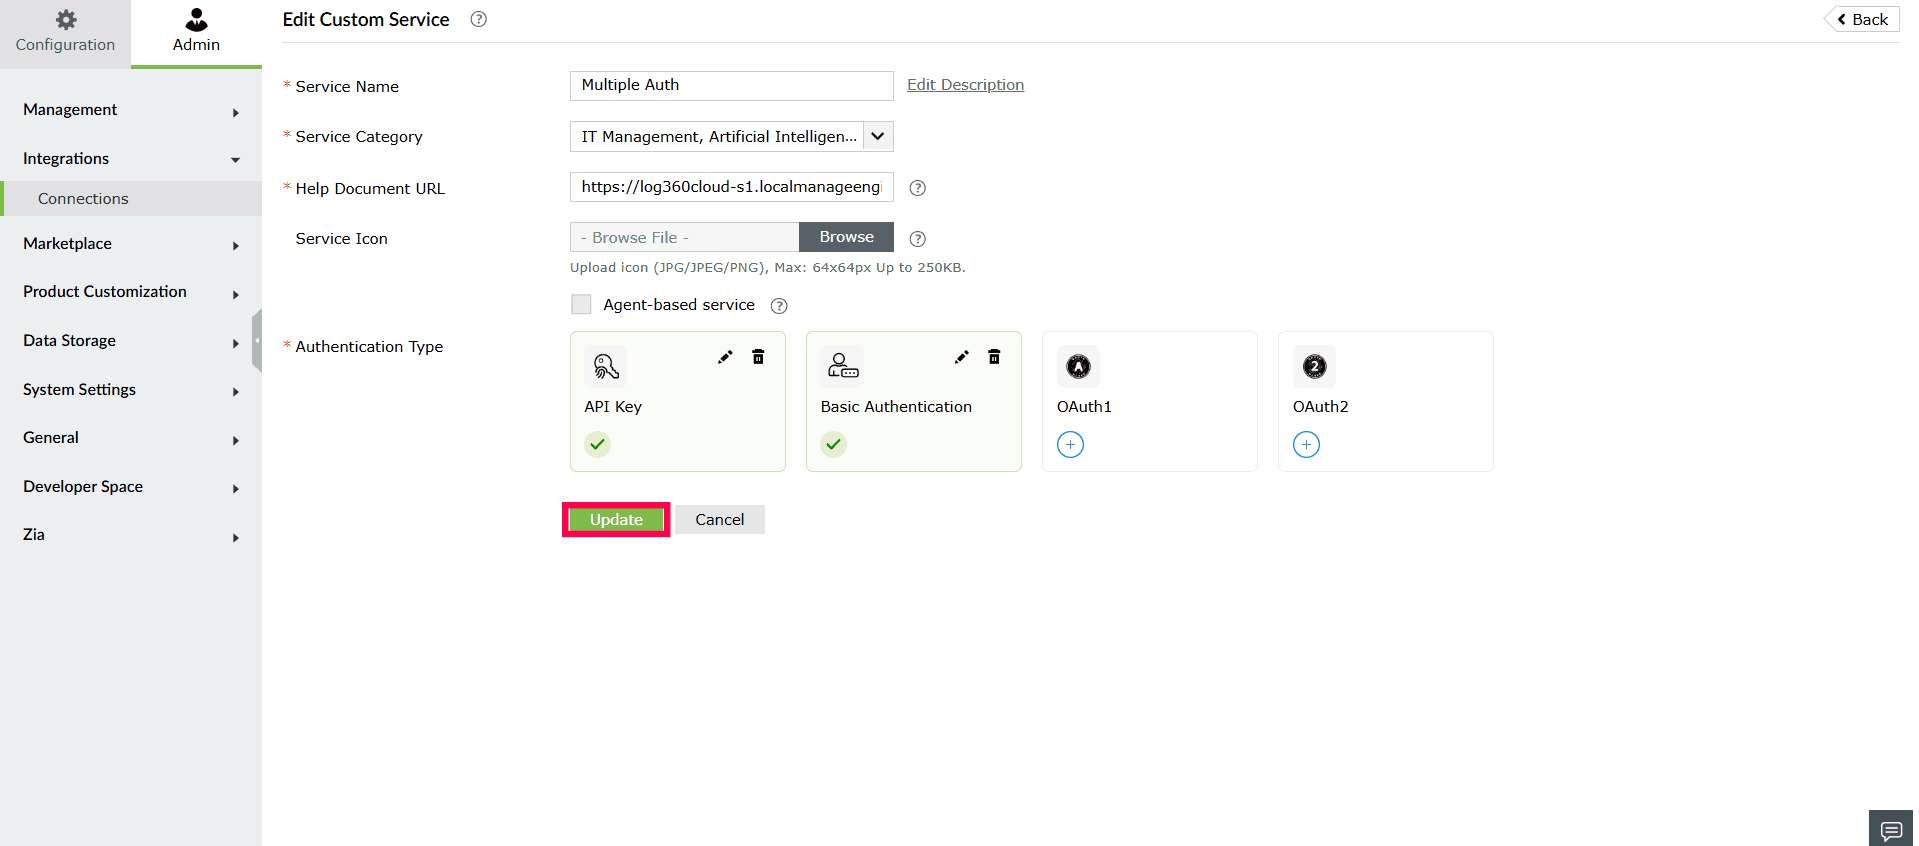
Figure 5: Updating authentication type - In the confirmation pop-up that appears, select Proceed.
Note If the custom service is already in use by existing connections, log collection configurations, Custom Widgets, or Custom Functions, updating its authentication settings will disconnect those connections and require reauthentication before they can be used again. After you click Update, the following confirmation pop-up appears.
1. If associated with Log Collection Configurations, the following pop-up appears.
- In the confirmation pop-up that appears click Proceed.
- You can view the associated Log Collection Configurations by clicking the number shown next to it.
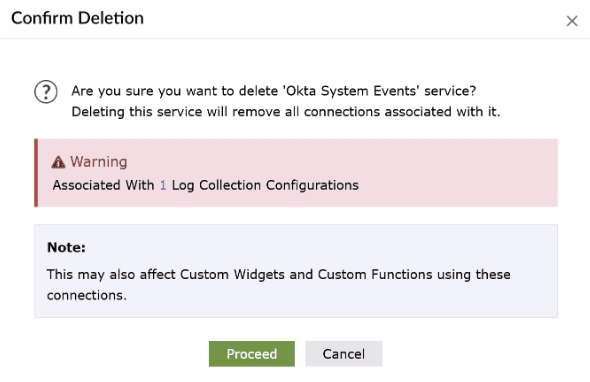
Figure 6: Confirming update
Editing an existing authentication type
- In the Connections page, locate the custom service you want to update.
- Click the icon on the custom service card.

Figure 7: Editing an existing authentication type - In the Edit Custom Service window, click the icon on the authentication method you want to modify.
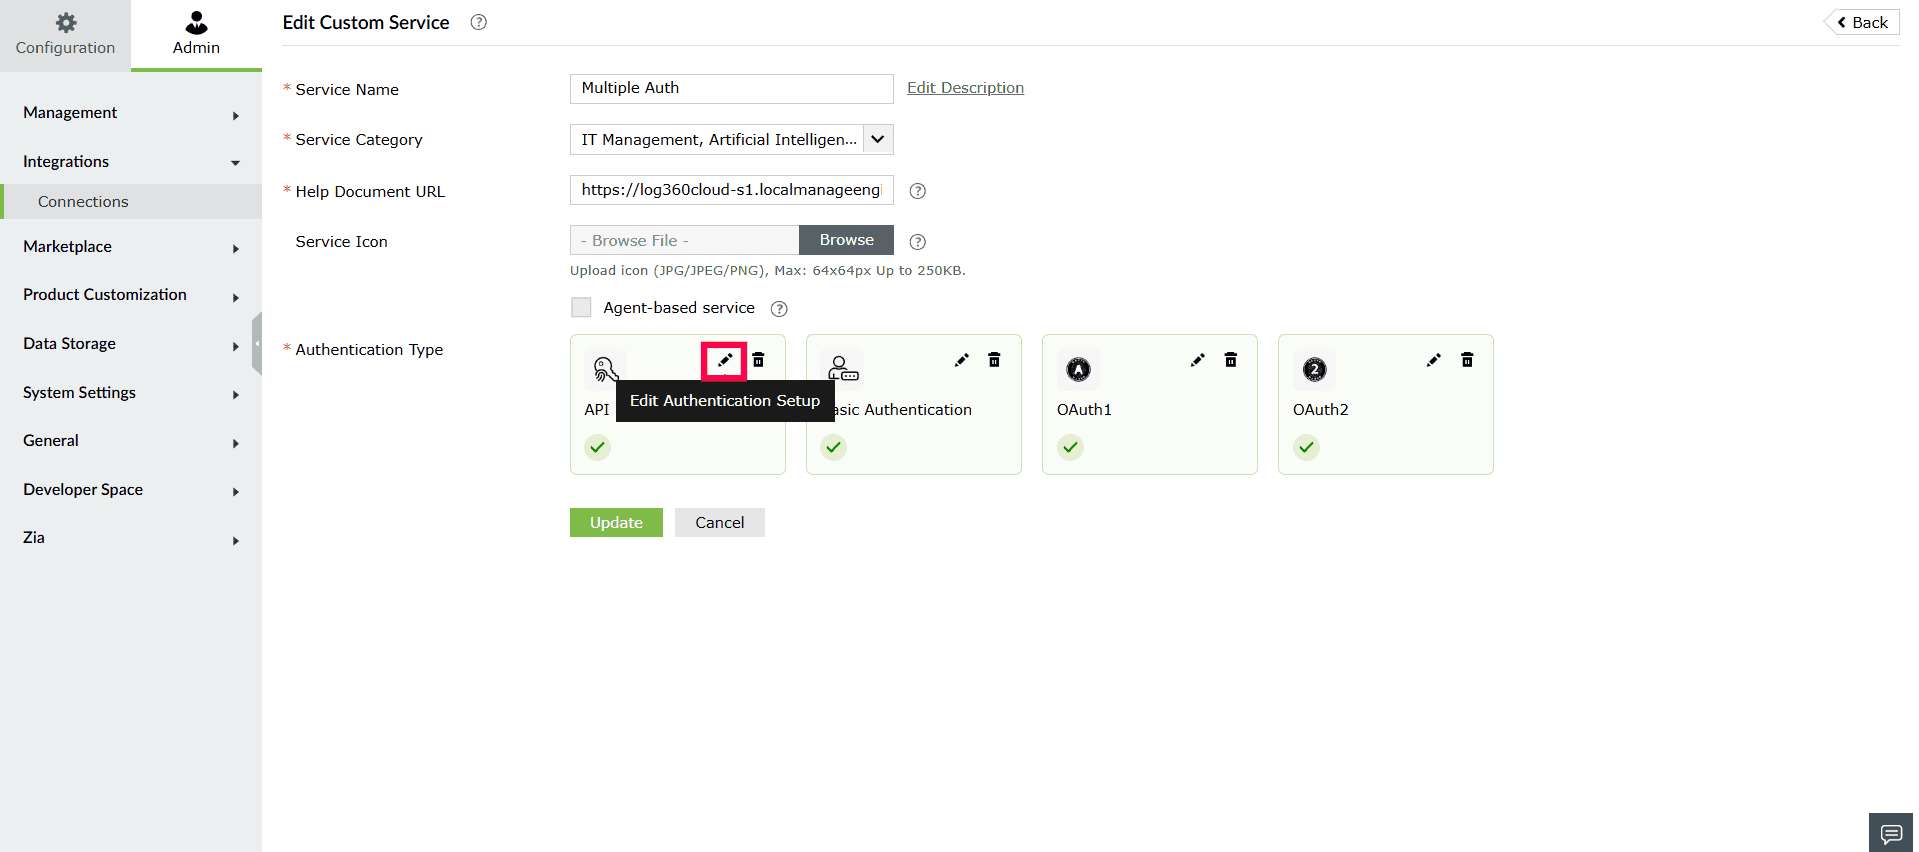
Figure 8: Editing authentication setup - The Edit Authentication Setup panel will open. Update the required details and click Update.
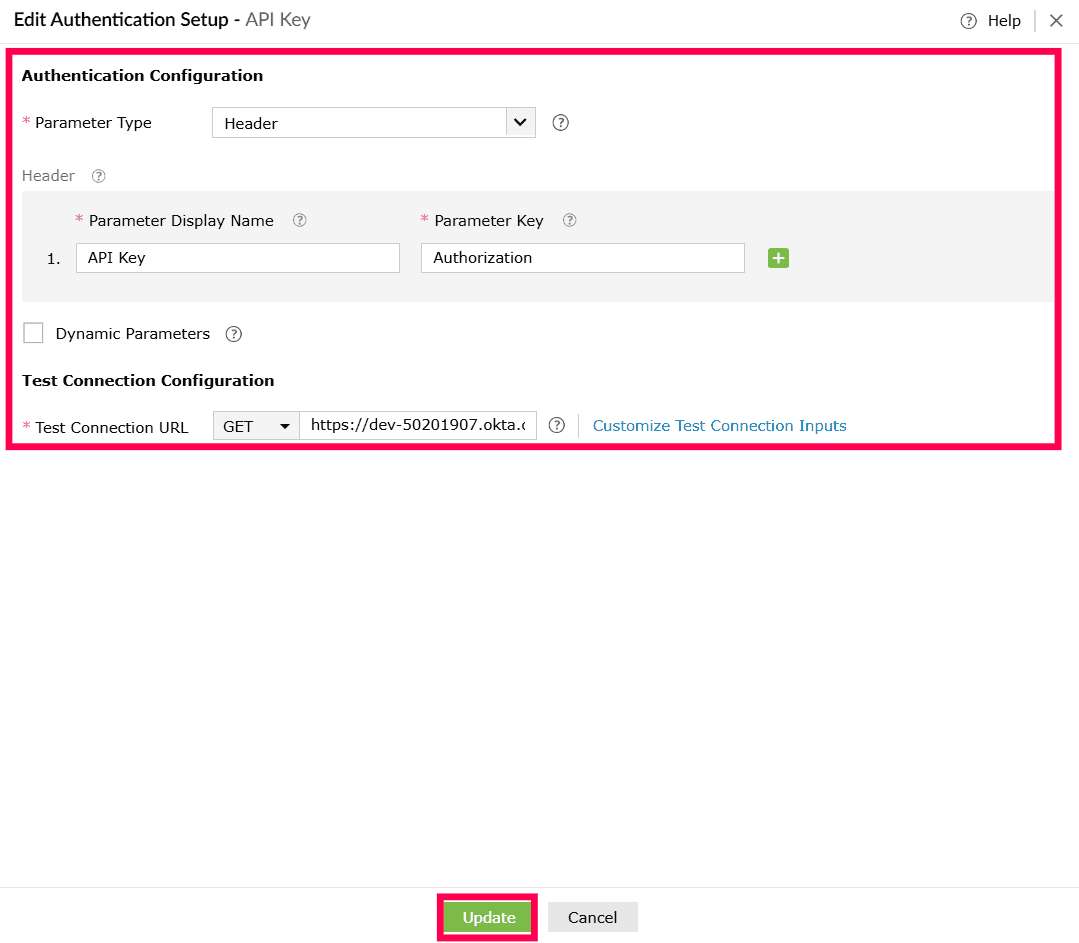
Figure 9: Editing authentication setup - After saving the authentication changes, return to the Edit Custom Service window and click Update to apply all changes to the custom service.
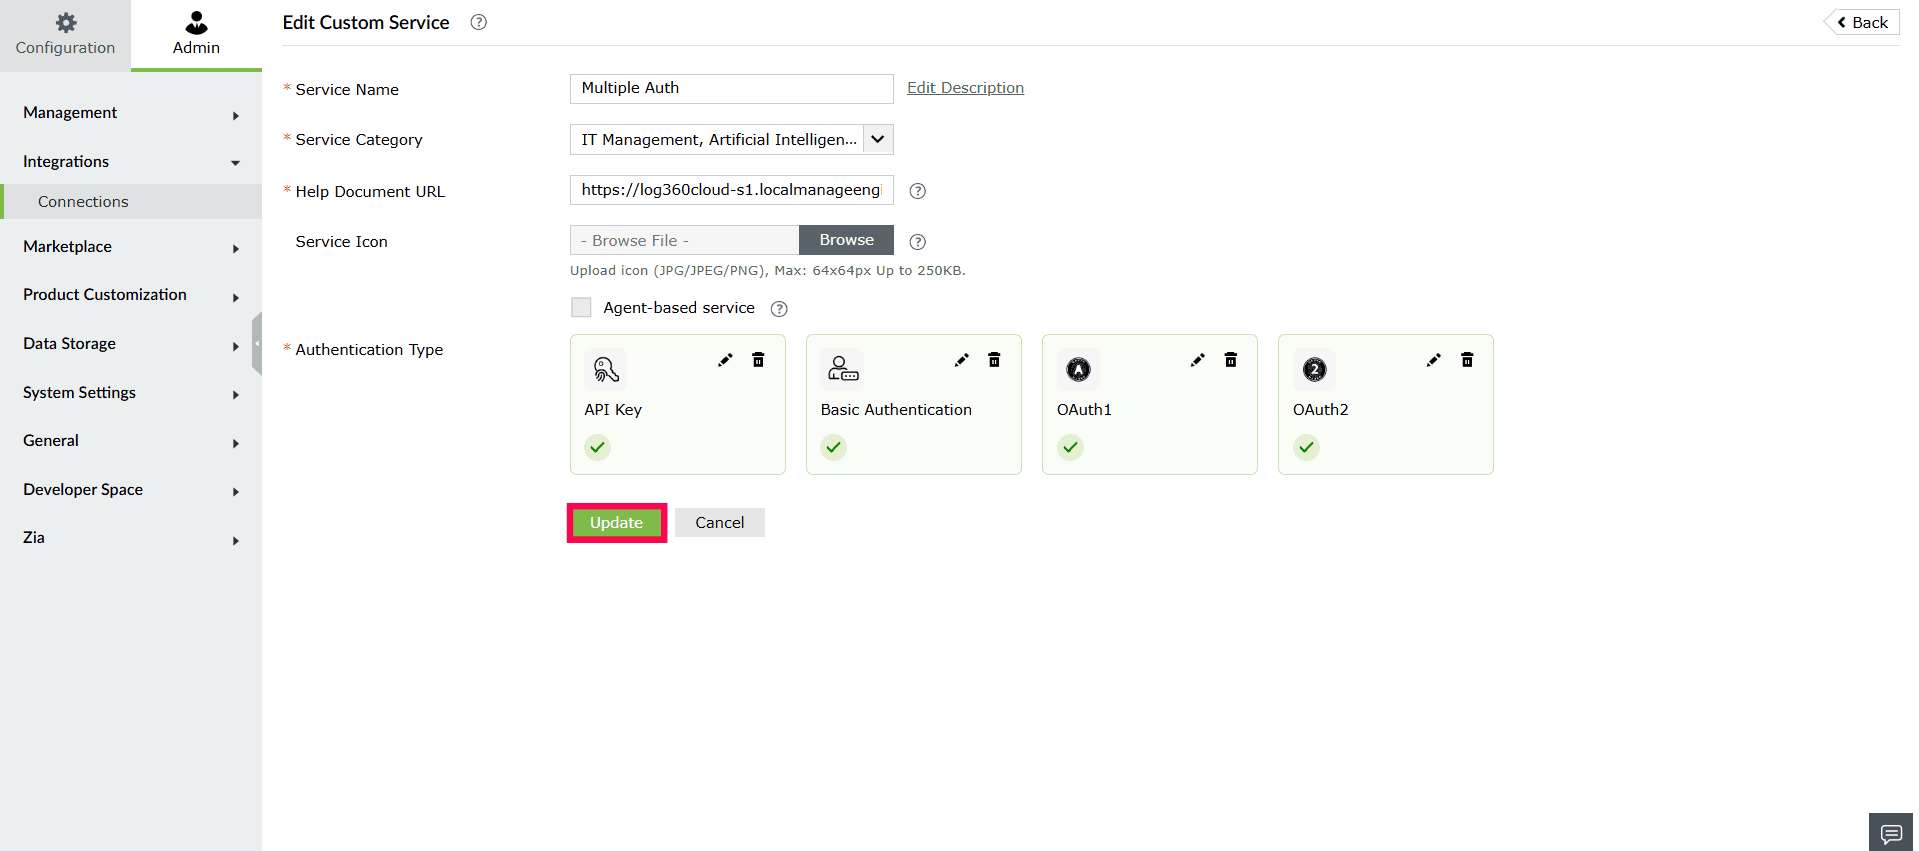
Figure 10: Updating changes - In the confirmation pop-up that appears, select Proceed.
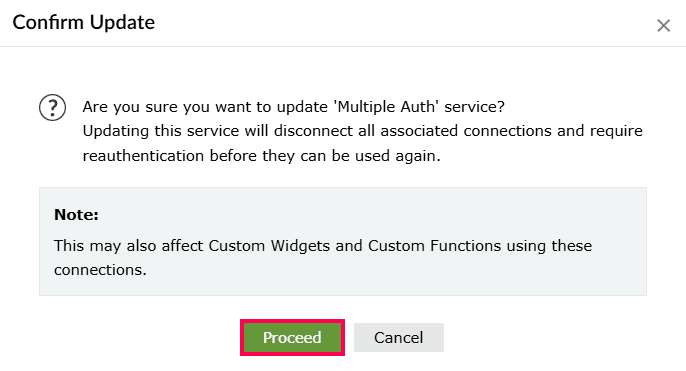
Figure 11: Confirming update
Deleting an authentication type
You can remove an existing authentication setup from a custom service if it is no longer required.
- In the Connections page, locate the custom service you want to modify and click the icon on the service card.
- In the Custom Service window, under Authentication Type, hover over the authentication method you want to remove.
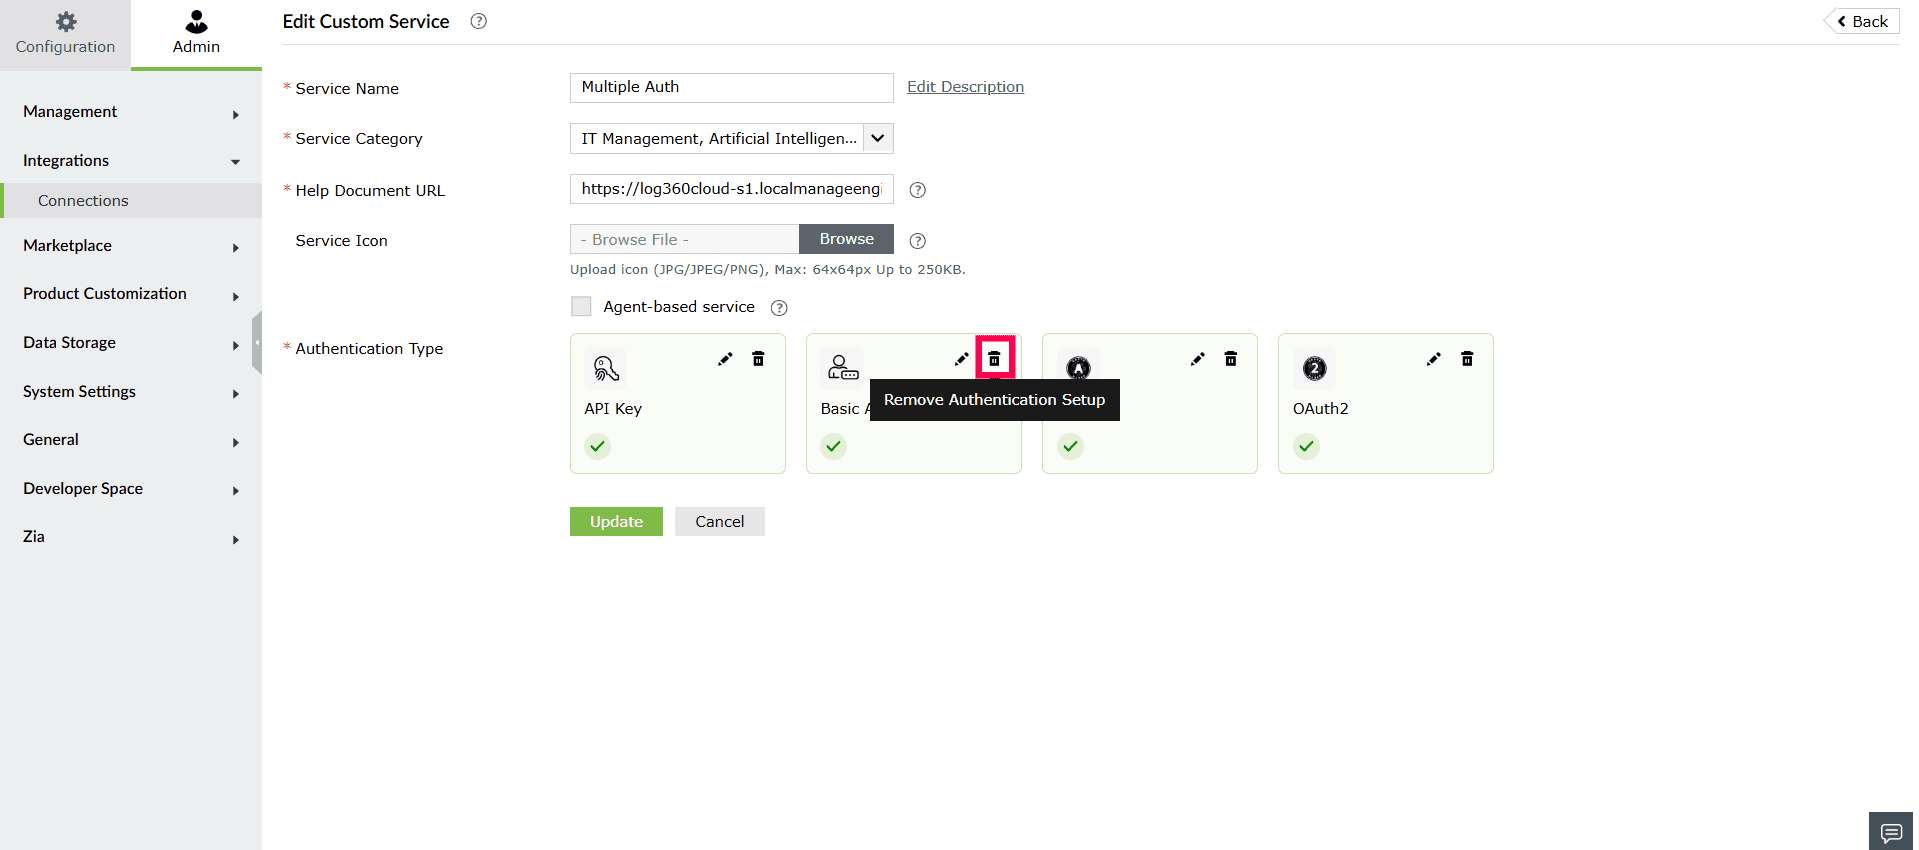
Figure 12: Deleting an authentication setup - Click the
 icon.
icon. - In the confirmation pop-up that appears, click Proceed to complete the removal.
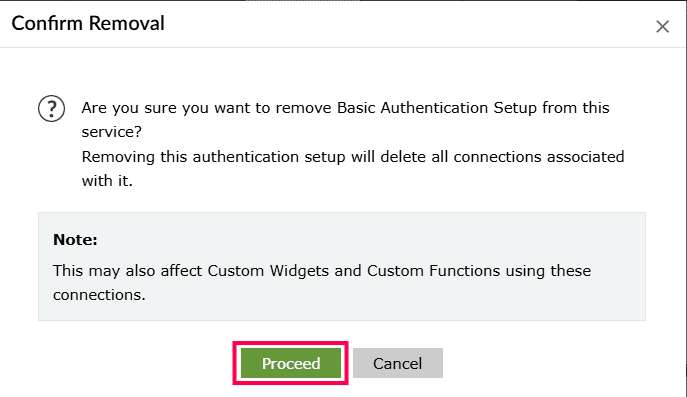
Figure 13: Confirming deletion
Deleting a custom service
- In the Connections page, locate the custom service you want to delete.
- Click the icon on the service card.
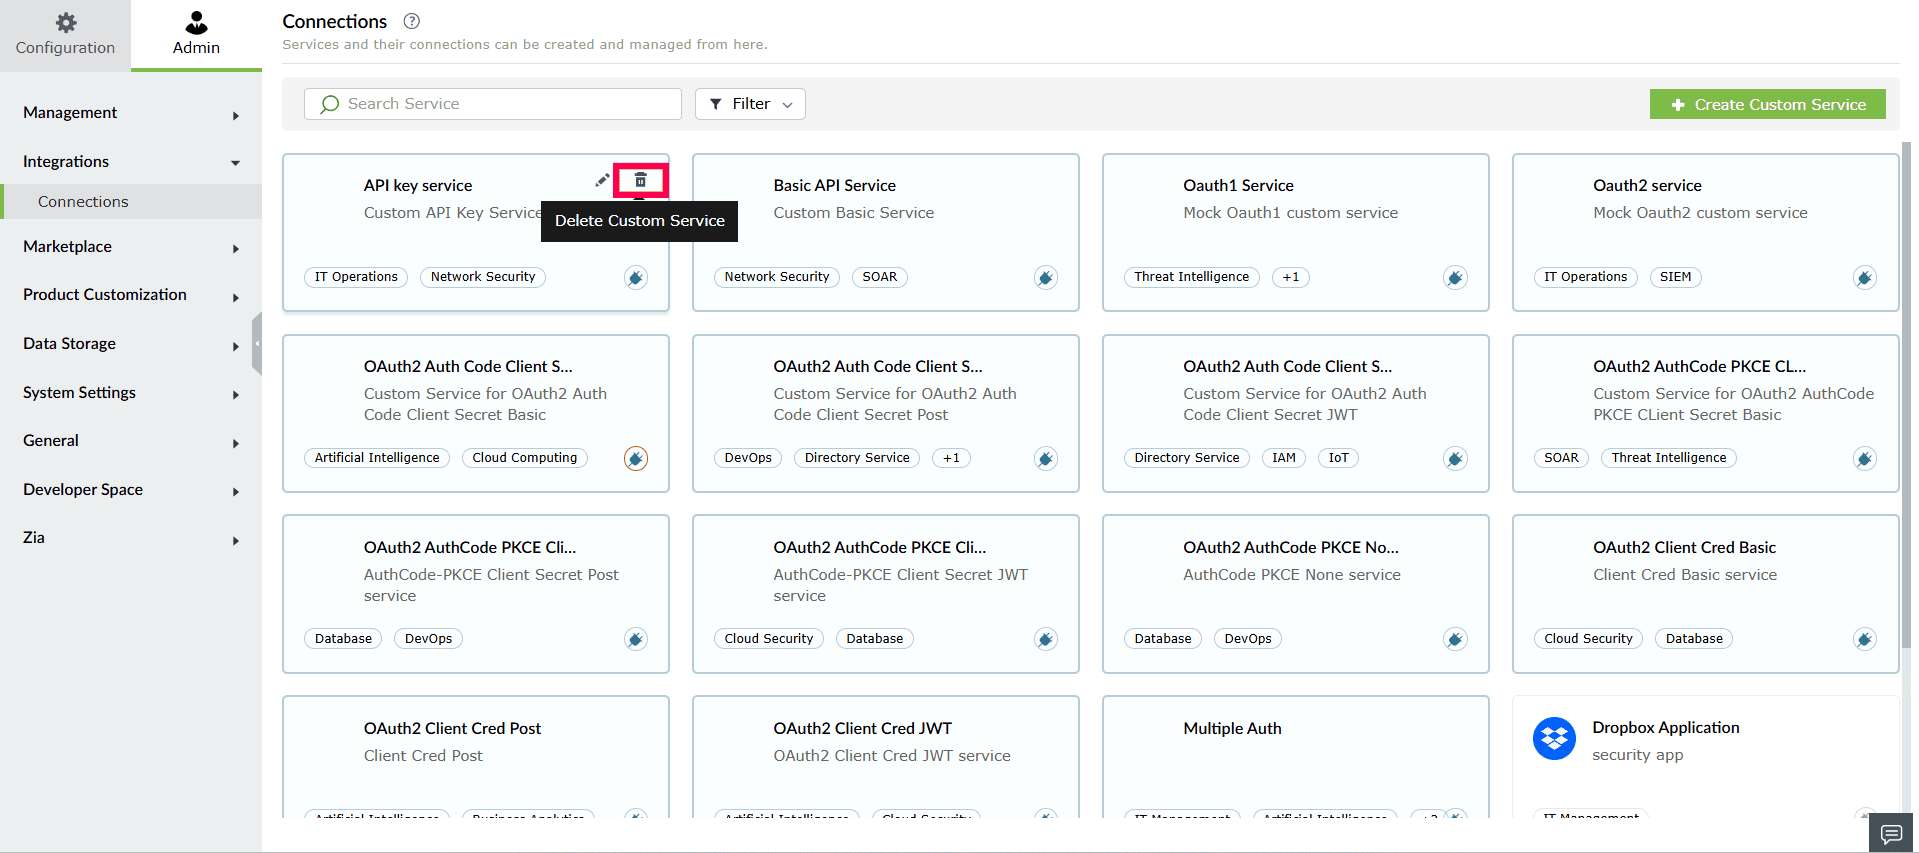
Figure 14: Deleting a custom service - A confirmation pop-up will appear, click Proceed to confirm the deletion.
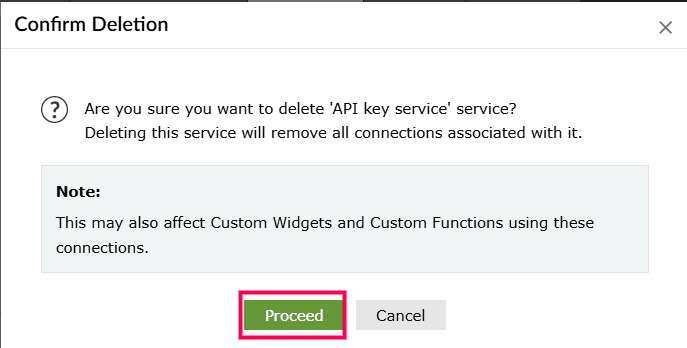
Figure 15: Confirming deletion
1. If the service is associated with Log Collection Configurations, the following pop-up appears:
- Click Proceed to confirm the deletion.
- You can view the associated Log Collection Configurations by clicking the number shown next to it.

2. The service is associated only with custom widgets, or functions, the following pop-up appears:
- Click Proceed to delete the service.

Viewing connections
- In the Connections page, select the service for which you want to view the connections.
- The Connections tab displays a table of all connections created for that service. The table lists the following details:
- Connection Name - The unique name assigned to the connection.
- Connection Link Name - The auto-generated link name used for referencing the connection.
- Click the
 icon next to it to copy the link name.
- Click the
- Authentication Type - Specifies the authentication method used
- Associated Capabilities - The features or modules (such as log collection) that are using this connection.
- Created By - The user who created the connection.
- Status - Indicates whether the connection is currently Connected, Disconnected, Partially Connected, Expired.
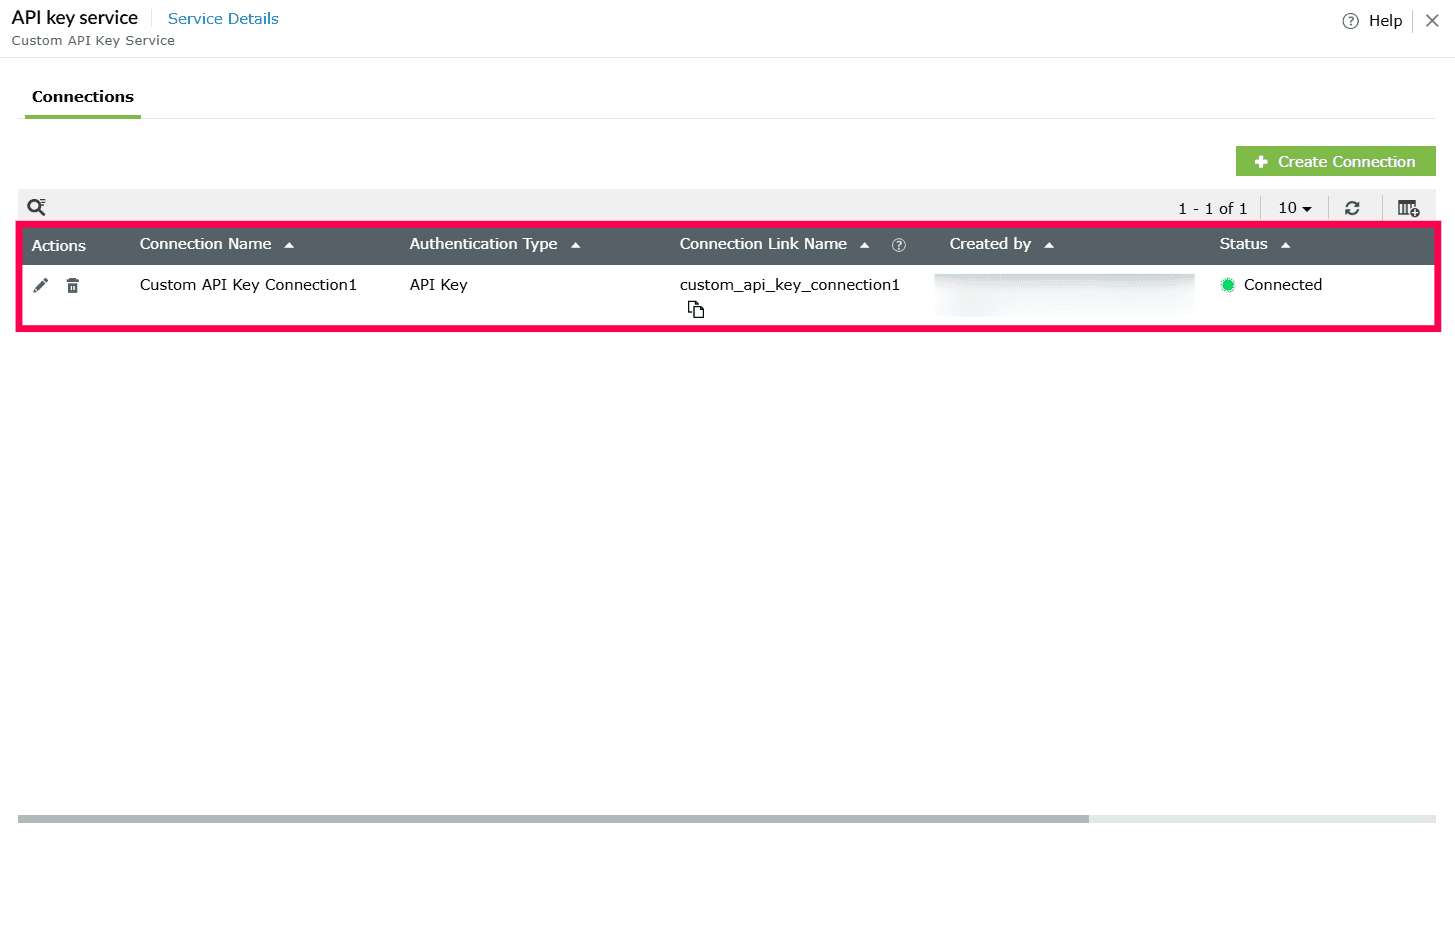
Figure 18: Viewing connections - Hover over Details in the Status column to view any missing or revoked scopes associated with the connection.
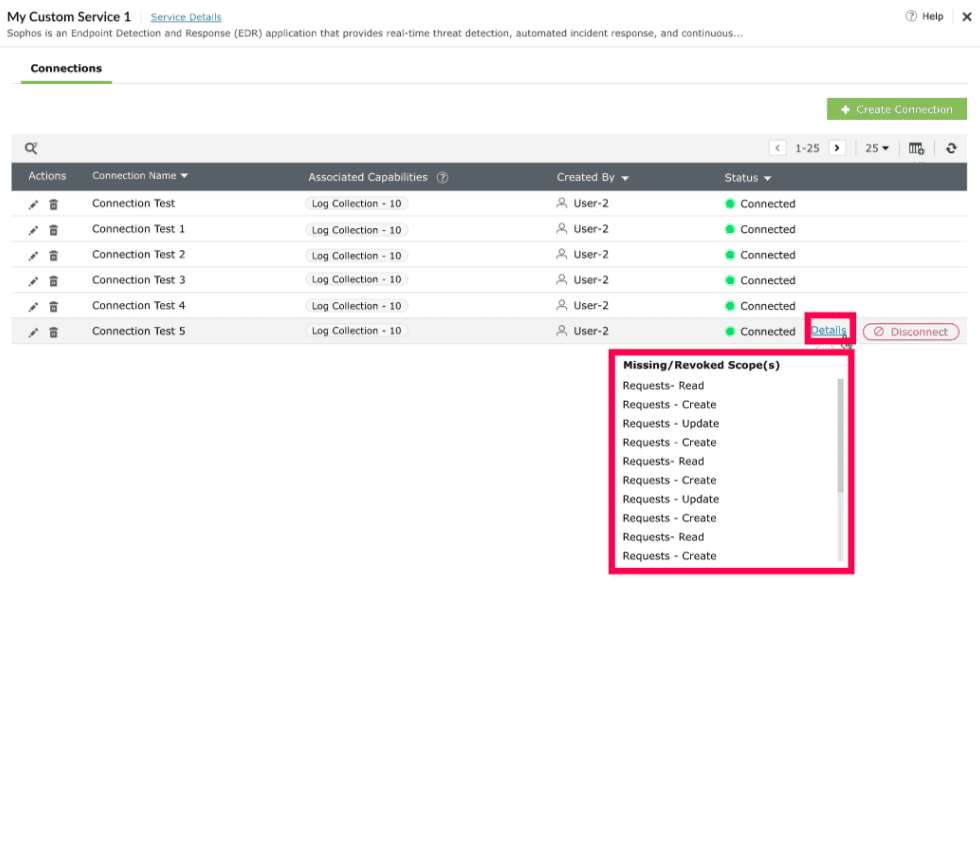
Figure 19: Viewing missing/ revoked scopes - To add or remove columns in the Connections table, click the
 icon above the table.
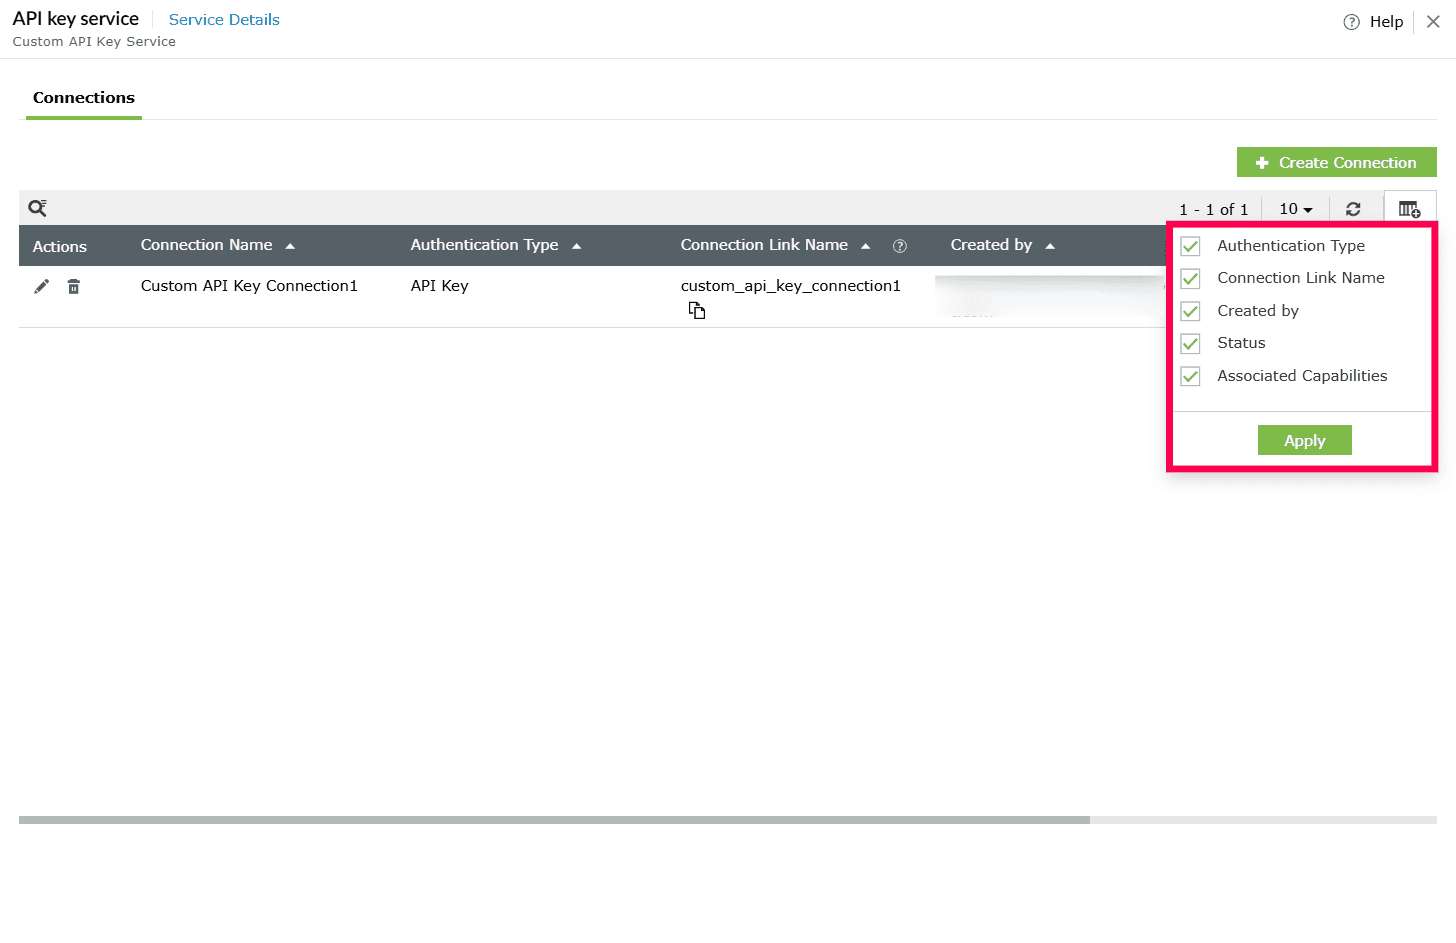
Figure 20: Adding/ removing columns - Select the checkbox next to each column you want to display, and click Apply to update the table.
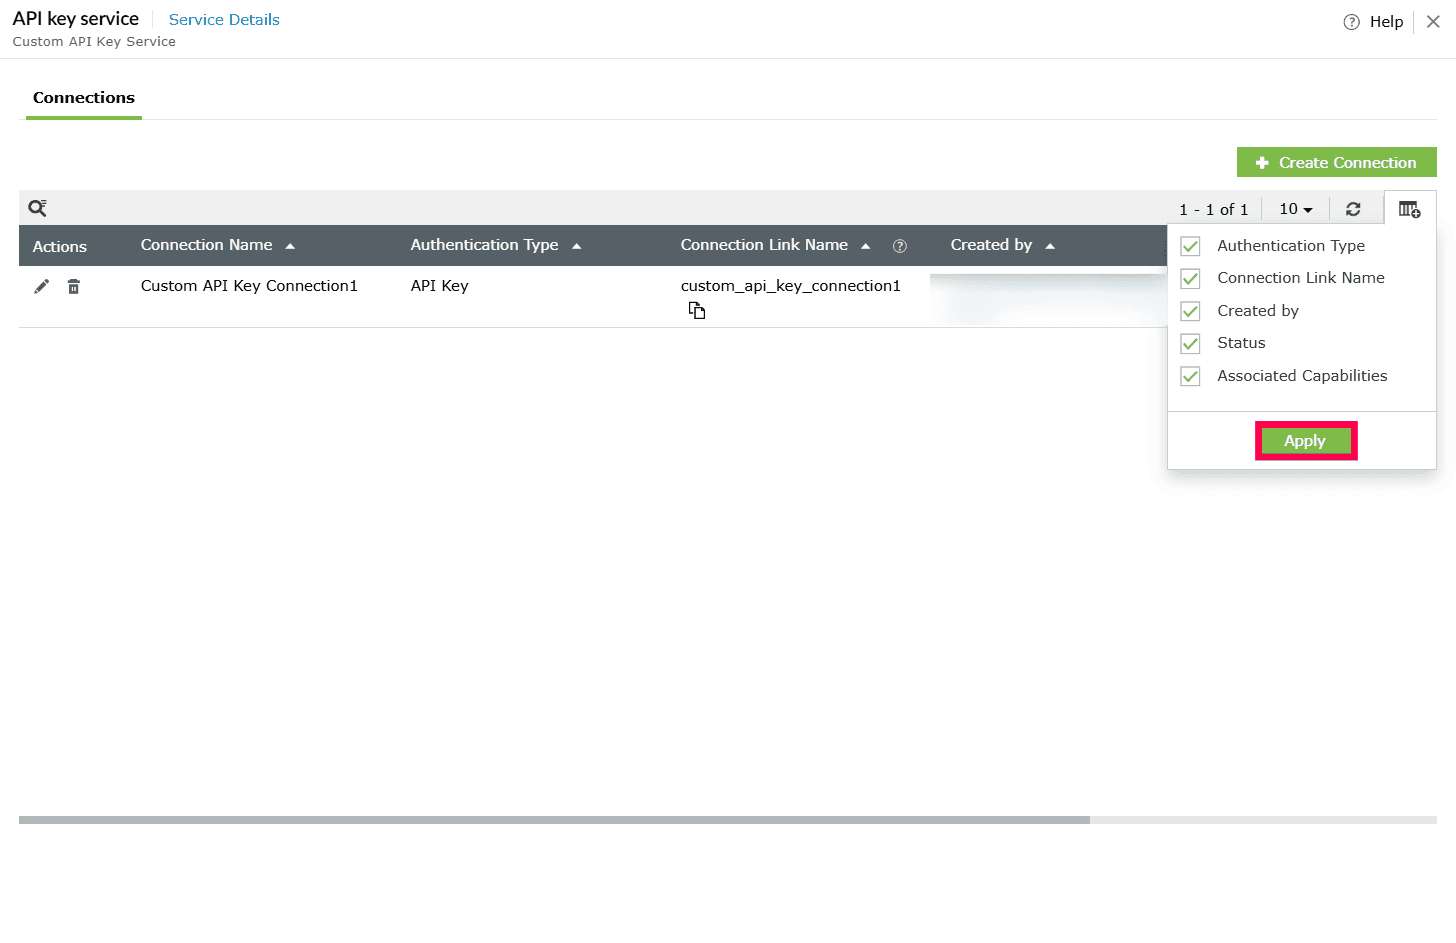
Figure 21: Applying the changes - Click the
 icon to update the table and display the latest connection status.
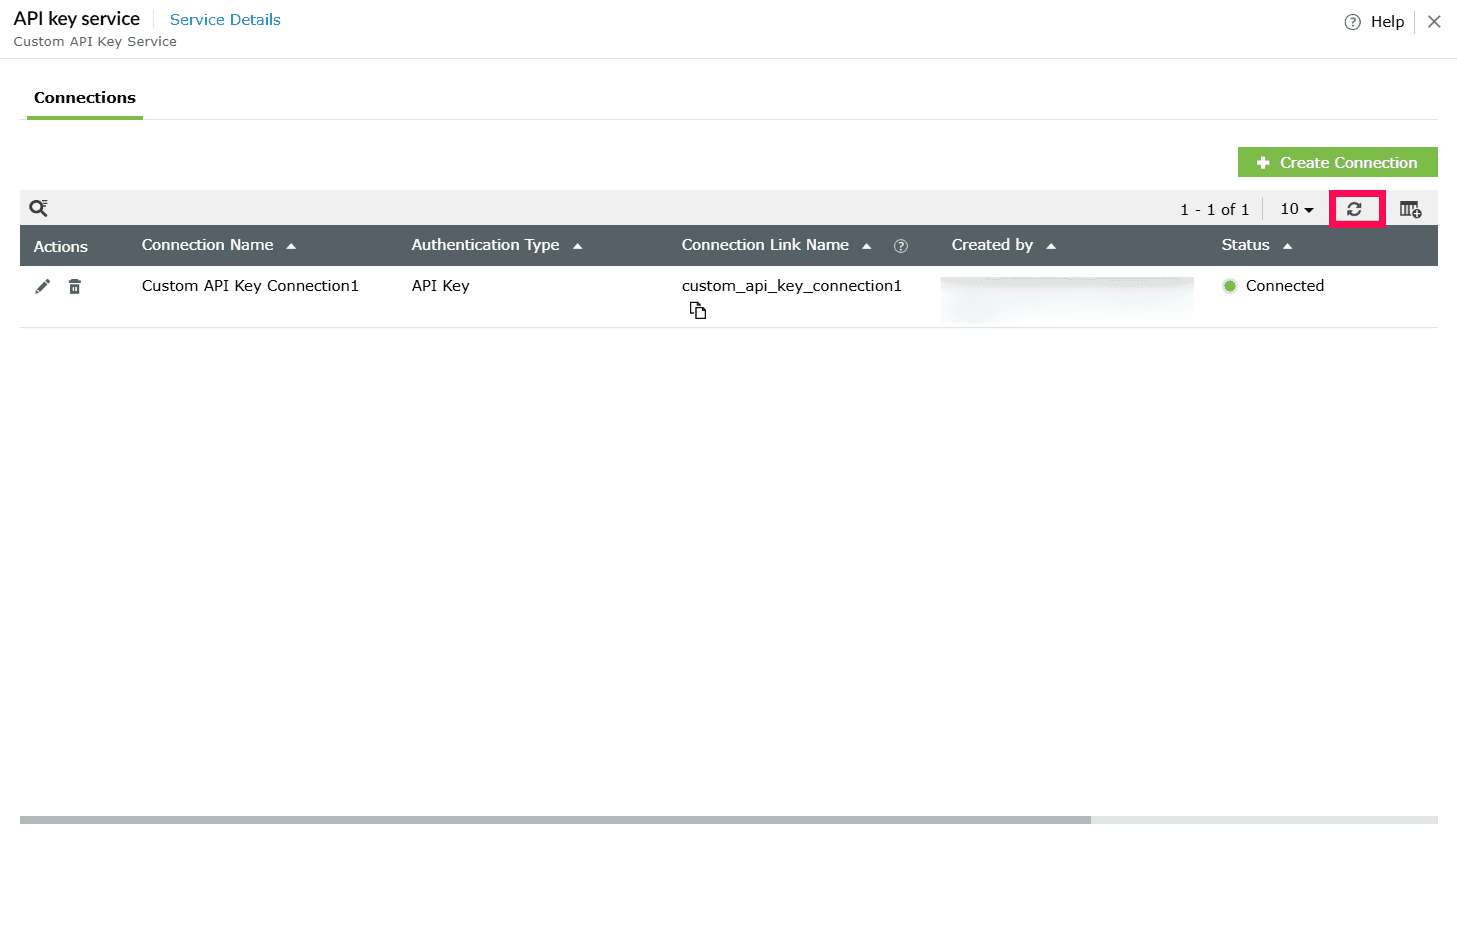
Figure 22: Refreshing the table - To disconnect a connection, click Disconnect under the Actions column.
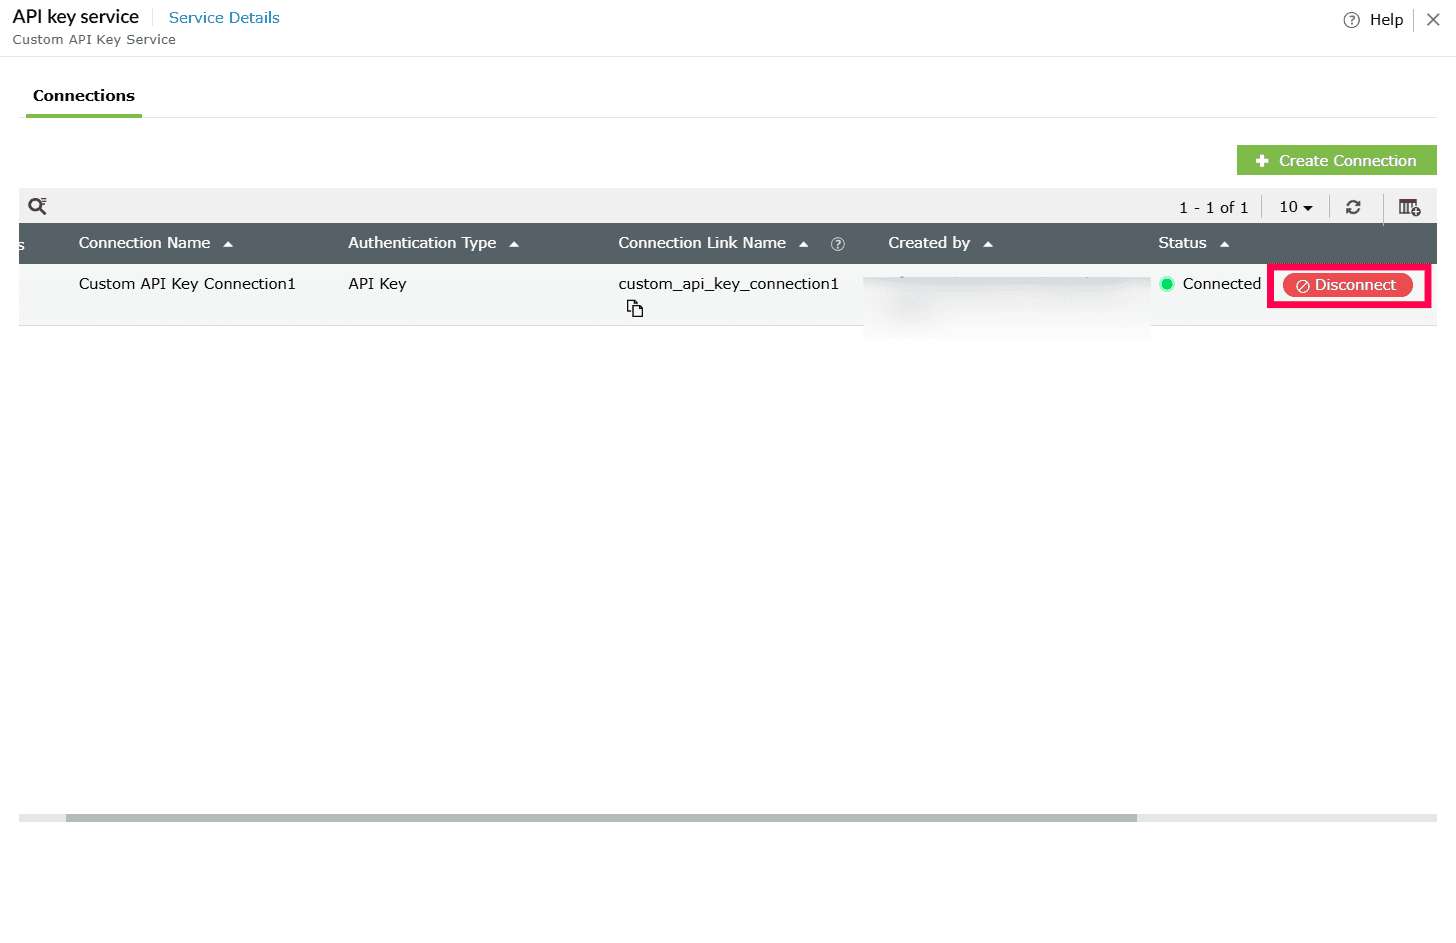
Figure 23: Disconnecting a connection Note If the connection is currently used by log collection configurations, Custom Widgets, or Custom Functions, disconnecting it will temporarily disable those configurations until the connection is authenticated again. After you click Disconnect, the following confirmation pop-up appears. - If the service is associated with Log Collection Configurations, the following pop-up appears:
- Click Proceed to disconnect.
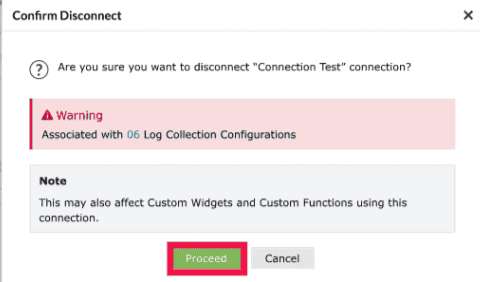
Figure 24: Confirming deletion - You can view the associated Log Collection Configurations by clicking the number shown next to it.
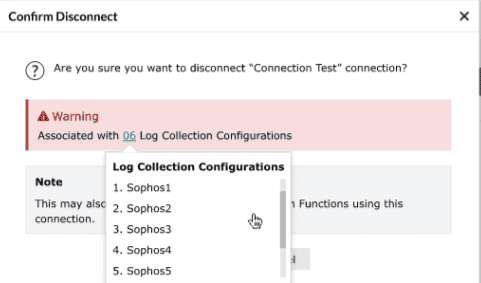
Figure 25: Viewing log collection configurations
- Click Proceed to disconnect.
- To reconnect, click Connect.
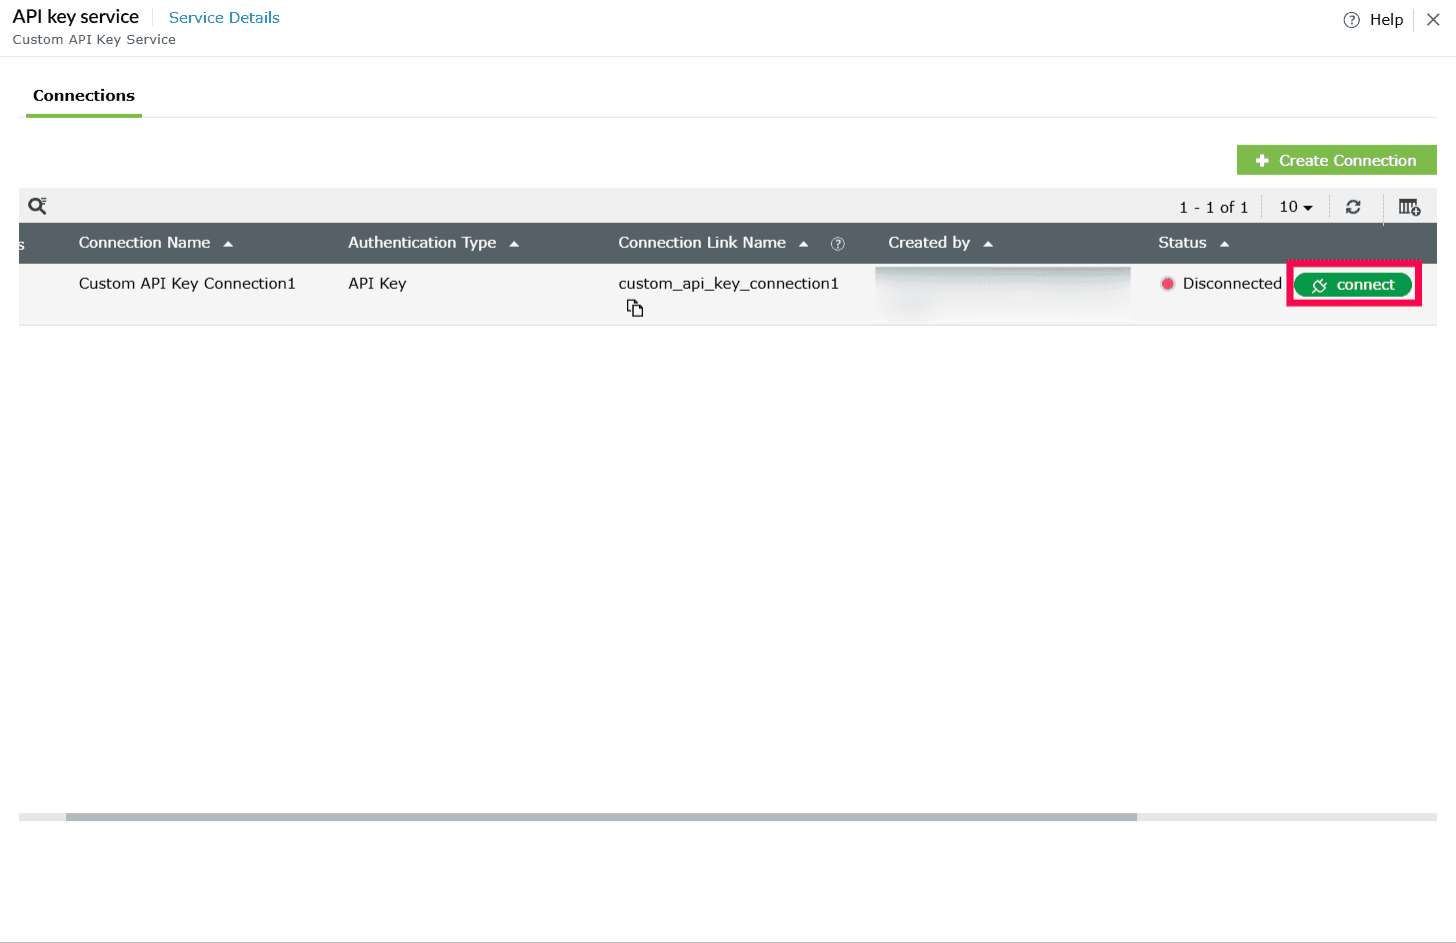
Figure 26: Reconnecting a connection - In the Establish Connection window, verify the credentials.
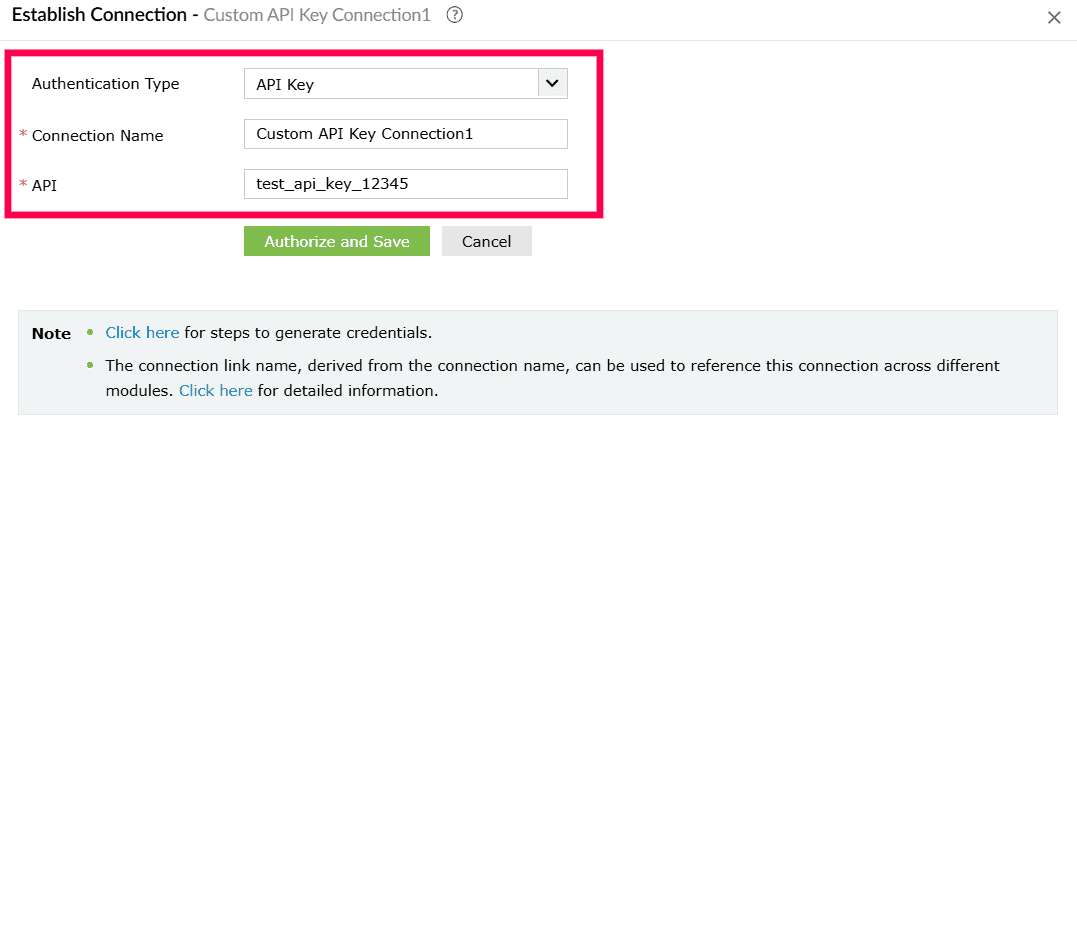
Figure 27: Configuring connections - Click Authorize and Save to re-establish the connection. Once authorized, the status updates to Connected.
- Under the Associated Capabilities column, click the entry displayed for that connection.
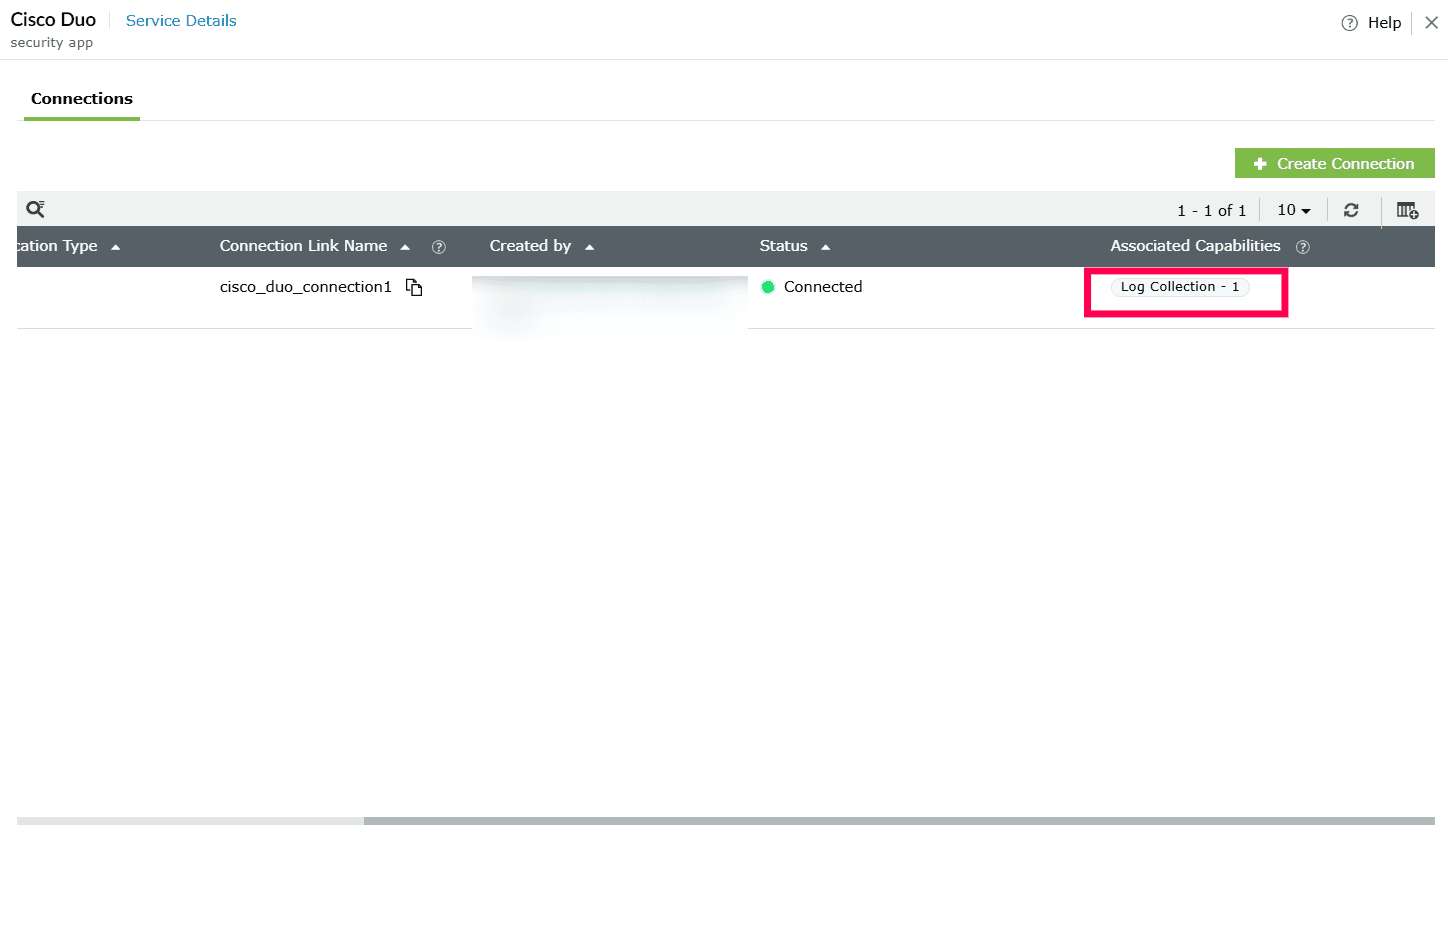
Figure 28: Viewing associated capabilities - A panel opens showing the complete list of capabilities associated with the connection.
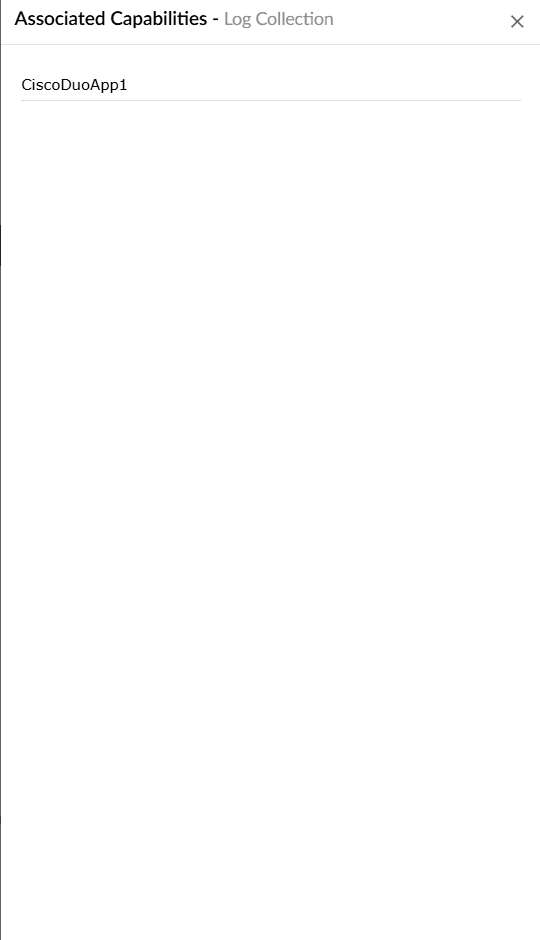
Figure 29: Viewing associated capabilities - To search for a specific connection, click the
 icon above the table.

Figure 30: Locating connections - In the Connection Name, enter the name of the connection to narrow the results.
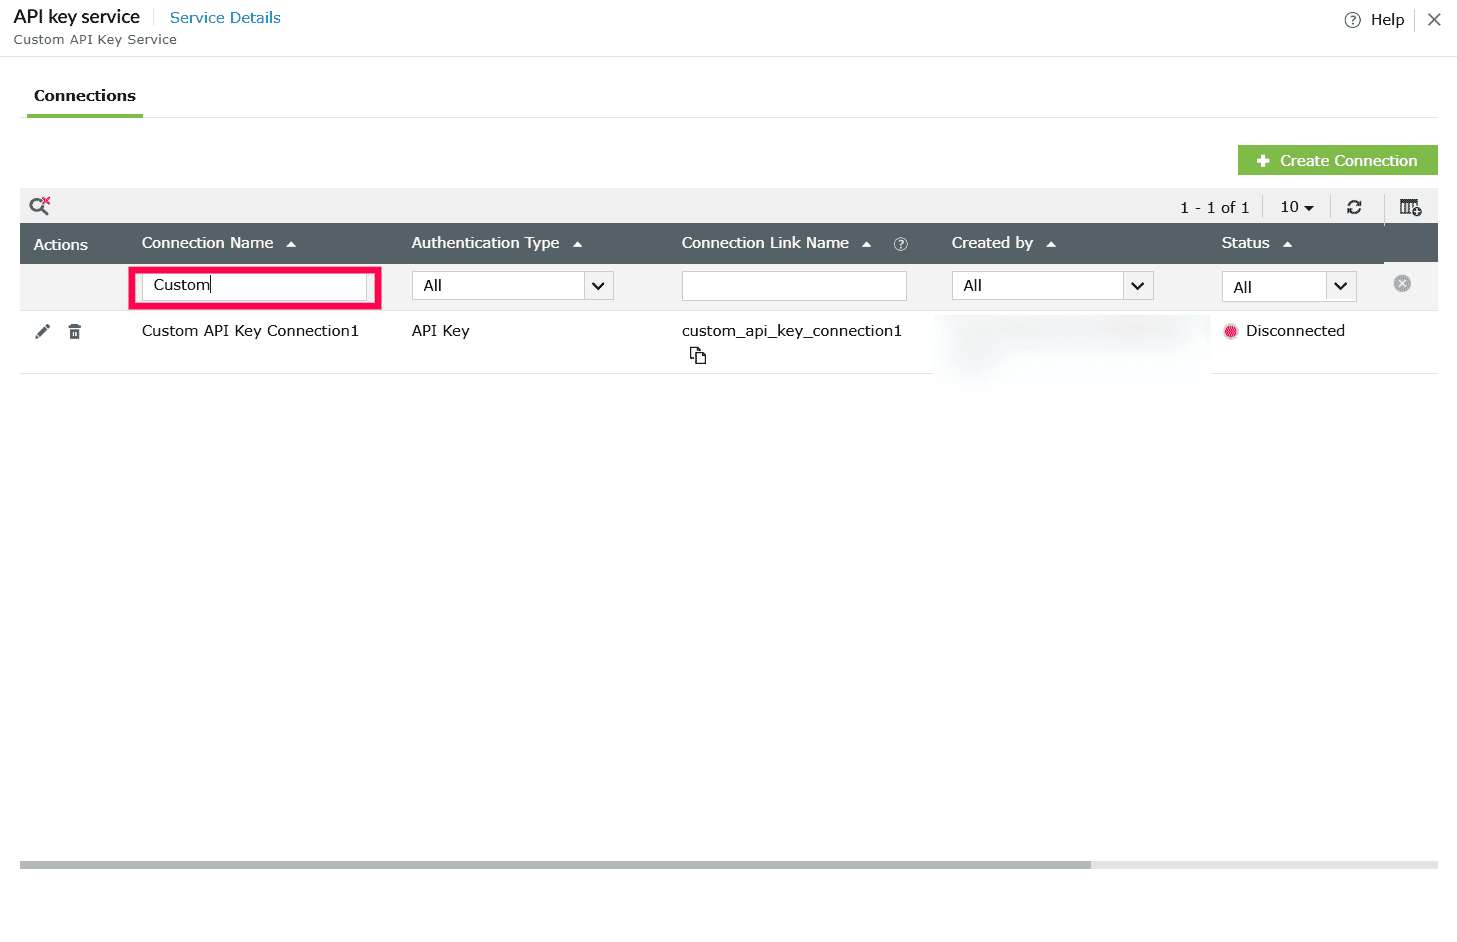
Figure 31: Filtering connections by name - You can also refine the list using the dropdowns displayed above the table:
- Created By dropdown - Select All or choose a specific user to view only the connections created by that user.
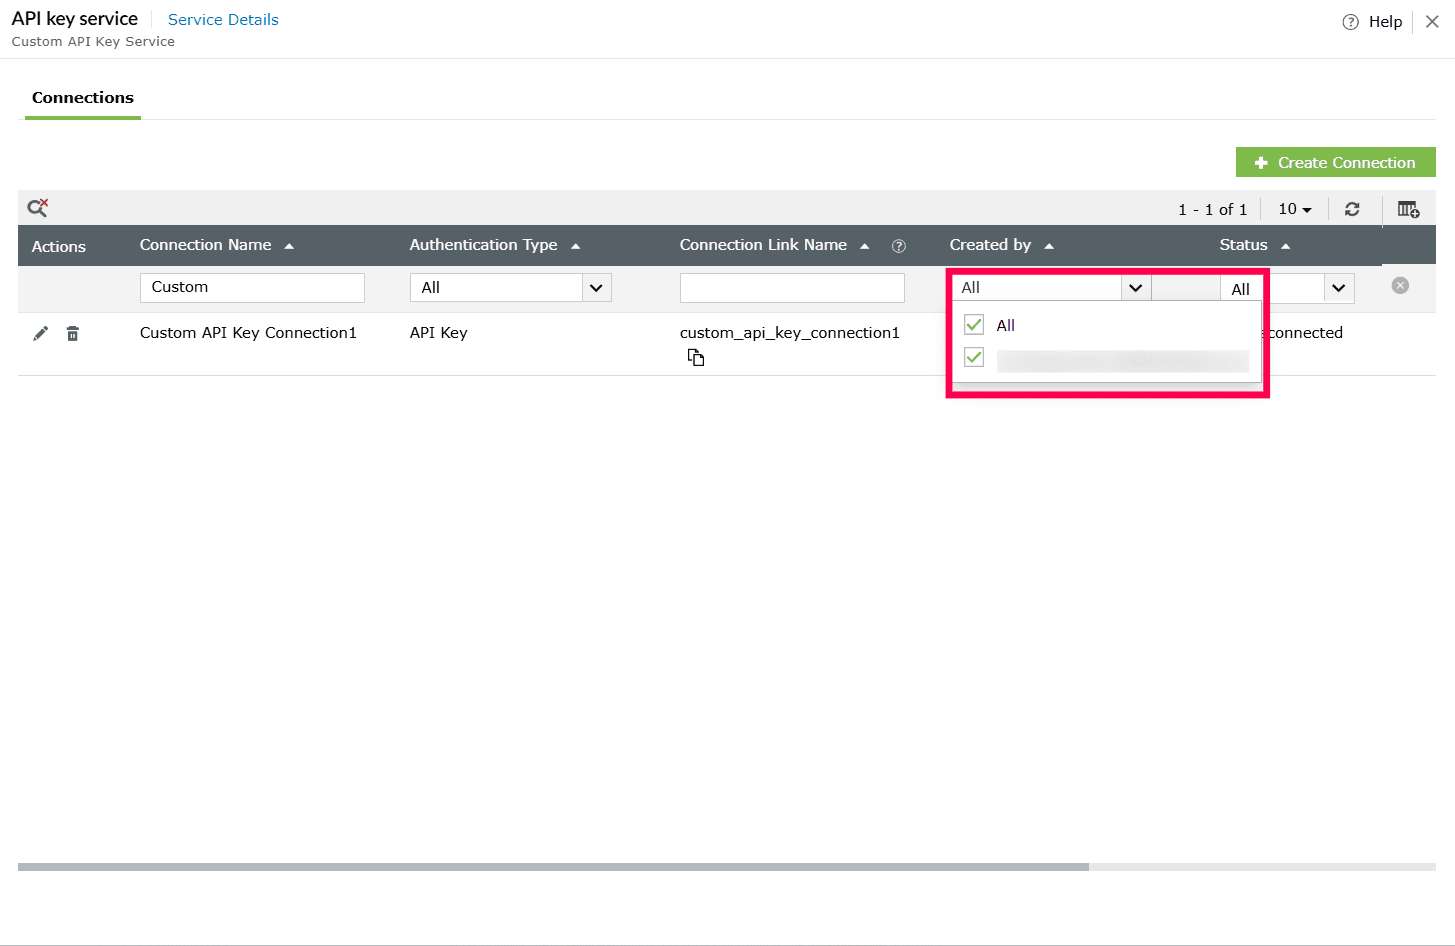
Figure 32: Filtering connections by user - Status dropdown - Select All, Connected, Disconnected, Partially Connected, Expired to filter connections based on their status.
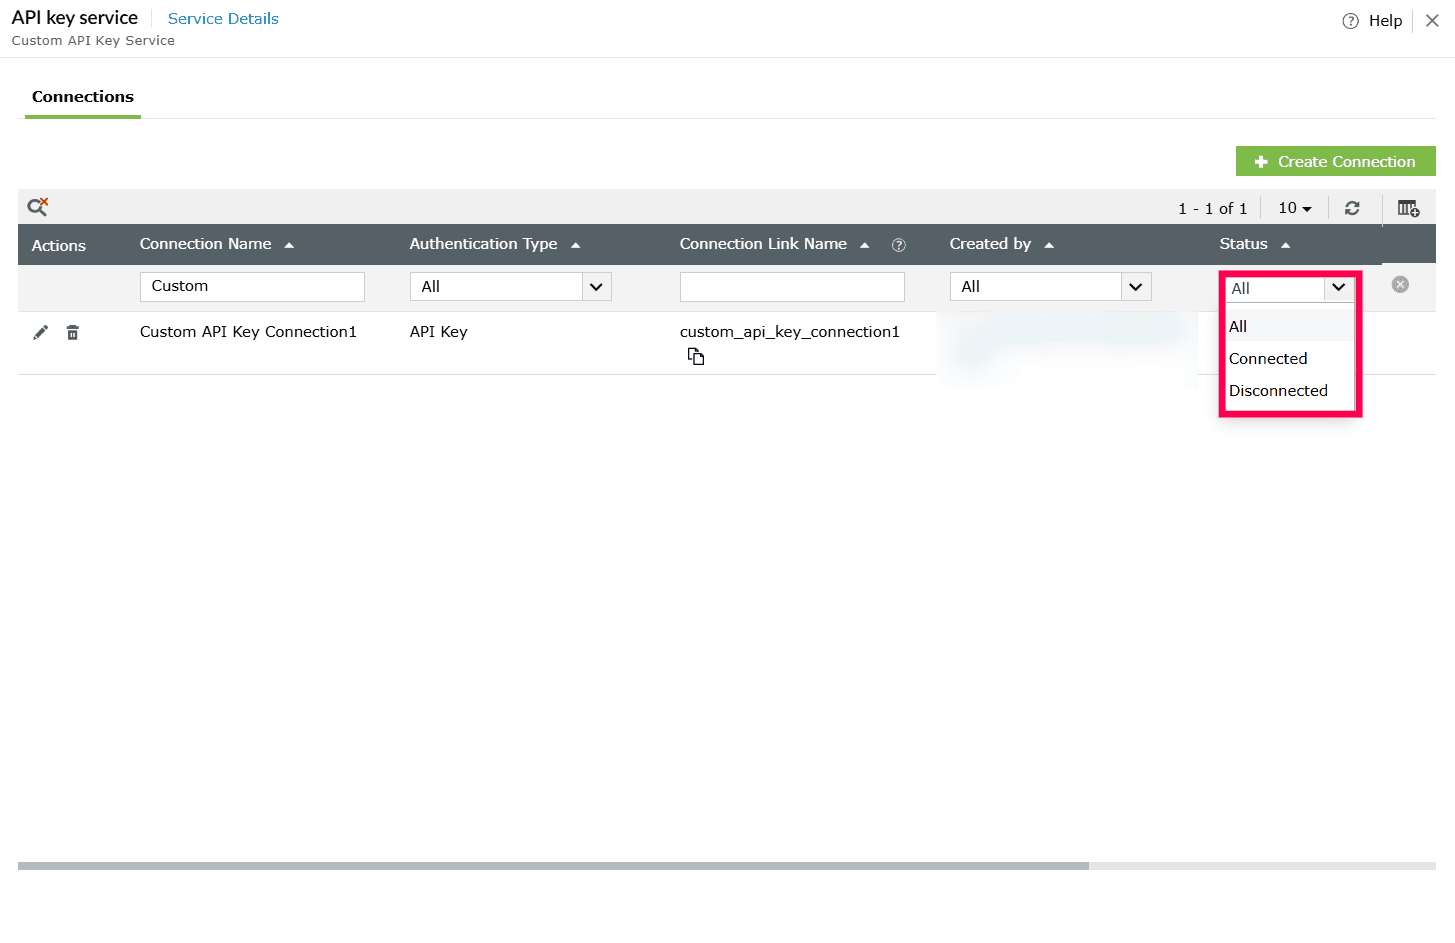
Figure 33: Filtering connection by status - Authentication type dropdown - Select the checkbox next to the required authentication type(s).
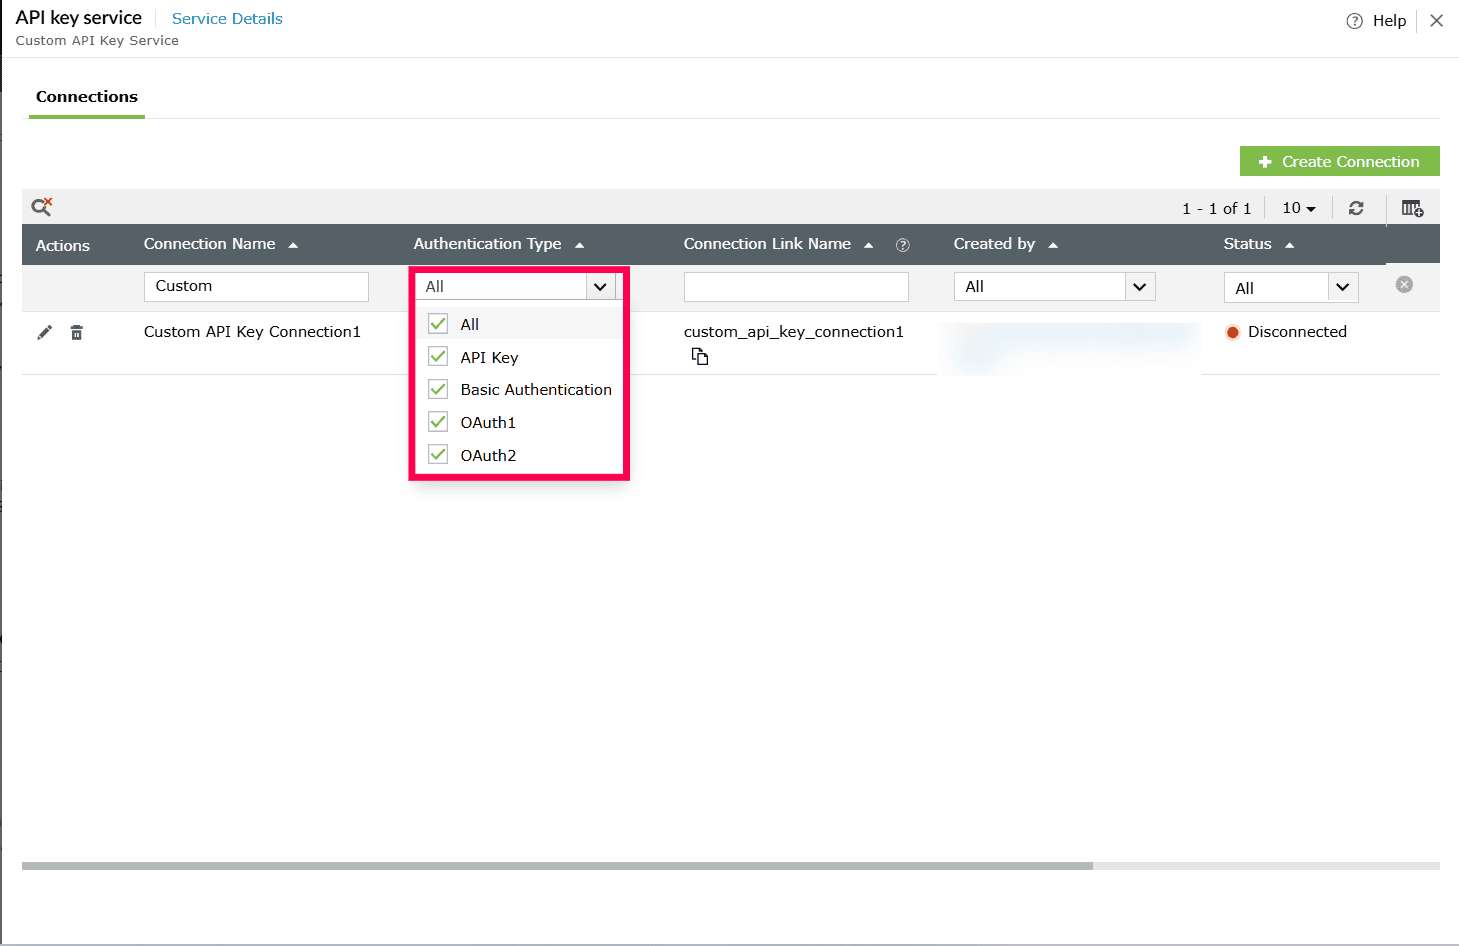
Figure 34: Filtering connection by authentication type - Click the
 icon to clear the search and return to the full list.

Figure 35: Clearing search - Select a connection entry in the table to view its Connection Details.
- The Connection Details window opens and displays the following information:
- Connection Name - The name assigned to the connection.
- Connection Link Name - The auto-generated link name used for referencing the connection.
- Click the icon next to it to copy the link name.
- Click the
- Service Name - The pre-defined or custom service to which the connection belongs.
- Authentication Type - The method used for authentication such as API key, OAuth2, etc.
- Status - Indicates whether the connection is Connected, Disconnected, Partially Connected, Expired.
- Created By - The user who created the connection.
- Scope - Displays the permissions or access scopes granted to the connection, if applicable.
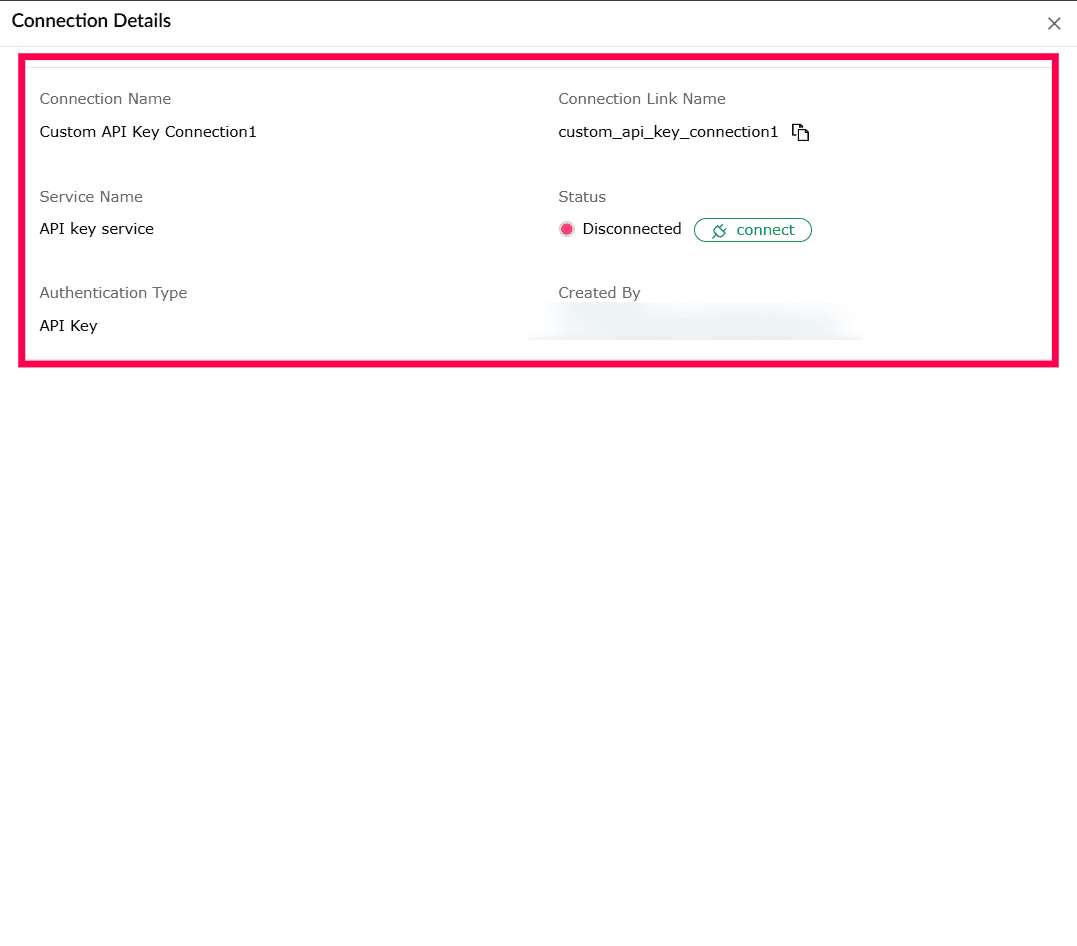
Figure 36: Viewing connection details - Click Show More under Scope(s) to view the complete list of authorized scopes.
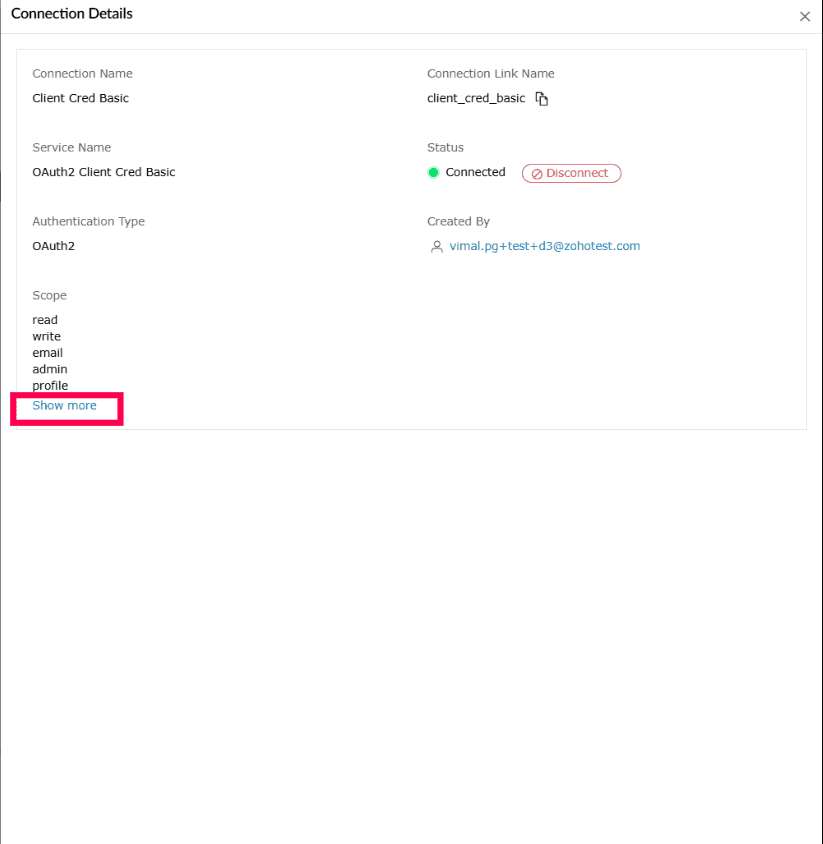
Figure 37: Viewing list of authorized scopes - The Scope(s) panel slides open, displaying all scopes associated with the connection.
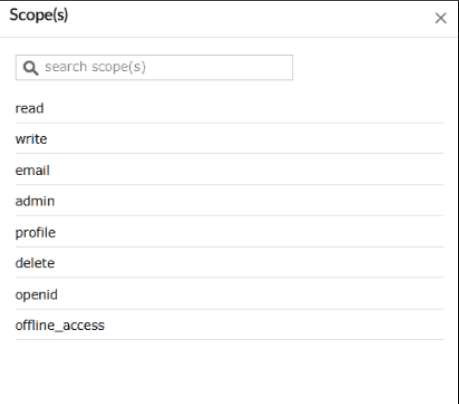
Figure 38: Viewing list of authorized scopes - You can also use Search Scope(s) to locate a specific scope.
- To update a connection, click the icon for the required connection under the Actions column.
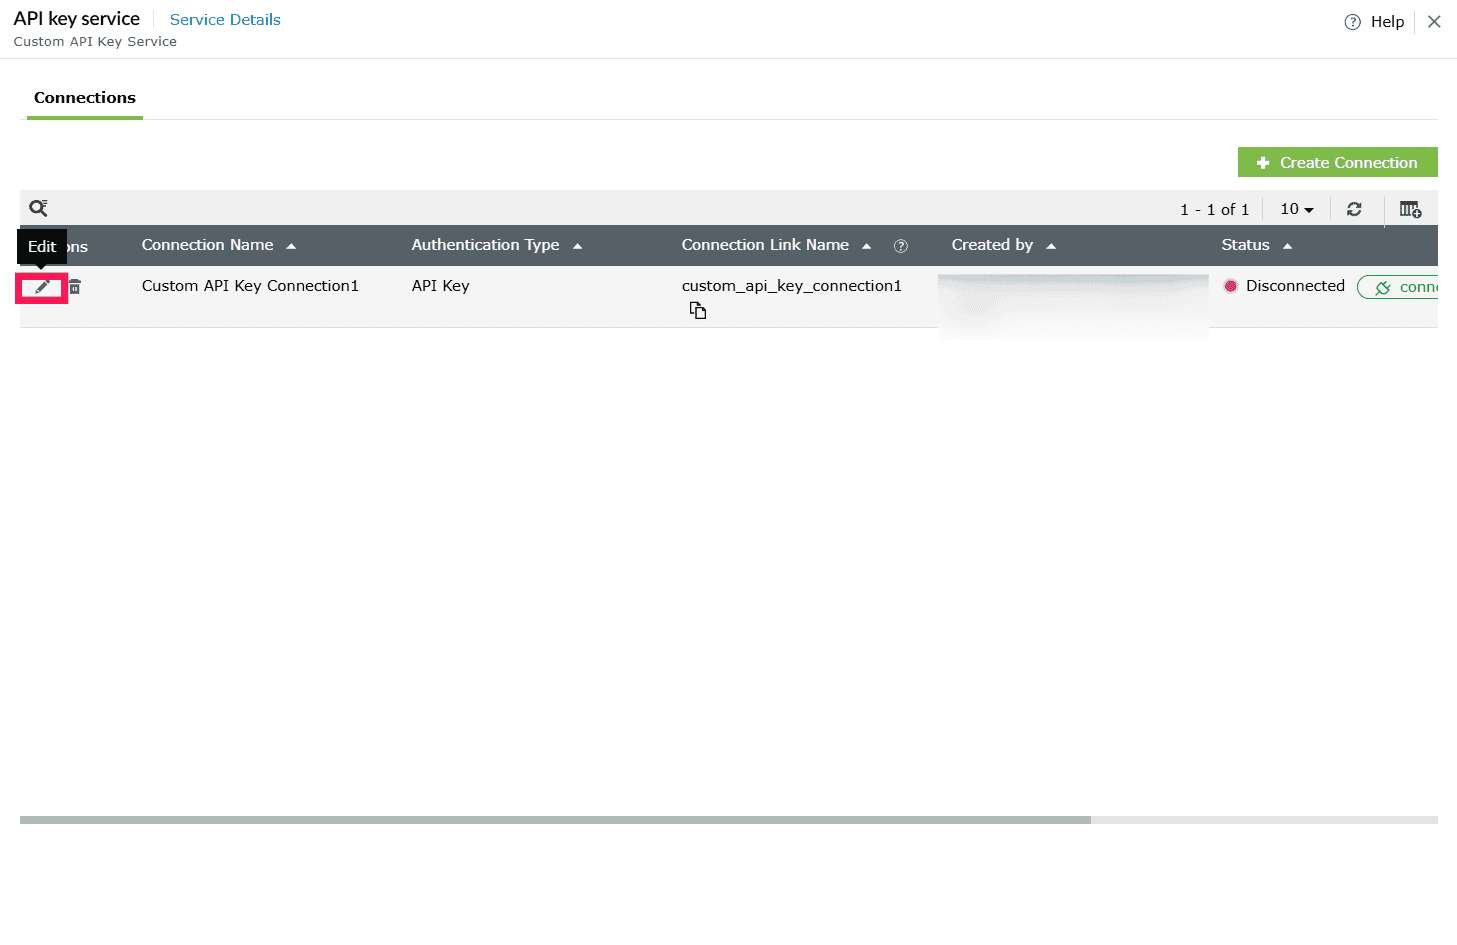
Figure 39: Editing a connection - Update the required fields.
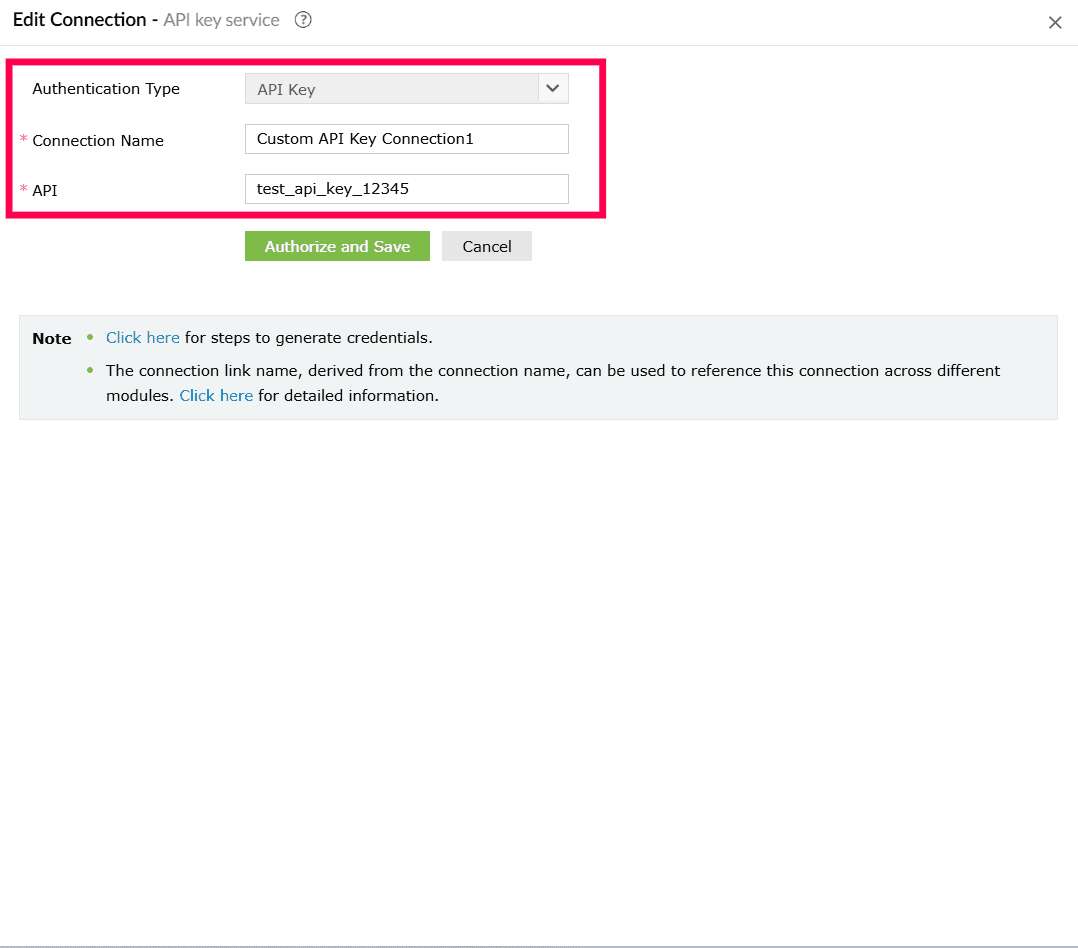
Figure 40: Updating a connection - To delete a connection, click the icon next to the connection under the Actions column.

Figure 41: Deleting a connection - A confirmation pop-up appears, click Proceed to confirm deletion.
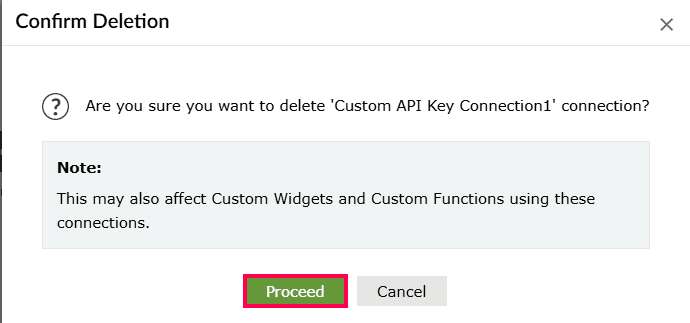
Figure 42: Confirming deletion
Filtering services
In the Connections page, you can use filters to narrow down the list of services.
- Click Filter to open the filter panel.
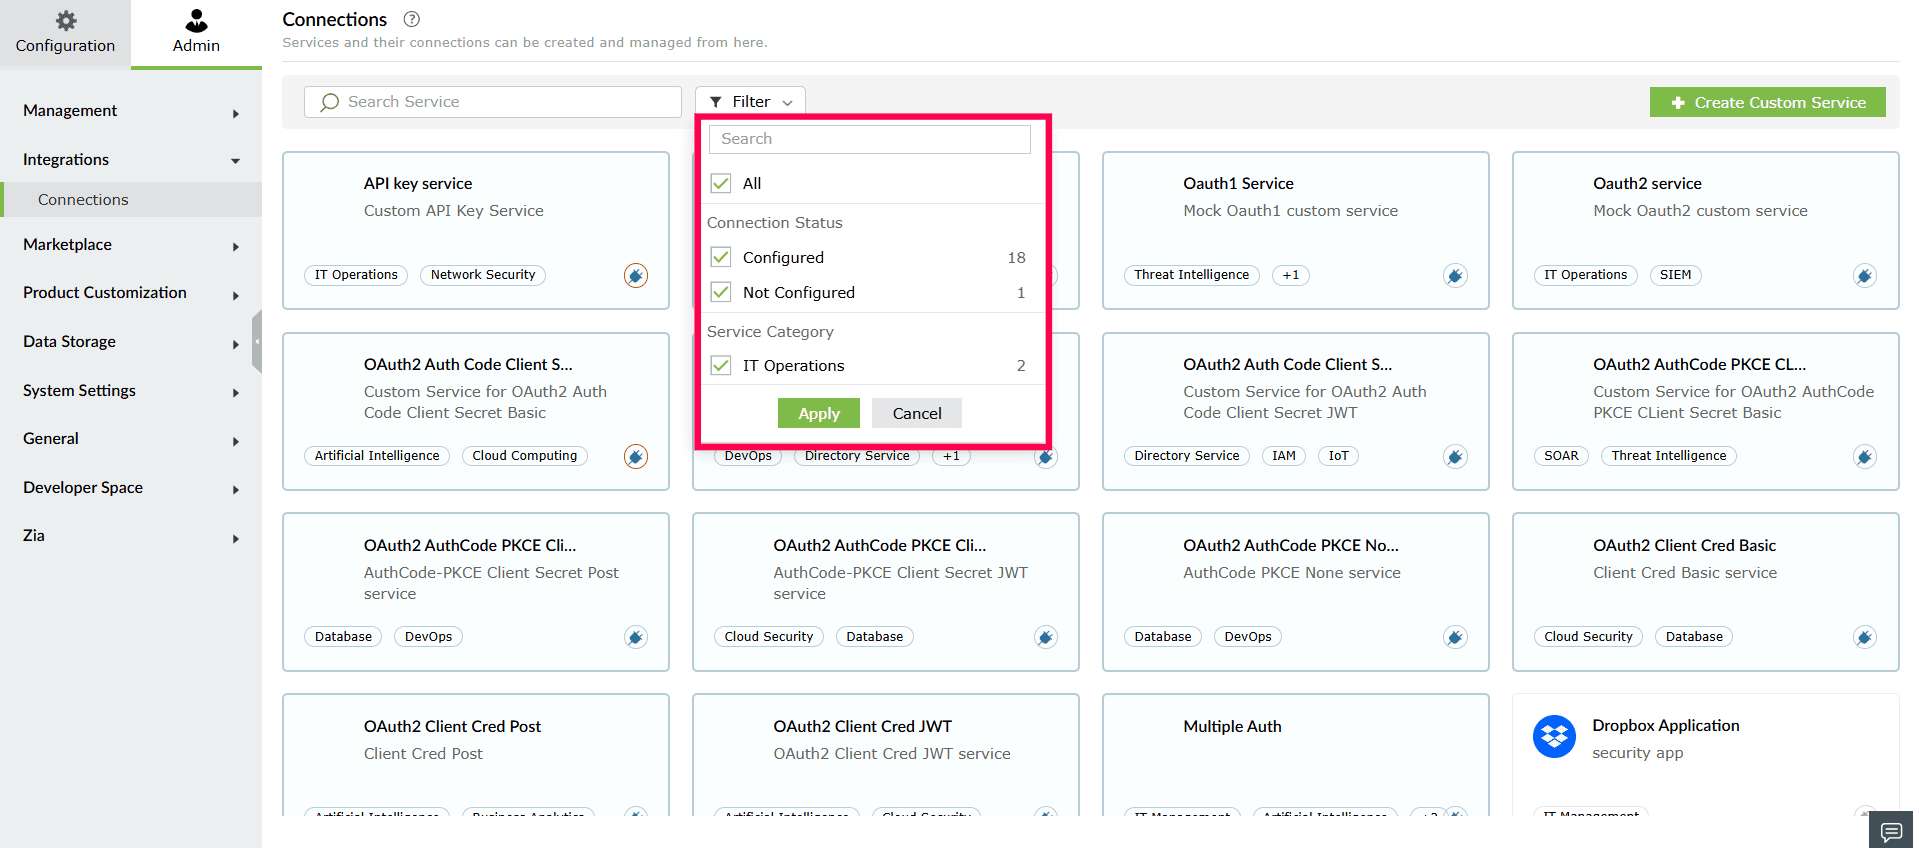
Figure 43: Filtering connections - Under Connection Status, you can select one or both of the following options:
- All - Displays all services, regardless of whether a connection is configured.
- Configured - Displays only services that already have one or more connections.
- Not Configured - Displays services that do not have any connections yet.
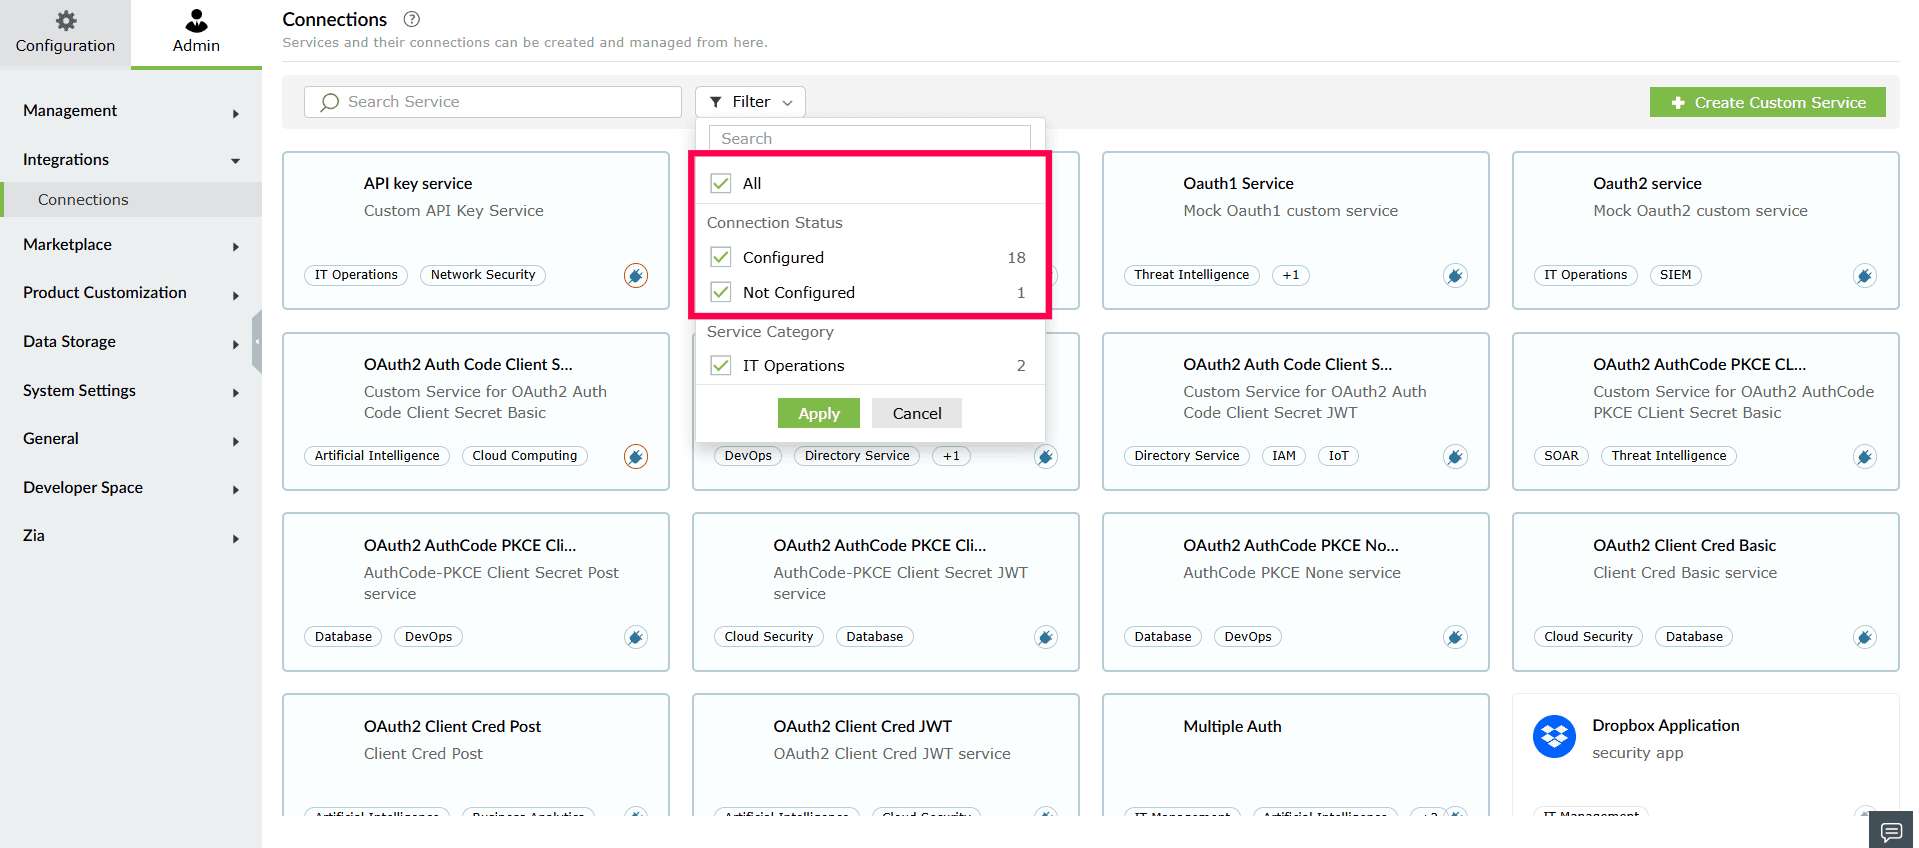
Figure 44: Filtering connections - Under Service Category, select one or more categories from the list.

Figure 45: Filtering connections - Click Apply to update the service list based on your selections.
- To clear the applied filters, reopen the Filter panel, deselect the chosen options and click Apply.
- You can also use the Search Services bar at the top of the panel to locate a category.
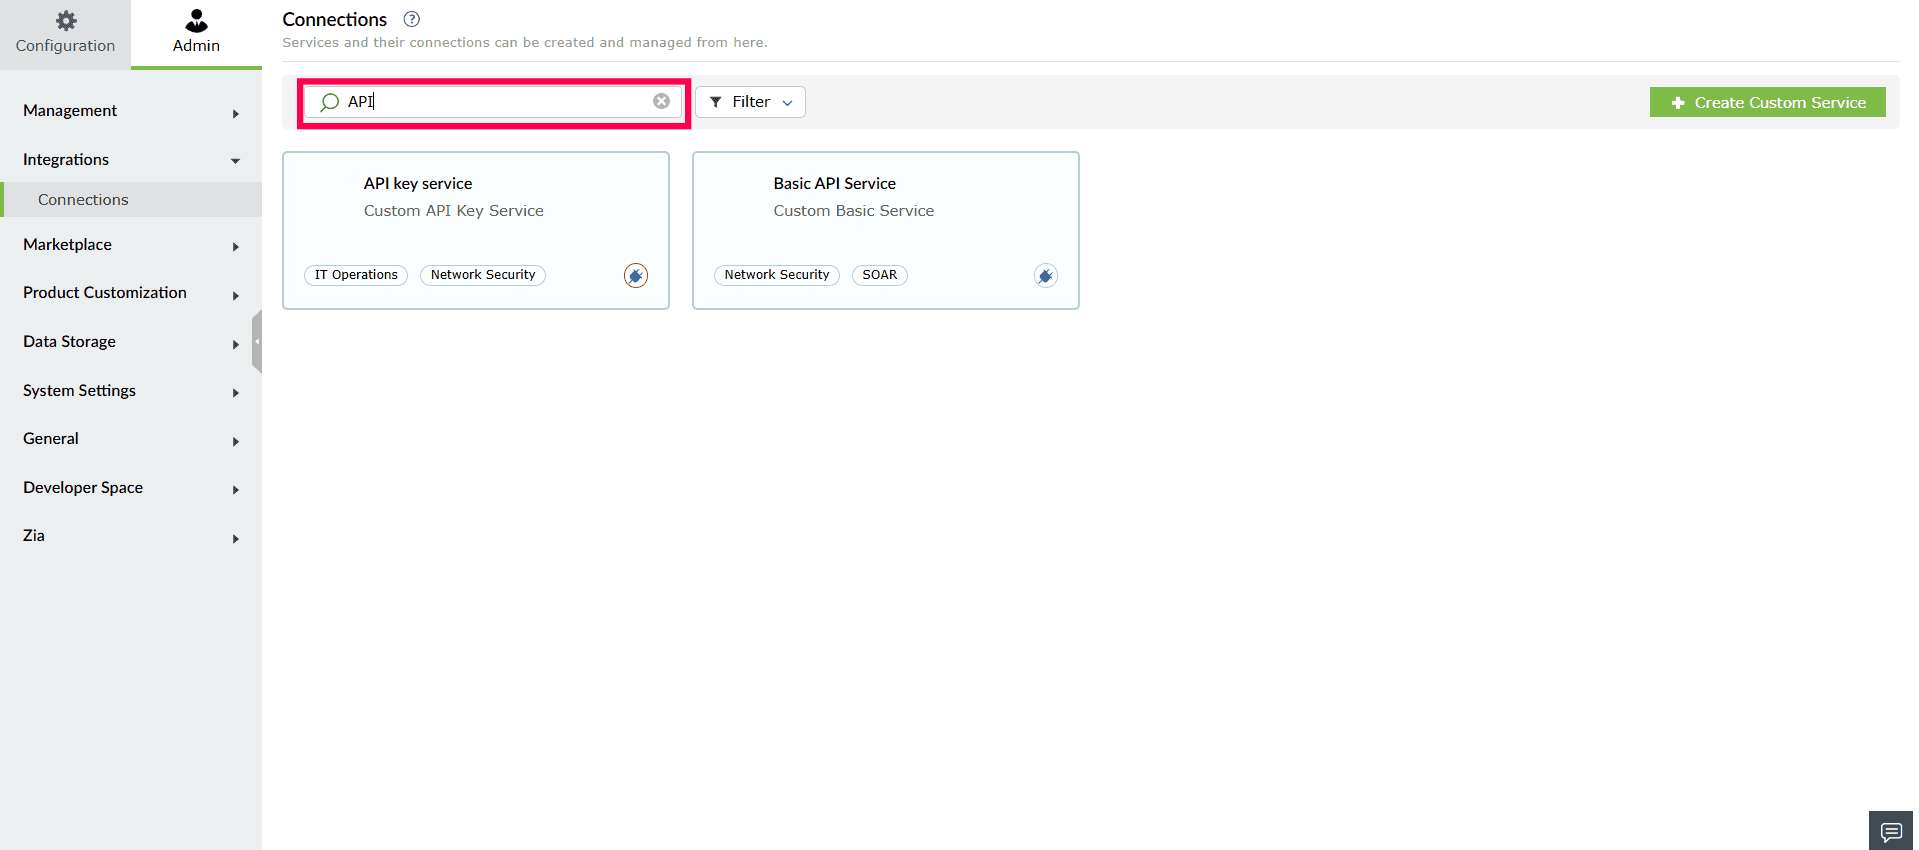
Figure 46: Locating a service - You can also view the number of active connections for a service by hovering over the
 icon displayed on each service card.
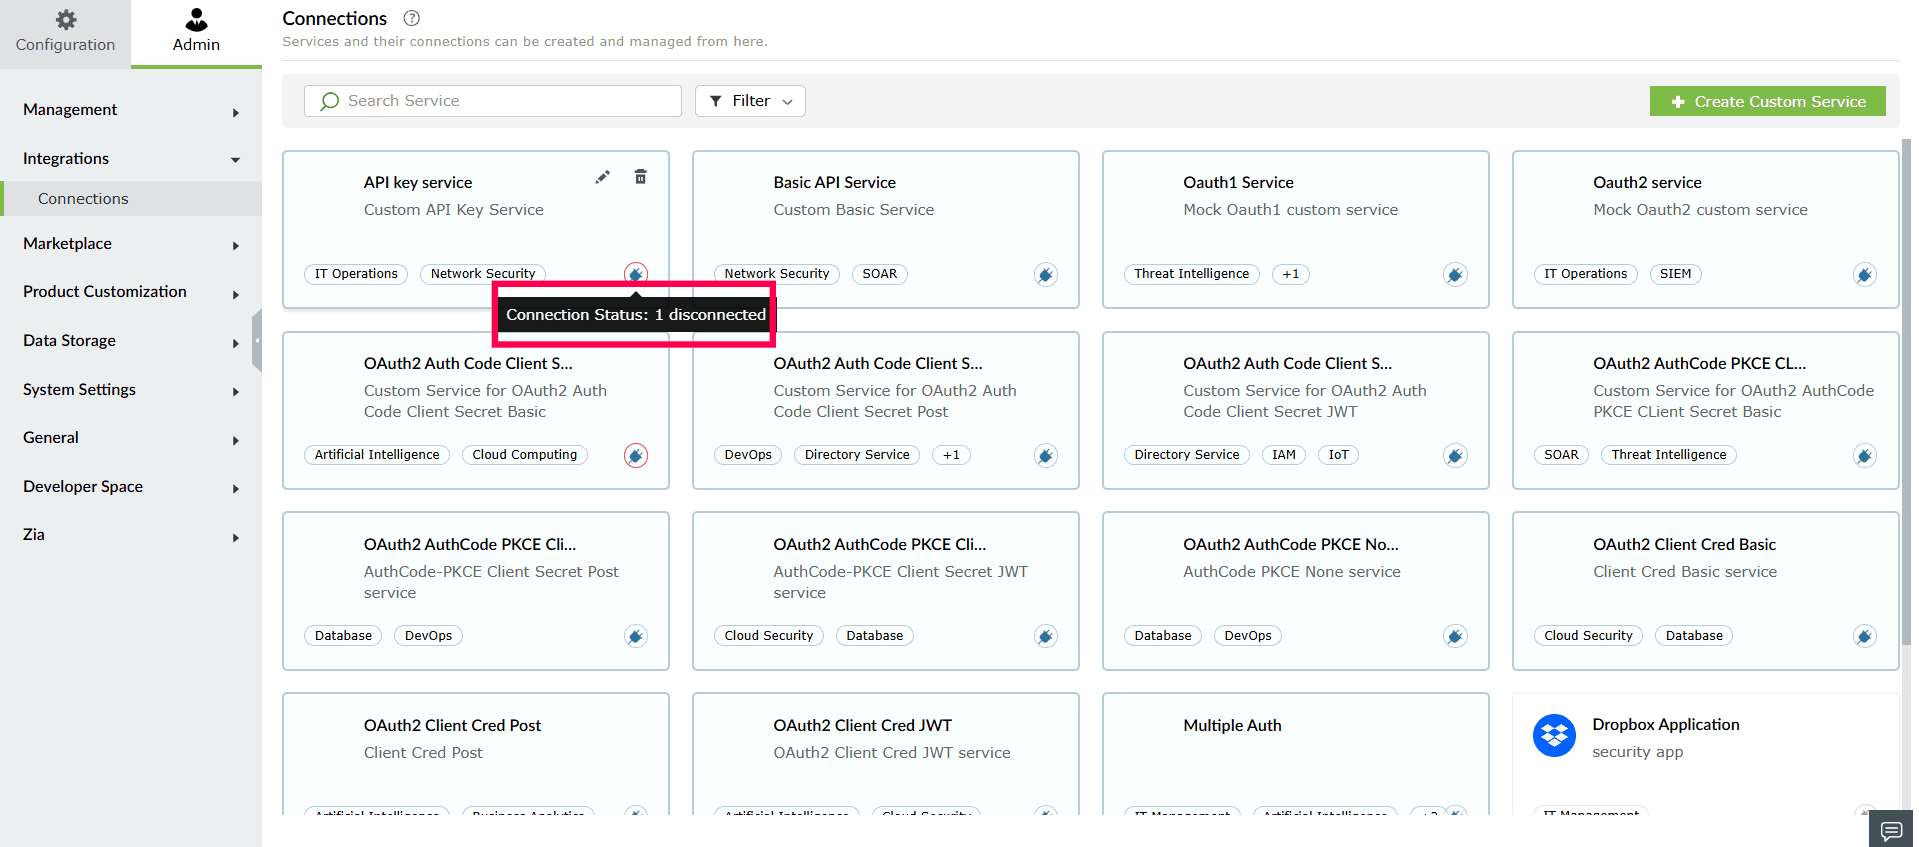
Figure 47: Viewing connection status
Read also
This page explained how to manage and update your custom service configurations. For related configurations, refer to the following articles: