General

Under the General tab of Logon Settings, you can configure the following:

CAPTCHA Settings

Enabling this will display a CAPTCHA image on the login page. End users must enter the characters shown in the CAPTCHA image to log into the M365 Security Plus. This feature is applicable only for AD login and default help desk technicians.

You can choose to display a CAPTCHA always or only after a certain number of invalid login attempts. You can also enable audio CAPTCHA.

Steps to enable CAPTCHA
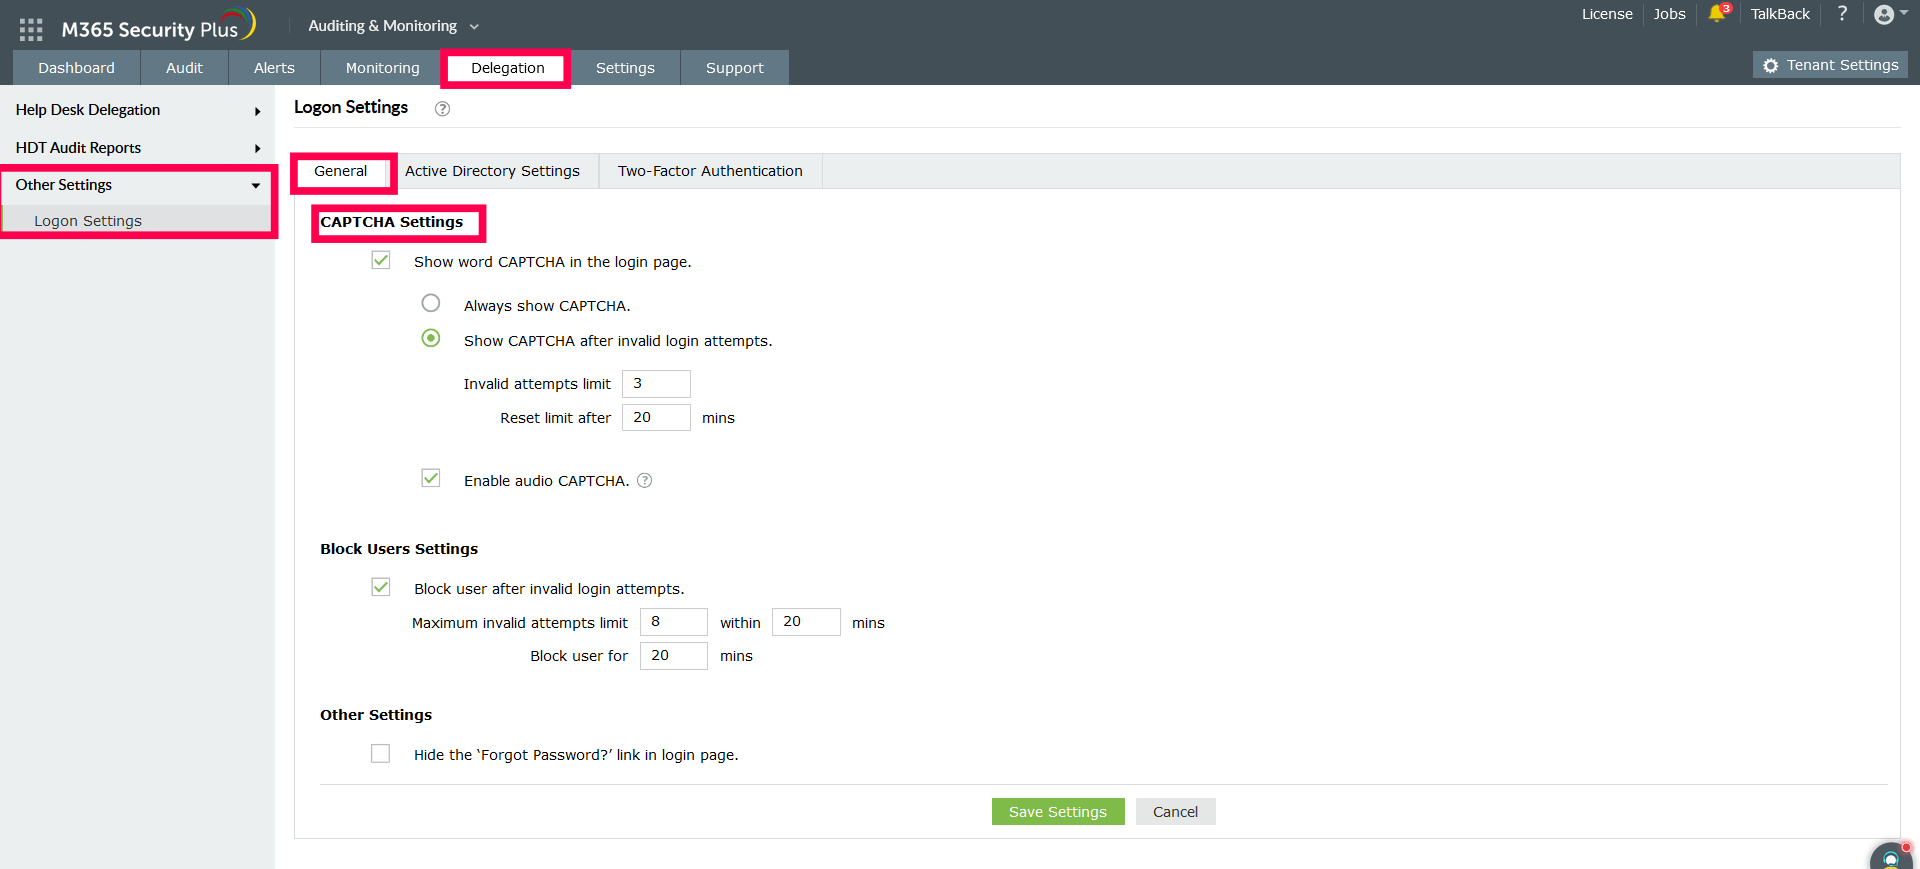
  1. Log in to M365 Security Plus as an administrator.
  2. Navigate to Delegation > Other Settings > Logon Settings, and click on the General tab.

    CAPTCHA Settings

  3. Check the box next to Show word CAPTCHA on the login page.
    • Select Always show CAPTCHA if you want users to go through CAPTCHA verification every time they log in.
    • Select Show CAPTCHA after invalid login attempts if you wish to enable this identity verification option after a certain number of failed login attempts.
      • Enter the number of invalid login attempts after which CAPTCHA verification should appear.
      • Enter the threshold (in minutes) for resetting the counter that tracks the number of invalid login attempts. After the specified time passes, the user will be able to log in without CAPTCHA verification

        Example: Consider the following configurations:

        • The invalid login attempts limit is three.
        • The invalid login attempts limit is reset after 30 minutes.

          In this example, if a user fails to log in three consecutive times within a 30 minute interval, a CAPTCHA image will be displayed. The user will have to enter the correct credentials, along with the characters shown in the CAPTCHA image, to login to M365 Security Plus successfully.
          After 30 minutes, the product won't ask for a CAPTCHA while logging in.

  4. Select Enable Audio CAPTCHA if needed.
    Note: When audio CAPTCHA is enabled, only digits will be shown in the CAPTCHA image along with a play option. If a browser doesn’t support audio CAPTCHA, the default CAPTCHA image (with letters and digits) will be shown.
  5. Click Save.

Block Users Settings

This option can be used to block users from accessing M365 Security Plus for a specified time interval after a certain number of failed authentications. This feature is applicable only for AD login and default help desk technicians.

Steps to block user access after too many failed logins:
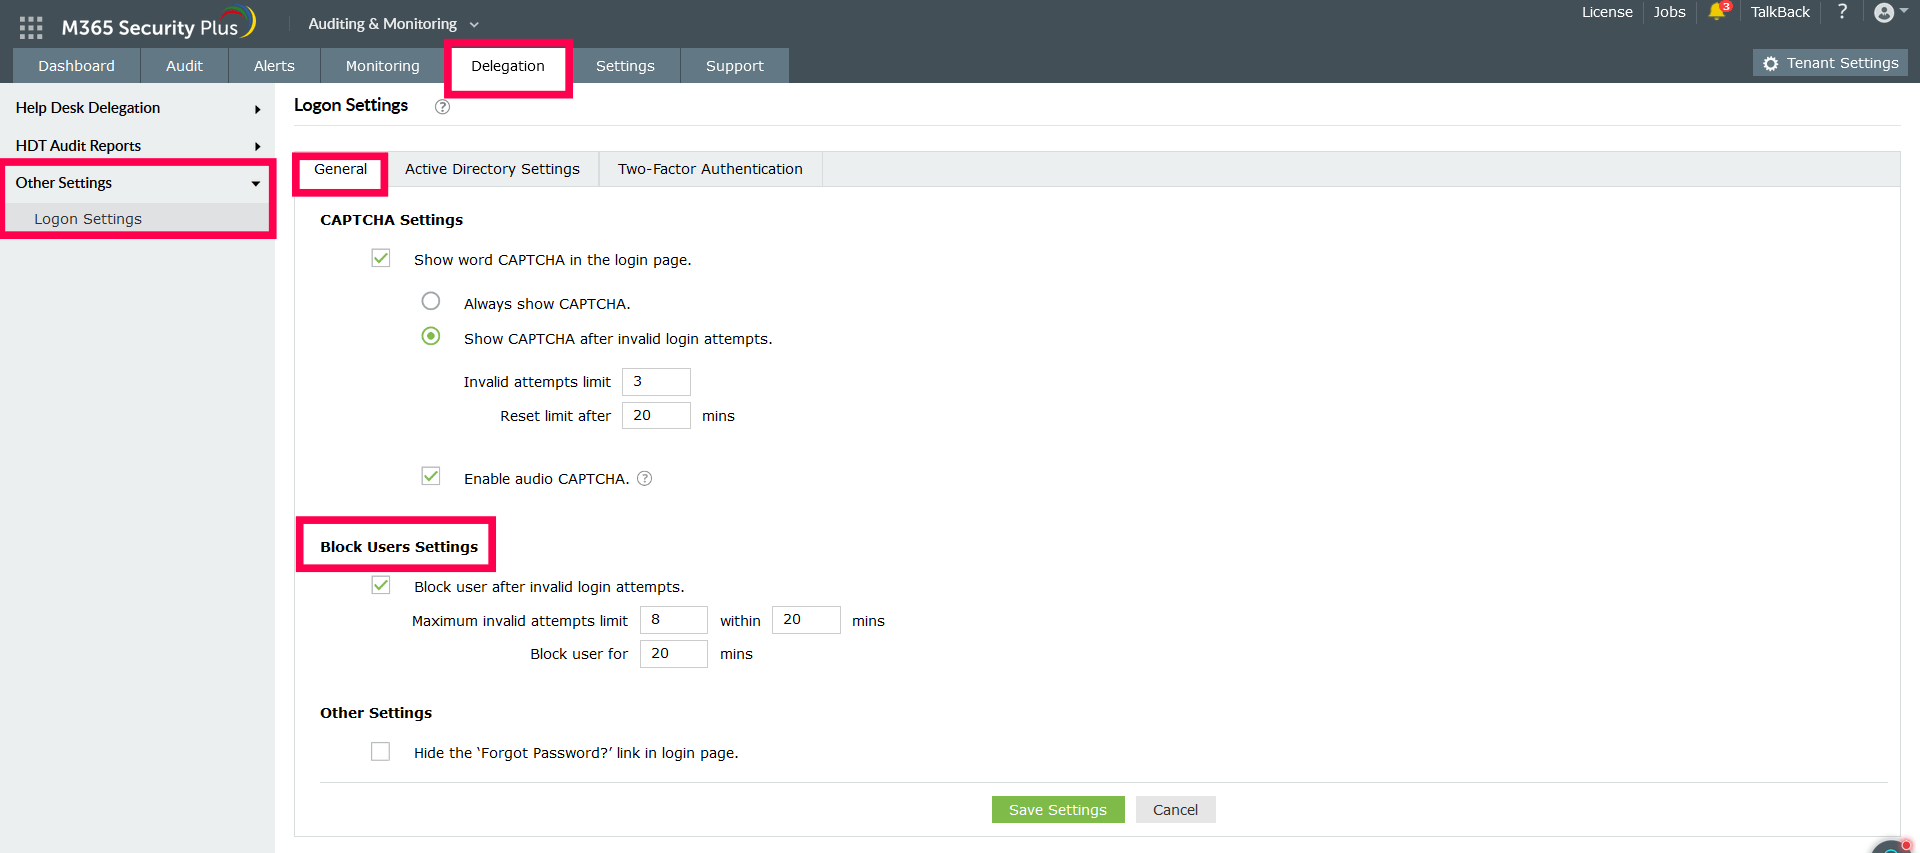
  1. Log in to M365 Security Plus as an administrator.
  2. Navigate to Delegation > Other Settings > Logon Settings, and click the General tab.

    Block Users Settings

  3. Check the box next to Block user after invalid login attempts.
  4. Enter the number of invalid login attempts after which users should be blocked.
  5. Enter the threshold (in minutes) for resetting the counter that tracks the number of invalid login attempts. After the specified time passes, the users who were blocked will be able to log in again.
  6. Enter the number of minutes for which users should be blocked.

    Example: Consider the following limits:

    • Invalid login attempts limit is 3 within 5 minutes
    • Reset the invalid attempts limit after 30 minutes

    In the above example, if a user fails to log in three times within a five-minute interval, they will be blocked from logging into M365 Security Plus for 30 minutes.

  7. Click Save.

Other Settings

If you want to hide the Forgot Password? link on the login page, check the Hide the ‘Forgot Password?’ link in login page box.

Get download link