How to Enroll Android Devices Without Camera?
In certain high-security environments, such as defence organizations and restricted zones, camera-equipped devices are often banned due to security concerns. This document provides step-by-step instructions for administrators to enroll Android devices that do not have a camera.
Pre-requisites
- A Windows/macOS computer.
- USB cable to connect the device to the computer or laptop.
- Ensure that no Google account is logged in or syncing data on the device.
Steps to enroll Android devices without camera
- On the Laptop or computer, download the Device Owner provisioning tool from the following link for Windows or Mac.
- After downloading, extract all the files in the zip file to a location on your machine.
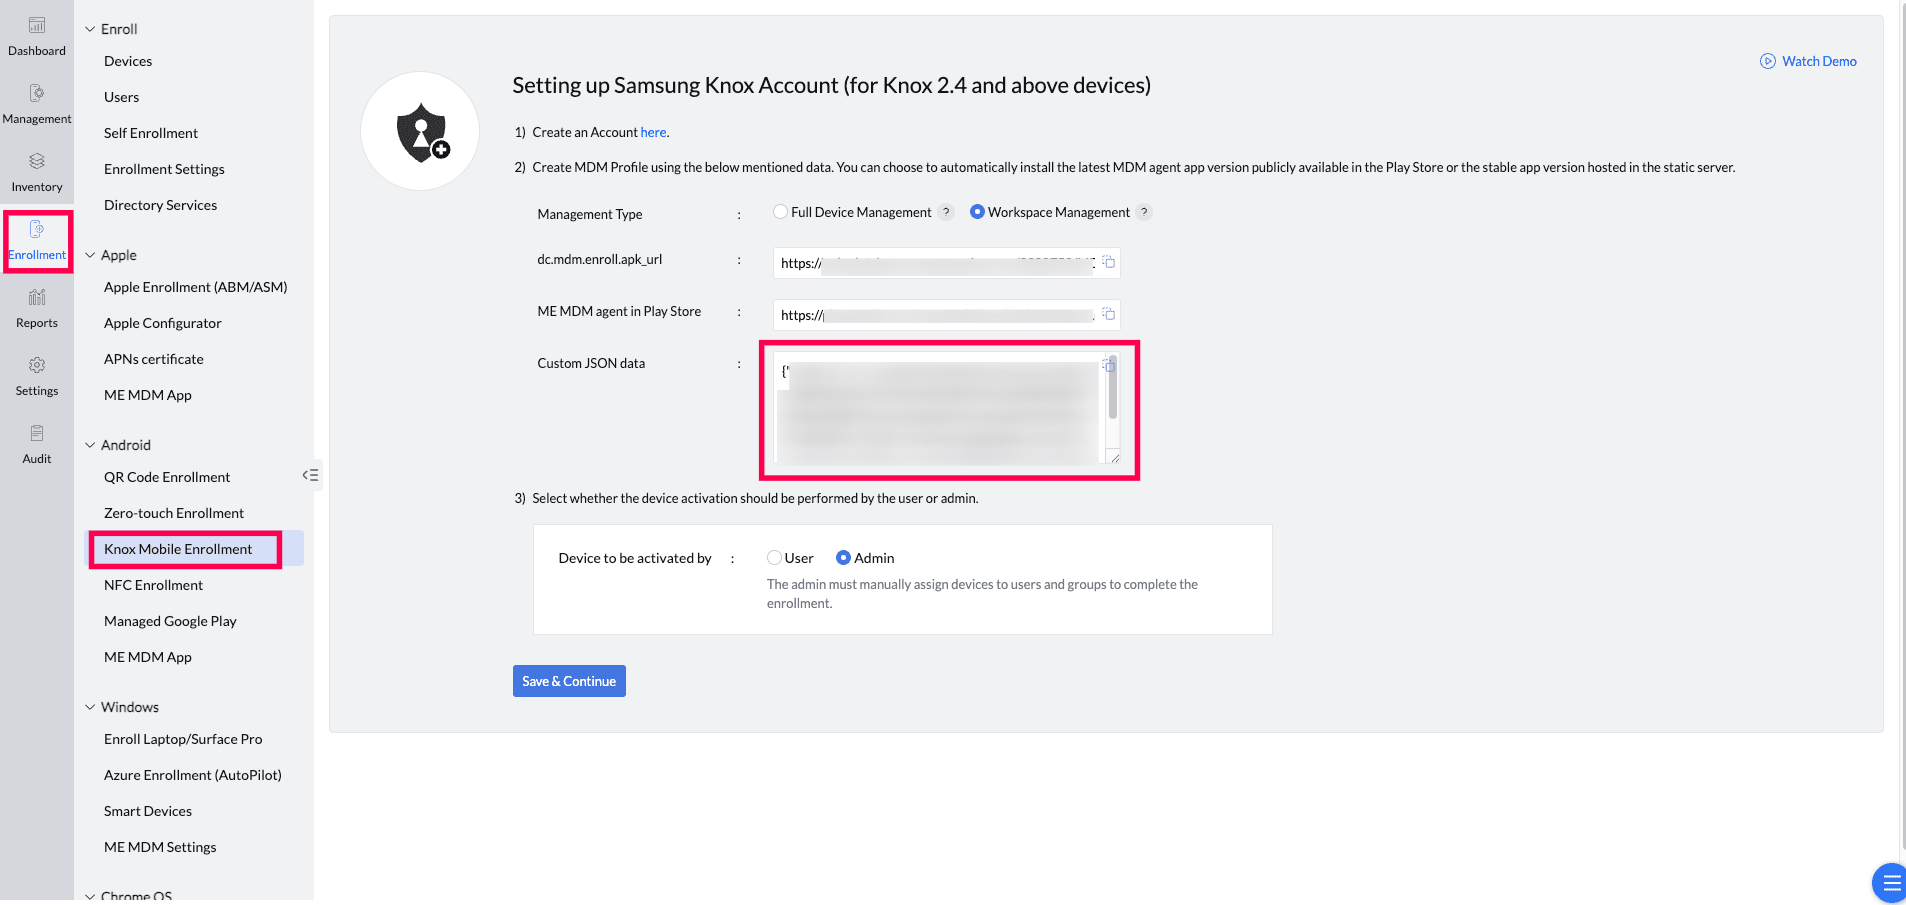
- To proceed with the enrollment you need the Custom ManageEngine MDM App. Reach out to MDM support with JSON details which are present on the MDM Console->Enrollment->Knox Device Enrollment for getting the Custom Manageengine MDM apk file for the enrollment.
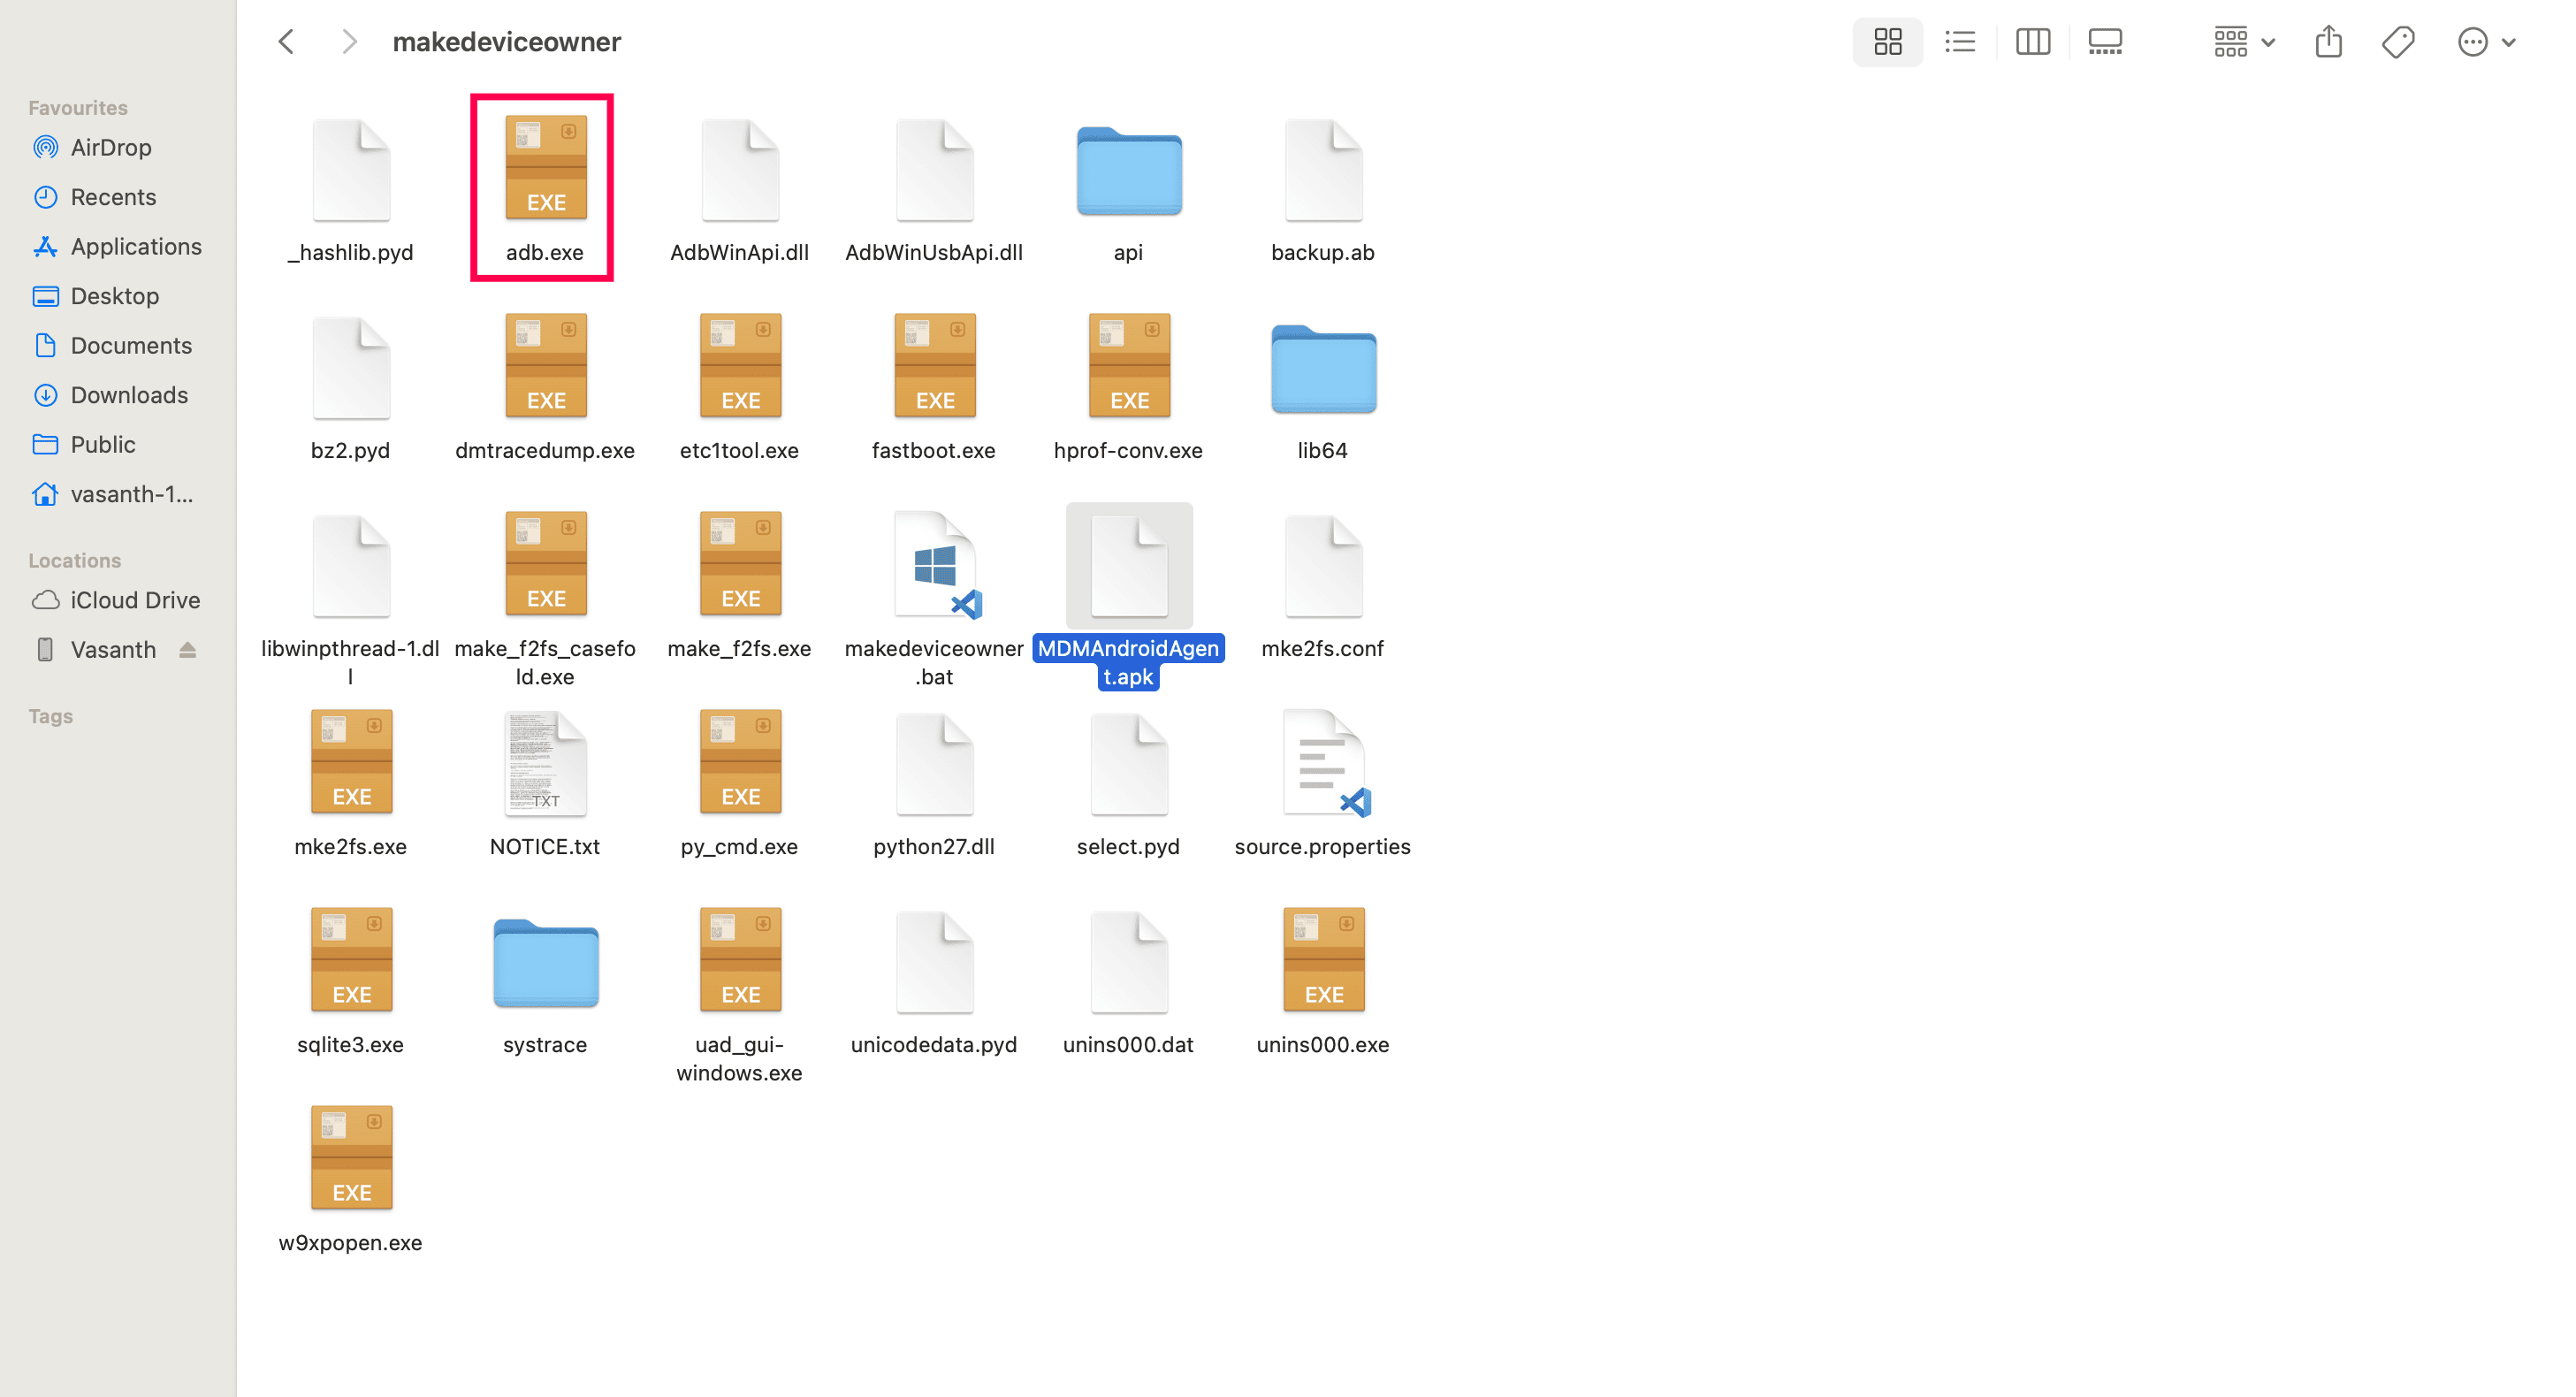
- Place the custom APK (MDMAndroidAgent.apk) file provided by MDM support where the adb.exe file is present (C:\Users\YourUsername\Downloads\makedeviceowner\makedeviceowner\).
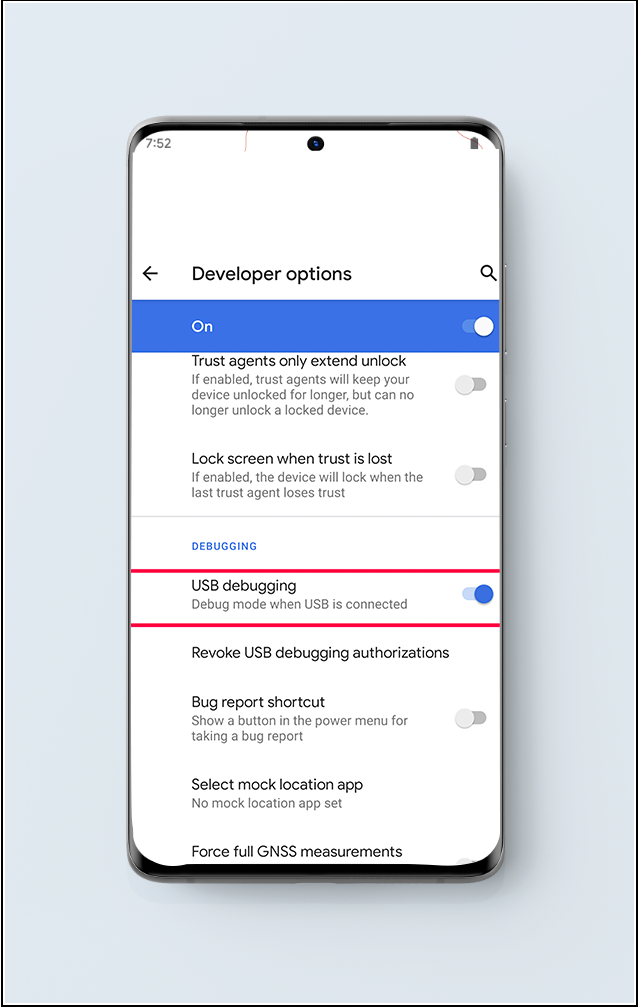
- Enable Developer Options
- USB Debugging:
- On the Android device, go to Settings > About Phone.
- Tap Build Number 7 times to enable Developer Options.
- Go back to Settings > System > Developer Options.
- Enable USB Debugging.
- Connect the Android device to the computer via USB.
- On the device, if prompted, allow USB Debugging by selecting Allow on the pop-up.
- Wireless Debugging:If USB debugging is not an option, follow these steps to enable debugging via the Wireless Debugging method:
- Reset the device and ensure that both the device and PC are connected to the same Wi-Fi network.
- Navigate to Settings → Developer Options → Enable Wireless Debugging. When prompted with "Allow wireless debugging on this network?", select Allow.
- In Command Prompt, enter the following command to connect ADB via the device’s IP address:
adb connect <ip_address>:<port>
- On the android device, go to Pair Device with Pairing Code under the Wireless Debugging option. In Command Prompt, enter the pairing command:
adb pair <ip_address>:<port>
- Enter the pairing code displayed on the device when prompted.
- USB Debugging:
- Now open the Command prompt (for a windows device) or terminal (for a Mac device).
- Open the zip file folder where adb.exe is present in the command prompt/terminal. Execute the below commands:
Command Prompt: adb devices
Terminal: ./adb devices
Ex: cd C:\Users\YourUsername\Downloads\makedeviceowner\makedeviceowner> adb devices
If the device is listed, proceed. If not, recheck USB debugging and drivers.Command Prompt: makedeviceowner.bat
If the execution is successful, you can see a success message in the command prompt.
Terminal: makedeviceowner.shFor Windows:

For Mac:

- Open the installed ManageEngine MDM app on the device.
- The app will automatically attempt enrollment.
- Follow the additional on-screen instructions if required.
- After succesful enrollment, ensure to Disable Developer options (USB/Wireless Debugging).