Adding Workflows in OpManager
OpManager's workflow feature helps network admins automate routine monotonous tasks, thereby helping them focus on other critical aspects of network monitoring. With OpManager, users can create a workflow and then configure the trigger upon which the workflow must be executed. Users can also restrict the scope of this workflow to limited devices, by applying the workflows to a set of devices alone. Hence, users can configure different workflows for different fault-remediation measures and execute them according to the trigger configured.
- Creating a workflow
- Executing a workflow from the device snapshot page
- Other workflow actions
Creating a workflow
Users can follow the below steps to create a workflow.
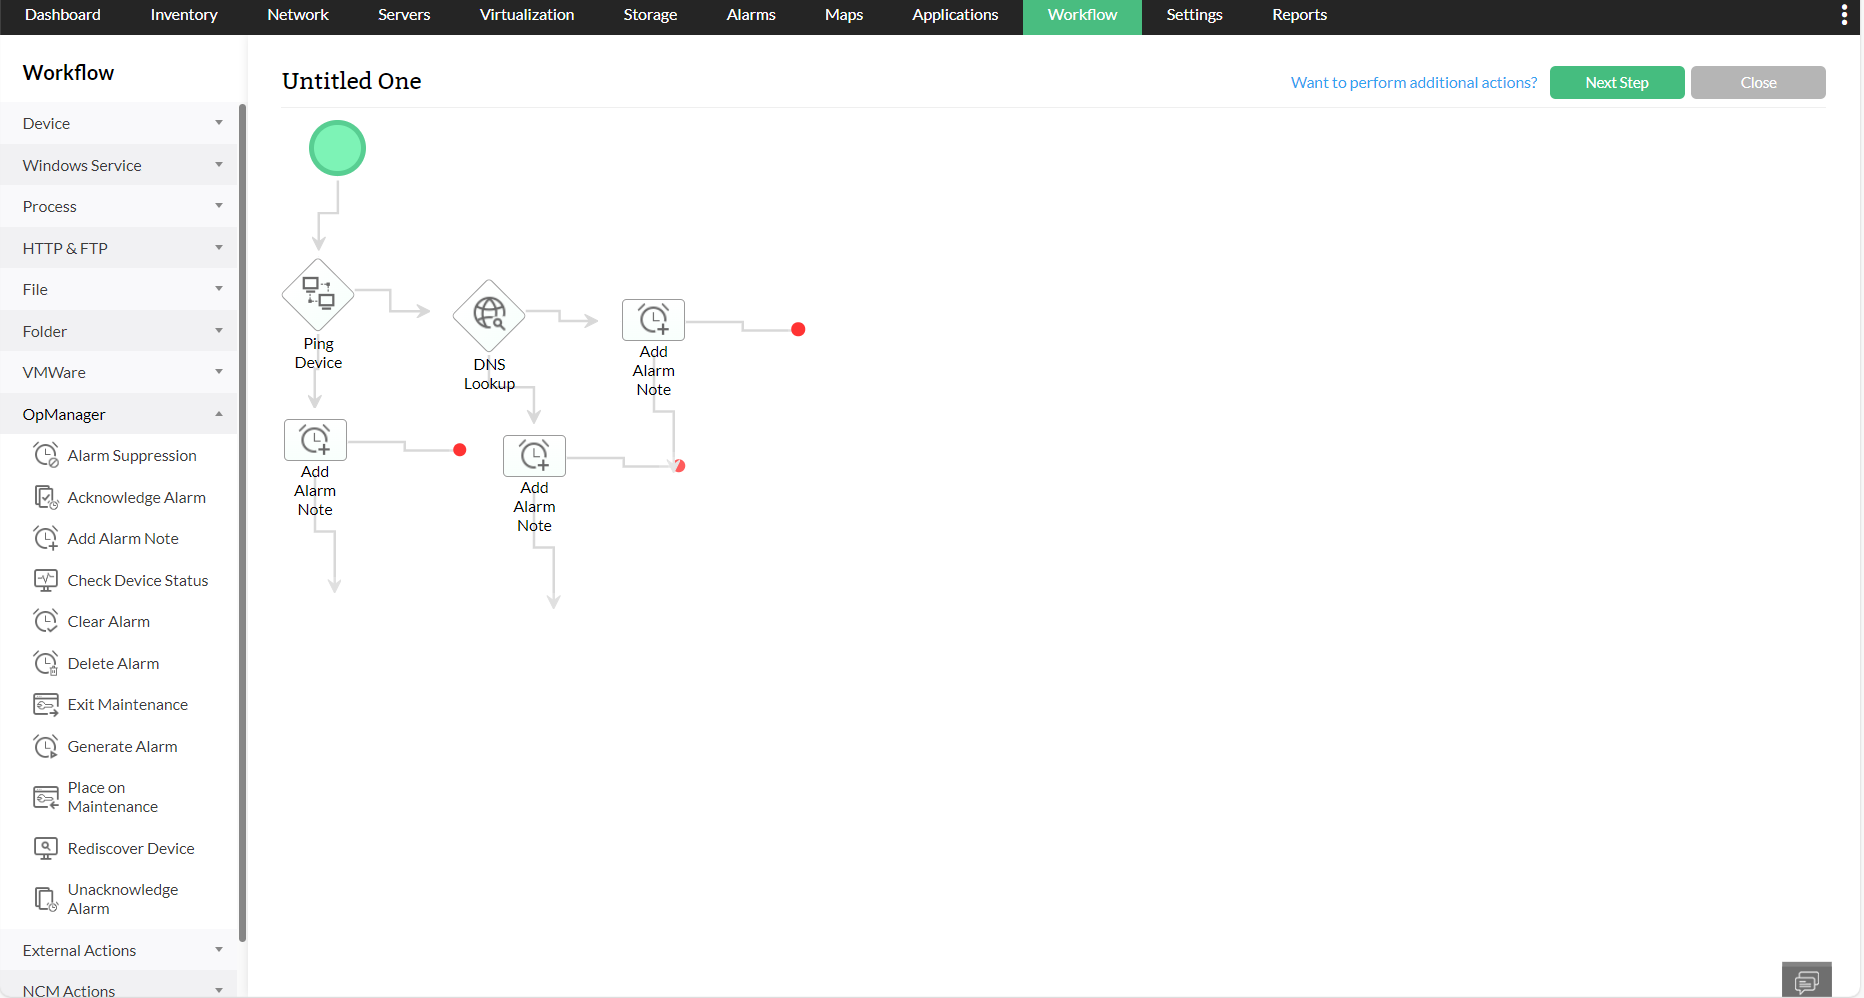
Selecting the actions
- Click on the "Workflow" tab.
- Users can now either import a workflow or create a new workflow.
- Click on the "New" option available at the top-right corner to create a new workflow.
- Now, drag and drop the different actions available across different categories from the left pane to to the workspace.
- Once the all the actions have been added, click on the "Next Step" at the top right corner.
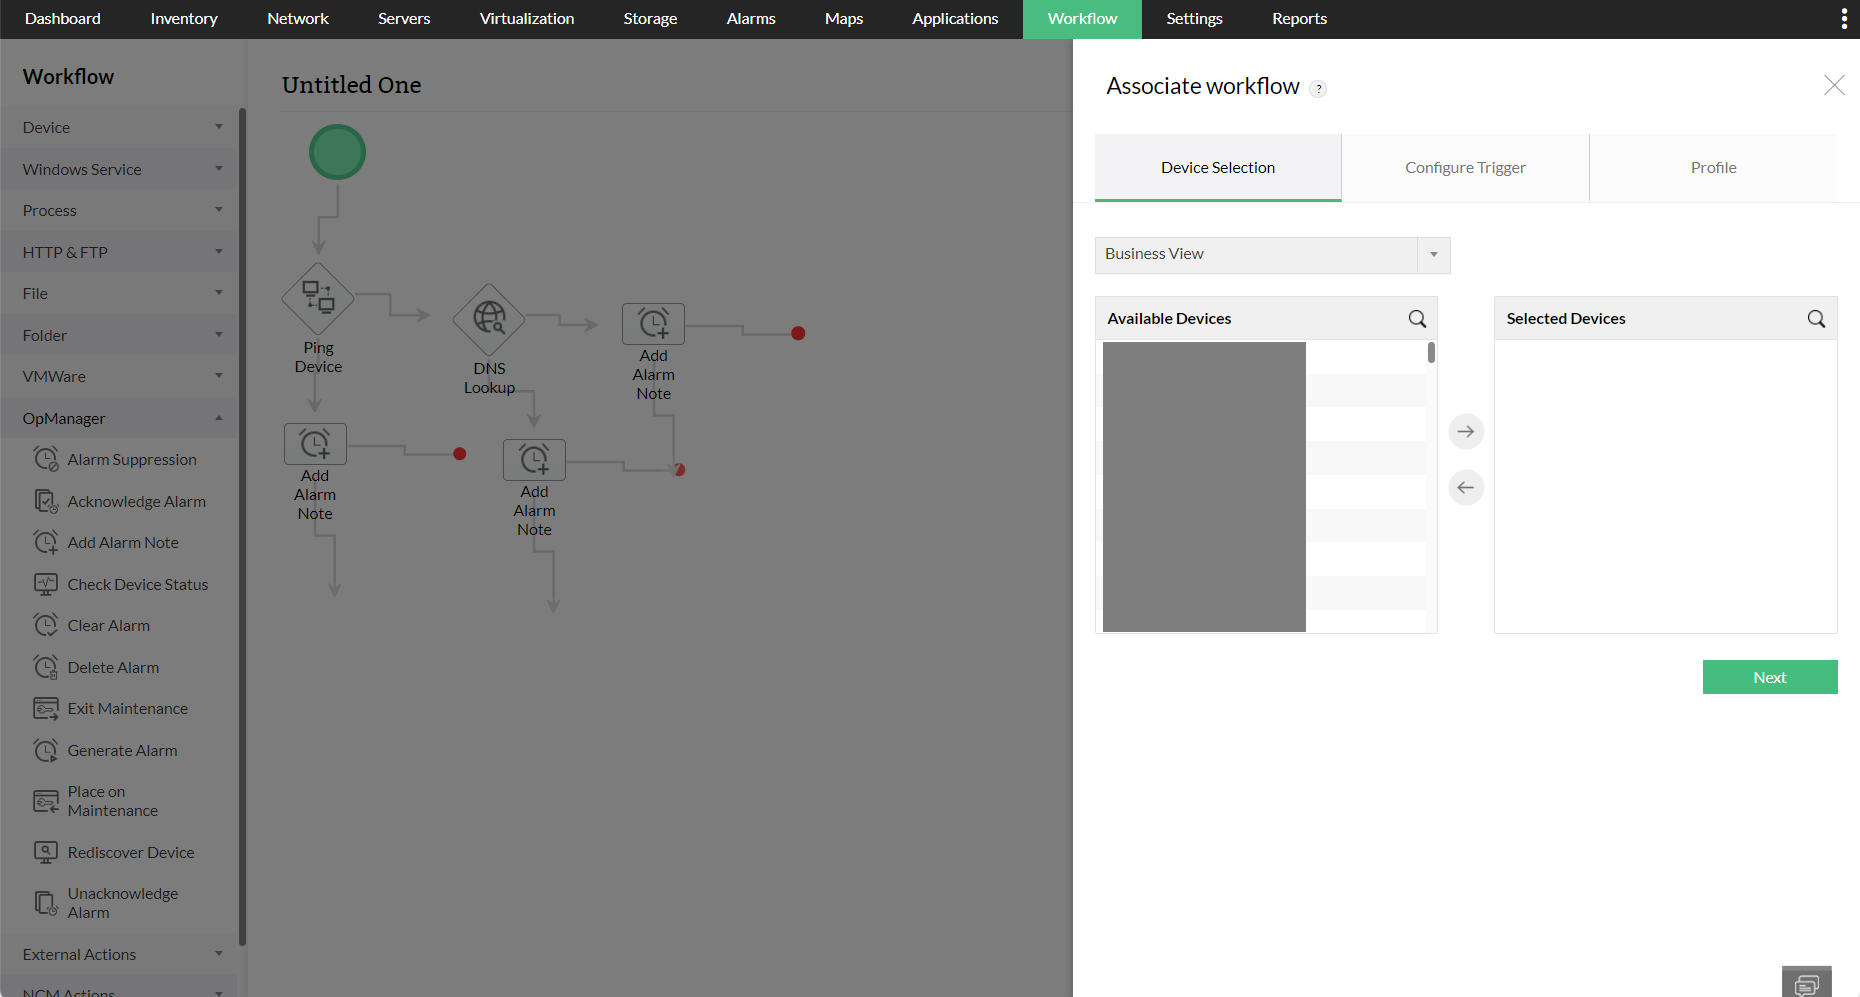
Selecting the devices
Now that the corresponding actions have been added for the workflow, users must now select the devices to which the workflow must be applied to. Users can just select the devices form the "Available Devices" section and then move them to the "Selected Devices" section, and then click on "Next". Users can also filter the devices based on the group, business view, or category they belong to.
Configuring triggers
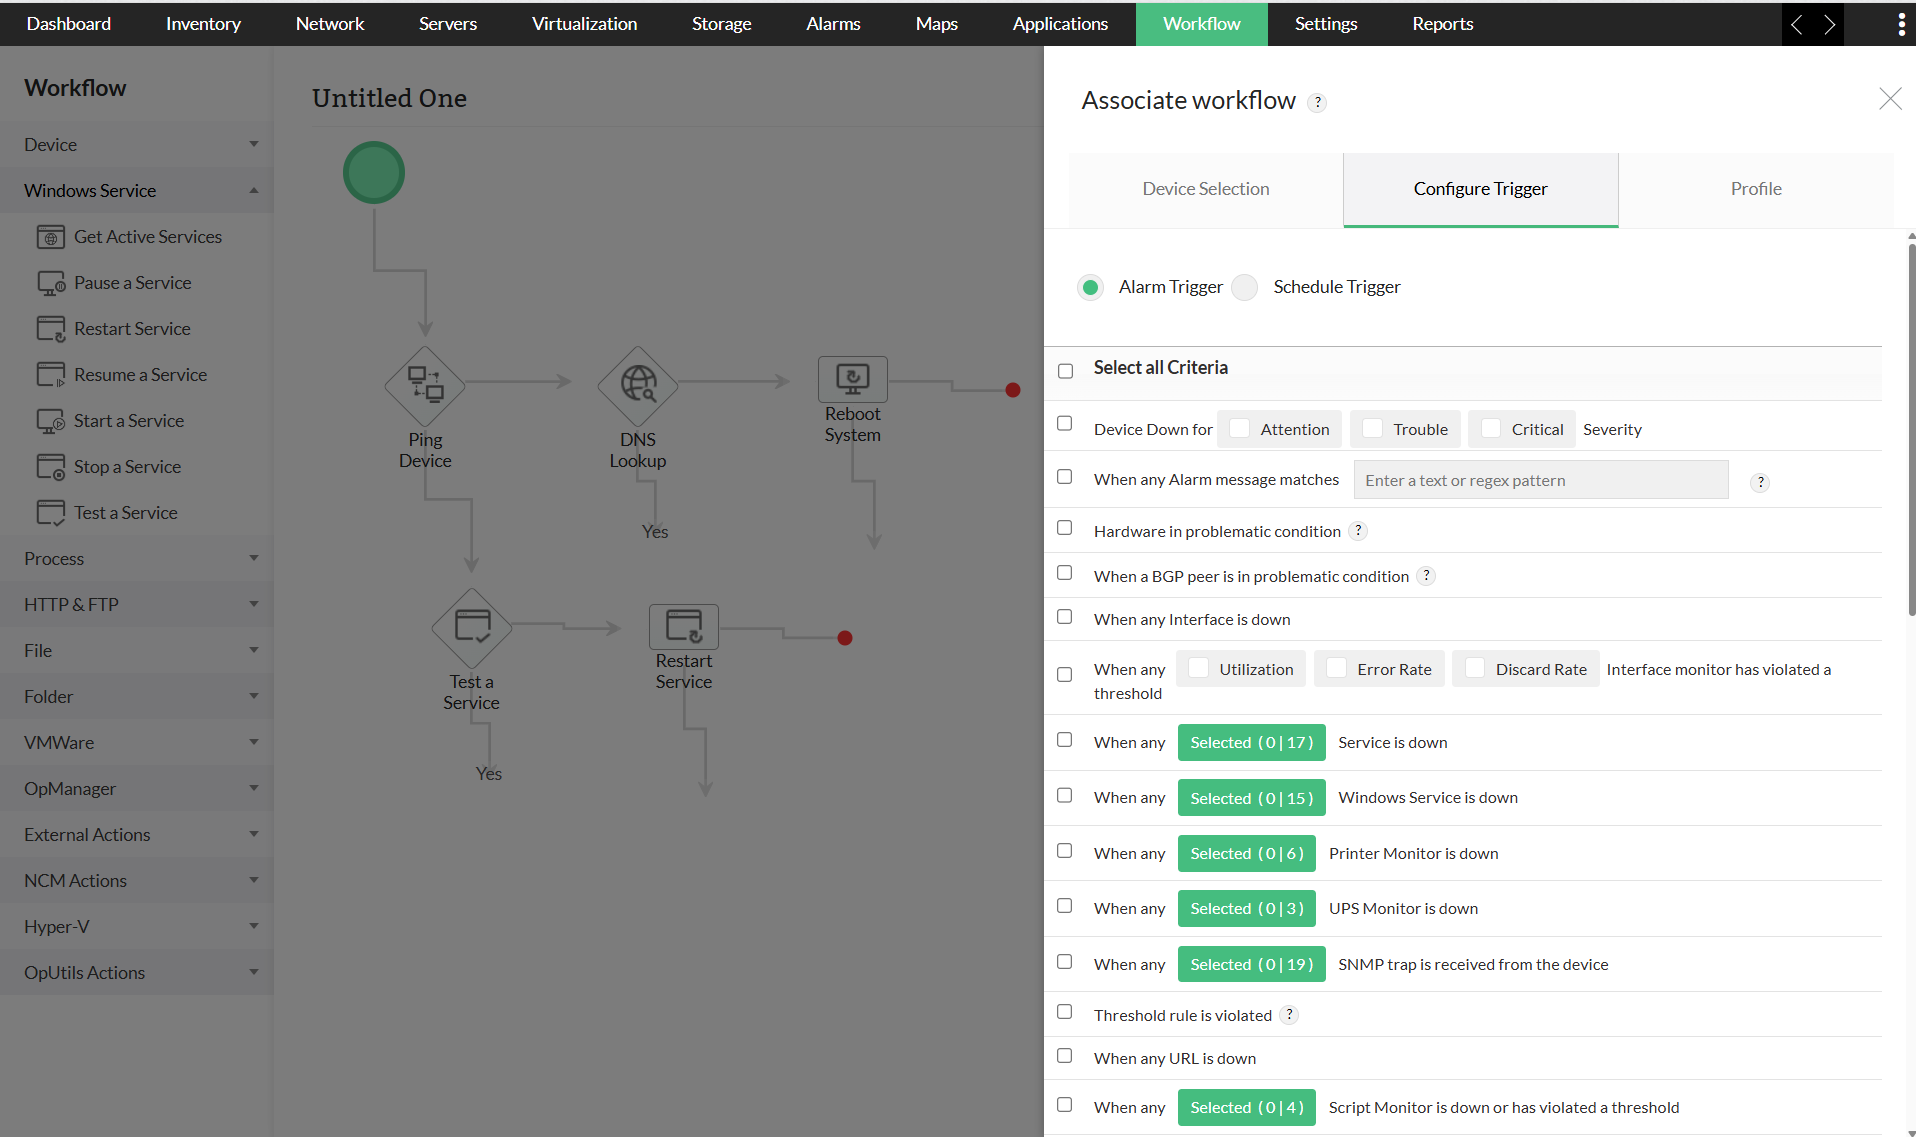
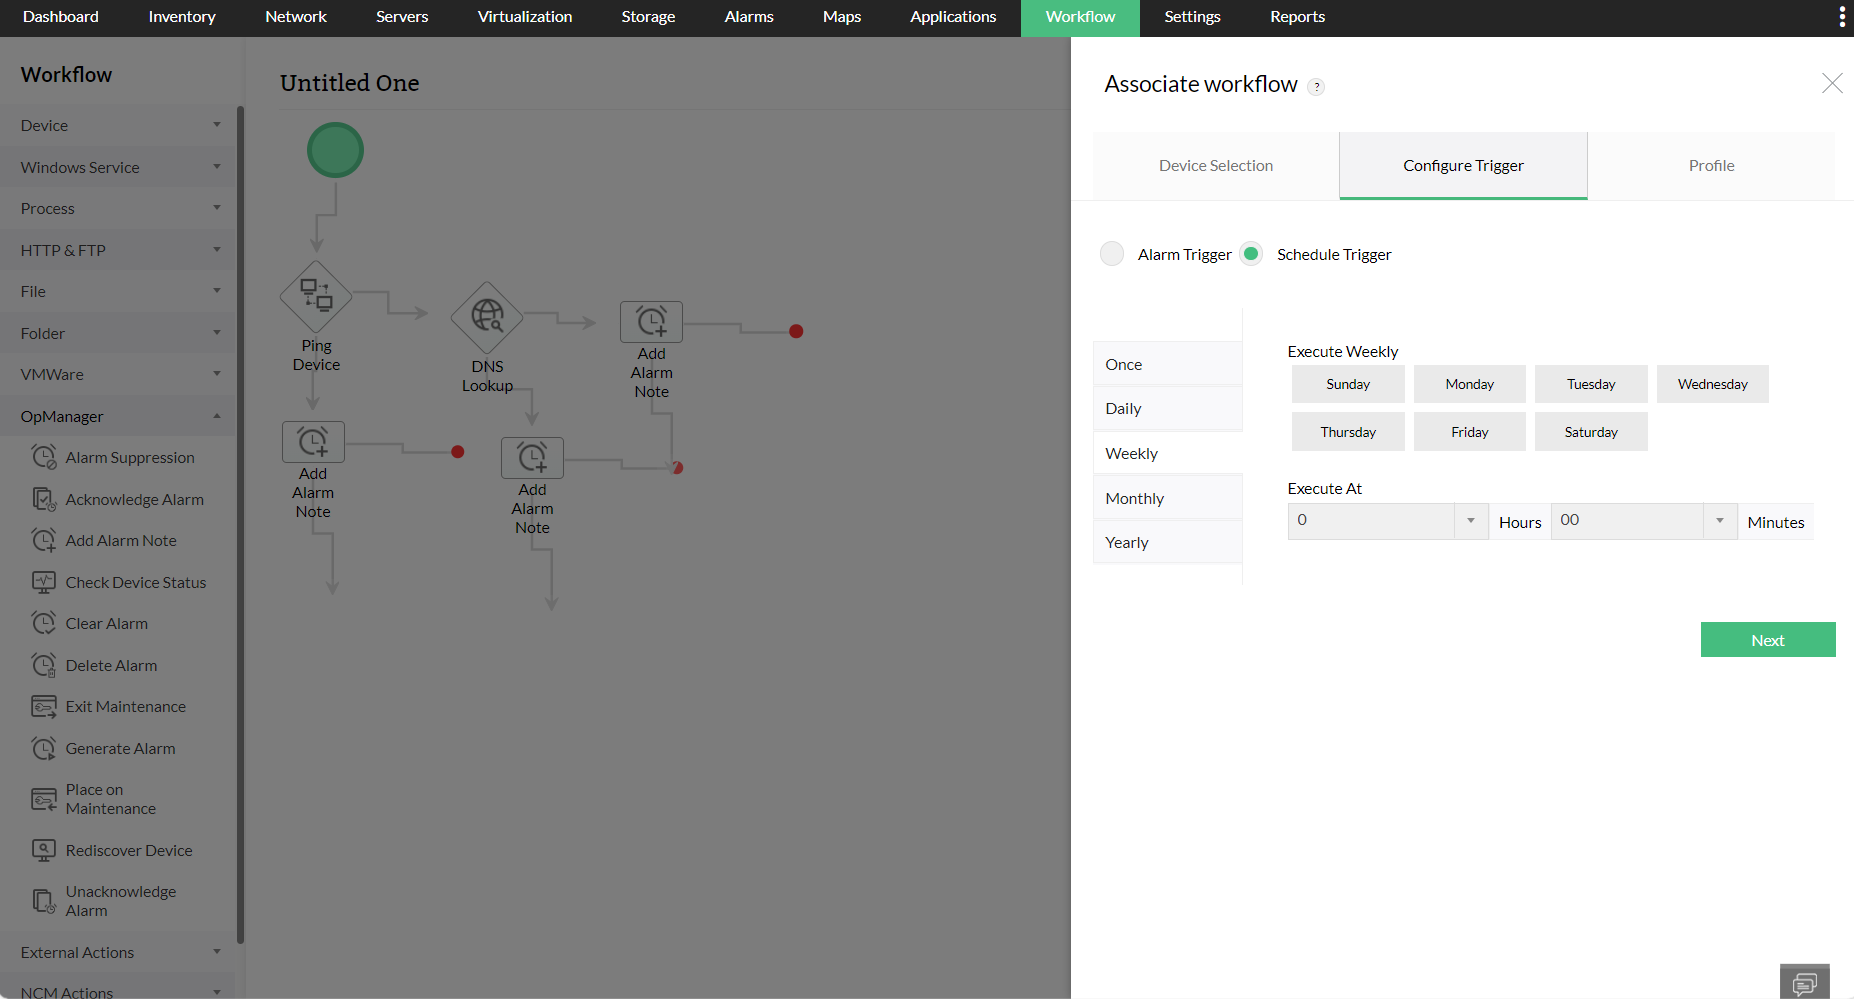
Configure the alarm trigger to trigger a workflow when an alarm is raised or configure a schedule trigger, if you want to schedule this workflow for periodical execution.
- Click on the Configure Trigger tab.
- Alarm Trigger: Click on the Alarm Trigger option. Select the required criteria. Executes this workflow on the associated devices, if any of the criteria is satisfied.
- Schedule Trigger: Click on the Schedule Trigger option to schedule the workflow action. Configure the date and time i.e. you can choose to execute the workflow either once, daily, weekly, monthly or yearly at a specified day/time, based on your preference.
- Click Next
Configuring Profile details
Now, configure the profile name and description along with trigger intervals.
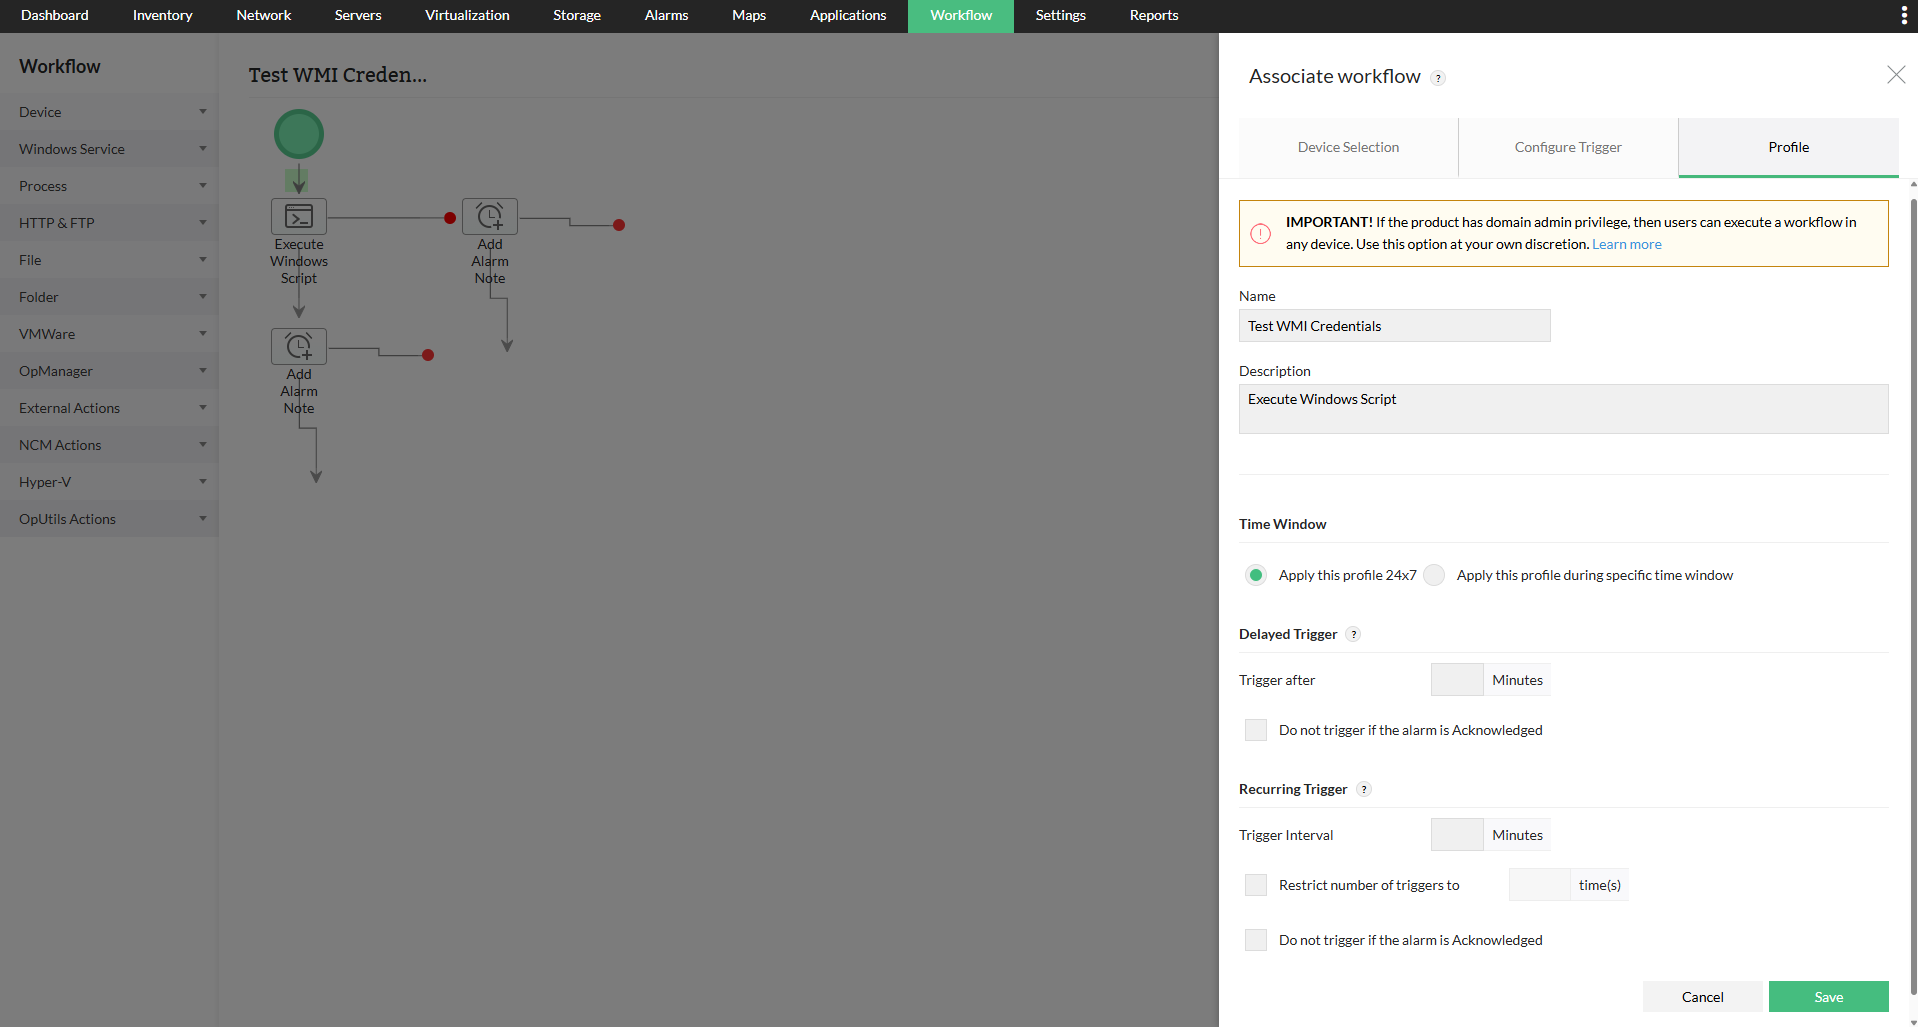
- Click on the "Profile" tab and enter the name and description for this workflow profile.
- Configure the delayed and recurring trigger interval of this worflow
- Time Window: Select either Apply this profile all time or Apply this profile during the below mentioned time window. Selecting the latter keeps the Workflow active only during the specified days and hours.
- Delayed Trigger: If you want the workflow to be triggered at a delay, enter the delay time (in minutes). If you don't want to trigger the workflow if the alarm has been acknowledged in the mean time, you can select the 'Do not trigger if alarm is acknowledged' check box.
- Recurring Trigger: This option helps you trigger the workflow at regular intervals, till the alarm is cleared. Enter the trigger interval and number of triggers. If you don't want to trigger the workflow repeatedly if the alarm has been acknowledged, you can select the 'Do not trigger if alarm is acknowledged' check box.
- Click Save
The workflow has been successfully added. It will be executed on the associated devices at the scheduled time or when any of the criteria selected is satisfied. You can check the output of the workflow in the Workflow Logs.
Executing a workflow from the device snapshot page
- Navigate to Inventory --> Devices.
- Click on a particular device, to open its corresponding snapshot page.
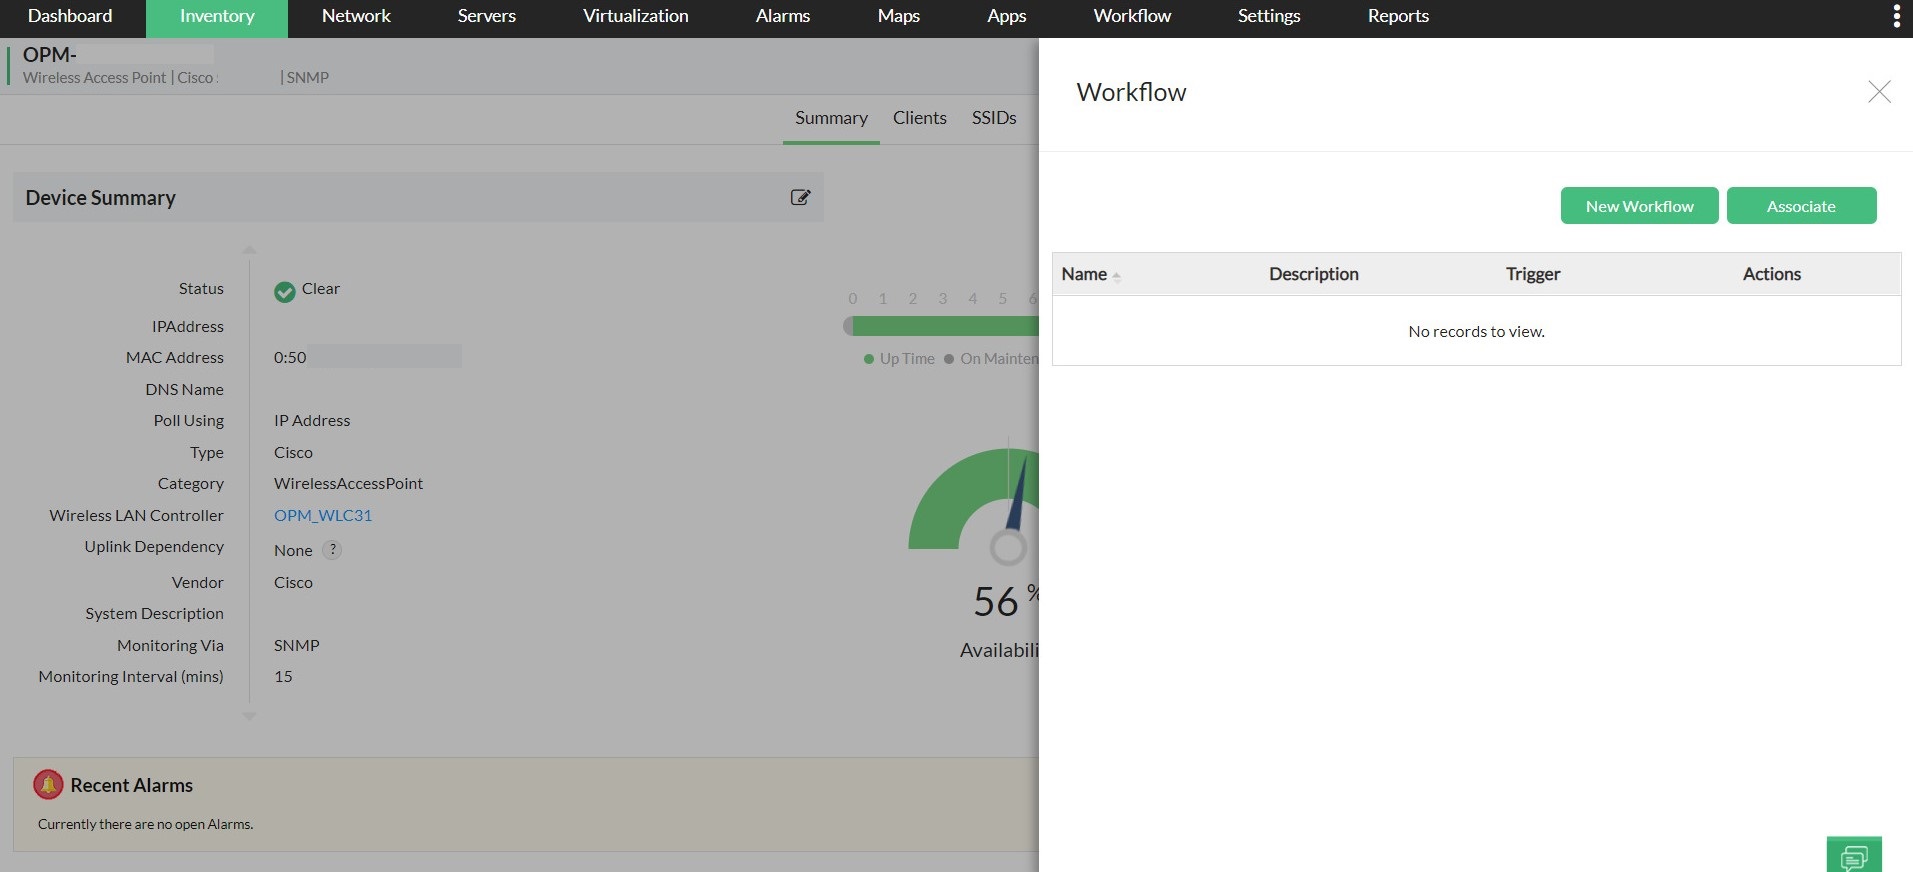
- On the top right tab having a list of icons click the workflow icon.
- Click on New Workflow. (This will take you to the Workflow page in OpManager)
- You can design your own workflow here.
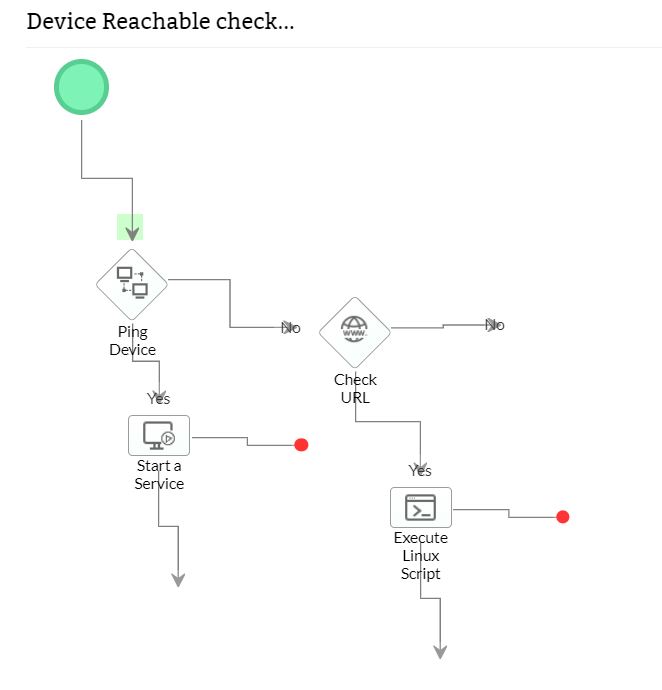
Sample Workflow
Following is a sample workflow which gets executed automatically when a device down alarm is raised. This workflow sends ping request, if passed does DNS Lookup and adds the output as notes to the alarm.
Other workflow actions
Apart from creating new workflows, users can also perform various other operations. Users can edit, copy, import, or even export workflows. Users can open the "Workflow" tab where they will have a list of all the workflows that have been created. Under the actions column, users can select the respective action to be taken.
To edit a workflow, users can select the respective workflow by clicking on it, and then clicking on "Save", after making the respective changes to the selected devices, trigger criteria, name, and description if required.
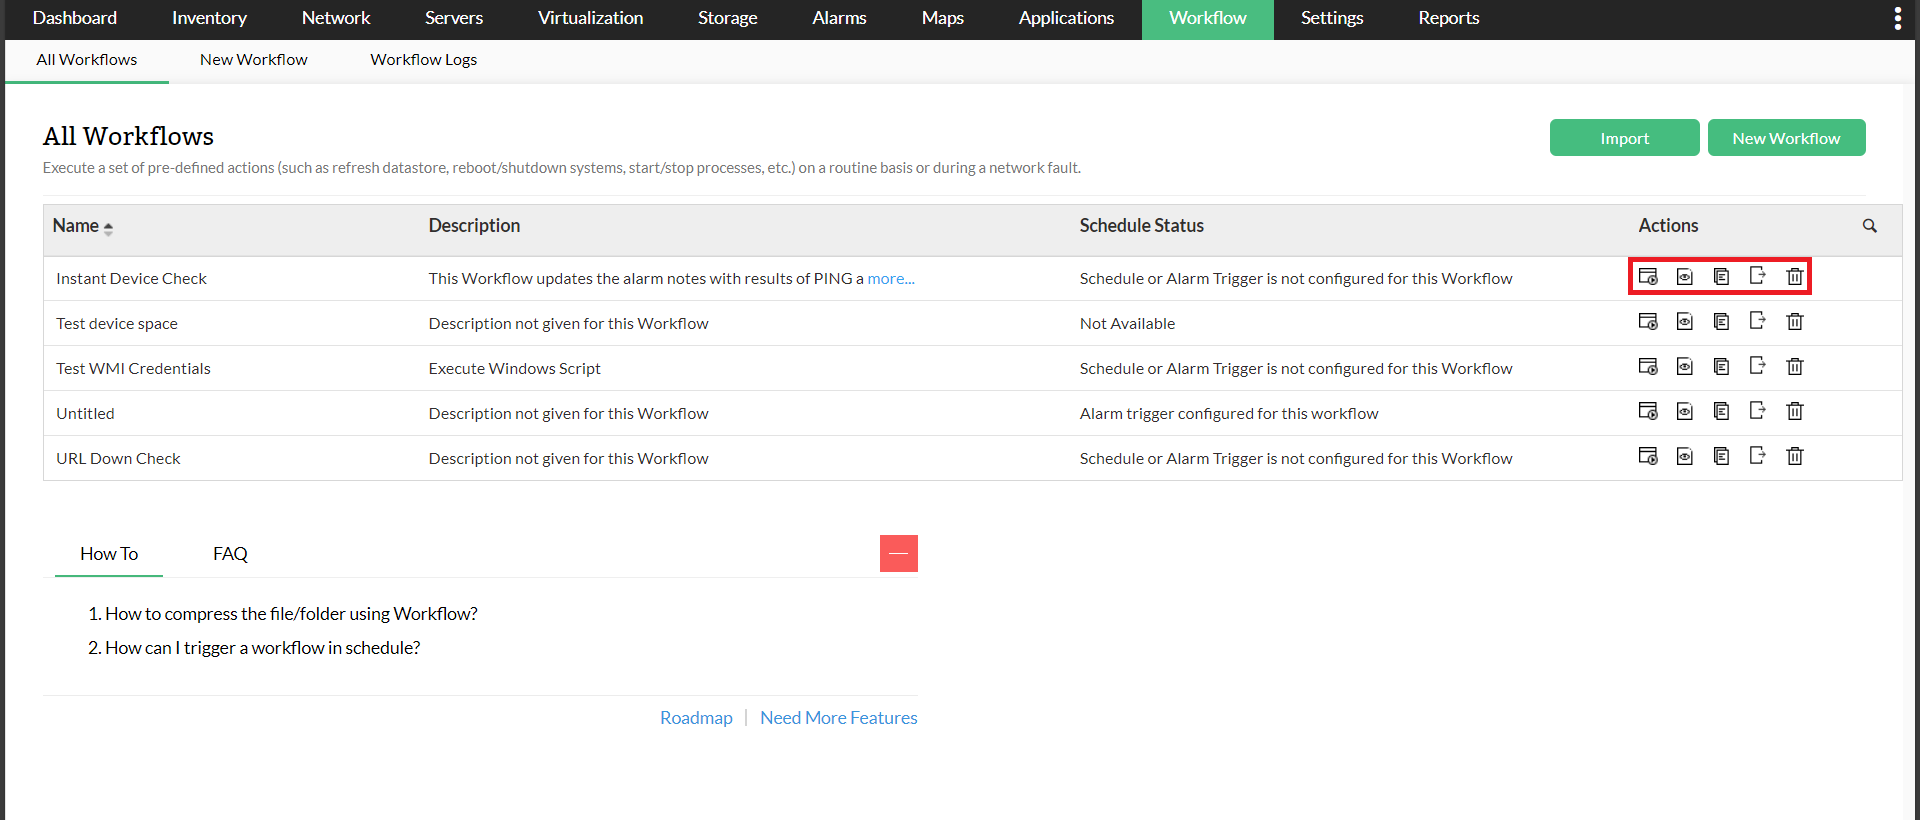
Furthermore, users can also view the workflow execution logs which helps them have a clear picture of how the workflow was executed under OpManager.
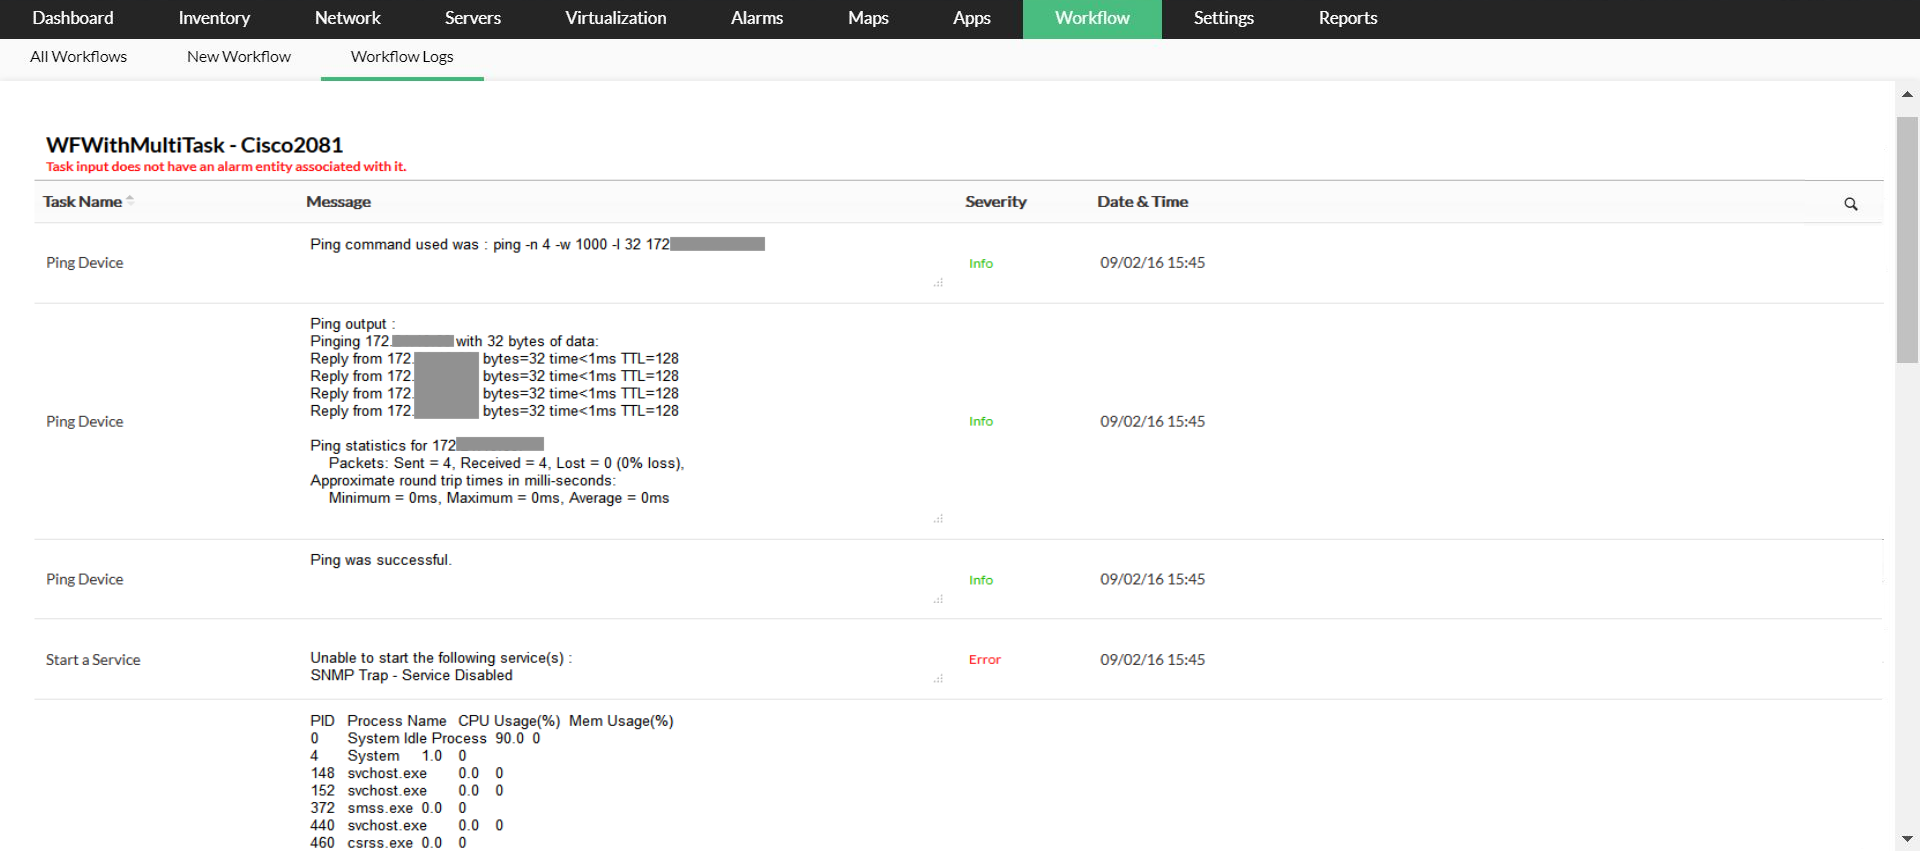
This is how by configuring workflows and executing them based on configured triggers, network admins can easily automate their fault remediation process and reduce their MTTR.
Thank you for your feedback!
