Google Workspace settings
Administrators can create and manage Google Workspace user accounts directly from ADManager Plus. To perform these directory-level operations, ADManager Plus must securely connect to your Google Workspace environment using a service account with domain-wide delegation.
This integration enables centralized management of:
- Google Workspace user accounts.
- Groups.
- Organizational units (OUs).
- Domain synchronization.
To set up the integration, you must configure the Google Workspace settings in ADManager Plus and authorize access using Google Admin SDK.
How the feature works
The integration process involves:
- Creating or selecting a Google Cloud project.
- Enabling Google Admin SDK.
- Creating a service account.
- Generating a P12 key.
- Authorizing the required OAuth scopes in the Google Admin Console.
- Configuring the service account credentials in ADManager Plus.
Once configured, ADManager Plus can securely perform directory management operations in Google Workspace.
Prerequisites
Before configuring Google Workspace in ADManager Plus, ensure the following:
- You have Super Admin privileges in Google Workspace.
- A Google Cloud project is available (new or existing).
- Google Admin SDK can be enabled in the project.
- You have access to configure domain-wide delegation in Google Admin Console.
- ADManager Plus is installed and accessible with administrative privileges.
Configure Google Workspace settings in ADManager Plus
- Click the Admin tab.
- Navigate to Directory/Application Settings located in the top-right corner.
- Click the Google Workspace tab.
- Enter the following details:
- Username
- Service Account Email
- P12 Key File Path or JSON File Path
- Select the required domains from the Linked Domains drop-down menu.
- Click Save.
Note Multiple Google Workspace accounts can be linked to the same domain.
Steps to create a Google Workspace service account
- Navigate to the Google Cloud Console.
- Log in to your Google Workspace Administrator account.
- In the left pane, click IAM & Admin and navigate to Manage Resources.
- Create a new project named ADManager Plus or use an existing project.
- In the left pane, toggle to APIs & Services and click Library.
- Enable the required API: Admin SDK.
- Navigate back to IAM & Admin and in the left pane, click Service Accounts.
- Click Create a Service Account, enter the name as ADManager Plus, and click Create and Continue.
- Skip or configure roles and permissions, and click Done.
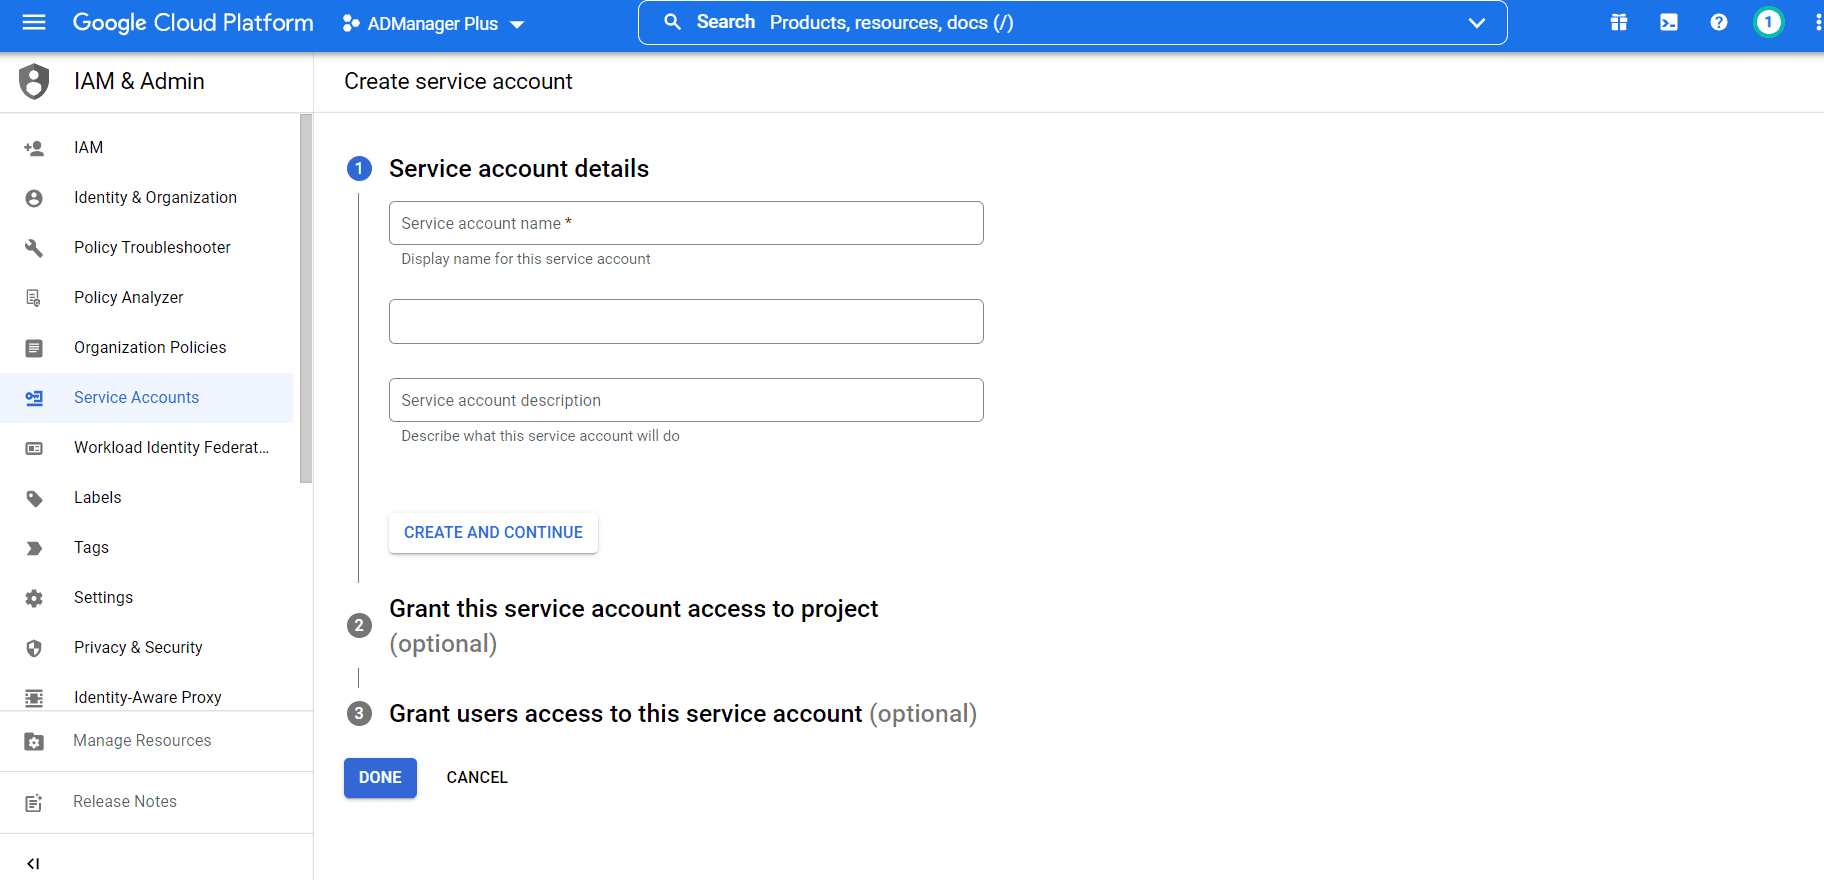
Service account details to create a new service account.
Steps to authorize your service account
- Navigate to the Google Workspace Cloud Console.
- In the Google Workspace Admin Console home page, navigate to Security > Access and data control > API controls.
- Click Manage Domain Wide Delegation > Add new, and enter the client ID of the service account that you created.
- Enter the following scopes under OAuth Scopes:
- https://www.googleapis.com/auth/admin.directory.user
- https://www.googleapis.com/auth/admin.directory.group
- https://www.googleapis.com/auth/admin.directory.orgunit
- https://www.googleapis.com/auth/admin.directory.domain.readonly
- https://www.googleapis.com/auth/apps.licensing
- https://www.googleapis.com/auth/admin.directory.rolemanagement
- Click Authorize.
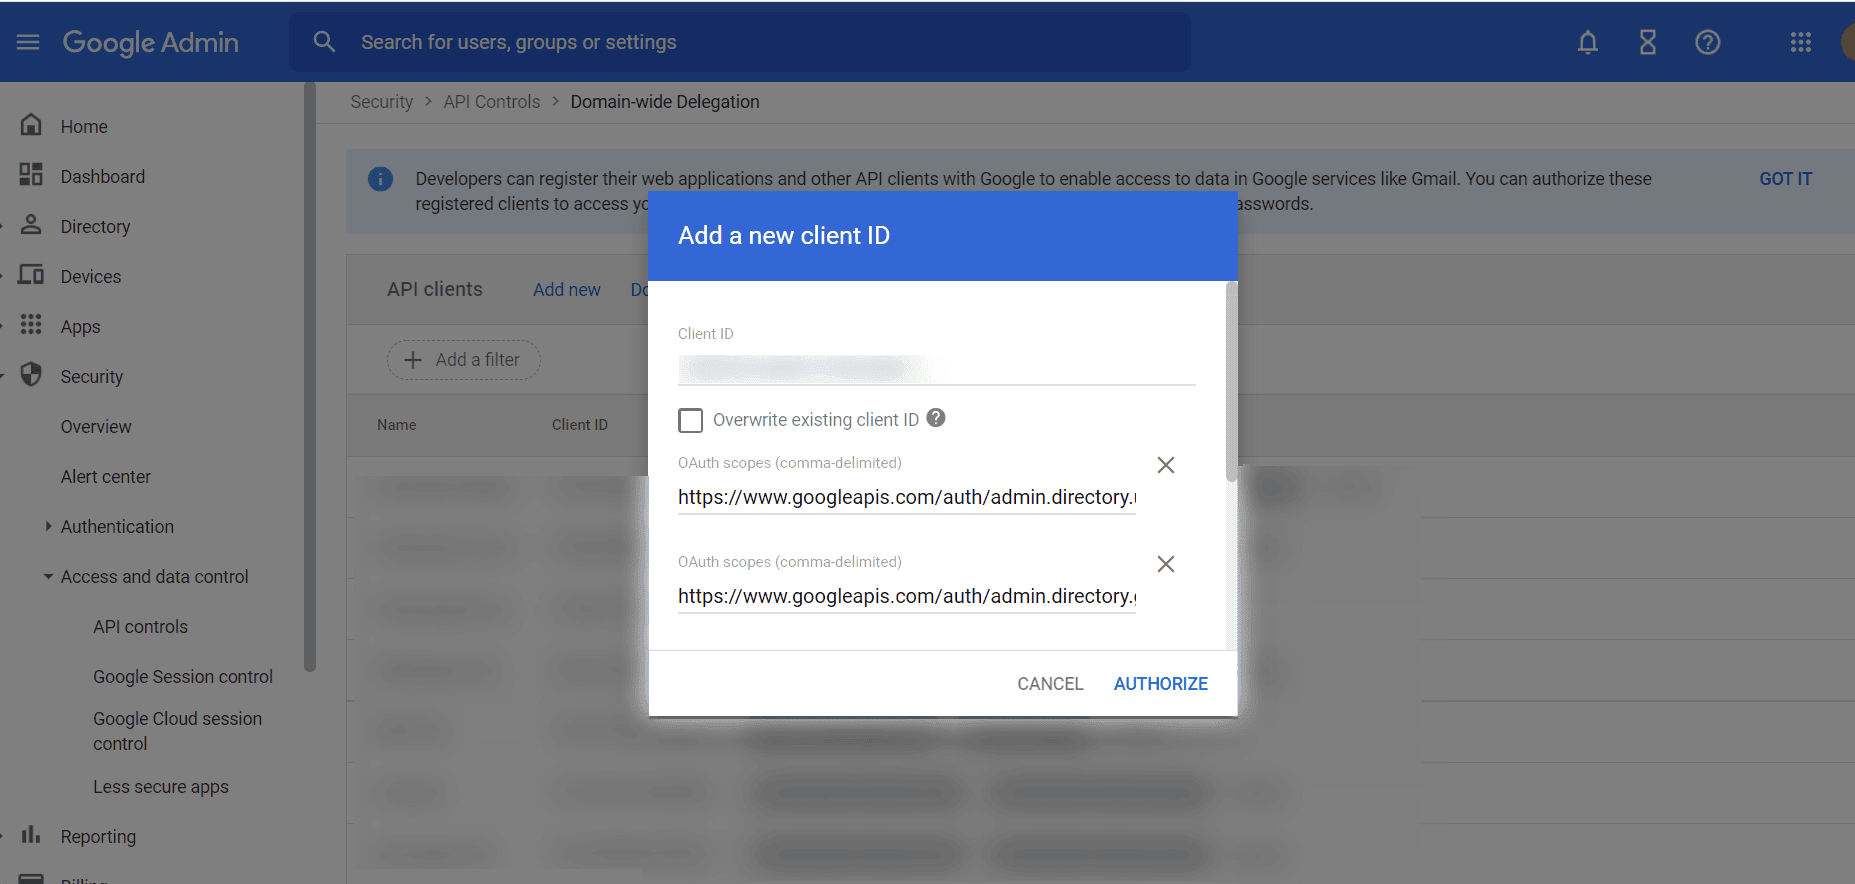
Add client ID and OAuth scopes for domain-wide delegation.
To modify the scopes of an existing service account:
- Navigate to Manage domain-wide delegation and click the service account email.
- Click Edit. In the Edit Scopes pop-up window, add or remove the given scopes.
To learn more about domain-wide delegation of authority, see Create access credentials.
Steps to create a P12 key for your service account
- Open the Google Cloud Console.
- In the left pane, select IAM & Admin and navigate to Service Accounts.
- Select the service account email and toggle to the Keys tab.
- Click Add Key and generate a new P12 key or JSON file path for your service account.
Note The private key is created and automatically downloaded. Record the file name and location, as these are needed to configure a Google Workspace account in ADManager Plus.
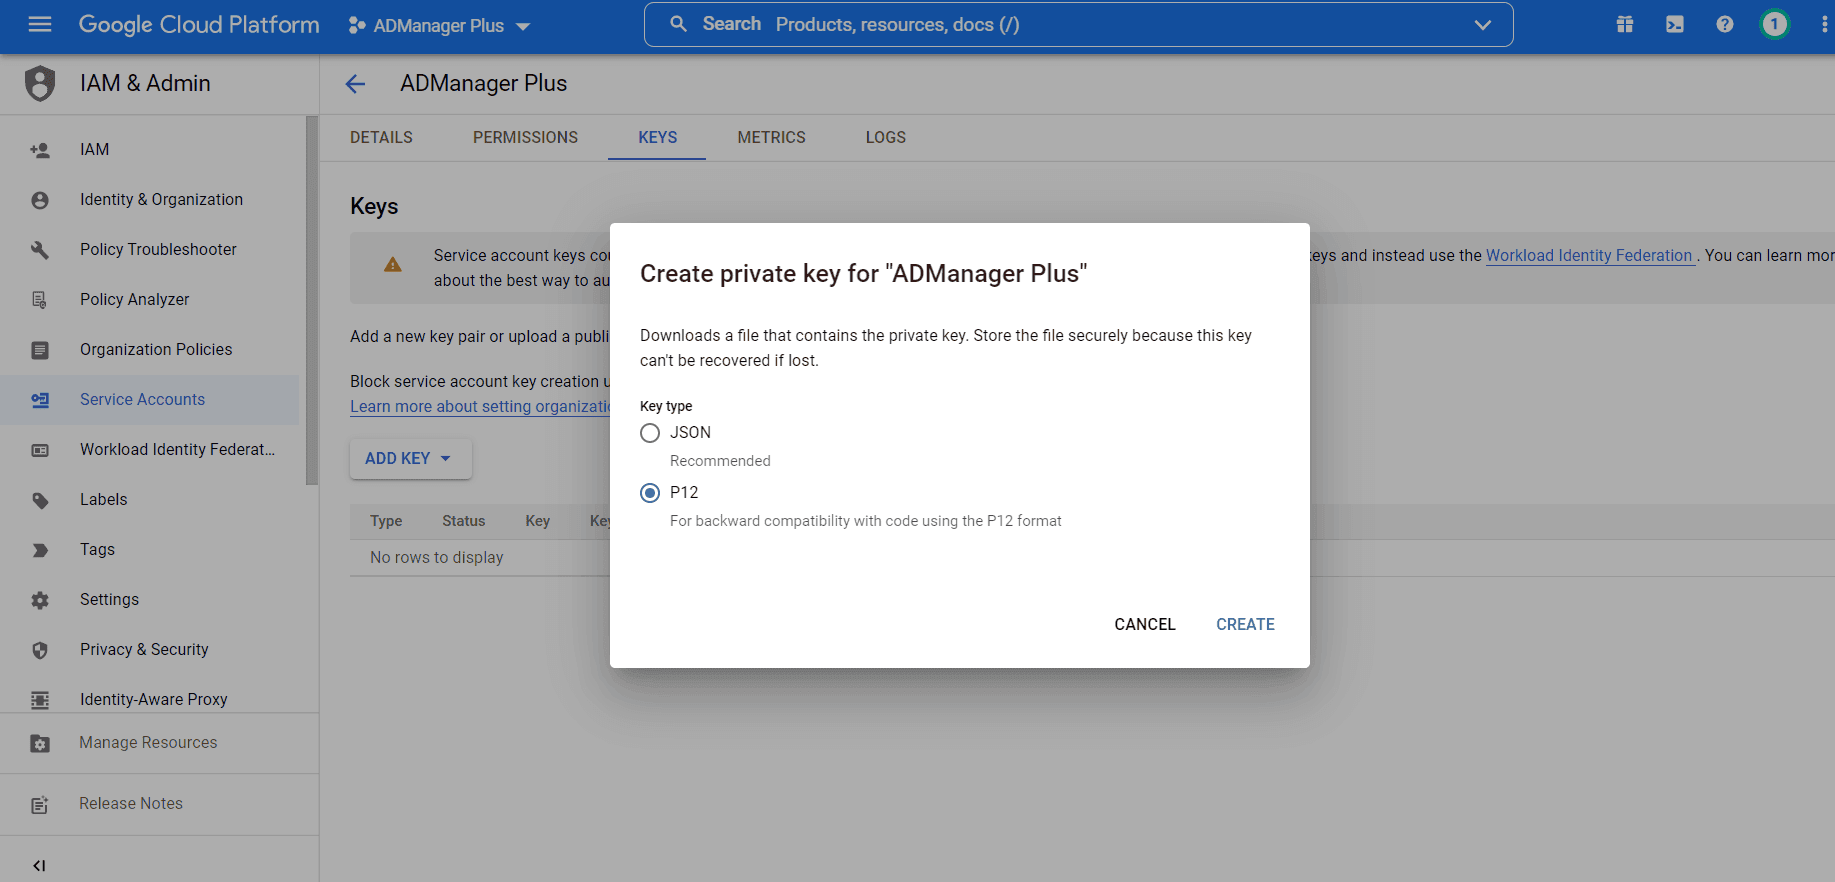
Generate a private key for the ADManager Plus service account.
Modify an existing Google account
After adding a Google Workspace account, you can perform the following actions:
- Edit: To modify the account details, click the edit icon and change the required values. Then click Save.
- Delete: To delete a domain, click the trash icon.
- Refresh: To synchronize the account details, click the refresh icon. This synchronizes Active Directory users with their Google Workspace accounts, assuming both were created using the same email address.
Tips:
- Use a dedicated Google Cloud project for ADManager Plus integration.
- Store the P12 key or JSON file securely.
- Verify that Admin SDK is enabled before troubleshooting.
- Periodically review authorized OAuth scopes for compliance with your organization's security policies.
- After making changes to scopes, restart ADManager Plus if needed.