
Event-driven automation
Event-driven automation is a key component of Active Directory automation that enables you to configure specific events as triggers to execute a predefined series of actions through orchestration templates and webhook templates. It automates user provisioning, deprovisioning, and routine management tasks across identity infrastructures such as Active Directory, Microsoft 365, and Google Workspace. When the configured trigger event occurs, the associated orchestration templates and webhook templates are executed immediately, allowing for real-time, condition-based automation of identity and access management tasks. You can associate any number of orchestration templates or webhook templates with a single event, providing flexibility to handle complex workflows such as employee onboarding, offboarding, and other identity and access management IAM routines.
Why do admins need event-driven automation?
When employees are onboarded, modified, or offboarded, admins have to carry out a series of management actions such as enabling or disabling user accounts, granting or revoking folder access permissions, and adding or removing group memberships. Performing these actions manually, across several applications, is tedious and time consuming, and it increases the room for errors and potential security risks.
Event-driven automation ties these actions to the event that should cause them. The same sequence runs the same way for every occurrence, with no manual step between the event and the actions that follow it.
How event-driven automation works
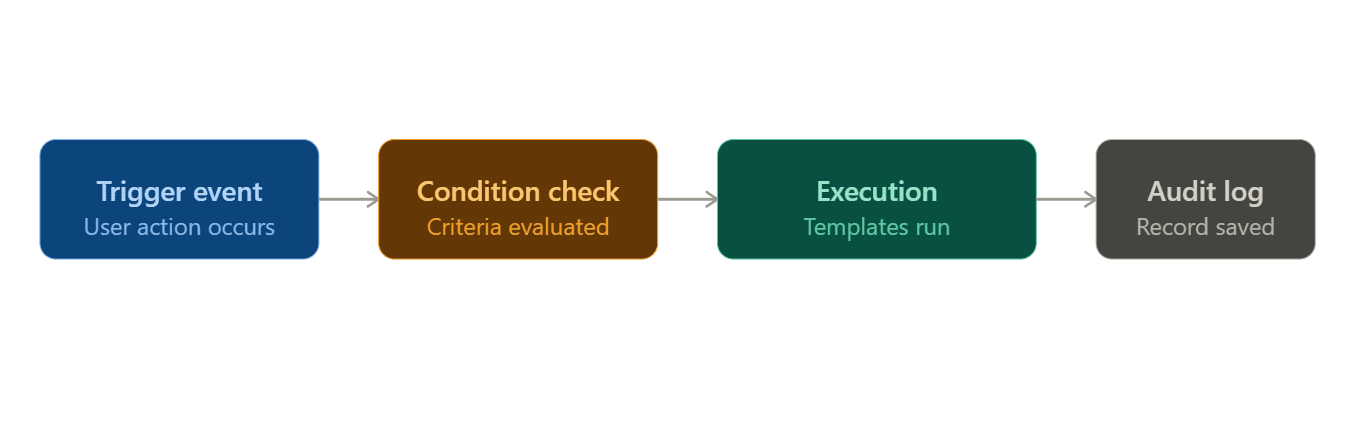
Event-driven automation operates on a trigger-condition-action model. An action performed in the product, such as user creation, modification, or deletion, acts as the trigger event. Once the trigger event occurs, the product evaluates whether the specified criteria and execution conditions (On All Occurrences, On Success, or On Failure) are met. If the conditions are satisfied, the linked orchestration templates and webhook templates are executed automatically. Every execution is recorded in the audit history for tracking and compliance purposes. Orchestration templates and webhook templates can also be executed through scheduled automations, workflow actions, and advanced management. Event-driven automation is the route that executes them in response to an action performed in the product.
Prerequisite
- If your automation involves sending email notifications, configure the email server settings before proceeding.
Note: Event-driven automations execute only when the configured trigger event occurs within the product. Changes made directly in Active Directory outside of the product will not trigger these automations.
Steps to create a new event-driven automation
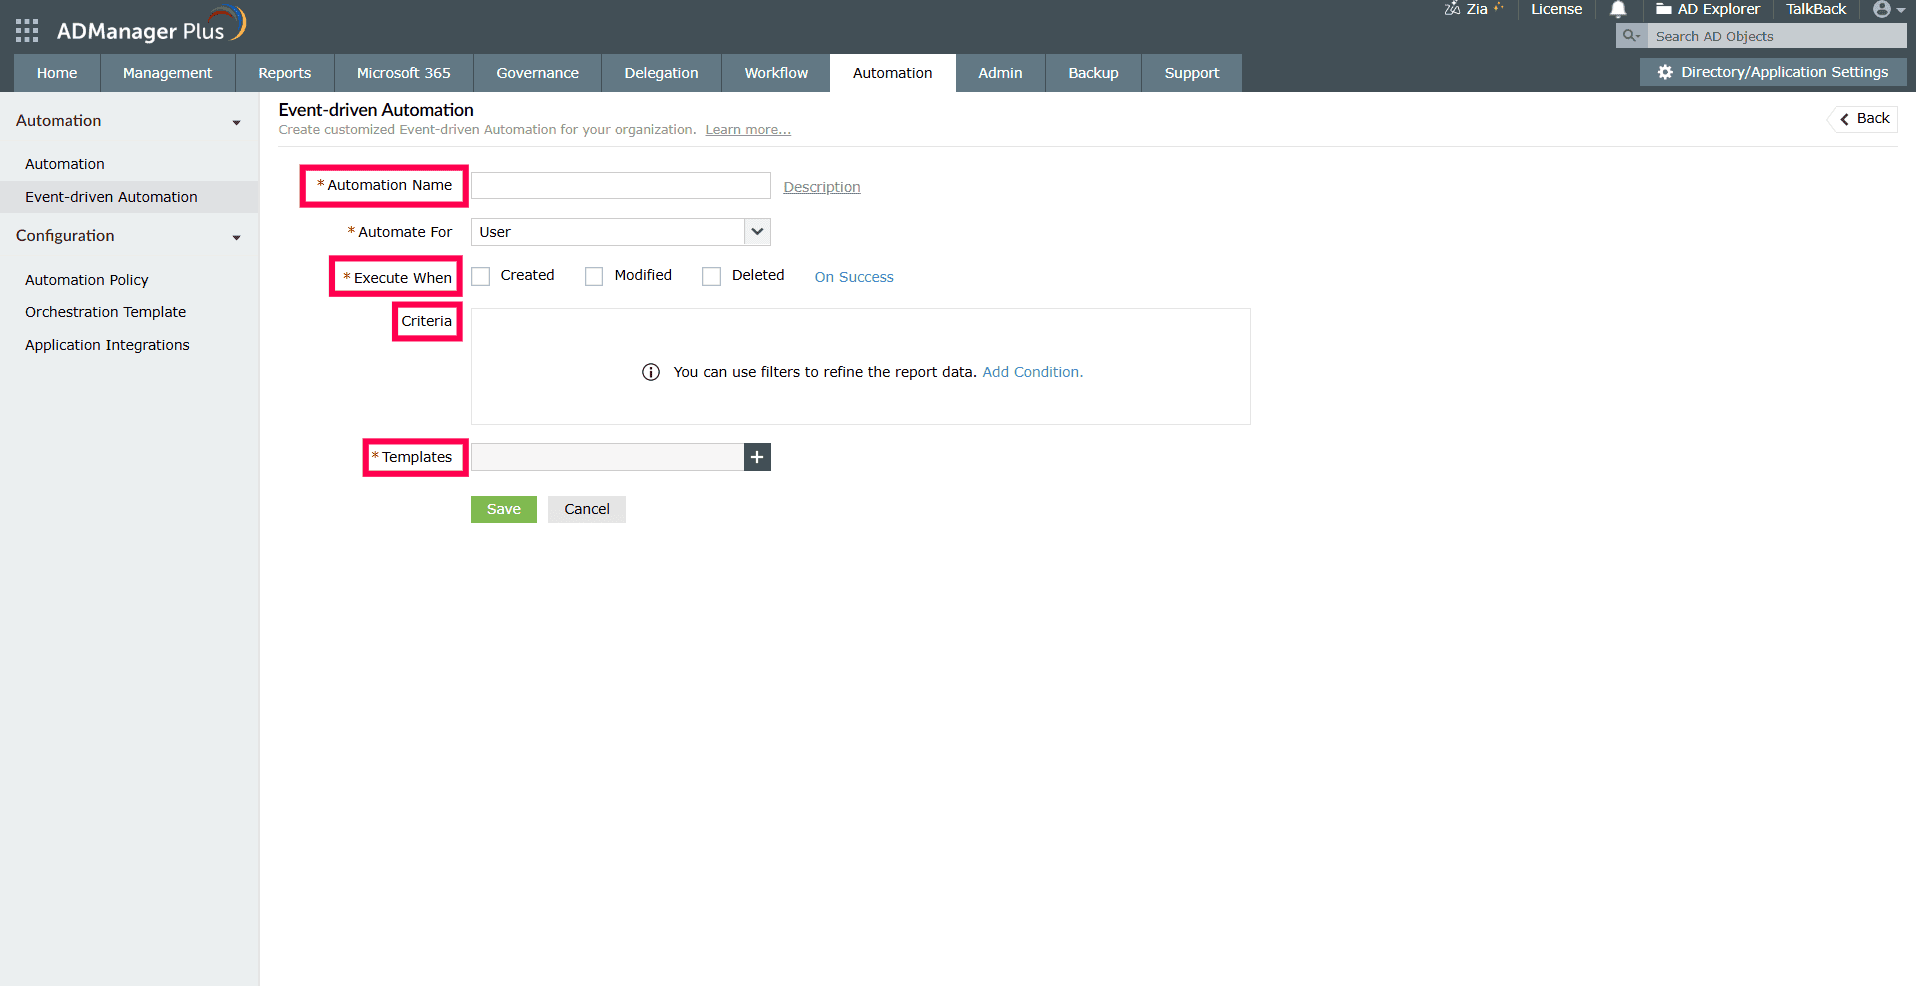
- Navigate to Automation > Event-driven Automation in the left pane.
- Click the + Create New Automation button in the top-right corner of the page.
- Enter a suitable name and description for the automation.
- In the Execute When field, select the action that will trigger the execution of the orchestration templates or webhook templates. Choose one of the following execution conditions:
- On All Occurrences: Executes the automation for every instance of the selected action.
- On Success: Executes the automation only when the action completes successfully.
- On Failure: Executes the automation only when the action fails.
- In the Criteria field, specify the conditions that the triggered action must satisfy to execute the orchestration templates or webhook templates.
- In the Templates field, select the orchestration templates or webhook templates you want to execute. You can create as many templates as you need and define the sequence of actions within each one. If the required template is not available, you can create one directly from this field by clicking + Create New Template, then click OK.
- Click Save.
The newly created automation will appear in the list view on the Event-driven Automation page, along with its associated orchestration templates, webhook templates, criteria, and the object type it automates.
After you create an automation, you can manage it directly from the Actions column in the list view:
- Modify an automation: Click the Edit (pencil) icon, update the necessary fields, and click Save.
- Delete an automation: Click the Delete icon, then click OK in the confirmation prompt. Deleted automations cannot be recovered.
- Enable or disable an automation: Click the Enable/Disable toggle icon to switch the automation's status. Disabling pauses execution without losing the configuration.
- Share an automation: Click the Share icon and configure the sharing options as required.
- View audit history: Click the Audit History icon to view execution details such as the trigger event, timestamp, and the templates that were executed.
Tips
- Combine multiple orchestration templates and webhook templates within a single event-driven automation to handle complex workflows. For example, trigger user provisioning, mailbox creation, and group assignment all from one user-creation event.
- Leverage webhook templates to integrate the product with external systems such as ITSM tools or custom applications for end-to-end automation across your IT ecosystem.
- Disable rather than delete automations during testing or maintenance windows. This preserves the configuration and allows you to resume operations quickly.
- For more business-oriented use cases such as employee onboarding and offboarding automation, refer to the Active Directory automation use cases page.