Configuring OAuth for Microsoft Graph API
This document explains how to configure OAuth authentication for Microsoft Graph API by registering an application in Microsoft Azure and integrating the credentials with Applications Manager. The configuration involves the following steps:
- Registering an application in Azure
- Capturing application credentials
- Generating a client secret
- Configuring API permissions
- Integrating OAuth settings in Applications Manager
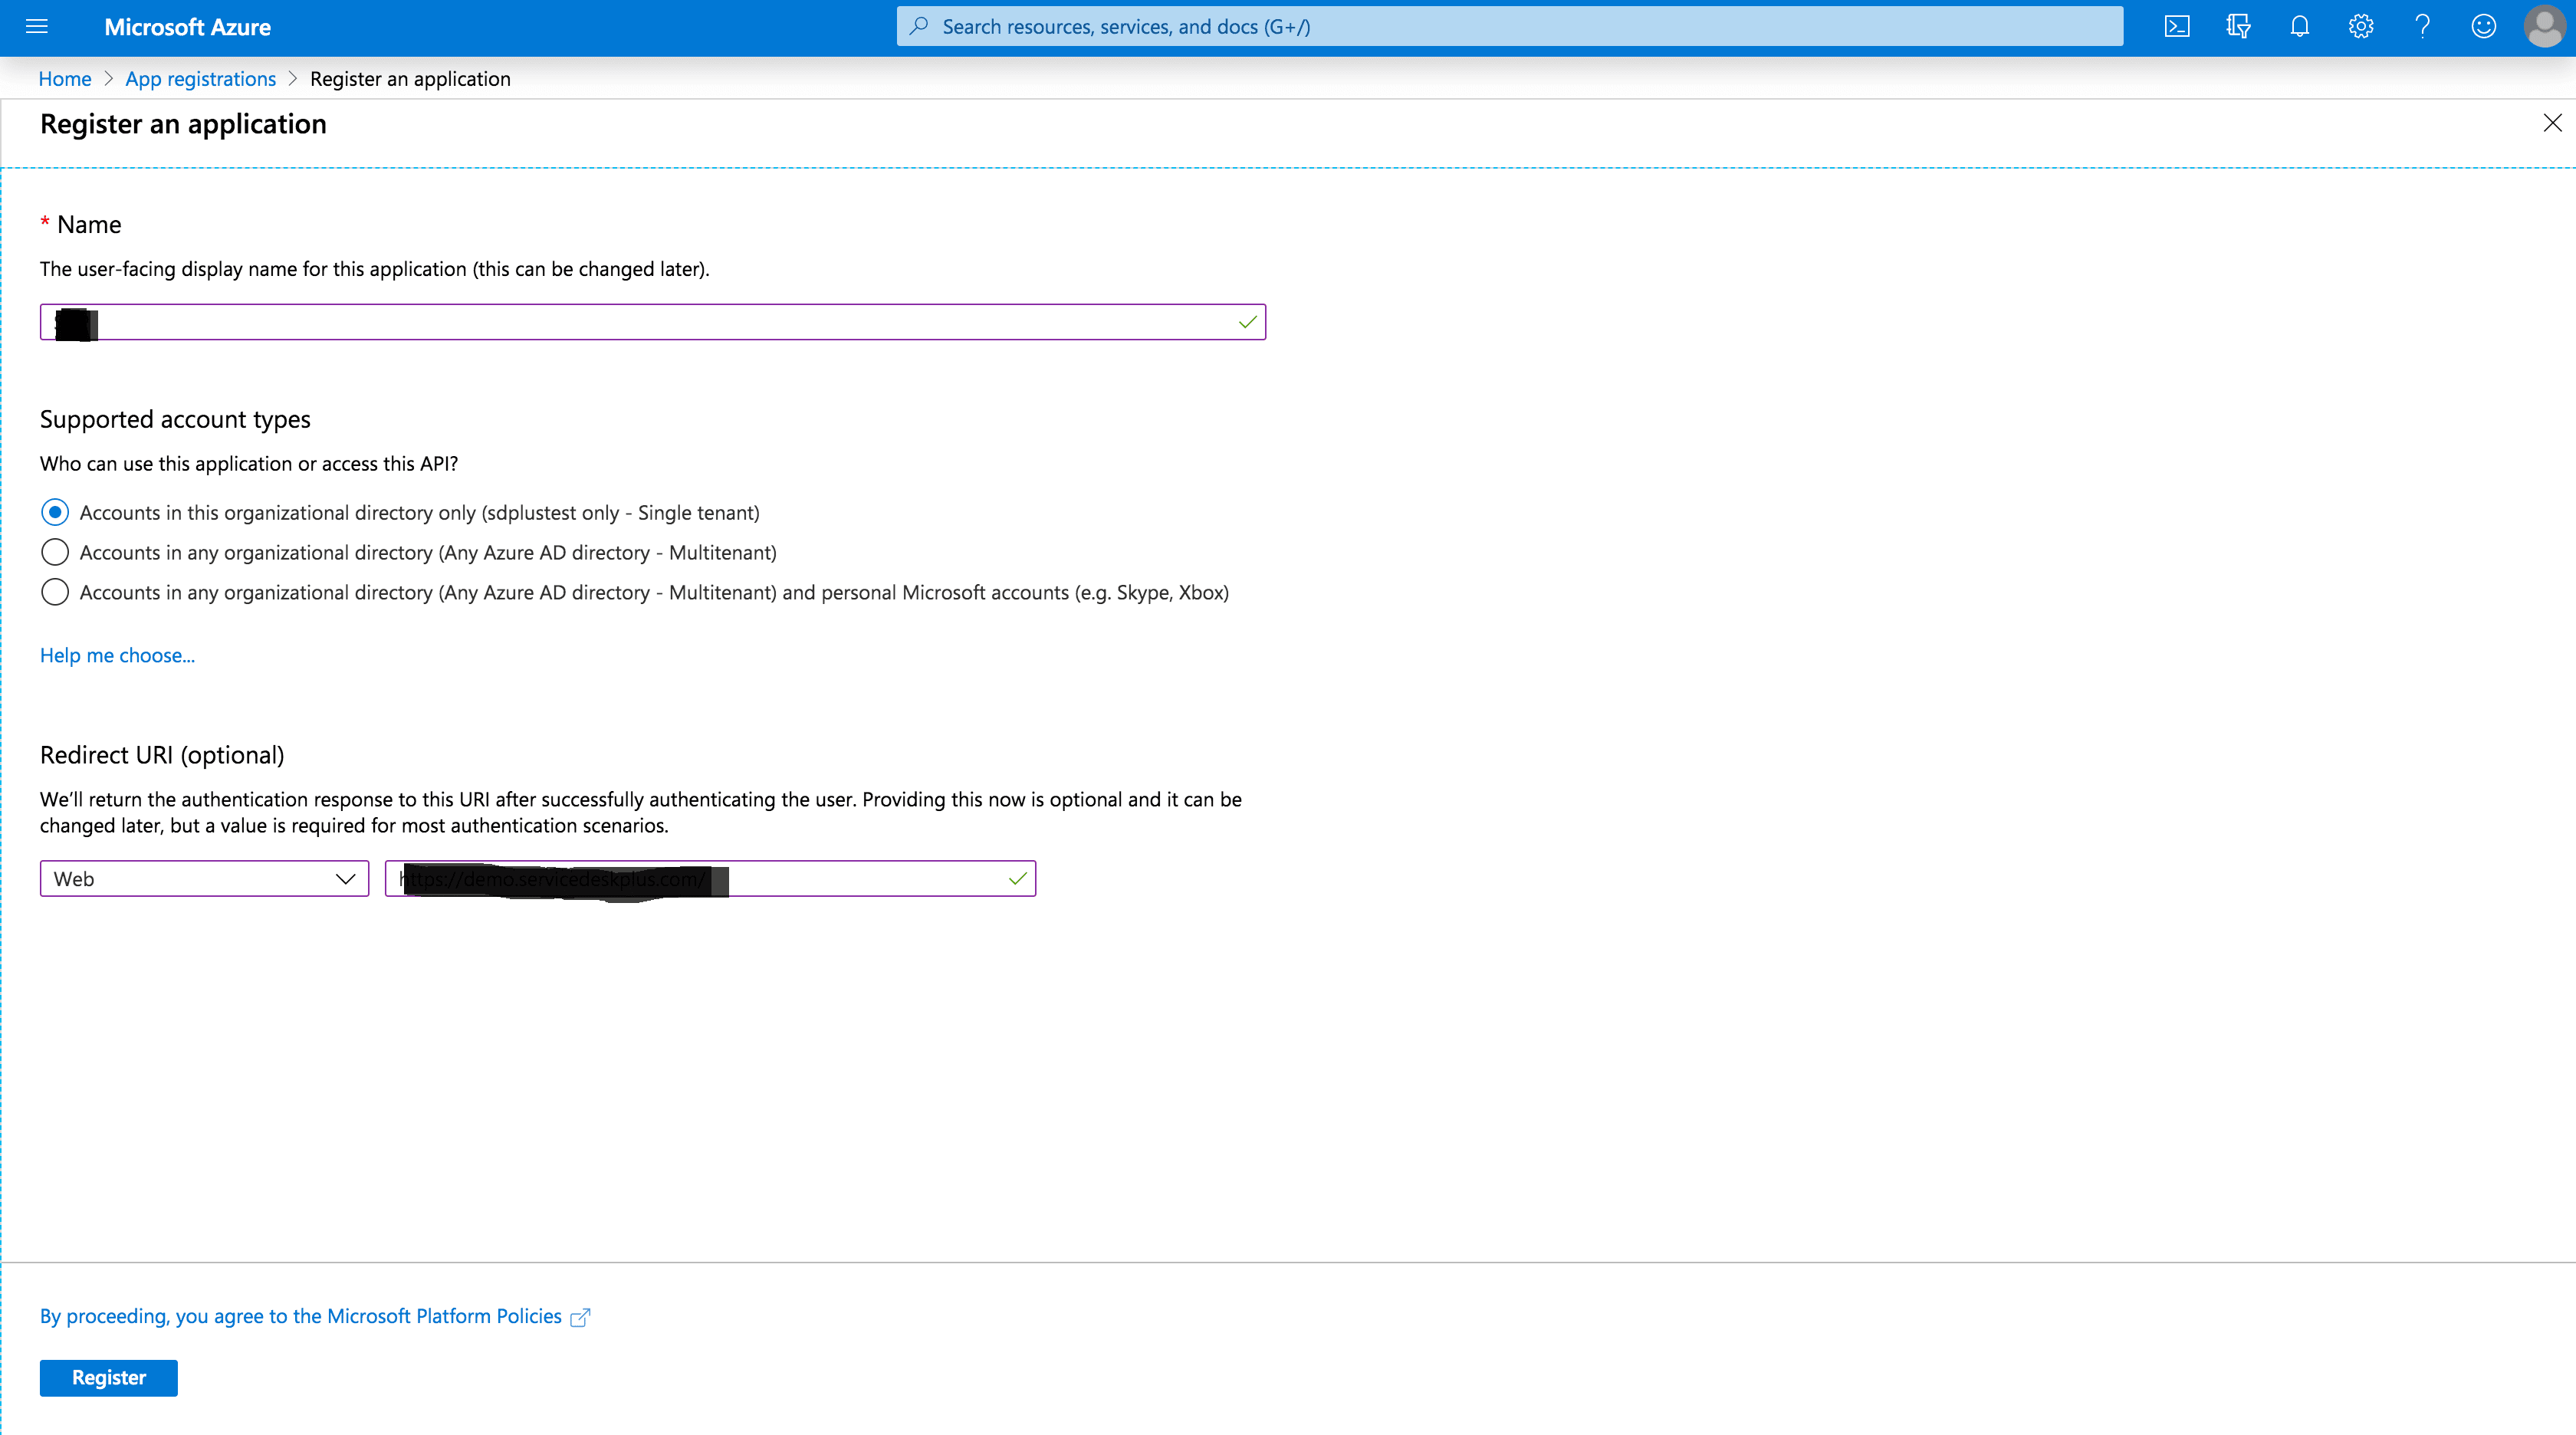
1. Register an Application in Azure
To enable OAuth authentication, you must first register your application in the Azure portal.
- Log in to the Azure portal.
- Navigate to App registrations → New registration.
- Enter a Name of your choice for your application.
- Choose the appropriate Supported account types based on your organization requirements.
- Configure Redirect URI depending on the OAuth grant type:
- Client Credentials: Leave this field blank.
- Authorization Code / Resource Owner Credentials: Select Web and paste your application's Redirect URL.
- Click Register to create the application.
2. Capture Application Credentials
After registering the application, collect the required credentials.
- Navigate to the Overview page of the registered application.
Copy the Application (Client) ID. This will be used as the Client ID in Applications Manager.
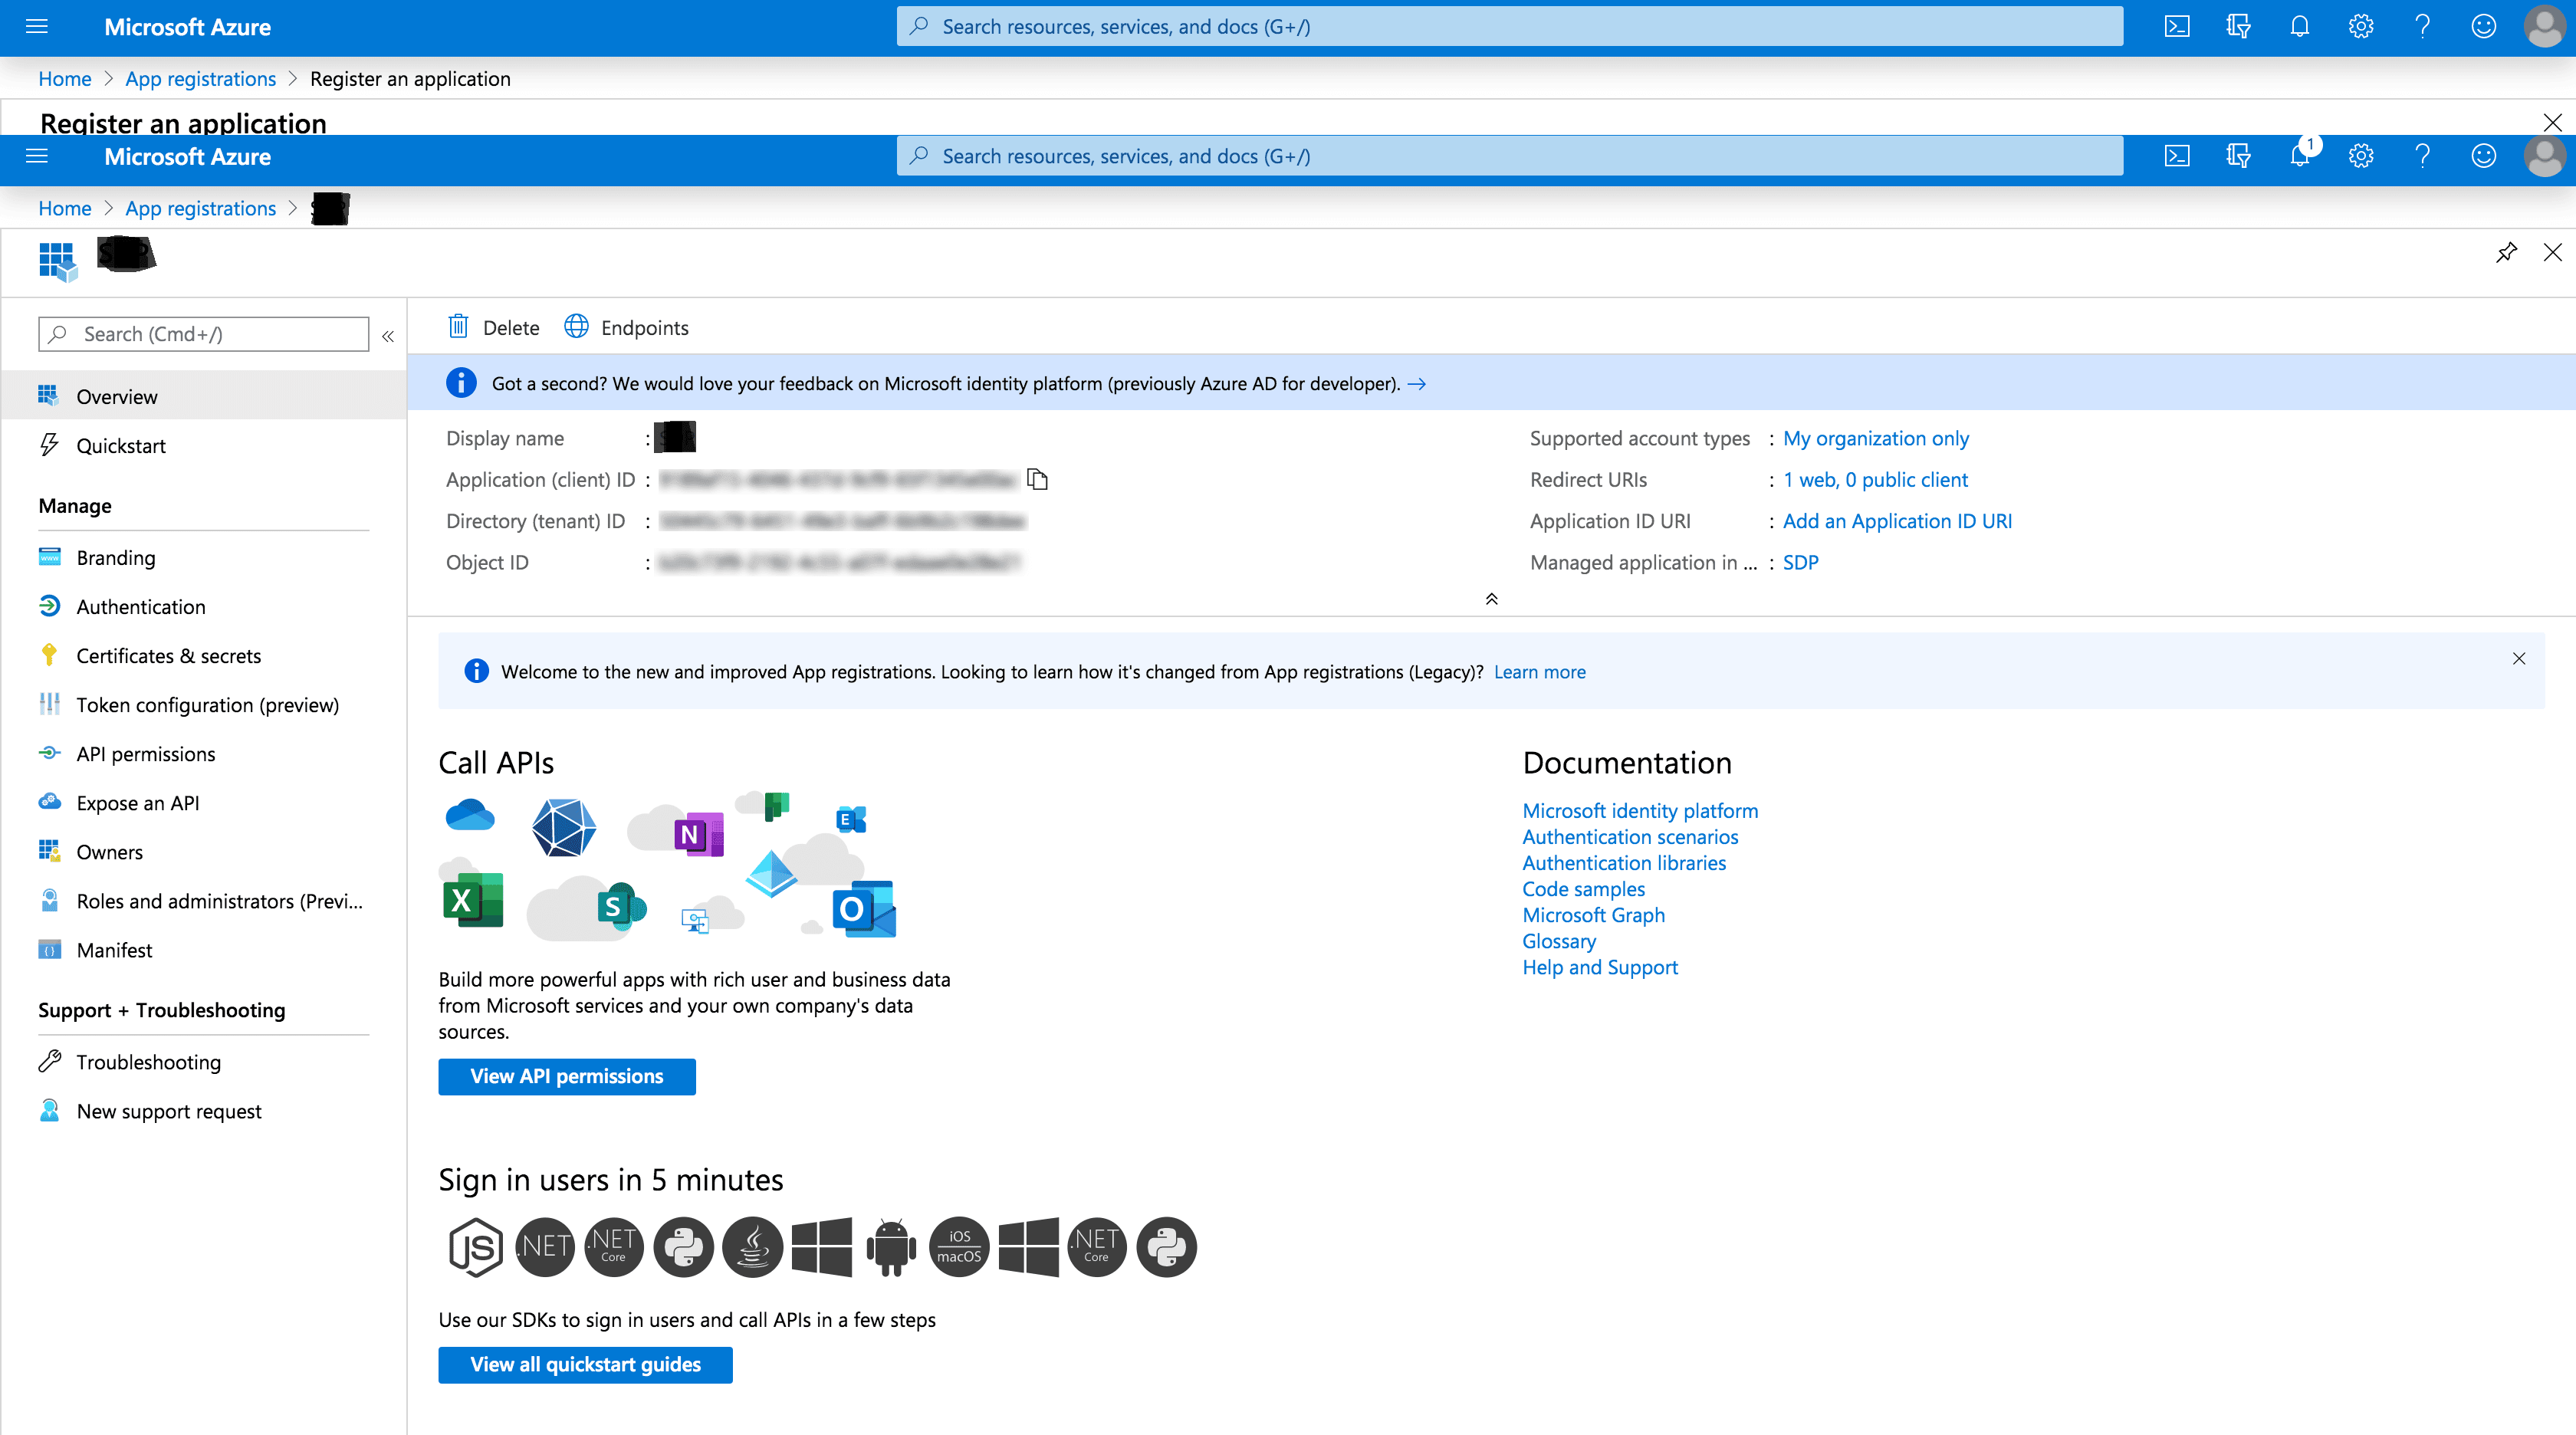
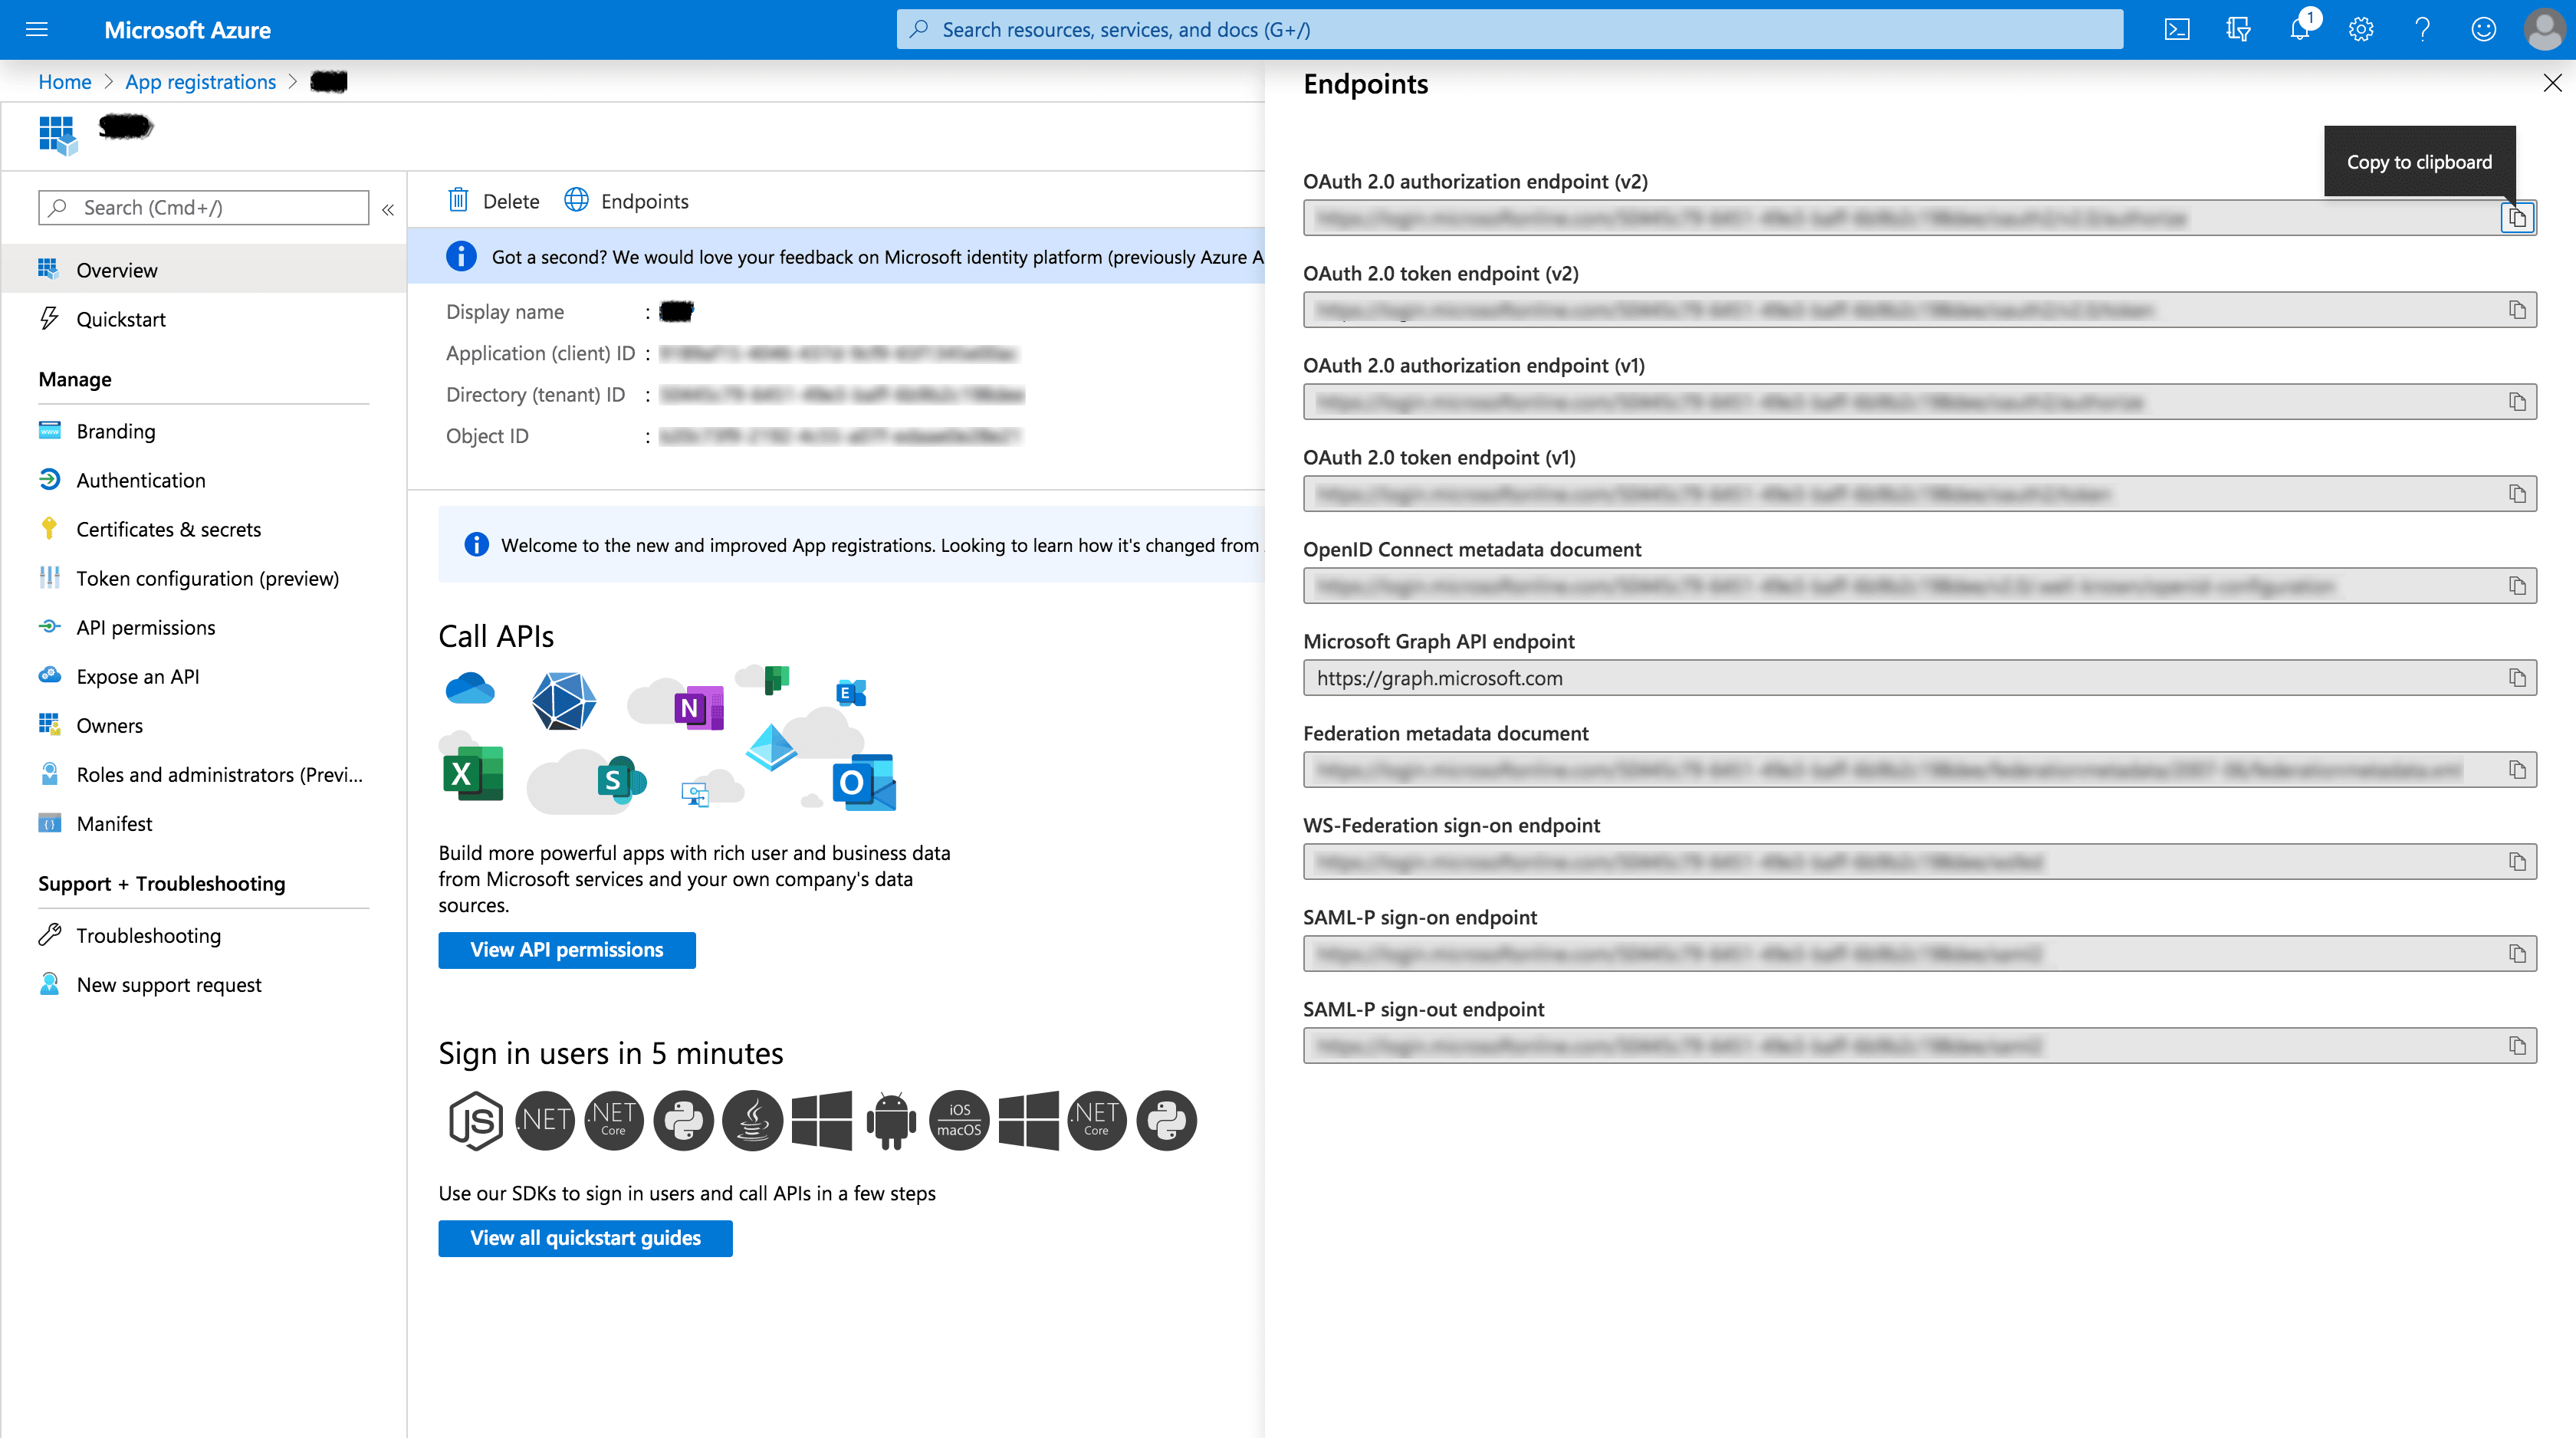
- Click Endpoints at the top.
Copy the OAuth 2.0 Authorization Endpoint (v2) and OAuth 2.0 Token Endpoint (v2). These values will be used as the Authorization URL and Token URL in Applications Manager.
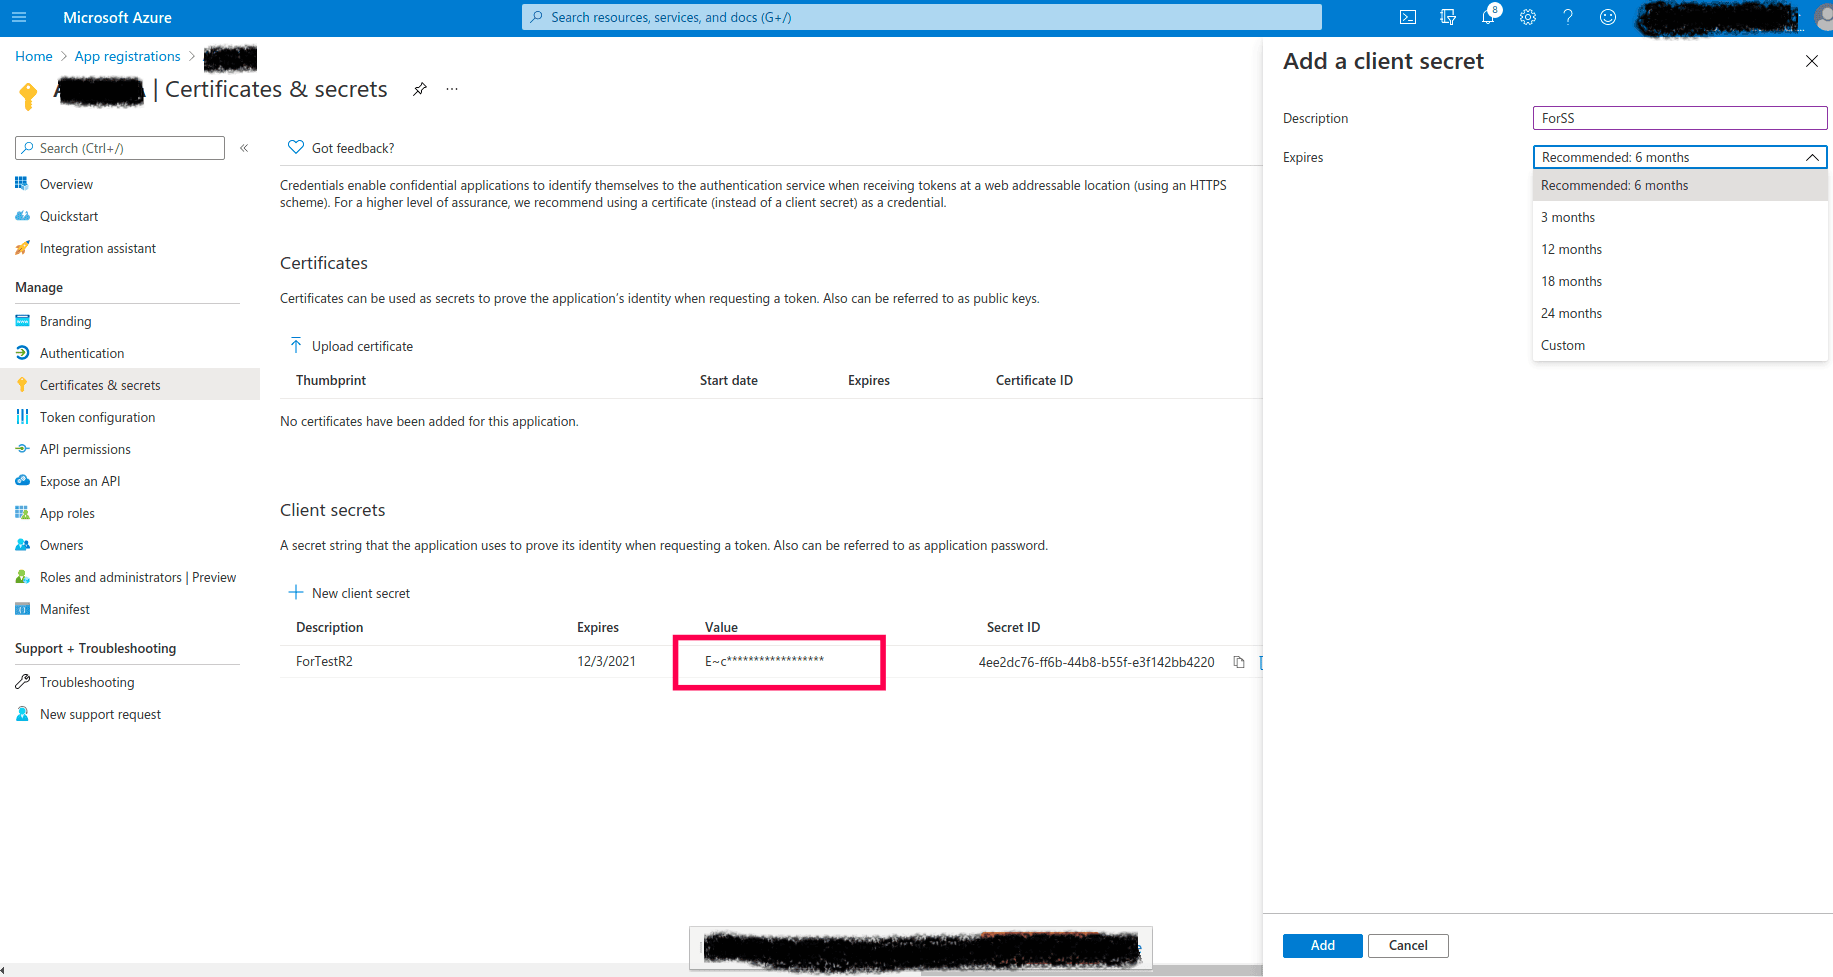
3. Generate a Client Secret
A client secret is required for OAuth authentication.
- In the left navigation panel, go to Certificates & secrets → New client secret.
- Provide a name for the secret in Description and select an appropriate expiration period.
- Click Add.
- Copy the Value of the client secret. This value will be required when configuring OAuth in Applications Manager.
Note: The client secret value is displayed only once. Make sure to copy and store it immediately.
4. Configure API Permissions
Permissions must be configured depending on the OAuth grant type used.
- Navigate to API Permissions → Add a permission.
Select Microsoft Graph.
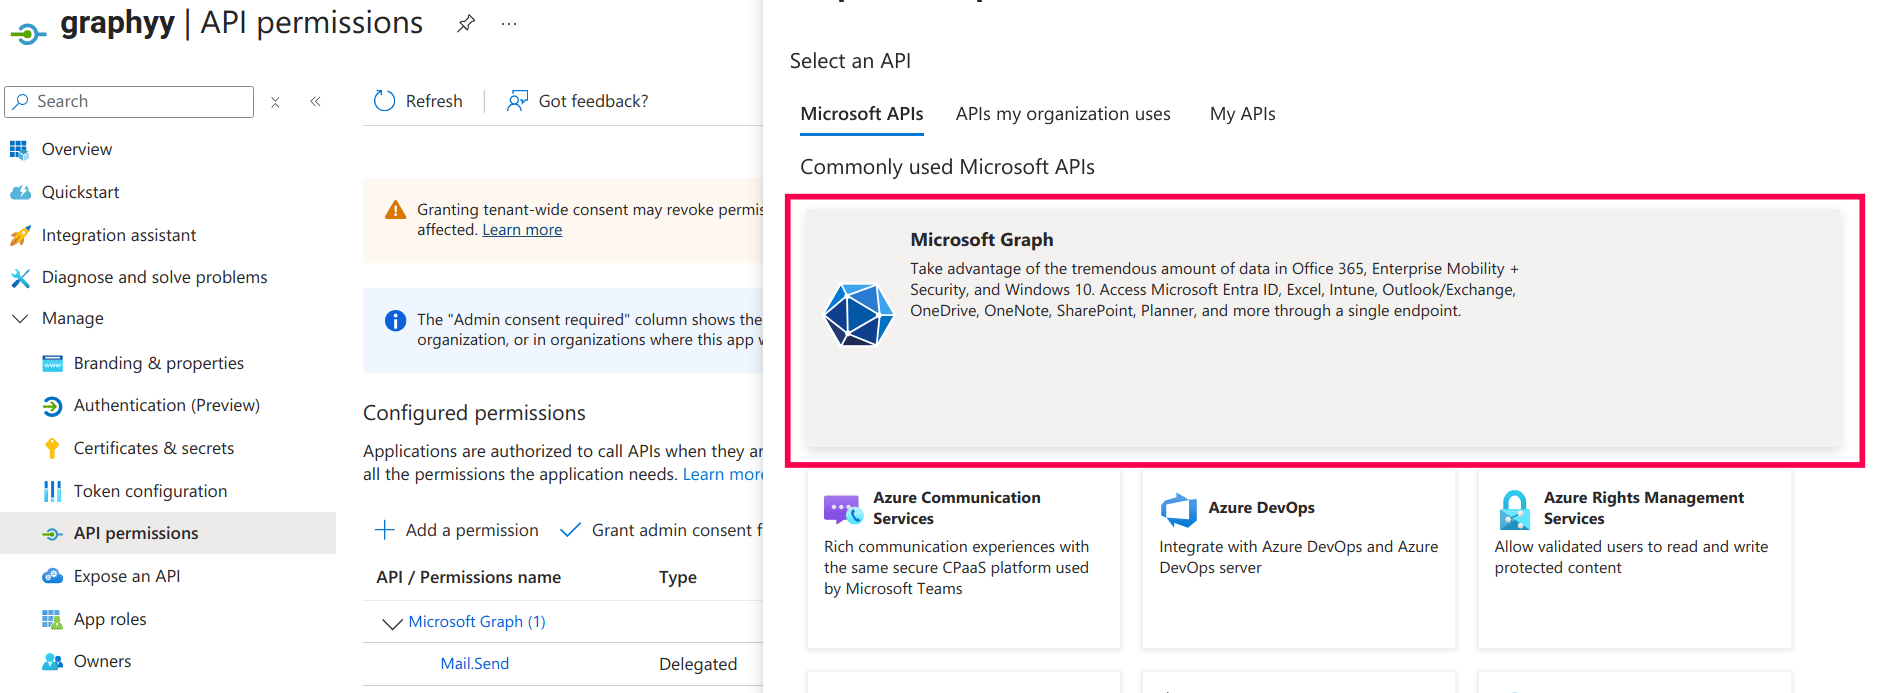
- Assign permissions based on the grant type:
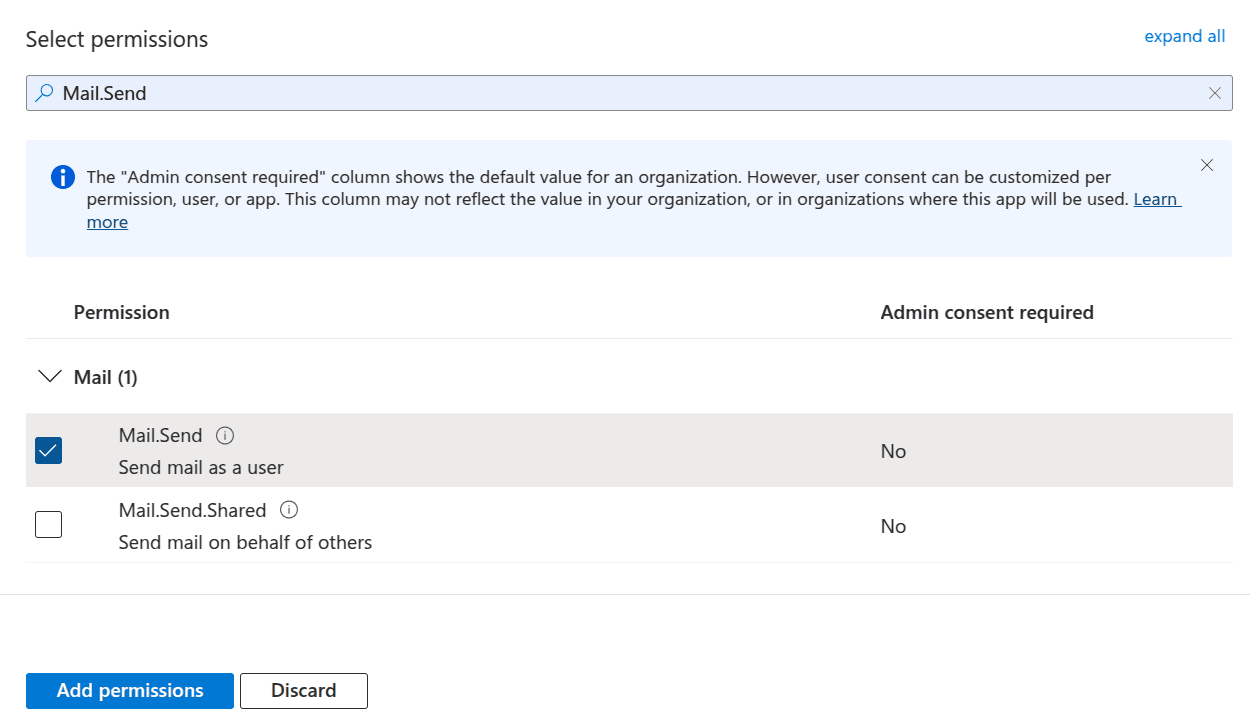
- Authorization Code / Resource Owner Credentials: Choose Delegated permissions, then search and select Mail.Send.
- Client Credentials: Choose Application permissions, then search and select Mail.Send.
Click Add permissions.
Click Grant admin consent for [Organization Name] and confirm by selecting Yes.
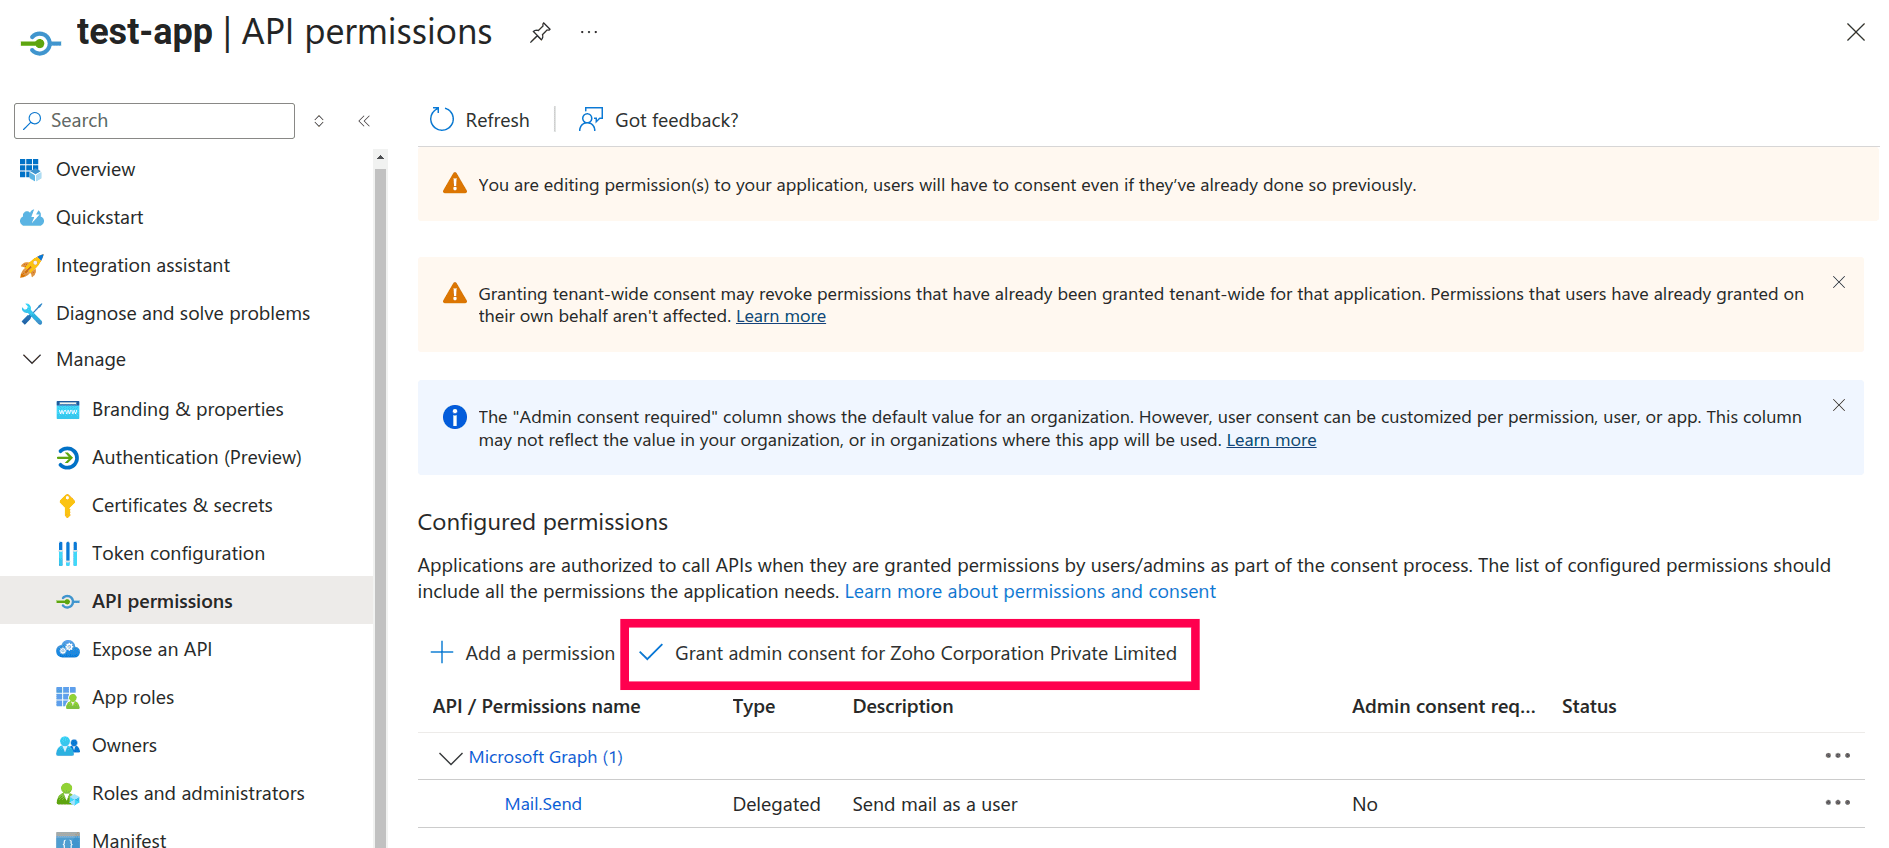
Note: Ensure the permission status shows a green checkmark, indicating that admin consent has been successfully granted.
5. Integrating OAuth Settings in Applications Manager
After completing the Azure configuration, add the OAuth provider in Applications Manager.
- Log in to Applications Manager.
- Navigate to Settings → Credential Settings → OAuth Provider → Add OAuth Provider.
Enter the configuration details as shown below:
Field Value OAuth Provider Configuration Client ID Application (Client) ID from the Azure Overview page Client Secret Secret Value from Certificates & secrets (not the Secret ID) Authorization URL OAuth 2.0 Authorization Endpoint (v2) Token URL OAuth 2.0 Token Endpoint (v2) OAuth Request Configuration Token Request Method POST Request Body Authenticated Request Method Basic Authentication Grant Type Configuration Authorization Code Mail.Send offline_access Resource Owner Password Credentials (ROPC) Mail.Send offline_access Client Credentials .default - Click Authorize to complete the configuration.
If the credentials and permissions are configured correctly for Microsoft Graph API, the OAuth provider will be successfully added in Applications Manager.

