How to Upload HAR File and Console Log to Endpoint Central Support Team
When you encounter UI issues while using Endpoint Central, our support team may require your HAR file and console log to diagnose the problem. This guide explains how to generate and upload the required files.
Table of Contents
Generating Console Logs from Browsers
Follow these instructions to upload console logs from different browsers:
Generating Console Logs in Chrome
- Open Developer Tools: Click the menu button (three vertical dots) → More Tools → Developer Tools.
- Navigate to Console.
- Enable the following options under Preferences:
- Log XMLHttpRequests
- Show Timestamps
- Preserve Log upon Navigation
- Reproduce the issue and then copy or save the console log:
- Right-click → Save as (TXT file).
Generating Console Logs in Firefox
- Open Developer Tools: Click the menu button (three horizontal lines) → More Tools → Web Developer Tools.
- Navigate to Console.
- Enable:
- Persist Logs
- Show Timestamps
- Reproduce the issue and then copy or save the console log:
- Right-click → Select All → Copy.
- Paste and save as a text document.
Generating Console Logs in Microsoft Edge
- Open Developer Tools: Click the menu button (three horizontal dots) → More Tools → Developer Tools.
- Navigate to Console.
- Reproduce the issue while the console logs are being recorded.
- Right-click the log area → Save as (TXT file).
Generating HAR Files
Use these instructions to generate a HAR file in different browsers:
Generating HAR Files in Chrome
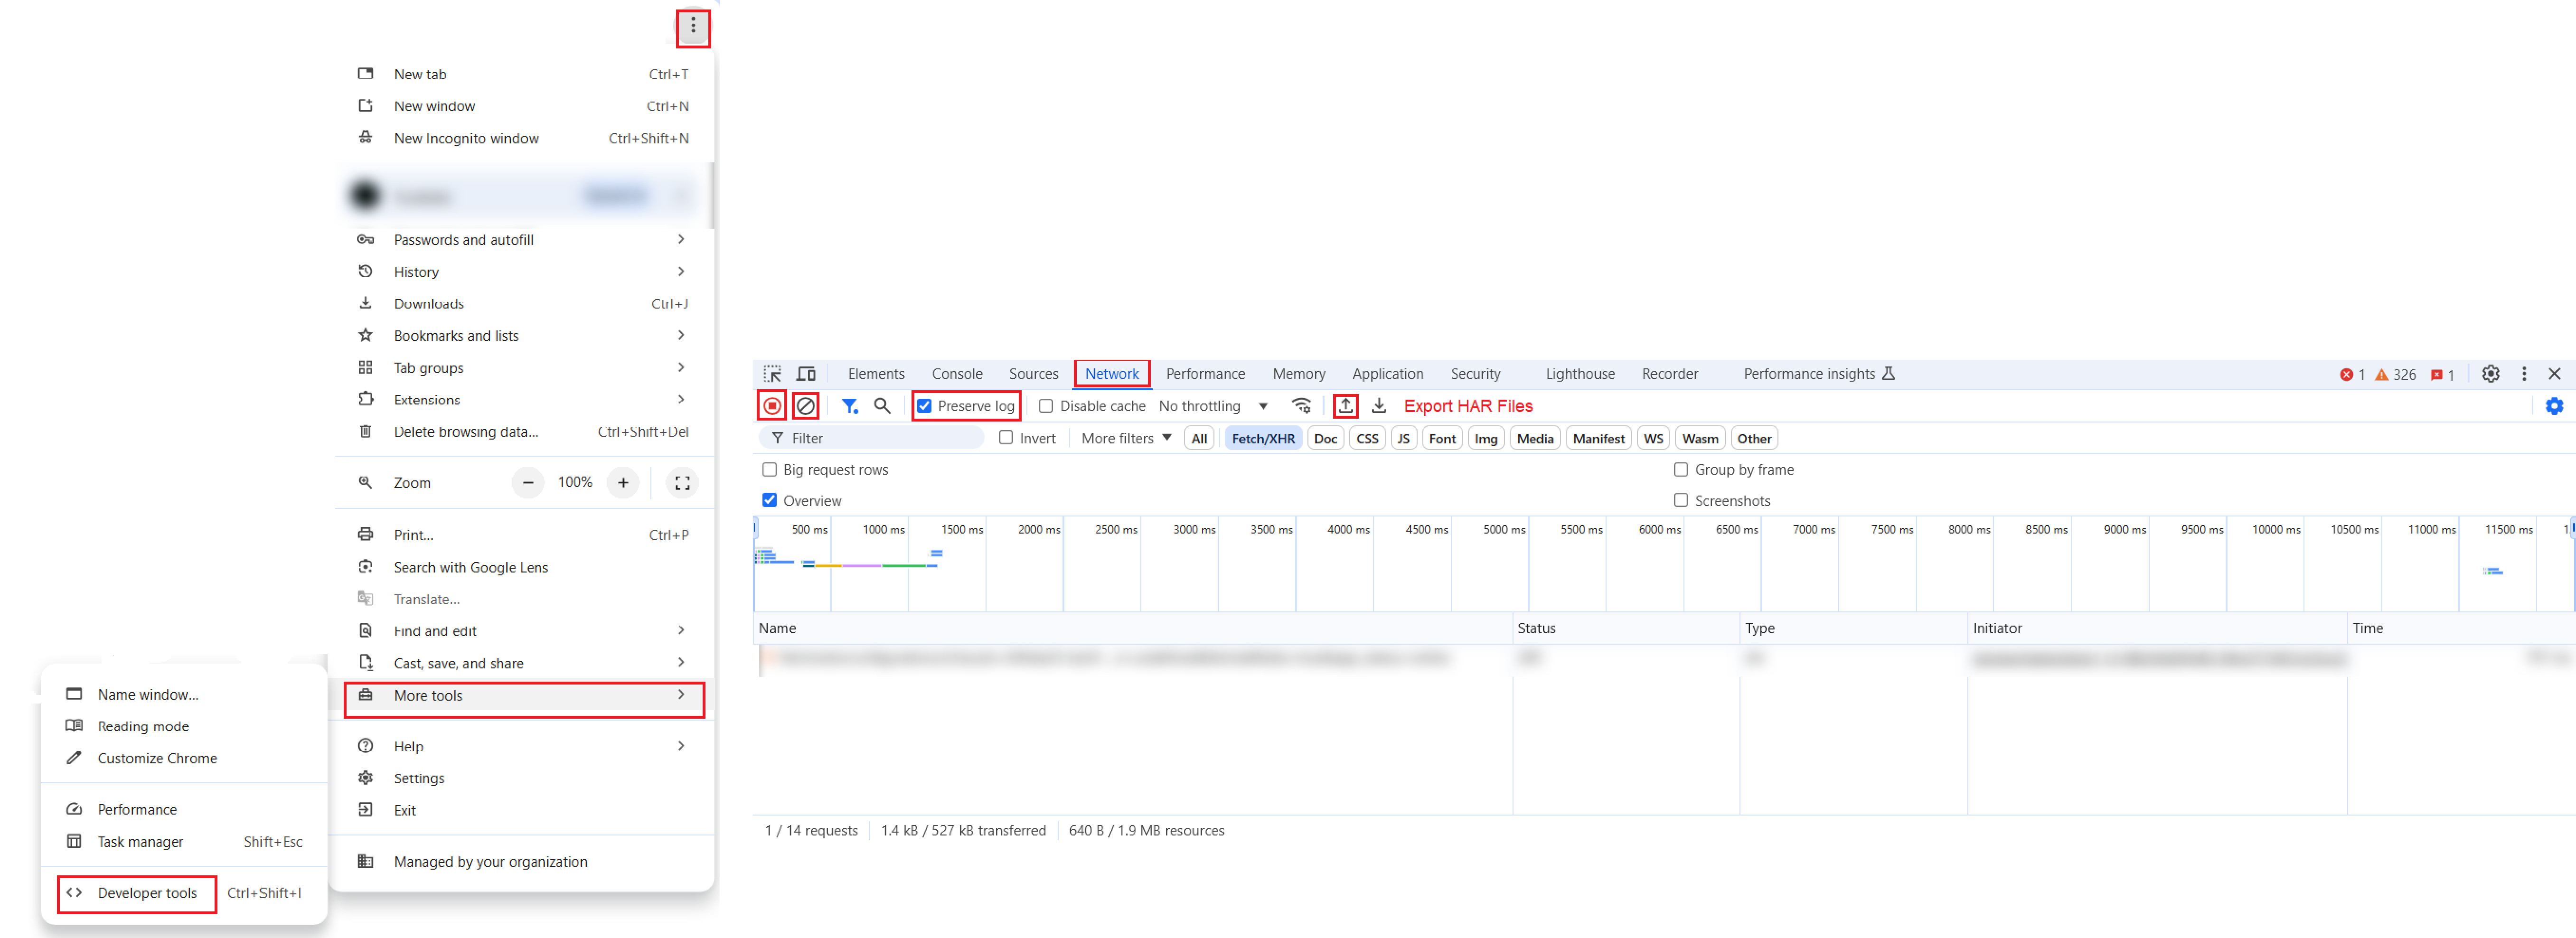
- Open Developer Tools: Click the menu button (three vertical dots) → More Tools → Developer Tools.
- Go to the Network tab.
- Enable Preserve Log and ensure the recording button is red.
- Reproduce the issue.
- Right-click any column (Name/Status/Type) → Save all as HAR with Content.
Generating HAR Files in Firefox
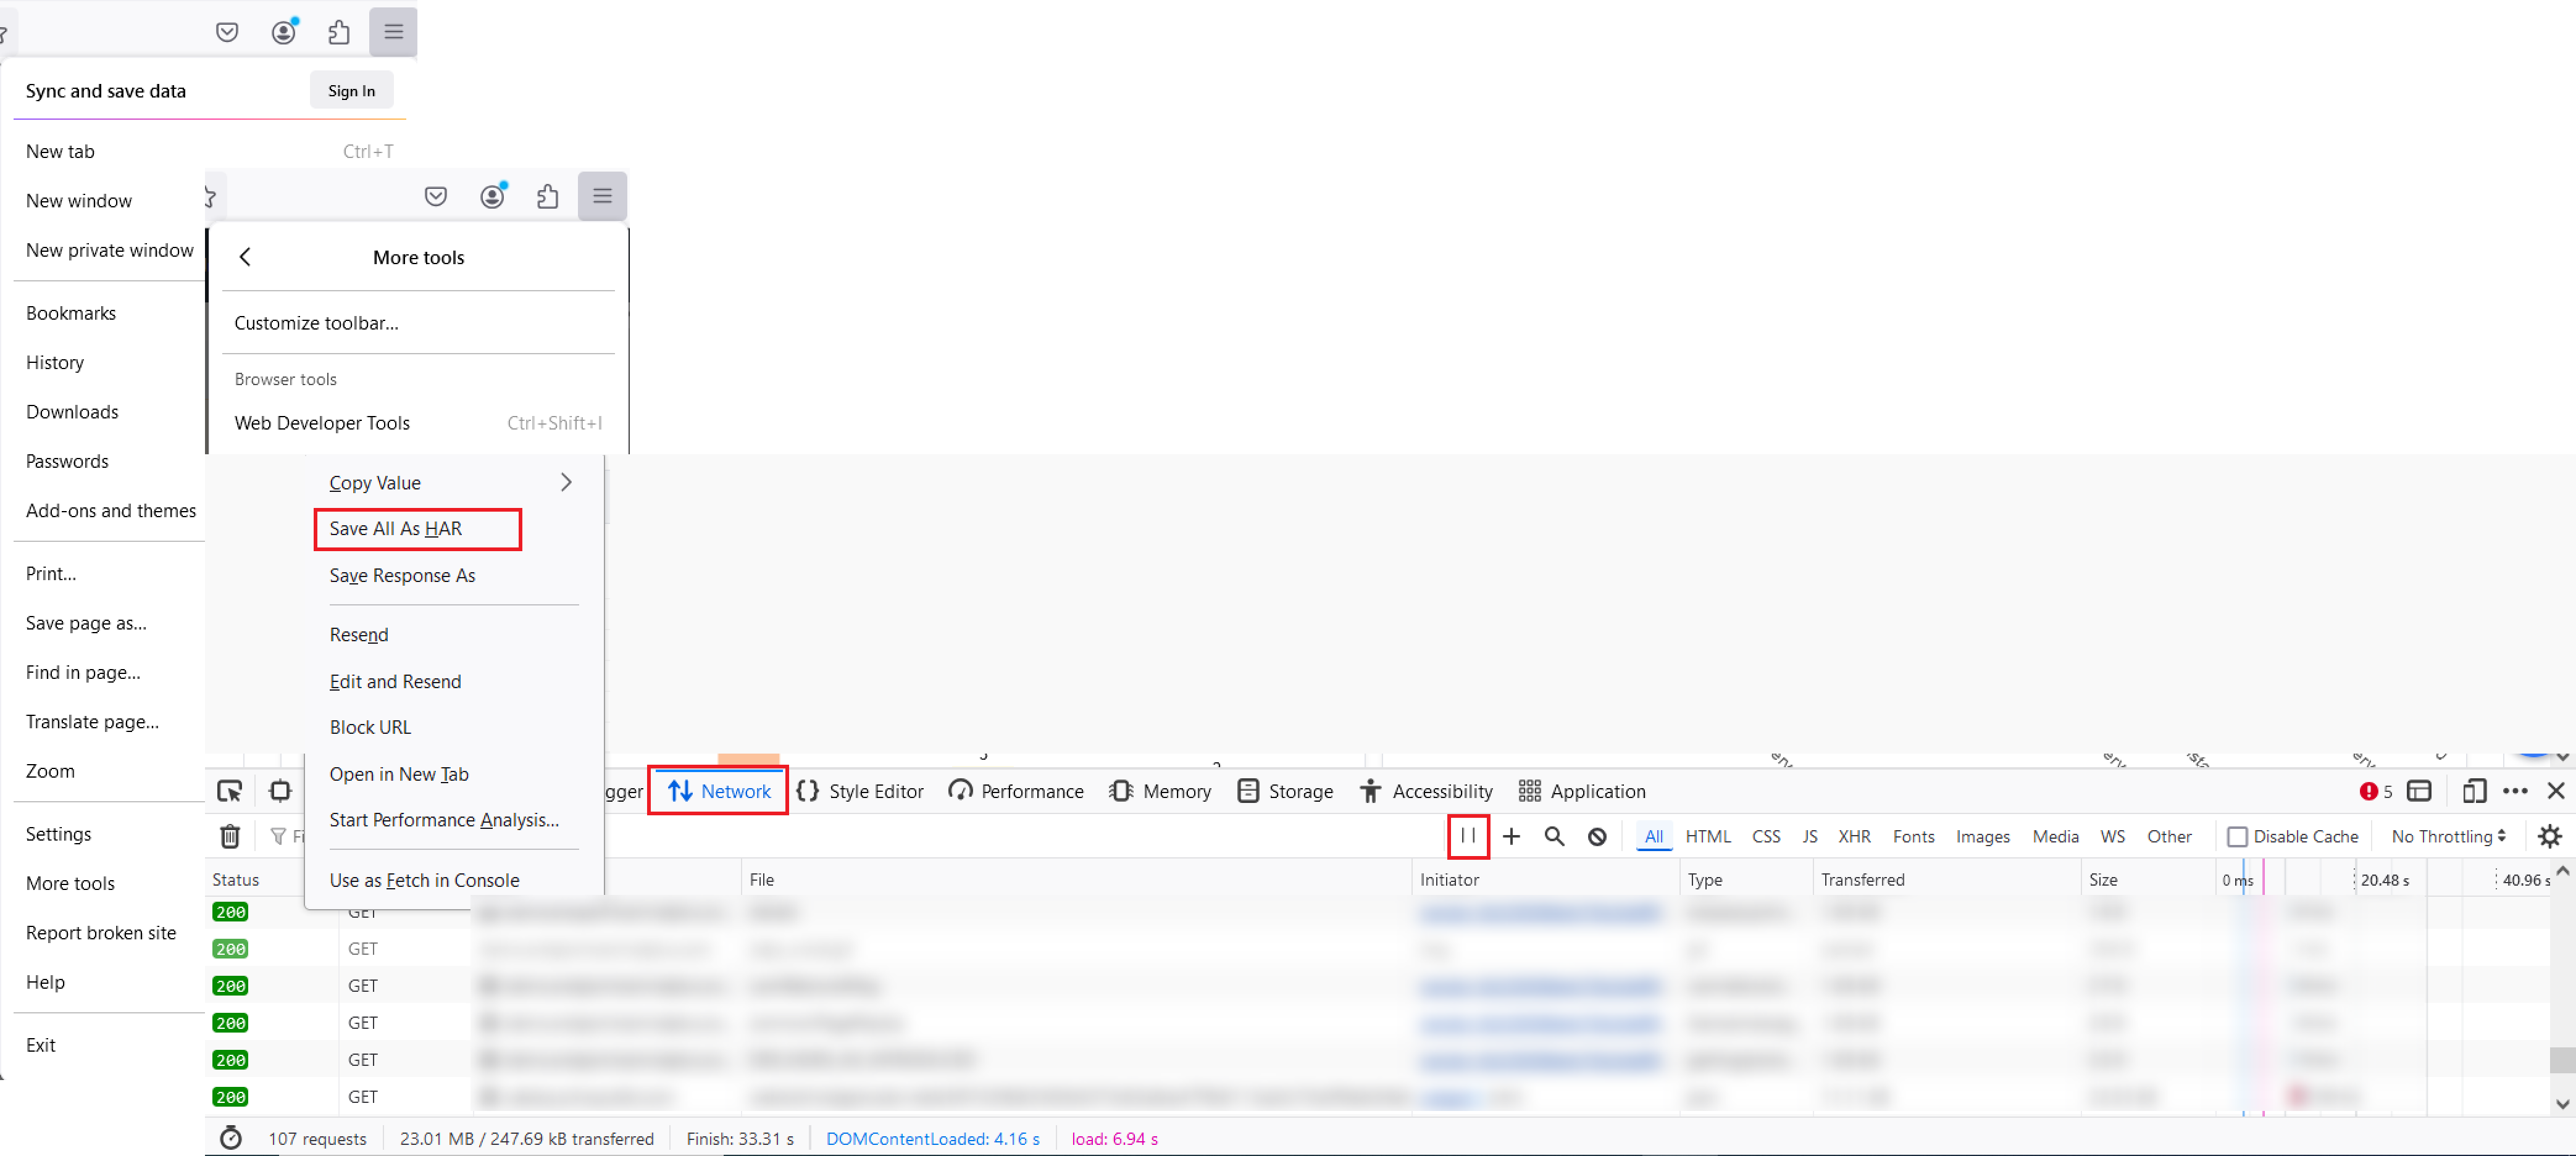
- Open Web Developer Tools.
- Go to the Network tab.
- Reproduce the issue.
- Right-click on the request area → Save all as HAR.
Generating HAR Files in Microsoft Edge
- Open and go to the page where the issue is occurring.
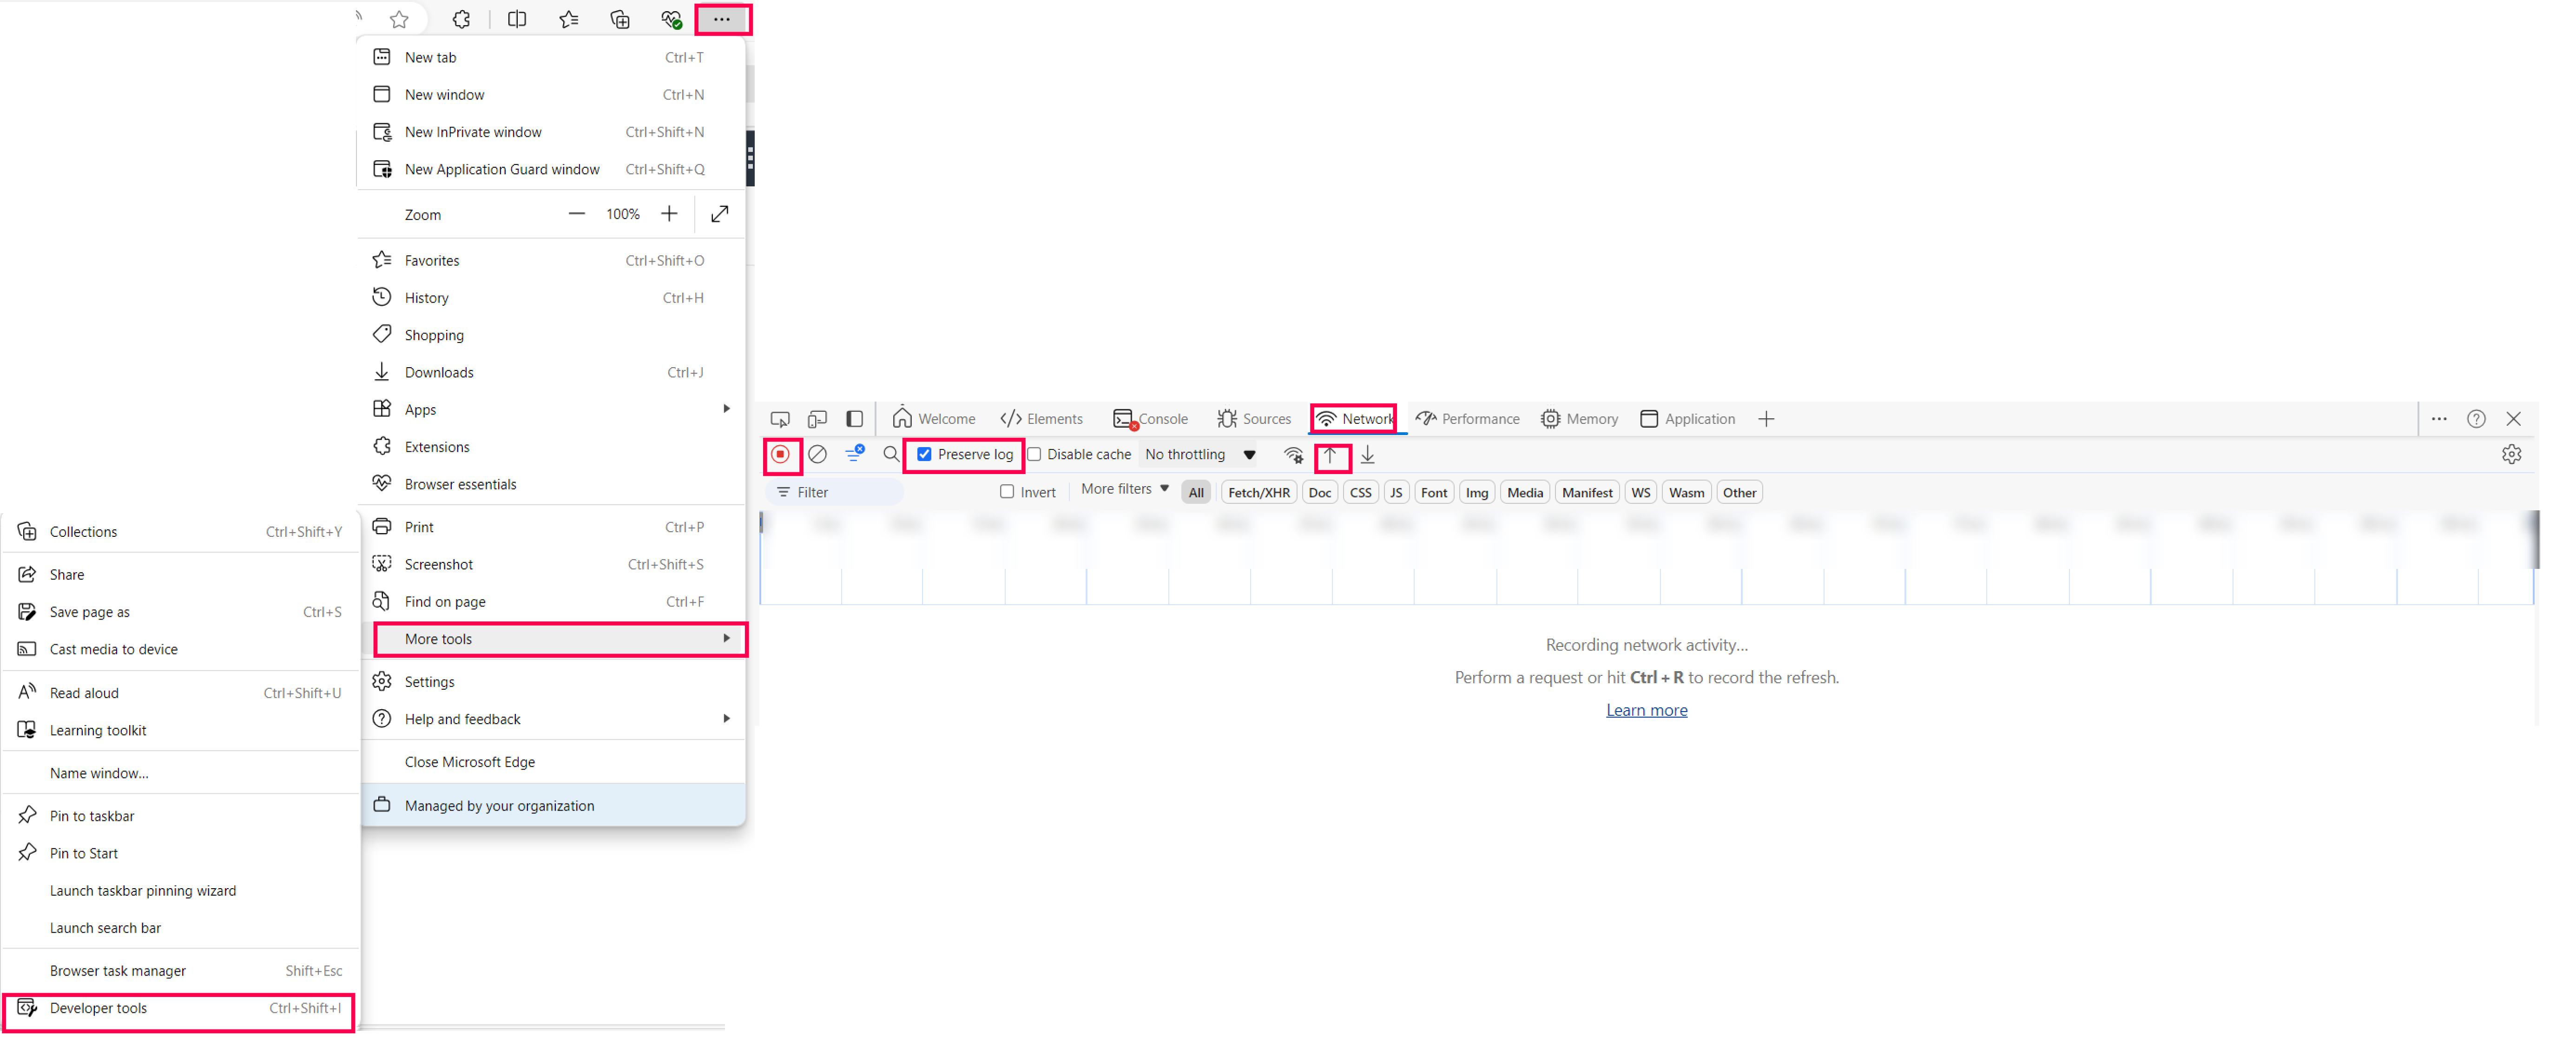
- Press F12 on your keyboard (or click the gear icon → F12 Developer Tools).
- Click the Network tab.
- Reproduce the issue that you were experiencing before, while the network requests are being recorded.
- Once done, click the Save button.
- Give the trace a filename and click the Save button which will save it as a .har file or .xml file.
Generating HAR Files in Safari
Before generating the HAR file, make sure you can see the Develop menu in Safari. If it is not there, follow the instructions under Use the developer tools in the Develop menu in Safari on Mac.
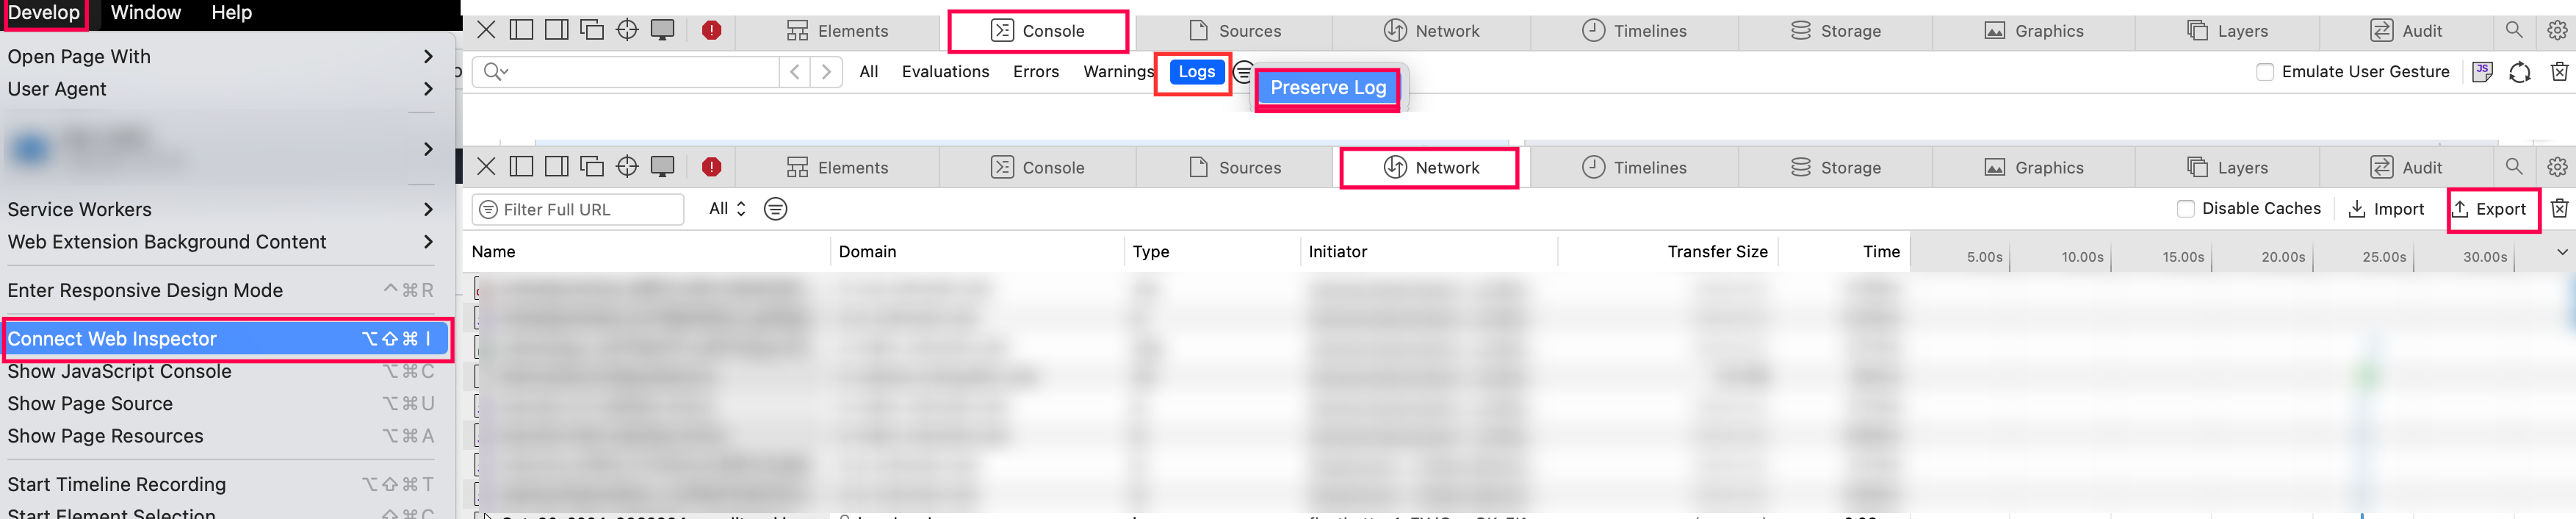
- Open the Develop menu and select Show Web Inspector.
- Click the Network tab and complete the activity that is causing issues.
- Click the download icon (the arrow pointing down icon) and save the web archive file.
Uploading Logs to Endpoint Central Support
To submit the logs:
- Log in to the Web Console.
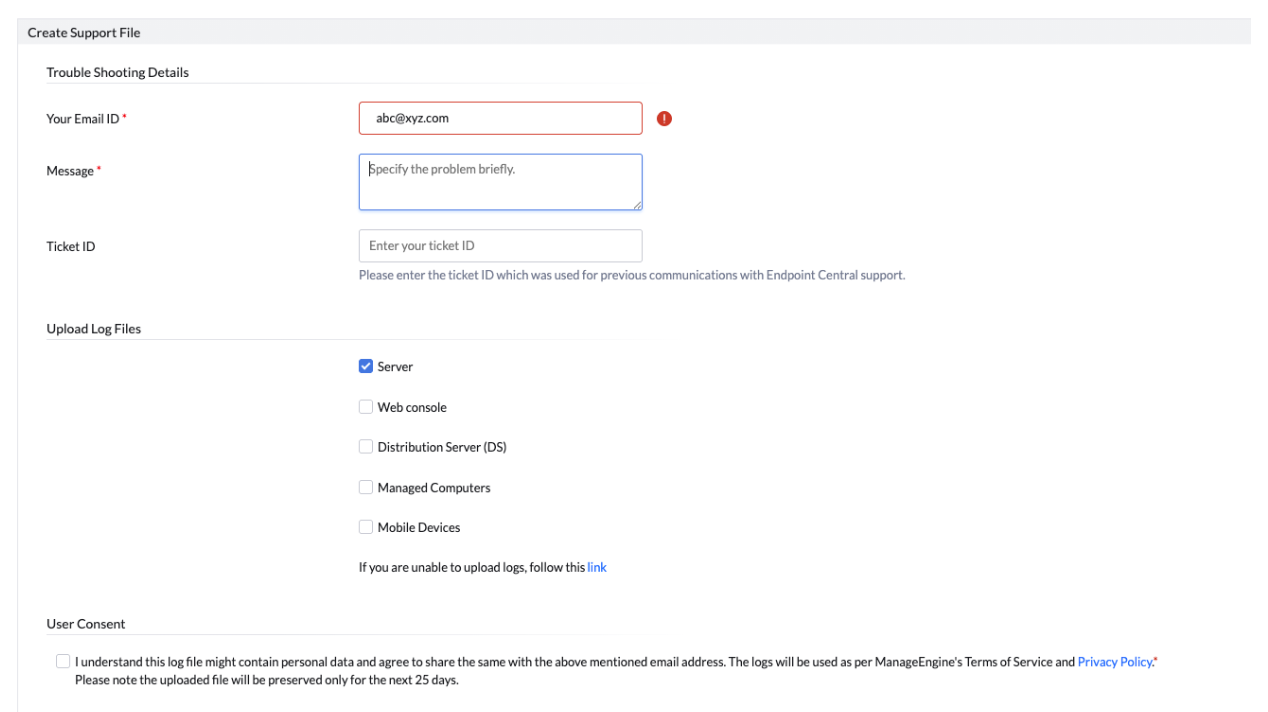
- Navigate to Support → Create Support File.
- Your email ID: Specify your email address to send the logs.
- Message: Specify the problem briefly
- Ticket ID: Specify the ticket ID if available
- Upload Log files: Select the log files (Server, Managed computers, etc.)
- Select the user consent and send the logs.
Note
If the web console is inaccessible:
- Go to this link.
- Enter the Ticket ID if available.
- Ensure that you attach the required log files, including HAR and console logs.
- Provide details and click Upload.