Managing IPv6 Addresses
OpUtils IP address manager manages and monitors your IPv6 addresses in addition to IPv4. IPv6 addresses lets you create a global site and add subnets to it. For a better address allocation, better organization, more address space and easier identification, you can create a logical grouping by locations or cities and then add the subnets to it. For example, you can create a site like OpUtils IPv6 and then add your locations like USA, Canada, Europe, etc and then add subnets to each of these locations.
Discovering IPv6 Addresses
OpUtils will automatically discover the IPv6 network and list them under Discovered v6 Hosts under the tree. You can also click the Discover IPv6 Address link to initiate the discovery again. The next step is to add Global Prefix to move the discovered hosts to that prefix.
Adding IPv6 Global Prefix
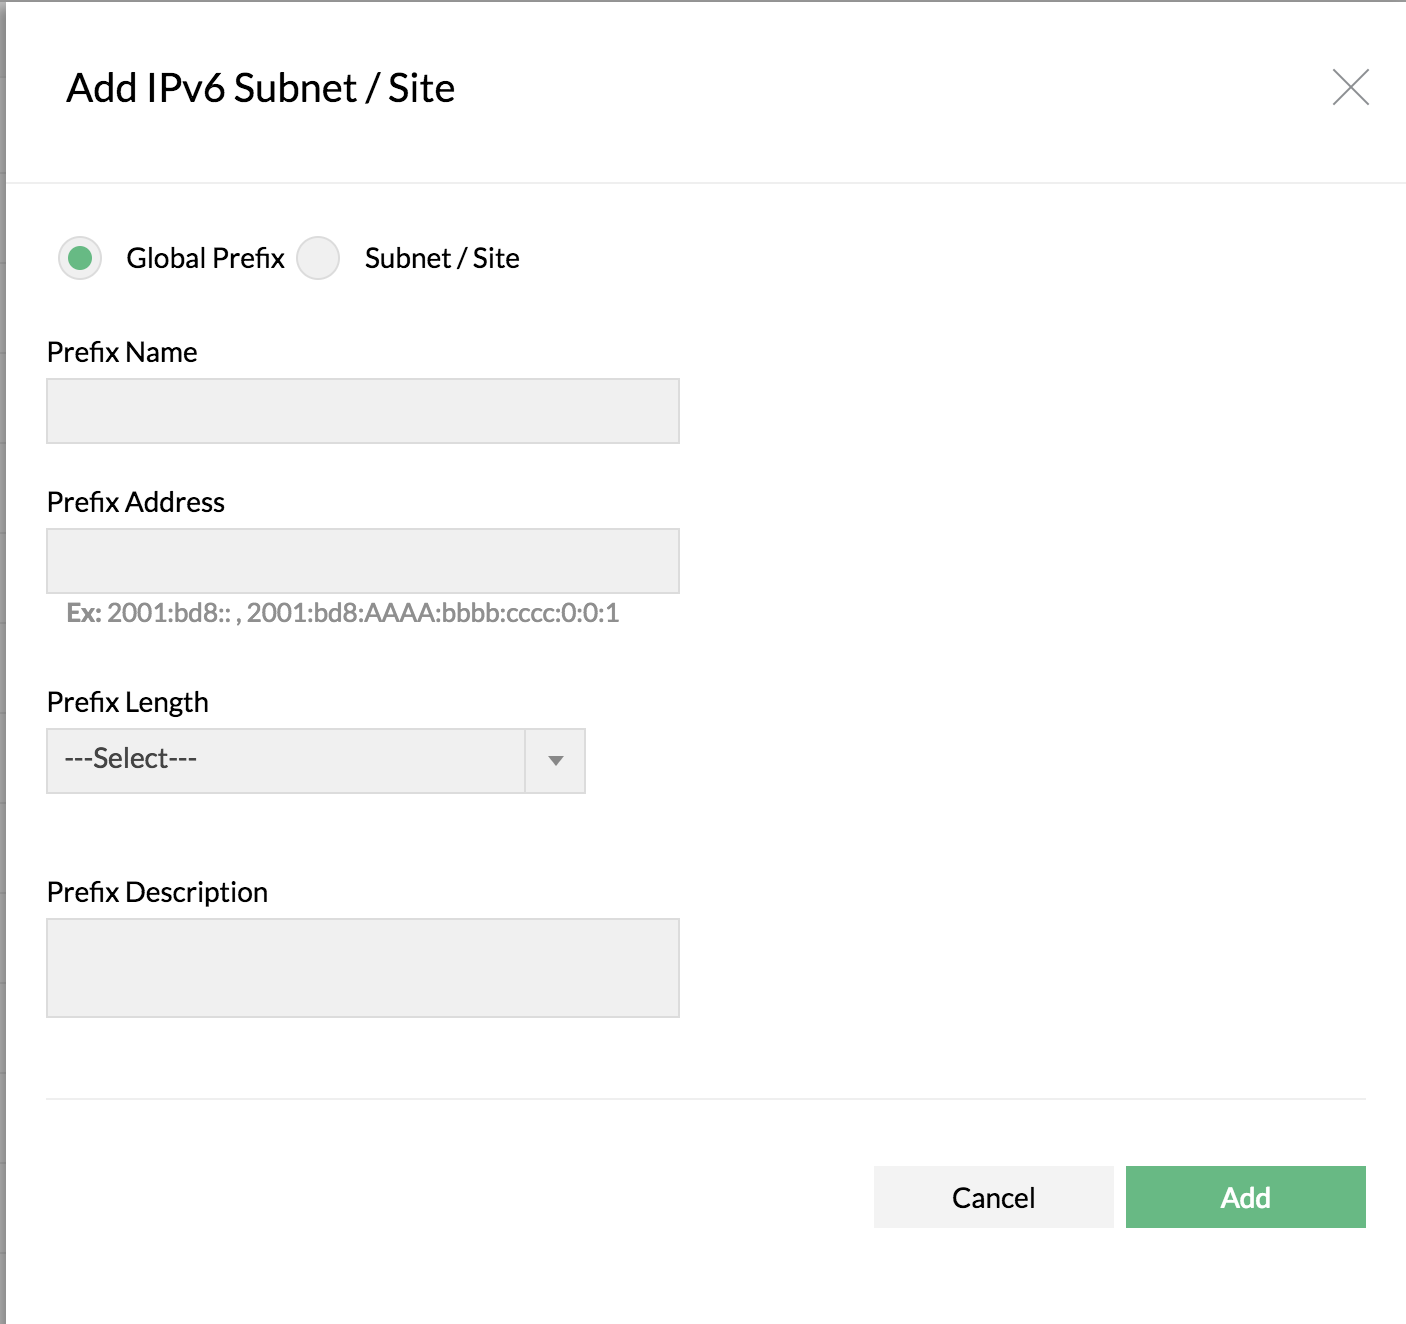
Global Prefix is the first thing you add to which you can add your sites and subnets to manage. You can add multiple global prefixes at a time. Below are steps to add a Global Prefix:
- Under Inventory, select IP Address Manager's subnets and click “Discovered v6 Hosts” from left tree.
- Choose Add IPv6 Subnet/Site by clicking '+' icon in the top right corner of the UI.
- Click the 'Global Prefix' option(radio button).
- Specify the name for the Global Prefix.
- Specify the Prefix Address, length and description.
- Click Add
When you add a Global Prefix, the hosts that match the defined prefix will automatically be moved to this Global Prefix from the Discovered v6 Hosts.

Adding IPv6 Subnets or Sites
Once you have added the Global Prefix, the next thing to do is to add sites to these Global Prefix and to add subnets to those sites. You can also add your subnets directly under the Global Prefix. To add a site or a subnet, follow the steps below:
- Under Inventory, select IP Address Manager's subnets and click “Discovered v6 Hosts” from left tree.
- Choose Add IPv6 Subnet/Site by clicking '+' icon in the top right corner of the UI.
- Click the 'Subnet/Site' option(radio button).
- Choose a Parent node under which you wish to add this subnet or the site. The parent node is usually the Global Prefix or the sites that you have added before.
- Specify the prefix name, address, length and description.
- Click Add
Scheduling Subnet Scanning
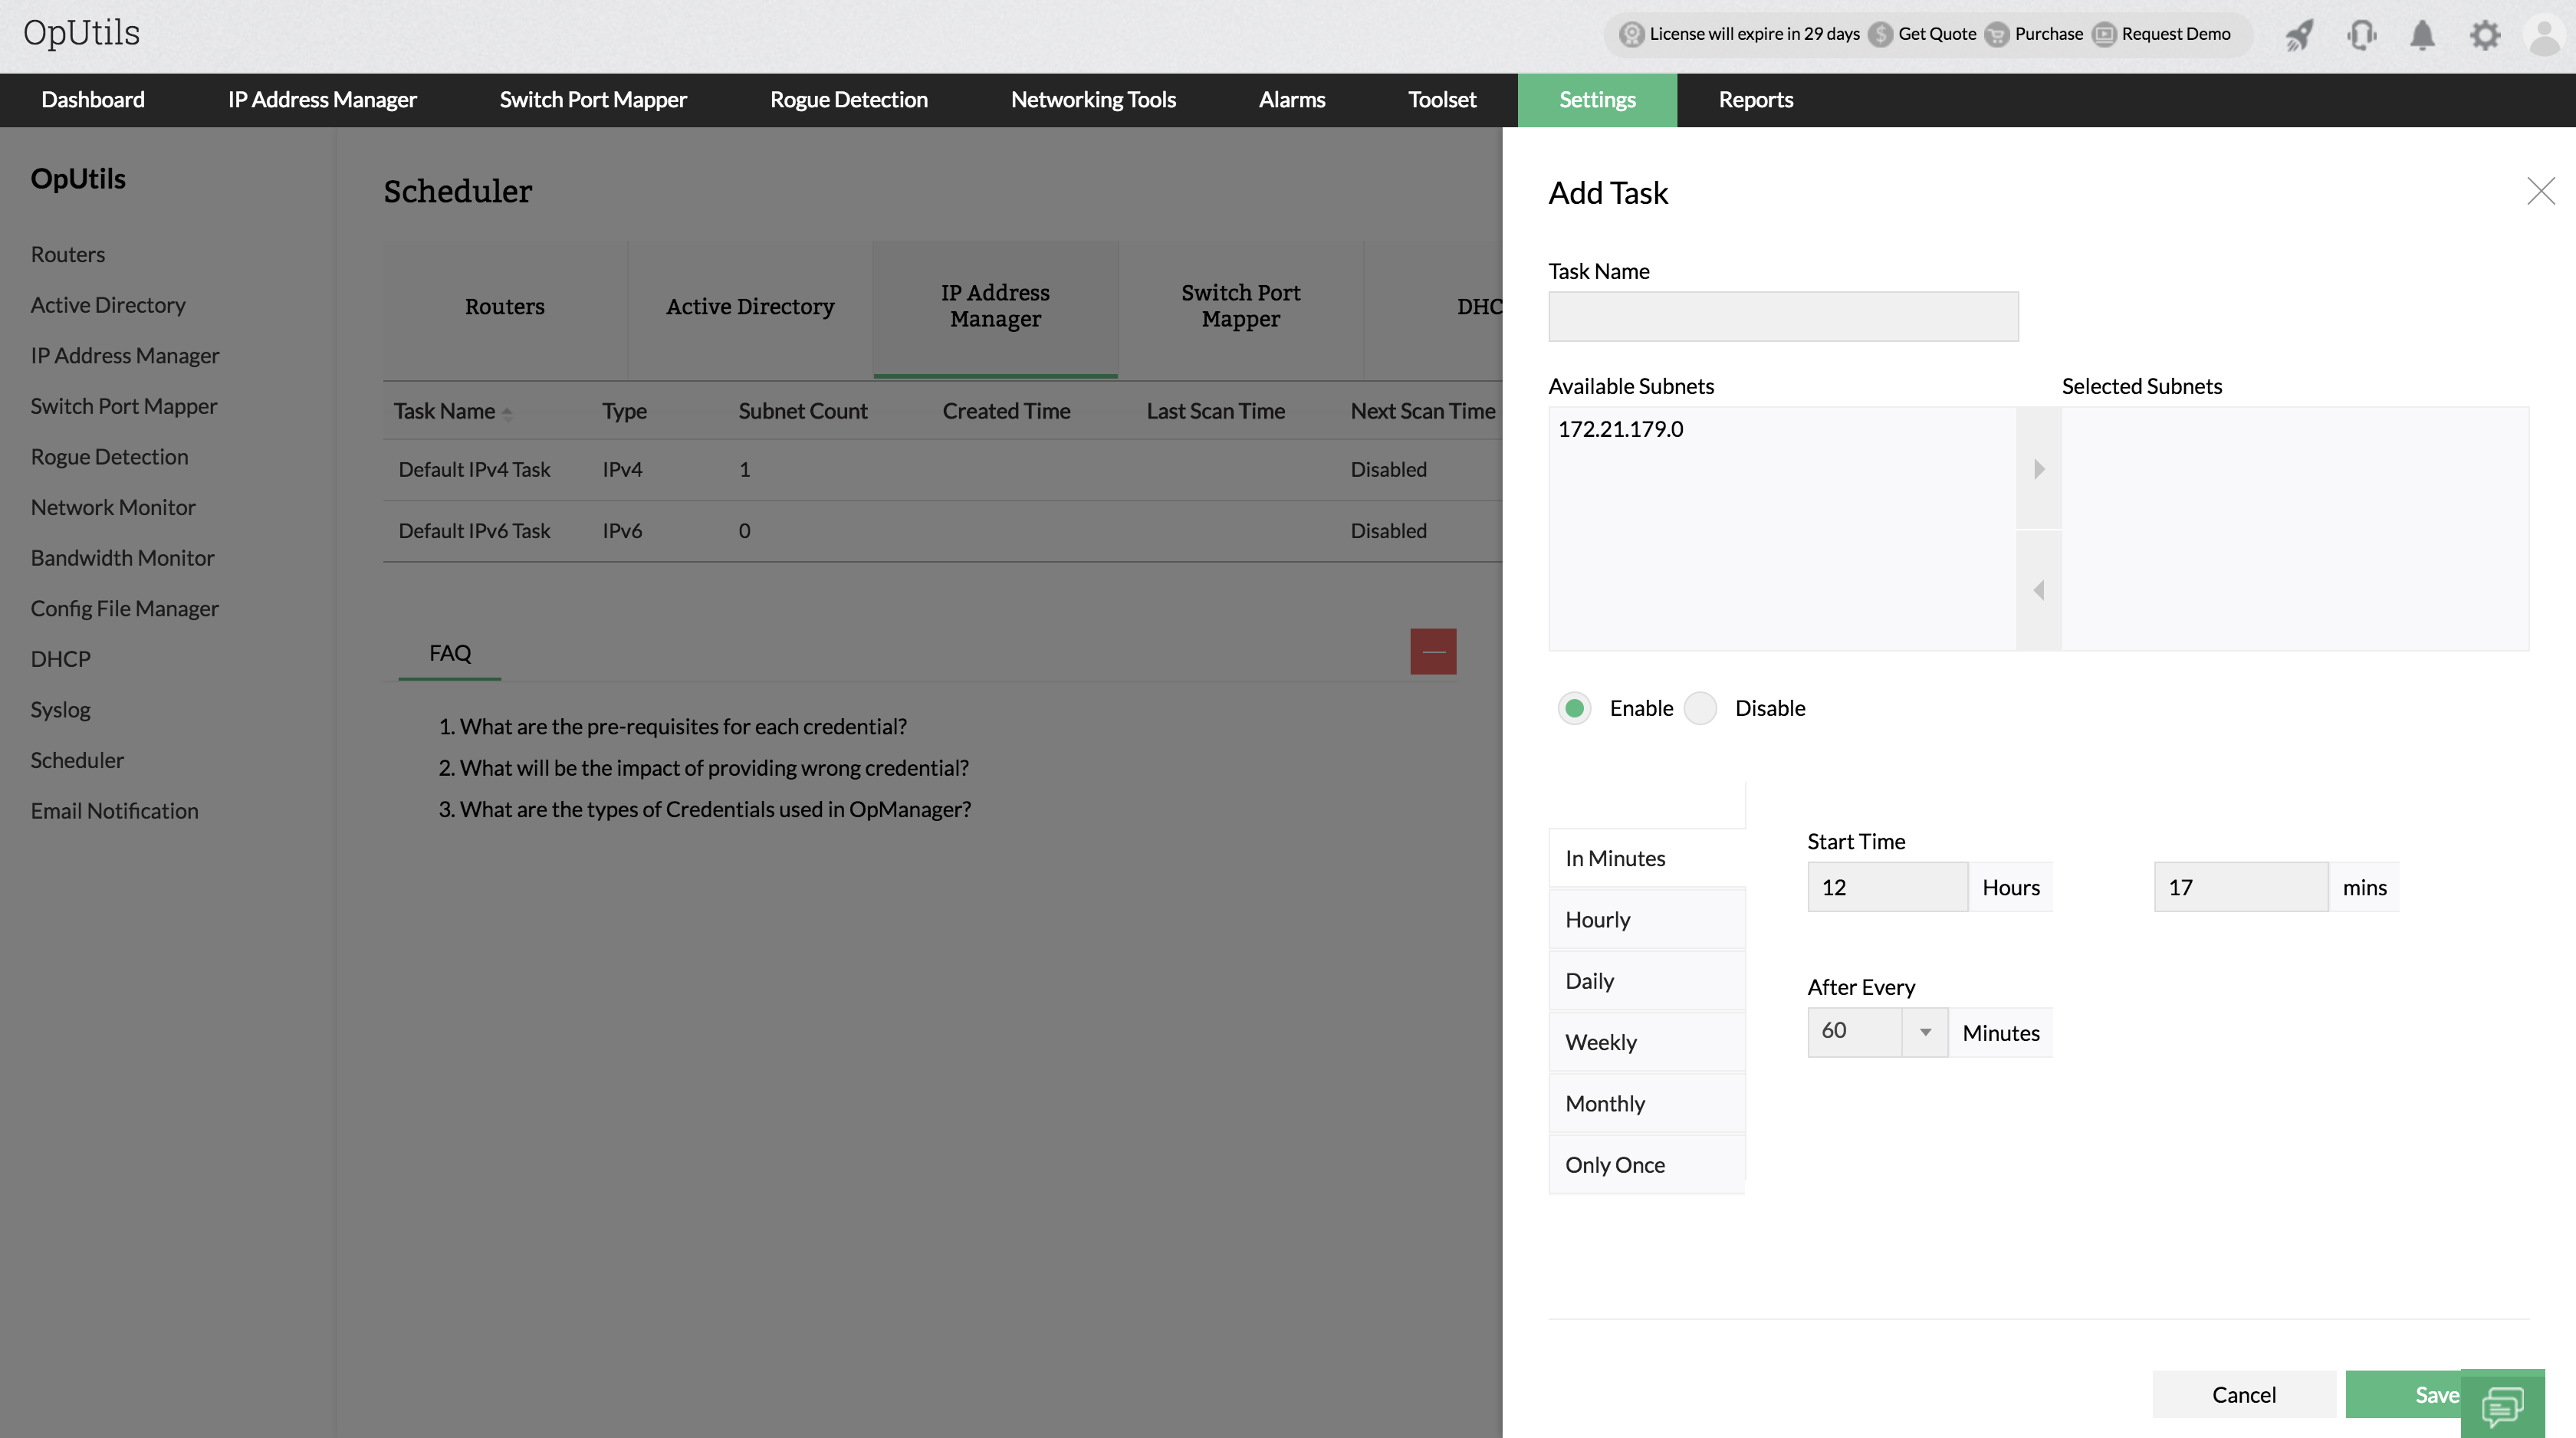
Click the Scheduler link to enable scanning of subnets periodically. This will list the details of the scheduled tasks that have been created already.
- Click Add task and choose the subnets to be added to this task for scanning. Same subnet cannot exist in multiple task. If you add a subnet that has been added in a different task before, it will be automatically removed from the previous task.
- Change the Scheduler Status to Enabled
- Specify the interval to perform the scan:
- Daily - to update everyday. You need to specify the starting time.
- Weekly - to update on specific day(s) in a week. You need to specify the starting time and the day(s) on which the update should happen.
- Monthly - to update on a specific day every month(s). You need to specify starting time, select a day and select a month/months.
- Once Only - to run the tool only once at the scheduled time.
- Click Save

Viewing IP Details
To view the current status of the IP Addresses,
- Select the subnet or a site from the tree.
- Choose the IP Details tab
- This will list all the IP Addresses in that site / subnet with its details like its current state, MAC Address, Forward lookup, Reverse lookup, DNS Status, etc. You can filter the view by the availability or the DNS status
Viewing IP History
IP history will maintain the previous state of an IP address and its changes. For example, if an IP address has been reassigned to a new device, the history will show the MAC Address to which it was assigned before.
To view the IP history
- Select the subnet or a site from the tree
- Choose the IP History tab
Thank you for your feedback!