Auto-enrolling users by importing data from external databases
ADSelfService Plus can connect to external databases — Oracle, MS SQL, MySQL, and PostgreSQL — and import enrollment data stored in them to automatically enroll users. This is useful when the necessary enrollment data already exists in an external database, avoiding the need for users to enroll manually. Before importing data, ensure that the required authenticators are configured under the relevant policies.
How it works
Administrators first create a data source connection to the external database, then configure a fetcher that queries it using a custom SQL query and maps the results to a selected policy and authenticator type. Once set up, enrollment data can be fetched manually on demand or automatically via a scheduler that runs at a configured frequency.
Prerequisite: You must have administrator-level access to the ADSelfService Plus portal to configure external database enrollment.
Import data formats
The data imported from the external database must follow the formats specified for each authenticator in the table below.
Note: The database header names listed are samples — you are not required to use the exact same names. sAMAccountName is mandatory and must be a valid username present in AD.
| Authenticator | Database header name | Allowed format |
|---|---|---|
| Security Questions and Answers | question | Must be a security question. Example: What is your favourite colour? |
| answer | Must be the corresponding answer. Example: Yellow. | |
| AD Security Questions | answer | Must be the corresponding answer to the security question. Example: Yellow. |
| SMS Verification | mobile | Must contain numbers 0–9 only. |
| Email Verification | Must be a valid email address. | |
| Duo Security | sAMAccountName | Must be a valid user in AD. |
| Google Authenticator | googleauth secret key | Must contain letters A–Z or a–z and numbers 2–7. |
| Microsoft Authenticator | microsoftauth secret key | Must contain letters A–Z or a–z and numbers 0–9. |
| Zoho OneAuth TOTP | zohooneauth secret key | Must contain letters A–Z or a–z and numbers 0–9. |
| Custom TOTP – Software token | customtotp secret key | Must contain letters A–Z or a–z and numbers 0–9. |
| Custom TOTP – Hardware token | customtotp hardware serial number | Must contain letters A–Z or a–z and numbers 0–9. |
| customtotp secret key | Must contain letters A–Z or a–z and numbers 0–9. |
Note:
- Secret key length must be between 16 and 350 characters (inclusive).
- Serial number length must be between 4 and 250 characters (inclusive).
Configuration steps
Step 1: Connect to the external database
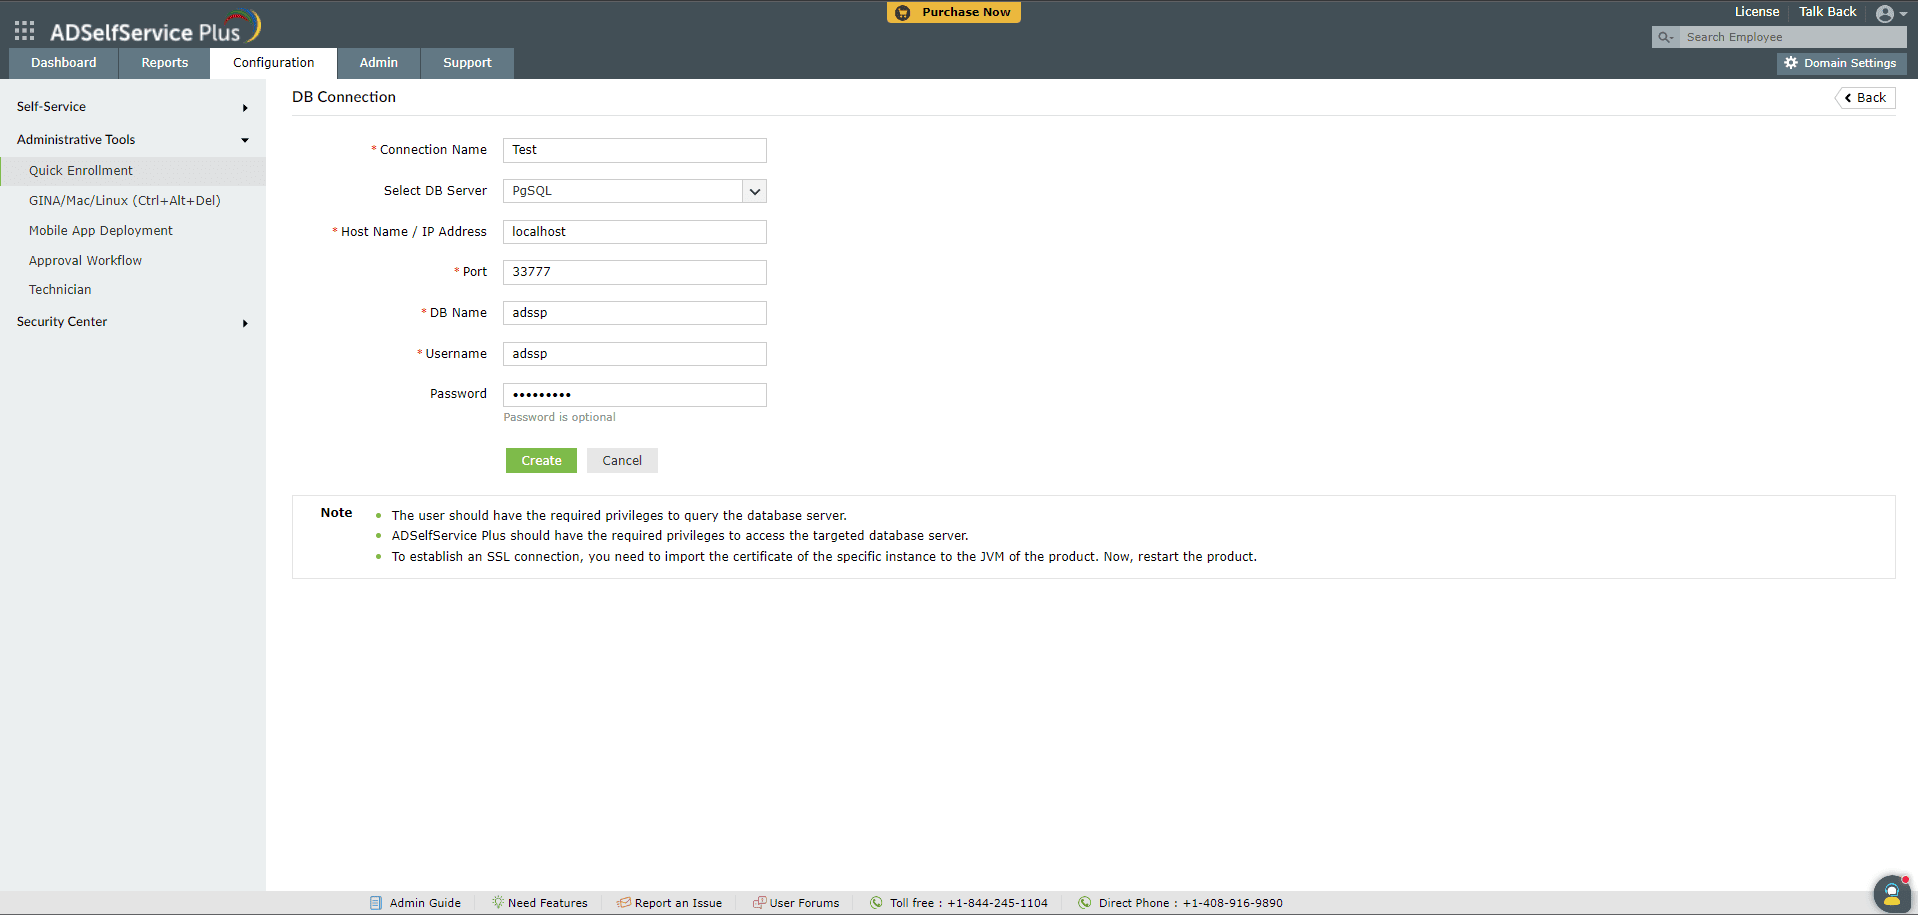
- Log in to the ADSelfService Plus admin portal and navigate to Configuration > Administrative Tools > Quick Enrollment > Import Enrollment Data from External Database.
- Click + Add New Data Source.
- Enter a Connection Name for the data source.
- From the Select DB Server drop-down, select the type of database to connect to.
- Enter the Host Name / IP Address and Port number of the database server.
- In the DB Name field, enter the name of the database that stores your enrollment data.
- Enter the Username and Password of a user with query privileges on the database server.
- Click Create.
Note:
- The user account must have the required privileges to query the database server.
- ADSelfService Plus must have the required privileges to access the target database server.
- To establish an SSL connection, import the certificate of the specific database instance into the JVM of ADSelfService Plus, then restart the product.
Step 2: Configure a fetcher to import data
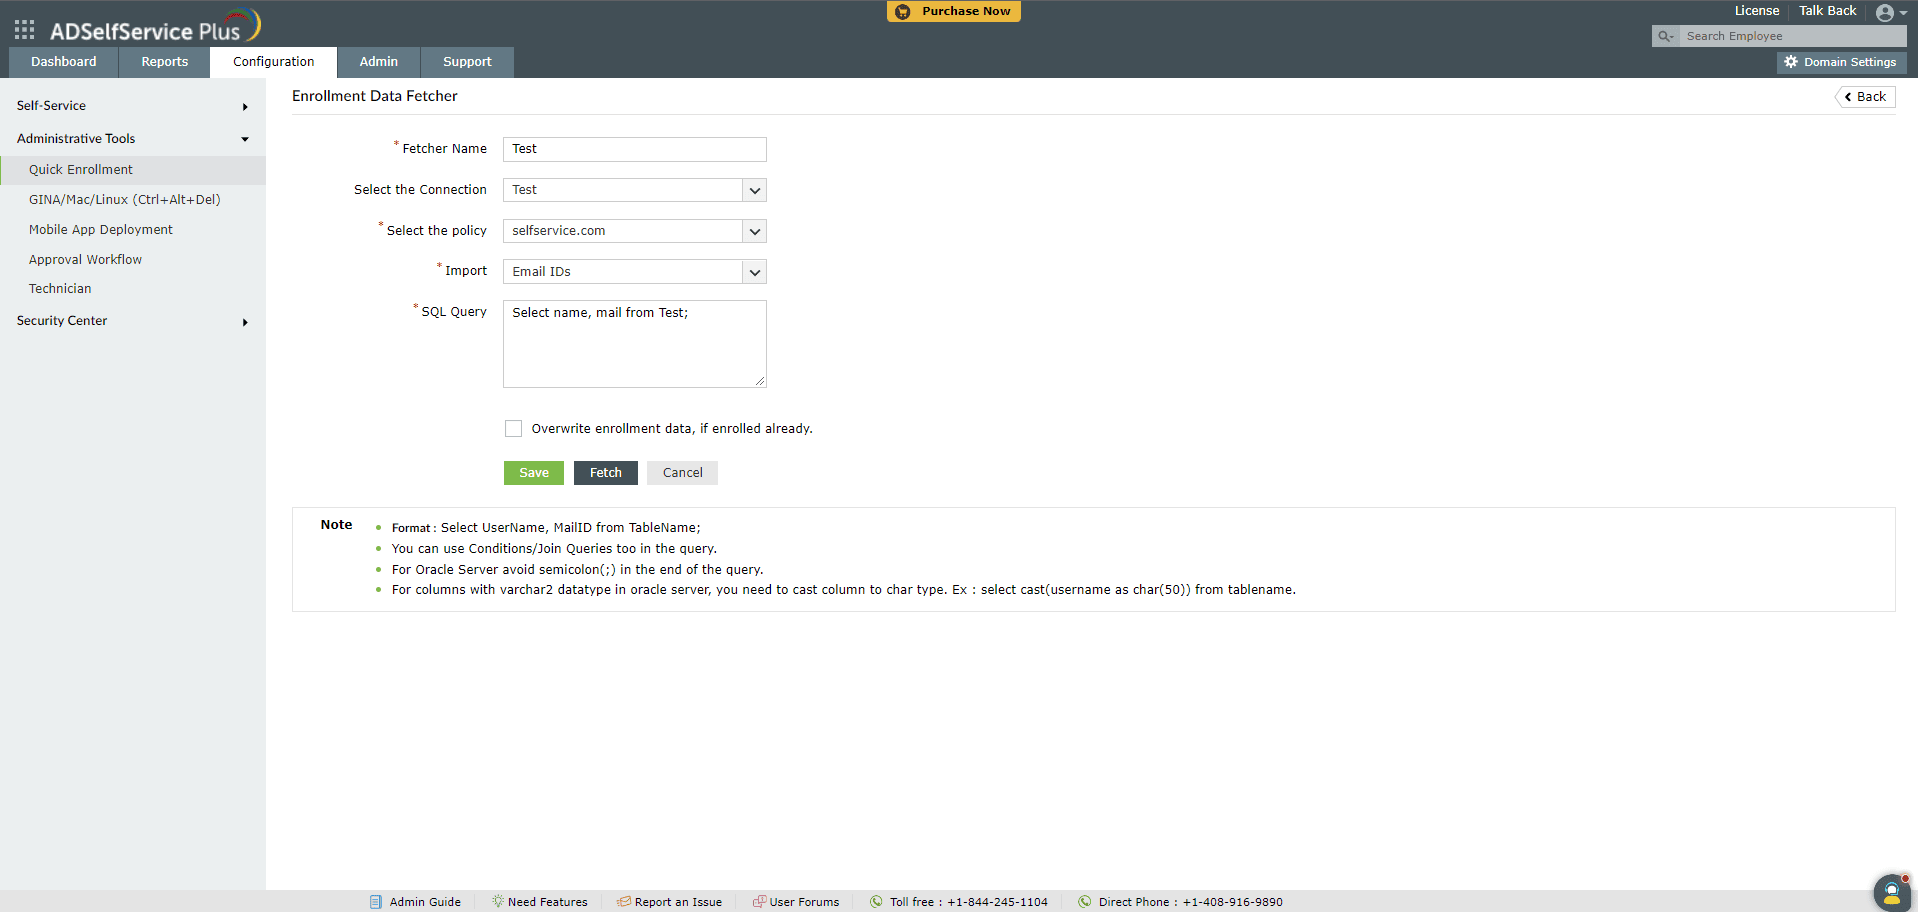
- On the Import Enrollment Data from External Database screen, click + Add New Fetcher.
- Enter a name in the Fetcher Name field.
- From the Select the Connection drop-down, select the database connection created in Step 1.
- From the Select Policy drop-down, select the policy to which the enrollment data applies. To import data for local users (users who are not part of AD but have accounts on specific machines), select localusers.domain.
- From the Import drop-down, select the type of enrollment data to import.
- In the SQL Query field, enter the query to fetch the required data from the database. Ensure that the selected authenticators match the order of columns in the query.
- Sample query: SELECT UserName, Question, Answer, CustomTOTPSecretKey, CustomTOTPHardwareSerialNumber FROM TableName;
- Click Save.
Importing enrollment data
Once the fetcher is configured, enrollment data can be imported in two ways:
- Manually: Click the Fetch Again icon to immediately import enrollment data for new domain users added to the database.
- Automatically: Set up a scheduler to automatically fetch and update enrollment data for new domain users at regular intervals.
You can also import and enroll users through a CSV file. See [Auto-enrolling users by importing data from a CSV file].