Schedule Reports
Using the Schedule Reports [ ] option available at the top-right of each report generation page, you can automatically generate and email reports to the admin, managers, and other stakeholders. This feature triggers automated, scheduled reports to keep stakeholders informed without any manual intervention.
How the report scheduler works
This feature uses the ADSelfService Plus scheduling engine to automatically generate reports at specified intervals and distribute them via email to designated recipients. The system maintains scheduler configurations, applies filters, formats reports according to specified preferences, and handles the complete automated reporting workflow.
Limitations
- Attachment size: Email delivery is restricted by your mail server’s attachment size limits.
- Connectivity dependency: AD-related reports depend on domain connectivity; outages or replication delays may result in incomplete data.
- Server load: Multiple concurrent report generation schedules can increase server load. You can mitigate this using load balancing configurations to distribute the workload across multiple server nodes. Learn more
- Network path dependency: Archiving to network locations may fail if the path is unavailable or slow.
Prerequisites
- You must have administrator or technician-level access to the ADSelfService Plus portal to schedule reports.
- Mail server settings must be configured in ADSelfService Plus to send the reports by email. Learn more
- To store reports on a network path, ensure that the location is valid and ADSelfService Plus has read/write access to it.
Configuring report schedules
To schedule reports, perform the following steps:
- Navigate to your directory > Reports > Schedule Reports button to view the list of schedulers.
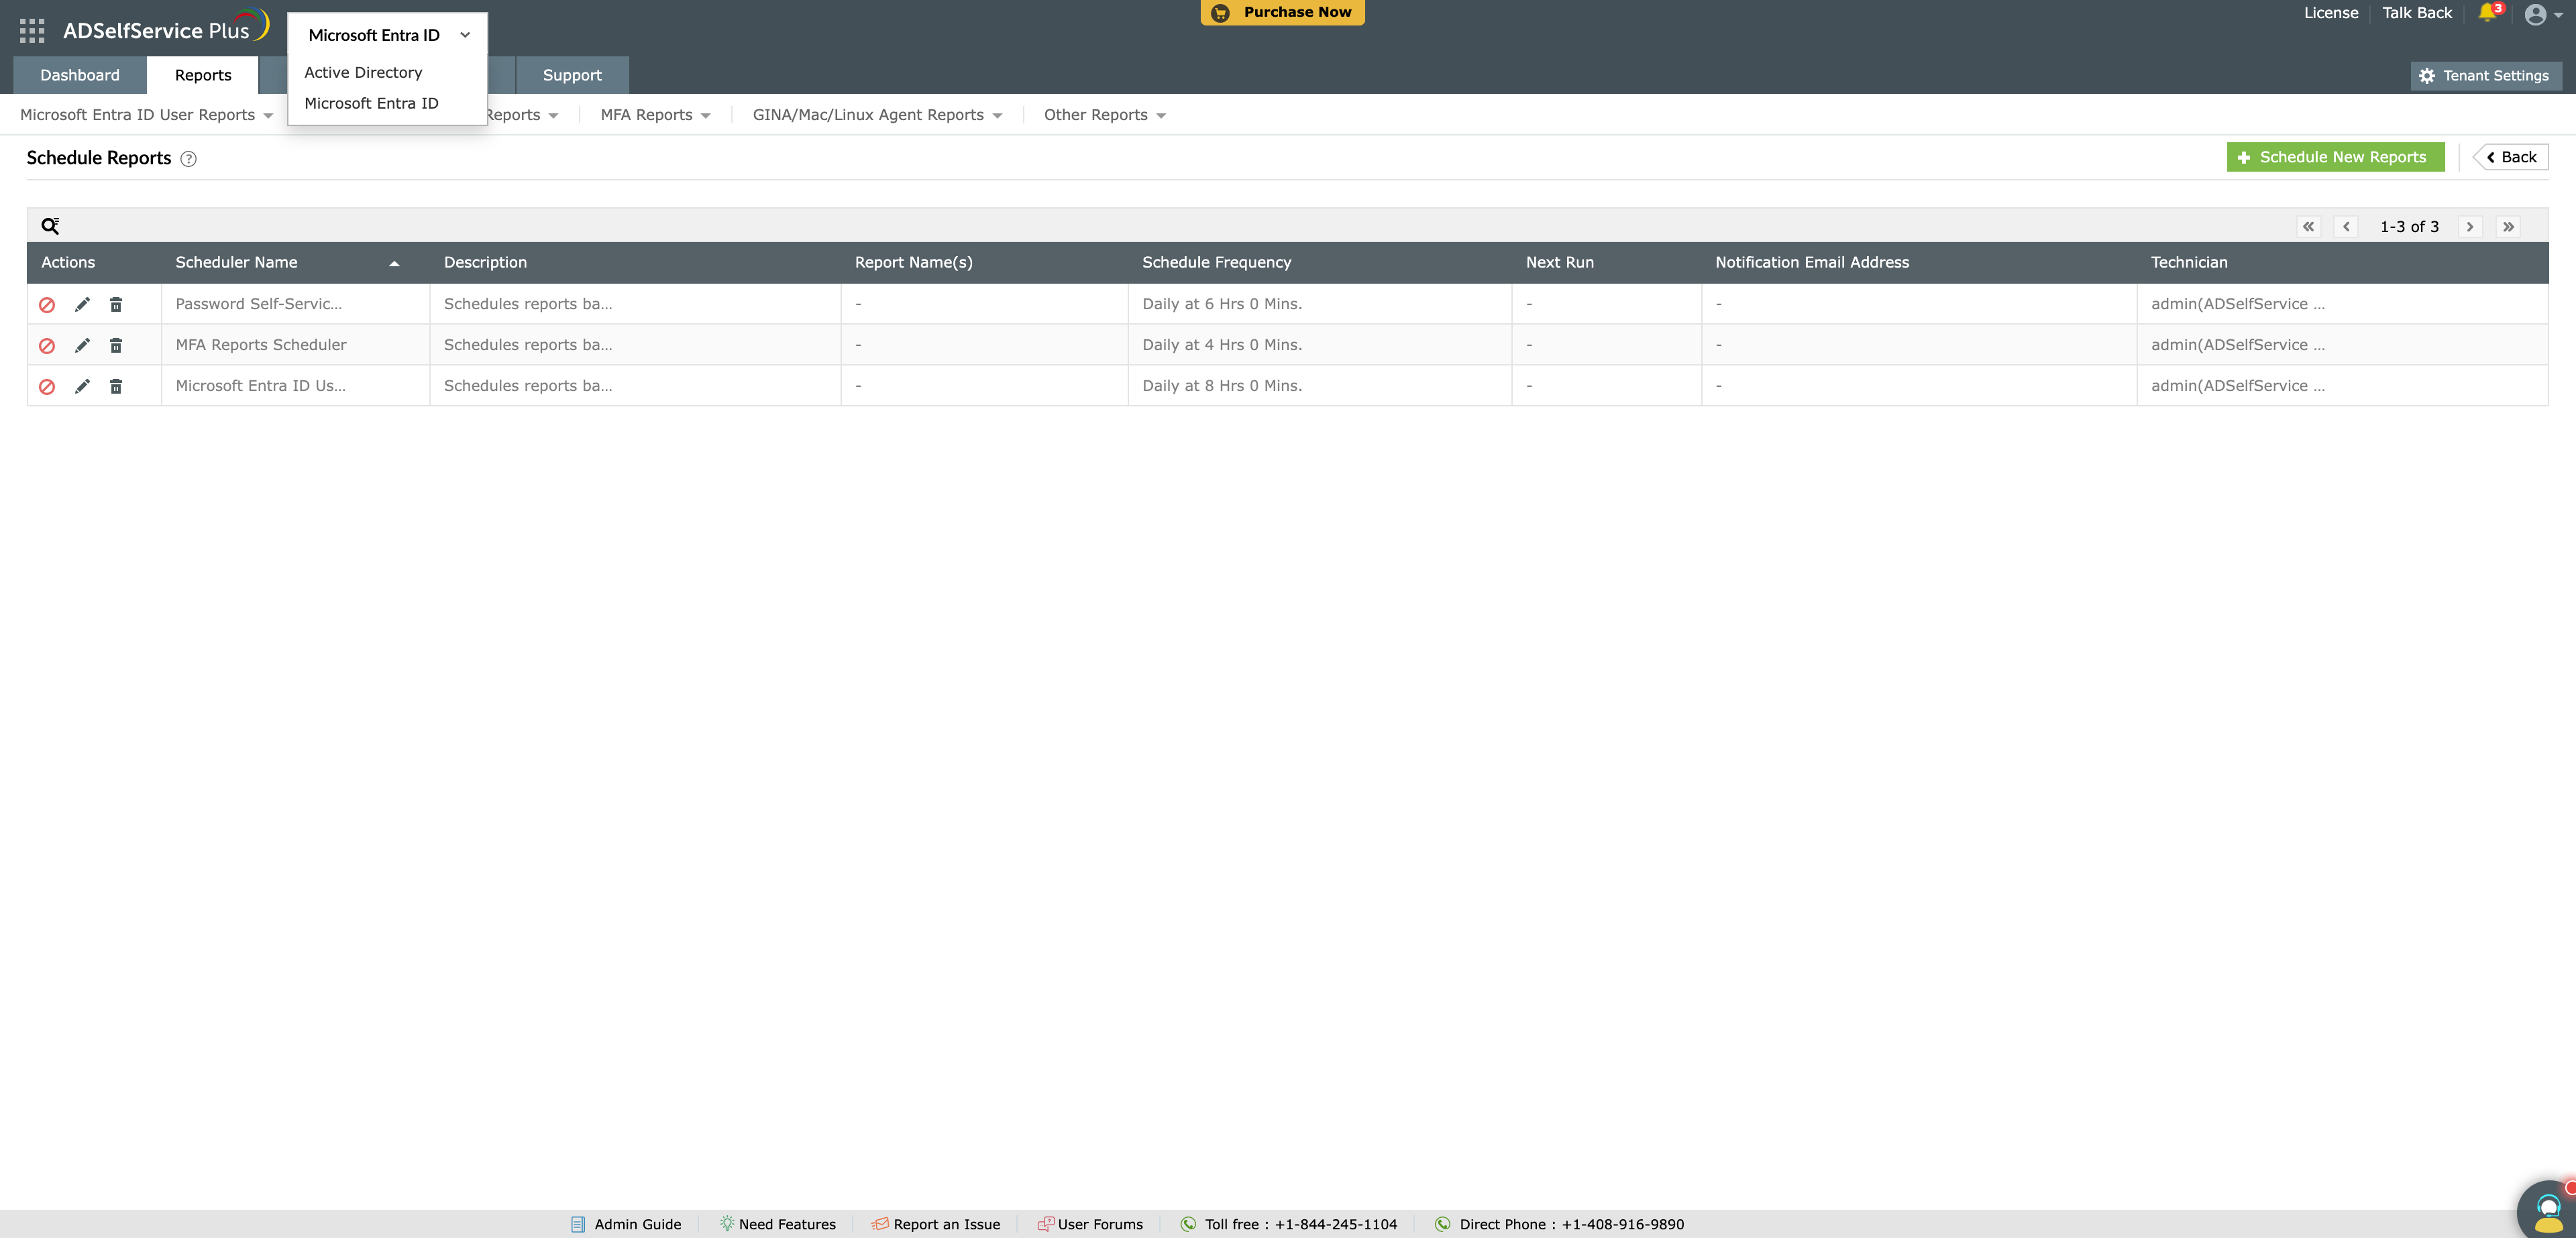
- To edit an existing scheduler, click the edit icon [
 ]. if you wish to create a new scheduler, click the Schedule New Reports button.
- Enter the Scheduler Name and add a description using the Add Description option.
- Use the Select Domain/Tenant section to select the desired domain or tenant and the specific OUs or domains to include in the report.
- In the Select Reports section, select the Report Type. From the list available, select the reports required. If required, filters can be applied to the reports being generated by clicking on the edit icon [
 ]. next to the chosen report.
 Note: Active Directory Reports can be filtered based on specific subsets such as the time remaining for expiry, disabled users, or smart card users.
 - Under Select Duration, specify the time at which the updated reports are to be generated regularly.
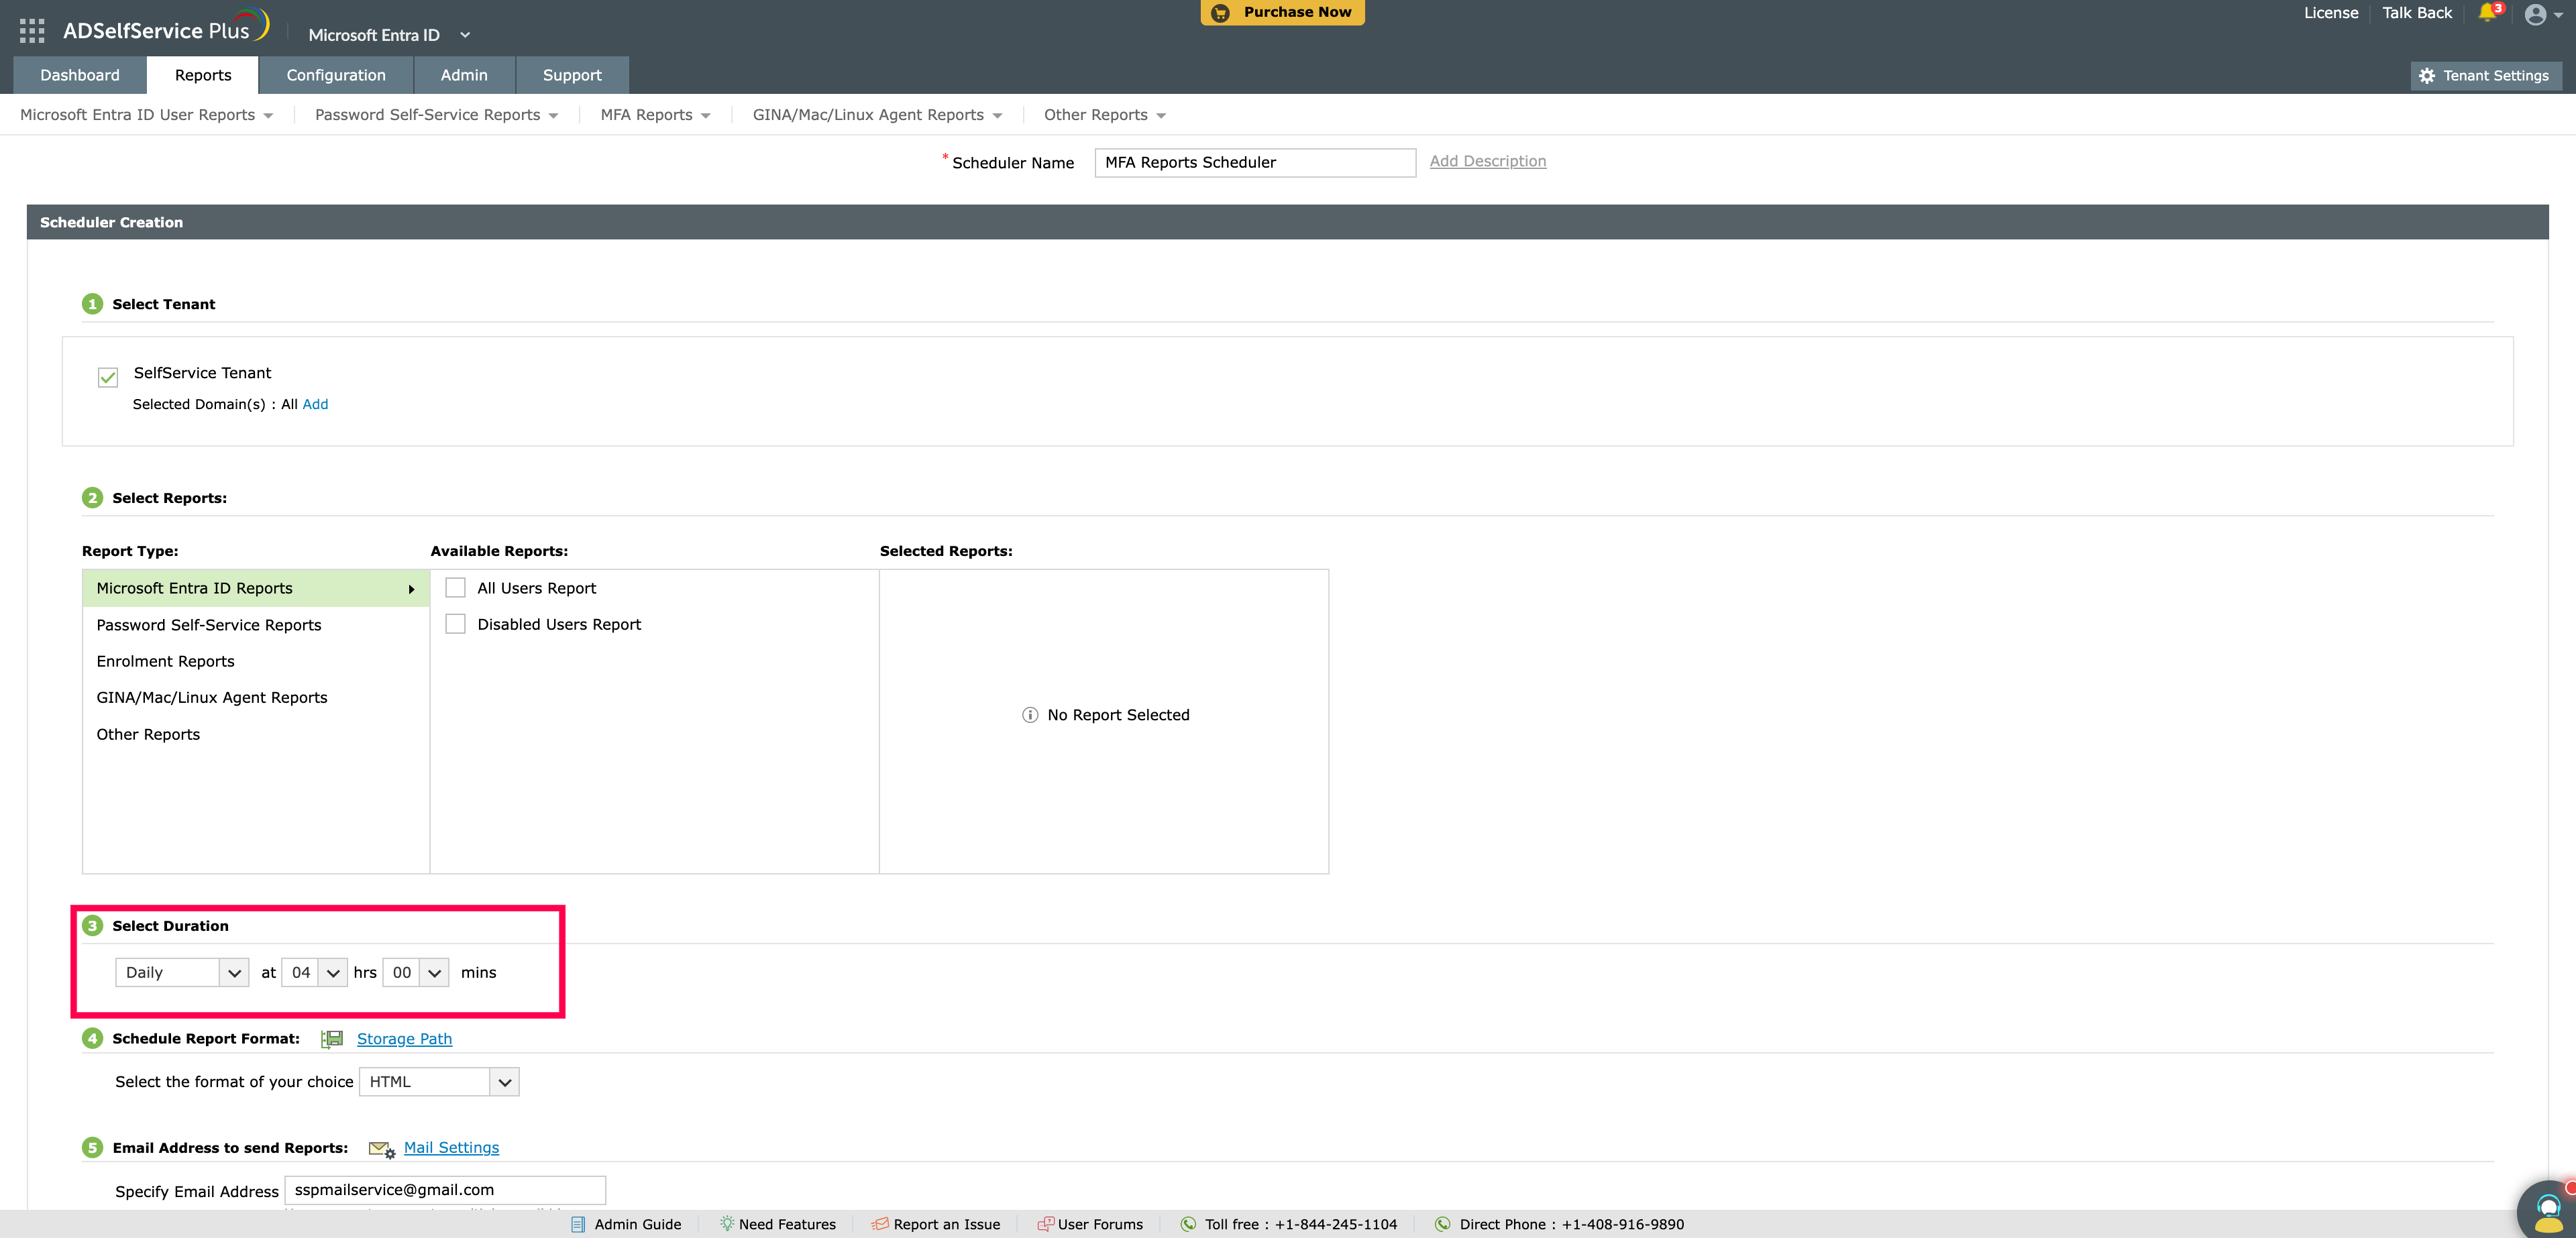
- In the Schedule Report Format section, select the desired report format. You can also click on the Storage Path option to specify the destination for storing the generated reports.
- Under the Email Address to send Reports section, use the Specify Email Address field to enter the email address to which the generated reports need to be sent. Click Mail Settings, and in the tab that pops up, specify the subject and message of the email. You can also select the Send as ZIP format checkbox if you wish to send the reports as a compressed ZIP file.
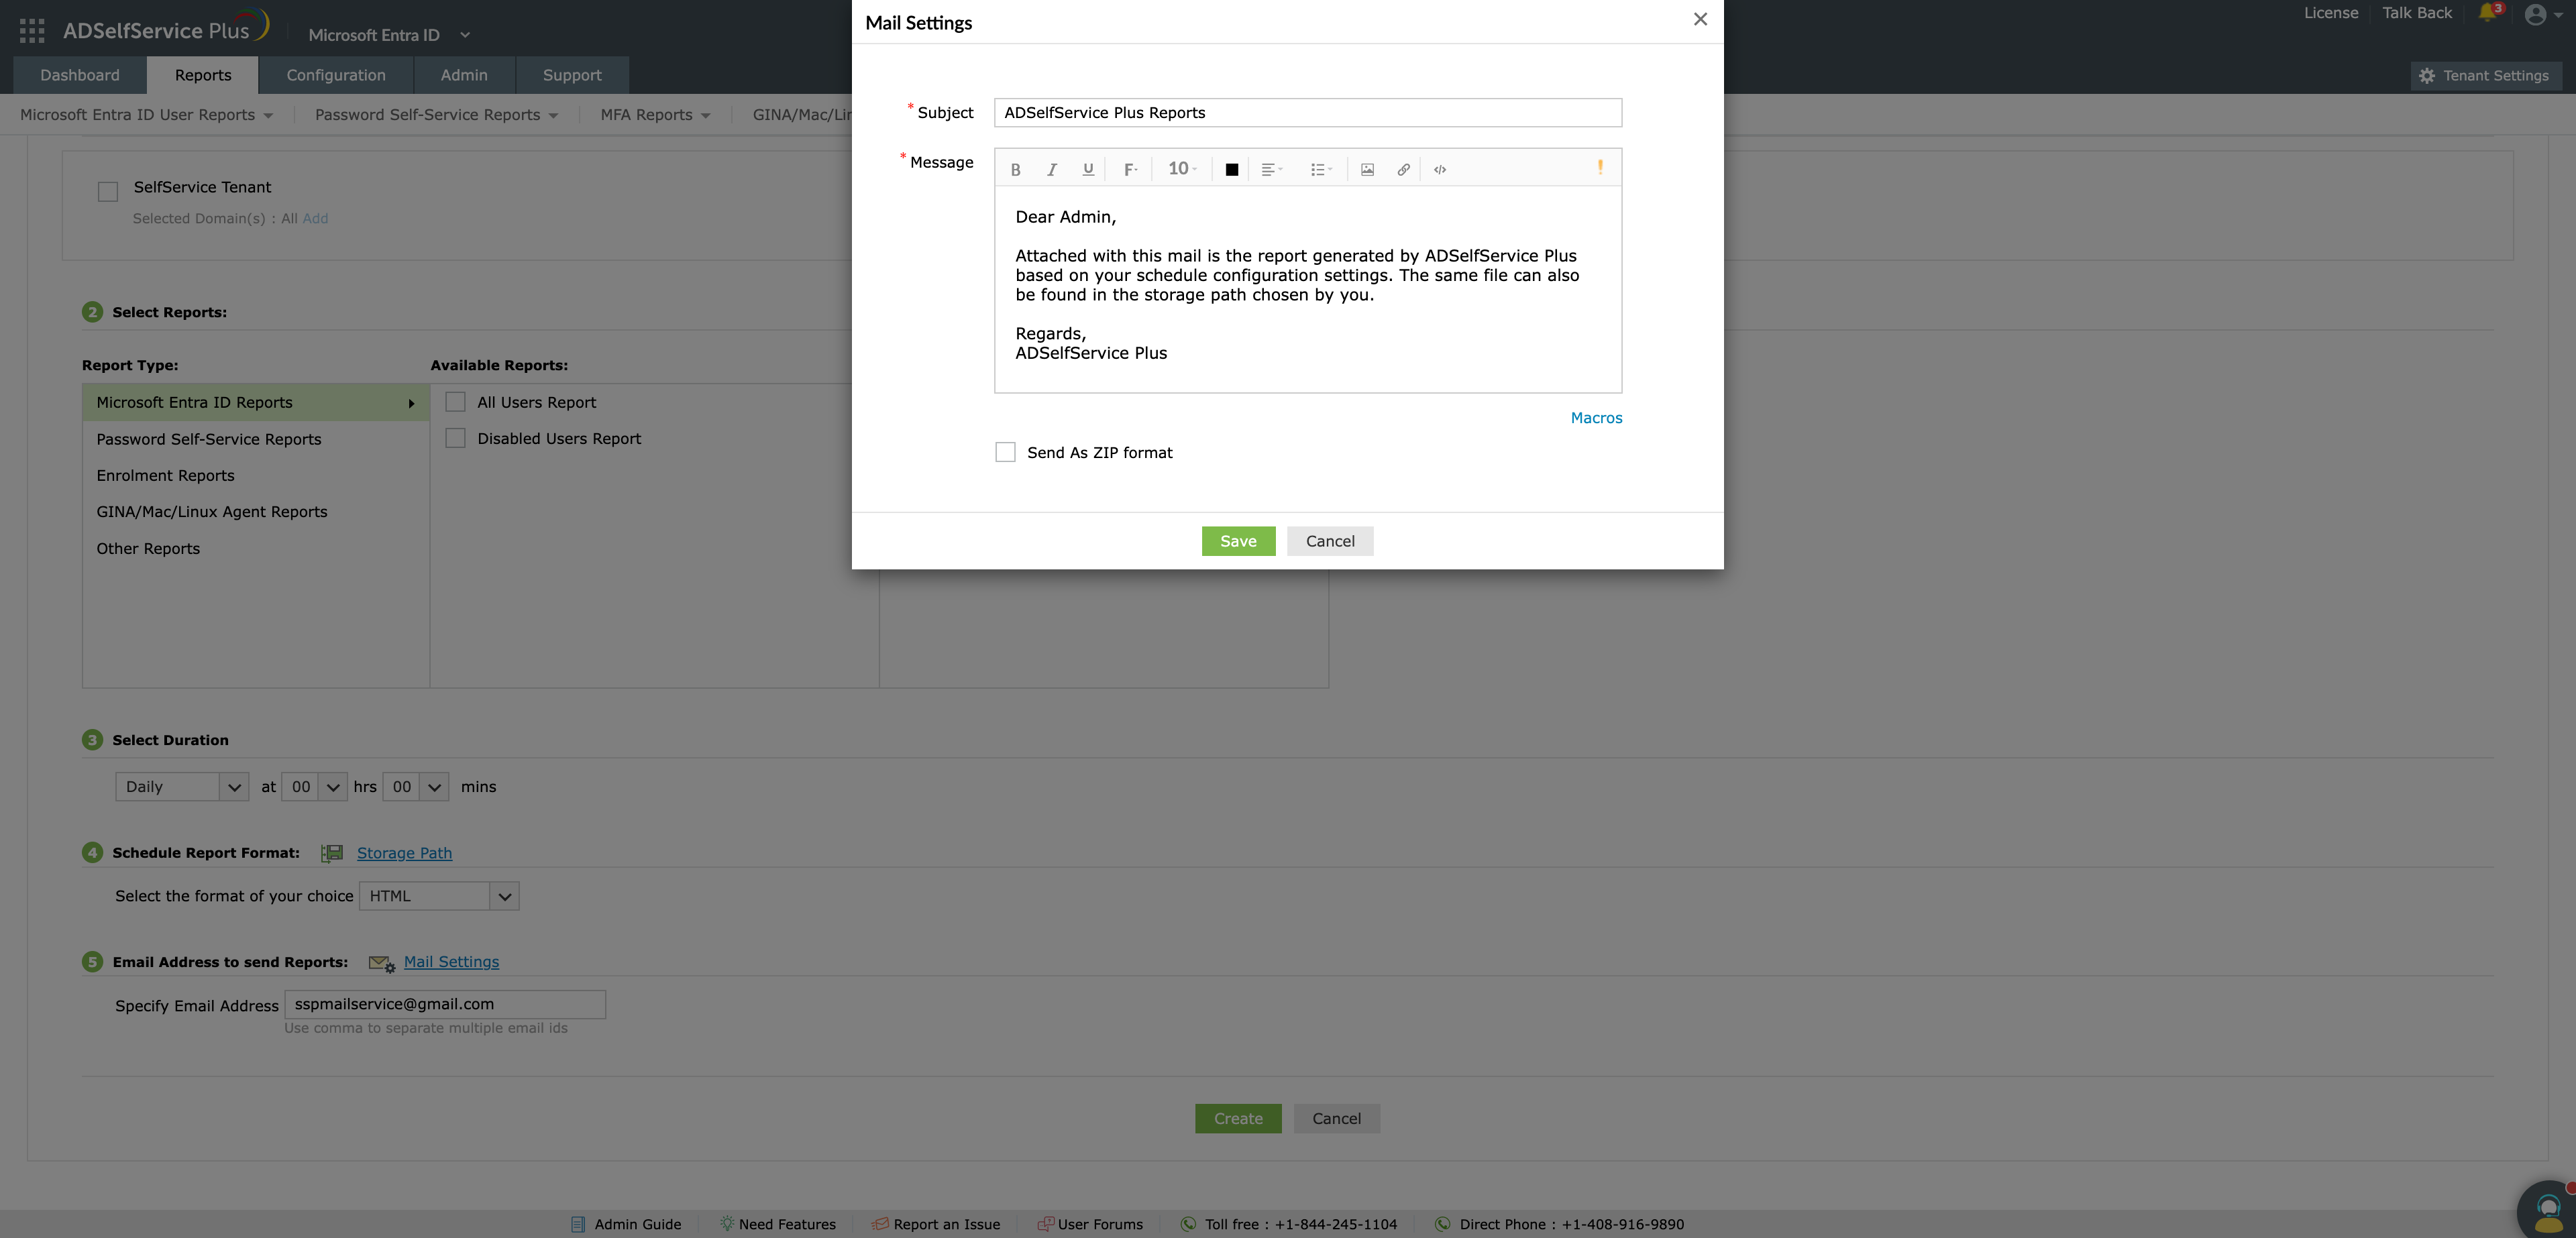
- Click Save in the Mail Settings pop-up.
- Click Update if you are making these changes to the existing schedule. If you are creating a new schedule, click Create.
Tips
- Stagger schedule times to avoid multiple heavy reports being generated simultaneously.
- For large reports, consider using a network location instead of email attachments.