
ADSelfService Plus in action
How to simplify student record management using ADSelfService Plus
On-premises | Cloud applications
Managing student records
Accurate student record mangement, including information such as mobile phone numbers, photos, and addresses, is crucial as staff use this information to share student progress with parents. In addition to this information, institutions will also want to record and track other details on students like the health, academic, and attendence records. If the help desk has to manually manage these student records, it'll drastically increase administrative overhead.
Keep user accounts up-to-date with Directory Self-Update
This article will walk you through the process of easing student record management activities without compromising data security by providing students the option to self-update their profile information using ADSelfService Plus’ Directory Self-Update feature.
- Force AD update: Force students to update important Active Directory (AD) attributes by marking them as mandatory in the self-update form. The important attributes can be default attributes like email address or mobile phone number, or can be custom attributes like Height, Weight, etc.
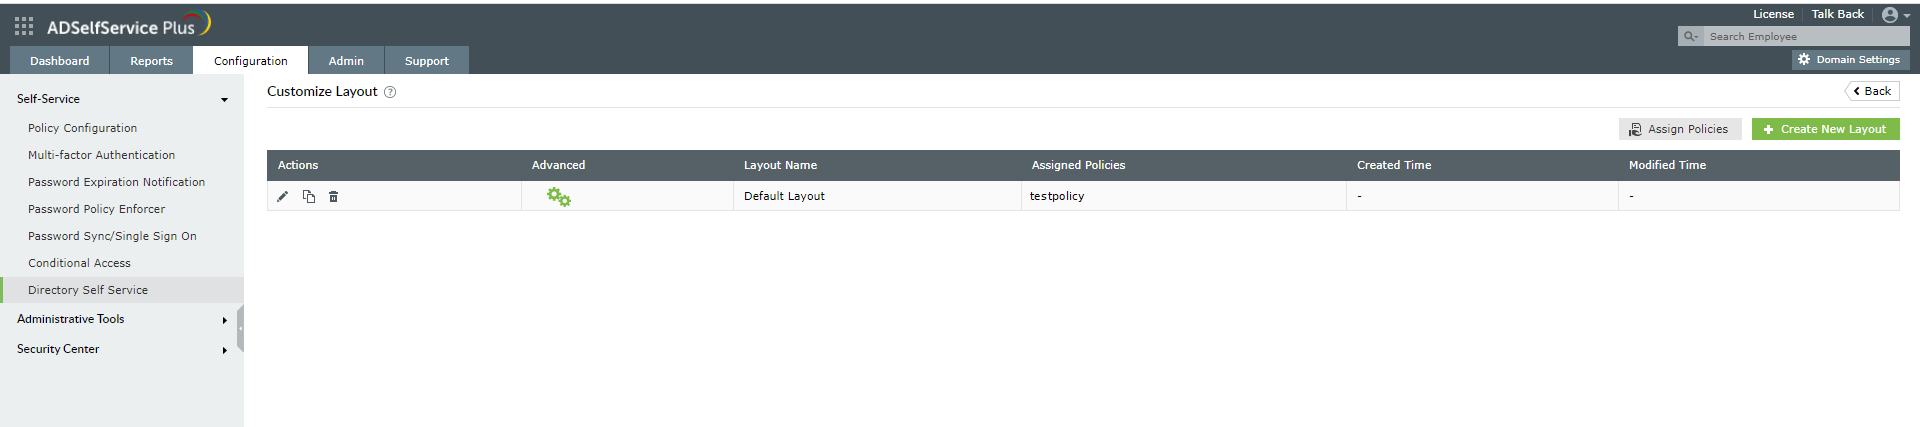
- Go to the Configuration → Directory Self-Service → Self-Update Layout..
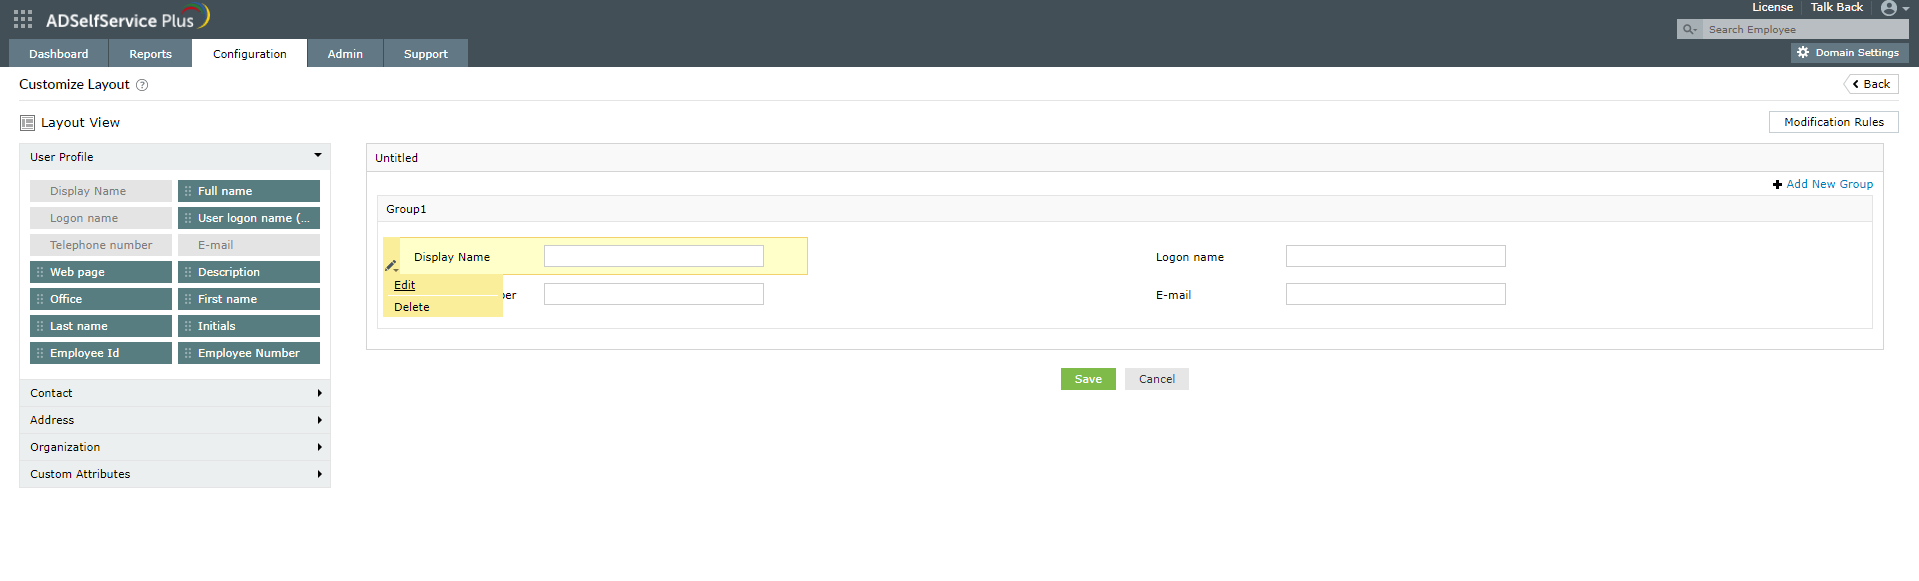
- You can choose to edit an existing layout or choose to Create New Layout.
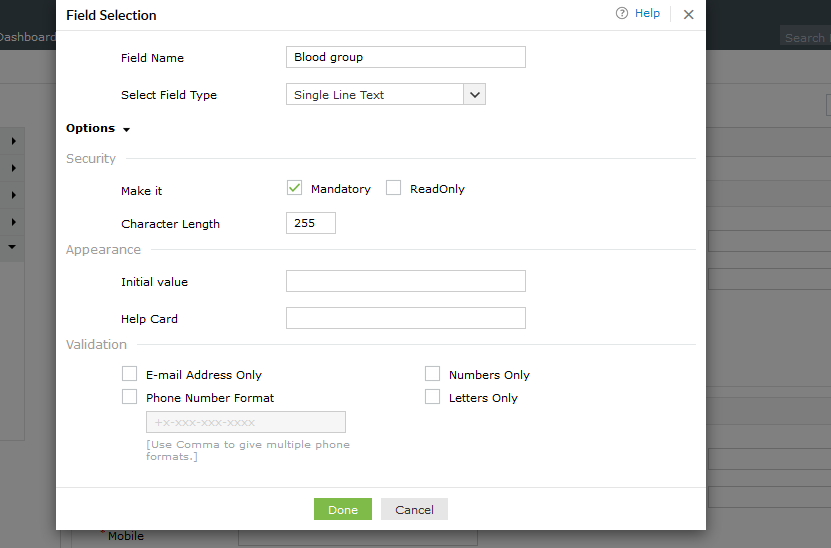
- In the window that opens, navigate to the fields you want to be mandatory, and click the Edit button.
- In the Field Selection window, select Mandatory in the Security section. Click Save.

Now when students log in to the user portal, they will be required to update the mandatory fields. They won't be able to switch tabs until they do.
- Set modification rules: Auto-populate the values of certain attributes whenever a student updates the corresponding attribute.
- Go to the Configuration → Directory Self-Service → Self-Update Layout..
- You can choose to edit an existing layout or choose to Create New Layout.
- In the window that opens, click the Modification Rules tab in the top-right corner.
- Click Create New Rule → Add Conditions.
- Select the attribute whose value change has to be checked, and enter the condition that has to be satisfied. Also, fill in the attribute values that will be updated if the specified condition is met. Add multiple conditions, and link them using AND or OR conditions.

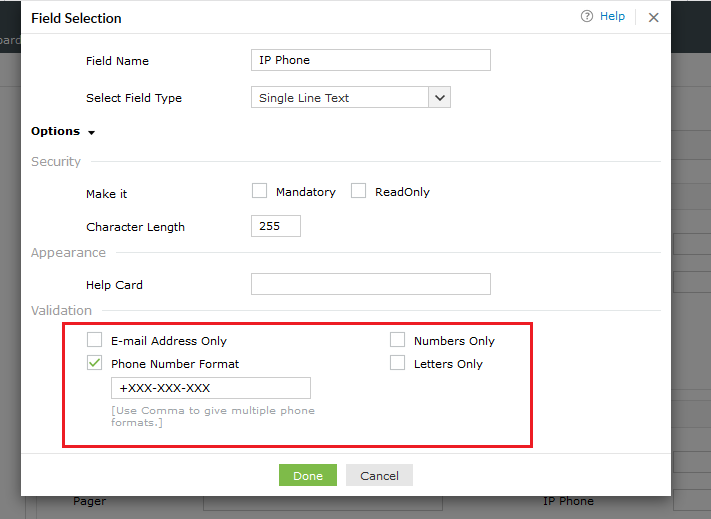
- Validate data: Help students avoid accidental errors by specifying whether the entered value in the self-update form should be an email address, mobile number, or contain only numbers or only letters.
- Go to the Configuration → Directory Self-Service → Self-Update Layout..
- You can choose to edit an existing layout or choose to Create New Layout.
- Select the field that you want to validate data, and click Edit.

- In the window that opens, navigate to the Validation section, and select the format that you want depending on the Field Name.
You have now successfully configured ADSelfService Plus to simplify student record management.