
What is password sprawl?
Password sprawl occurs when organizations use multiple applications, and the identity management for each application is independent. In such scenarios, users are forced to remember multiple passwords, and must authenticate themselves each time they want to access an application.
Disadvantages of improper identity management:
- Users have to remember multiple sets of credentials.
- Overload of help desk calls for password reset and other operations.
- Technicians need to manage user identities for multiple applications.
Sounds chaotic, right?
How to prevent password sprawl
Wouldn't it be better to have a solution that helps users log in to all applications in just one go?
Single sign-on (SSO) does exactly that. It's an authentication scheme that allows users to log in to several applications by authenticating them only once.
Benefits of SSO:
- Users don't have to remember multiple passwords.
- Authentication is performed once for all applications. Once a user is successfully logged in to one application, they will be logged in to the rest of the applications automatically.
Prevent password sprawl with ADSelfService Plus, a single sign-on solution
ManageEngine ADSelfService Plus supports SSO for a large array of applications including G Suite, Office 365, Azure, Zendesk, Salesforce, etc. With ADSelfService Plus, you can configure any number of these applications for SSO and provide users easy, one-click access to them without forcing them to remember multiple passwords or log in multiple times.
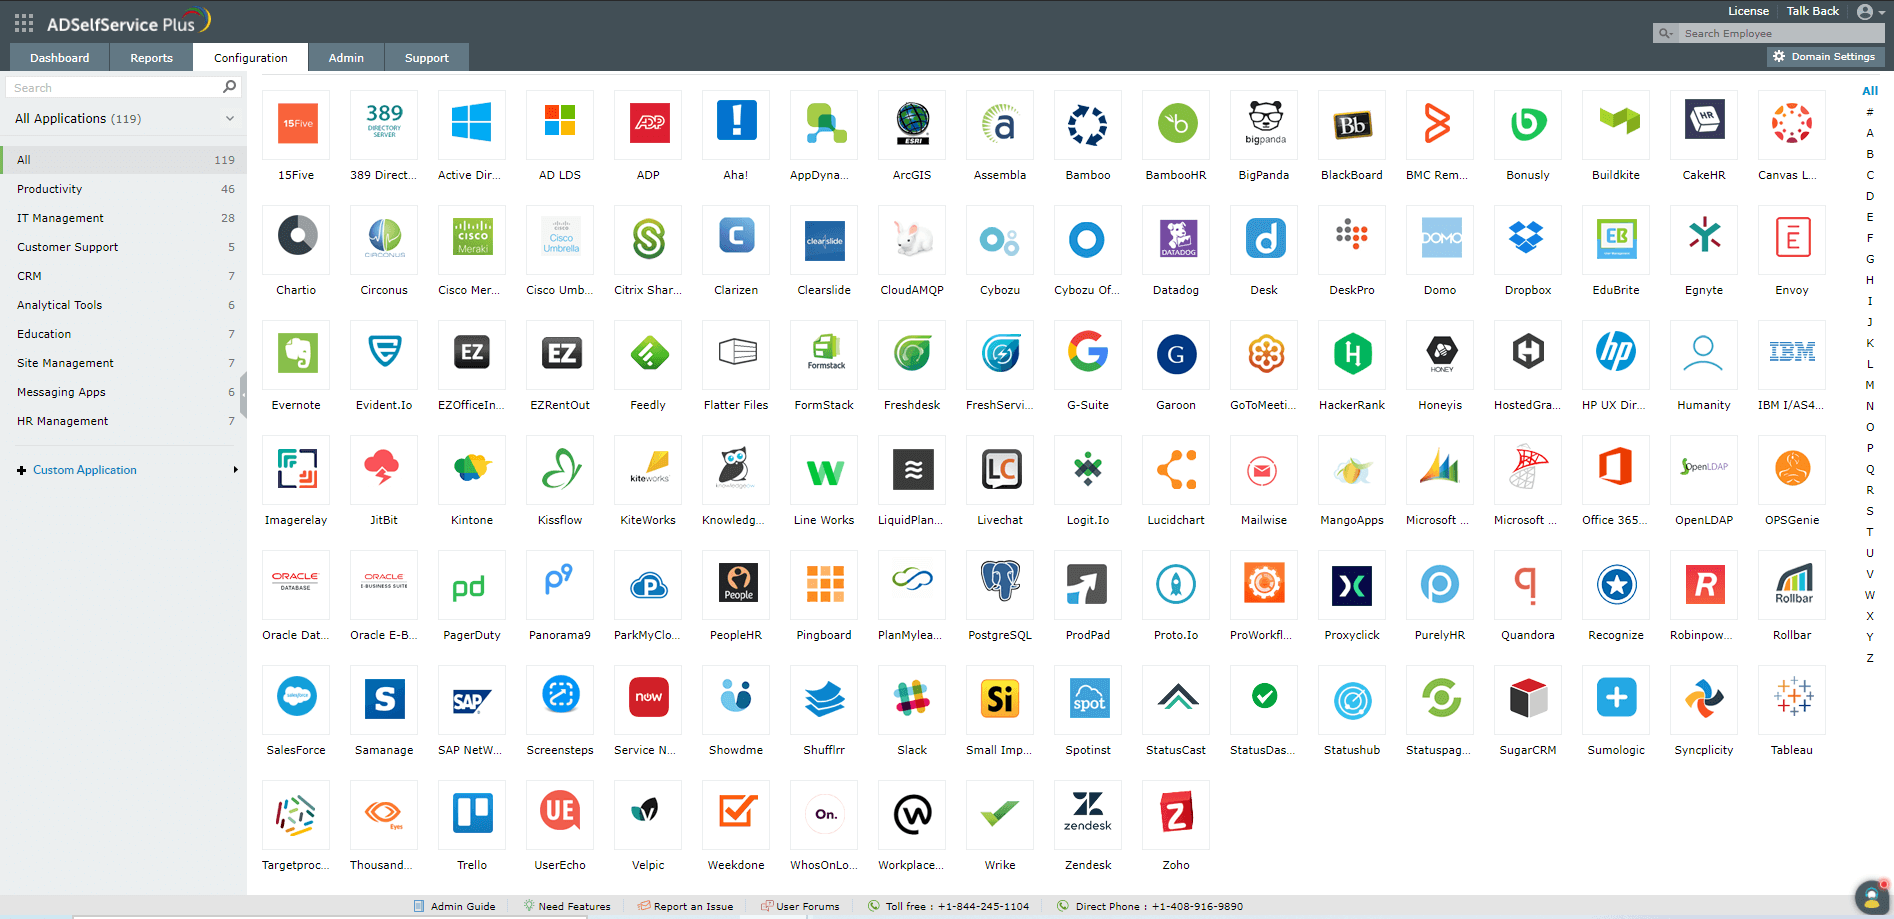
ADSelfService Plus supports all of these apps out-of-the-box for SSO. Besides these, it also offers the flexibility to add any other app or your own custom app for SSO.
For detailed steps to configure SSO for supported applications, click here.
Steps to enable SSO for SAML-based enterprise applications:
Prerequisite:
- Log in to the enterprise application you want to enable SSO for.
- Get the Metadata or Entity ID/SAML Redirect URL and ACS URL from the enterprise application.
Adding your custom application:
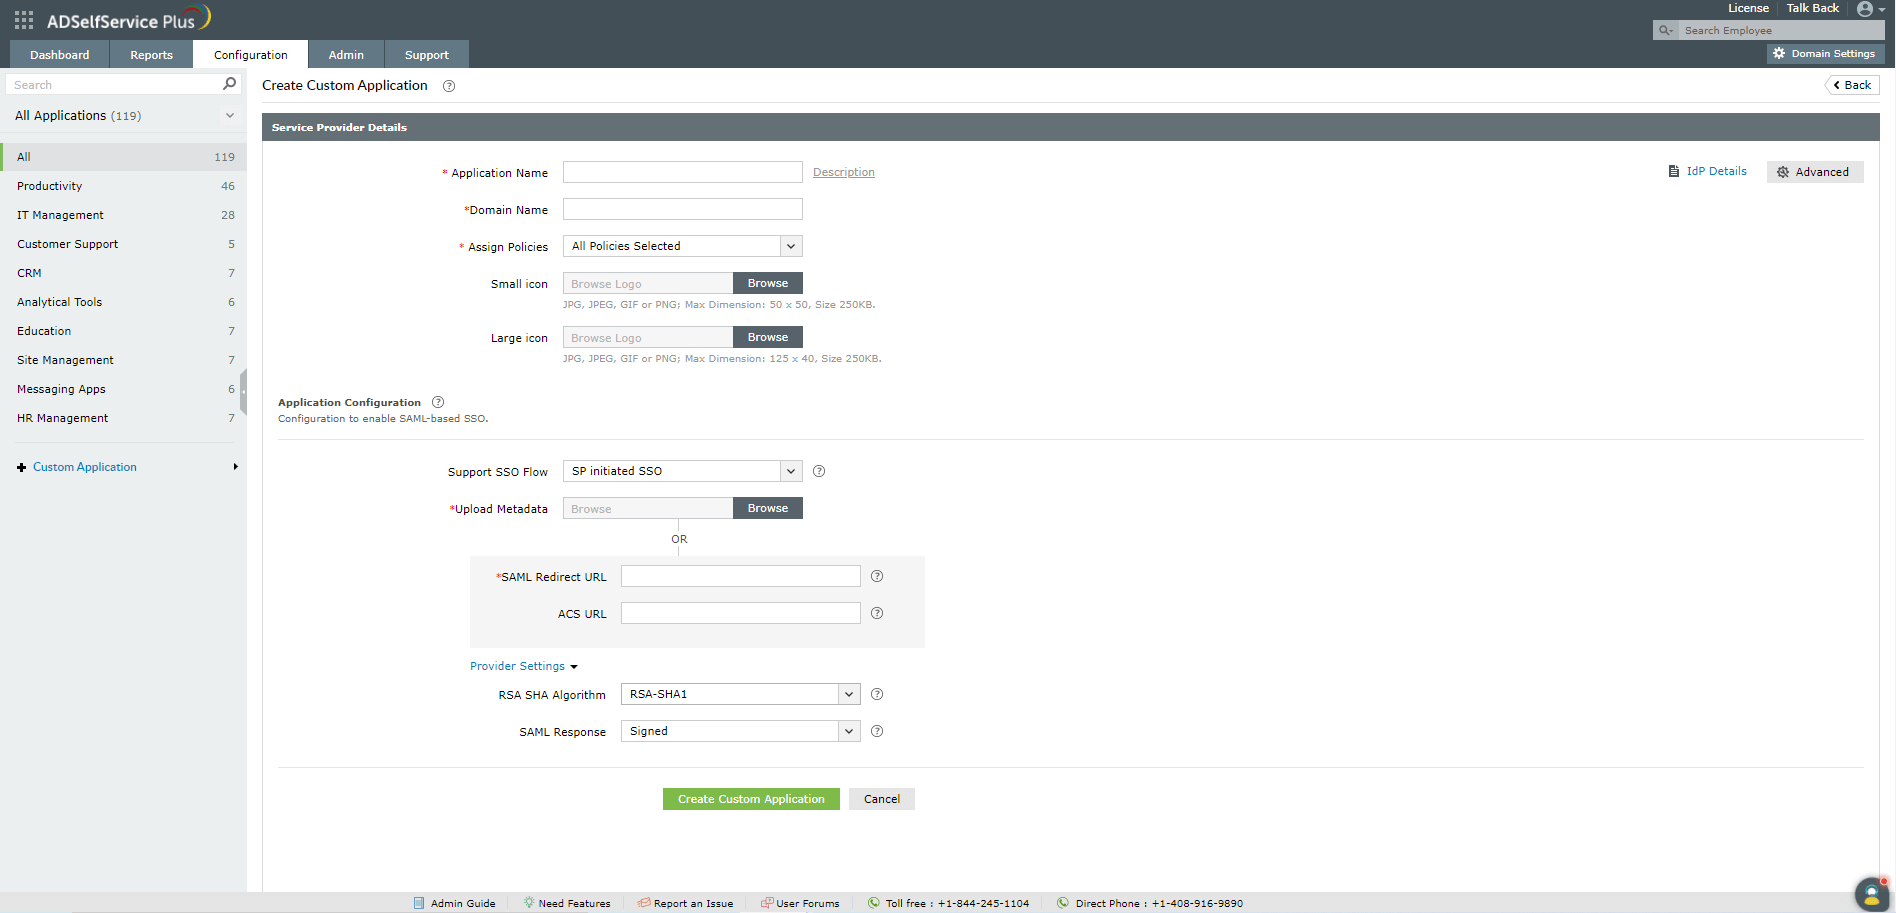
- Log in to the ADSefService Plus admin console.
- Navigate to Configuration → Self-Service → Password Sync/Single Sign-On → Custom Application.
-
Select the desired policies in the Assign Policies field. Users who are part of the selected policies will have the changes applied to them.
Note: ADSelfService Plus allows you to create organizational unit (OU) and group-based policies for your Active Directory (AD) domains. To create a policy, go to Configuration > Self-Service > Policy Configuration > Add New Policy. - Enter your Application Name and Description.
- Enter the domain name of your email address in the Domain Name field. For example, if your email address is hollyholt@mydomain.com, then mydomain.com is your domain name.
- Upload an image for the app icon in both sizes.
- Provide a suitable option for the Supported SSO flow.
- Automatic configuration: If you have downloaded the Metadata from step 2 of prerequisite, upload it here. Otherwise, follow step 9.
-
Manual configuration: Based on the SSO flow selected in step 7, enter the required details:
a) SP flow:
- In the SAML Redirect URL field, enter the SAML redirect URL your application service provider supplies. The URL value can be found in the application's default login page or the SSO configuration page.
- Enter the Assertion Consumer Service (ACS) URL your application service provider provides in the ACS URL field. This value can also be found in the application's SSO configuration page.
- Enter the Assertion Consumer Service (ACS) URL your application service provides in the ACS URL field. This value can also be found in the application's SSO configuration page.
- In the Entity ID field, enter the Entity ID that your application service provider supplies. This value can also be found in the application's SSO configuration page.
- Under Provider Settings:
- Choose an RSA-SHA1 or RSA-SHA256 Algorithm depending on the encryption your application supports.
- Pick a SAML response (Signed/Unsigned).
-
Click Create Custom Application.
Note: ADSelfService Plus gives you the privilege to apply contextual access and MFA/ two-factor authentication (2FA) settings for your applications. To enable context-based reverse proxy, navigate to Admin > Product Settings > Connection > Proxy Settings. To enable MFA/2FA for your applications, navigate to Configuration > Multi-factor Authentication > MFA/2FA Settings.
Congratulations! You've now configured SSO for your desired applications.