
What is single sign-on (SSO)?
Effective identity management is a huge challenge for all organizations adopting cloud applications in droves. If user identities are managed independently for every SaaS application, users have to remember multiple passwords. Help desk technicians will also have a tough time managing password resets for multiple applications across a hybrid environment.
Single sign-on, popularly known as SSO, was introduced as a solution to this problem. It is an authentication scheme that allows users to log in to multiple applications with a single set of credentials. Because of this, users don't have to enter their credentials each time they need access to their applications. If SSO is enabled across applications and platforms, the user's successful authentication to one application or platform will be used to access other connected applications.
Benefits of SSO:
- Users don't have to remember multiple passwords anymore.
- Reduces the number of help desk calls related to password resets and locked out accounts.
- Eases the process of identity management.
Enable SSO in your organization with ADSelfService Plus.
ManageEngine ADSelfService Plus, a comprehensive AD self-service, password management, and SSO solution, supports SSO for various applications, including G Suite, Microsoft 365 (formerly Office 365), Zendesk, and Salesforce. Using ADSelfService Plus, you can implement SSO for these applications to give your users one-click access without requiring them to remember multiple passwords or log in multiple times.
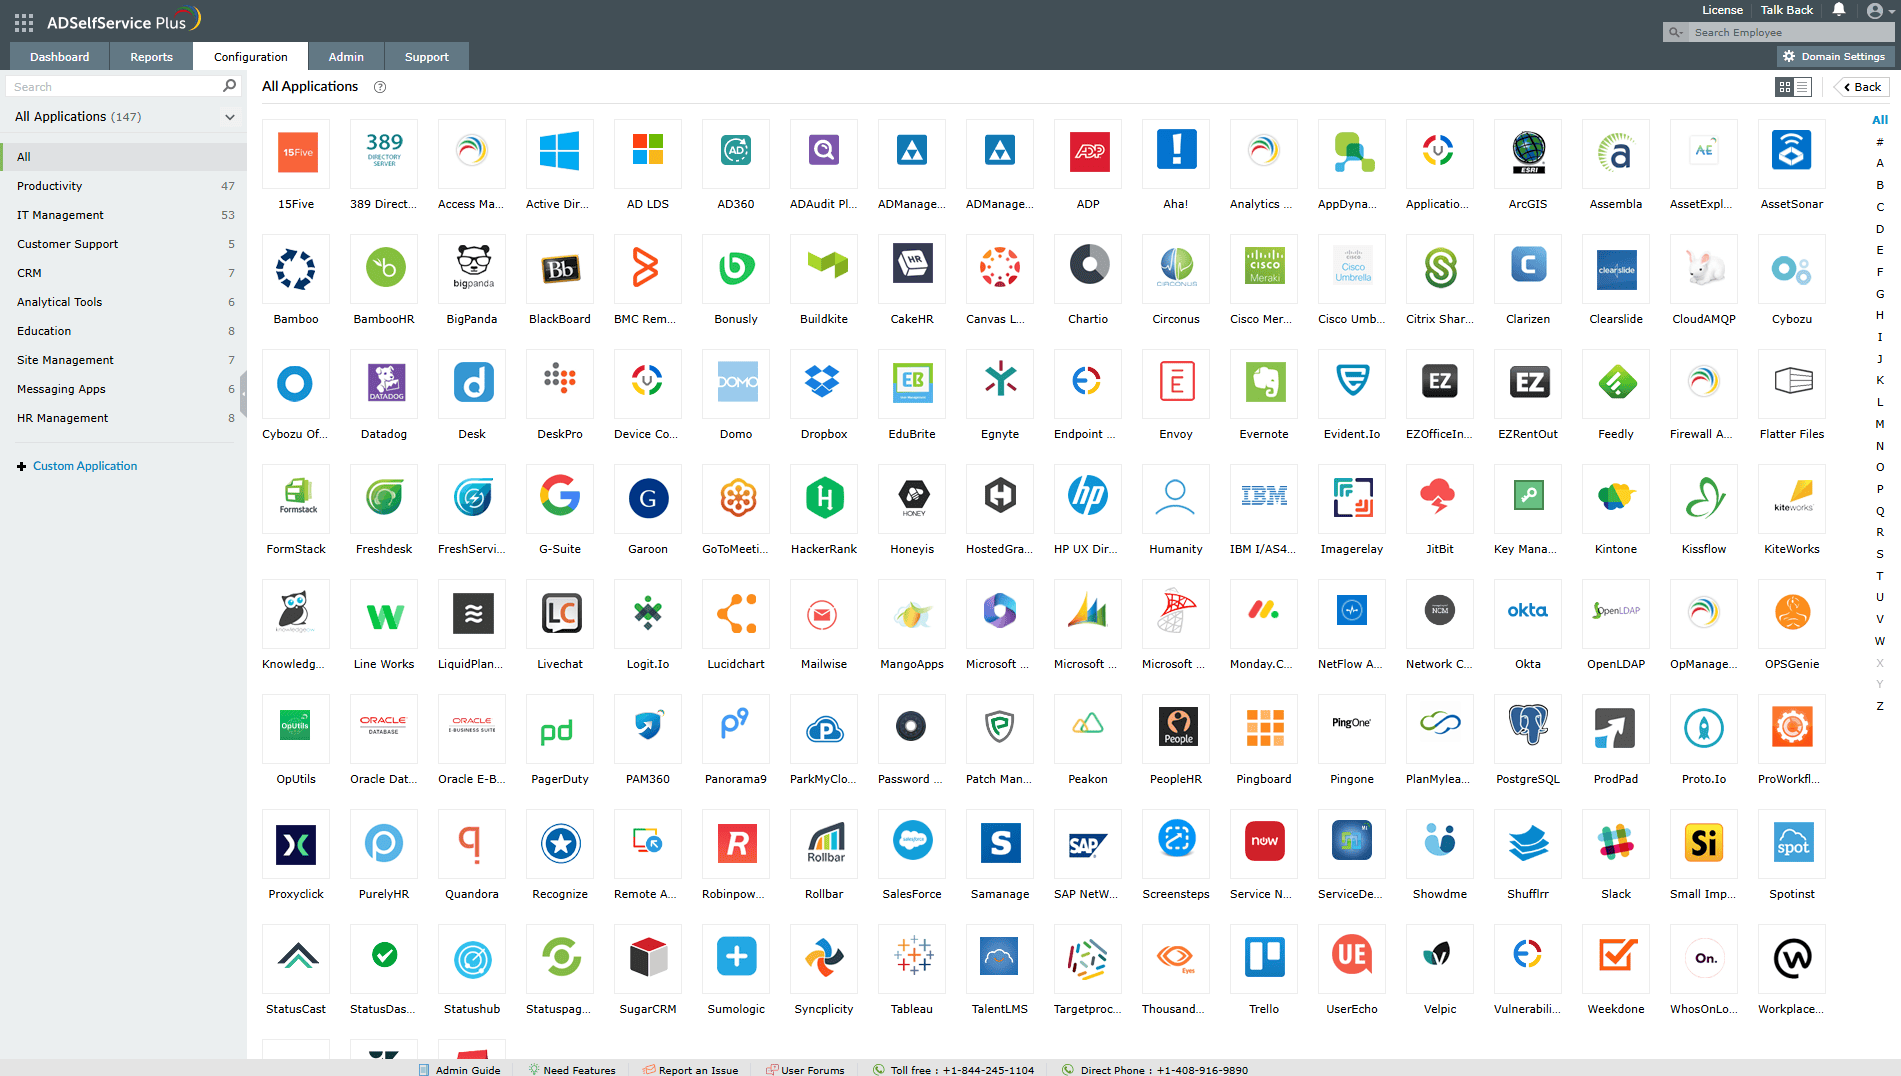
Fig. 1: Preconfigured SSO applications in ADSelfService Plus
ADSelfService Plus supports all of these apps out-of-the-box for SSO. Besides these, it also offers the flexibility to add any other app or your own custom app for SSO.
For detailed steps to configure SSO for supported applications, click here.
Steps to enable SSO for SAML-based enterprise applications:
Prerequisite:
- Log in to the enterprise application you want to enable SSO for.
- Get the Metadata or Entity ID/SAML Redirect URL and ACS URL from the enterprise application.
Adding your custom application:
- Log in to the ADSefService Plus admin console.
- Go to Configuration → Self-Service → Password Sync/Single Sign-On → Custom Application.
-
Select the desired policies in the Assign Policies field. Users who are part of the selected policies will have the changes applied to them.
Note: ADSelfService Plus allows you to create organizational unit (OU) and group-based policies for your Active Directory (AD) domains. To create a policy, go to Configuration > Self-Service > Policy Configuration > Add New Policy. - Enter your Application Name and Description.
- Enter the domain name of your email address in the Domain Name field. For example, if your email address is hollyholt@mydomain.com, then mydomain.com is your domain name.
- Upload an image for the app icon in both sizes.
- Provide a suitable option for the Supported SSO flow.
- Automatic configuration: If you have downloaded the Metadata from step 2 of prerequisite, upload it here. Otherwise, follow step 9.
-
Manual configuration: Based on the SSO flow selected in step 7, enter the required details:
a) SP flow:
- In the SAML Redirect URL field, enter the SAML redirect URL your application service provider supplies. The URL value can be found on the application's default login page or the SSO configuration page.
- In the ACS URL field, enter the Assertion Consumer Service (ACS) URL your application service provider supplies. This value can also be found on the application's SSO configuration page.
- In the ACS URL field, enter the Assertion Consumer Service (ACS) URL your application service provider supplies. This value can also be found on the application's SSO configuration page.
- In the Entity ID field, enter the Entity ID that your application service provider supplies. This value can also be found on the application's SSO configuration page.
- Under Provider Settings:
- Choose an RSA-SHA1 or RSA-SHA256 Algorithm depending on the encryption your application supports.
- Pick a SAML response (Signed/Unsigned).
-
Click Create Custom Application.
Note: ADSelfService Plus gives you the privilege to apply contextual access and MFA/ two-factor authentication (2FA) settings for your applications. To enable context-based reverse proxy, navigate to Admin > Product Settings > Connection > Proxy Settings. To enable MFA/2FA for your applications, navigate to Configuration > Multi-factor Authentication > MFA/2FA Settings.
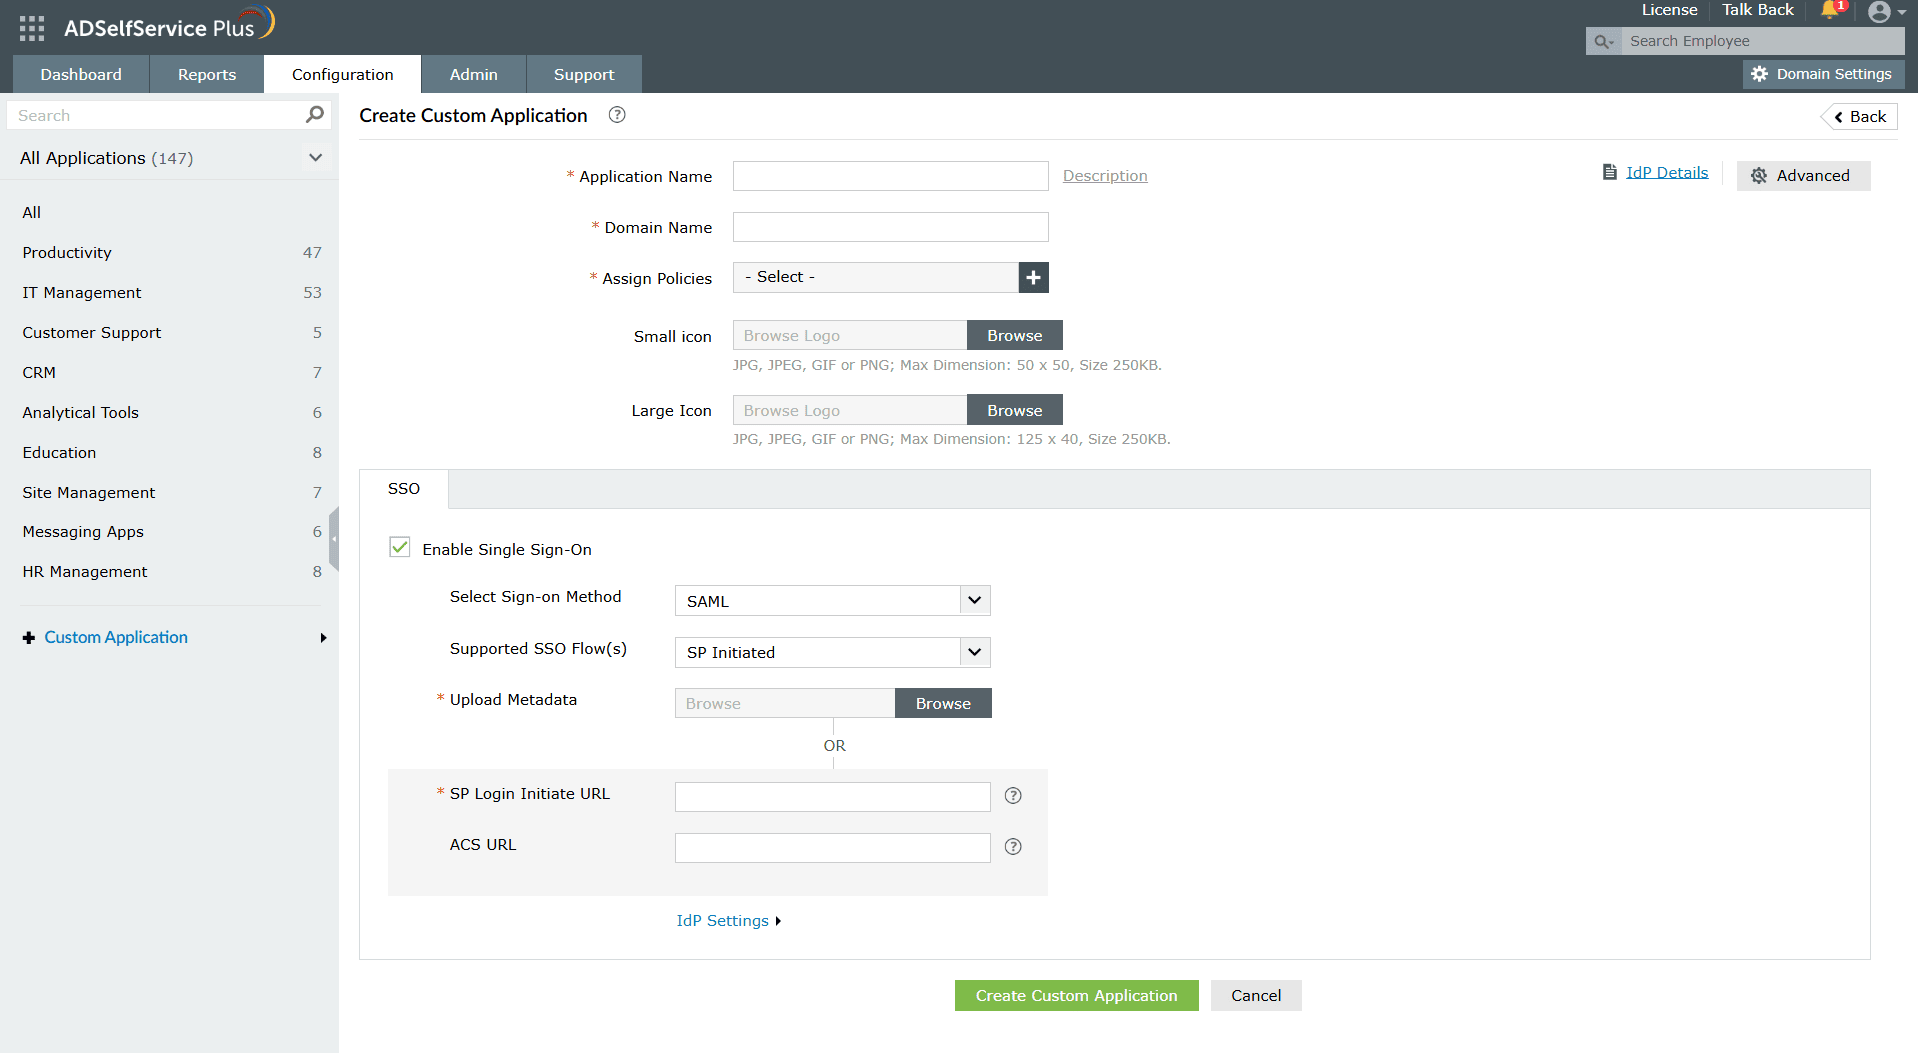
Fig. 2: Custom SSO app configuration in ADSelfService Plus
Congratulations! You've now configured SSO for your desired applications.