Configuring Project Roles
- Go to Admin > Customization > Project Management.
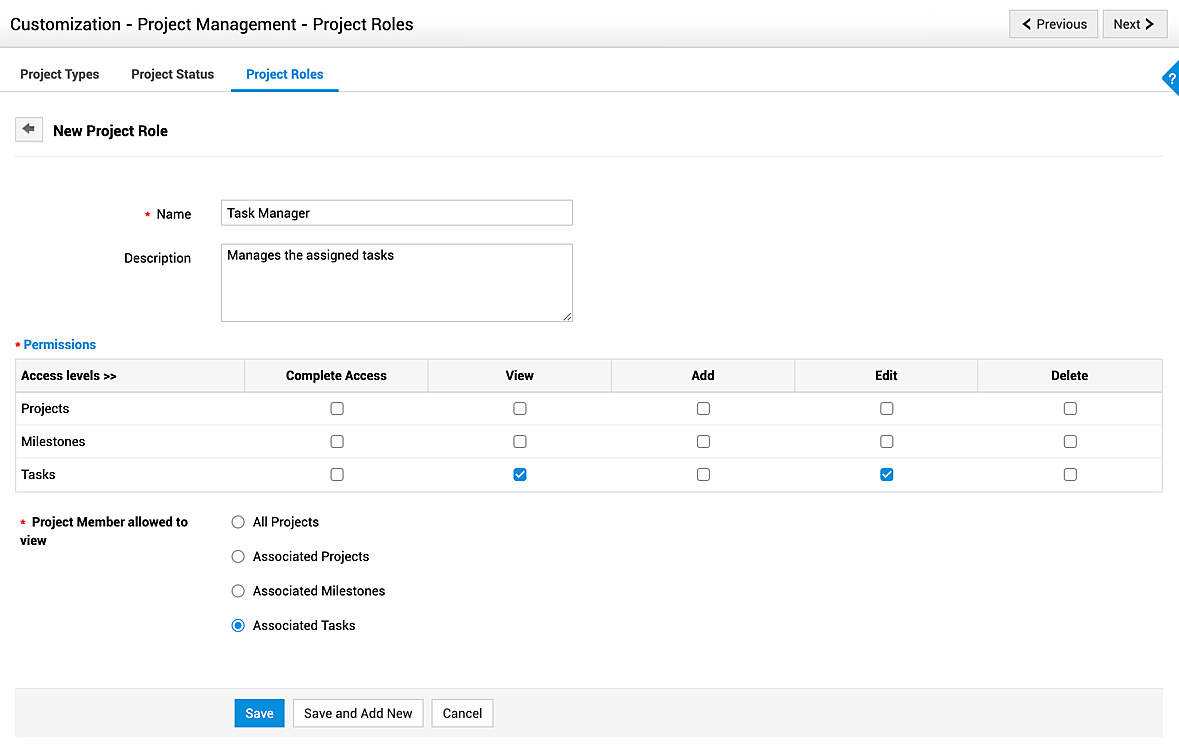
- Navigate to Project Roles, click New.
- Name: Provide a unique name for the project role. This field is mandatory.
- Description: Provide a short description about the project role.
- Configure the access levels using the appropriate check boxes.
- Configure the access permission for the project role.
- Click Save or Save and Add New.

Project Admin, Project Manager, Team Manager, and Team Member are the default project roles. Project Admin and Team Member roles cannot be edited or deleted. The project role can be assigned to users/requesters, and it cannot override project-specific roles configured under Admin > Users > Technicians. Project-specific role serves as the default option when no project role is configured for the user/requester. The Project Admin will have complete access to Project Module and the Team Member will have permission to work on the tasks assigned to them.
List View Actions
Edit/Delete Project Roles - Click ![]() besides a project role to edit or delete it. To bulk delete, select multiple project roles and click
besides a project role to edit or delete it. To bulk delete, select multiple project roles and click ![]() .
.
Note: If a project role associated with a project request is deleted, it will be marked as inactive.
Filter Project Roles - By default, the active project roles are displayed on the project roles page. Click the Project Roles drop-down to switch between Active and Inactive Project Roles.

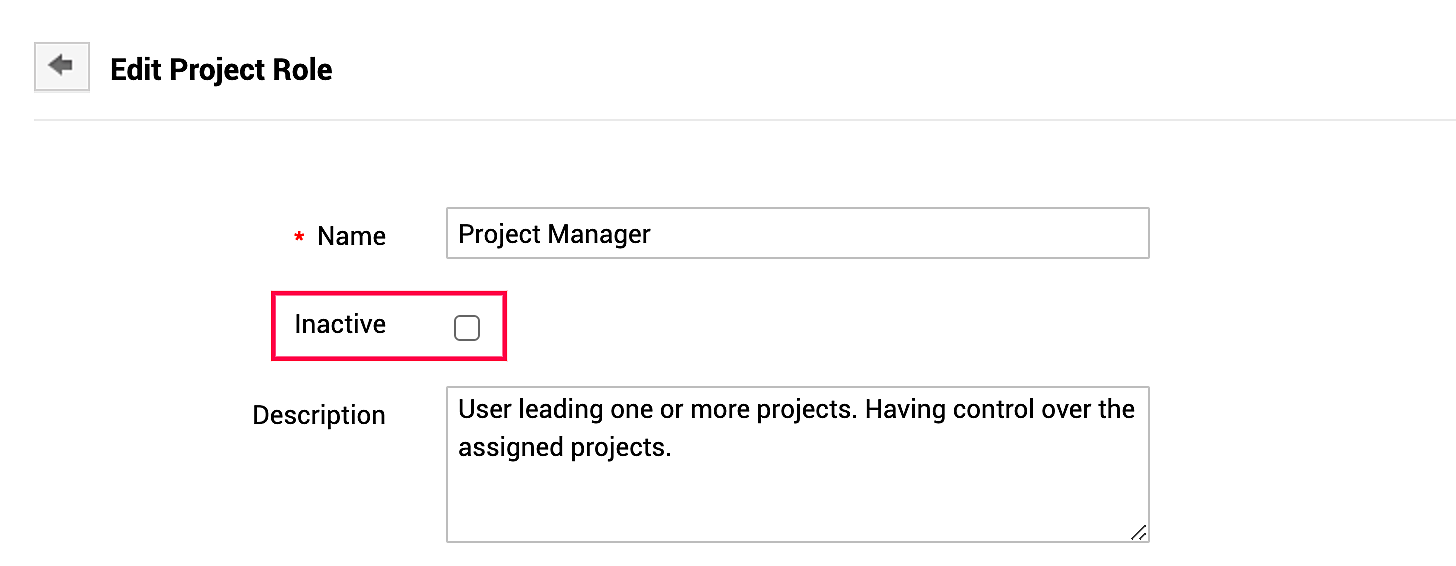
Reactivate Inactive Project Roles - Edit an inactive project role and uncheck the Inactive box. Click Update to reactivate the project role.
You can also select multiple inactive project roles and click Mark as Active.

Search through Project Roles - Click the ![]() icon to search through the project roles from the list view.
icon to search through the project roles from the list view.
Limit the number of records displayed - Choose the number of project roles to be displayed in the list view.
Sort Project Roles - Click the ![]() icon to sort the project roles in alphabetical order.
icon to sort the project roles in alphabetical order.

