How do you audit file usage in SharePoint?
In this article:
- Objective
- Prerequisite
- Steps to follow
- Limitations of using native tools
- Troubleshooting tips
- Related links and articles
Objective
In this article, we'll learn how to audit SharePoint file access and usage using the native SharePoint tool and ManageEngine's SharePoint Manager Plus. When multiple users collaborate, it's important to monitor and track shared files to know who made what changes to which file and folder. This helps to ensure the integrity of confidential files and also averts unauthorized operations.
Prerequisite
- The user must have the Global Administrator privilege.
Steps to audit file usage in SharePoint
This table lists the steps to generate SharePoint file access log reports using native SharePoint and SharePoint Manager Plus.
SharePoint Online
- Log in to the Microsoft Office 365 admin center with Global Administrator privilege.
- Click Show All from the left and select Compliance under Admin centers.
- In the Compliance center, select the Audit tab on the left and click Start recording user and admin activity. Give it a minute to complete. In case you don’t see this link or button, that means auditing is already turned on.
- Log in to the Security and Compliance Center and navigate to Search > Audit Log Search on the left.
- In the search panel, use the Activities drop-down to select your preferred file activity, such as Accessed file, Deleted file, or Checked in file.
- Configure other search criteria like date and time, users, and sites.
- Once set, click Search. This will display a report that can be filtered and exported in CSV format.
SharePoint Manager Plus
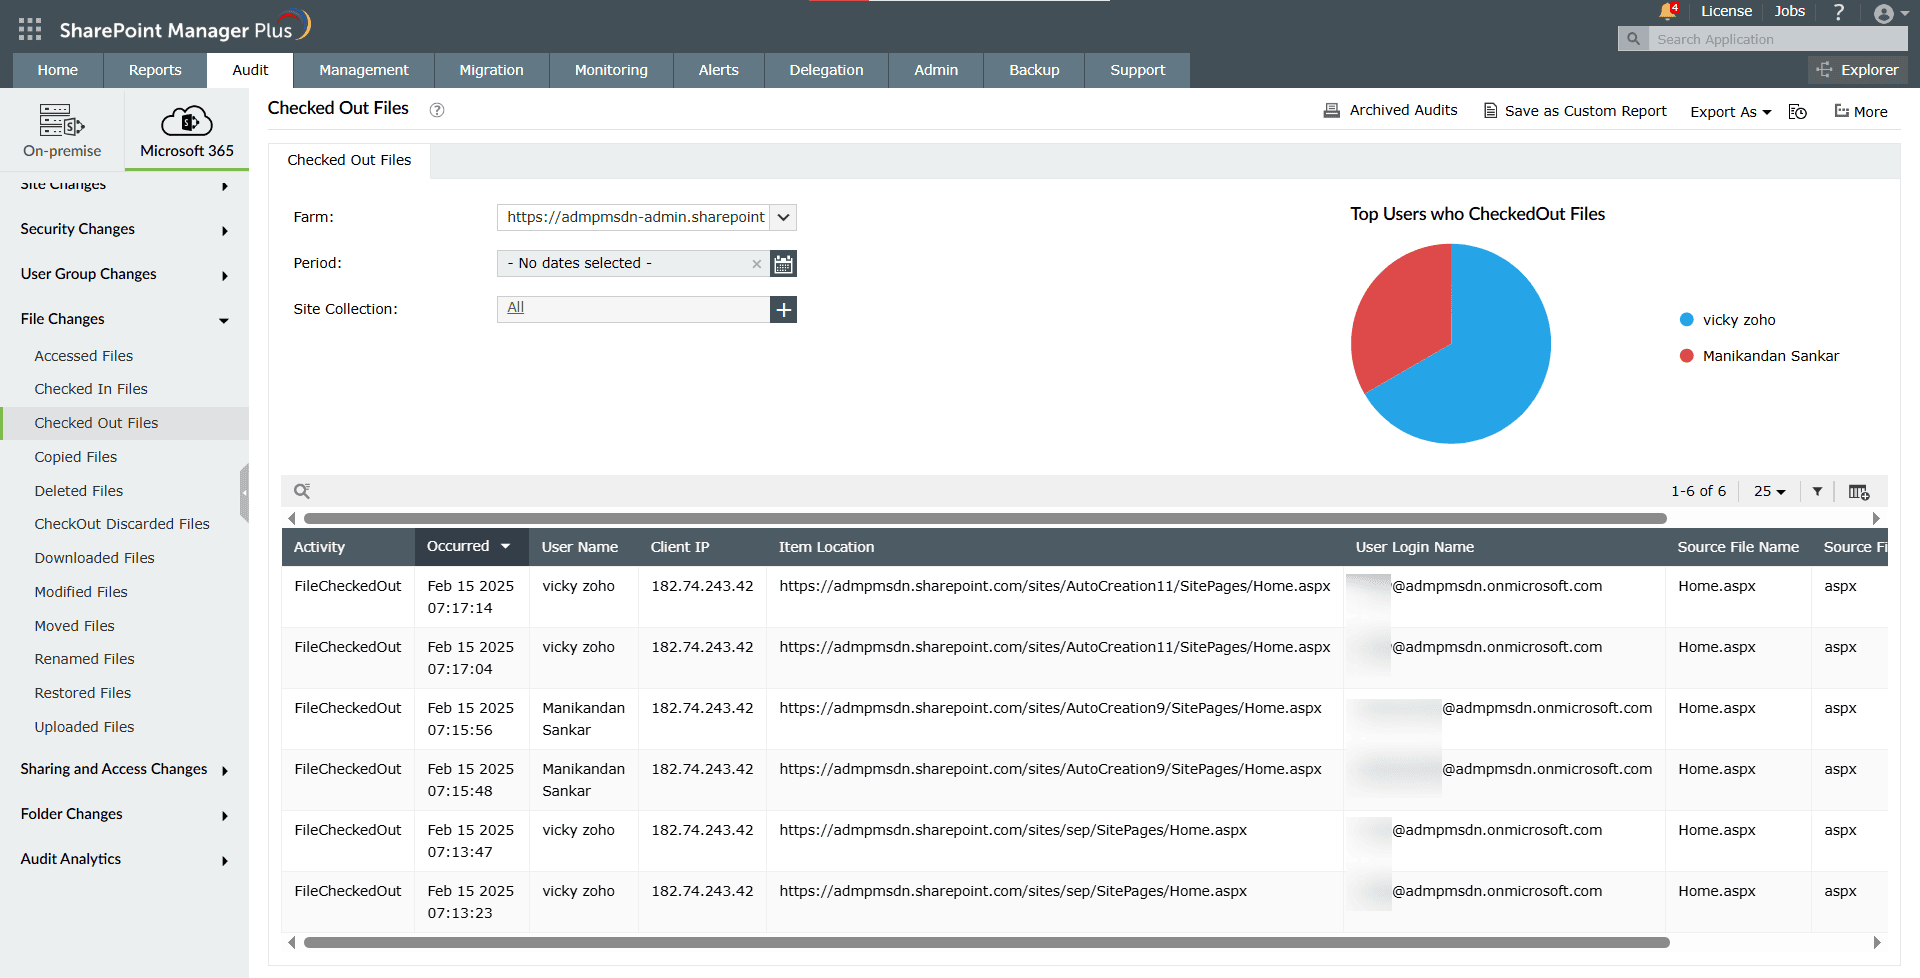
- Login to SharePoint Manager Plus and navigate to the Audit tab > Microsoft 365.
- Click the File Changes report category. From the list of reports, select your preferred report like Accessed Files, Deleted Files, or Checked In Files.
- Select your tenant, site collections, and the period for which you'd like to audit.
- The audit report will be generated below.
Note:
- To filter and narrow down your search, click the Filter
 icon to configure the criteria.
 - To save the report with your filter settings applied, click Save as Custom Report.
- To export the report, click the Export As drop-down at the top-right corner.
- To schedule the report, click the More icon and select Schedule New Report.
Limitations of using native SharePoint tools to audit file usage
Here are key drawbacks of relying solely on SharePoint’s built-in audit tools:
- Creating a report from scratch every time, including choosing user and file activities, is slow and cumbersome. SharePoint Manager Plus provides preconfigured audit reports for each file activity and lets you save custom reports for quick access.
- Reports can be exported only in the Excel file format. SharePoint Manager Plus enables you to export reports in CSV, PDF, XLS, and HTML formats.
- Reports need to be manually generated each time. SharePoint Manager Plus lets you schedule reports periodically or at a particular time to your preferred email addresses.
Troubleshooting tips
If you receive an error while generating a report for on-premises SharePoint versions, it could be because audit logs weren't enabled, or there was no data to display. See Configure audit settings for a site collection to ensure event logging is set up.
Related topics and articles
- How to configure audit logging for a SharePoint site collection?
- How to audit a SharePoint site collection?
- How to configure audit log trimming?
- How to view audit log reports in SharePoint Online?
Last updated on: 30-05-2025
- An overview of SharePoint
- How to create a SharePoint group?
- How to change SharePoint group permissions?
- How to check permissions of SharePoint users and groups?
- How to configure audit logging for a SharePoint site collection?
- How to check the size of a SharePoint site?
- How to check the size of SharePoint storage?
- How to migrate sharepoint on premises to online?