Service Catalog
The IT department has a wide range of services to offer to the IT users. These services are exposed to the users in the Service Catalog drop-down menu. The services proposed to the end-users are employee-centric with a request-oriented view of the service. The easy-to-use service catalog describes the services offered, and facilitates users to browse for services, submit requests for IT services and monitor their status.
Most of the basic day-to-day IT services required by the users are installation, relocation, internet access, email access, virus protection, provision of hardware and software, mail server and account management to name a few. With Service Catalog, services are easily accessed, evidently portrait and delivered consistently with high quality.
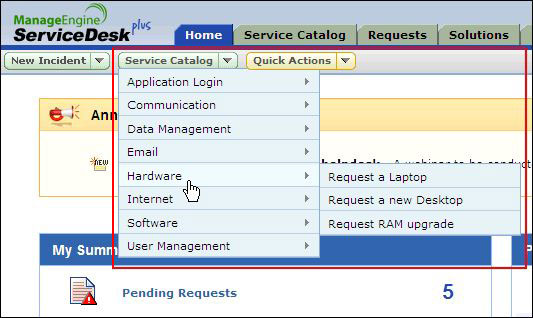
The Service Catalog drop-down menu lists the services available in the catalog. The service items are grouped according to Service Categories and are available to users who are approved to access it. All you need to do is browse through the services, select a desired service item and raise a service request.
Searching for Service(s)
A search can be conducted to choose a service from the wide range of service items displayed in the application. Enter a key word in the search field say, "software" and click enter. The desired search results are obtained.
Creating a Service Request
Creating a new service request is as simple as creating a new incident request from the available templates. Browse through the Template List and select a service that is relevant to your needs. Service requests can be raised from the application in two ways,
Service Catalog drop down
Similar to the New Incident drop down, a Service Catalog drop down listing the available service categories in the catalog appears. Browse through the service categories and select a service.
Service Catalog
Alternatively, you can select a service from the Service Catalog tab. All you need to do is select the Service Category and select the service item link from the list. You can also conduct a search for desired services.
Selecting a service from the list, takes you to the New Service Request form. The form is customized for end-user specific by the Service Manager.
In the service request form,
-
The logged in Requester Details such as Name, Contact Number, Job Title and Description are pre-filled automatically. These fields are non-editable.
-
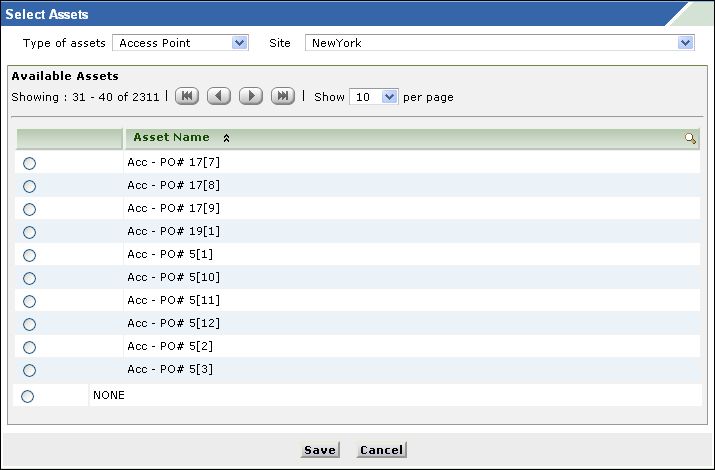
The assets associated to the requester are populated in the Asset drop down. Select the Asset from the drop down. If you want to select an asset that is not associated to you, select the icon  .
.
NOTE: The is available only if the Administrator has disabled the option to show only the workstations associated to the requester in Self Service Portal Settings.
In Select Assets pop-up window, you can filter the assets by selecting the Type of assets such as, access point, routers, workstation and so on, from the drop-down. Selecting All Assets from the drop-down menu lists all the assets available in the application, irrespective of the asset type. You can further filter the assets according to sites using the Site drop-down. Selecting a site lists the assets from that particular site. Say, for instance, if the site selected is "New York" and the asset type is "Access Point", then all the access points associated to the site New York are listed.
-
The Subject and Description for the service request is pre-filled by the Service Manager.
-
By default, if the location of the requester is configured in the application, then the same is populated in the Site field.
-
Enter relevant values in remaining fields. If the fields are pre-filled with values, you can edit the same. Certain fields might not be editable.
-
If you are requesting for any resources, select the resources from the available list from the Resource Info block.
-
If required, you can Attach Files to the service request. To attach a file,
-
Click Attach File button and browse through the files.
-
Click Open in the File Upload pop-up.
-
Click Attach File button. The file is attached to the service request with the file name and size. A delete icon is present to delete the file. Similarly, you can add another file but please note that the maximum size of the attachment is 10MB.
-
Click Add New Request to raise the request. Click Reset to reset the entered values. Click Cancel to take you to the request list view page.
