- Overview
- Configuration
AssetSonar
Enhance IT asset security with AssetSonar and ADSelfService Plus
AssetSonar is a cloud-based IT asset management tool that helps organizations track, manage, and optimize assets throughout their life cycles. By integrating ADSelfService Plus with AssetSonar, you can empower users with one-click, secure access to AssetSonar through SSO, and leverage just-in-time (JIT) provisioning for seamless onboarding.
JIT provisioning
Utilize SCIM-based JIT provisioning for user accounts in AssetSonar, reducing the IT workload and ensuring consistent user access.
SSO for simplified access
Provide users with seamless, one-click access to AssetSonar, reducing login complexities and improving productivity.
Passwordless authentication for streamlined access
Enable passwordless authentication to AssetSonar, simplifying user access while maintaining strong security standards, leading to a better user experience.
Configuring SAML SSO for AssetSonar
These steps will guide you through setting up the single sign-on (SSO) functionality between ADSelfService Plus and AssetSonar.
Prerequisite
- Log in to ADSelfService Plus as an administrator.
- Navigate to Configuration > Self-Service > Password Sync/Single Sign On > Add Application, and select AssetSonar from the applications displayed. Note: You can also find AssetSonar application that you need from the search bar located in the left pane or the alphabet wise navigation option in the right pane.
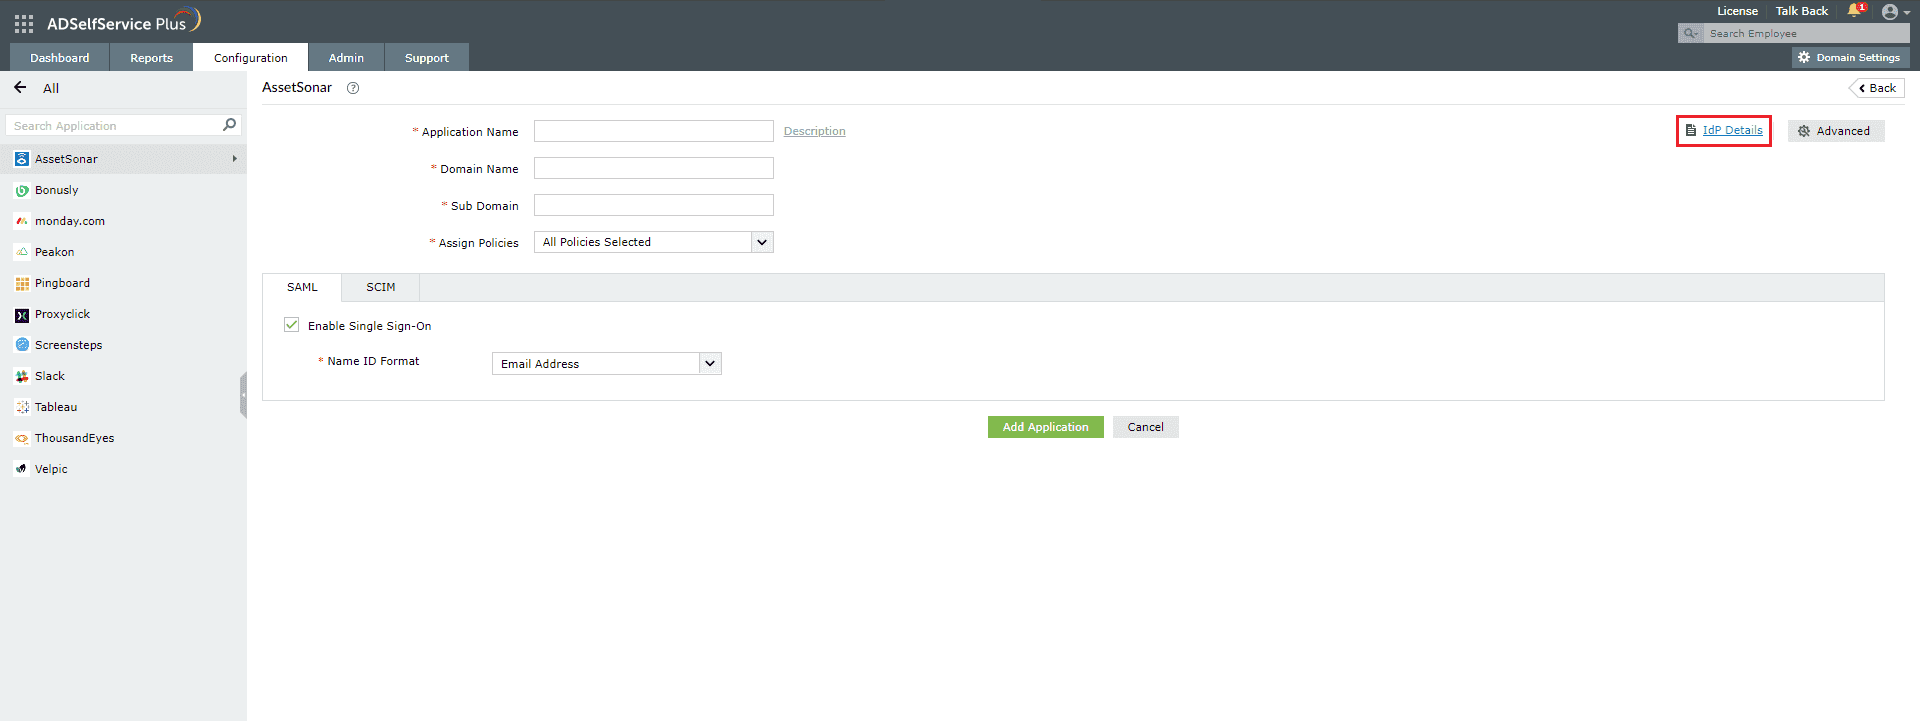
- On the AssetSonar configuration page, click IdP details in the top-right corner of the screen.
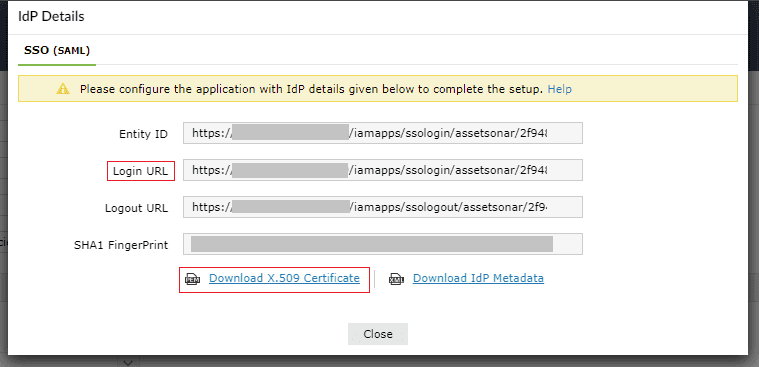
- In the pop-up that appears, copy the Login URL and download the SSO certificate by clicking Download X.509 Certificate.
AssetSonar (Service Provider) configuration steps
- Log in to AssetSonar with an administrator’s credentials.
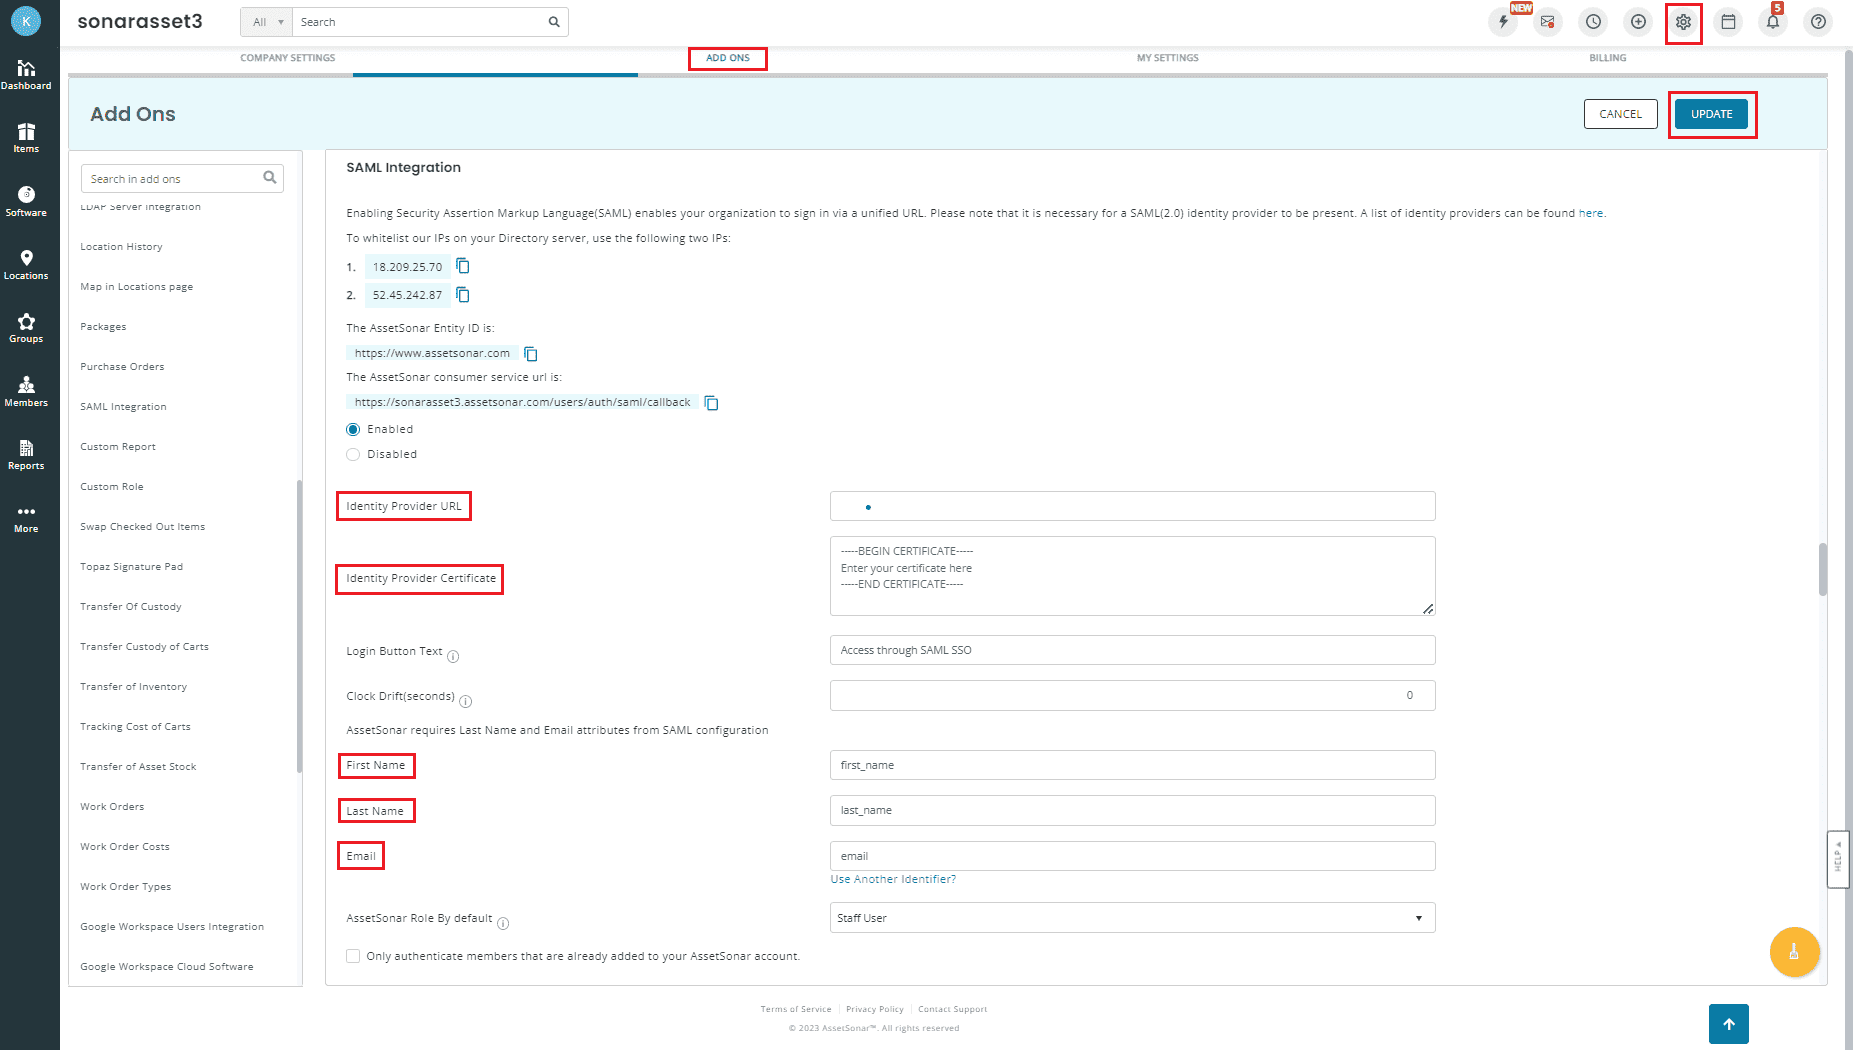
- Navigate to Settings > ADD ONS and select SAML Integration
- Select Enabled to configure SAML-based SSO.
- Paste the Login URL copied in Step 4 of Prerequisite in the Identity Provider URL field.
- Enter the content of the X.509-Certificate downloaded in Step 4 of Prerequisite in the Identity Provider Certificate field.
- Retain the First Name, Last Name, and Email fields values as first_name, last_name, and email, respectively.
- Click UPDATE.
ADSelfService Plus (Identity Provider) configuration steps
- Now, switch to the ADSelfService Plus AssetSonar configuration page.
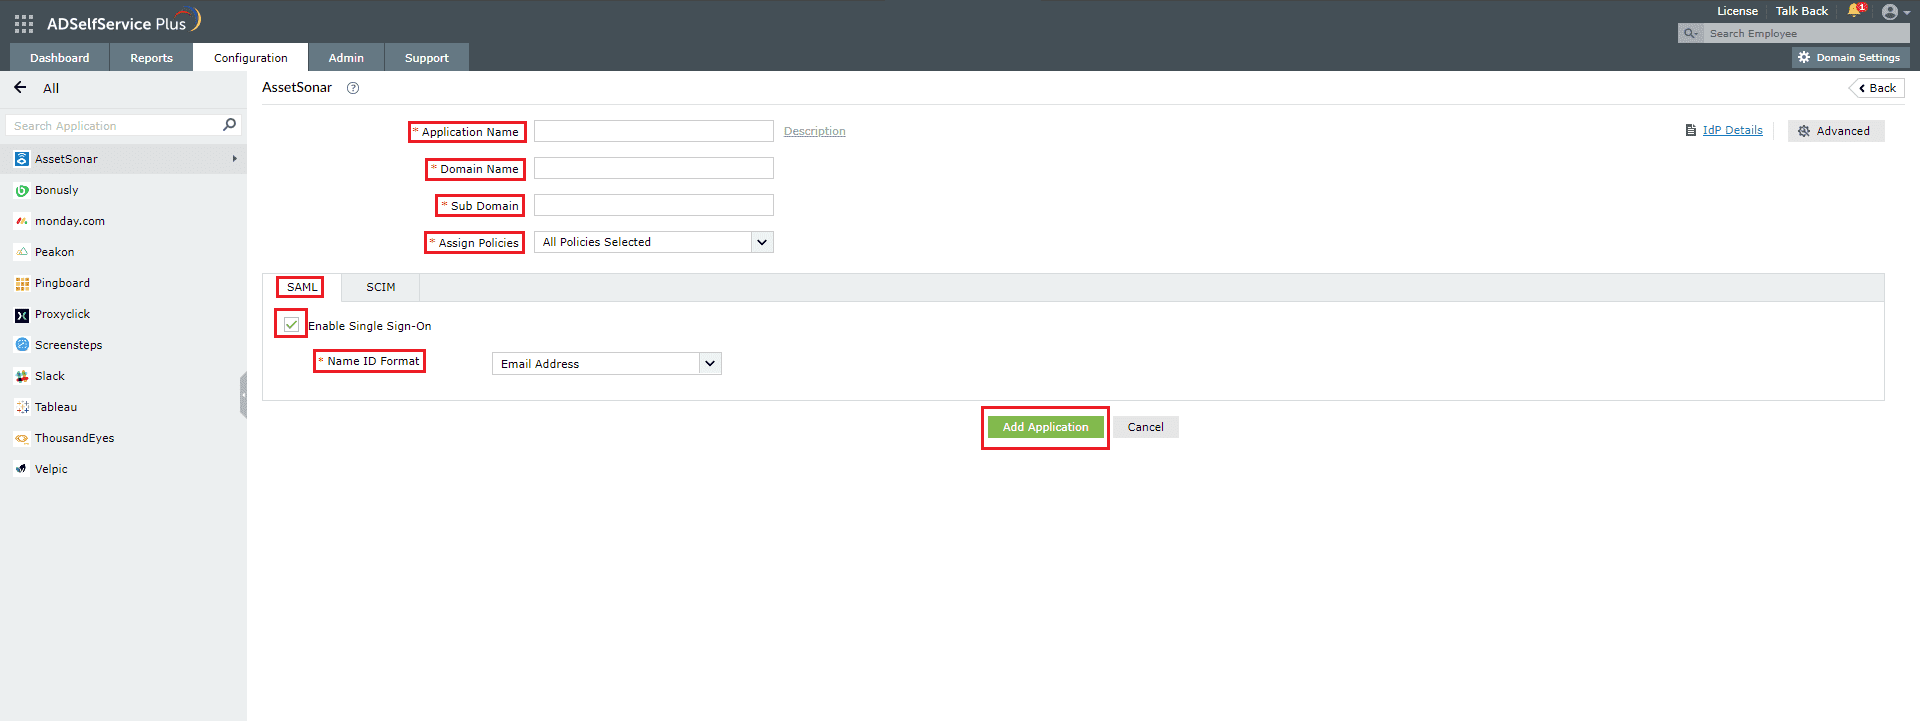
- Enter the Application Name and Description.
- Enter the Domain name of your AssetSonar account. For example, if you use johndoe@thinktodaytech.com to log in to AssetSonar, then thinktodaytech.com is the domain name.
- In the Sub Domain field, enter the subdomain name of your AssetSonar account. For example, if your AssetSonar URL is https://xyzcorp.assetsonar.com, then xyzcorp is the subdomain.
- In the Assign Policies field, select the policies for which SSO needs to be enabled. Note: ADSelfService Plus allows you to create OU and group-based policies for your AD domains. To create a policy, go to Configuration > Self-Service > Policy Configuration > Add New Policy.
- Select the SAML tab and check Enable Single Sign-On.
- In the Name ID Format field, choose the format for the user login attribute value specific to the application. Note: Use Unspecified as the default option if you are unsure about the format of the login attribute value used by the application.
- Click Add Application.
Your users should now be able to sign in to AssetSonar through ADSelfService Plus.
Note: For AssetSonar, SSO is supported for SP and IDP initiated flow.