Adding Wasabi as a repository
Prerequisites
- To ensure backups in Wasabi cannot be changed, you need to create a new repository and enable the immutability feature during the creation process. Immutability cannot be applied to an already existing repository.
- You will also need the Access Key and Secret Access Key of your Wasabi account. To learn how to find the Access keys, click here.
Adding Wasabi storage as a repository
- Navigate to the Admin tab > Administration > Backup Repository > Cloud.
- Click the Add Repository button in the top-right corner.
- Select Wasabi from the Repository Type drop-down.
- Enter a name in the Repository Name field.
- Enter the Access Key and Secret Access Key.
- Enter the Bucket Name.
Note: Metadata of the Microsoft 365, on-premises Exchange, Google Workspace, and Zoho WorkDrive backups will be stored in the default Elasticsearch node.
- Click Save.
Once you’ve created the cloud storage repository, you can view the following information:
- Name of the repository
- Name of the account
- Type of the repository
- Status of the connected repository
You can also perform the following operations:
Refresh repository details
To fetch the status of the connected repository:
- Click the
 Refresh icon located in the Actions column of the repository.
Update existing repository
- Click the
 Edit icon under the Actions column of the repository to change the name of the repository.
- Modify the name of the repository and click Save.
Delete existing repository
- Click the
 Delete icon under the Actions column of the repository that you wish to delete.
Note: Deleting a configured repository will permanently delete all backup files in the repository, and you will not be able to perform any restorations.
Finding your Access Key and Secret Access Key in Wasabi
- Log in to the Wasabi Console in your web browser.
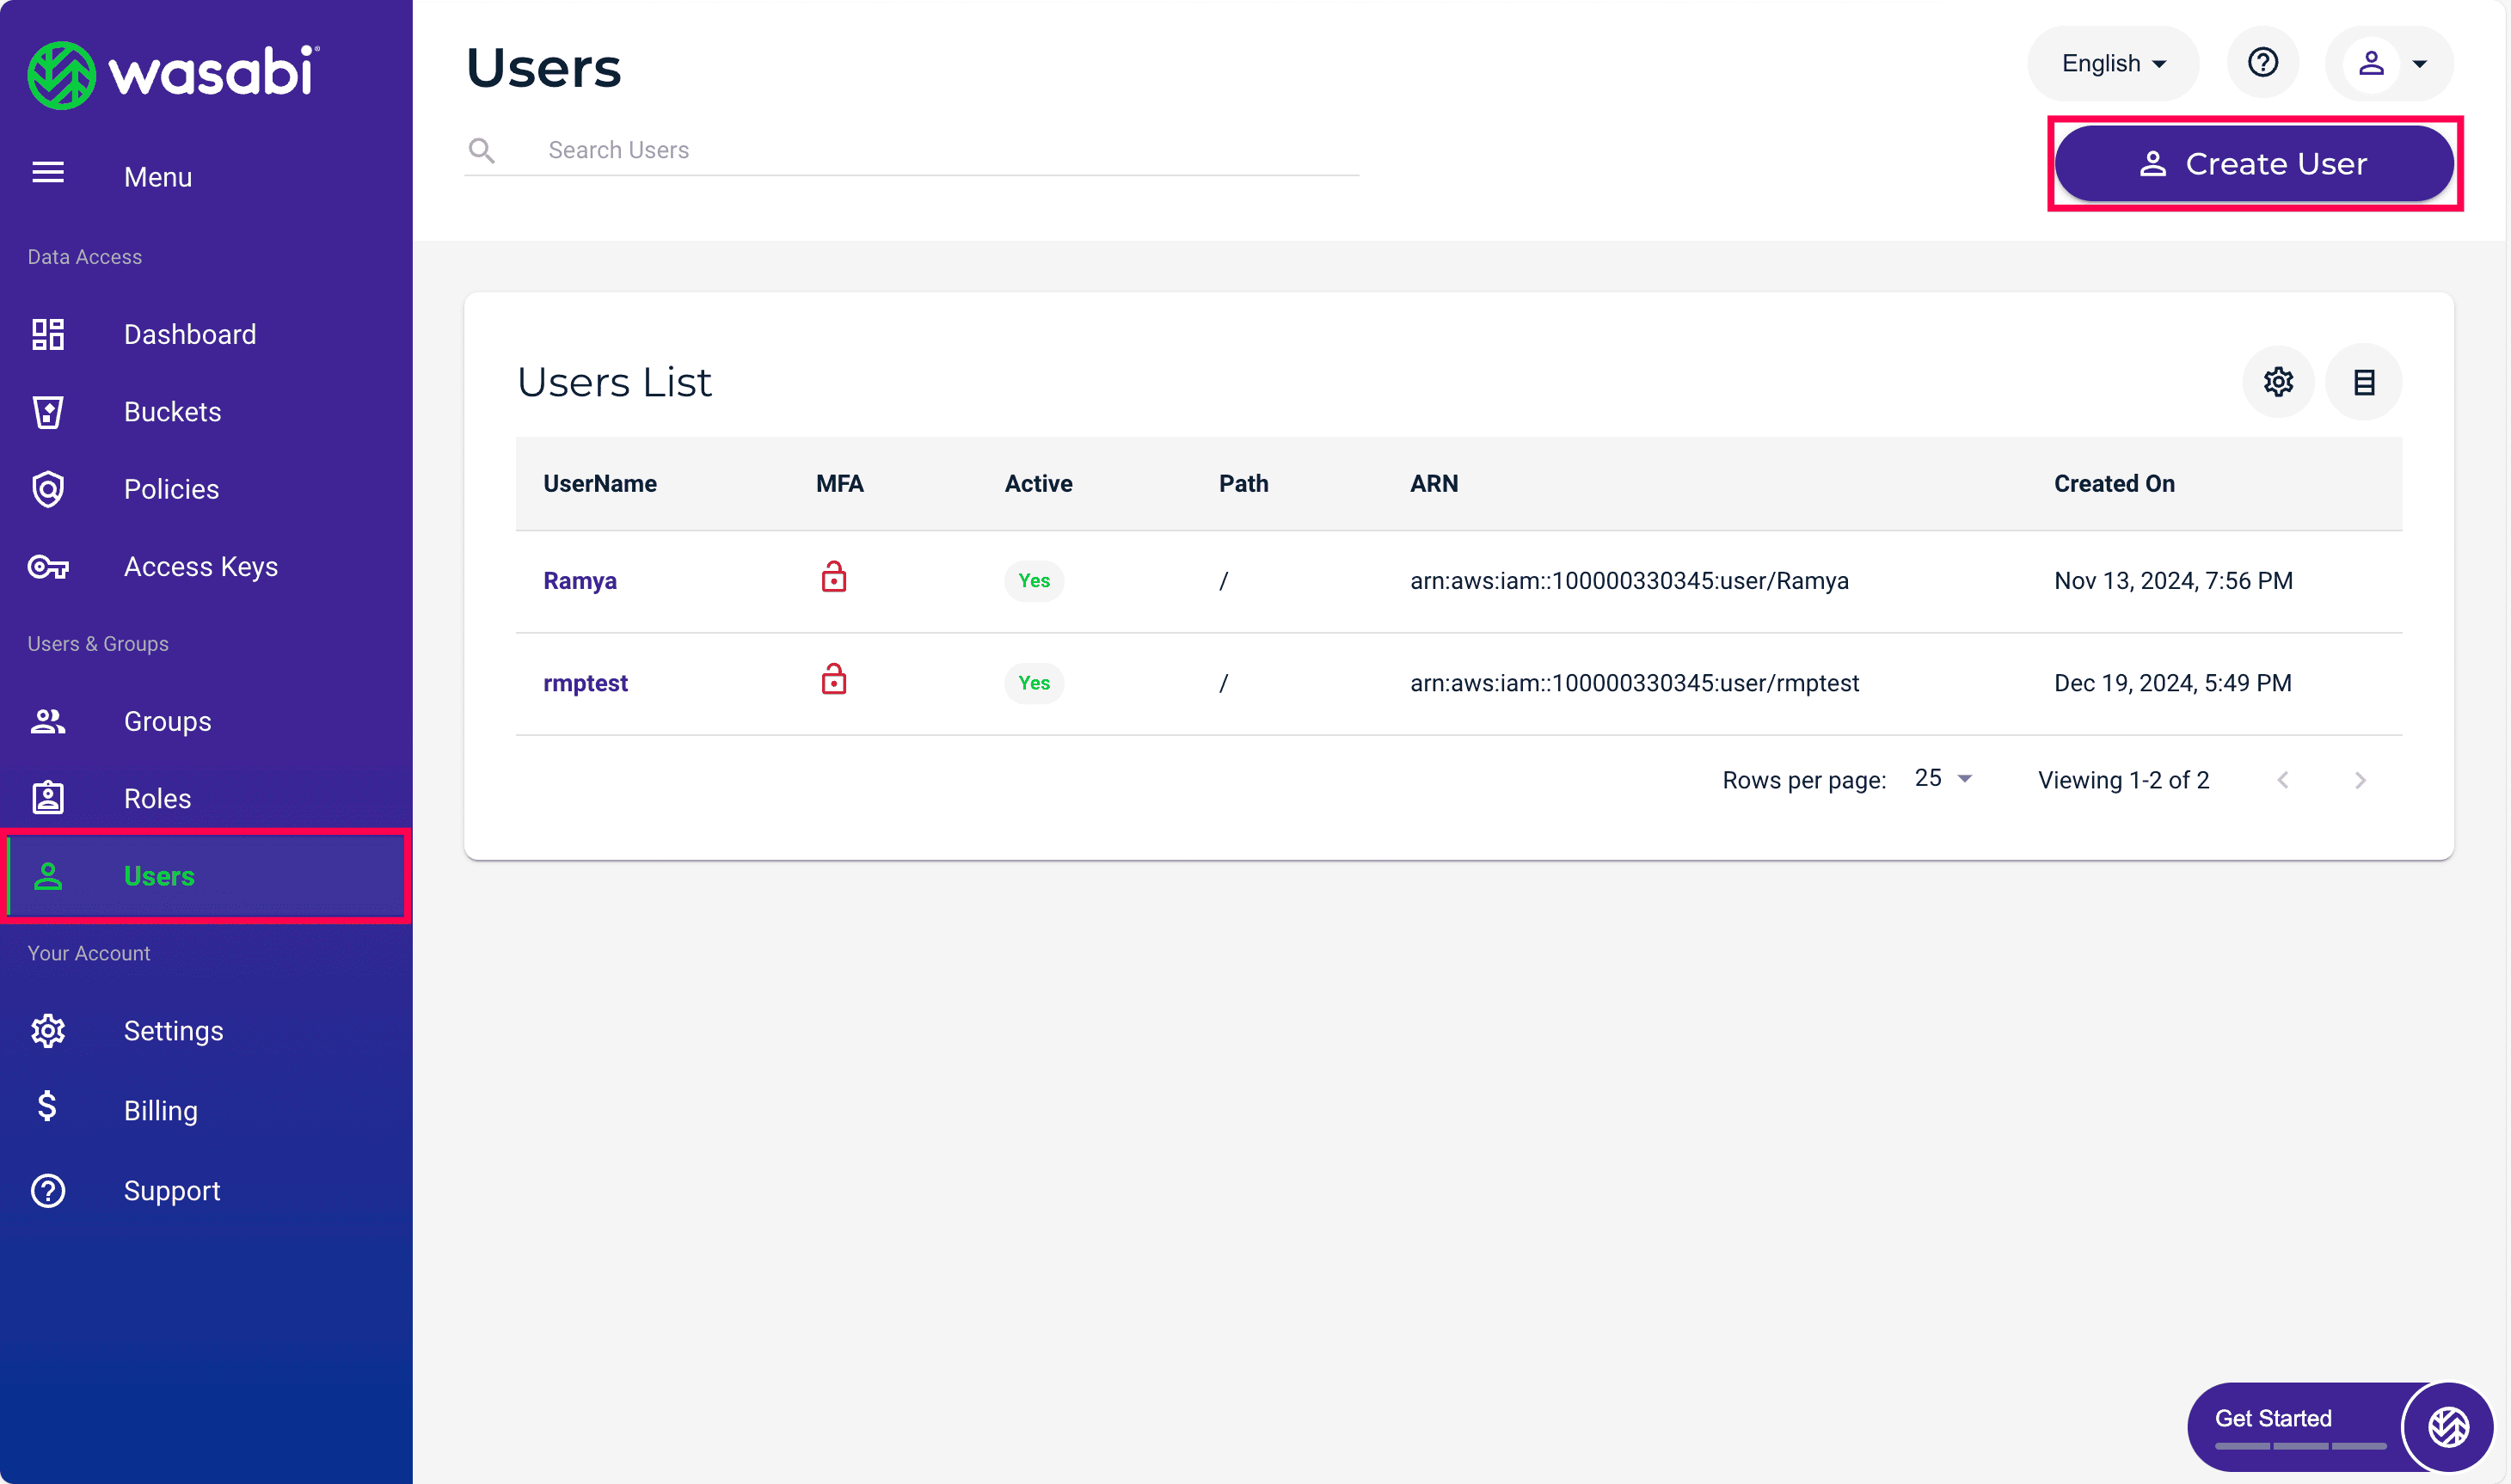
- Select Users under Users & Groups in the left pane.
- Click Create User to create a new user.
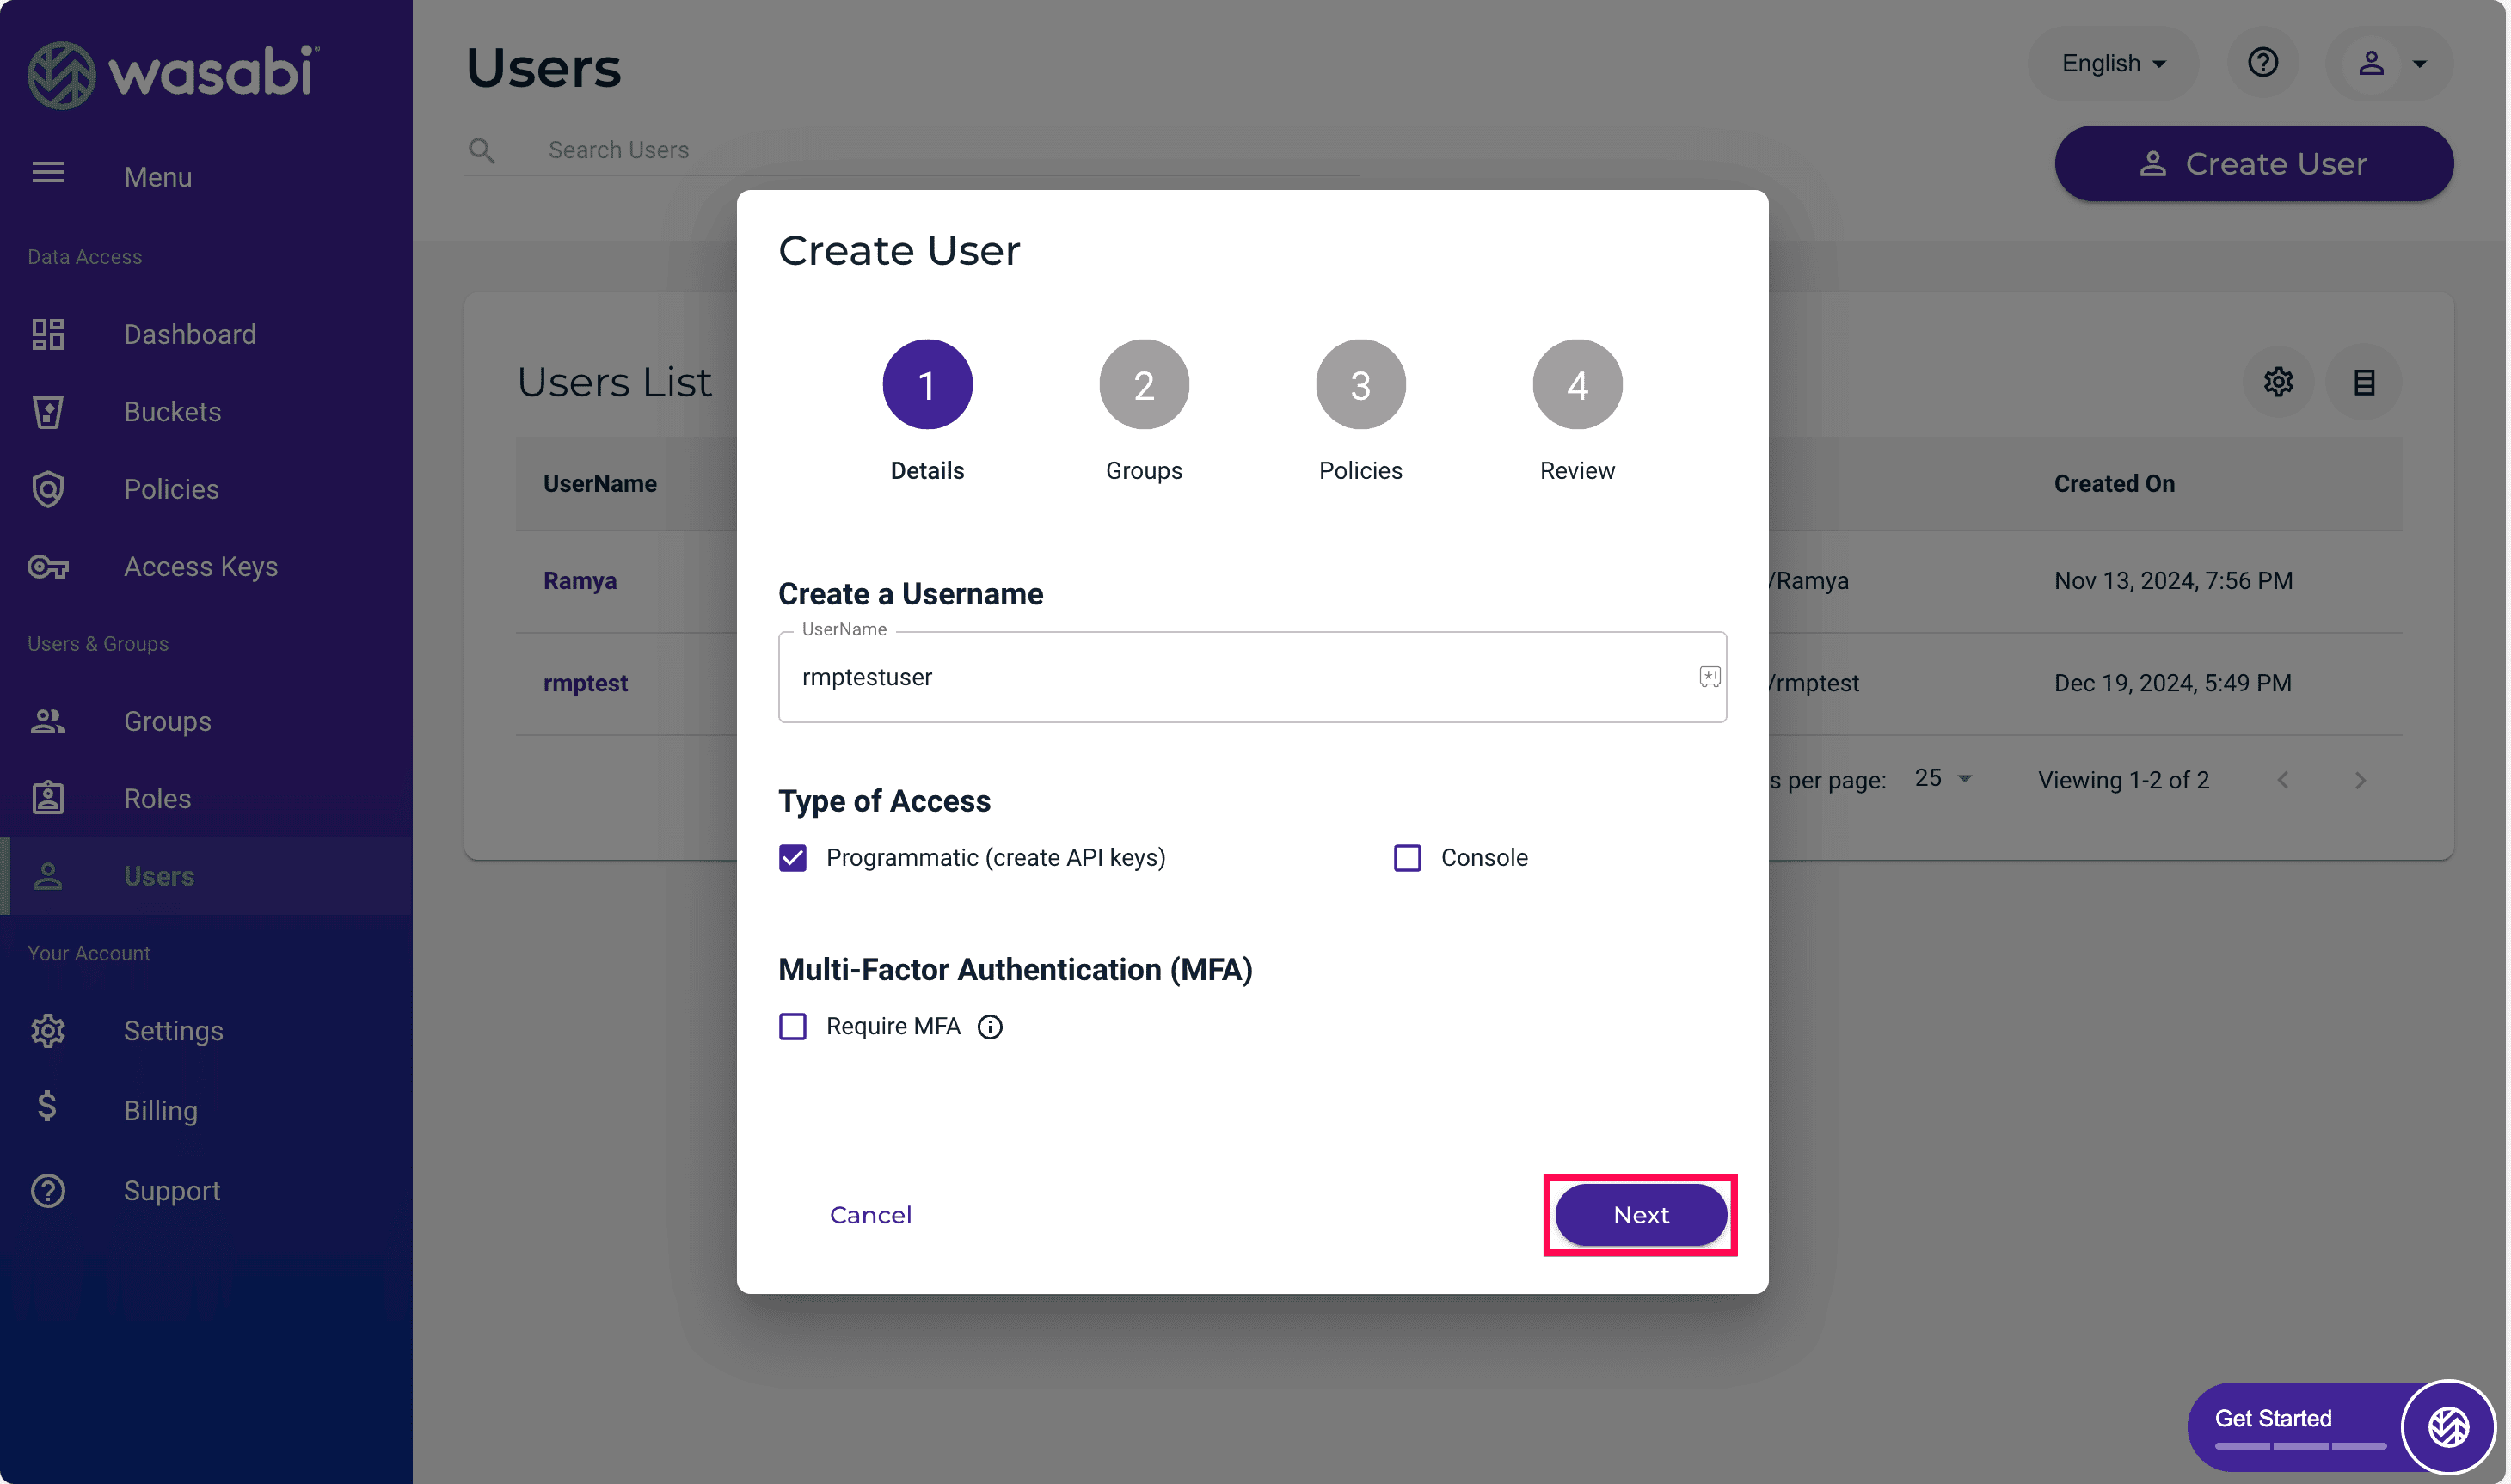
- Enter a name for the user in the Create a Username field.
- In the Type of Access field, check the Programmatic (create API keys) box.
- Leave the Multi-Factor Authentication (MFA) box unchecked and click Next.
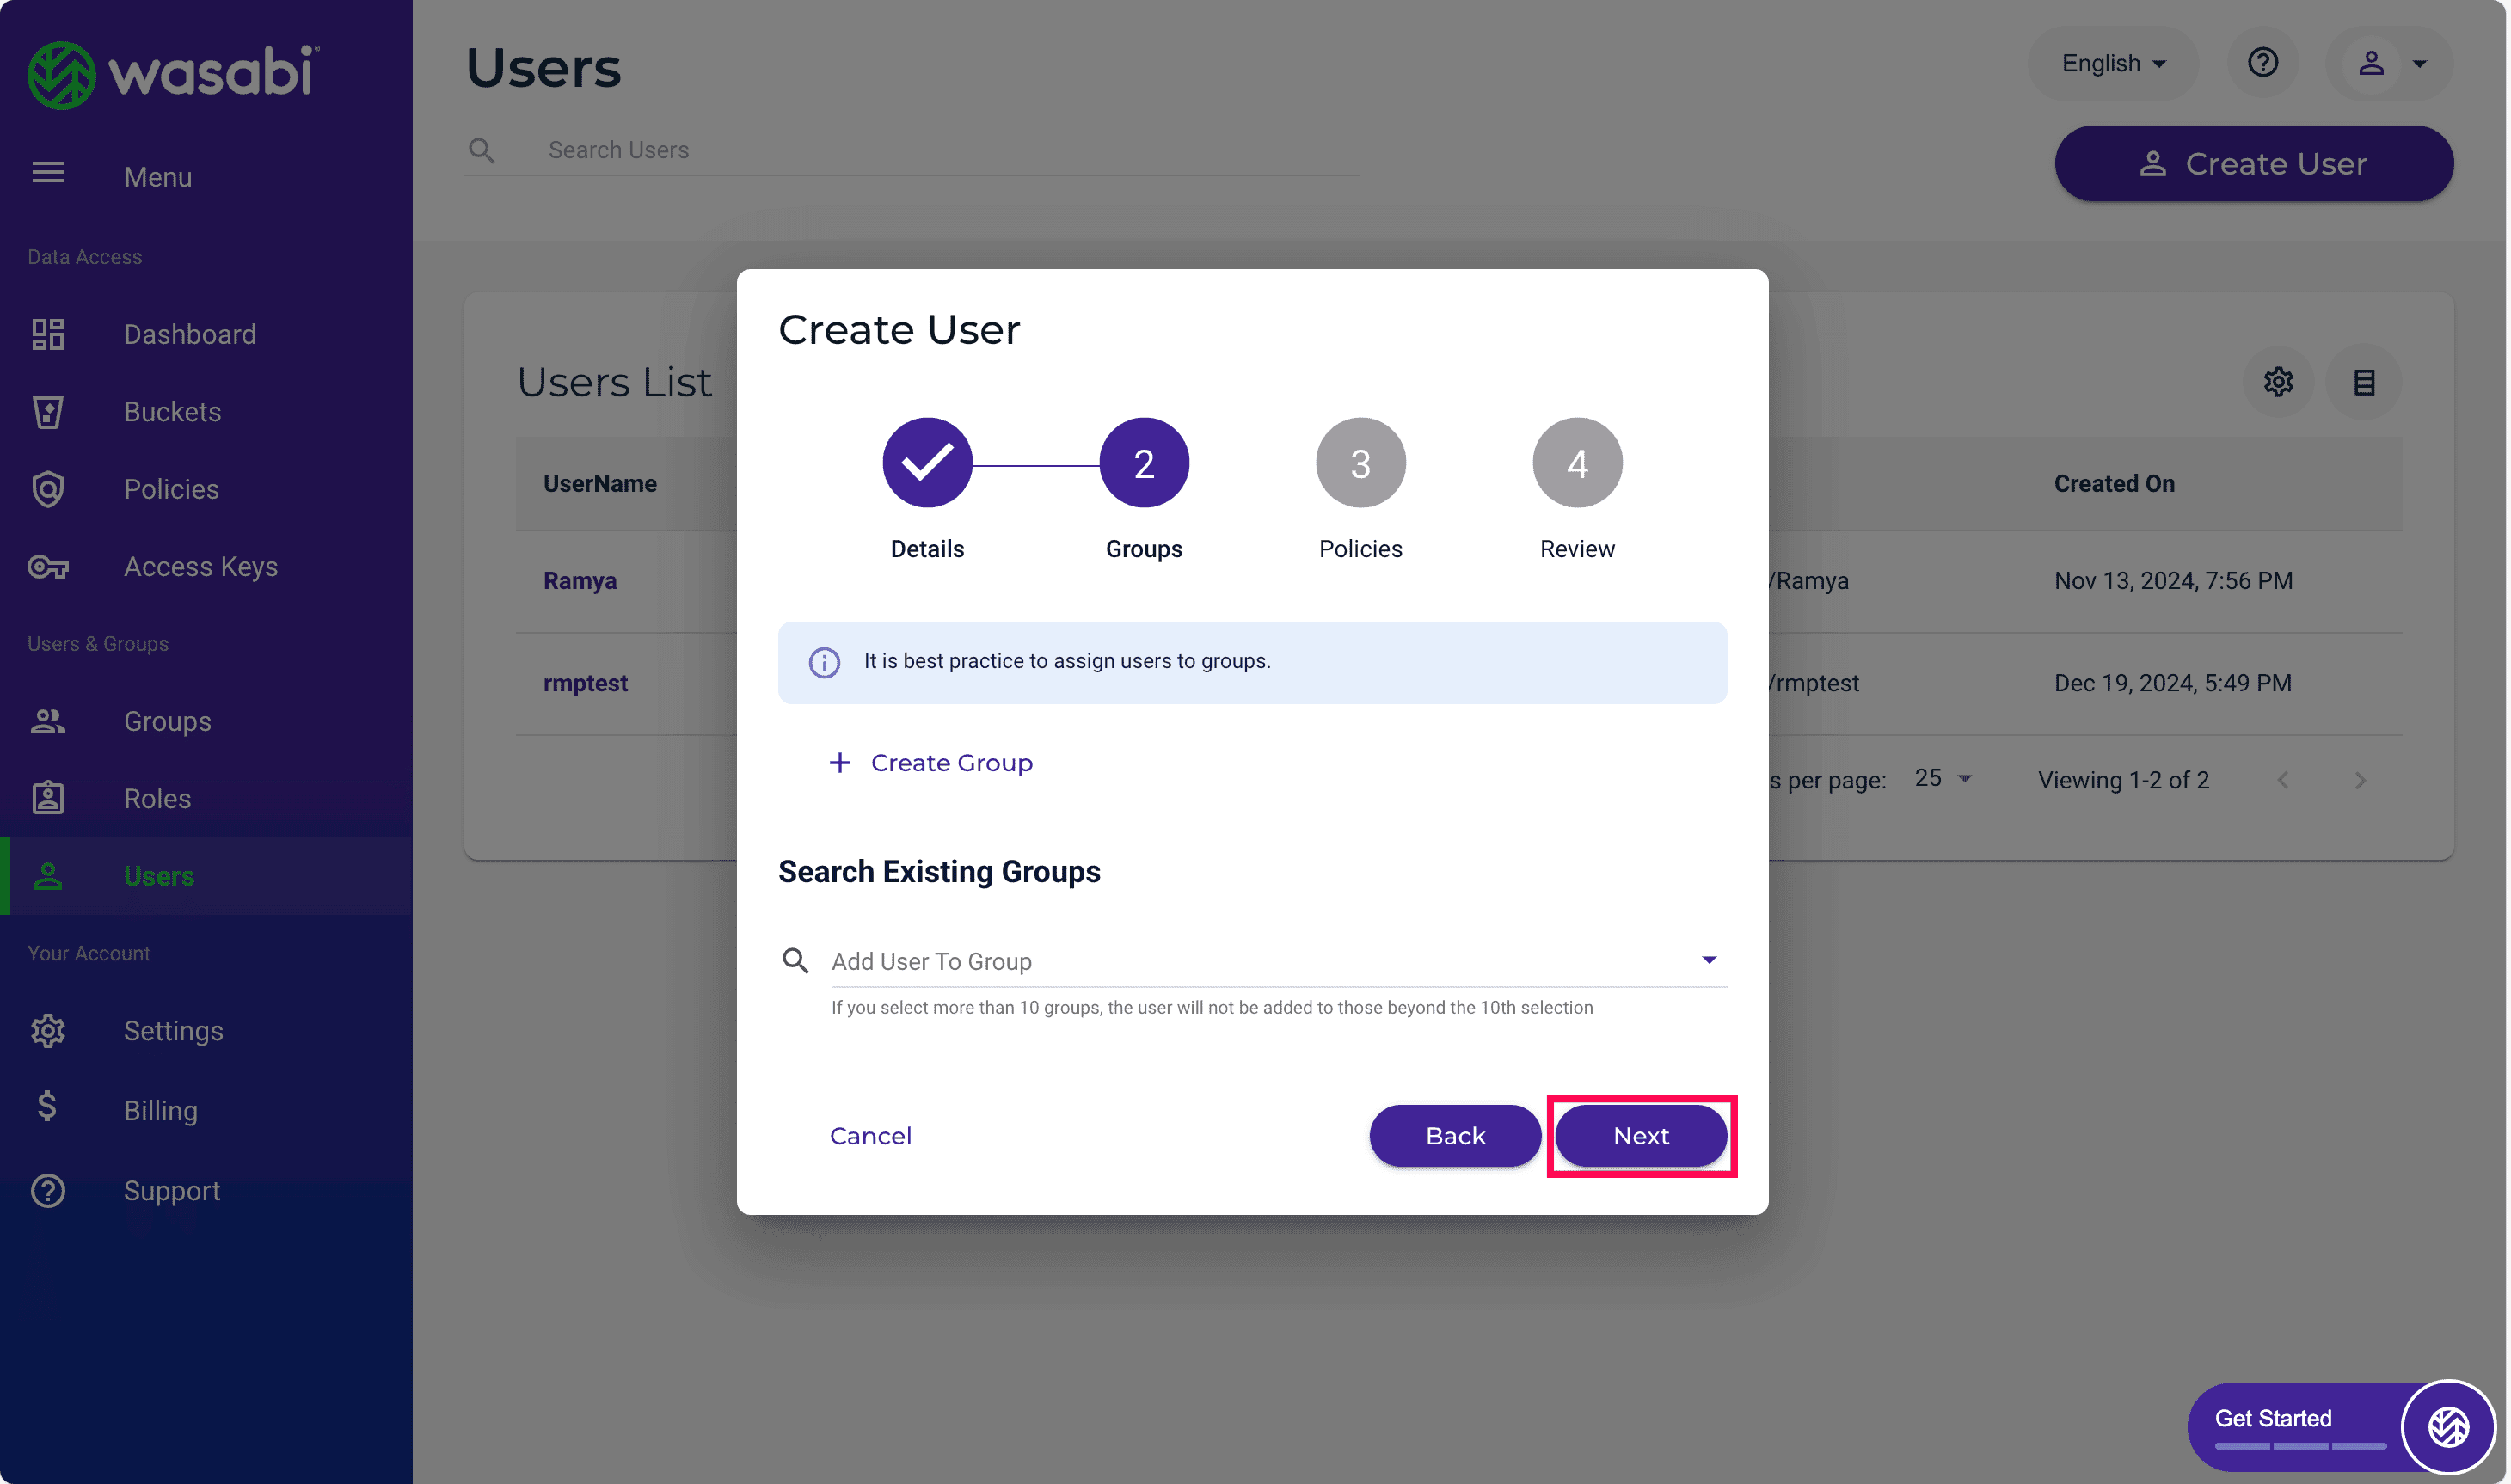
- Assign the user to a group if needed and click Next.
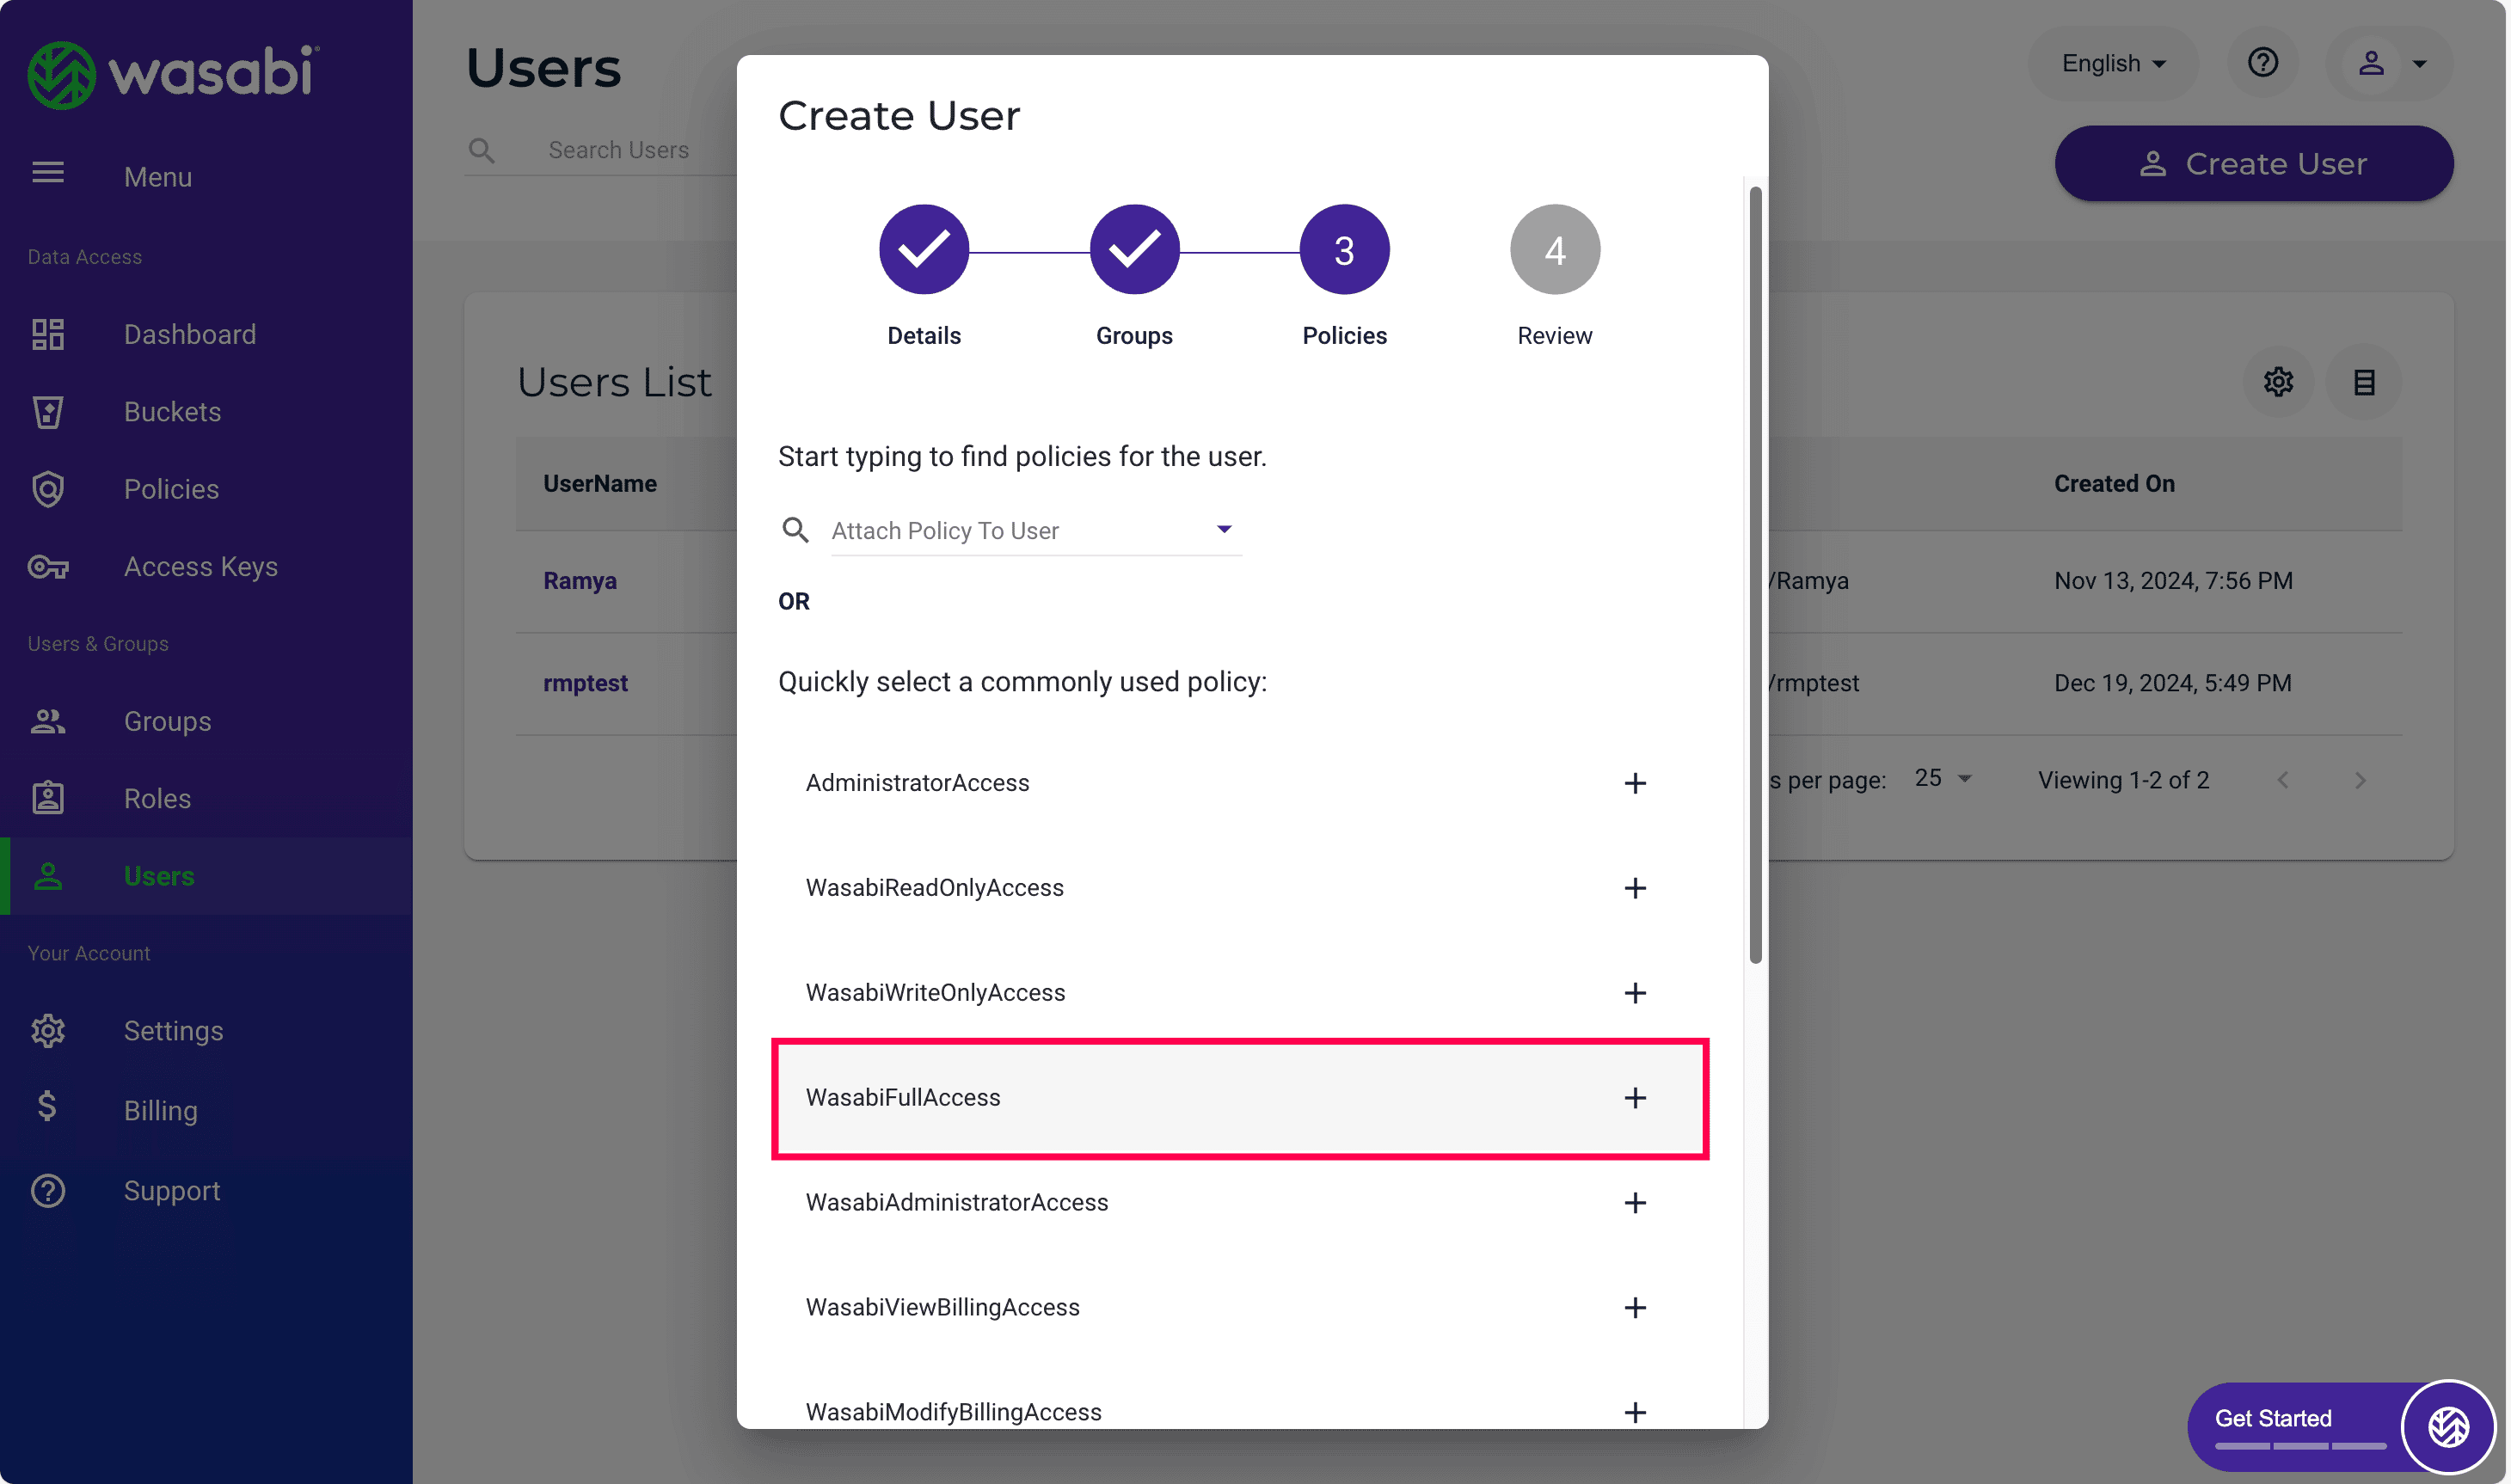
- Click the Attach Policy to User and select WasabiFullAccess and click Next.
- Review the entered details and click Create User.
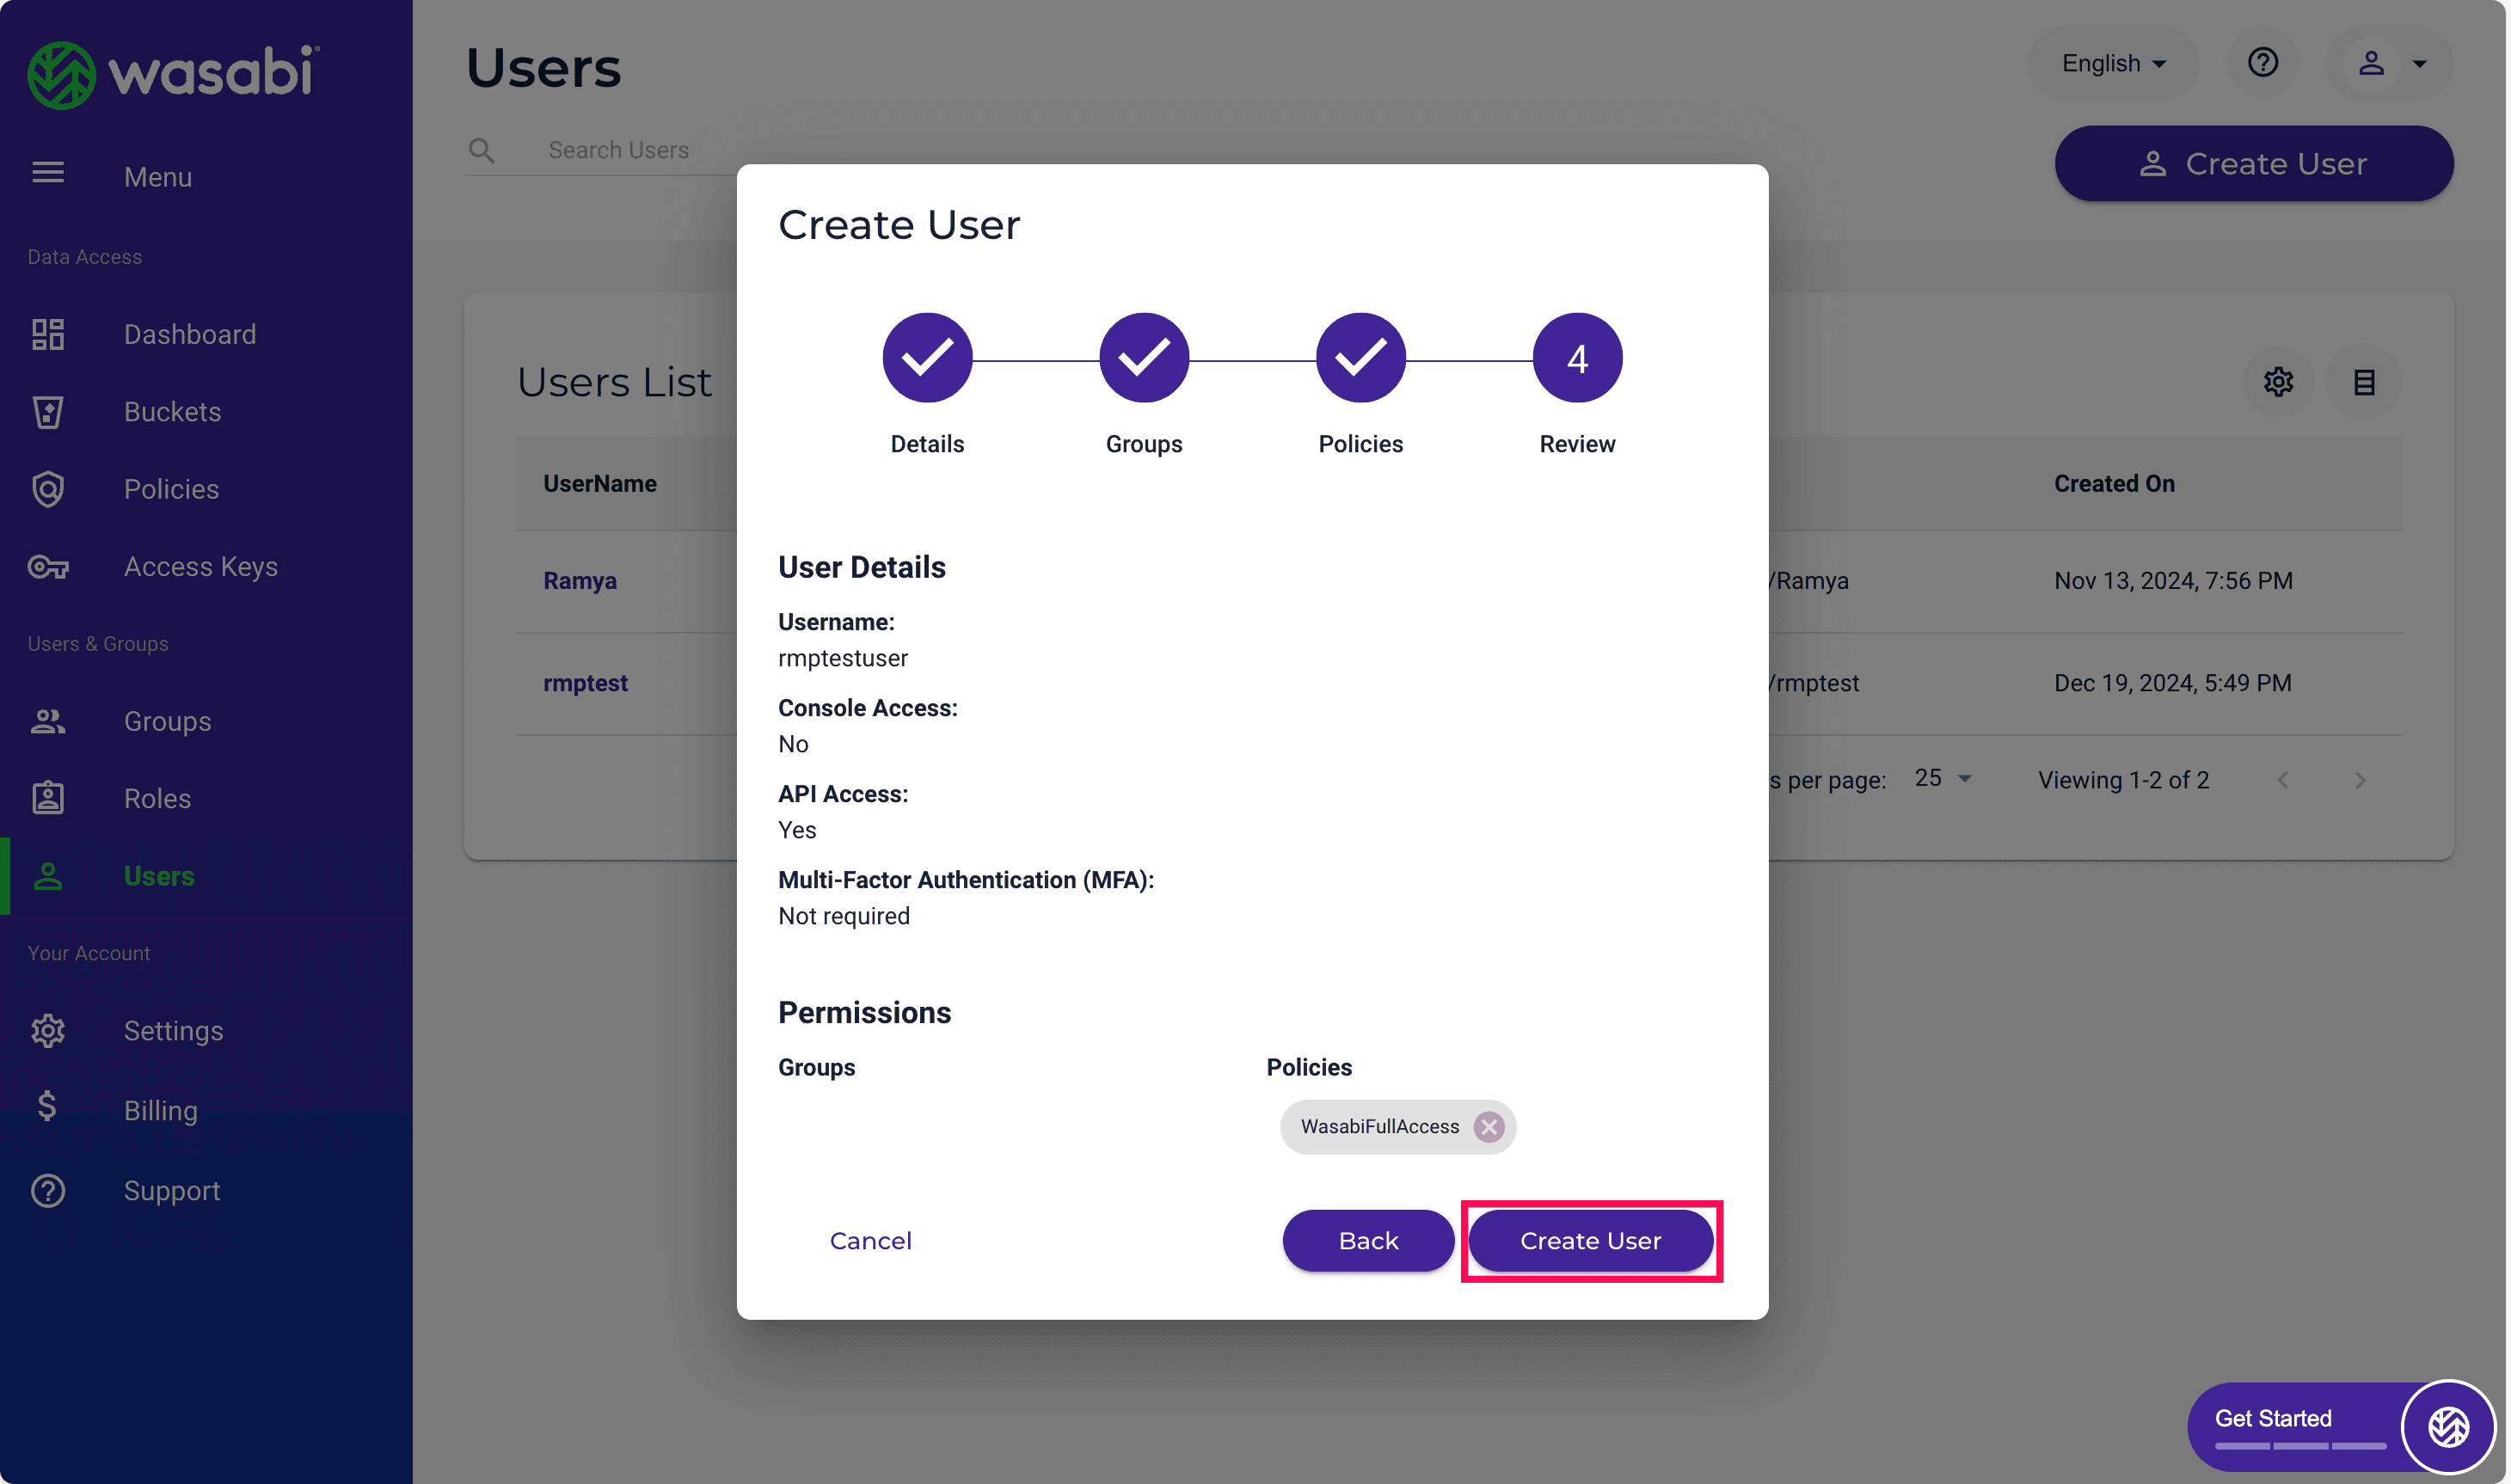
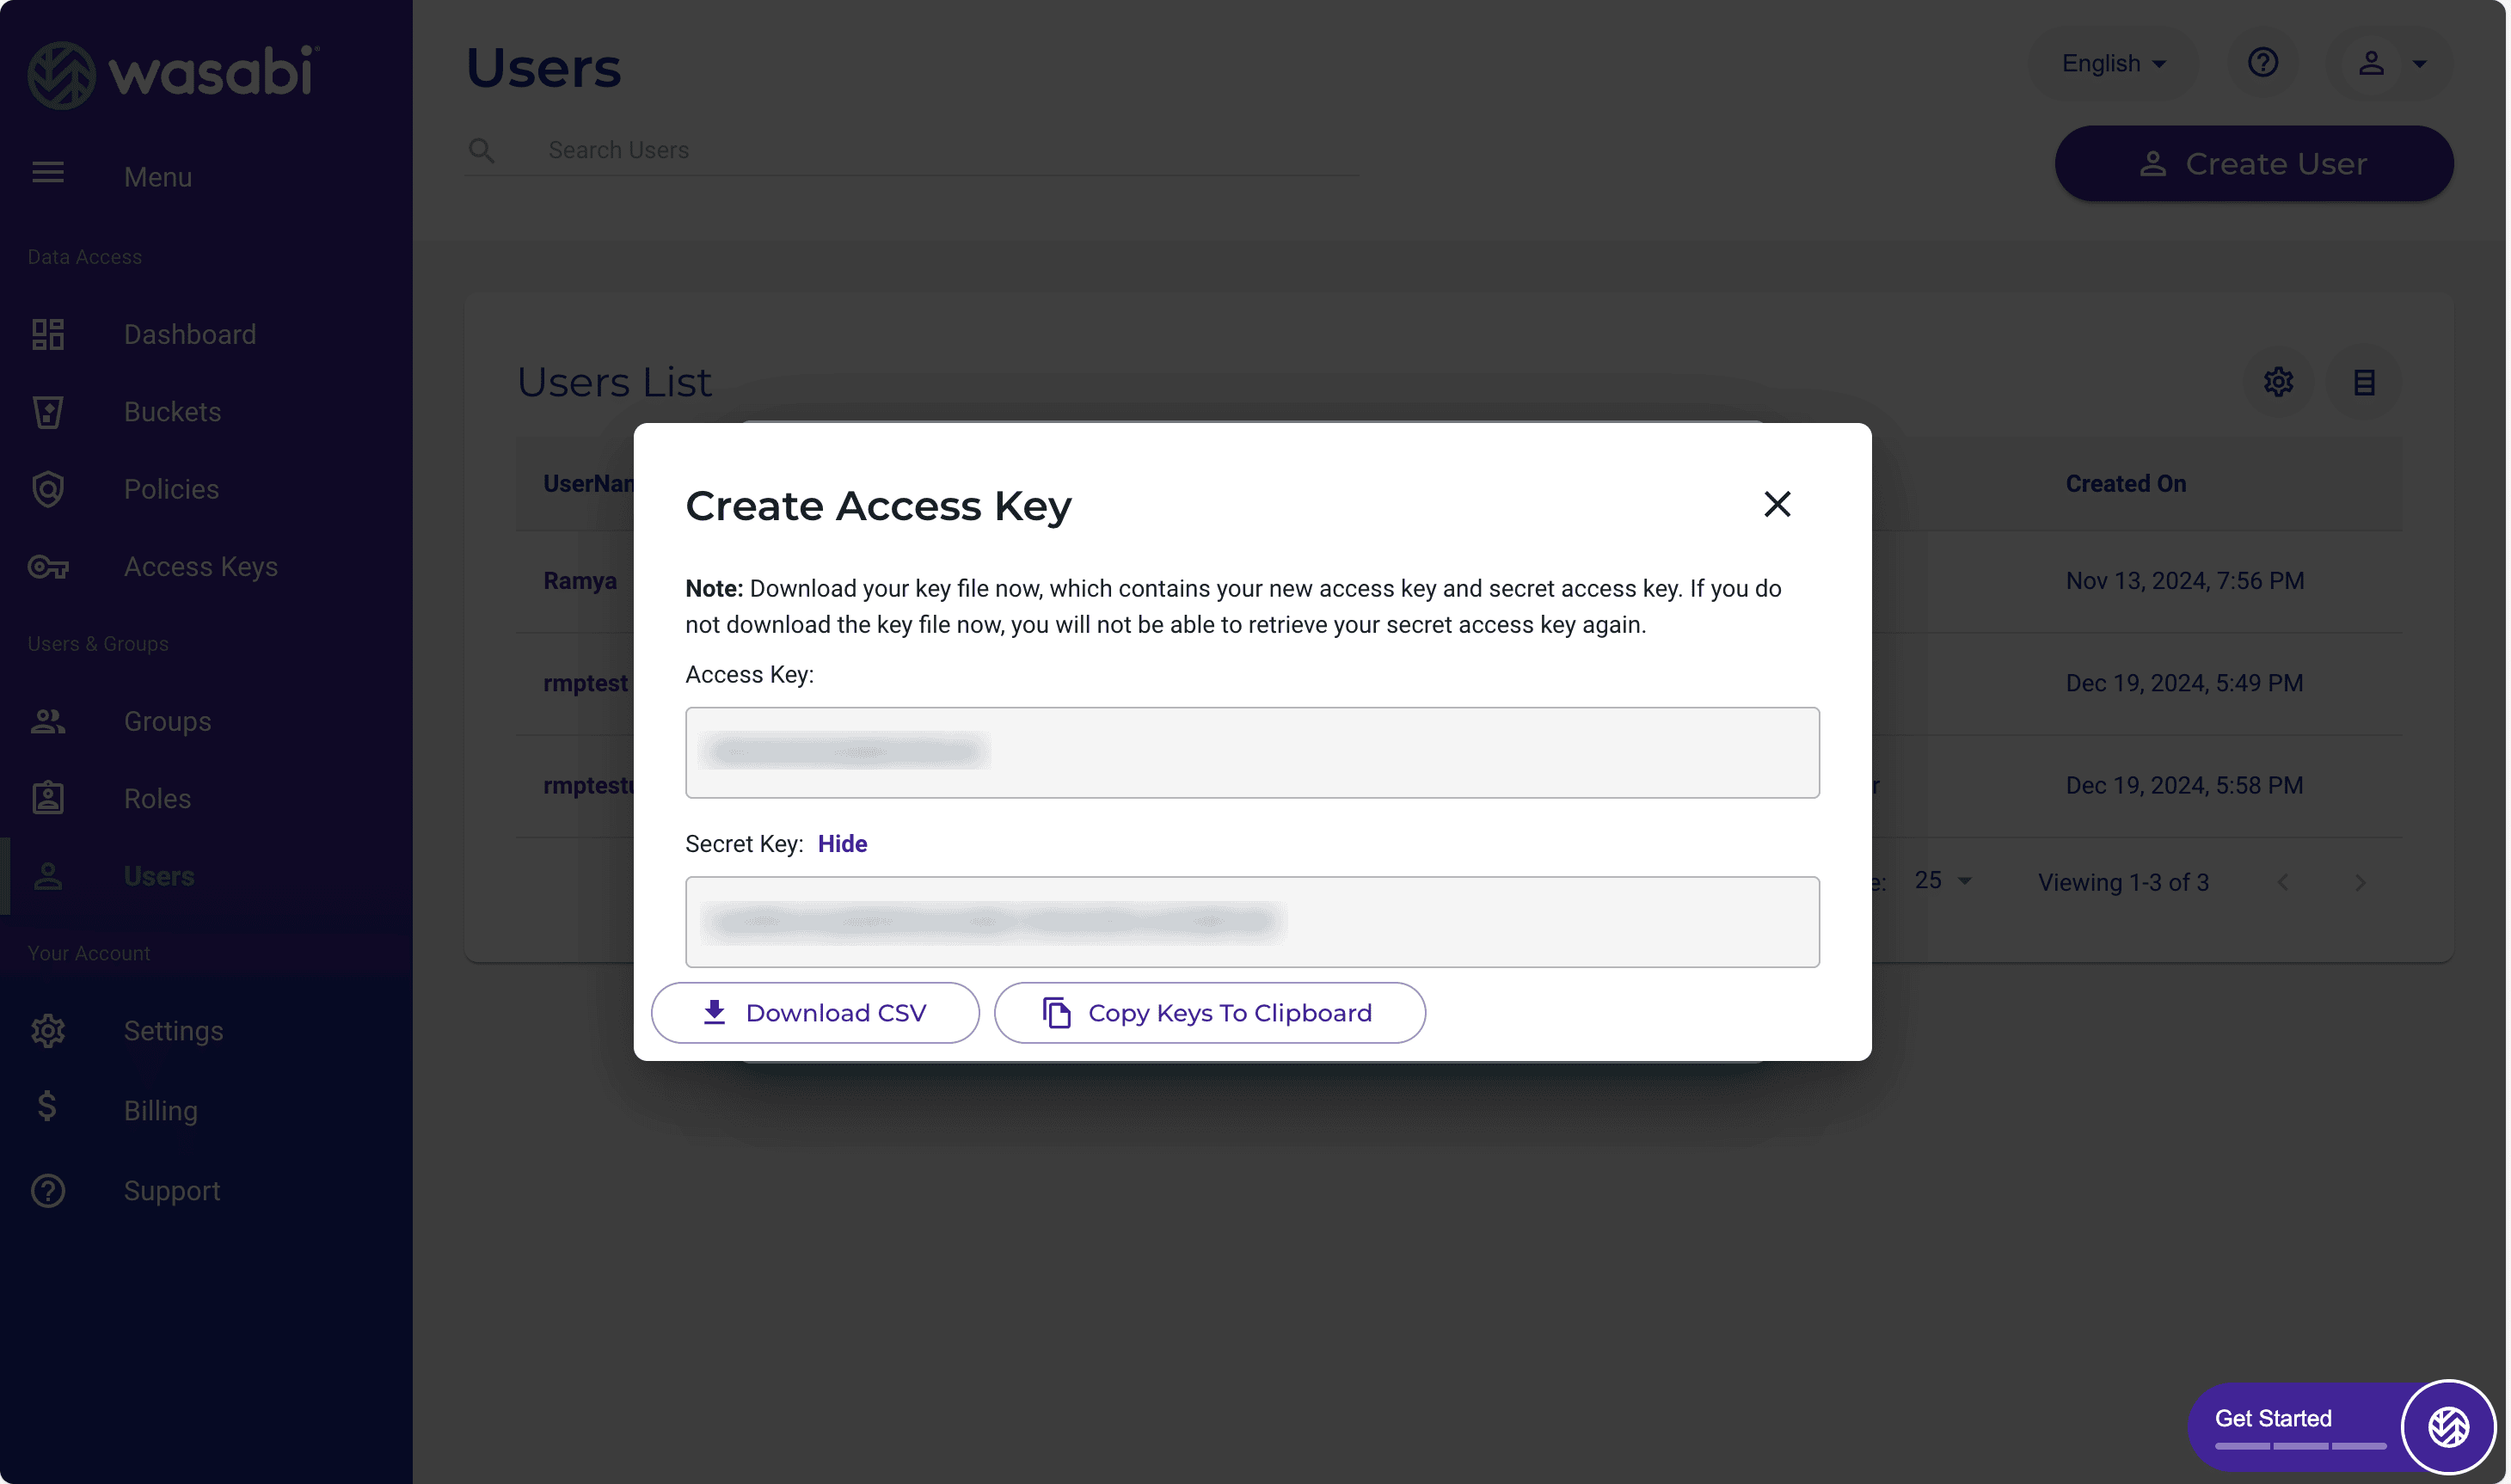
- Copy the Access Key and Secret Key from the pop-up that appears to configure your Wasabi storage account in RecoveryManager Plus.
 ADManager Plus
 ADAudit Plus
 ADSelfService Plus
 M365 Manager Plus