Importing data from Snowflake
If you have your data stored in Snowflake cloud database, you can easily import the data into Analytics Plus or connect live with the Snowflake for advanced reporting and analysis.
- Data Import: Data from your database will be imported and stored in Analytics Plus. Periodic schedules can be set up to fetch the latest data automatically from the cloud database.
- Live Connect: In this mode, data will not be imported and stored in Analytics Plus. Instead, Analytics Plus will display live data from your database when reports and dashboards are launched. The report loading time will directly depend on the response and performance of Snowflake. Live connections offer the convenience of real-time updates.
Data import
- Why should I allowlist Analytics Plus' IP addresses and how do I do it?
- How do I import data from the Snowflake database into Analytics Plus?
- How do I edit the setup?
- How long does it take for the data to be imported?
- Will foreign keys defined between the tables in the cloud database be linked in Analytics Plus as well?
- Is it possible to change the data type of the columns imported into Analytics Plus?
- How do I schedule data import?
- How do I get notified of import failures?
- Can I import data from the cloud database into an existing workspace in Analytics Plus?
- Can I synchronize data from the cloud database instantly?
- How do I resolve synchronization failure?
- How do I remove a data source?
Live connect
- How do I connect live with the Snowflake database?
- How can I edit the live connect configuration?
- What are the differences between periodic data imports and live connections?
- How long does it take to visualize data in Analytics Plus?
- Will the foreign keys defined between tables in the database be defined in Analytics Plus?
- Why am I unable to access a table or a report in Analytics Plus?
- What is a Mismatch?
- When do Mismatches occur and how do I resolve them?
- How to reflect the meta data changes of individual tables from the cloud database instantly?
- Is it possible to connect live with newly added tables in the Snowflake database?
- Is it possible to change the data type of the columns in Analytics Plus?
- Can I import data from other data sources into a workspace set up with Snowflake live connection?
- Can I create query tables in workspaces set up with live connection?
- What happens when I delete or rename the database in Snowflake?
- How do I remove the Snowflake setup?
Data import
1. Why should I allowlist Analytics Plus' IP addresses and how do I do it?
Click here to view the entire list of IP addresses that needs to be allowlisted categorized based on different data centers.
2. How do I import data from the Snowflake database into Analytics Plus?
3. How do I edit the import setup?
4. How long does it take for the data to be imported into Analytics Plus?
After setting up data import from your cloud database, you might have to wait some time for the initial fetch to happen. Depending on the amount of data in your application, the reports and dashboards might take up to 5 minutes to display all the metrics. If you access the workspace before the initial fetch is complete, it will not display any data.
5. Will the foreign keys defined between the tables in the cloud database be linked in Analytics Plus as well?
When importing multiple tables, the foreign keys defined between the tables in the cloud database will be linked in Analytics Plus using lookup columns. However, if you import one table at a time, the foreign keys will not be defined. In such cases, you can manually link the tables in Analytics Plus using the lookup column functionality. To learn more about lookup columns, click here.
6. Is it possible to change the data type of the columns imported into Analytics Plus?
Yes. To learn more about changing the column type in Analytics Plus, click here.
Note: While changing the column's data type in Analytics Plus, ensure that it is compatible with the column's data type in the cloud database, for successful data synchronization.
7. How do I schedule data import?
Follow the steps below to schedule data import for an existing table in Analytics Plus.
Select the Data Sources option from the side panel, and navigate to the required Snowflake data source.
Click the Sync Settings button.
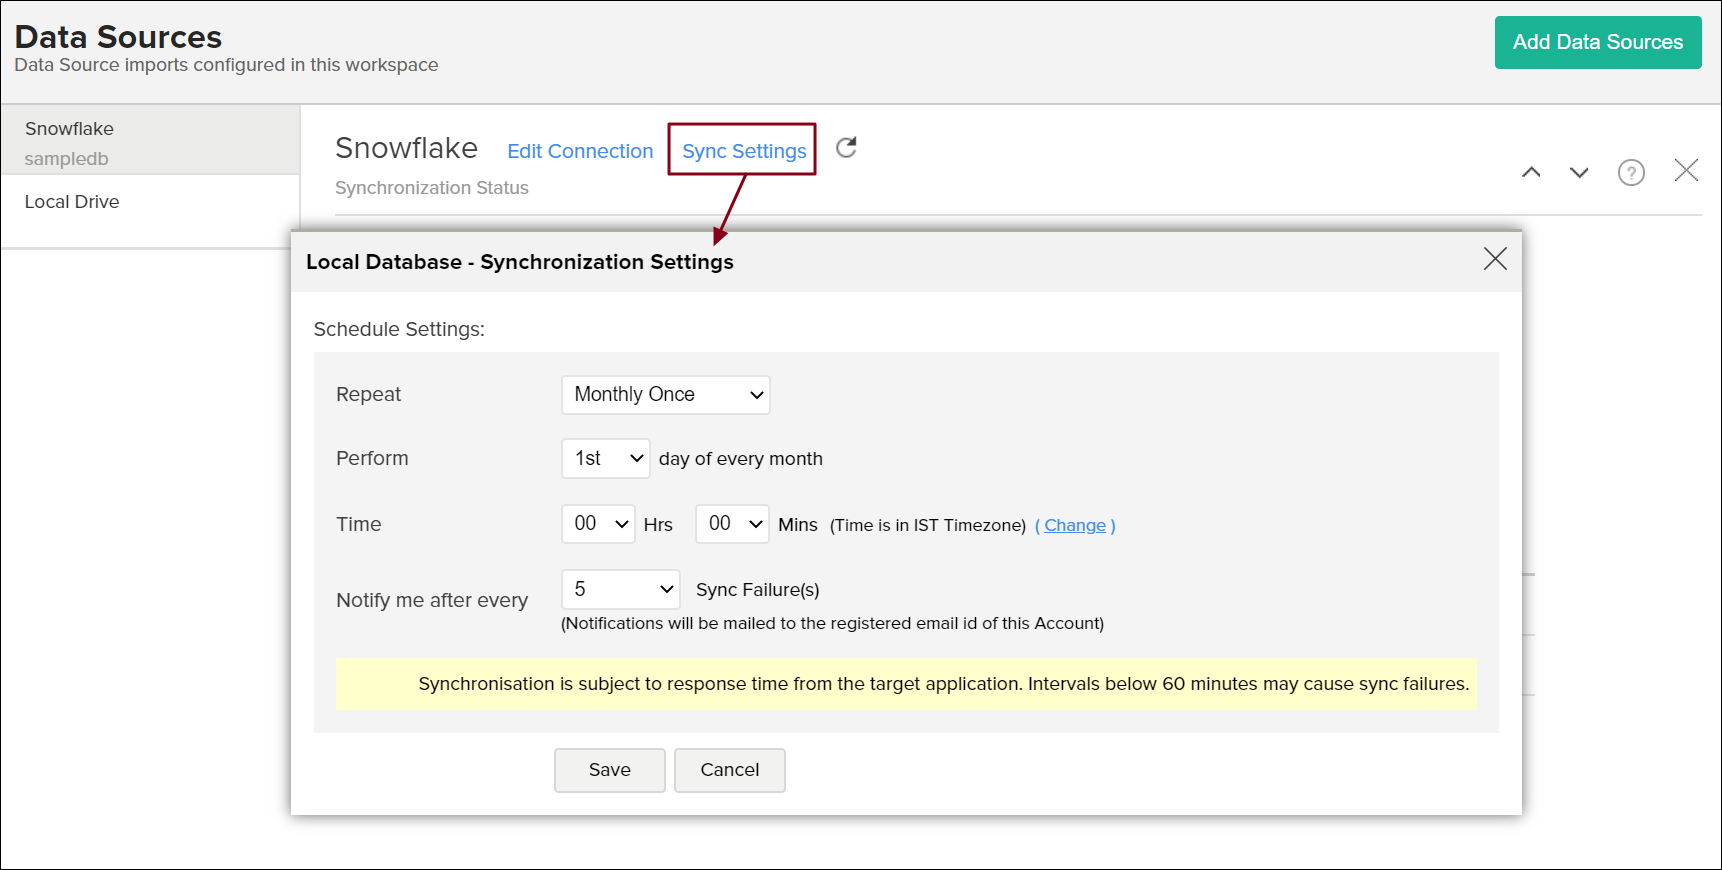
Select the required schedule interval from the Repeat every drop down.
Specify the number of consecutive import failure after which you are to be notified in the Notify me after every 'N' Sync Failure (s) section.
Click Save. The data from your Snowflake database will be imported into Analytics Plus in the specified intervals.
You can also schedule the import during the initial import. Refer this presentation to know more.
8. How do I get notified of import failures?
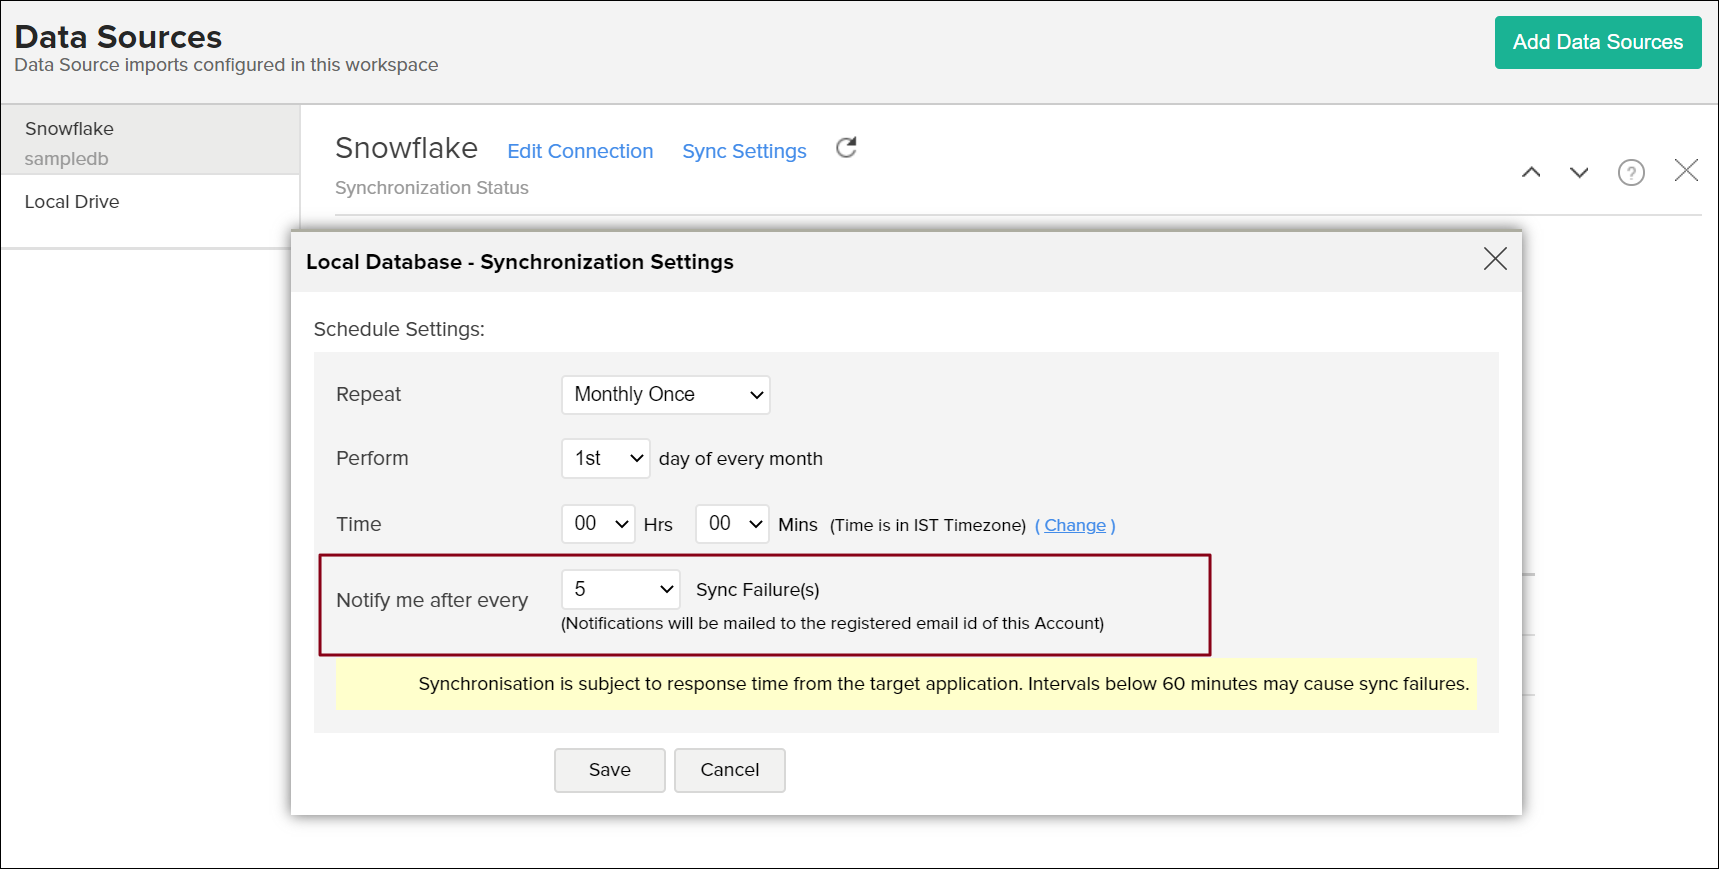
You can choose to be notified of consecutive import failures, in case it occurs, while setting up data schedules. To do this,
Select the Data Sources option from the side panel, and navigate to the required Snowflake data source.
Click the Sync Settings button.
Specify the number of consecutive import failure after which you are to be notified using the Notify me after every 'N' Sync Failure (s) section.
You can also set up notifications of import failures during the initial data import. Refer this presentation to know more.
9. Can I import data from the cloud database into an existing workspace in Analytics Plus?
Yes. Follow the below steps to import data into an existing workspace:
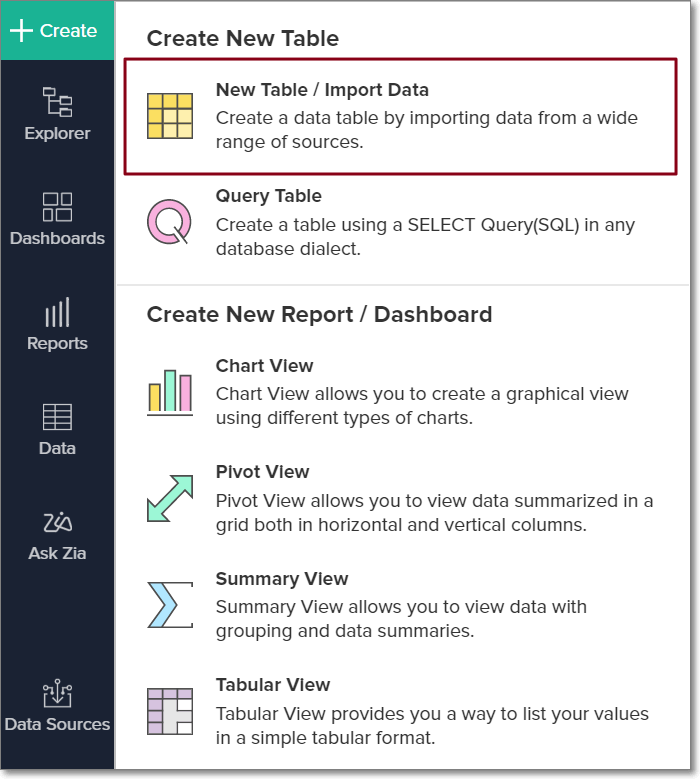
Open the required workspace. Click Create from the side panel, and select the New Table / Import Data option.
Click the Cloud Databases tile, and follow the steps detailed in this presentation.
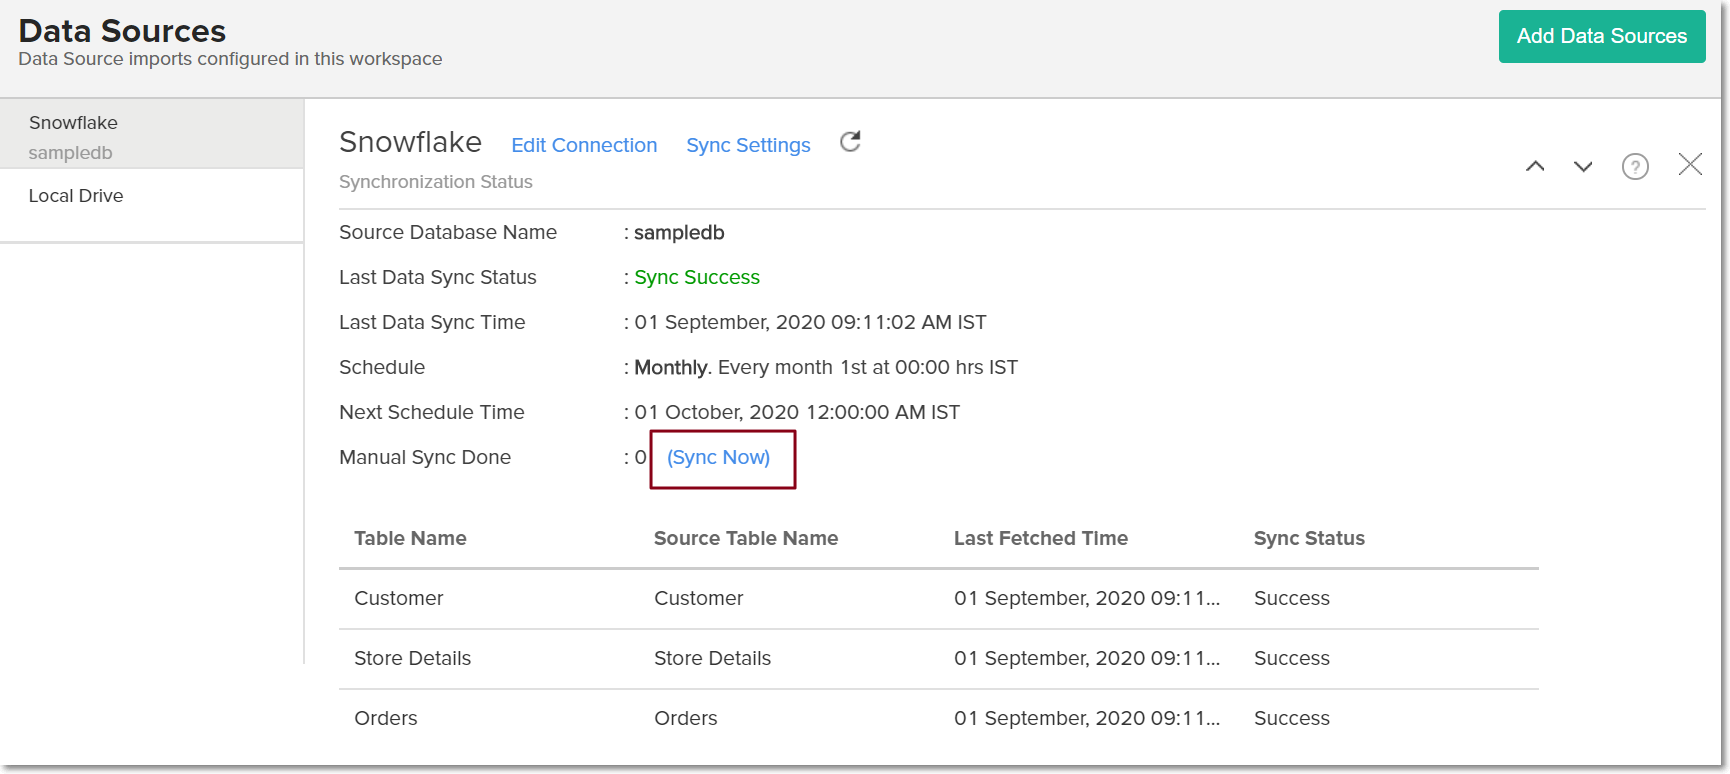
10. Can I synchronize data from the cloud database instantly?
Yes. Follow the steps below to do this.
Open the required workspace, and click the Data Sources tab from the side panel.
Click the Sync Now link.
11. How do I resolve synchronization failure?
To resolve synchronization failure, you need to understand the reason behind the failure. To do this,
Click the Data Sources button from the side panel, and navigate to the required data source.
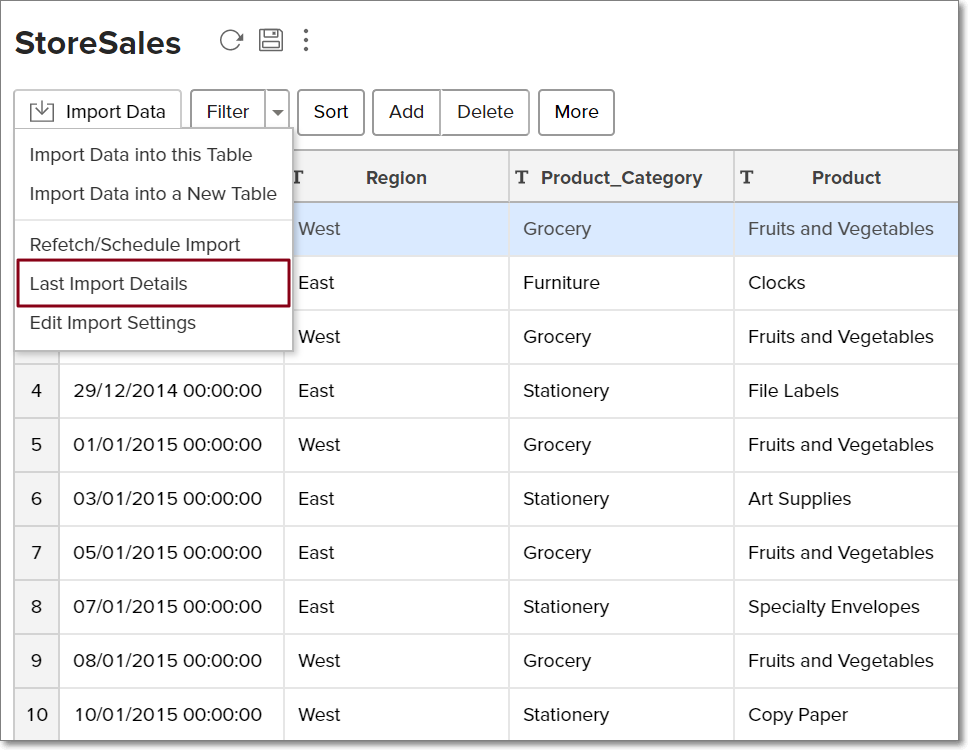
Click the View Last Import Details icon that appears on mouse over the listed tables. This opens the Import Details page, which provides detailed insight on the reason for the synchronization failure.
You can also view the Import Details page by opening the required table, and selecting the Import Data -> Last Import Details option.
12. How do I remove a data source?
To remove the setup,
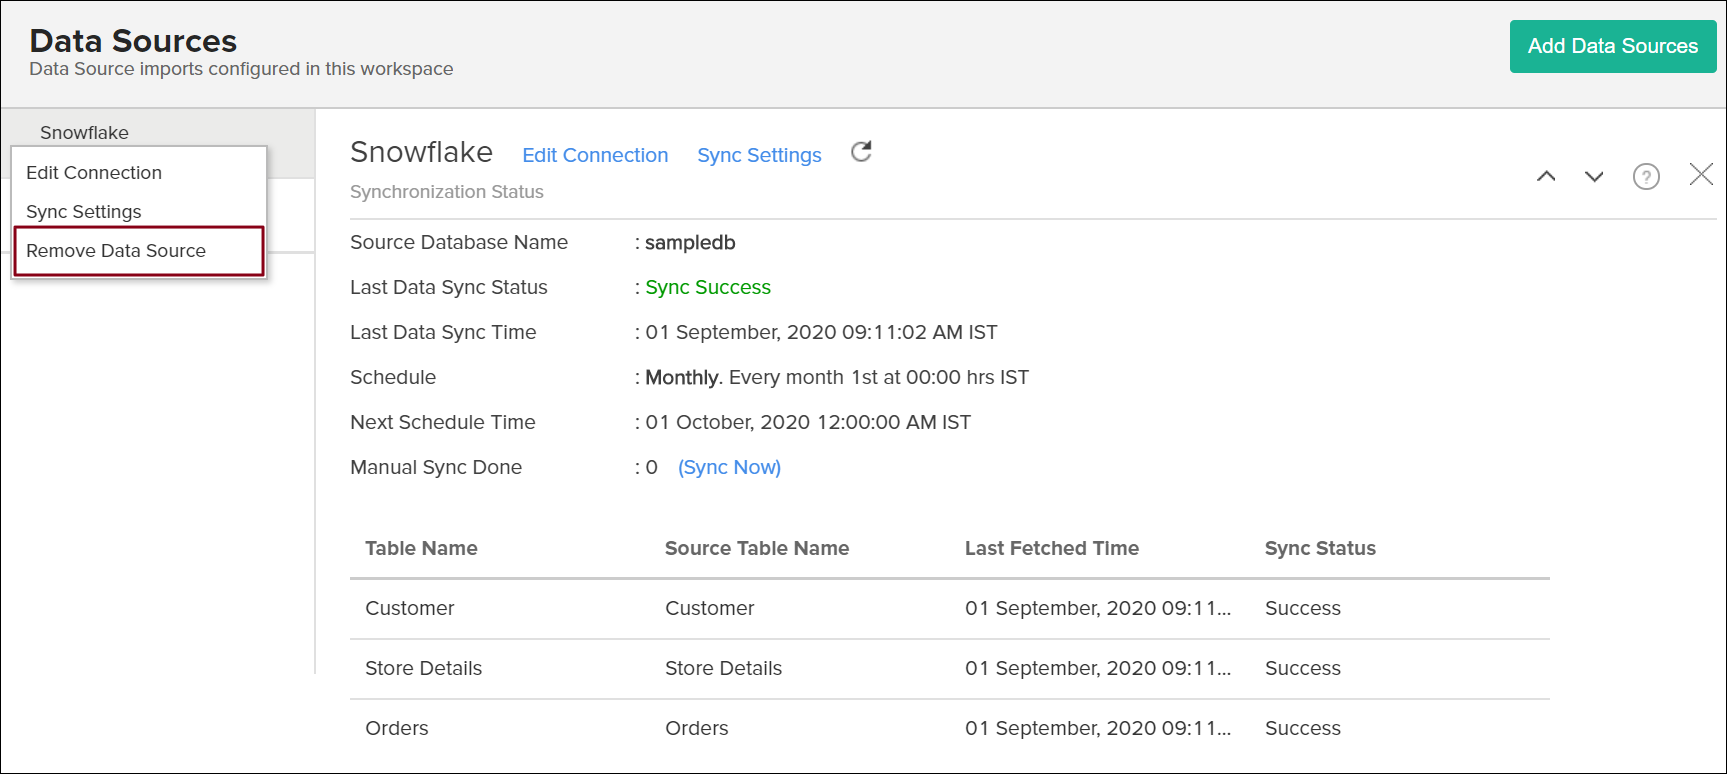
Click the Data Sources button from the side panel, and navigate to the required data source.
Click the Settings icon that appears on mouse over the data source's name, and select Remove Data Source.
Note: Removing the data source does not delete the corresponding tables and reports from Analytics Plus. However, further synchronization cannot be carried out.
Live connect
1. How do I connect live with the Snowflake database?
2. How do I edit the live connection configuration?
3. What are the differences between data imports and live connections?
The various differences are tabulated below.
| Data Import | Live Connect |
| The data from the Snowflake database will be imported and stored in Analytics Plus. | The data from the Snowflake database will be fetched live whenever you create or access a report in Analytics Plus. |
| Data from other sources can be imported into the same workspace and combined for reporting and advanced analysis. | Data from other sources cannot be imported into a workspace that is created using live connections. |
| Changes made to the columns in the data source, such as addition or deletion, will be synchronized automatically. | To reflect any changes in data structures from the data source to Analytics Plus, manual synchronization has to be carried out. |
| Query tables can be created. | Query tables cannot be created in a workspace set up with live connect. |
| Report loading time will be fast, as the data is stored locally in Analytics Plus. | As data from the source database is not stored locally in Analytics Plus, the loading time will depend on the performance of database, and the amount of data included in the report. |
4. How long does it take to visualize data in Analytics Plus?
As data from the source database is not imported into Analytics Plus, the loading time depends on the amount of data stored in your Snowflake database, and the performance of the database.
5. Will the foreign keys defined between tables in the database be defined in Analytics Plus?
Look-up relationship will be automatically created for tables linked via foreign keys in the Snowflake database. You can also manually link the tables in Analytics Plus using the lookup column functionality. To learn more about lookup columns, click here.
6. Why am I unable to access a table or a report in Analytics Plus?
If the tables or columns present in Analytics Plus have been deleted from the database, you will not be able to access the corresponding views in Analytics Plus. To overcome this, remap the corresponding table or column. Click here to know more.
7. What is a Mismatch?
In Analytics Plus, a mismatch occurs when the tables and columns in your Analytics Plus workspace don't have a direct mapping to the data in the database. In case of any mismatches, Analytics Plus will not be able to fetch appropriate data from the Snowflake database. These mismatches are listed under the Mismatch tab of the corresponding Data Sources page. Refer to the following question to know more.
8. When do Mismatches occur and how do I resolve them?
9. How to reflect the meta data changes of individual tables from the cloud database instantly?
When you have meta data changes in any or all of your tables, you can instantly reflect those changes in Analytics Plus. Changes in meta data include updates such as column addition and deletion.
Follow the steps below to reflect meta data changes in Analytics Plus:
Open the required workspace, and click the Data Sources tab from the side panel.
Navigate to the required data source, and click the Sync option that appears on mouse over the required table name.
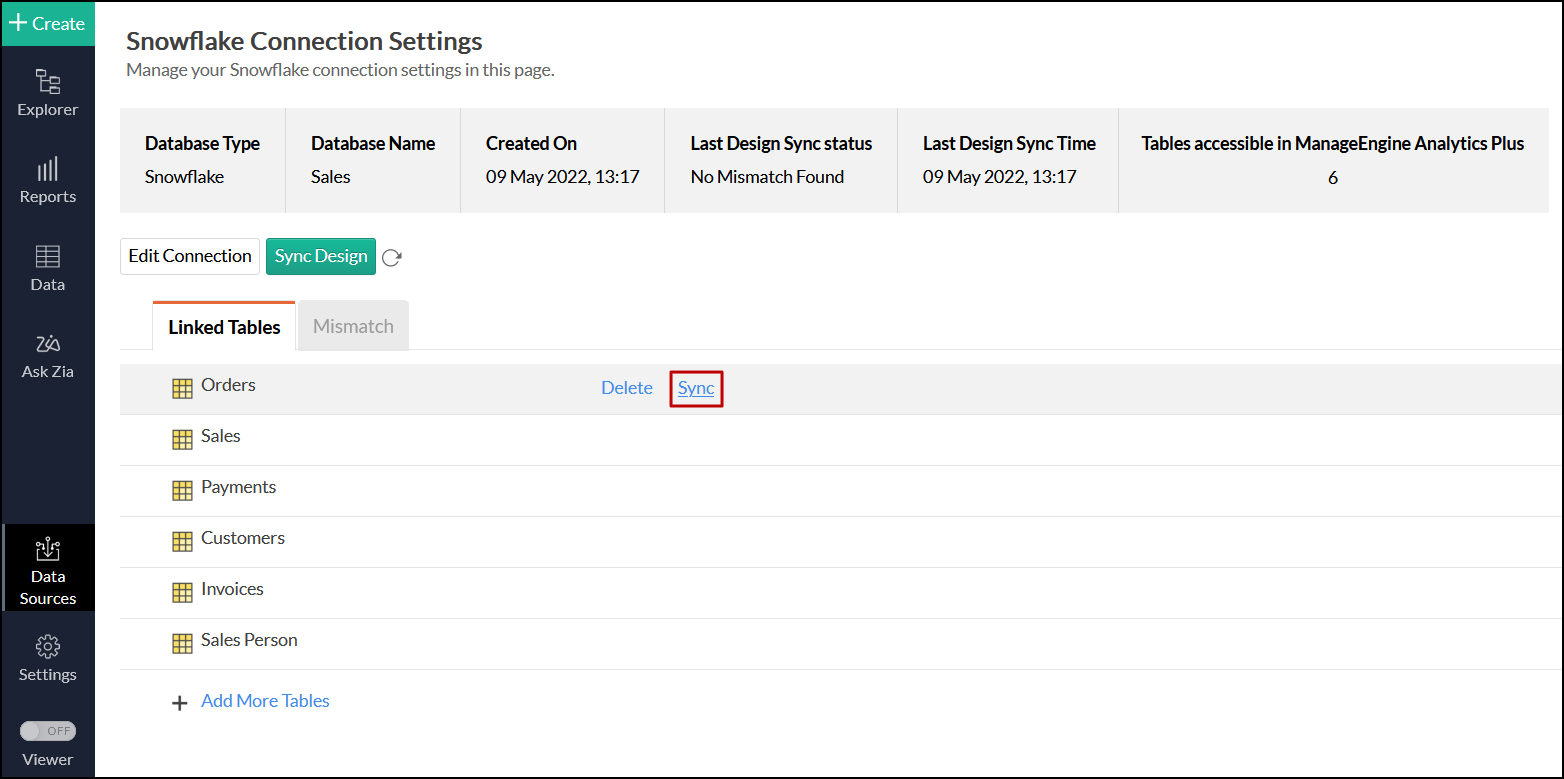
The meta data changes of the selected table will be reflected instantly from the cloud database to the Analytics Plus table.
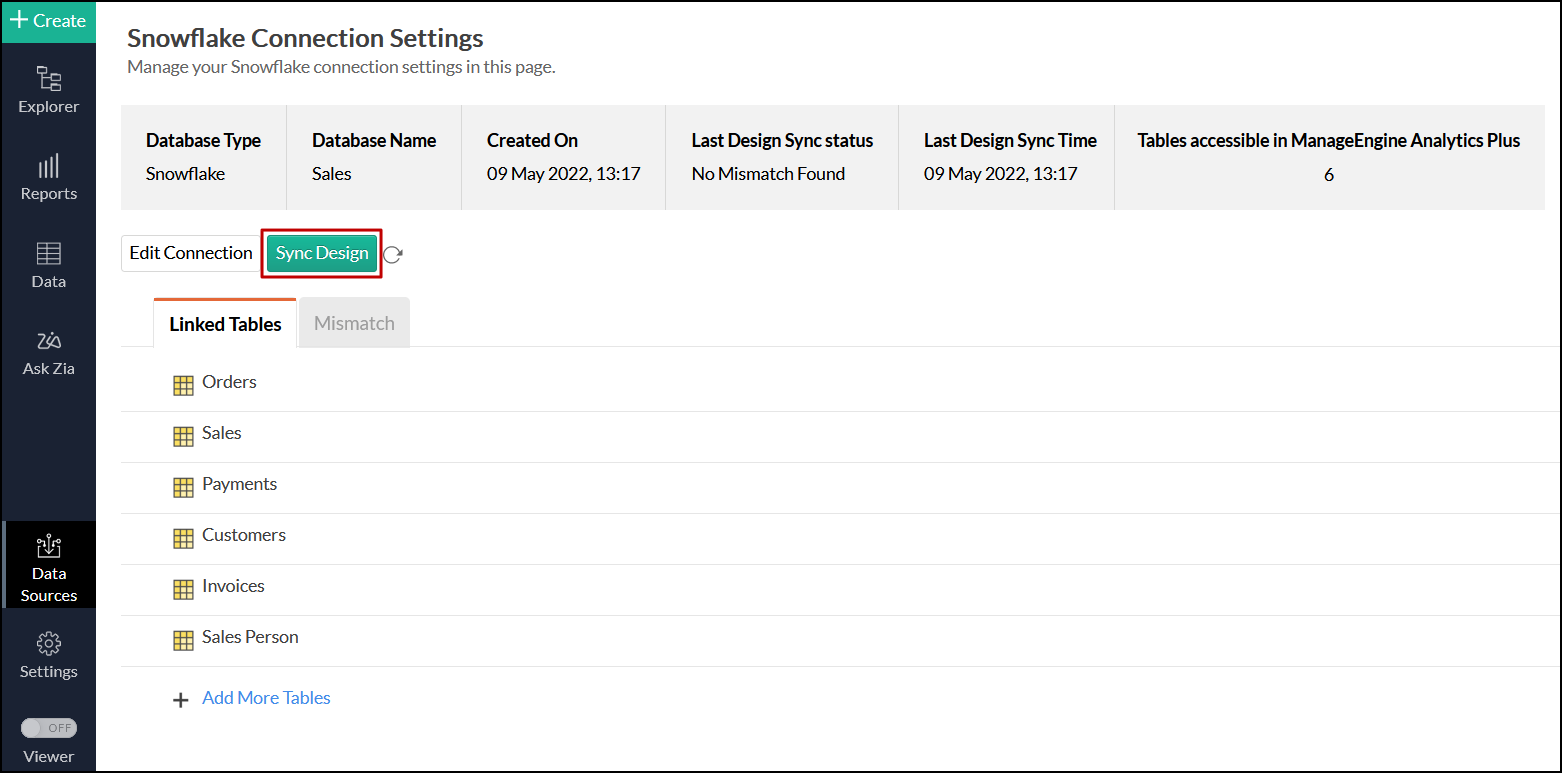
You can also update the meta data changes of all tables from the cloud database by clicking the Sync Design button.
10. Is it possible to connect live with newly added tables in the Snowflake database?
Yes. To do this, click the Data Sources option from the side panel and click + Add More Tables to link the newly added tables from the Snowflake database to Analytics Plus.
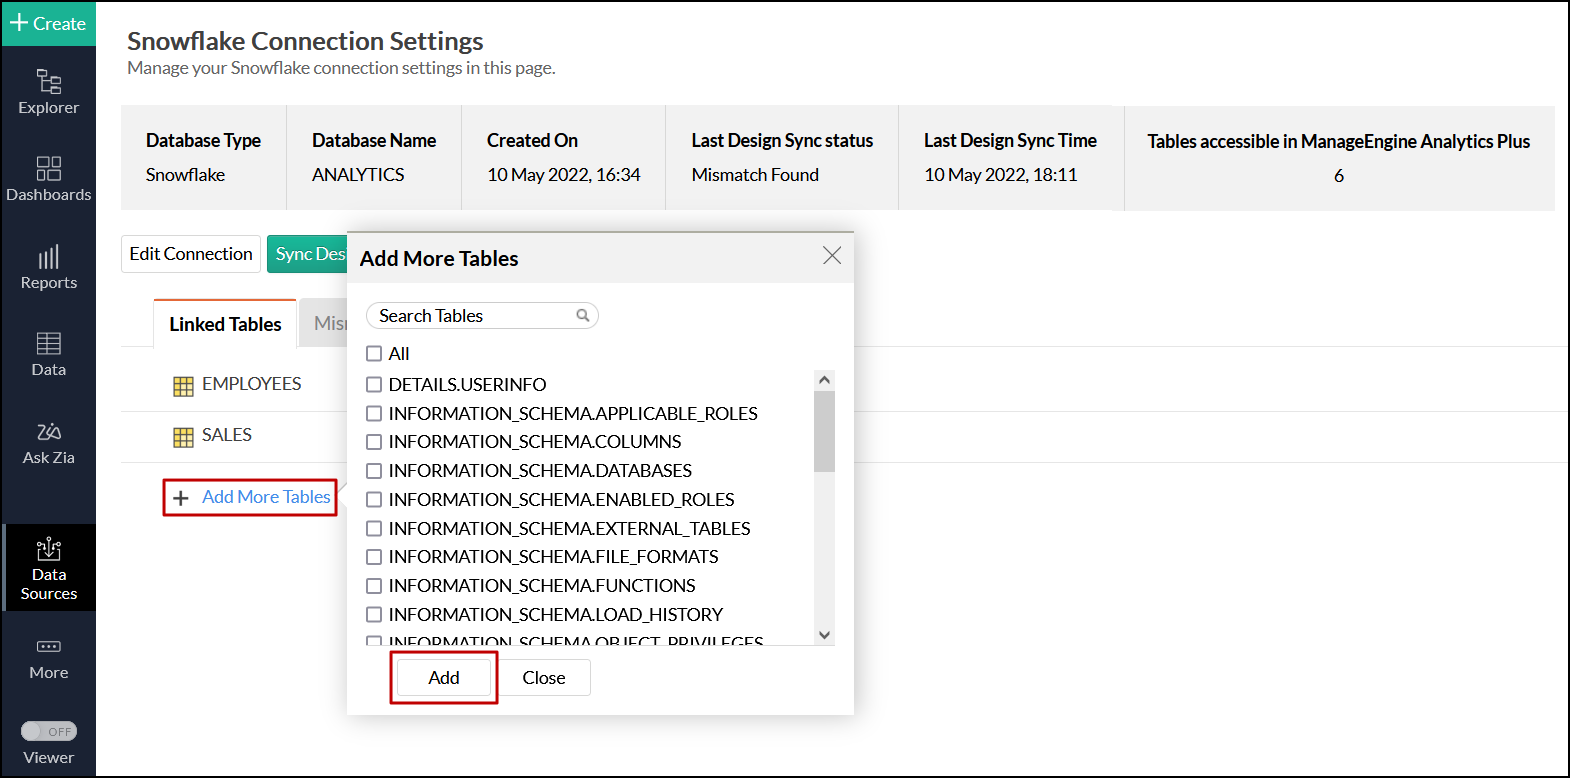
Note: In case of mismatches, you will not be able to add new tables. The mismatches need to be resolved first. Click here to know more about resolving mismatches.
11. Is it possible to change the data type of the columns in Analytics Plus?
No. You cannot change the data type of the columns in Analytics Plus when connecting live with your database.
12. Can I import data from other data sources into a workspace set up with live connection?
No. Data from other data sources can only be imported into workspaces that are created using the Data Import option.
13. Can I create query tables in workspaces set up with live connection?
Unlike data imports, live connections do not fetch data and store it locally in Analytics Plus. Therefore, query tables cannot be created in such scenarios. To do this, data has to be imported using the Data Import option.
14. What happens when I delete or rename the database in Snowflake?
If the database is renamed or deleted, Analytics Plus loses the connectivity to Snowflake, and the following error message appears.
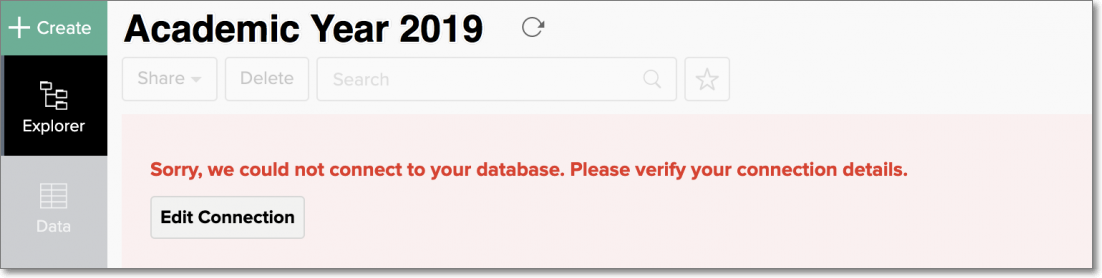
This error message also appears when there are any connectivity issues, or if your Snowflake credentials have expired. To overcome this, click the Edit Connection button that appears, and modify the required settings. To learn more about editing live connection settings, click here.
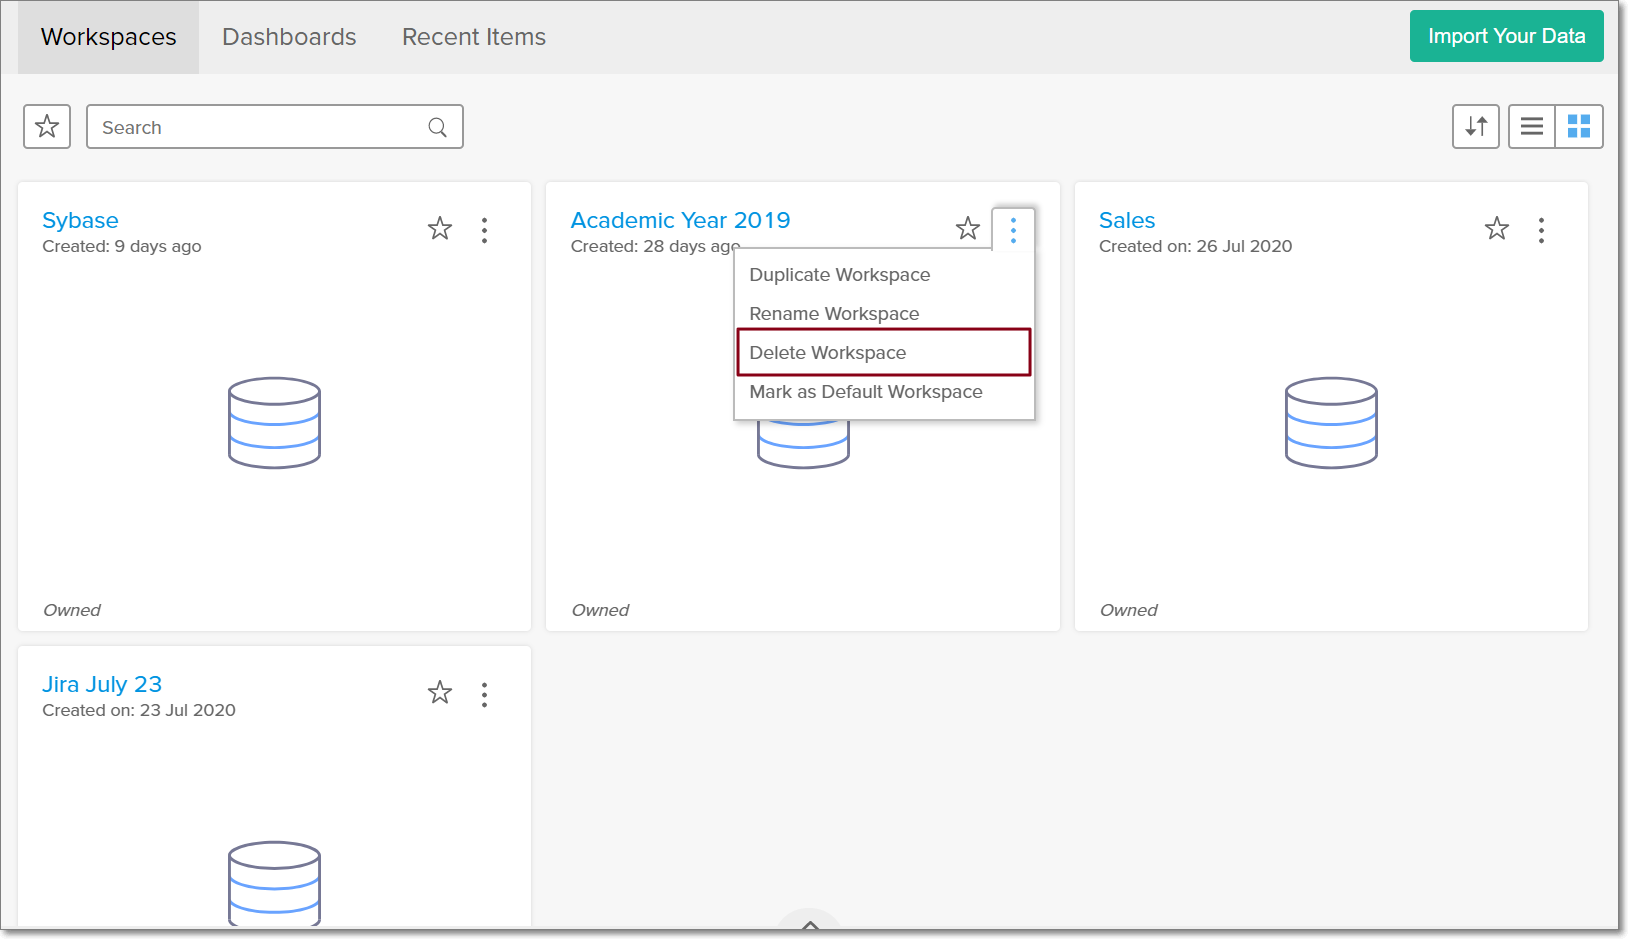
15. How do I remove the Snowflake setup?
To remove the live connection setup, the corresponding Analytics Plus workspace has to be deleted. To do this, navigate to the required workspace in the Analytics Plus homepage, and click the More Actions icon. Select the Delete Workspace option and confirm your action in the popup that appears.