Understand date-time field
The date-time field enables your users to enter a date and time. They can either use a date-time picker or type the required date and time. The date-time field displays the date and time values as per the date and time format set in your app's settings. Below is how a date-time field looks on form:
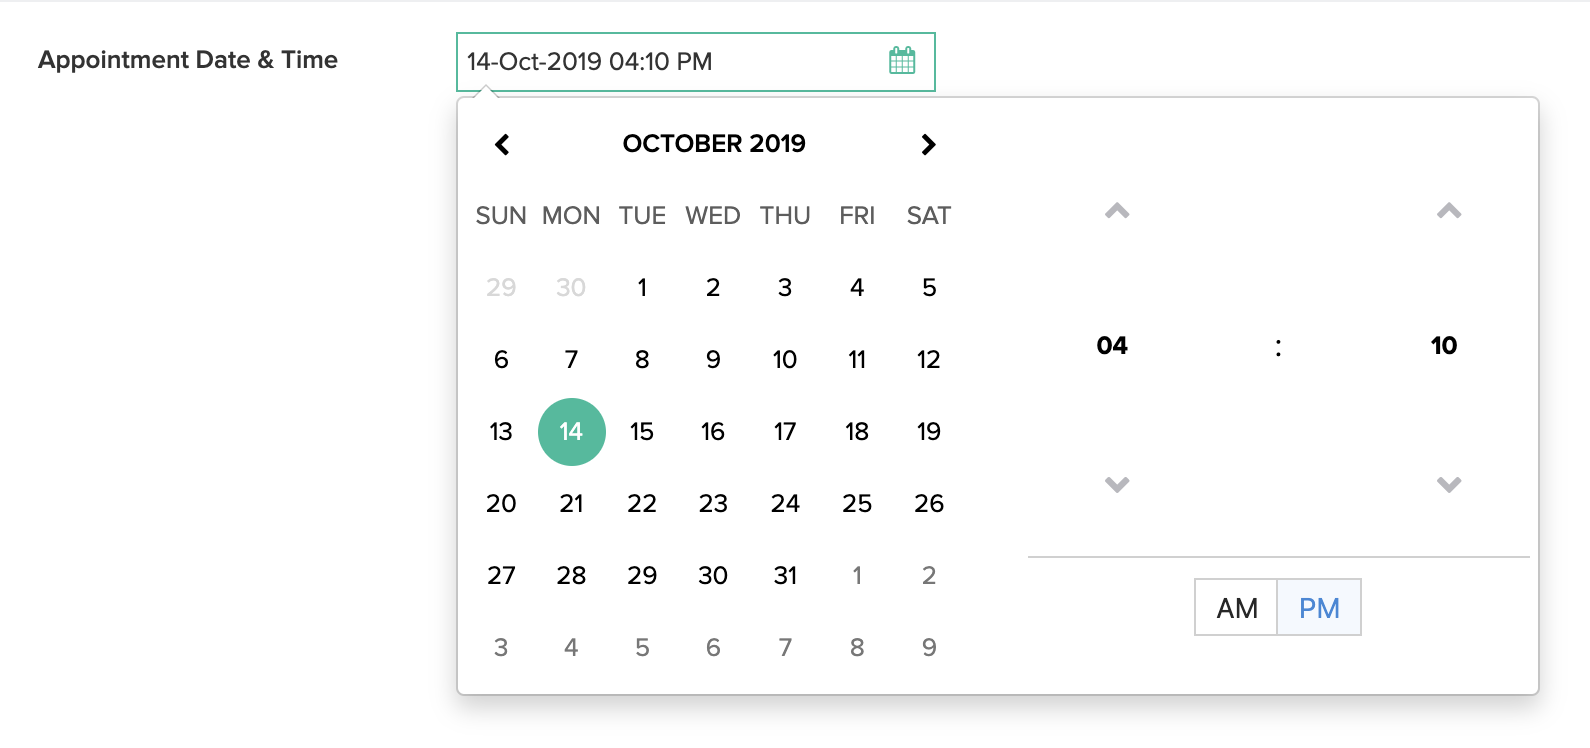
- When a user accesses from a web browser:

- When a user accesses from a phone or tablet:

When to use this field
You may consider the following pointers to determine when to use a date-time field:
- Use a date-time field if the data that you want to enable your users to enter is a particular date and time value according to the date and time format set in your app's settings
- When you want to enable your users to enter just a date value, you must add a date field to your form
- When you want to enable your users to enter just a time value, you must add a time field to your form.
Experience while entering data
- When a user is using a web browser, clicking in the date-time field's input area will open the date-time picker. The current date comes highlighted, and the picker auto-selects the time at which the user opened the picker. Your user can select the required date and time in a few clicks.

- When a user is using a phone/tablet, tapping in the date-time field's input area will open the date-time picker that auto-selects the current date and time. Your user can select the required date and time by individually selecting the month, date, year, hour, minutes and seconds, and then tapping Done.
Features
You can perform the following customizations for the date-time field on a form:
- Set allowed days
- Set allowed hours
- Hide or show seconds
- Set minutes interval
- Set initial value
- Other field properties
Refer to this section to learn about the customizations for the date-time field in reports.
Set allowed days
You can customize the date-time field such that it accepts a date that falls on an allowed day of the week. Learn how
For example, you may allow your users to select a date that falls on a Monday or Wednesday. When a user accesses this time field and selects a time that is not within the allowed hours, they will be prompted with an error message.
- When a user accesses this date-time field from a web browser, dates that do not fall on a Monday or Wednesday will appear greyed out and will be disabled in the calendar. If a user types a date that does not fall on an allowed day, form submission will fail and the user will be prompted with an error message.
- When a user accesses this date-time field from a phone/tablet, dates that do not fall on a Monday or Wednesday will appear greyed out and will be disabled in the calendar. The user can select a date that falls on an allowed day.
Set allowed hours
You can customize the date-time field such that it accepts a time that falls during the hours you allow. Learn how.
For example, you may allow your users to select a time that falls between 10:00 to 16:00 (i.e., 10:00 am to 4:00 pm). When a user accesses this time field and selects a time that is not within the allowed hours, they will be prompted with an error message.
Hide or show seconds
By default, the seconds part is displayed by the time field. You can hide it in both—the form and its reports—by disabling the Show seconds field property. Learn how to manage seconds for the date-time field
When Show seconds is disabled and users access from a web browser, the seconds picker won’t appear in the date-time field. However, users are free to type the seconds part.
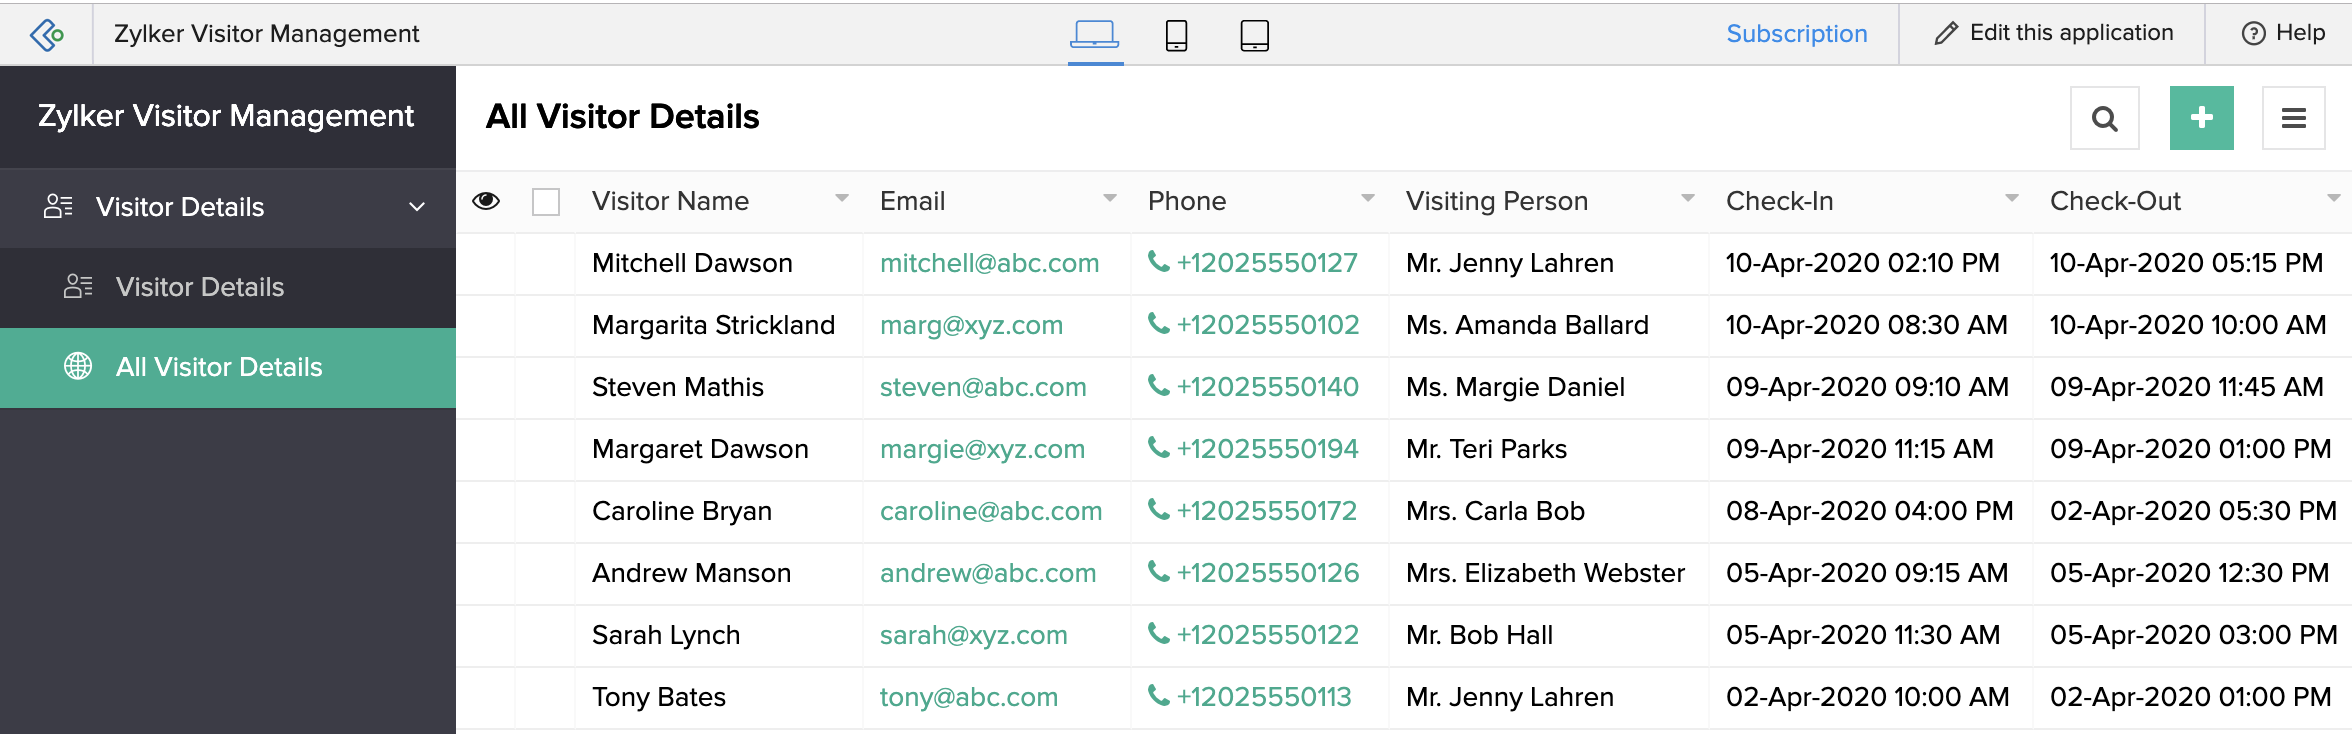
Below is an example of a date-time field in a list report that doesn't show seconds:
Set minutes interval
You can customize the time picker such that your users get to set the minutes part as per the interval you set. Learn how to set minutes interval for time fields
Setting the minutes interval will not prevent users from entering a time that does not conform to the selected interval. However, when the typed minutes part does not adhere to the Minutes interval of that field, the input will automatically be rounded to the nearest acceptable value. For example, if your users enter 11:24 PM as the input, the time field will automatically set it as 11:20 PM; when they enter 11:26 PM, the time field will automatically set it as 11:30 PM.
Set initial value
Initial Value for a date-time field refers to the date and time values that comes set when your users access your forms to submit an entry. The initial value can be either the current date and time or a particular date and time. Learn how
For example, imagine that you are building an app to help your users book appointments, where the Book an Appointment form accepts details such as appointment date and time, visitor's name and purpose of visit. You can automate the capturing of visiting date and time by pre-defaulting that date-time field with the current date and time. This will also help your visitors save time and effort in filling out your form. This is achieved by selecting zoho.currenttime as that date-time field's initial value.
You can also pre-default the date-time field with the current date and let your users select the required time value. This is achieved by selecting zoho.currentdate as that date-time field's initial value. The time part will be set as 12:00 AM or 00:00 as per the time format set in your app's settings.
Other field properties
- Customize the field name and field link name of this field
- Make it mandatory for your users to enter a date and time in this field
- Prevent your users from entering duplicate values in this field
- Show this field only to the app’s admin (and hide it from other users)
- Set the field size
- Enable displaying a tooltip message when your users hover their mouse on this field
Report-level customizations
By default, when your users access a date-time field in reports, they see the Full Date. You can customize the appearance of the date values as follows:
- Set the Display Option: You can enable your users to view the Full Date, Day of month, Month, Year, Week Day (Monday, Tuesday, etc.), Date Only, or Time Only