Manage version updates
Upgrade to version 2.6.0 for long-term support (recommended)
Download the service pack 2.6.0 and follow the upgrade procedure given below.
Service pack 2.6.0SHA256 value : 3df1d047027e1b53d6cb5bcf513e5ce165d36d7ddce885ee070551b35c56c2bc
Download the service pack 2.5.0 and follow the upgrade procedure given below.
Service pack 2.5.0SHA256 value : 4a6bac0af8307b649d2ae4a6c22dc0c56fa352c6ae442c15ea93914930bbae12
Download the service pack 2.6.0 and follow the upgrade procedure given below.
Service pack 2.6.0SHA256 value : 3df1d047027e1b53d6cb5bcf513e5ce165d36d7ddce885ee070551b35c56c2bc
It will be a three step upgrade process to get to the latest version (2.6.0).
Step 1: Download the service pack 2.1.0 and follow the upgrade procedure given below.
Service pack 2.1.0SHA256 value : 2581a777f9a0e5dd383cb9f06f68fb95db428033d3cbcbfb13e0b119fa2d1c89
Step 2: Download the service pack 2.5.0 and follow the upgrade procedure given below.
Service pack 2.5.0SHA256 value : 4a6bac0af8307b649d2ae4a6c22dc0c56fa352c6ae442c15ea93914930bbae12
Step 3: Download the service pack 2.6.0 and follow the upgrade procedure given below.
Service pack 2.6.0SHA256 value : 3df1d047027e1b53d6cb5bcf513e5ce165d36d7ddce885ee070551b35c56c2bc
Download ME AppCreator: New users can download the latest version of ManageEngine AppCreator here and start exploring its features right away.
Support details: Details on the version-wise support timelines are available in the Product Support Life Cycle document.
Real-time feature updates: All the latest features, enhancements, and issue fix updates, will be updated in the release notes for your reference.
- View your version number
- Prerequisites
- Update ManageEngine AppCreator for Windows
- Update ManageEngine AppCreator for Linux - GUI
- Update ManageEngine AppCreator for Linux - Console
View version number
- Access your ManageEngine AppCreator web client.
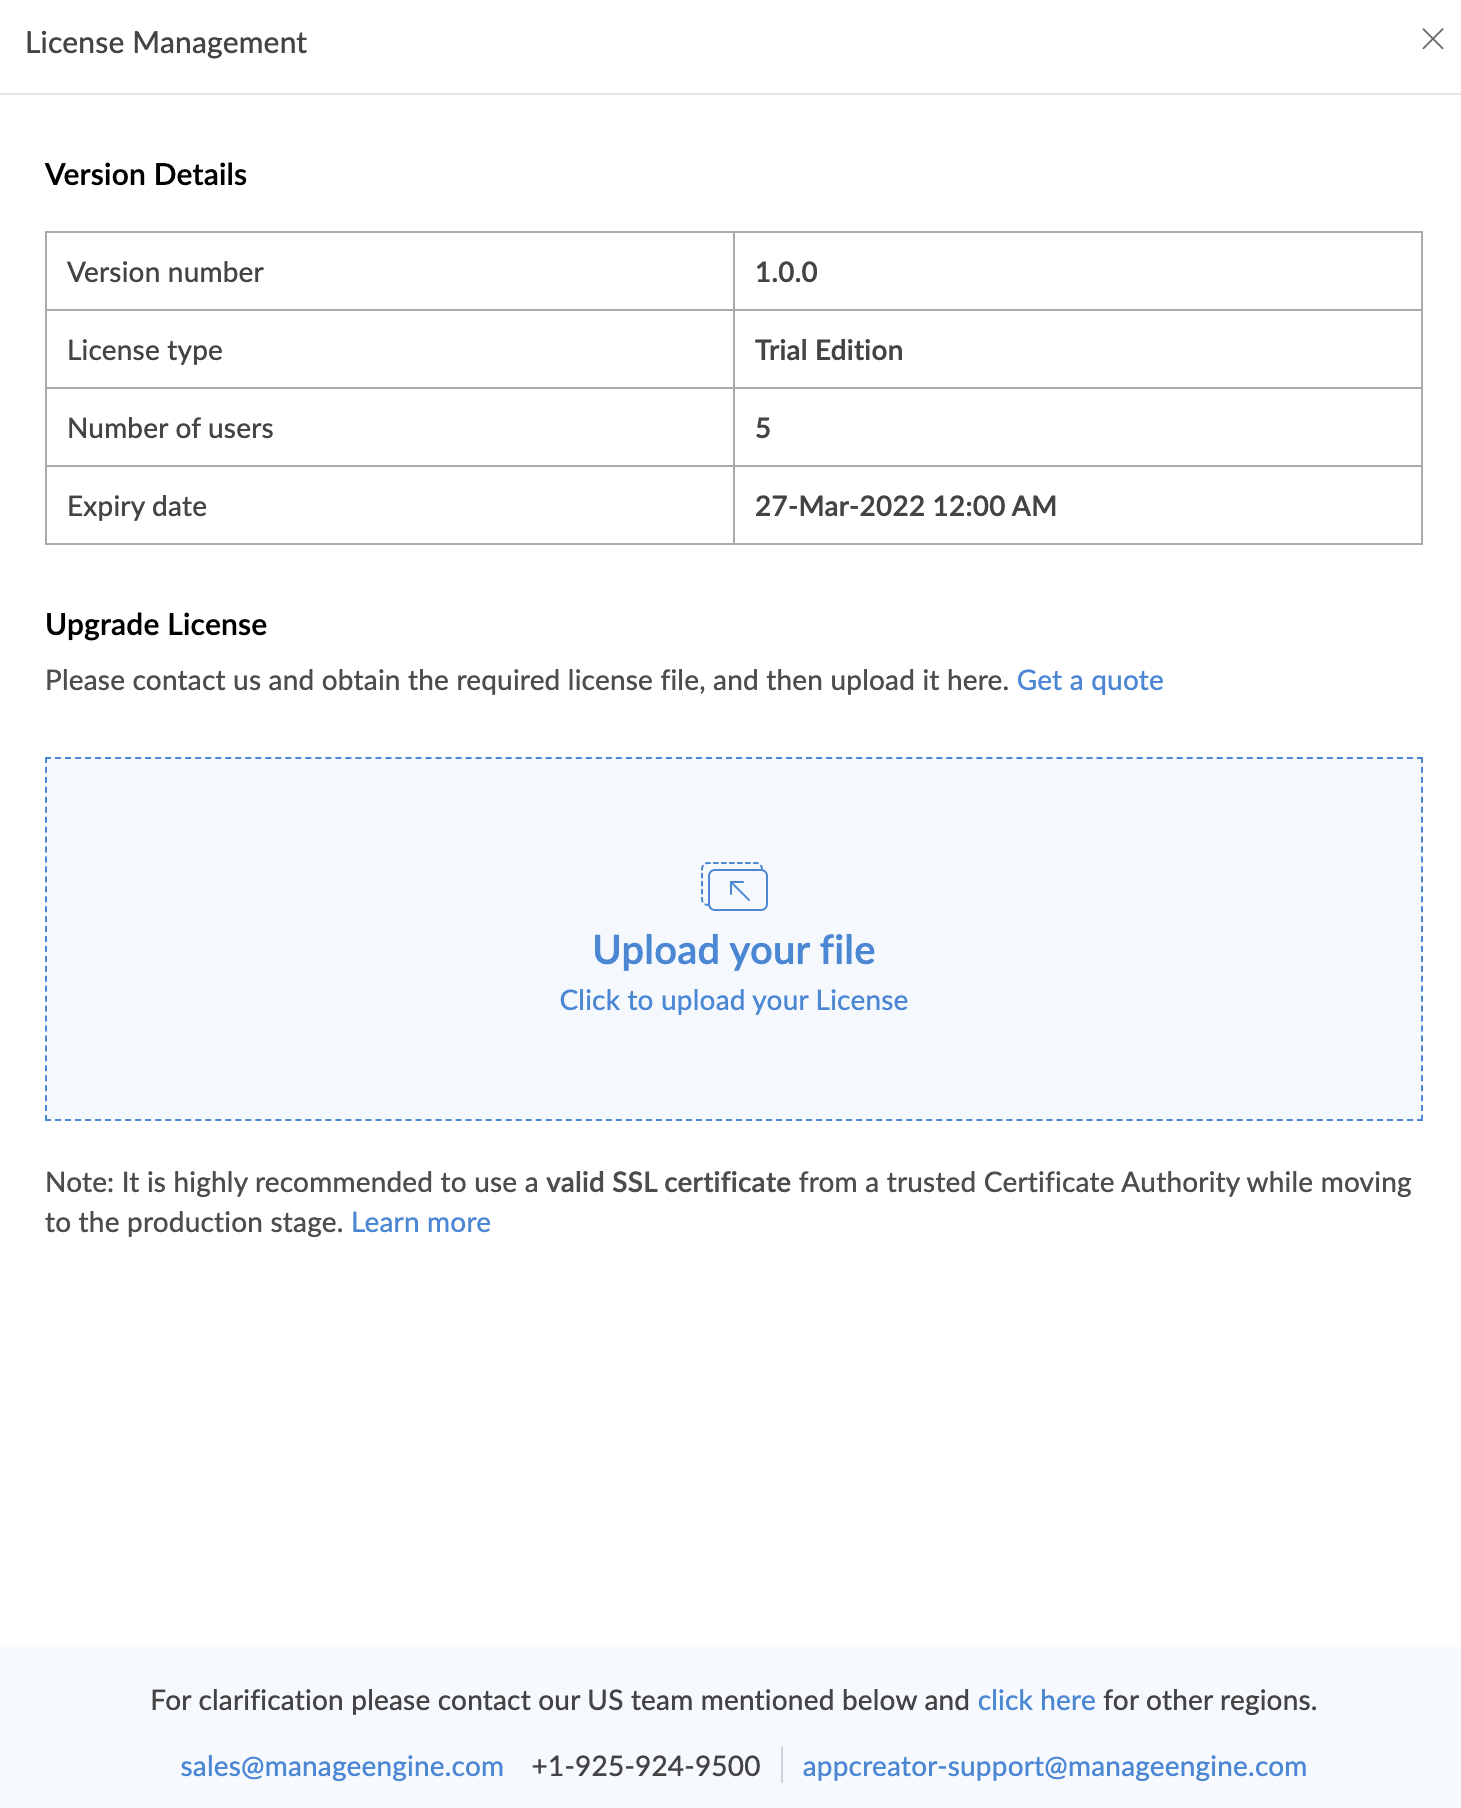
Click License near the top-right corner. The License Management pane will appear.
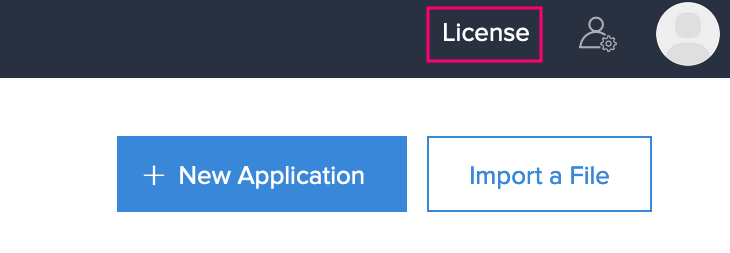
View the version number under the Version Details section.
Prerequisites
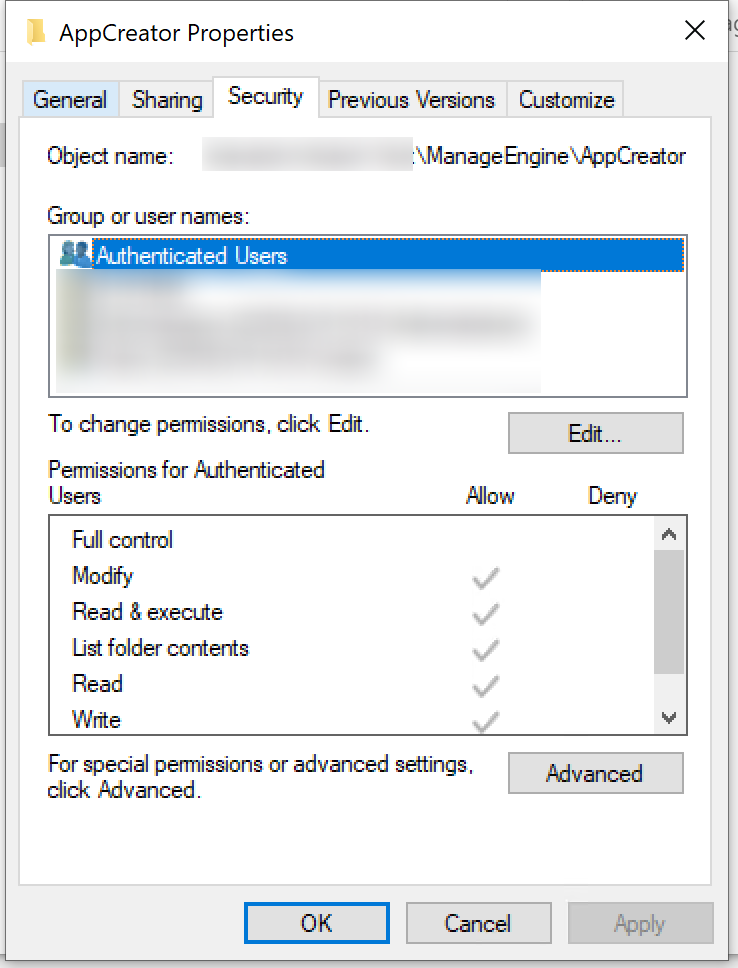
- As a best practice, take a complete backup of the 'ManageEngine AppCreator Home' folder - /InstallationDirectory/AppCreator. Ensure that no files in this folder are open/used before the start of the upgrade process.
The ManageEngine AppCreator installation directory should have the following permissions configured. This is a pre-requisite for a successful upgrade, and these permissions can be revoked after the upgrade is complete.
Update ManageEngine AppCreator for Windows
To update your ManageEngine AppCreator to a newer version,
- Shut down ManageEngine AppCreator.
- Windows installations - Open the services window (Run --> services.msc) and stop the 'ManageEngine AppCreator service'.
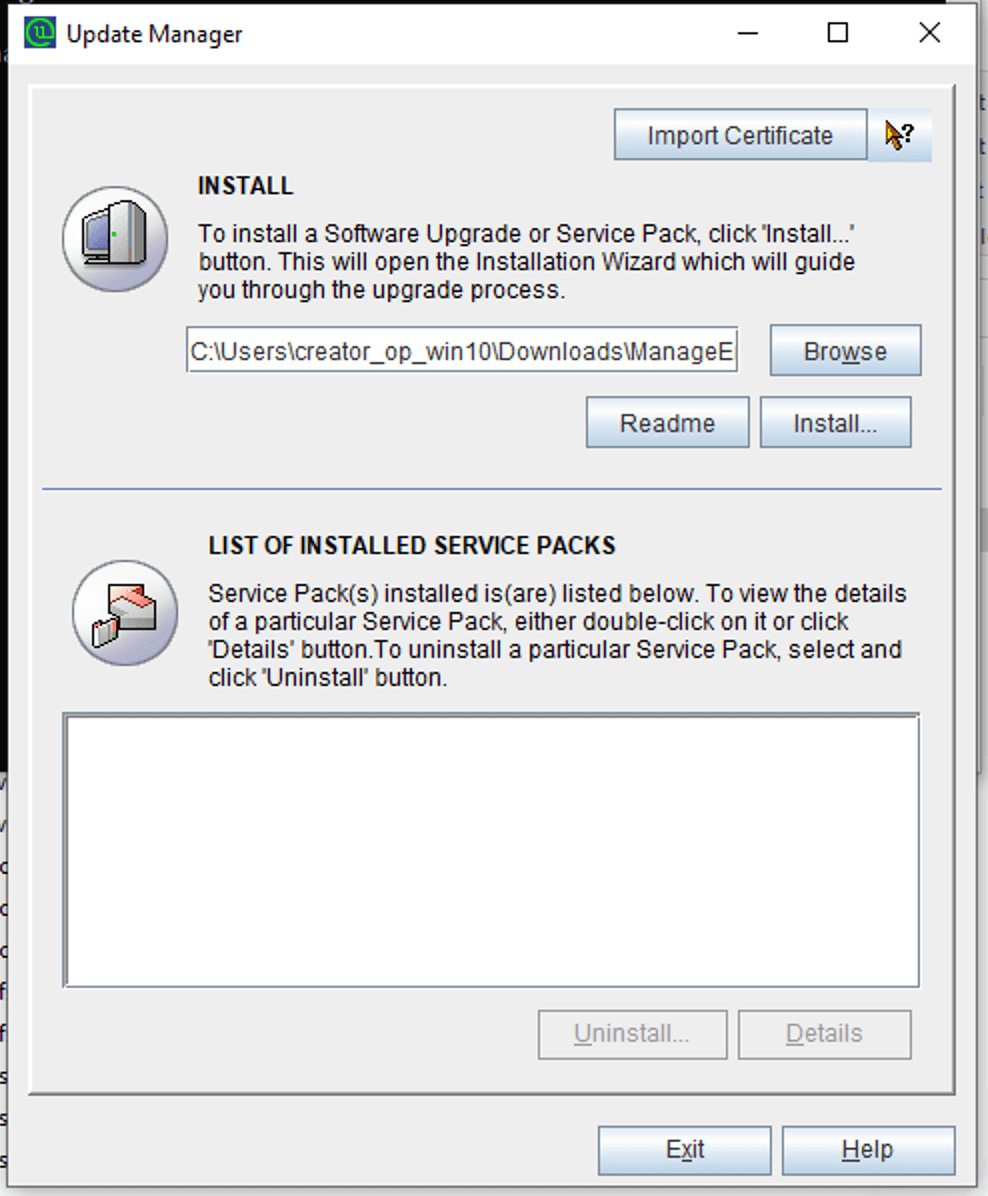
- Navigate to installed folder/AppCreator/bin/ via the command prompt and click the UpdateManager file. The Update Manager wizard will open.
- Alternatively, you can type updatemanager.bat in the command prompt to open the Update Manager wizard.
- For console mode, run the command updatemanager.bat -c to invoke the Update Manager tool.
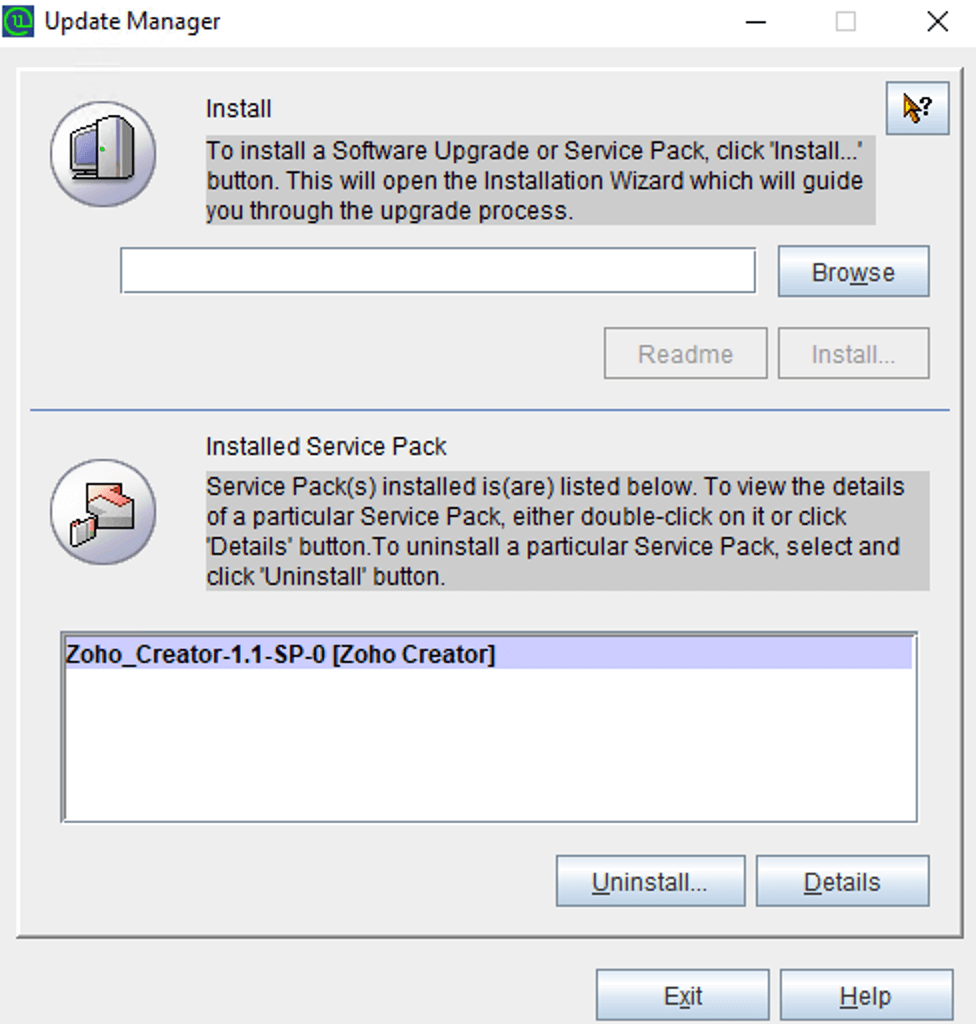
In the Update Manager, browse and select the service pack file (.ppm) saved on your computer and click Install.
The Import Certificate dialog box appears as shown below. To download the certificate, click here.
- If you are not connected to the internet, only then will the Import Certificate tab appear.
- If you are connected to the internet, the certificate will be downloaded automatically.

- Once the certificate has been downloaded, click Browse and import the downloaded certificate.
- Click Import. Follow the on-screen instructions and continue the upgrade process.
Click Install to initiate the upgrade process. You can view the Installation Status.
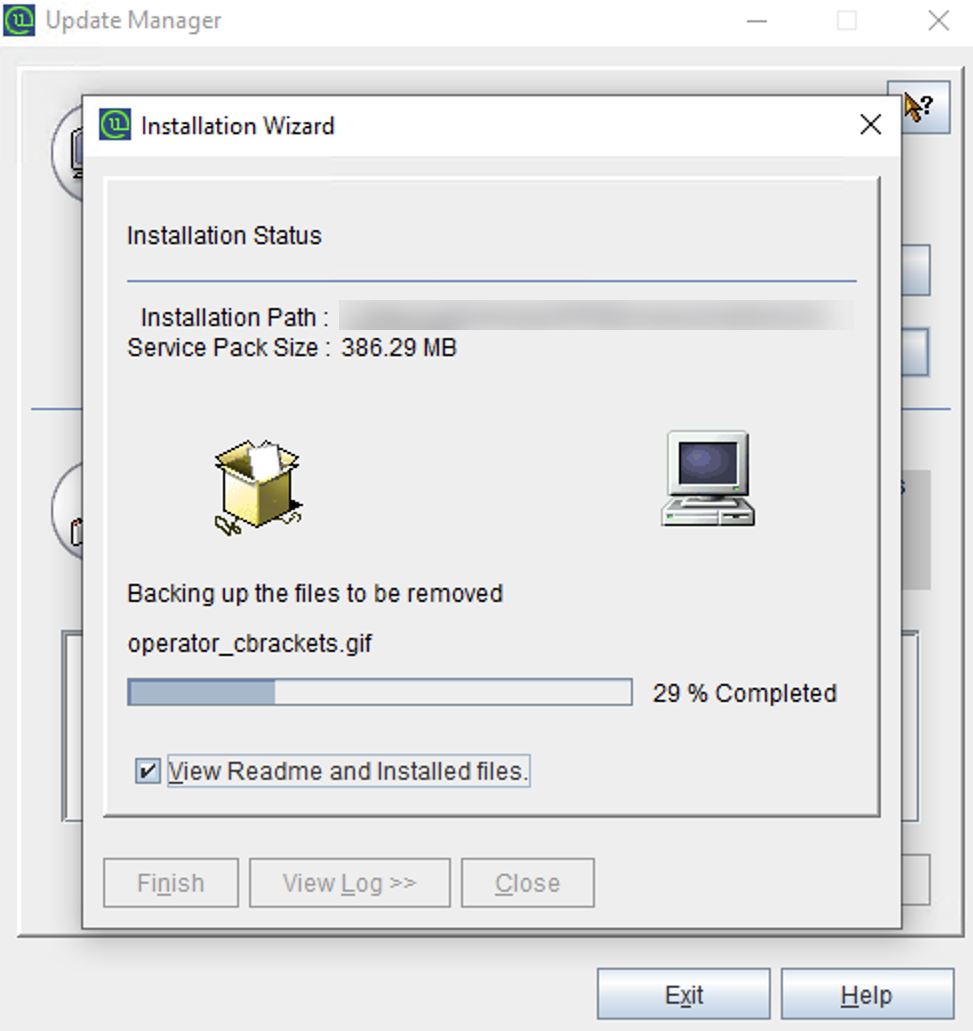
The Installed Service Packs will be listed below the respective section.
- Once you see the Installed message on your screen, click Finish to complete the installation.
- Start the ManageEngine AppCreator application.
Update ManageEngine AppCreator for Linux - GUI
- Shut down ManageEngine AppCreator.
- Linux installations - Run the sh app_ctl.sh shutdown command from installed_folder/AppCreator/bin/ via terminal.
- Navigate to installed folder/AppCreator/bin/ via the command prompt and type the command sh UpdateManager.sh
- The Update Manager wizard will open.
- To update to a new version, follow steps 2-6 in the section above.
Update ManageEngine AppCreator for Linux - Console
- Shut down ManageEngine AppCreator.
- Linux installations - Run the sh app_ctl.sh shutdown command from installed_folder/AppCreator/bin/ via terminal.
- Navigate to installed folder/AppCreator/bin/ via the command prompt and type the command sh UpdateManager.sh -c
Enter "i" to install the new version of ManageEngine AppCreator.

- Enter "n" to exit the installation.