Understand passing parameters to a page
Parameters are named values that are appended to your page URL as a query string. Page parameters are used to pass values to pages, similar to how we pass arguments to functions. They can pass data across the pages of applications in your AppCreator account. For example, displaying the employee details working in a selected department, displaying order details based on order ID and so on.
- Page elements where parameters can be used
- Things to know
- Adding parameters
- Deleting parameters
- Naming the parameters
- Example
Using parameters
The page elements where parameters can be used are listed below:
- Panels:
- Display: The display aspect of text and button in a panel can be configured to display the required data. Learn how
- Action: The action aspect of text, image and button in a panel can be configured to display the required data. Learn how
- Image: The images in a panel can be configured to display the required data. Learn how
- Chart: You can set a filter (criteria) or use ZML attributes to filter the data based on the parameter value. Learn how
- Gauge: You can set a filter (criteria) or use ZML attributes to filter the data based on the parameter value. Learn how
- Search: The search element can be configured to display the search results (page or report) based on the page parameter. Learn how
- Form: You can set the value of the fields in a form to display the data based on the page parameter. Learn how
- Report: You can set a filter (criteria) or use ZML attributes to filter the data based on the parameter value. Learn how
- Snippets: You can display data inside HTML and ZML snippets based on the parameter value. Learn how
- Button:
- Display: The display aspect of a button in a panel can be configured to display the required data. Learn how
- Action: The action aspect of a button in a panel can be configured to display the required data. Learn how
- Image: The images in a panel can be configured to display the required data. Learn how
Things to know
- You can use page parameters to set dynamic values while loading a page.
- Parameters and their values are placed in the query string portion of the URL that follows a question mark. They are comprised of a key and a value pair, separated by an equal sign. For example,https://<domain>/<account_owner_name>/<appLinkName>/#<pageLinkName>?param1=<value>
Here, param1 is the page parameter and its value follows the equal sign. This URL format allows the data to be retained on browser refresh and reload.
- Pages can be filtered using multiple parameters. The ampersand (&) character is used to separate the parameter-value pairs. For example,https://<domain>/<account_owner_name>/<appLinkName>/#<pageLinkName>?param1=<value>¶m2=<value>
Naming parameters
- Parameter names are case-sensitive.
- You can name parameters using letters (English), numbers, and the underscore character (_).
- A parameter name must start with a letter. String, number (including record ID), date, and Boolean values can be passed as page parameter values.
- By default, the maximum number of characters allowed in a parameter name is 100.
Example
Imagine you've created an application called Order Management. In this application, you have designed a parameterized page titled Track your Order that displays the order details upon entering the respective tracking ID (record ID). In addition to a page parameter named tracking_id, this page has the following components:
- An embedded stateless form containing a single line field named Enter your tracking ID in which users enter their tracking IDs. Upon form submission, it'll load the same page but with the page parameter (tracking_id) appended to the page URL in the format :
pageParam=singleLineFieldInput - A HTML snippet that is configured to display the order details in the form of a table based on the input tracking ID.
Creating the parameterized page
A parameterized page is the page that has application-level parameters to hold the input (in the form of parameter values) and render the required data on the same page. For example, you have designed a parameterized page titled Track your Order and added a parameter named tracking_id. Here, the parameter values are record IDs, which are unique values for each record (order summary). Upon entering the record ID, the order details are displayed in the same page. You can create a page by following the steps in this page and specify the page name as Track your Orders.
Adding a parameter to your page
- Edit your app.
- Navigate to the Design tab and open the page builder.
- Click the Gear icon near the top-right corner of the page builder. The Page properties pane will appear.
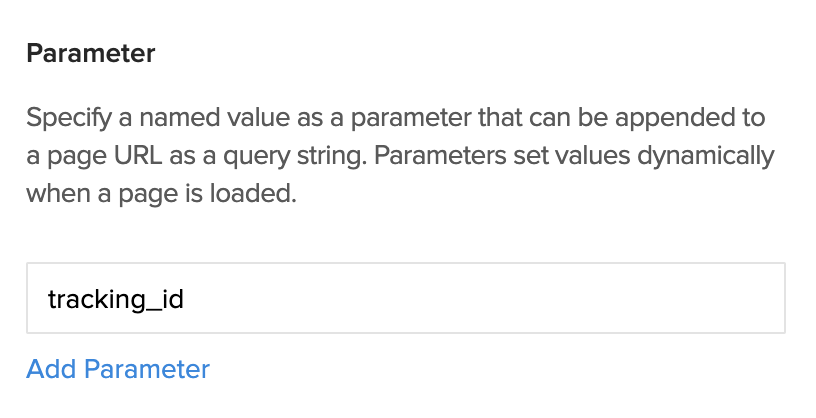
- Click Add Parameter under Parameter section.
- Type the parameter name as tracking_id and click Add.
- Close the Page properties pane.
Embedding a stateless form in your page
- Edit your app.
- Navigate to the Design tab and open the page builder.
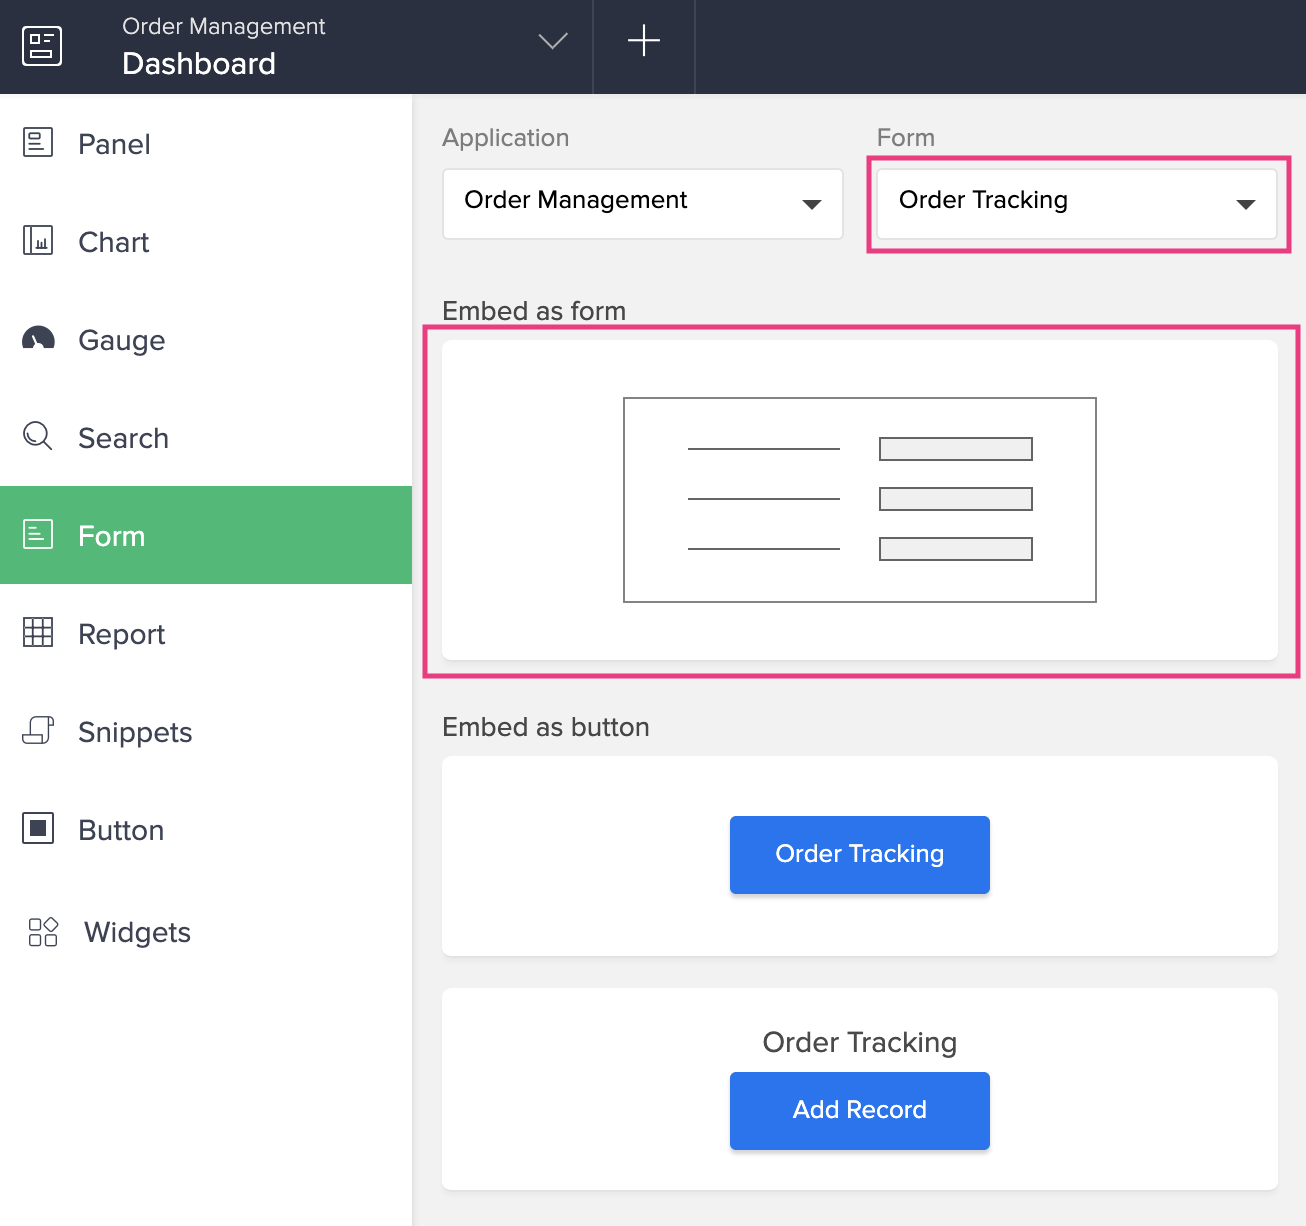
- Select Form from the palette on the left and choose the stateless form named Order Tracking.
- Click and drag the form under Embed as Form option to embed the form into the page.
- Click the Configure option in the toolbar at the top-center of the page builder. The Form Embed Configuration pane will slide in from the right
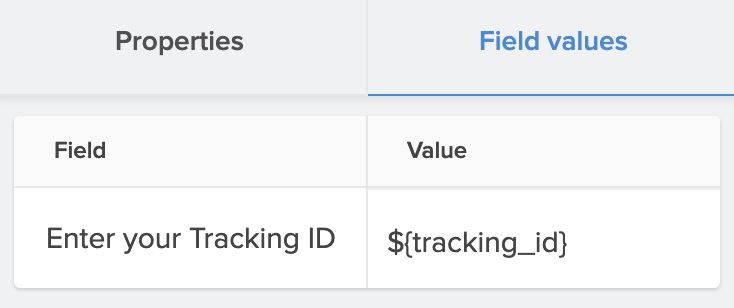
- Under the Field values tab, click Configure values. Specify the value as tracking_id (page parameter) beside the Enter your tracking ID field.
- Click Done at the top-right to save the configuration.
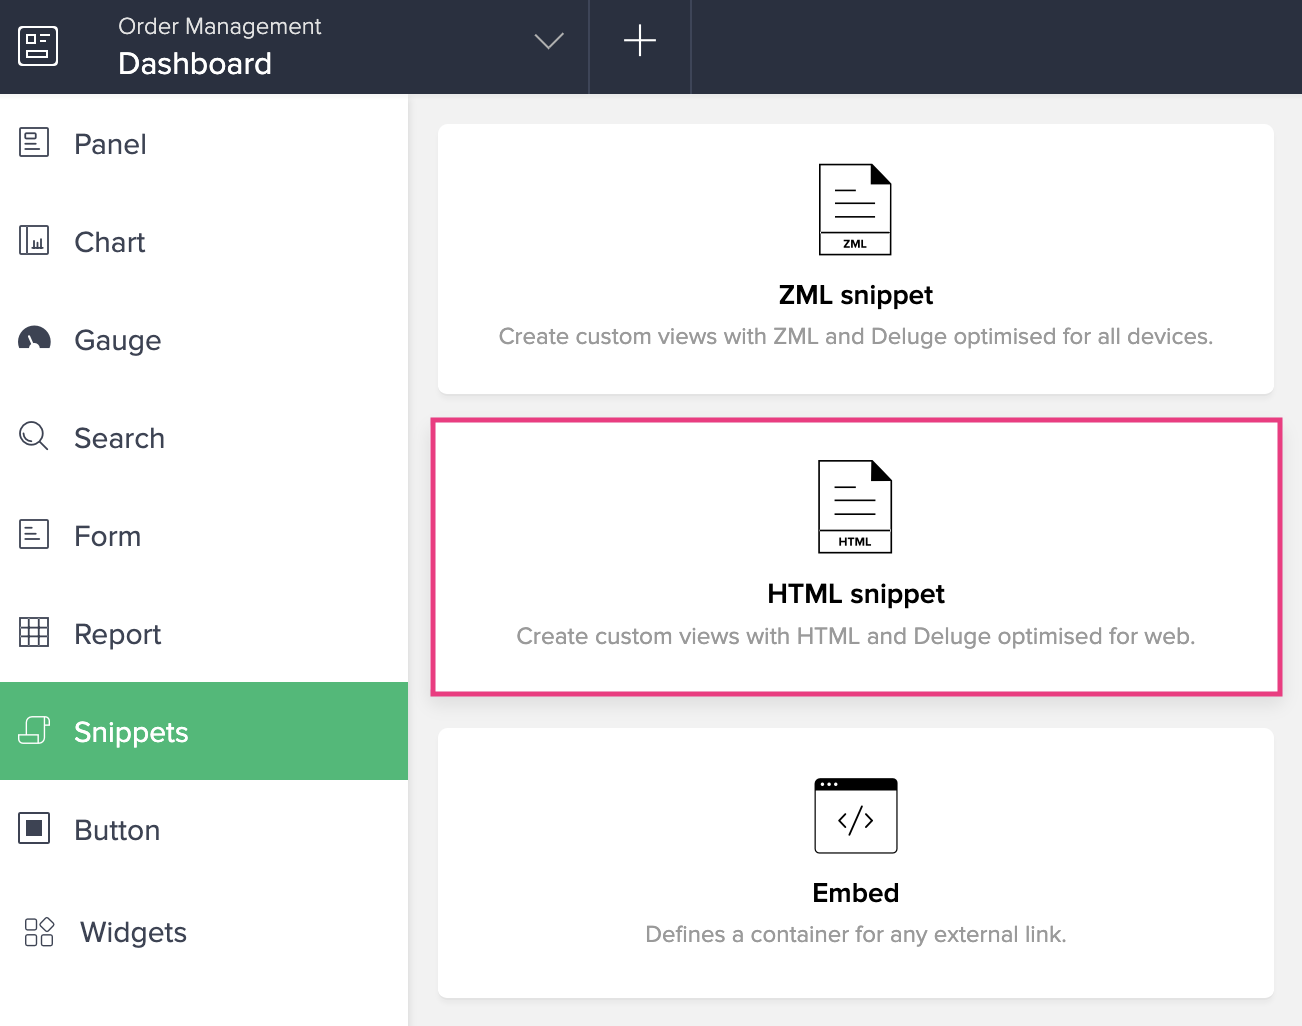
Adding a HTML snippet to your page
- Edit your app.
- Navigate to the Design tab and open the page builder.
- In the page builder, click Snippets on the left, then drag and drop the HTML Snippet on to the required position on your page. The HTML Snippet editor will appear.
- Add the required HTML (to create a table that displays the order details), CSS, and Deluge code. Below image shows a reference code to filter and display record details using record ID in the HTML snippet.
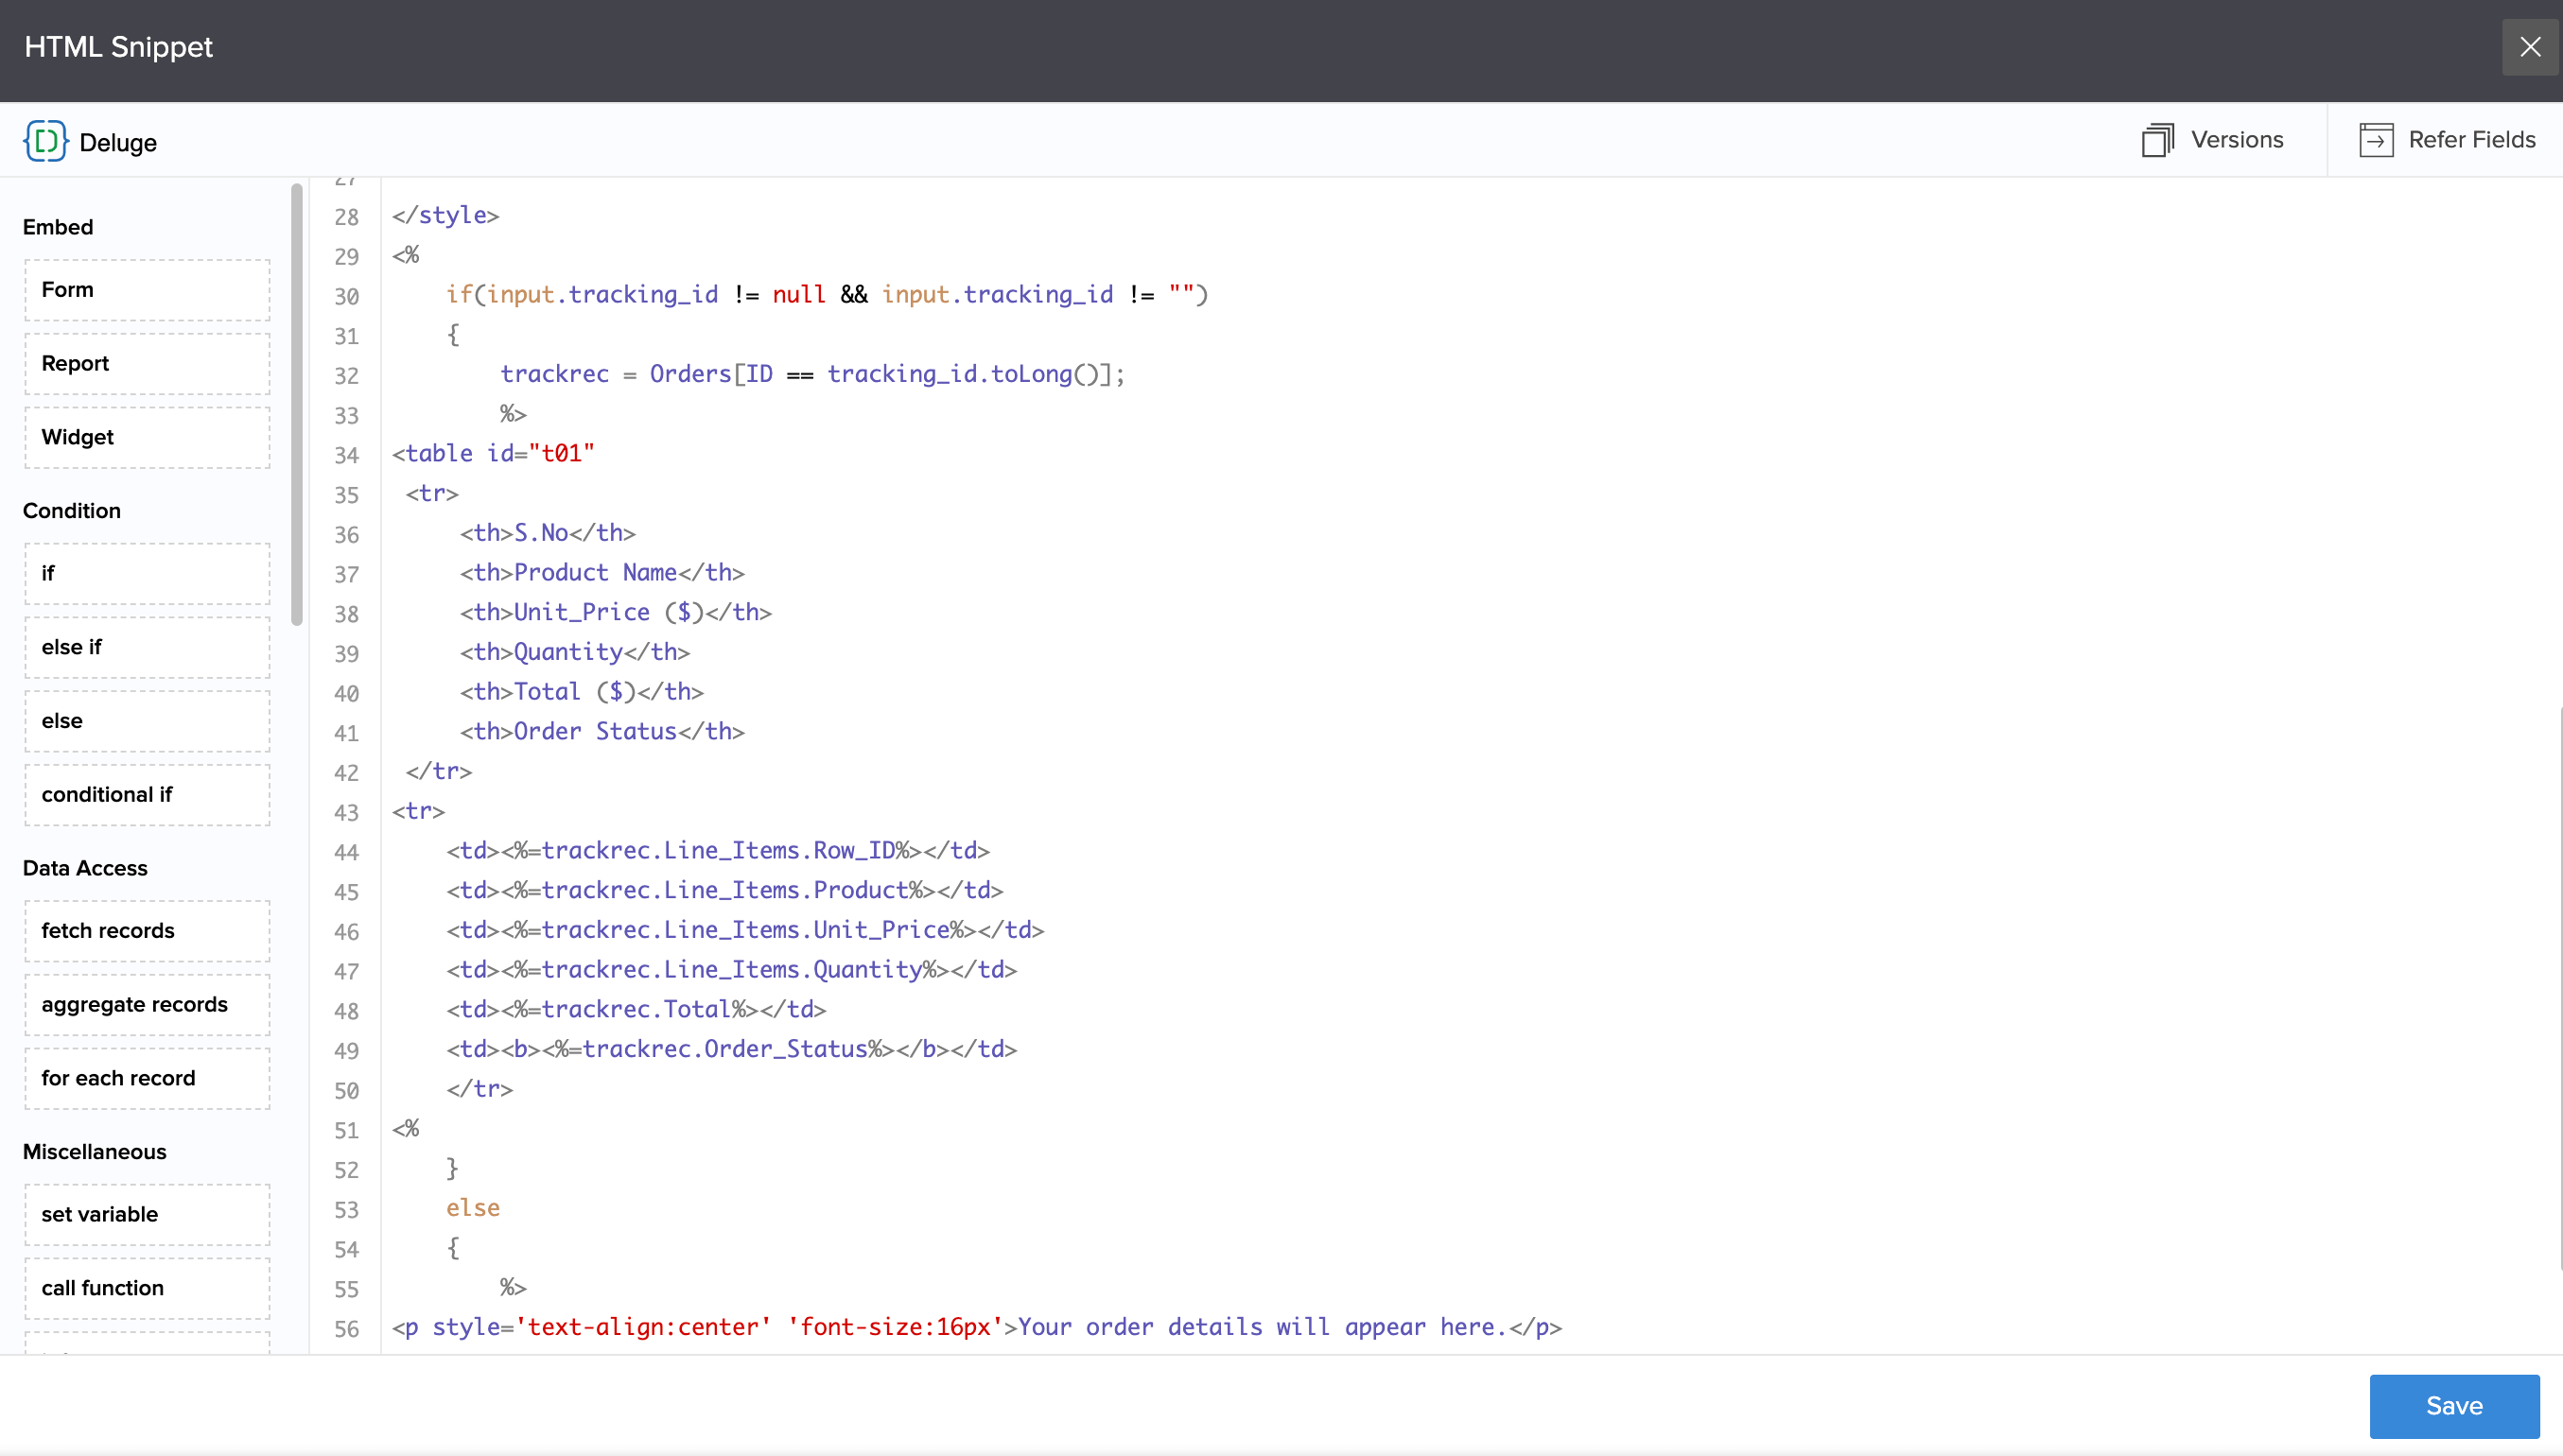
- Click Save and close the editor.
- Access the live Track Your Order page and enter your tracking ID.
- Click Track to display the order details. The below gif shows how the order details are displayed based on the tracking_id parameter: