Configure Active Directory Federation Service using SAML
Active Directory Federation Services (AD FS) is a Single Sign On (SSO) solution by Microsoft. The service manages authentication through a proxy service hosted between Active Directory (AD) and the target application (AppCreator app).
Note:
- You need to obtain the login URL, logout URL, and the certificate from AD FS.
- Once the user is created in AD, click on the user's properties and add an Email Address for that user.
- Ensure that the time of your AD machine and the machine in which AppCreator is hosted match.
- In case of any error, refer to this page.
- Ensure that your Active Directory Federation Service (AD FS) is configured and working.
- Log in to the AD FS 3.0 server and open the Management console.
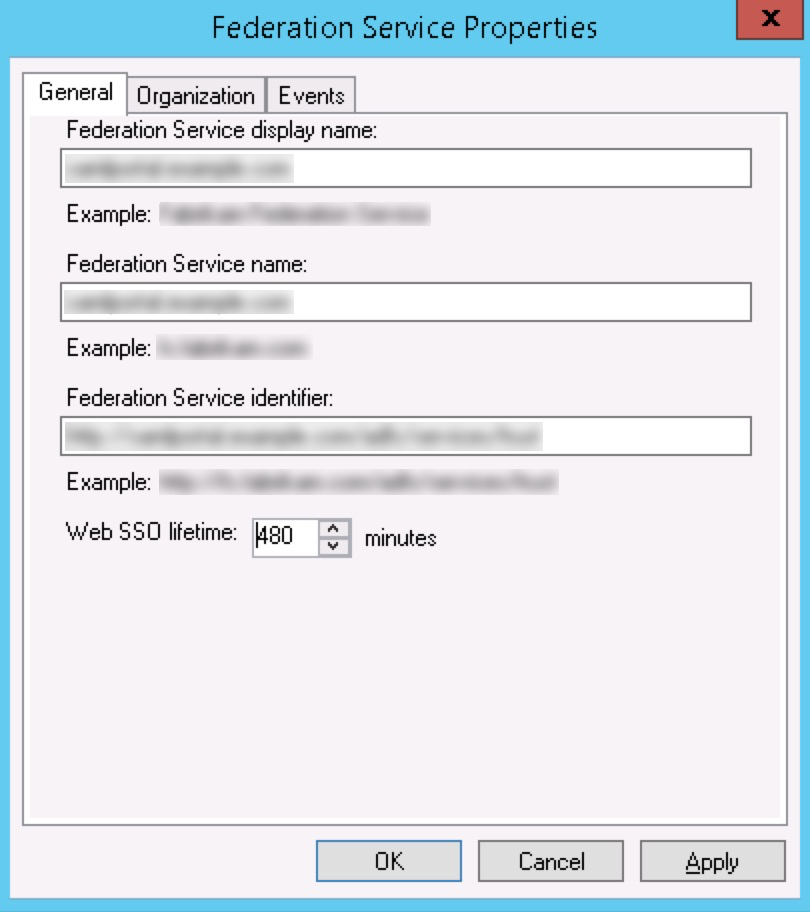
- Right-click Service in the left-pane menu and select Edit Federation Service Properties.
- Under General, check if your DNS entries and certificate names are correct.
- Using your Federation Service name, use a browser and go to the following URL:https://federationservicename.com/federationMetaData/2007-06/FederationMetaData.xml
Example:
https://yourdomain.samlportal.com/federationMetaData/2007-06/FederationMetaData.xmlThe login URL and logout URL are present in the XML file as SingleSignOnService and SingleLogoutService tags.
- Export the Token-Signing certificate:
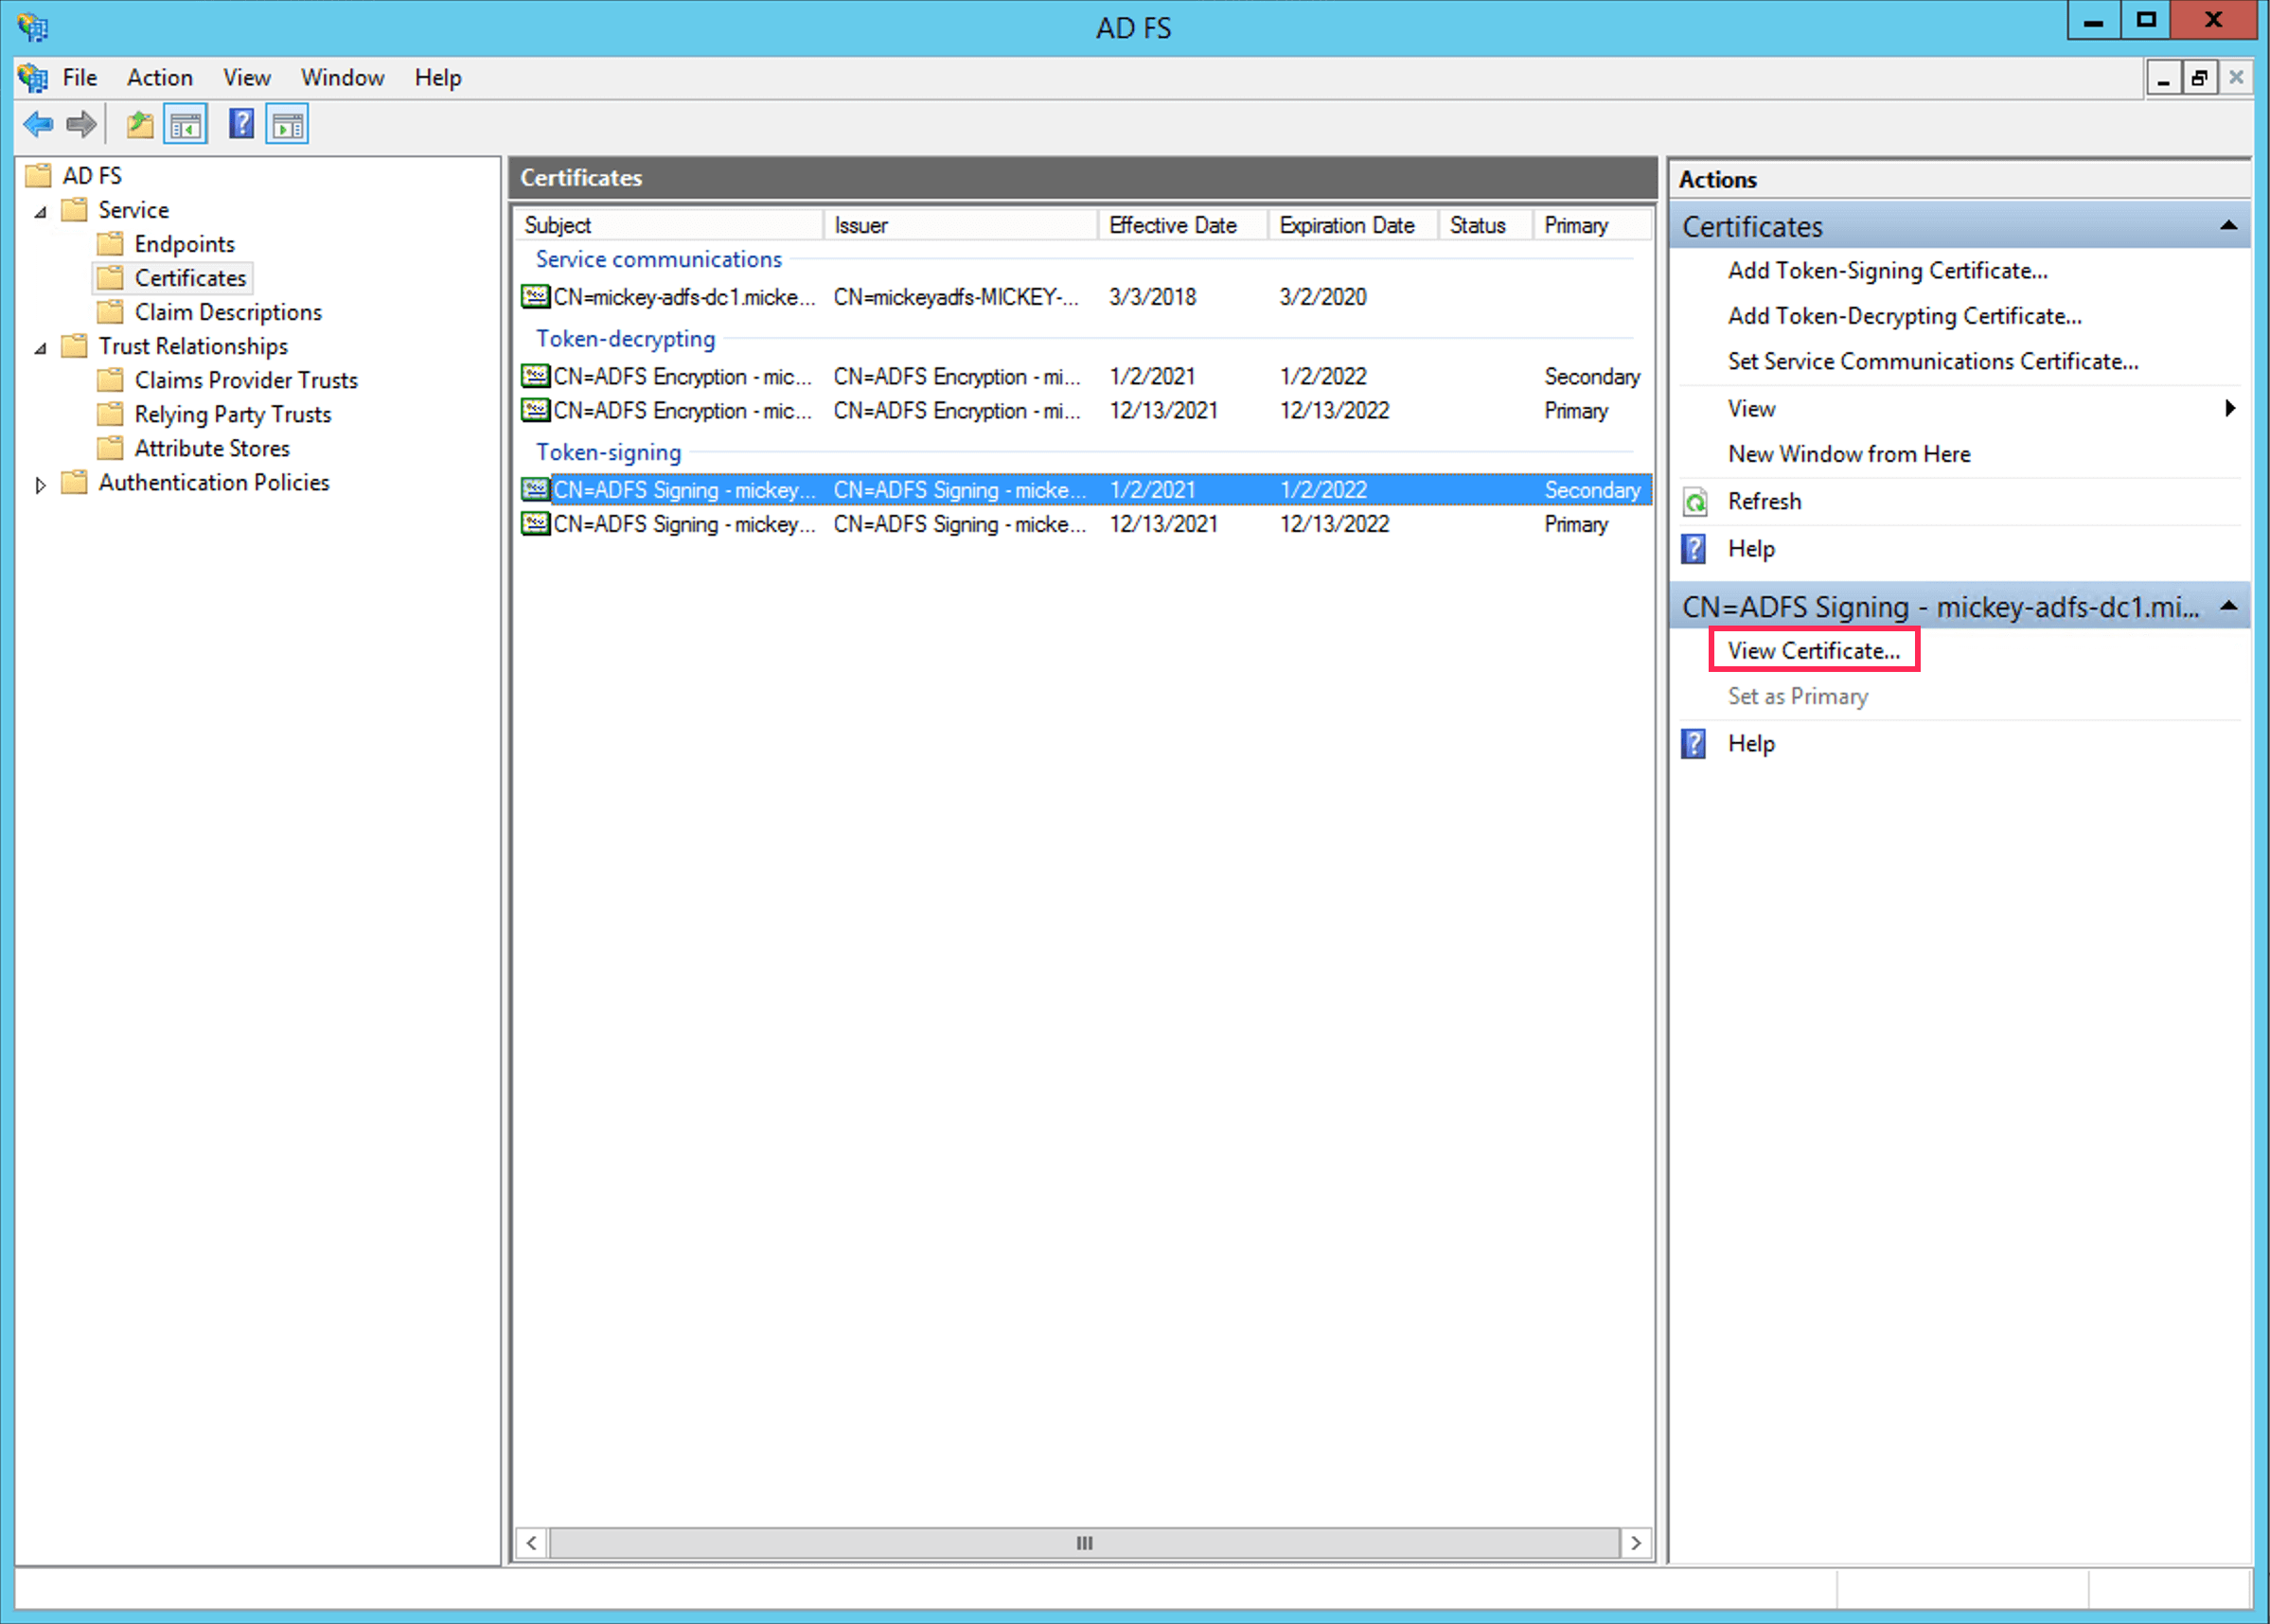
- Click Certificate underService in the left-pane menu.
- Click on the required primary certificate in the Certificates section.
- Click View Certificate in the Actions tab on the right.
- Select the Details tab.

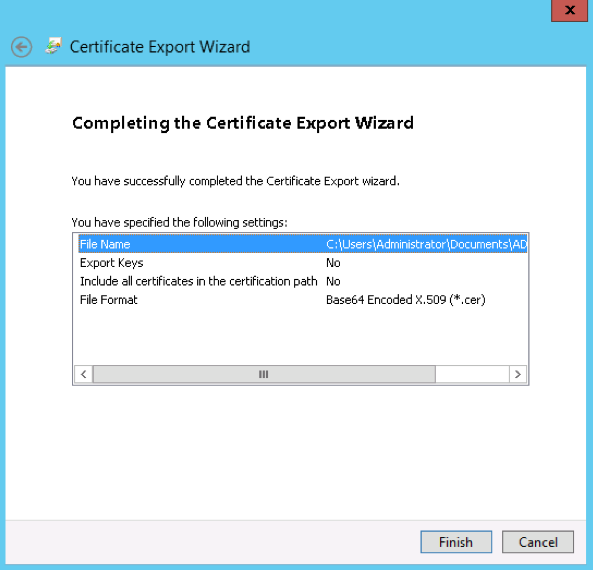
- Click Copy to File. The Certificate Export Wizard will open.
- Click Next.
- Ensure that the No, do not export the private key option is selected, and then click Next.
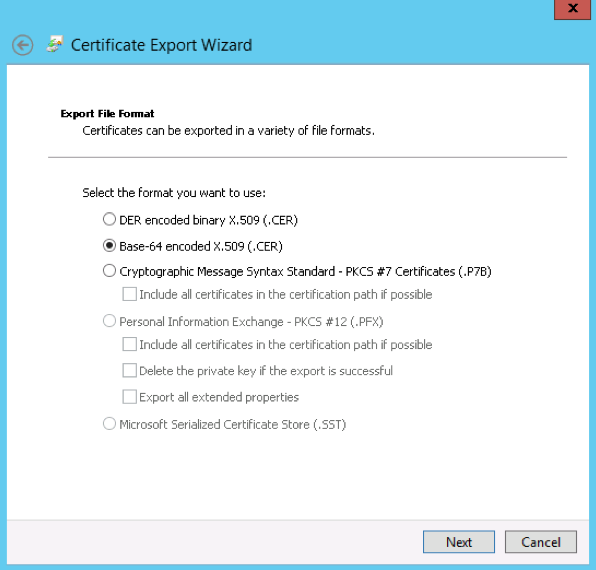
- Select Base-64 encoded X.509 (.cer), then click Next.
- Select a location to save the file and provide a name. Then click Next.
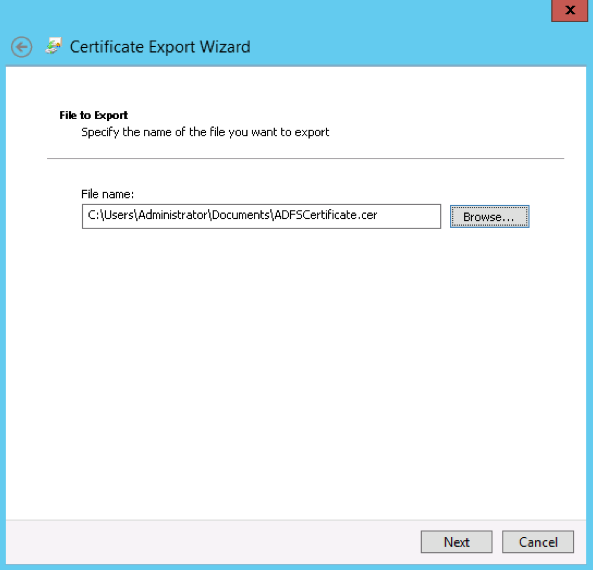
- Click Finish. The instance requires that this certificate be in .cer or .pem format.
- Configure Single Sign-On URL and Entity ID URLs at ManageEngine.
Submit metadata at AD FS
After configuring the AD FS in AppCreator's SAML Authentication page, we need to configure your AppCreator account details in AD FS, for which the following are to be added.
- Relying Party Trust - Allows AD FS to trust requests from a party and provide them response.
- Claim Rules - Helps configure which claim details will be present in the incoming request and which has to be sent in the response.
Add a Relying Party Trust
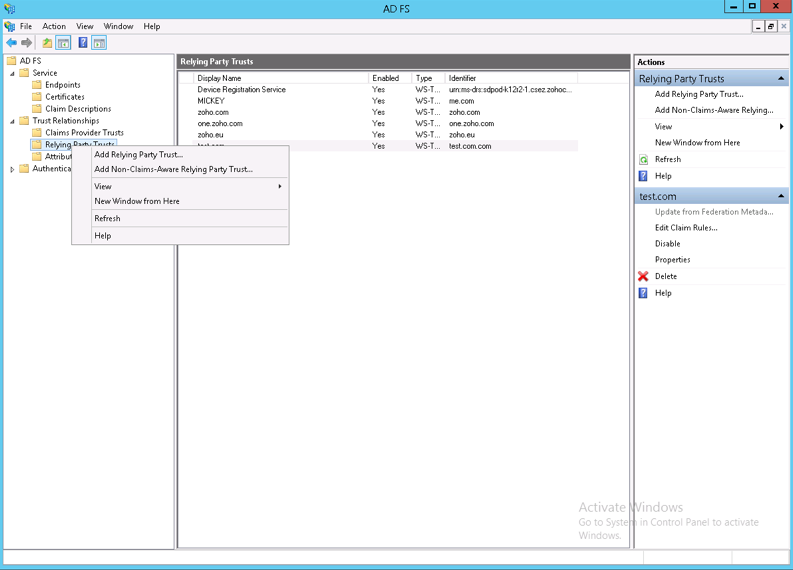
- Under Trust Relationships in the left-pane menu, right-click Relying Party Trusts and select Add Relying Party Trust. This will open the Add Relying Party Trust Wizard.
- On the Select Data Source screen, choose one among the below options:
- Select Import data about the relying party from a file and choose the file which you've downloaded from AppCreator's SAML Authentication page. To download this file go to AppCreator's SAML Authentication page and click on the Download metadata button.
- If you want to input the required data manually, select Enter data about the relying party manually.
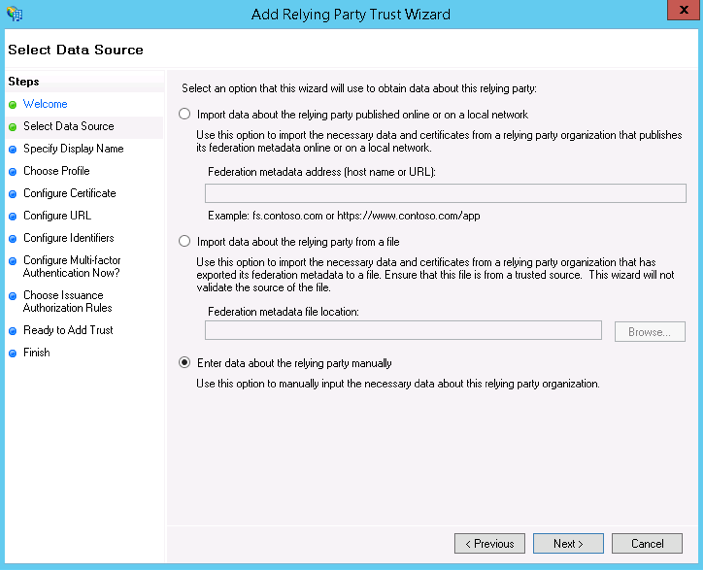
- Select Import data about the relying party from a file and choose the file which you've downloaded from AppCreator's SAML Authentication page.
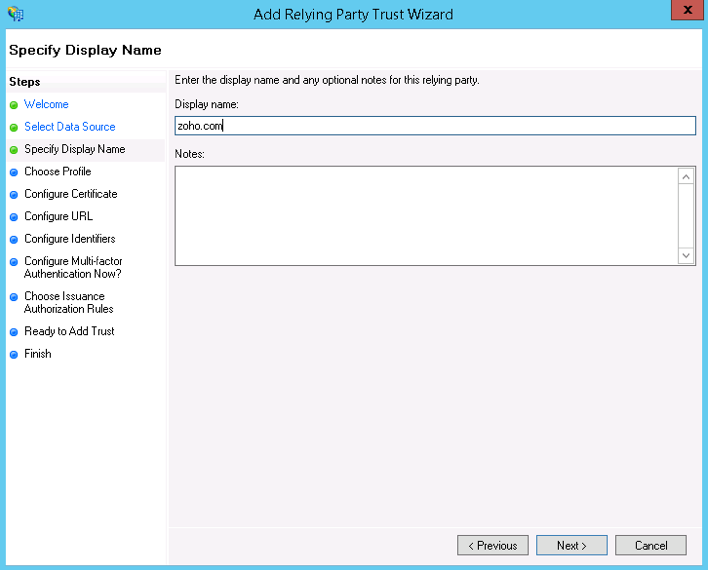
- Enter manageengine.com as the display name on the Specify Display Name screen. If you've chosen the Import data about the relying party from a file option, proceed to step 8 from here.
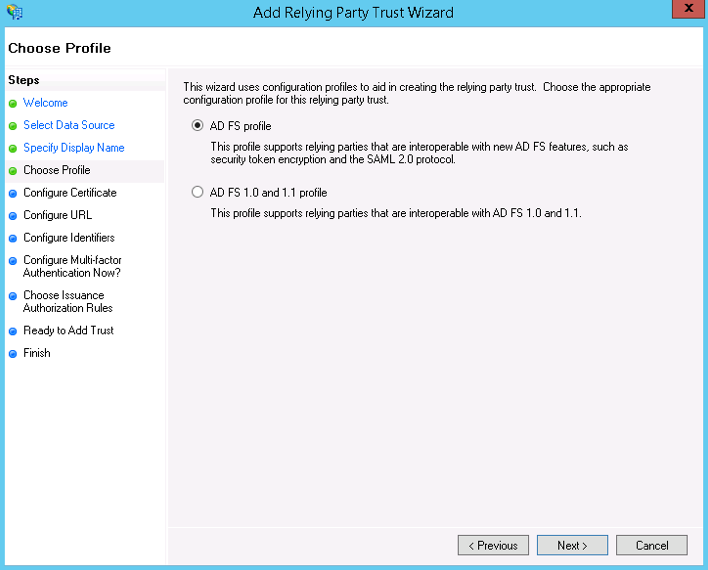
- Select AD FS profile on the Choose Profile screen and click Next.
- Browse the required certificate and click Next.

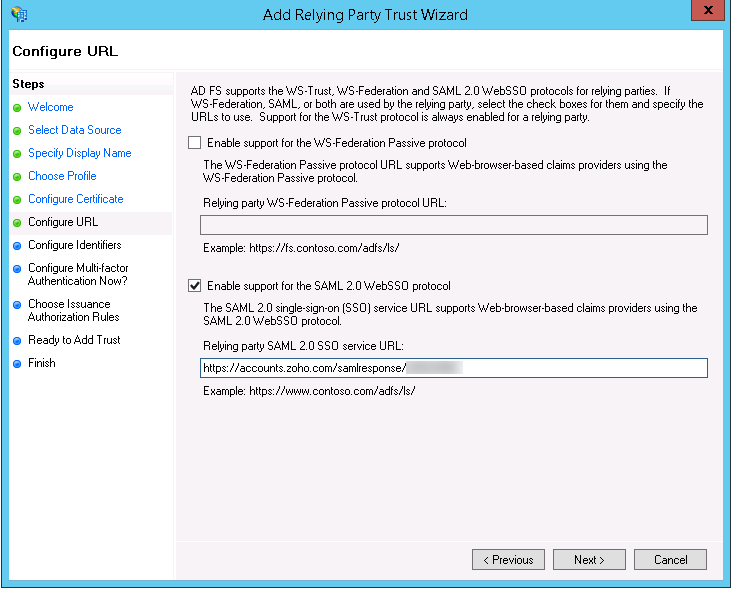
- Check the Enable Support for the SAML 2.0 WebSSO protocol option on the Configure URL screen and enter the ACS URL present in the metadata you downloaded from ManageEngine in the service URL text box.Note: You can find the ACS URL inside the location tag in the downloaded metadata file.
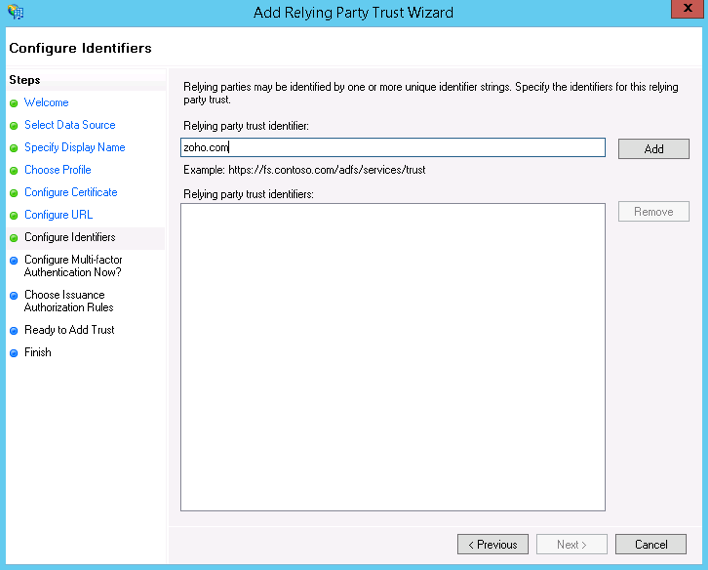
- Choose manageengine.com as the Relying Party Trust Identifier on the Configure Identifiers screen.
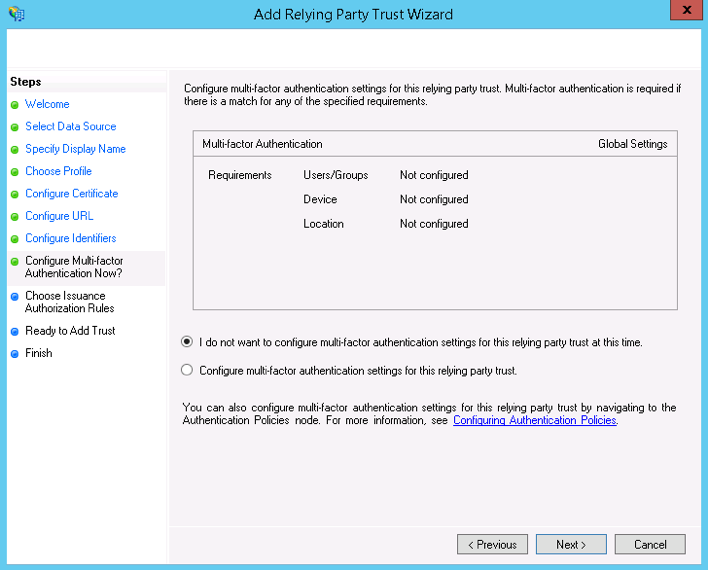
- Choose I do not want to configure multi-factor authentication settings for this relying party trust at this time on the Configure Multi-factor Authentication Now screen and click Next.
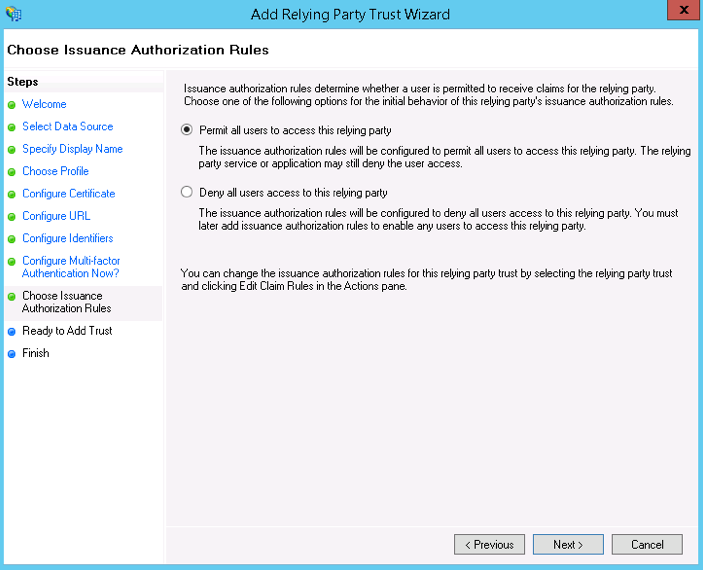
- Select the Permit all users to access this relying party button on the Choose Issuance Authorization Rules screen.
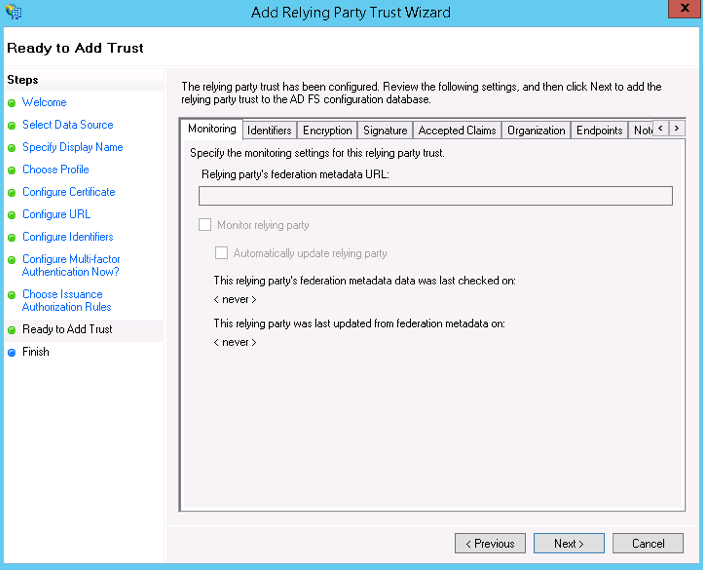
- The wizard will display an overview of your settings on the next two screens.
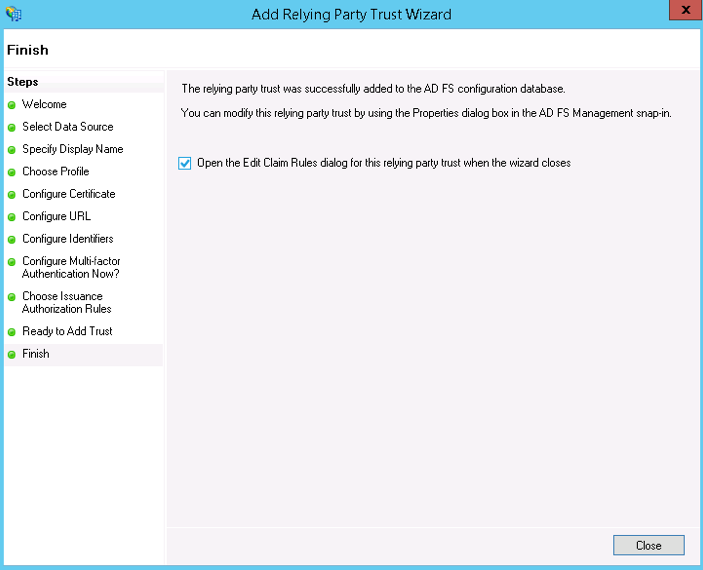
- On the final screen, use the Close button to exit and open the Claim Rules editor.
Creating Claim rules
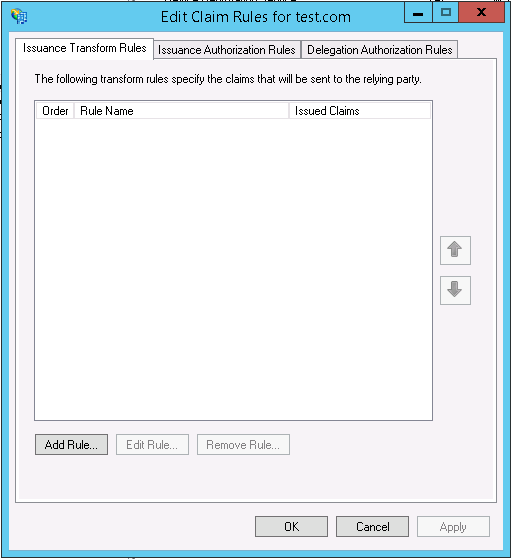
After the relying party trust is created, you can create claim rules. By default, the claim rule editor opens once you create a trust.
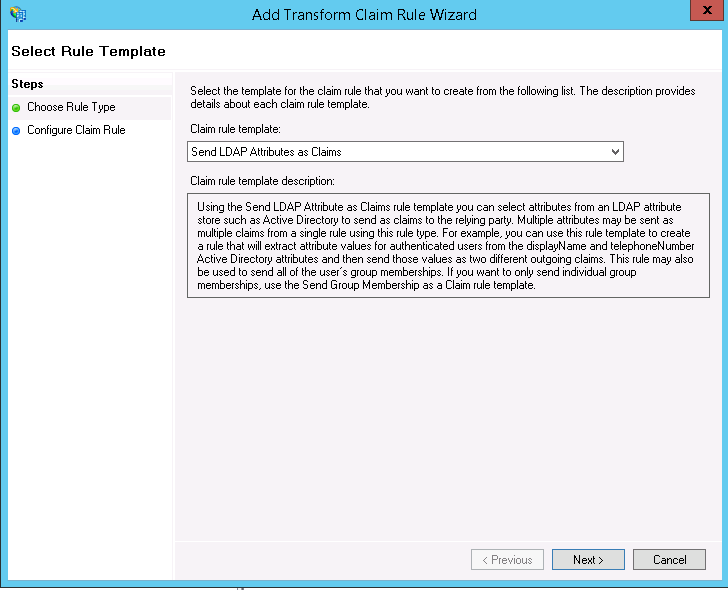
- Click Add Rule to create a new rule. This will launch the Add Transform Claim Rule Wizard.
- On the Choose Rule Type screen, select Send LDAP Attributes as Claims in the drop-down menu and click Next.
- On the Configure Claim Rule screen:
- Enter a Claim rule name.
- Choose Active directory from the dropdown menu for the Attribute Store.
- On the LDAP Attribute column, choose E-Mail Addresses from the drop-down menu.
- On the Outgoing Claim Type column, select E-Mail Address from the dropdown menu.
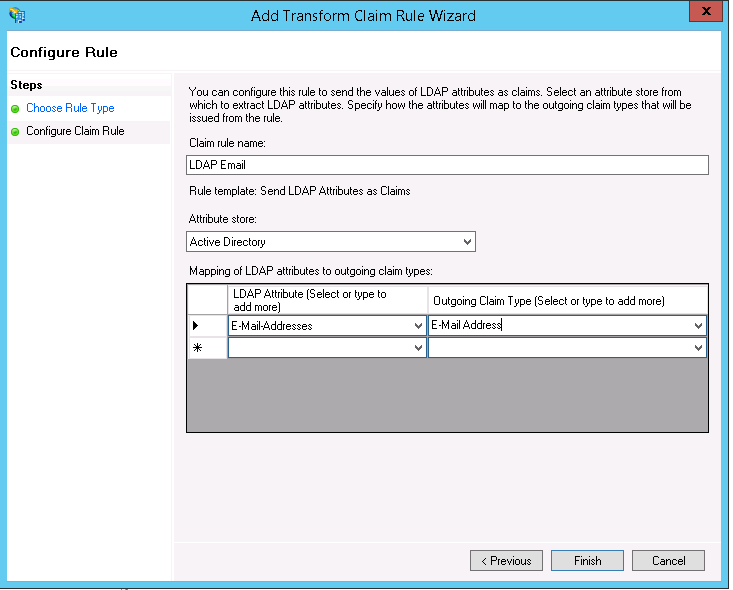
- Click Finish to save the rule.
- Create another claim rule and select the Transform an Incoming Claim template.
- On the Configure Claim Rule screen:
- Enter a Claim rule name.
- Choose E-Mail Address as the Incoming claim type from the drop-down menu.
- Select Name ID as the Outgoing claim type from the drop-down menu.
- Select Email as the Outgoing name ID format.
- Select the Pass through all claim values button.
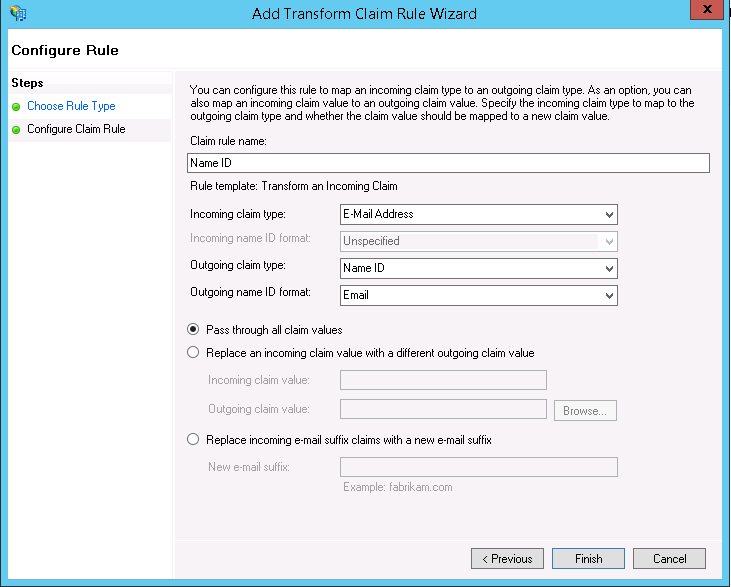
- Click Finish to create the claim rule.
- If you have selected Do you need Logout Response? at ManageEngine:
- Download the logout certificate in the AppCreator's SAML Authentication page.
- Go to Relying Party Trust under Trust Relationships and select manageengine.com.
- Go to Endpoints on the top navigation bar and click Add.
- Select the Endpoint type as SAML Logout.
- Enter the logout URL generated from the metadata file you downloaded from your ManageEngine account.
- Go to Signature on the top navigation bar and click Add.
- Upload the logout certificate.
- Go to Advanced on the top navigation bar.
- Select the Secure hash algorithm as SHA-256.