Customer management in Log360 MSSP
Last updated on:
In this page
- Overview
- Integrating outsourced Log360 instances into Log360 MSSP
- Accessing customer management
- Customer management
- Adding a customer
- Editing a customer
- Deleting a customer
- Manual data sync
- Manage customer license (via Customer Management page)
- To view the license allocation details
- To edit the license allocation details
- Monitoring customer server health
Overview
When you are converting your existing standalone instances to MSSP deployment model, you would want to remove multiple instances deployed across various regions and provide a single interface through MSSP deployment model to access them. The Customer Management module in Log360 MSSP allows a seamless onboarding while also providing a centralized interface to access and manage all integrated instances, enabling MSSPs to efficiently oversee customer environments from a single console.
Integrating outsourced Log360 instances into Log360 MSSP
Why is this crucial?
Integrating outsourced Log360 instances into Log360 MSSP is the central element of MSSP in which Log360 is integrated with the MSSP build. The outsourced Log360 instances (customer servers) are Log360 environments deployed on behalf of customers, running in their infrastructure.
NOTE Outsourced instances refer to customer instances deployed across different locations.
To centrally manage all the customers from MSSP console, those customer servers need to be integrated with MSSP.
To monitor and maintain outsourced Log360 instances, they have to be integrated into Log360 MSSP. Follow the steps below:
Phase 1: Download and install Log360
NOTE If you already have Log360 installed and running, you can skip this step and proceed with Phase 2: Integrate Log360.
- Download Log360 from the Log360 Website.
- Install Log360 by double-clicking the downloaded EXE files and following the InstallShield wizard.
- Once the installation is complete, start Log360 by double-clicking the desktop shortcut icons of the respective components.
Phase 2: Integrate Log360
Pre-requisites:
- Make sure that all the customers' product console is set up and running before proceeding with the steps given below.
- Your Log360 MSSP server and your customer server should be in the same version (build).
- Ensure that the connectivity of both Log360 MSSP and customer Log360 are bidirectional.
Accessing customer management
To access the customer management module:
- Log in to the Log360 MSSP application using the credentials of a Log360 MSSP administrator.
- Navigate to the Settings tab in the header pane and click on the Customer Management option.
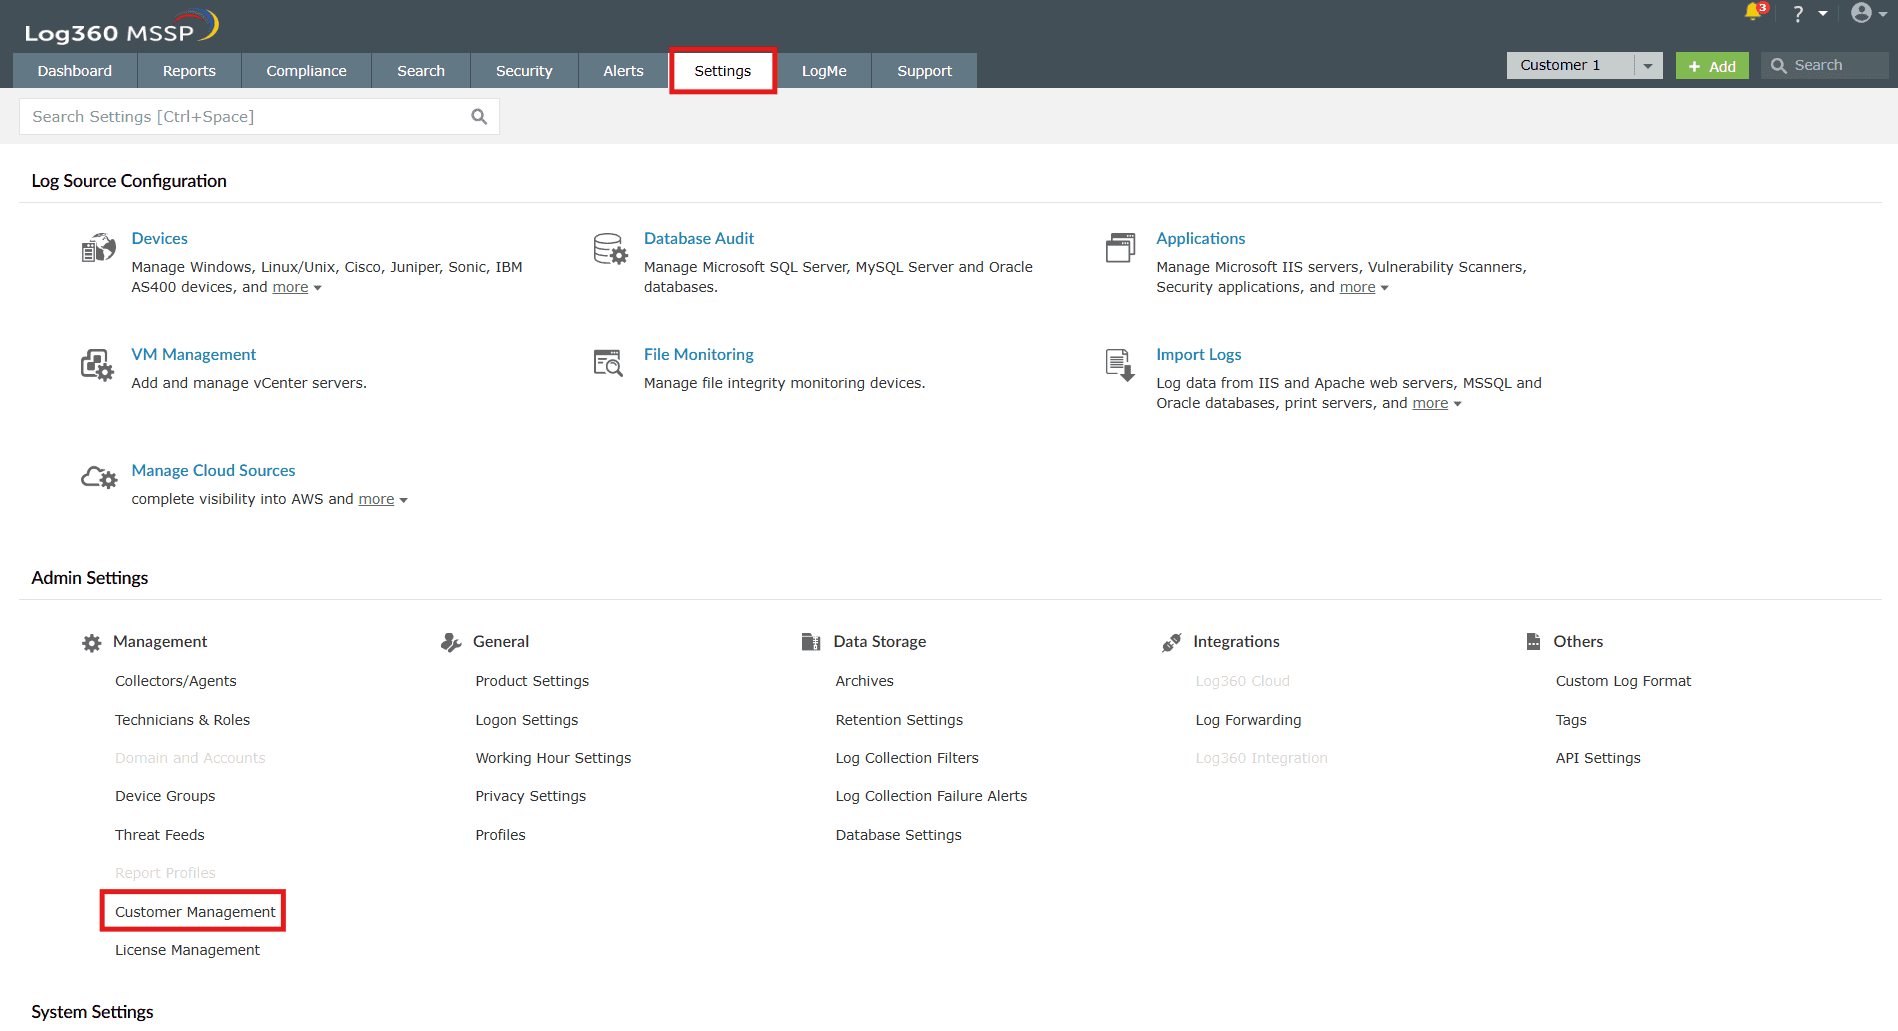
Image 1: Customer Management via Settings tab in Log360 MSSP - From this page, you can manage - add, edit, or delete customers.
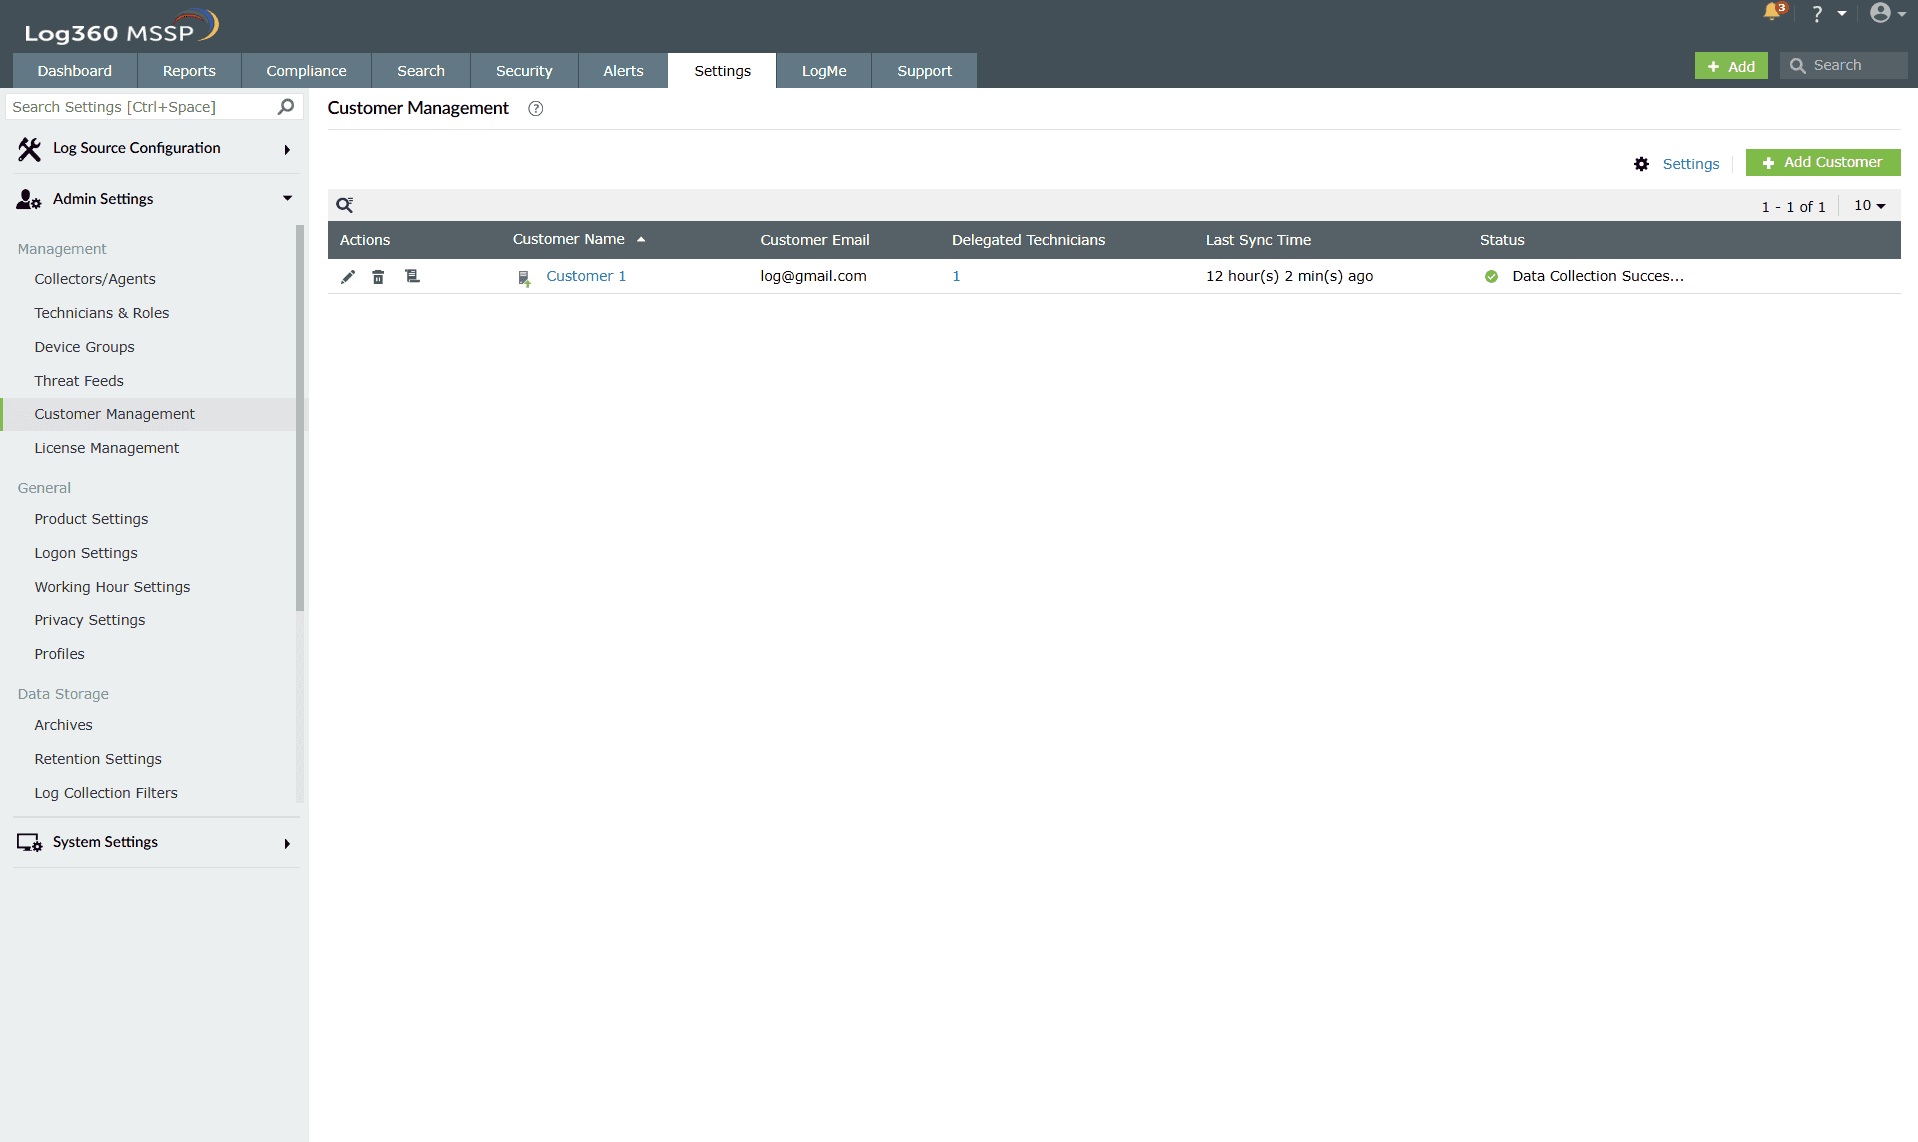
Image 2: Customer Management in Log360 MSSP
Customer management
Adding a customer
To add a customer,
- Click on the Add Customer link available in the Customer Management page. This opens the Add Customer form.
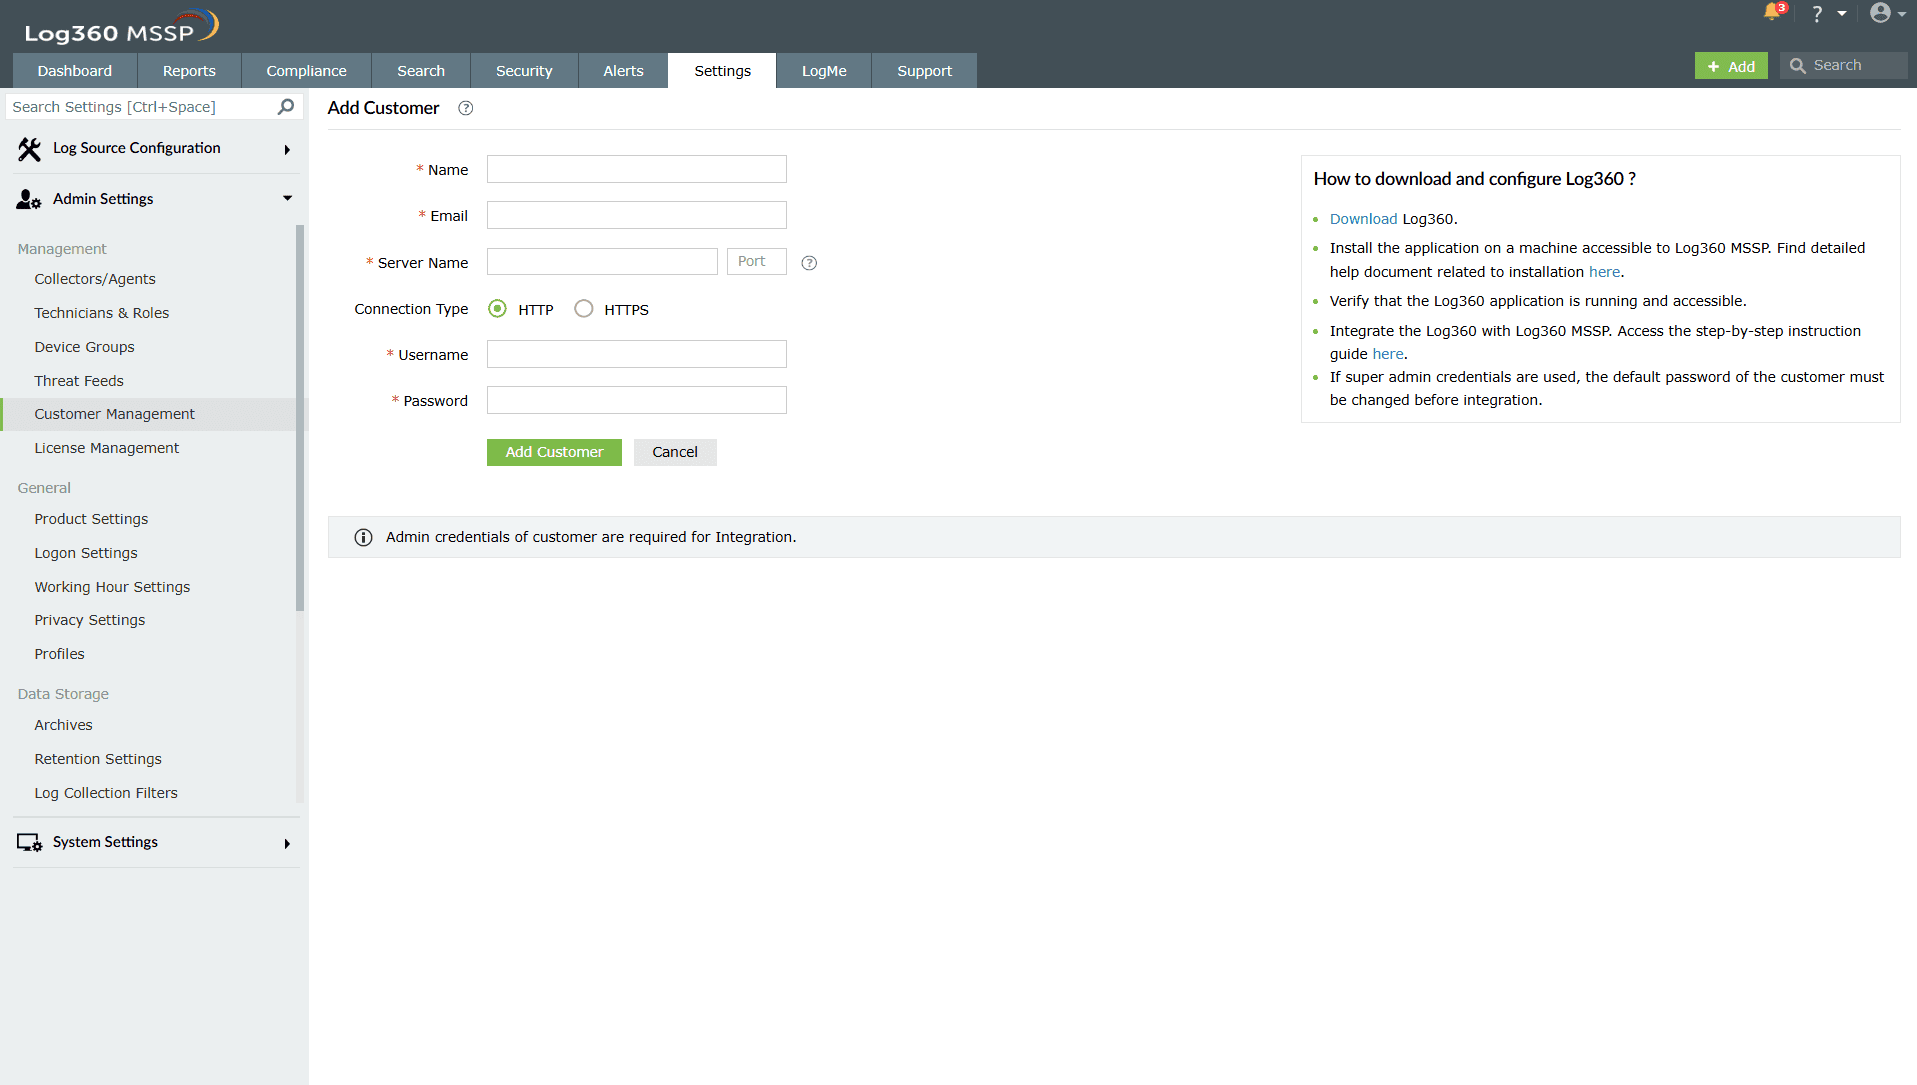
Image 3: Adding a customer in Log360 MSSP - Fill in the required fields in the form to add the customer:
- Enter the Customer Name and a valid Customer mail. The Customer Name needs to be unique and should not exist already.
- Enter Server Name, Port, and specify the Connection type (HTTP or HTTPS).
- Enter the Admin Credentials of the respective Log360 Customer.
- Click Add Customer.
- Upon successful completion of action, the below pop-up appears, and the respective customer is instantly added.
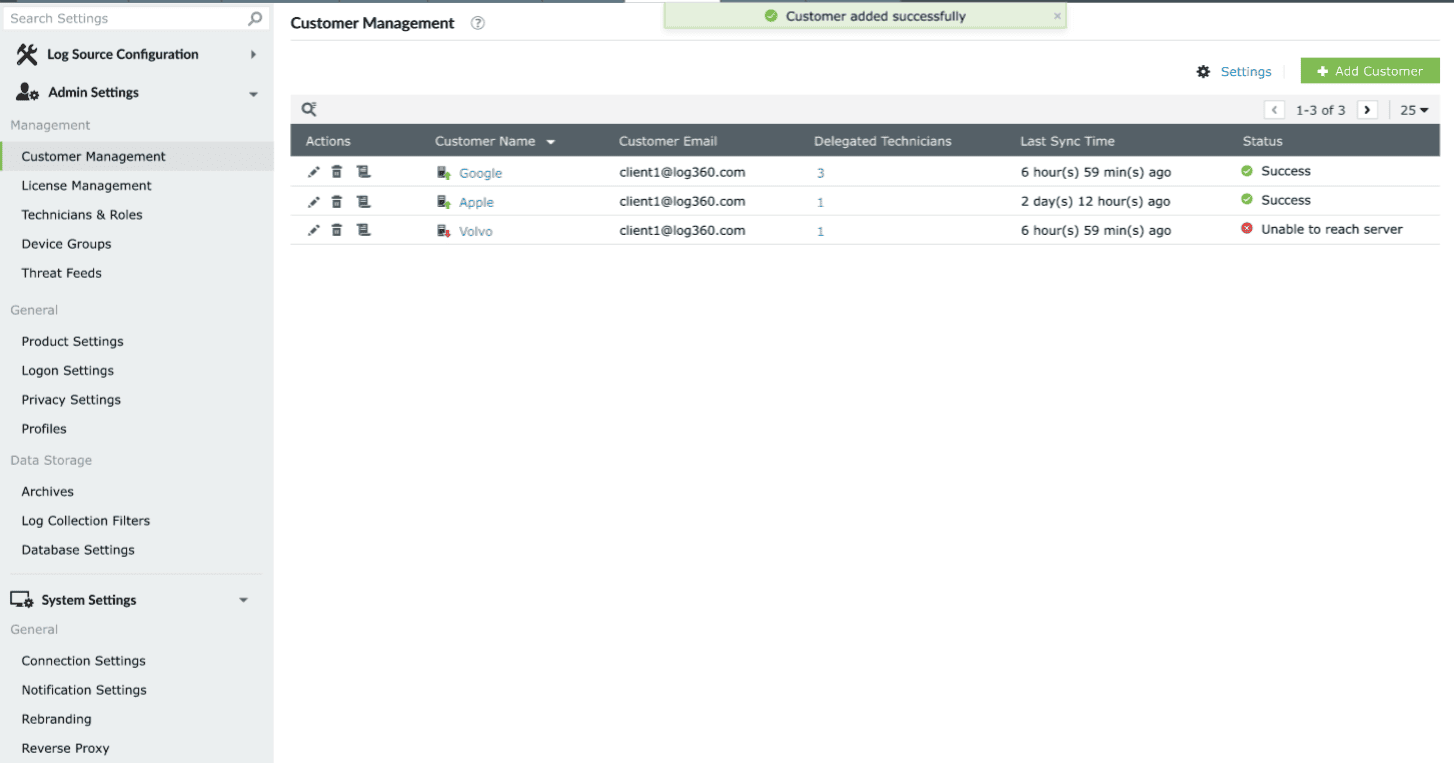
Image 4: Adding a customer in Log360 MSSP
Editing a customer
- Navigate to the Customer Management page and click on the edit icon
 beside the customer's name you wish to update. The edit form will open, similar to the Add Customer form.
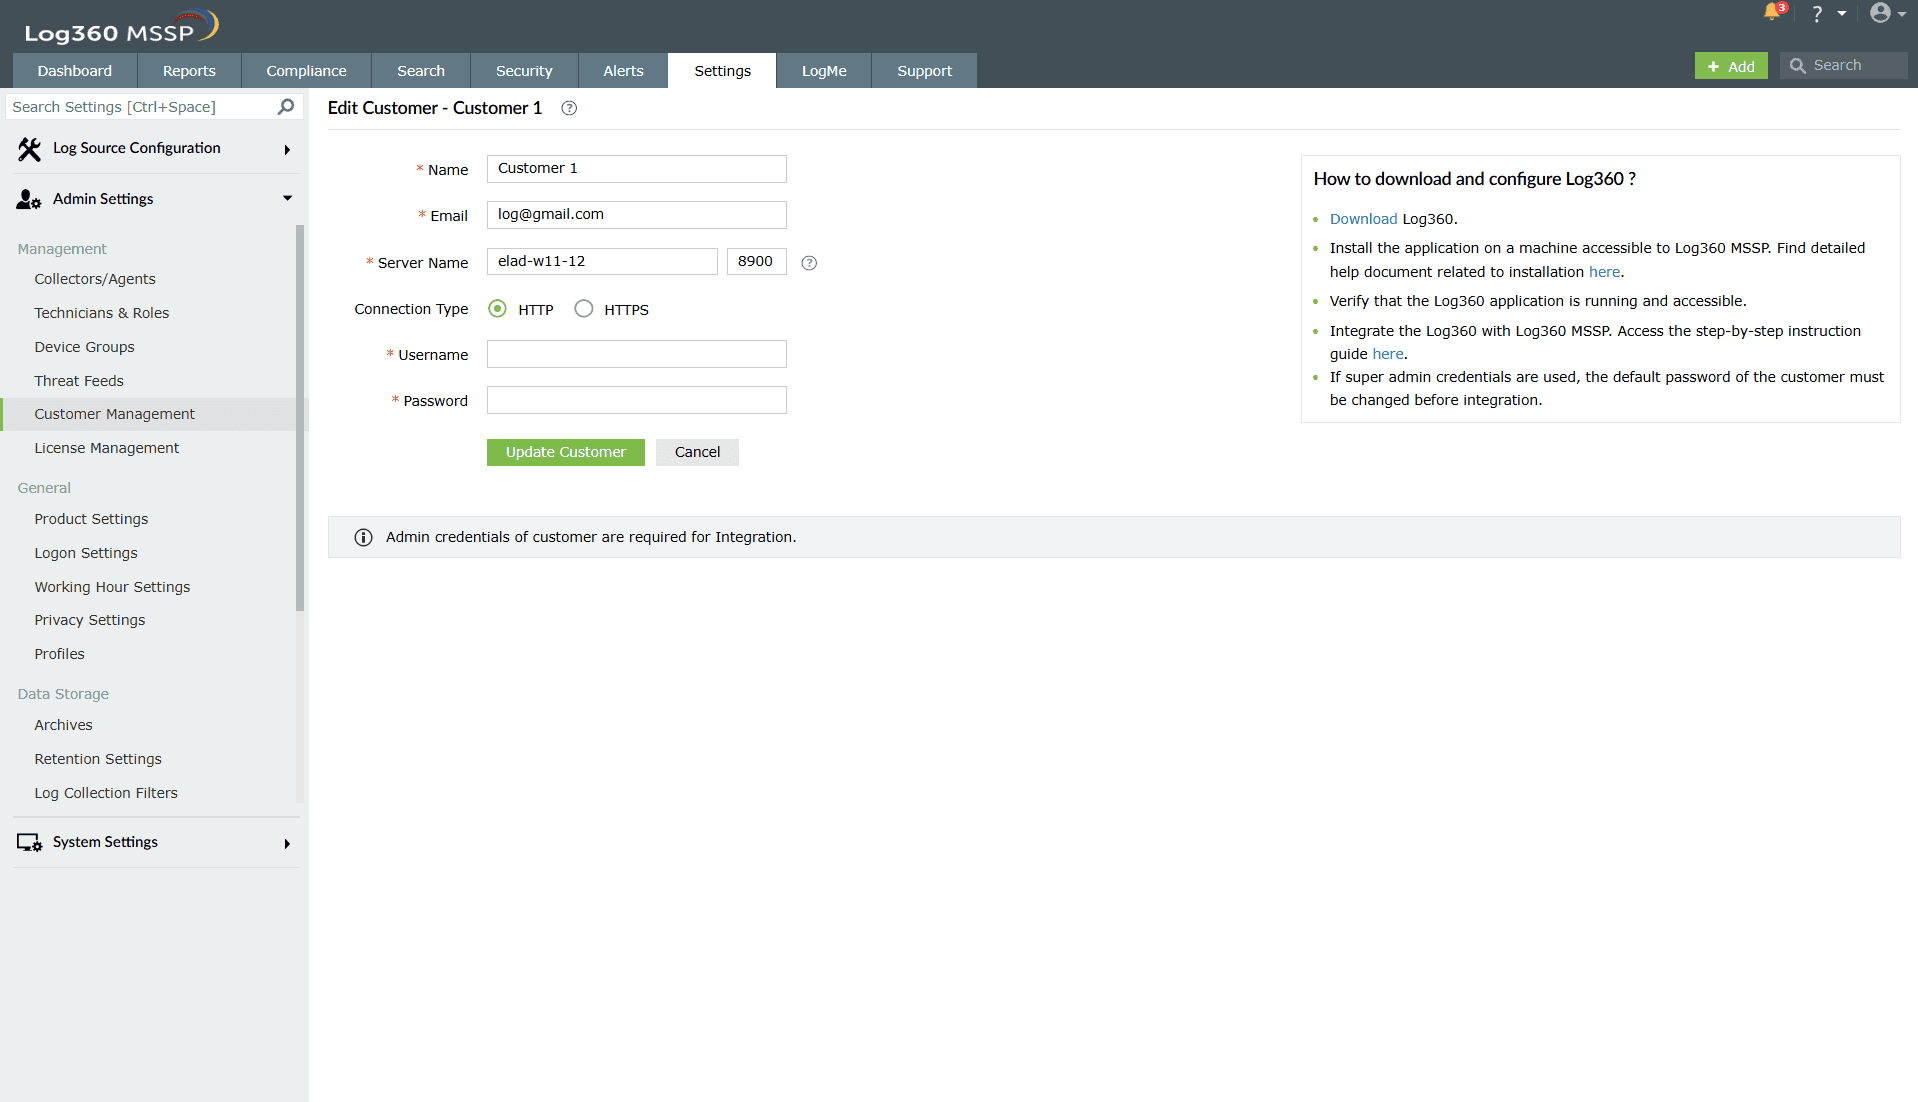
Image 5: Editing a customer in Log360 MSSP - Make the necessary changes, enter the Admin Credentials of the respective Log360 Customer, and click on Update Customer.
- Upon successful completion of action, the below pop-up appears, and the respective customer's details are instantly updated.
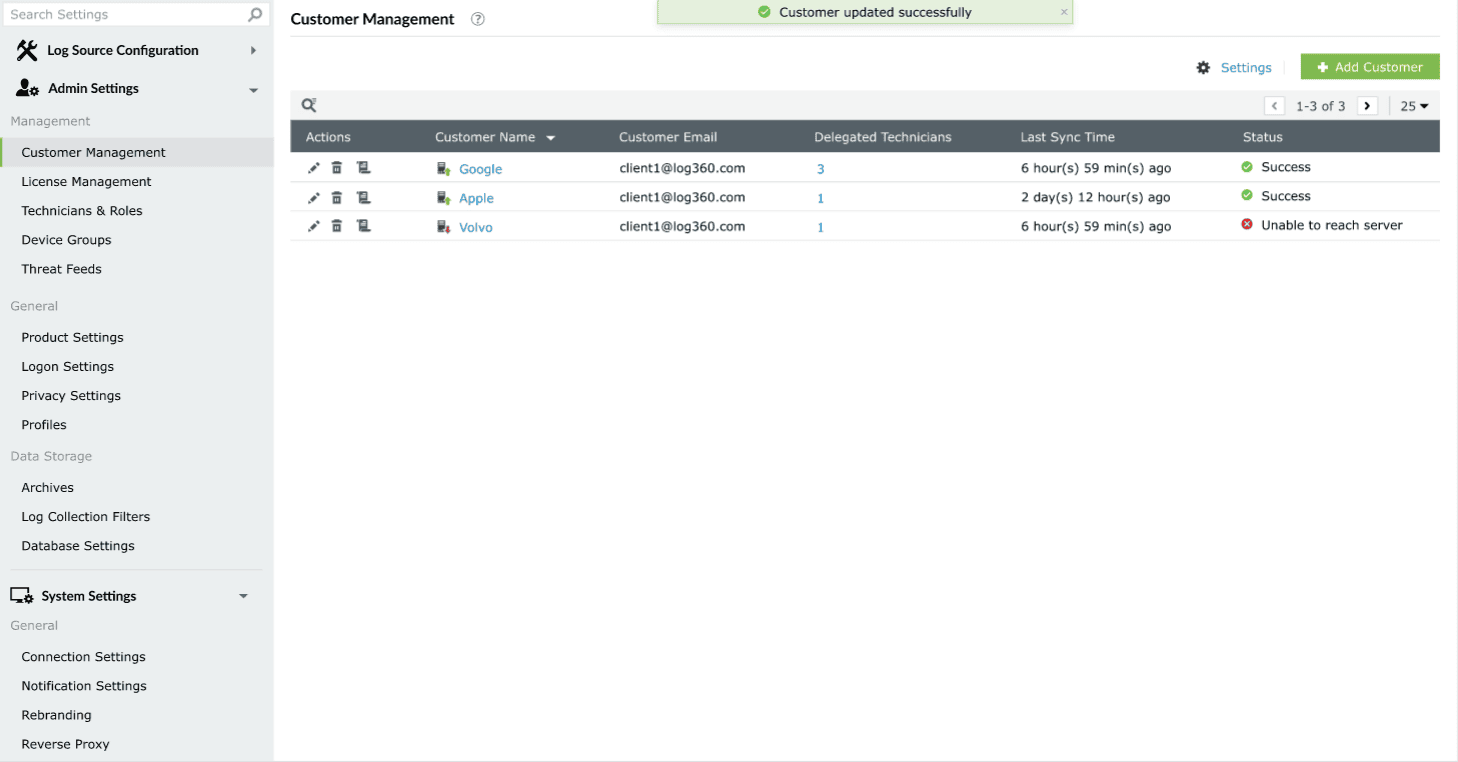
Image 6: Editing a customer in Log360 MSSP
Deleting a customer
Soft delete:
- Navigate to the Customer Management page and click on the delete icon
 beside the customer's name you wish to delete. A Confirm Password pop-up appears like shown below.
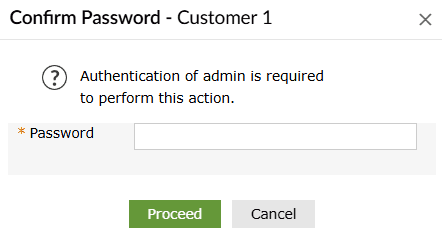
- Enter your (the currently logged in admin technician's) Password and click Proceed to confirm.
- Upon successful completion of action, the below pop-up appears, and the respective customer is instantly deleted.
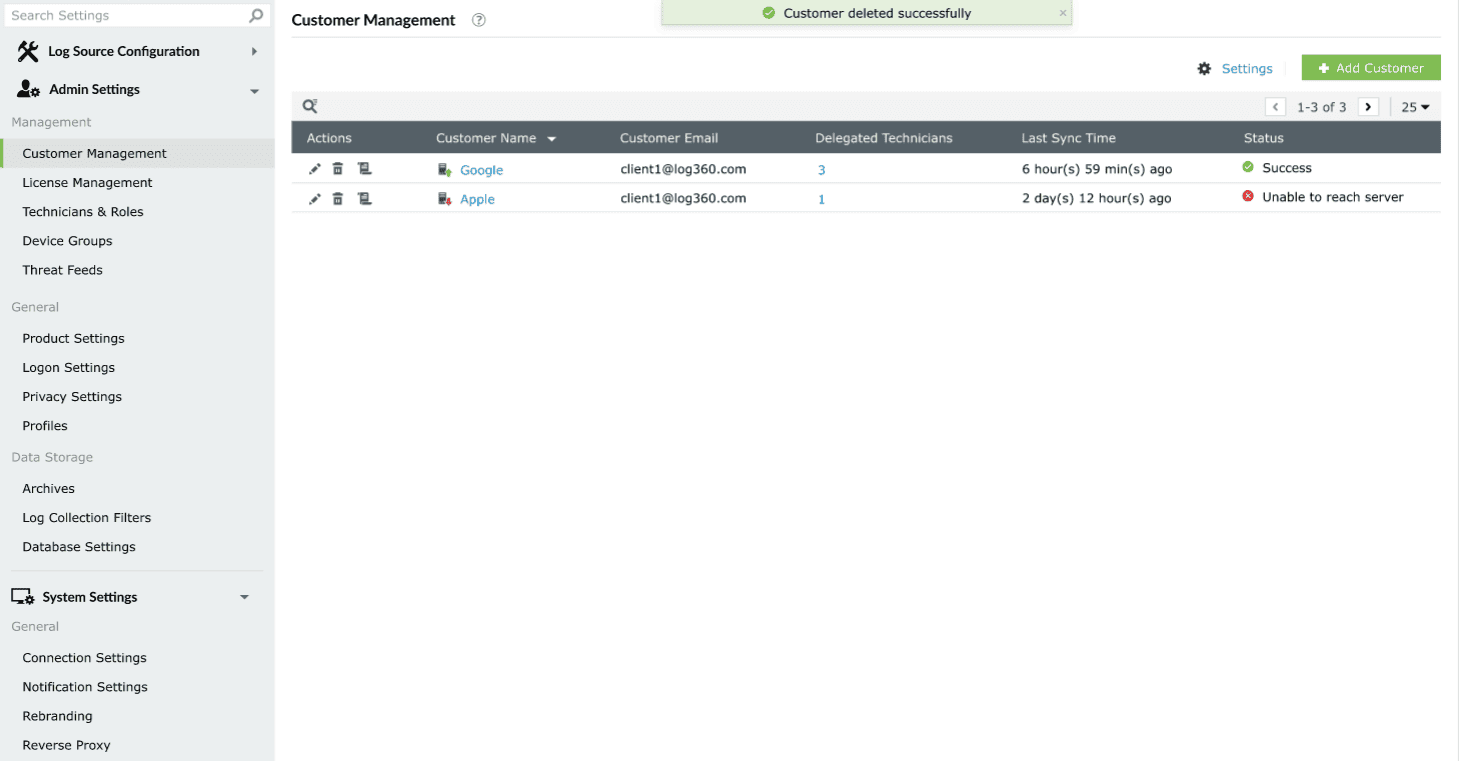
Image 7: Deleting a customer in Log360 MSSP
NOTE Make sure that given Log360 customer is up and reachable from Log360 MSSP.
Force delete:
- In the case of failure in the soft removal of a customer, the product automatically prompts a force delete customer popup. This applies to cases when the customer server is unreachable but the MSSP still needs to delete the customer.
- Enter the reason for force removal and click on Force Delete.
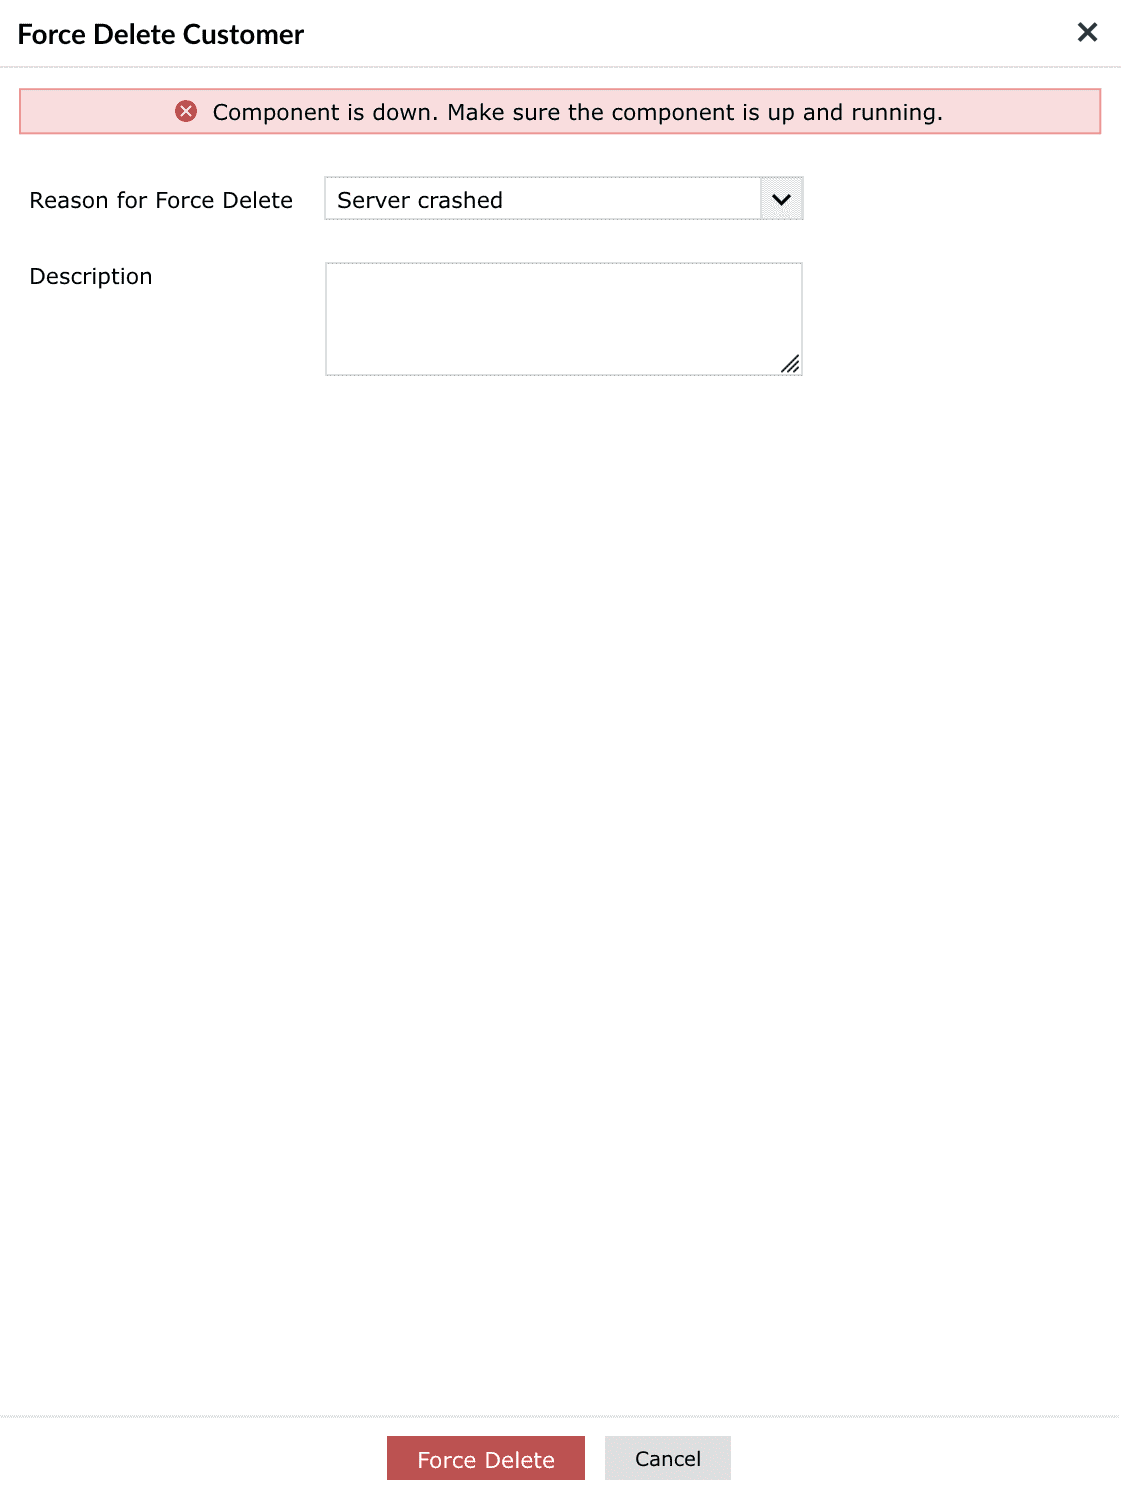
Image 8: Force deleting a customer in Log360 MSSP
NOTE If a customer is force deleted from Log360 MSSP while the customer is down or disconnected, Log360 MSSP details might not be completely removed from the customer.
Manual data sync
To manually trigger data synchronization between Log360 MSSP and Customer Log360 instance,
- Hover on the Status column of the desired customer to view the Sync Now button.
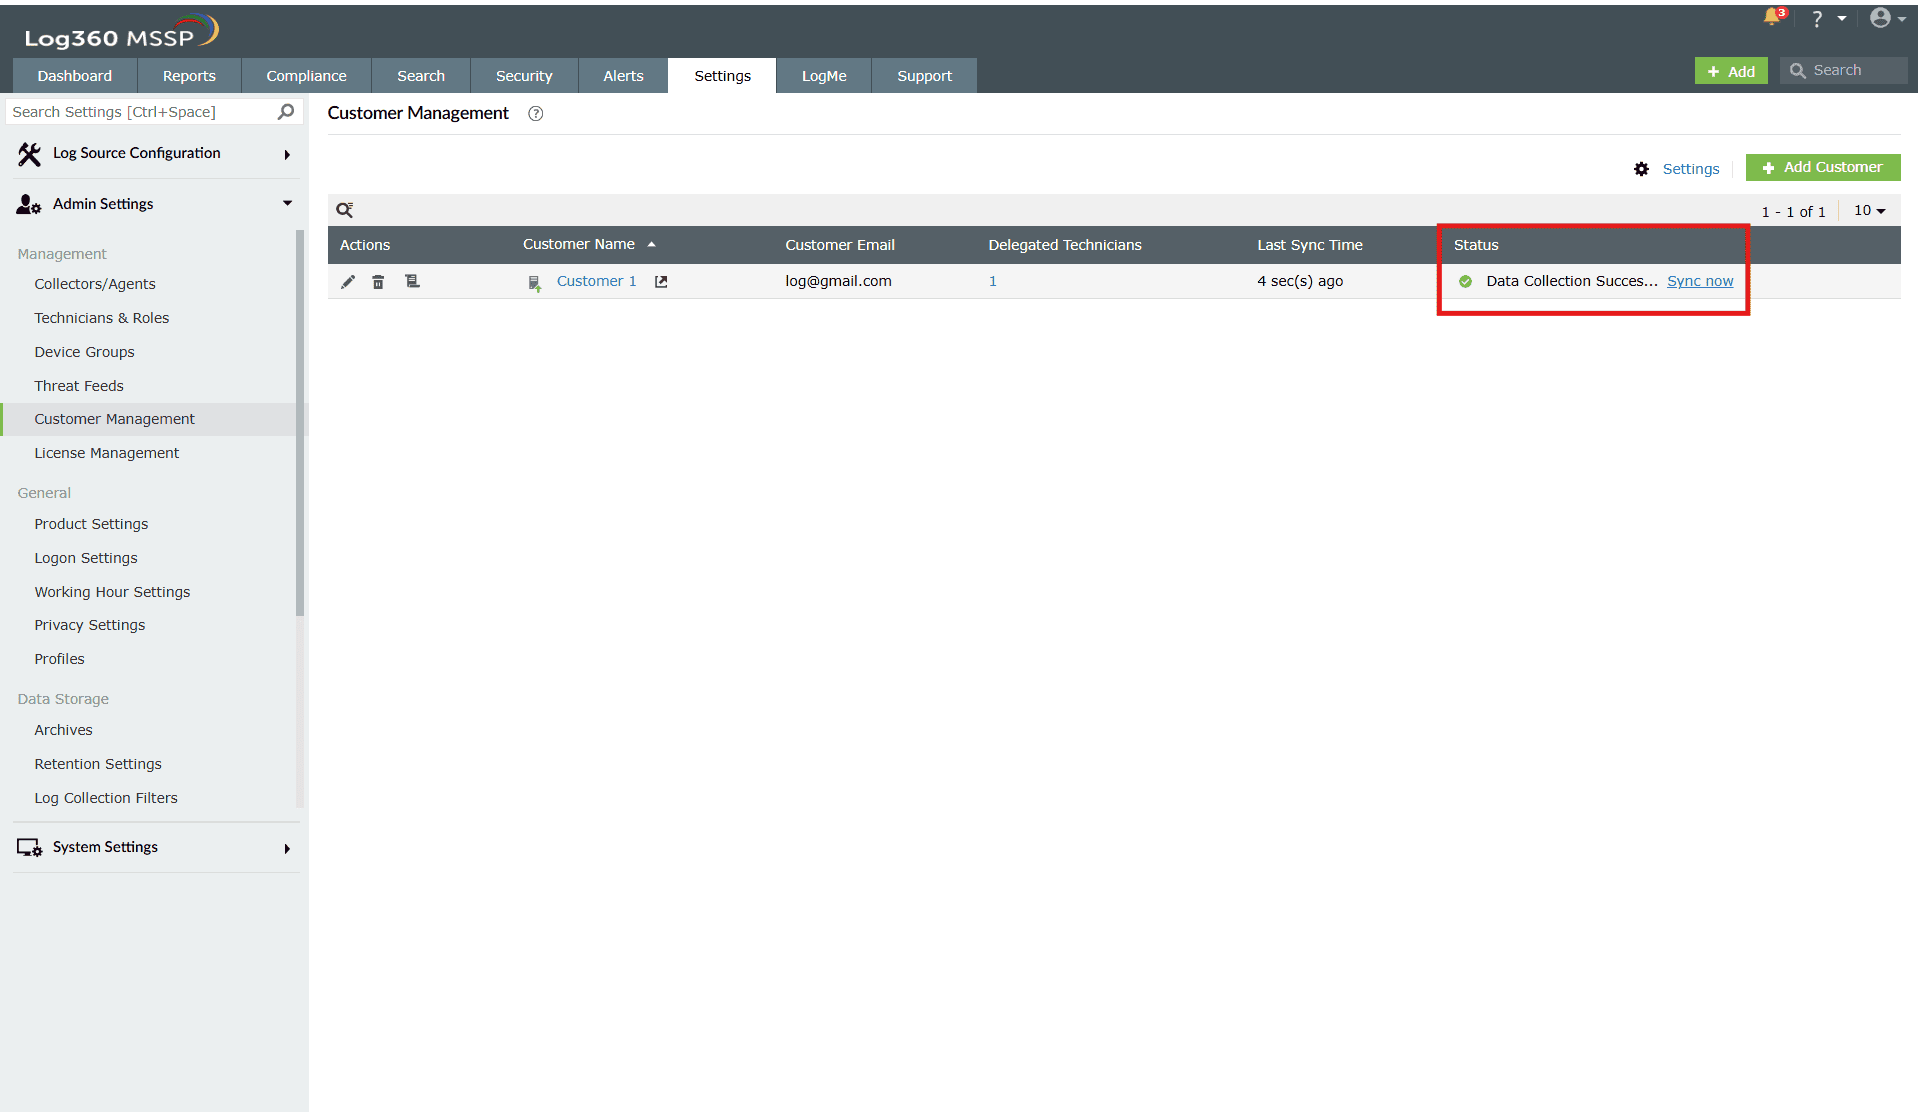
Image 9: Manual data sync in Log360 MSSP - Once you click on it the sync process begins and the status will be shown as below.
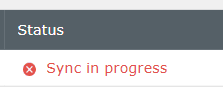
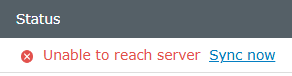
- In case the sync fails, the below status is shown.
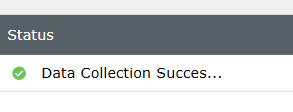
- Once the sync is successfully completed, the Data Collection Successful status is displayed as shown below.
Data synchronization between Log360 and Log360 MSSP
Once Customer Log360 has been integrated with Log360 MSSP, the data such as component integration and health details, reverse proxy, technician details, license details and more will automatically be synchronized. This saves time for the administrators, as they no longer have to configure the same settings across every Log360 customer.
Manage customer license (via Customer Management page)
To view the license allocation details:
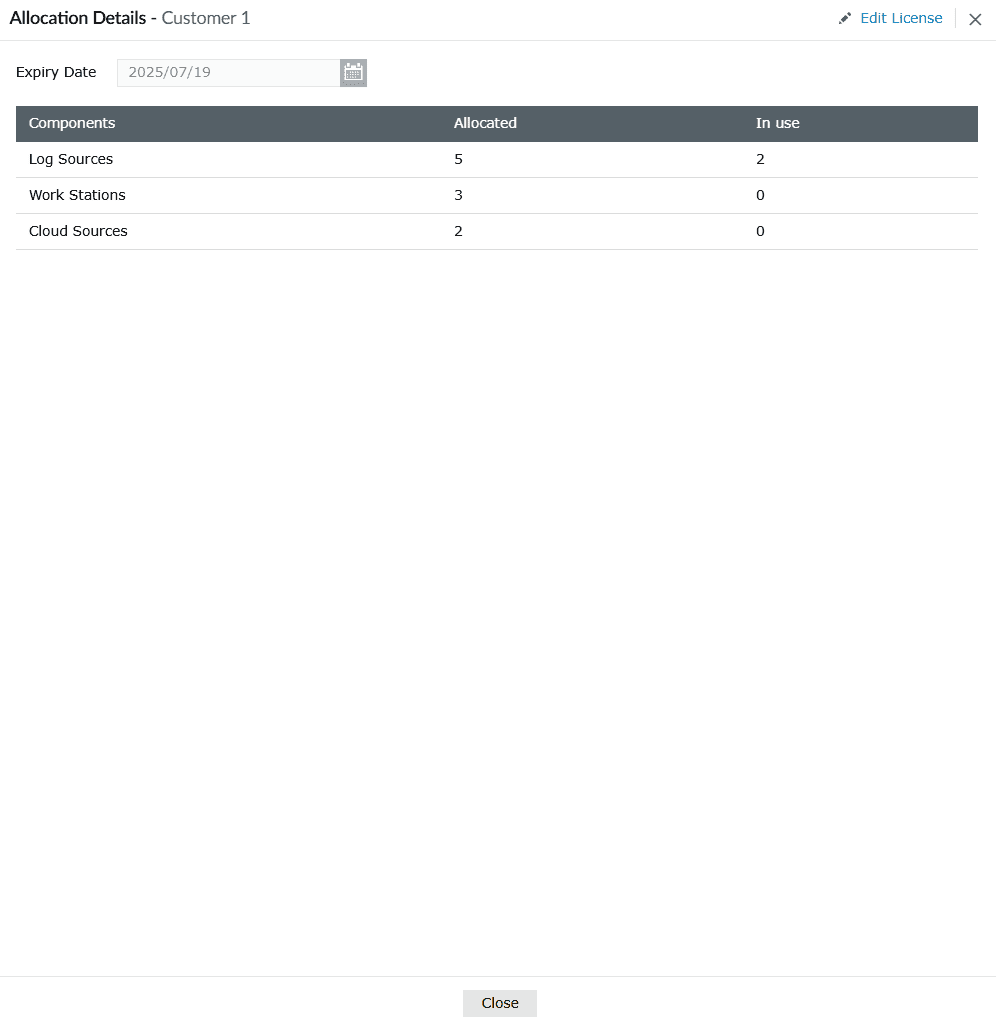
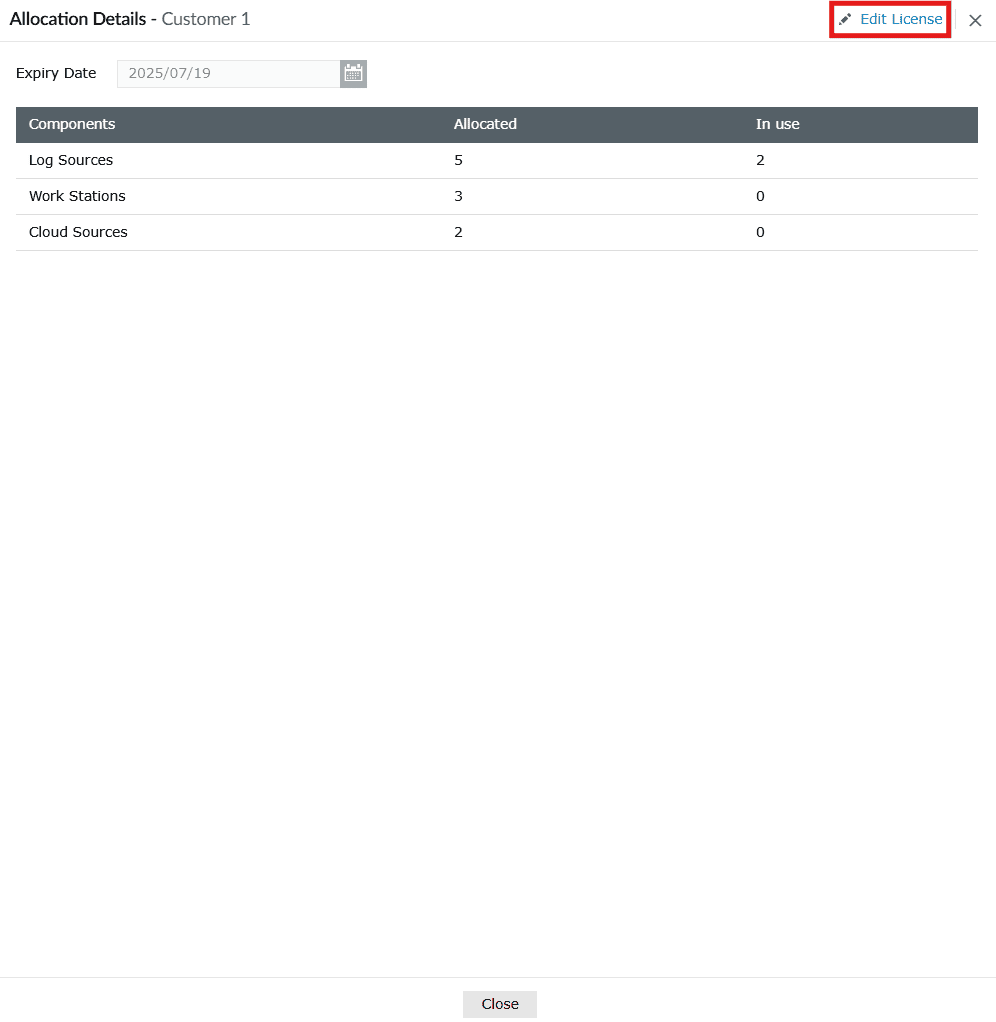
- Navigate to the Customer Management page and click on the license icon beside the customer's name. You will be taken to the License Management page with the Allocation Details box open. You can view all the required details pertaining to the license allocation of that customer.
To edit the license allocation details:
- Upon following the steps to view a customer's license allocation details, the Allocation Details box appears along with the option to edit at the top-right corner of the box. Click on the Edit License button to make changes to an existing customer's allocation details.
- Make the necessary changes and click on Update.

- Upon successful completion of the action, the below pop-up appears.

NOTE Additionally, you can allocate a license to a customer via the License Management page in the product console. To know more, refer to the License Management help document.
Monitoring customer server health
- There is a server icon located right before the name of the customer.
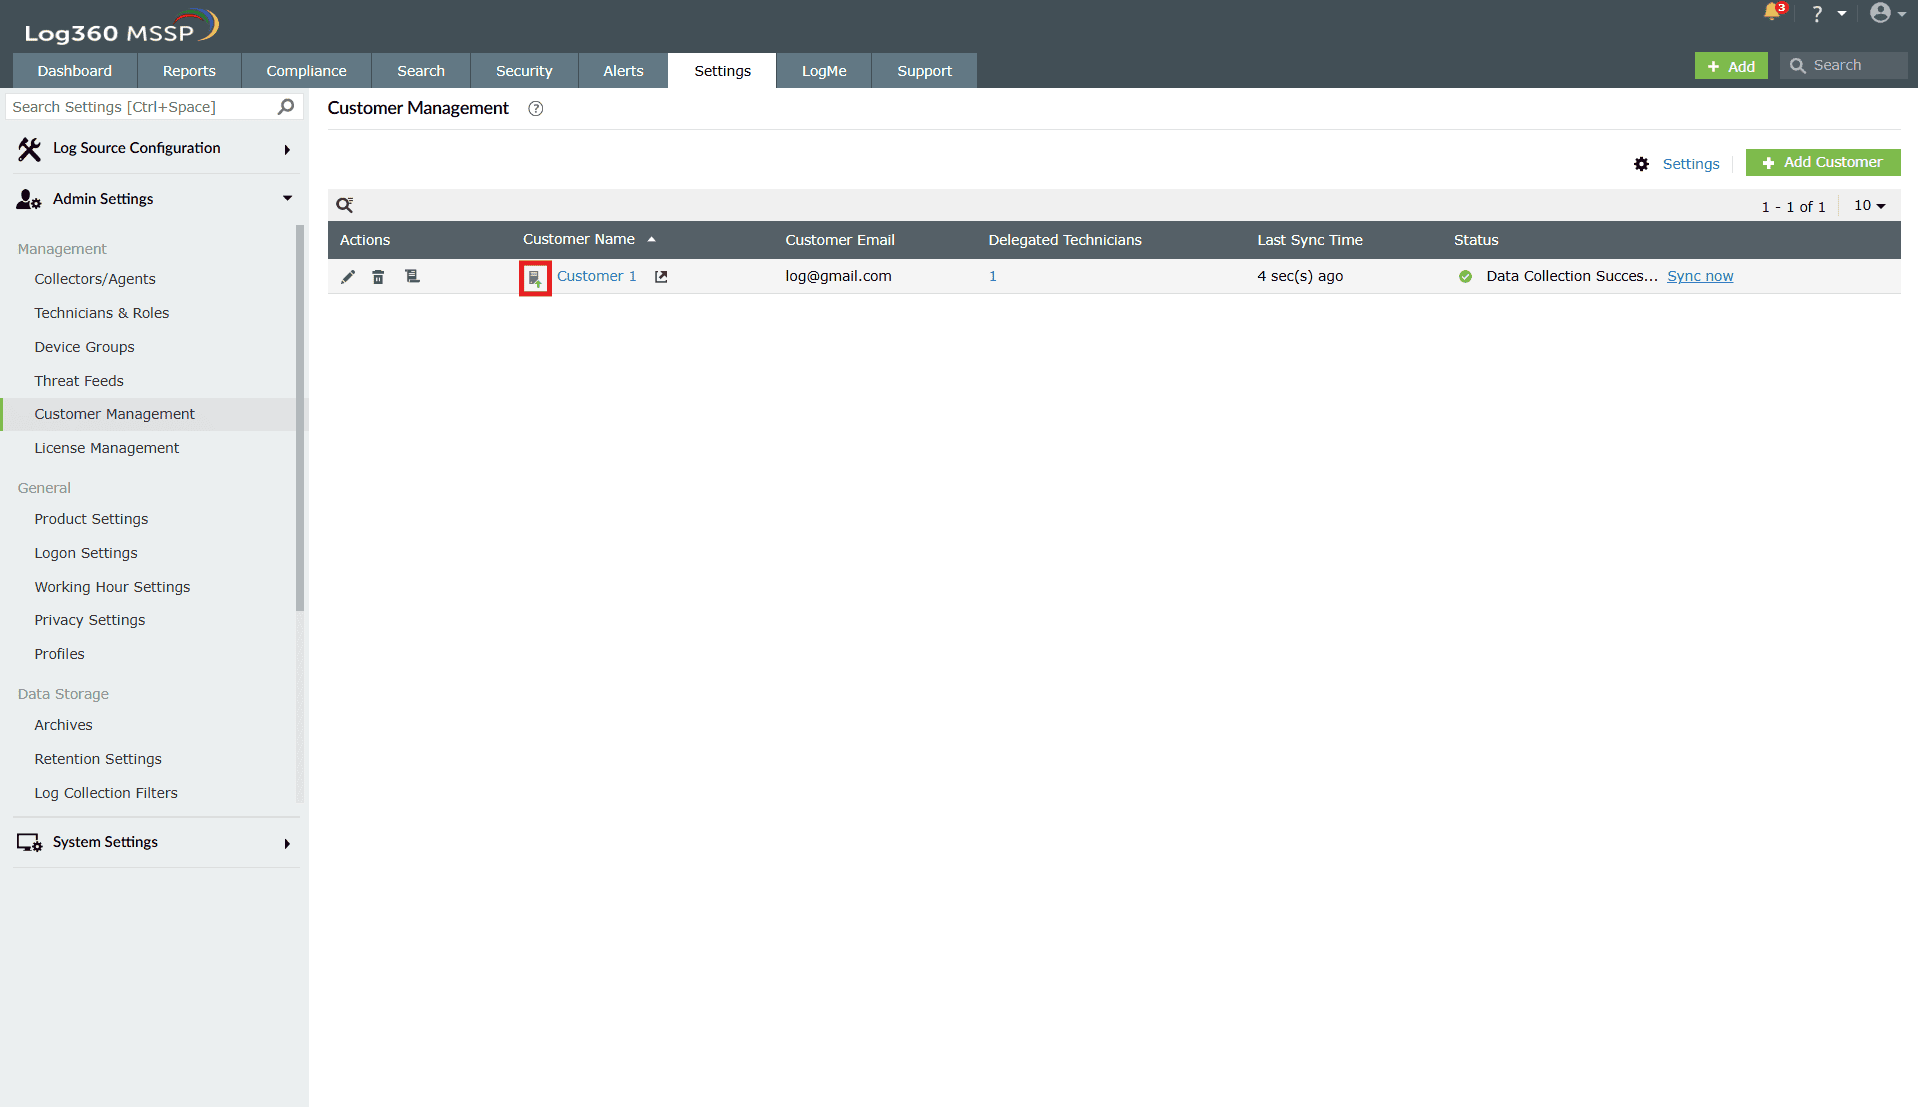
Image 10: Monitoring customer server health in Log360 MSSP - As shown below, the server icon near the customer name shows whether the customer server is up or down.
- The green upward arrow indicates that the server is up and running.
- The red downward arrow shows that the server is down.

NOTE In case of a server error, try restarting Log360 and trying again.
Read also
This document covered the complete workflow of integrating and managing customer Log360 instances within Log360 MSSP, from setup to monitoring. For related administrative capabilities, refer to: