License management in Log360 MSSP
Last updated on:
In this page
Overview
Log360 MSSP allows centralized license management of all its customer servers. This document elaborates the steps on applying license to the customer servers and managing those licenses.
Applying for license for MSSP server
- As the Admin technician in the MSSP, navigate to the Settings tab and click on License Management in the Management section under Admin Settings.
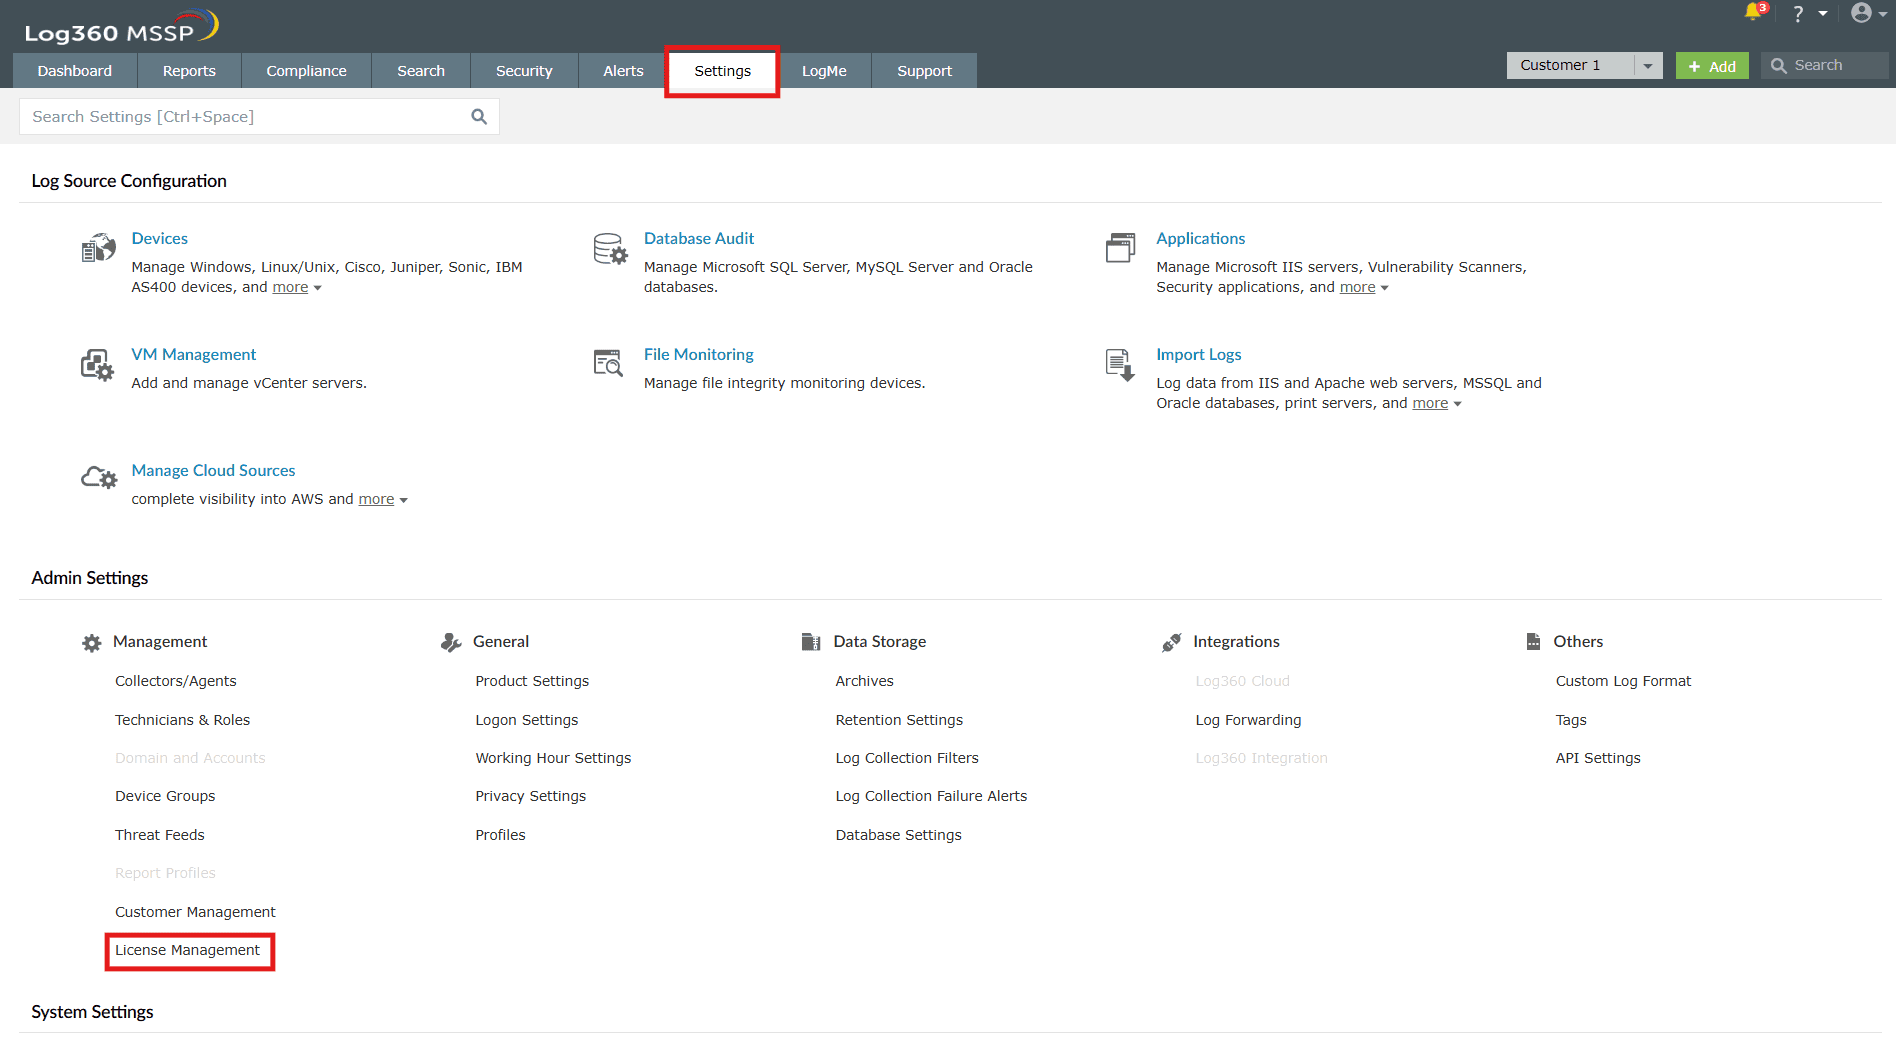
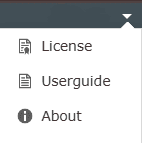
Image 1: License Management settings via the Settings tab in Log360 MSSP - The License Management page appears. Click on the drop-down button in the top-right corner as shown below.

Image 2: License Management in Log360 MSSP - Select License from the drop-down list.
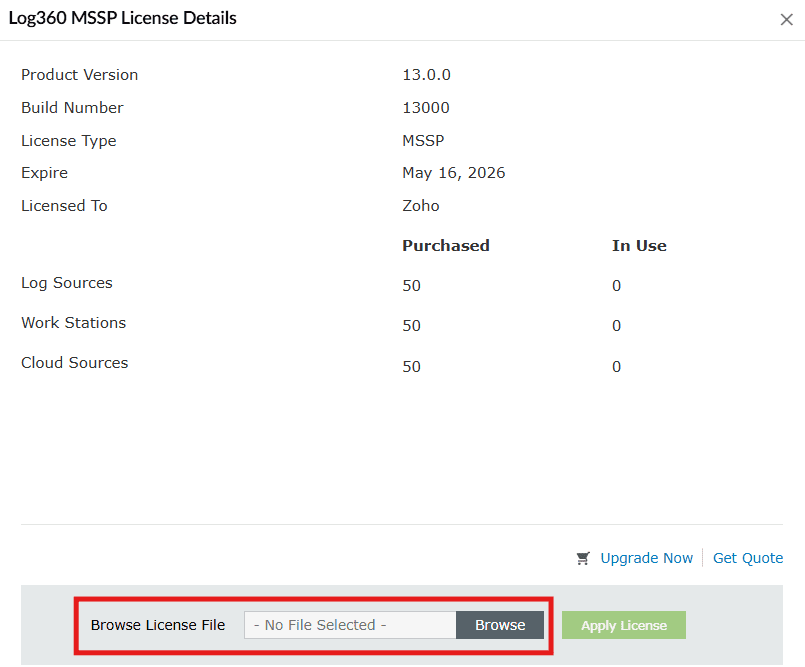
- The Log360 MSSP License Details box appears. Browse the MSSP License File and click on Apply License.
 NOTE
NOTE- Applying MSSP License is a mandatory step to allocate license to Customers.
- Without applying MSSP License, Customers can be integrated but Resources cannot be allocated.
- Internet connection is a must for License Module to work.
Applying a license to customer
- As the Admin technician of the MSSP, navigate to the License Management page via the Settings tab and click on Allocate present in the Allocation Details column.
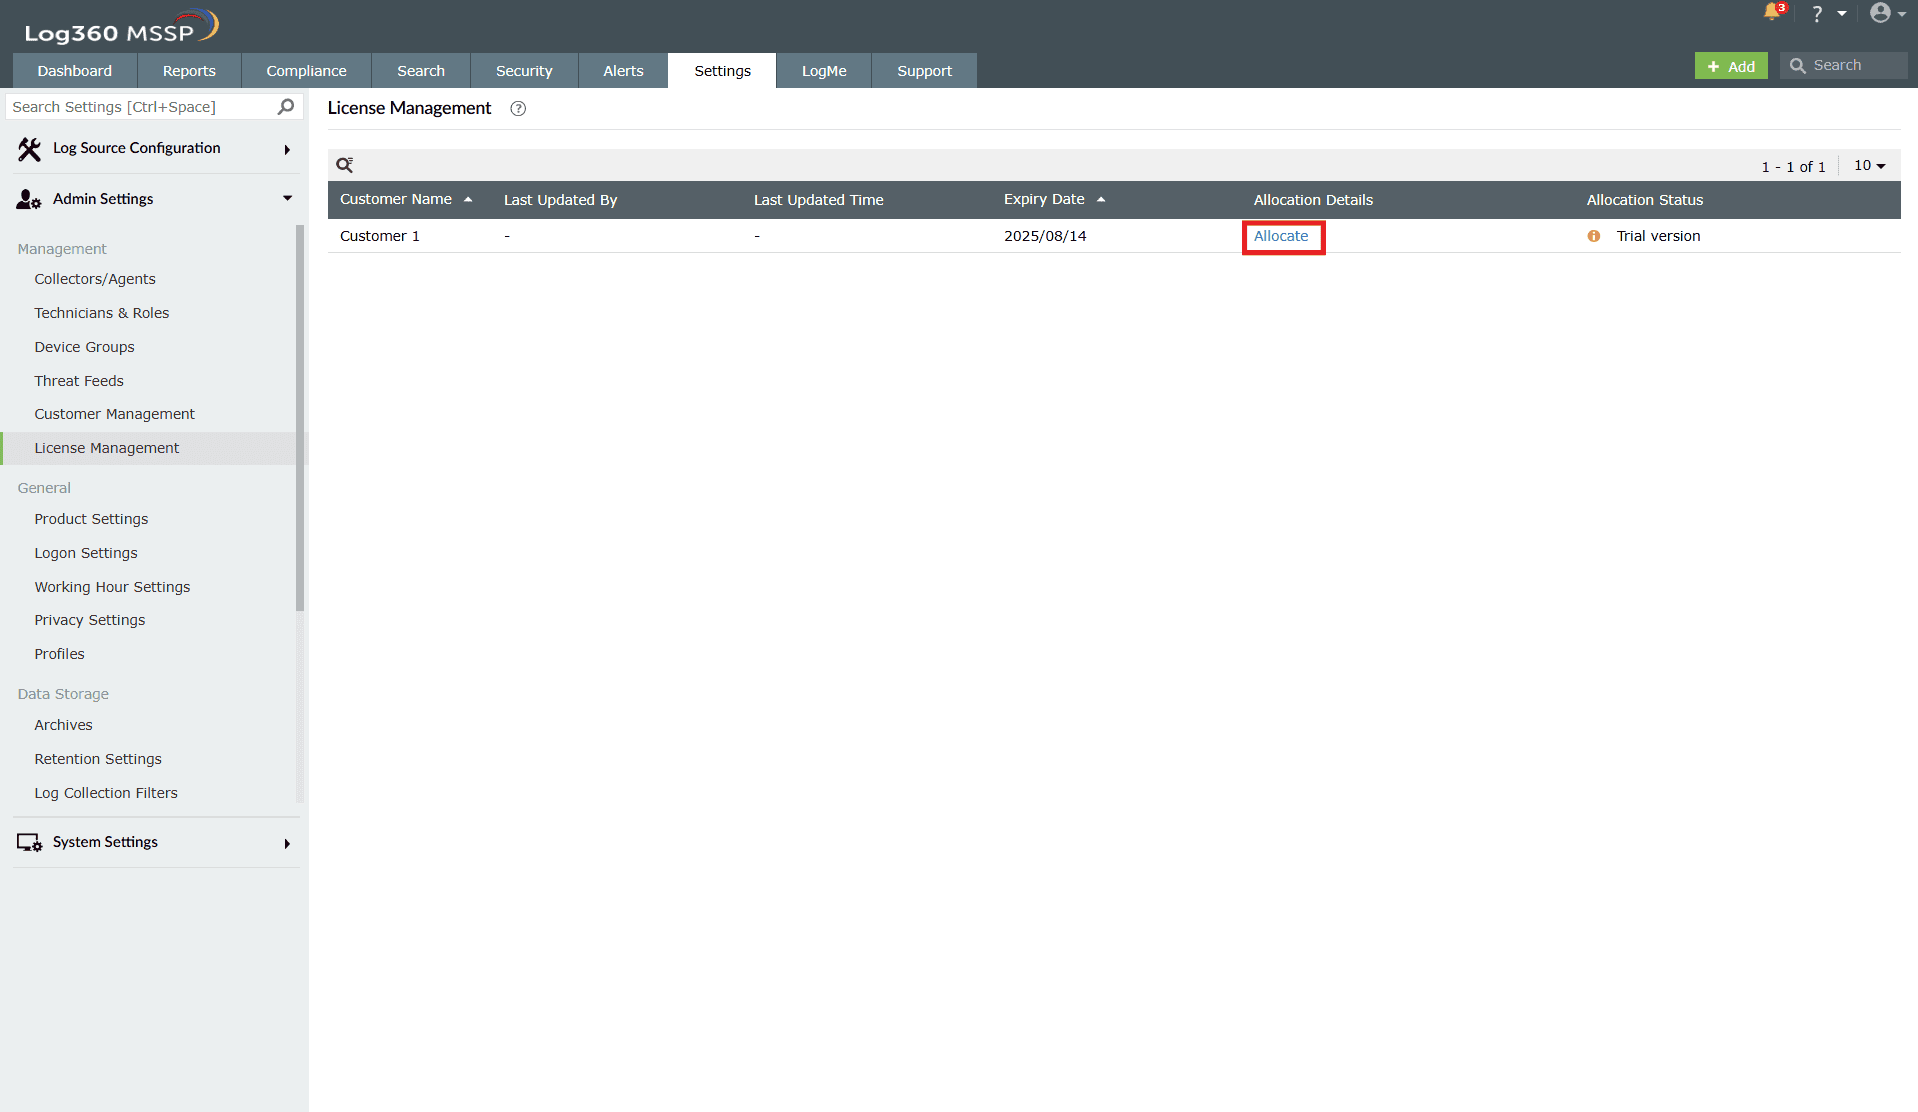
Image 3: License allocation details in Log360 MSSP - The Allocation Details box of that particular customer appears.
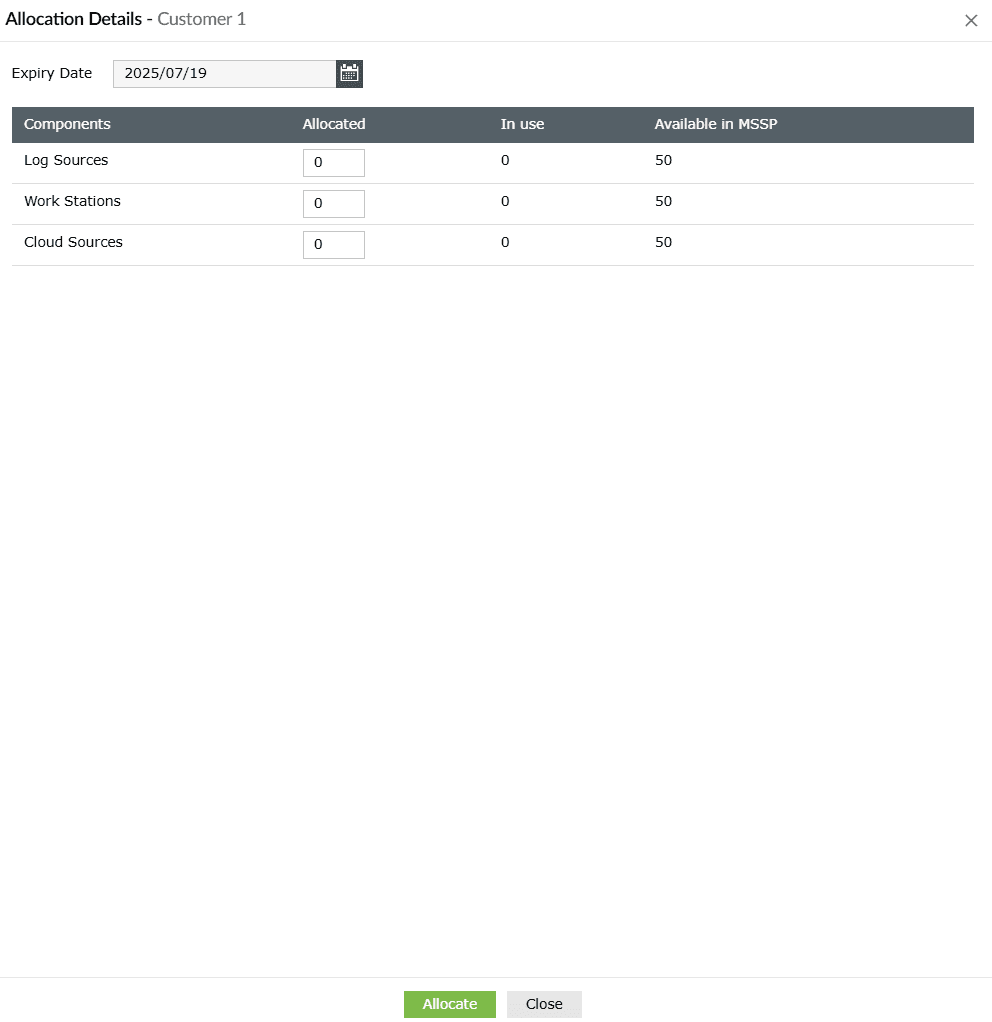
- When allocating resources to a customer for the first time, the required resources count can be set in the Allocated column and then click on Allocate.
- Upon successful completion of the action, the Allocation Details box closes and the below pop-up appears.
 NOTE
NOTE- Only technicians with the Administrator privilege can apply for a customer license.
- If allocation fails for a customer, license can be reapplied by clicking the Re-Apply License button.

Re-Apply License button applies the same license again. This can be used when a component was down previously but is now up and running.
Data in the License Management module
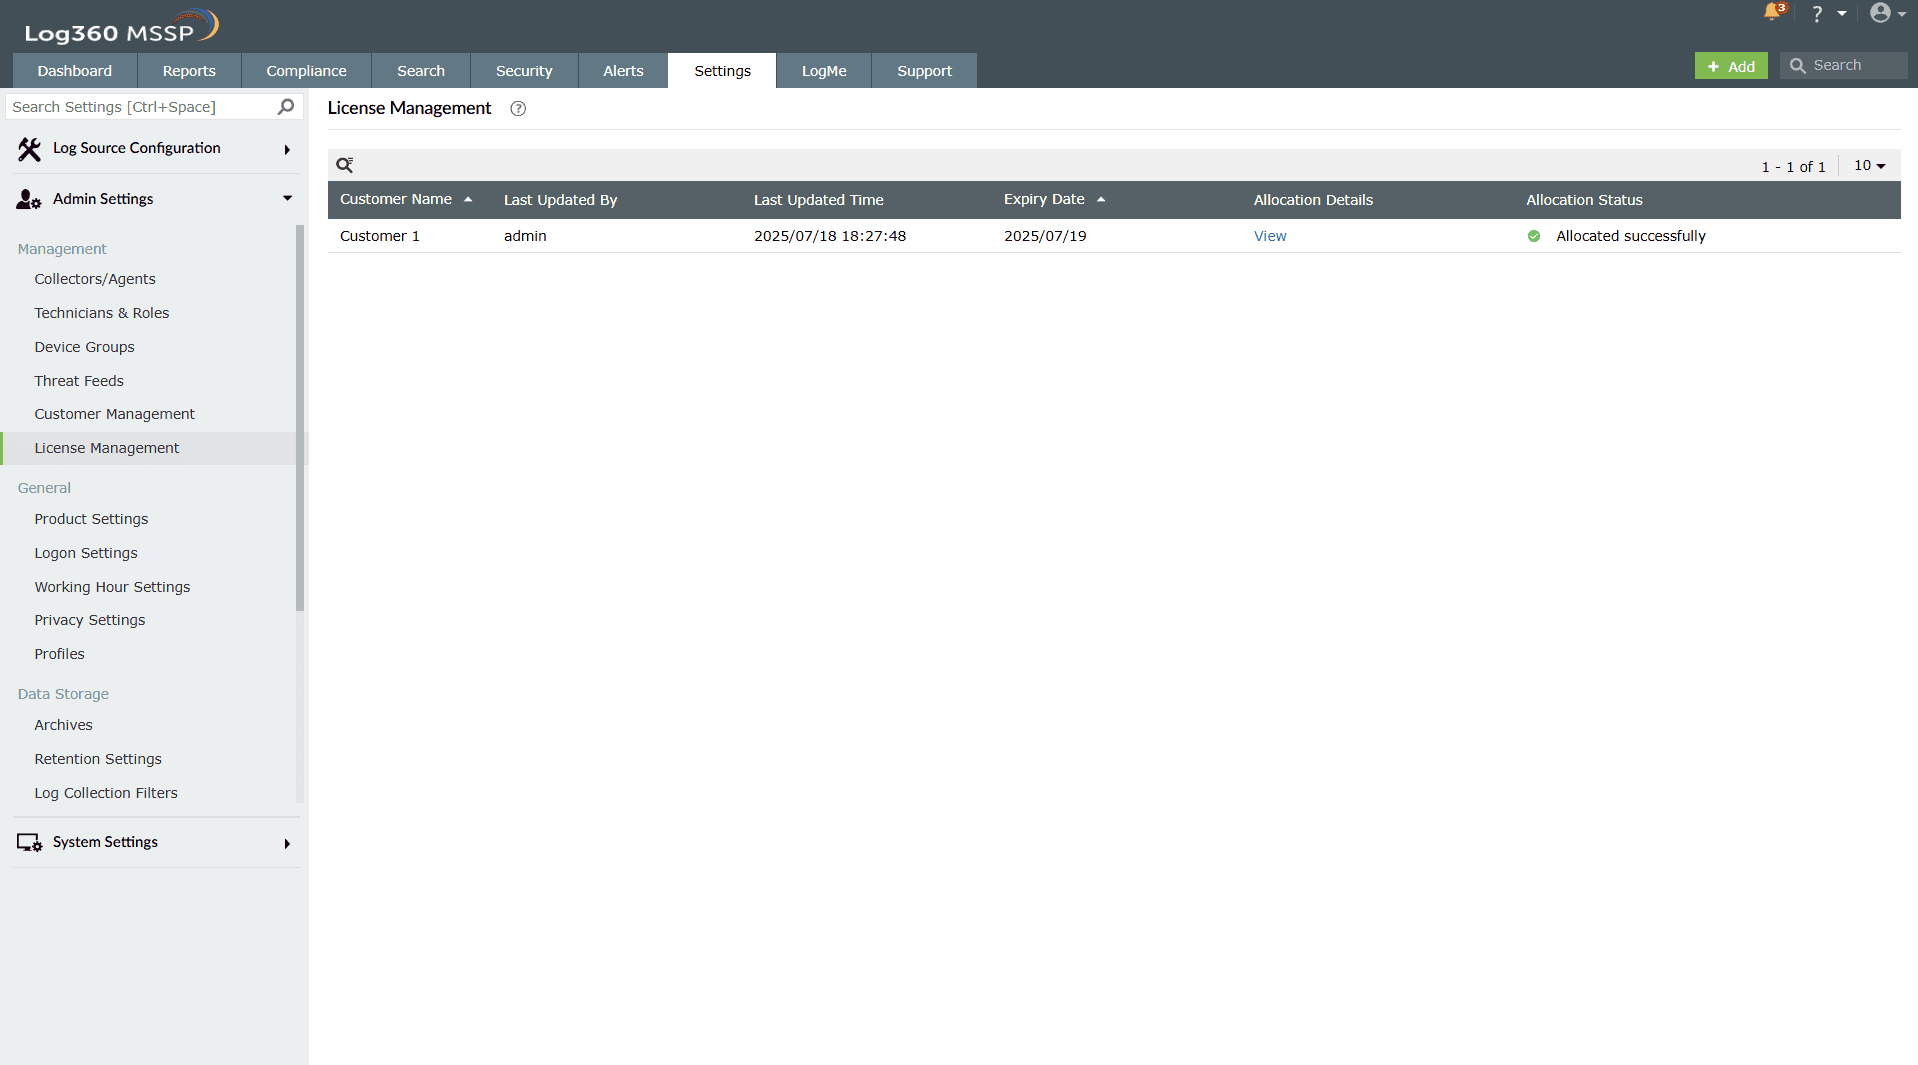
- Customer Name: The name of the customer with an allocated license.
- Last Updated By: Shows who has made the last change/update for this customer. Additionally, when hovered on the details in the Last Updated By column, the last updated date and time is shown.
- Last Updated Time: Shows when the last change/update has been made for this customer.
- Expiry Date: Shows the customer's current license's expiry date.
- Allocation Details: Provides the option to view (and edit) the allocation details of the customer.
- Allocation Status: Shows if the license for that customer has been allocated successfully or not.
Manage existing customer's license
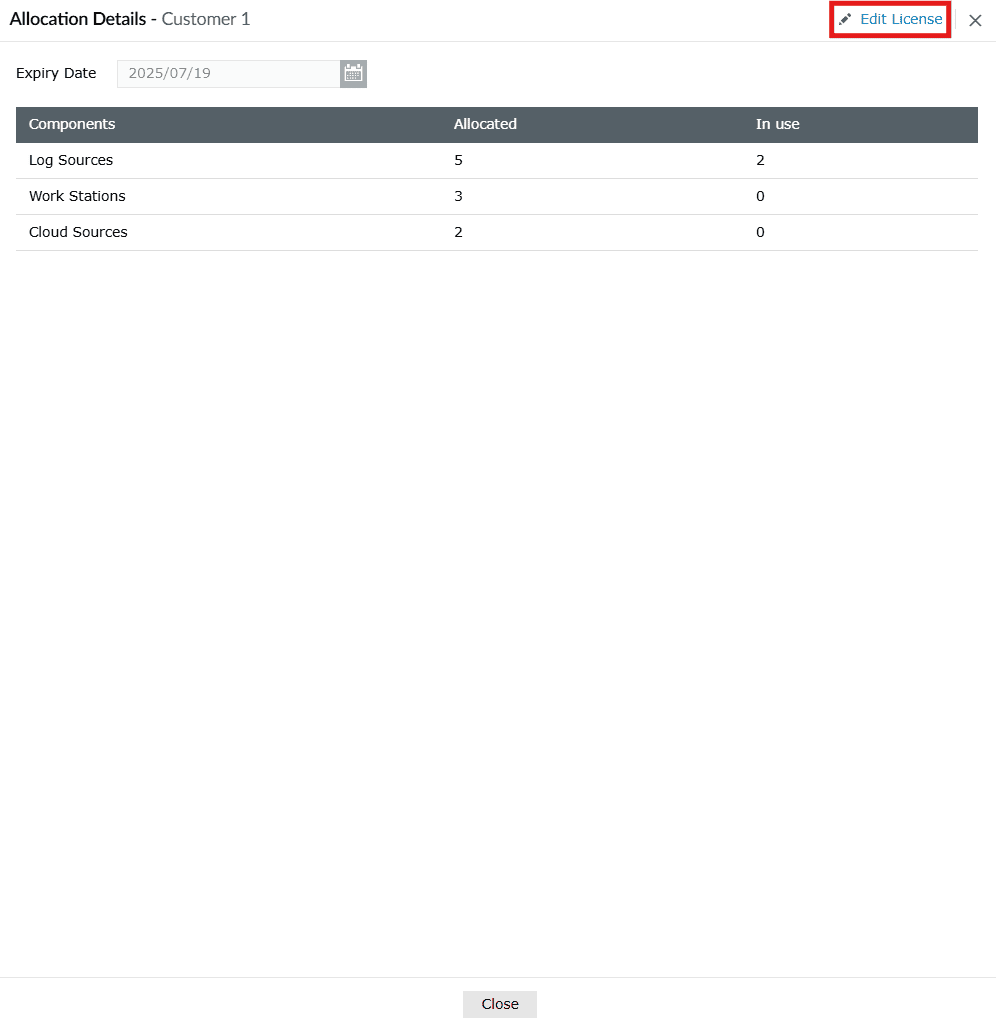
Viewing license allocation details
- In the License Management page, click on the view button under the Allocation Details column as highlighted below.
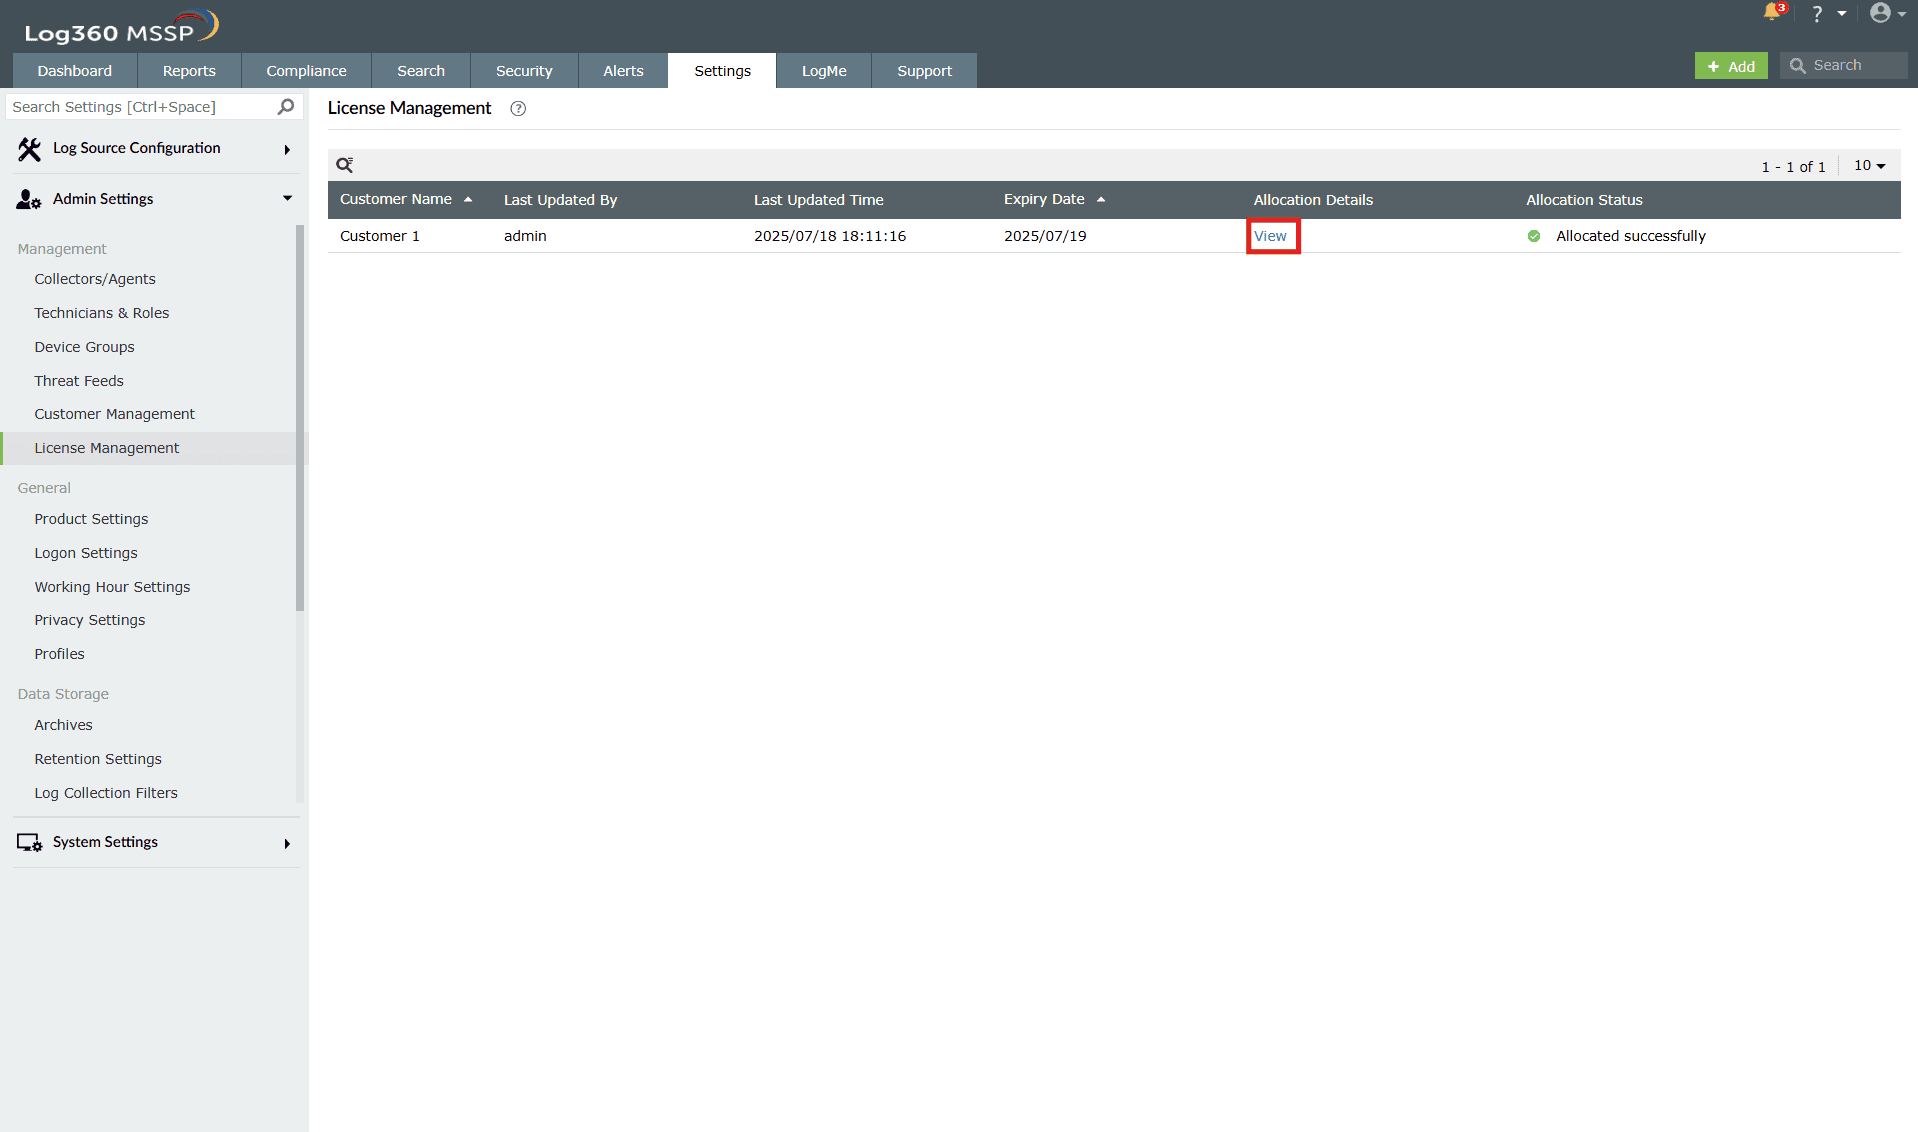
Image 5: Viewing license allocation details in Log360 MSSP - The Allocation Details box of that particular customer appears, and you can view all the required details pertaining to the license allocation of that customer.
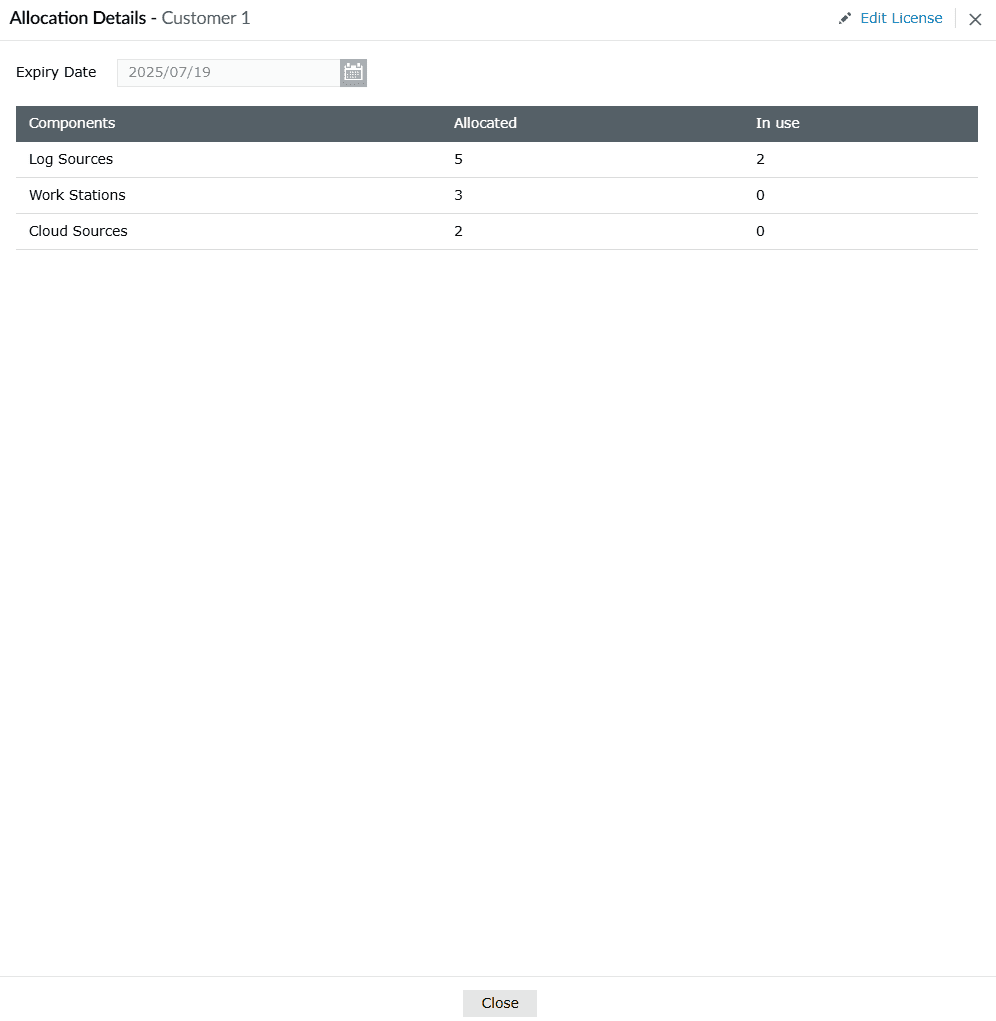
Edit license allocation details
- Upon following the steps to view a customer's license allocation details, the Allocation Details box appears along with the option to edit on the top-right corner of the box. Click on the Edit License button.
- Make the necessary changes and click on Update.
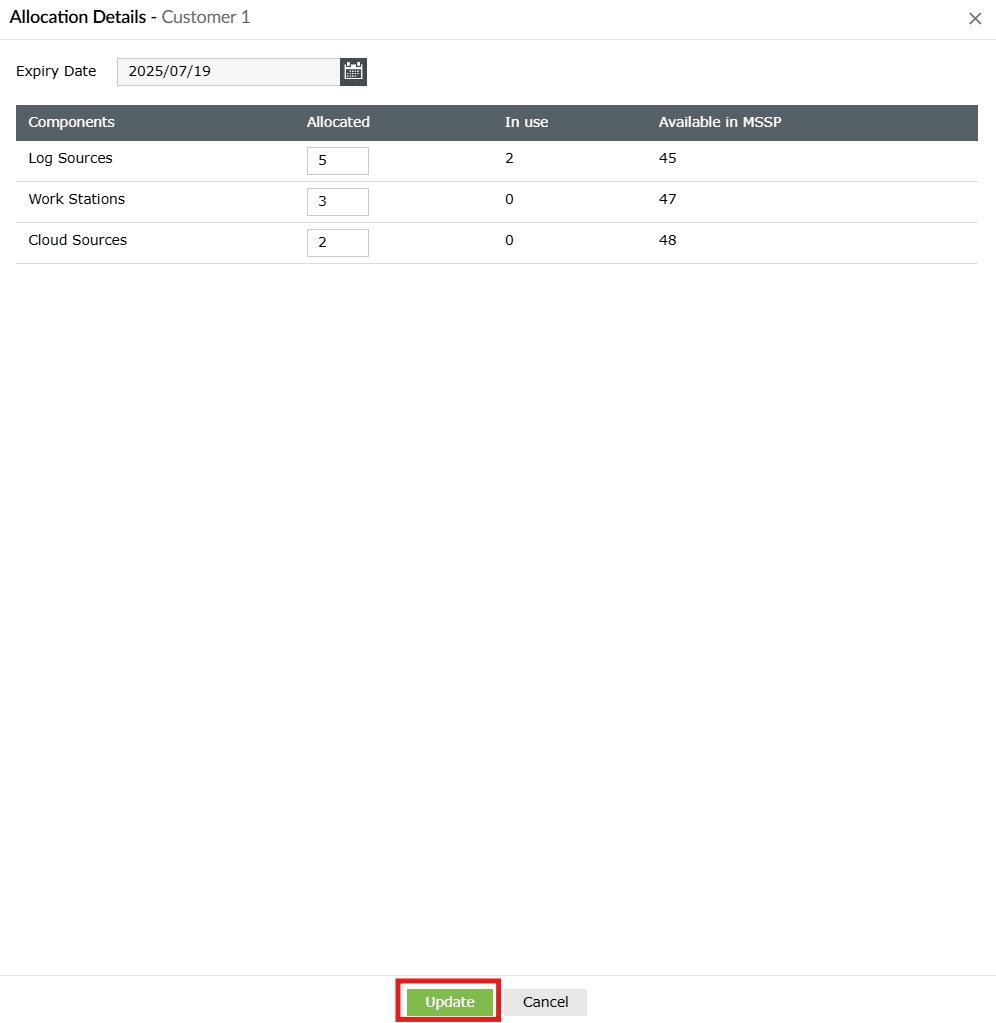
- Upon successful completion of the action, the below pop-up appears.

NOTE You can only view and/or edit a customer's license. An option to delete is not provided.
Read also
This document detailed the steps for applying and managing MSSP and customer licenses in Log360. For more features related to centralized administration, refer to: